C2PA Content Credential Photo Forensics 12 Apr 2:07 AM (6 months ago)
 C2PA Photo Forensics in Forensically
I have added support for reading C2PA metadata to my photo forensics tool Forensically. C2PA is the Coalition for Content Provenance and Authenticity. In their own words:
The Coalition for Content Provenance and Authenticity (C2PA) addresses the prevalence of misleading information online through the development of technical standards for certifying the source and history (or provenance) of media content.
The C2PA metadata is signed and optionally timestamped using a timestamp authority.
Cryptography & PKI
It’s important to note that digital signatures do not inherently guarantee trustworthiness. Even if the scheme is cryptographically sound you still need to trust everyone and everything with access to the keys.
Sadly the C2PA Javascript library doesn’t reveal a lot of useful information, essentially just the Organization of the Subject from what I can tell.
"signatureInfo": {
  "alg": "Es256",
  "issuer": "C2PA Test Signing Cert",
  "cert_serial_number": "640229841392226413189608867977836244731148734950",
  "time": "2025-04-06T20:32:57+00:00"
}
Neither does contentcredentials.org/verify.
There is a “known certificate list” and an email address to send in your certificate to be included. I’m not exactly sure what information is validated before a certificate is included.
As is, I’d take the signatures displayed in Forensically with a big pinch of salt.
Privacy and Tracking Concerns
C2PA includes support for remote manifests.
There are definitely use cases where having remote manifests makes sense, for instance to keep the file size of an asset small. They can however be used as beacons to track a person viewing the metadata.
For Forensically I have decided to disable support for remote manifests, both using configuration options and by blocking requests using a Content Security Policy.
File Sizes
Another little headache while implementing this was the size of the c2pa-js library. Using my Vite setup it compiles down to about 350 kB for the main ES module, 165 kB for a worker and 5.4 MB for the WebAssembly module.
To mitigate the impact of this I’m lazy loading the library only when needed. This brought up another issue, how do I figure out whether an image contains C2PA data without loading all of that code?
There is the @contentauth/detector package for that but it also weighs about 70 kB of WASM and JavaScript.
Ultimately, I wrote my own detection code. Luckily the pattern to be searched for doesn’t repeat the initial byte anywhere. So searching for it can be done efficiently using a simplified version of Knuth-Morris-Pratt.
My JavaScript implementation weighs about 300 bytes after minification.


%20addresses%20the%20prevalence%20of%20misleading%20information%20online%20through%20the%20development%20of%20technical%20standards%20for%20certifying%20the%20source%20and%20history%20(or%20provenance)%20of%20media%20content.%3C/p%3E%0A%3C/blockquote%3E%0A%3Cp%3EThe%20C2PA%20metadata%20is%20signed%20and%20optionally%20timestamped%20using%20a%20timestamp%20authority.%3C/p%3E%0A%3Ch2%3ECryptography%20%26amp;%20PKI%3C/h2%3E%0A%3Cp%3EIt%26%23x2019;s%20important%20to%20note%20that%20digital%20signatures%20do%20not%20inherently%20guarantee%20trustworthiness.%20Even%20if%20the%20scheme%20is%20cryptographically%20sound%20you%20still%20need%20to%20trust%20everyone%20and%20everything%20with%20access%20to%20the%20keys.%3C/p%3E%0A%3Cp%3ESadly%20the%20%3Ca%20href%3D%22https://github.com/contentauth/c2pa-js%22%3EC2PA%20Javascript%20library%3C/a%3E%20doesn%26%23x2019;t%20reveal%20a%20lot%20of%20useful%20information,%20essentially%20just%20the%20Organization%20of%20the%20Subject%20from%20what%20I%20can%20tell.%3C/p%3E%0A%3Cpre%3E%3Ccode%3E%26quot;signatureInfo%26quot;:%20%7B%0A%20%20%26quot;alg%26quot;:%20%26quot;Es256%26quot;,%0A%20%20%26quot;issuer%26quot;:%20%26quot;C2PA%20Test%20Signing%20Cert%26quot;,%0A%20%20%26quot;cert_serial_number%26quot;:%20%26quot;640229841392226413189608867977836244731148734950%26quot;,%0A%20%20%26quot;time%26quot;:%20%26quot;2025-04-06T20:32:57+00:00%26quot;%0A%7D%0A%3C/code%3E%3C/pre%3E%0A%3Cp%3ENeither%20does%20%3Ca%20href%3D%22https://contentcredentials.org/verify%22%3Econtentcredentials.org/verify%3C/a%3E.%3C/p%3E%0A%3Cp%3EThere%20is%20a%20%3Ca%20href%3D%22https://opensource.contentauthenticity.org/docs/verify-known-cert-list/%22%3E%26%23x201C;known%20certificate%20list%26%23x201D;%3C/a%3E%20and%20an%20email%20address%20to%20send%20in%20your%20certificate%20to%20be%20included.%20I%26%23x2019;m%20not%20exactly%20sure%20what%20information%20is%20validated%20before%20a%20certificate%20is%20included.%3C/p%3E%0A%3Cp%3EAs%20is,%20I%26%23x2019;d%20take%20the%20signatures%20displayed%20in%20%3Ca%20href%3D%22https://29a.ch/photo-forensics/%22%3EForensically%3C/a%3E%20with%20a%20big%20pinch%20of%20salt.%3C/p%3E%0A%3Ch2%3EPrivacy%20and%20Tracking%20Concerns%3C/h2%3E%0A%3Cp%3EC2PA%20includes%20support%20for%20%3Ca%20href%3D%22https://c2pa.org/specifications/specifications/1.4/specs/C2PA_Specification.html%23_embedding_a_reference_to_the_active_manifest%22%3Eremote%20manifests%3C/a%3E.%3C/p%3E%0A%3Cp%3EThere%20are%20definitely%20use%20cases%20where%20having%20remote%20manifests%20makes%20sense,%20for%20instance%20to%20keep%20the%20file%20size%20of%20an%20asset%20small.%20They%20can%20however%20be%20used%20as%20beacons%20to%20track%20a%20person%20viewing%20the%20metadata.%3C/p%3E%0A%3Cp%3EFor%20%3Ca%20href%3D%22https://29a.ch/photo-forensics/%22%3EForensically%3C/a%3E%20I%20have%20decided%20to%20disable%20support%20for%20remote%20manifests,%20both%20using%20configuration%20options%20and%20by%20blocking%20requests%20using%20a%20%3Ca%20href%3D%22https://developer.mozilla.org/en-US/docs/Web/HTTP/Guides/CSP%22%3EContent%20Security%20Policy%3C/a%3E.%3C/p%3E%0A%3Ch2%3EFile%20Sizes%3C/h2%3E%0A%3Cp%3EAnother%20little%20headache%20while%20implementing%20this%20was%20the%20size%20of%20the%20c2pa-js%20library.%20Using%20my%20Vite%20setup%20it%20compiles%20down%20to%20about%20350%20kB%20for%20the%20main%20ES%20module,%20165%20kB%20for%20a%20worker%20and%205.4%20MB%20for%20the%20WebAssembly%20module.%3C/p%3E%0A%3Cp%3ETo%20mitigate%20the%20impact%20of%20this%20I%26%23x2019;m%20lazy%20loading%20the%20library%20only%20when%20needed.%20This%20brought%20up%20another%20issue,%20how%20do%20I%20figure%20out%20whether%20an%20image%20contains%20C2PA%20data%20without%20loading%20all%20of%20that%20code?%3C/p%3E%0A%3Cp%3EThere%20is%20the%20%3Ca%20href%3D%22https://www.npmjs.com/package/@contentauth/detector?activeTab%253Dcode%22%3E@contentauth/detector%3C/a%3E%20package%20for%20that%20but%20it%20also%20weighs%20about%2070%20kB%20of%20WASM%20and%20JavaScript.%3C/p%3E%0A%3Cp%3EUltimately,%20I%20wrote%20my%20own%20detection%20code.%20Luckily%20the%20pattern%20to%20be%20searched%20for%20doesn%26%23x2019;t%20repeat%20the%20initial%20byte%20anywhere.%20So%20searching%20for%20it%20can%20be%20done%20efficiently%20using%20a%20simplified%20version%20of%20Knuth-Morris-Pratt.%3C/p%3E%0A%3Cp%3EMy%20JavaScript%20implementation%20weighs%20about%20300%20bytes%20after%20minification.%3C/p%3E)


Impulse Response Creator 23 Mar 8:51 AM (7 months ago)
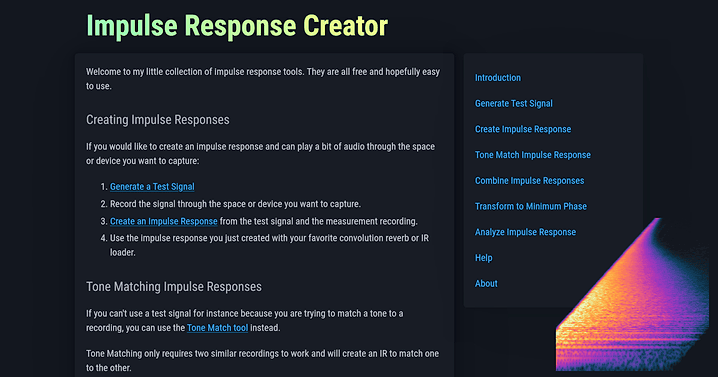 Impulse Response Creator
I got a little bit obsessed with convolution reverb and measuring impulse responses over the last few weeks. As part of that I’ve built myself a few command line tools to create and process impulse responses. I have now bundled these up into a web application, in the hope that they may be useful to others.
What are impulse responses and convolution reverbs
If you want to evaluate the acoustics of a room you are in, you can clap your hands and listen to the echos and reverberation of the clap. An impulse response is very similar to that. It’s the response of a system to being excited with a short impulse like the clap in the example before.
The impulse response can then be used to simulate the sound of the room using a process called convolution. An easy way to think of this is that for every point on the input signal the impulse response is played back with the volume (and polarity) adjusted to match the input. This cascade of echos will then match what that input would have sounded like in the room.
This principle isn’t limited to rooms, speaker cabinets, or audio. It works for any linear time-invariant sysyem.
Capturing Impulse Responses
 Spectrogram of the Impulse Response of a room.
In practice capturing accurate impulse responses is a bit more difficult than just clapping. Ideally the impulse used to excite the system is very brief. Infinitesimally brief. In order to get a good signal to noise ratio it should also be very loud, to get as much energy as possible into the system with that brief pulse.
The impulse generated by clapping hands isn’t very short, very intense, or easily reproducible. Better options are popping balloons or firing starter guns. Those methods are better than clapping but still far from ideal.
Can we avoid using an impulse to capture an impulse response?
Sweeping Sines
If we look at the problem from a frequency perspective an alternative approach becomes evident.
An ideal impulse is a short burst containing all frequencies at once. Instead of sending out all frequencies at once, we can send out different frequencies over time. To do so we can use a simple sine wave with a changing frequency over time. This test signal is also known as a sine sweep or chirp.
Now instead of an infinitesimally short pulse we can take as much time as we would like to send out our signal. This makes it easier to get a good signal to noise ratio and is much kinder to the equipment being measured.
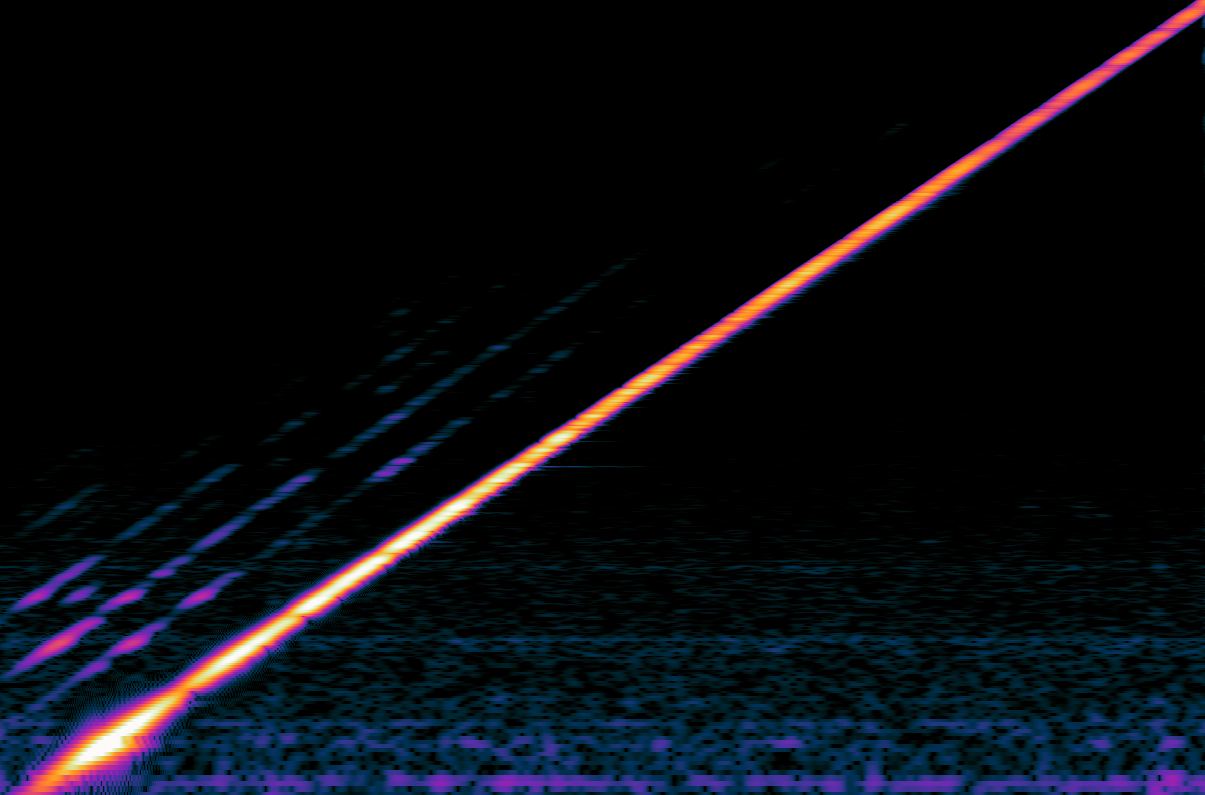
 Spectrogram of a sine sweep.
|
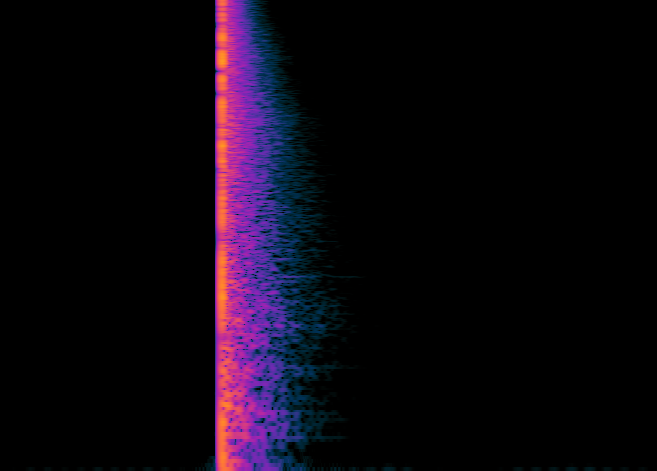
 Response to the sine sweep.
|
Note: The parallel lines above the sine sweep are due to harmonic distortion introduced in my measurement process. The horizontal noise are due to hum while measuring. Turns out getting good measurements in the real world is hard. But we can deal with those artifacts.
Deconvolution
There is just a tiny little problem, the response to our sine sweep isn’t a crisp impulse response instead it’s smeared out over time just like our test signal is. In order to get the impulse response we need to undo this smearing over time. This process is called deconvolution and it transforms the response to the sine sweep into an impulse response.
 Response to the sine sweep after deconvolution.
Looking at the spectrogram in visual context, this boils down to shearing.
My actual implementation is based on Farina, Angelo. (2000). Simultaneous Measurement of Impulse Response and Distortion With a Swept-Sine Technique. or Wiener Deconvolution depending on the test signal and selected options. The technique by Farina also gets rid of the harmonic distortion.
If this explanation was a bit too handwavy, I suggest reading the paper by Angelo Farina. He strikes a good balance between detail and accessiblity.
Web Implementation
After having played around a bit with my CLI implementation I’ve realized that there aren’t (m)any easy to use online tools for creating impulse responses. So I went the extra mile and added a little web ui in the hope that this - admittedly very niche tool, might be useful to others.
All the DSP code for this project is implemented in Rust and compiled to wasm. The UI is written in Typescript and uses React. Everything is bundled up using vite and wasm-pack.
I’ve also written some integration tests using Playwright. Using Playwright was rather nice and low friction so I will likely it again in future projects.
Limitations
While there is a UI and a bit of plumbing for normalizing and trimming the generated impulse responses the core of the code is still what I’ve written for my experiments.
There are still many rough edges and potential for improvement. One obvious area is improved noise reducation, especially with regards to impulse noise) which lead to chirps leaking into the deconvolved impulse response.
Demo
Finally a little demo of what this can sound like. At first the arpeggio is played back without added reverb, then convolved with a measurement my room and finally convolved with the impulse folded back onto itself with some feedback for an ambient effect.

Tuning Songs Instead of My Guitar 17 Nov 2024 10:25 AM (11 months ago)
 Try Fix Tuning
In 1834 Johann Heinrich Scheibler recommended using 440 Hz as the standard frequency for A4. For various reasons a lot of music deviates from that. Deviating from 440 Hz has its artistic merits and can give music a different feeling and timbre.
It’s an annoyance if you have to retune your instrument slightly for every song you want to play along with.
It is possible to shift the pitch of a piece of music instead, and I have written a pitch shifter called Timestretch Player to do just that. But finding the exact pitch offset is still tedious.
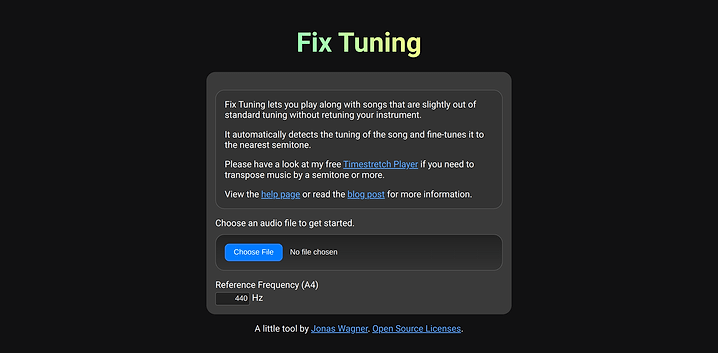
So being fed up with retuning my guitar to play along with some song supposedly tuned to match the pitch of an anvil being struck with a hammer in the intro I decided to build myself a little tool to automate the process.
Fix Tuning automatically detects the tuning offset from a reference pitch (usually 440 Hz) in cents (¹⁄₁₀₀ of a semitone) and corrects it by slightly changing the playback speed.
Implementation
The pitch offset detection works by detecting the fundamental frequency of harmonic signals in the audio file. It then calculates their delta from the closest note in the 12 tone equal temperament scale. Finally it calculates the pitch offset that will minimize the deltas.
The pitch-detection approach is loosely inspired by Noll, A. M. (1970). Pitch determination of human speech by the harmonic product spectrum, the harmonic sum spectrum and a maximum likelihood estimate.
Because the changes in pitch required to correct the offset are fairly small, I’ve opted to correct them by changing the playback speed rather than using a more advanced pitch-shifting method. In my opinion, the 3% difference in speed required to correct an offset of half a semitone is less noticeable than artifacts introduced by changing the pitch independently of the tempo. For high-quality resampling I’m using the rubato crate.
The DSP code is written in Rust and compiled to WebAssembly, while the web ui is built with plain typescript wired up using vite and wasm-pack.
Limitations
The pitch detection assumes a 12 tone equal temperament scale and doesn’t account for key or tonal center. It simply tunes the audio to align most closely with a 12 tone scale based on the reference frequency.
While the pitch detection is fairly robust due to averaging over the entire song, it will still struggle with music that is mostly atonal.
Most testing has been done with a small number of songs and short synthetic snippets. For the songs I’ve established the ground truth by ear. Hopefully good enough for quick validation, not good enough for fine tuning.
Lastly the web audio api used to decode the files resamples the decoded audio to sample rate it is internally using. This isn’t ideal but I think negligible in practice.
Why no AI?
Machine learning or “ai” would certainly lend itself to this problem. Already back in 2018 CREPE has shown that convolutional neural networks are well suited for pitch estimation. End-to-End Musical Key Estimation Using a Convolutional Neural Network shows that estimating the tonal center is possible as well. Estimating the tonal center would be fairly difficult with my current approach as it involves a lot of cultural and musical conventions that are difficult to capture in a simple algorithm.
However building up a suitable dataset for this use case, training and testing different architectures is quite a bit of work. Running inference in a web browser also tends to be non-trivial.
So I think given the current scope of the project going with a simple hand coded algorithm was the right call.
Next Steps
It could be interesting to integrate the pitch offset detection into my Timestretch Player. I’m also working on another guitar tuner, there “Tune to Song” could be a nice feature.
%22%3Esome%20song%3C/a%3E%20supposedly%20tuned%20to%20match%20the%20pitch%20of%20an%20anvil%20being%20struck%20with%20a%20hammer%20in%20the%20intro%20I%20decided%20to%20build%20myself%20a%20little%20tool%20to%20automate%20the%20process.%3C/p%3E%0A%3Cp%3E%3Ca%20href%3D%22https://29a.ch/fix-tuning/%22%3EFix%20Tuning%3C/a%3E%20automatically%20detects%20the%20tuning%20offset%20from%20a%20reference%20pitch%20(usually%20440%20Hz)%20in%20cents%20(%26%23xB9;%26%23x2044;%26%23x2081;%26%23x2080;%26%23x2080;%20of%20a%20semitone)%20and%20corrects%20it%20by%20slightly%20changing%20the%20playback%20speed.%3C/p%3E%0A%3Ch2%3EImplementation%3C/h2%3E%0A%3Cp%3EThe%20pitch%20offset%20detection%20works%20by%20detecting%20the%20fundamental%20frequency%20of%20harmonic%20signals%20in%20the%20audio%20file.%0AIt%20then%20calculates%20their%20delta%20from%20the%20closest%20note%20in%20the%2012%20tone%20equal%20temperament%20scale.%0AFinally%20it%20calculates%20the%20pitch%20offset%20that%20will%20minimize%20the%20deltas.%3C/p%3E%0A%3Cp%3EThe%20pitch-detection%20approach%20is%20loosely%20inspired%20by%20%3Ca%20href%3D%22http://noll.uscannenberg.org/Papers.htm%22%3ENoll,%20A.%20M.%20(1970).%20Pitch%20determination%20of%20human%20speech%20by%20the%20harmonic%0Aproduct%20spectrum,%20the%20harmonic%20sum%20spectrum%20and%20a%20maximum%20likelihood%0Aestimate%3C/a%3E.%3C/p%3E%0A%3Cp%3EBecause%20the%20changes%20in%20pitch%20required%20to%20correct%20the%20offset%20are%20fairly%20small,%20I%26%23x2019;ve%20opted%20to%20correct%20them%20by%20changing%20the%20playback%20speed%20rather%20than%20using%20a%20more%20advanced%20pitch-shifting%20method.%20In%20my%20opinion,%20the%203%25%20difference%20in%20speed%20required%20to%20correct%20an%20offset%20of%20half%20a%20semitone%20is%20less%20noticeable%20than%20artifacts%20introduced%20by%20changing%20the%20pitch%20independently%20of%20the%20tempo.%20For%20high-quality%20resampling%20I%26%23x2019;m%20using%20the%20%3Ca%20href%3D%22https://github.com/HEnquist/rubato/%22%3Erubato%3C/a%3E%20crate.%3C/p%3E%0A%3Cp%3EThe%20DSP%20code%20is%20written%20in%20Rust%20and%20compiled%20to%20WebAssembly,%20while%20the%20web%20ui%20is%20built%20with%20plain%20typescript%20wired%20up%20using%20%3Ca%20href%3D%22https://vite.dev/%22%3Evite%3C/a%3E%20and%20%3Ca%20href%3D%22https://github.com/rustwasm/wasm-pack%22%3Ewasm-pack%3C/a%3E.%3C/p%3E%0A%3Ch2%3ELimitations%3C/h2%3E%0A%3Cp%3EThe%20pitch%20detection%20assumes%20a%2012%20tone%20equal%20temperament%20scale%20and%20doesn%26%23x2019;t%20account%20for%20key%20or%20tonal%20center.%0AIt%20simply%20tunes%20the%20audio%20to%20align%20most%20closely%20with%20a%2012%20tone%20scale%20based%20on%20the%20reference%20frequency.%3C/p%3E%0A%3Cp%3EWhile%20the%20pitch%20detection%20is%20fairly%20robust%20due%20to%20averaging%20over%20the%20entire%20song,%0Ait%20will%20still%20struggle%20with%20music%20that%20is%20mostly%20atonal.%3C/p%3E%0A%3Cp%3EMost%20testing%20has%20been%20done%20with%20a%20small%20number%20of%20songs%20and%20short%20synthetic%20snippets.%0AFor%20the%20songs%20I%26%23x2019;ve%20established%20the%20ground%20truth%20by%20ear.%20Hopefully%20good%20enough%0Afor%20quick%20validation,%20not%20good%20enough%20for%20%20fine%20tuning.%3C/p%3E%0A%3Cp%3ELastly%20the%20web%20audio%20api%20used%20to%20decode%20the%20files%20resamples%20the%20decoded%20audio%20to%20sample%20rate%0Ait%20is%20internally%20using.%20This%20isn%26%23x2019;t%20ideal%20but%20I%20think%20negligible%20in%20practice.%3C/p%3E%0A%3Ch2%3EWhy%20no%20AI?%3C/h2%3E%0A%3Cp%3EMachine%20learning%20or%20%26%23x201C;ai%26%23x201D;%20would%20certainly%20lend%20itself%20to%20this%20problem.%20Already%20back%20in%202018%20%3Ca%20href%3D%22https://arxiv.org/abs/1802.06182%22%3ECREPE%3C/a%3E%20has%20shown%20that%20convolutional%20neural%20networks%20are%20well%20suited%20for%20pitch%20estimation.%20%3Ca%20href%3D%22https://arxiv.org/abs/1706.02921%22%3EEnd-to-End%20Musical%20Key%20Estimation%20Using%20a%20Convolutional%20Neural%20Network%3C/a%3E%20shows%20that%20estimating%20the%20tonal%20center%20is%20possible%20as%20well.%20Estimating%20the%20tonal%20center%20would%20be%20fairly%20difficult%20with%20my%20current%20approach%20as%20it%20involves%20a%20lot%20of%20cultural%20and%20musical%20conventions%20that%20are%20difficult%20to%20capture%20in%20a%20simple%20algorithm.%3C/p%3E%0A%3Cp%3EHowever%20building%20up%20a%20suitable%20dataset%20for%20this%20use%20case,%20training%20and%20testing%20different%20architectures%20is%20quite%20a%20bit%20of%20work.%20Running%20inference%20in%20a%20web%20browser%20also%20tends%20to%20be%20non-trivial.%3C/p%3E%0A%3Cp%3ESo%20I%20think%20given%20the%20current%20scope%20of%20the%20project%20going%20with%20a%20simple%20hand%20coded%20algorithm%20was%20the%20right%20call.%3C/p%3E%0A%3Ch2%3ENext%20Steps%3C/h2%3E%0A%3Cp%3EIt%20could%20be%20interesting%20to%20integrate%20the%20pitch%20offset%20detection%20into%20my%20%3Ca%20href%3D%22https://29a.ch/timestretch/%22%3ETimestretch%20Player%3C/a%3E.%20I%26%23x2019;m%20also%20working%20on%20another%20guitar%20tuner,%20there%20%26%23x201C;Tune%20to%20Song%26%23x201D;%20could%20be%20a%20nice%20feature.%3C/p%3E)
simplex-noise.js 4.0 & Synthwave Demo 23 Jul 2022 3:07 AM (3 years ago)
 View the synthwave demo
I’ve just released version 4.0 of simplex-noise.js. Based on user feedback the new version supports tree shaking and cleans up the API a bit. As a nice little bonus, it’s also about 20% - 30% faster.
It also removes the bundled PRNG to focus the library down to one thing - providing smooth noise in multiple dimensions.
The API Change
The following bit of code should illustrate the changes to the API well:
// 3.x forces you to import everything at once
import SimplexNoise from 'simplex-noise';
const simplex = new SimplexNoise();
const value2d = simplex.noise2D(x, y);
// 4.x allows you to import just the functions you need
import { createNoise2D } from 'simplex-noise';
const noise2D = createNoise2D();
const value2d = noise2D(x, y);
Tree shaking
Thew new API enables javascript bundler to perform tree shaking. Essentially dead code removal based on imports and exports.
Tree shaking reduces the size of bundled javascript by leaving out code that isn’t used. As author of a library it enables me to worry less about the bundle size impact of features that might not be used by the majority of users.
A little demo to celebrate
The release of 4.0 and getting over 1’000 stars on github was a good excuse to write a little demo to celebrate. For some extra fun I’ve decided to constrain myself to code a bit like I did in 2010 again. Canvas 2d only. No WebGL. :)
The performance implications of that decision are pretty terrible but it’s not like the world needs a demo to proof that quads can be rendered more quickly anyways. ;)
The demo uses 2 octaves of 2d noise from simplex-noise.js in a FBM configuration. The noise is then modulated with a few sine waves to create a twisting road, mountains and more flat plains.
At the highest resolutions the demo is pushing 4096 quads/frame! A bit more than the SuperFX Chip on SNES could handle. ;)
If you are interested in more details the code is available on github.
The future
With tree shaking reducing the impact of rarely used code it could be fun to add a few more features to simplex-noise.js in the future. A few ideas that come to mind are:
- Noise with a controllable period (aka tileable noise)
- Noise in 1D
- More random noise using a (better) hash function like xxhash
;%0Aconst%20value2d%20%3D%20simplex.noise2D(x,%20y);%0A//%204.x%20allows%20you%20to%20import%20just%20the%20functions%20you%20need%0Aimport%20%7B%20createNoise2D%20%7D%20from%20%26apos;simplex-noise%26apos;;%0Aconst%20noise2D%20%3D%20createNoise2D();%0Aconst%20value2d%20%3D%20noise2D(x,%20y);%0A%3C/code%3E%3C/pre%3E%0A%3Ch2%3ETree%20shaking%3C/h2%3E%0A%3Cp%3EThew%20new%20API%20enables%20javascript%20bundler%20to%20perform%20%3Ca%20href%3D%22https://developer.mozilla.org/en-US/docs/Glossary/Tree_shaking%22%3Etree%20shaking%3C/a%3E.%0AEssentially%20dead%20code%20removal%20based%20on%20imports%20and%20exports.%3C/p%3E%0A%3Cp%3ETree%20shaking%20reduces%20the%20size%20of%20bundled%20javascript%20by%20leaving%20out%20code%20that%20isn%26%23x2019;t%20used.%20As%20author%20of%20a%20library%20it%20enables%20me%20to%20worry%20less%20about%20the%20bundle%20size%20impact%20of%20features%20that%20might%20not%20be%20used%20by%20the%20majority%20of%20users.%3C/p%3E%0A%3Ch2%3EA%20little%20demo%20to%20celebrate%3C/h2%3E%0A%3Cp%3EThe%20release%20of%204.0%20and%20getting%20over%201%26%23x2019;000%20stars%20on%20github%20was%20a%20good%20excuse%20to%20write%20a%20little%20demo%20to%20celebrate.%0AFor%20some%20extra%20fun%20I%26%23x2019;ve%20decided%20to%20constrain%20myself%20to%20code%20a%20bit%20like%20I%20did%20in%202010%20again.%20Canvas%202d%20only.%20No%20WebGL.%20:)%3C/p%3E%0A%3Cp%3EThe%20performance%20implications%20of%20that%20decision%20are%20pretty%20terrible%20but%20it%26%23x2019;s%20not%20like%20the%20world%20needs%20a%20demo%20to%20proof%20that%20quads%20can%20be%20rendered%20more%20quickly%20anyways.%20;)%3C/p%3E%0A%3Cp%3EThe%20demo%20uses%202%20octaves%20of%202d%20noise%20from%20simplex-noise.js%20in%20a%20%3Ca%20href%3D%22https://thebookofshaders.com/13/%22%3EFBM%3C/a%3E%20configuration.%20The%20noise%20is%20then%20modulated%20with%20a%20few%20sine%20waves%20to%20create%20a%20twisting%20road,%20mountains%20and%20more%20flat%20plains.%3C/p%3E%0A%3Cp%3EAt%20the%20highest%20resolutions%20the%20demo%20is%20pushing%204096%20quads/frame!%20A%20bit%20more%20than%20the%20%3Ca%20href%3D%22http://www.anthrofox.org/starfox/superfx.html%22%3ESuperFX%20Chip%3C/a%3E%20on%20SNES%20could%20handle.%20;)%3C/p%3E%0A%3Cp%3EIf%20you%20are%20interested%20in%20more%20details%20the%20code%20is%20available%20%3Ca%20href%3D%22https://github.com/jwagner/simplex-noise-demo-synthwave%22%3Eon%20github%3C/a%3E.%3C/p%3E%0A%3Ch2%3EThe%20future%3C/h2%3E%0A%3Cp%3EWith%20tree%20shaking%20reducing%20the%20impact%20of%20rarely%20used%20code%20it%20could%20be%20fun%20to%20add%20a%20few%20more%20features%20to%20simplex-noise.js%20in%20the%20future.%20A%20few%20ideas%20that%20come%20to%20mind%20are:%3C/p%3E%0A%3Cul%3E%0A%3Cli%3ENoise%20with%20a%20controllable%20period%20(aka%20tileable%20noise)%3C/li%3E%0A%3Cli%3ENoise%20in%201D%3C/li%3E%0A%3Cli%3EMore%20random%20noise%20using%20a%20(better)%20hash%20function%20like%20xxhash%3C/li%3E%0A%3C/ul%3E)
Tool to apply wood textures to 3d prints 23 Oct 2021 10:57 AM (3 years ago)
 Test the 3d print texturizer
A little while ago I came across an interesting post on reddit on how a wood displacement map can enhance the look of 3D prints.
Just a bit before I also played with the fuzzy skin feature in prusa slicer 2.4. That made me wonder whether the wood effect could be achieved directly in the slicer by tweaking the fuzzy skin feature. I had a quick look at the prusa slicer source and it looked like it would be fairly easy to add.
To prototype the idea and gauge whether there is any interest in it I decided that it would be best to create a little web app using three.js.
For the effect to just work I had to avoid uv maps. Instead I’m using a basic volumetric (3d) procedural wood texture derived from sine waves and a bit of noise.
Preliminary results
To test the process I designed and printed a very simple phone stand and a 3D benchy using Polymaker PolyWood filament.
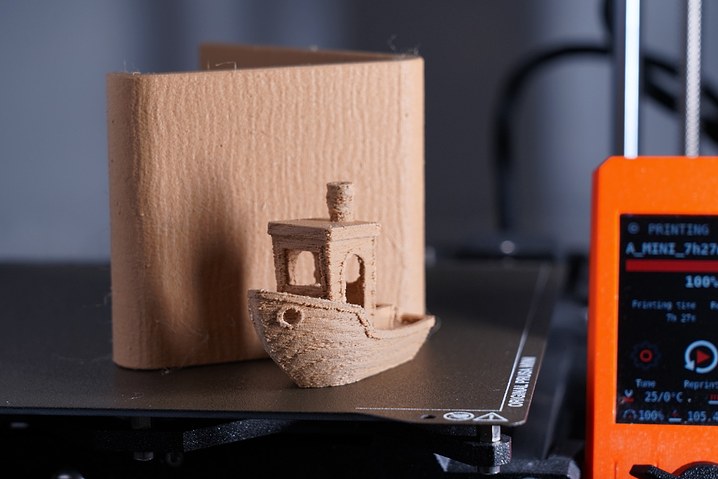 Benchy and phone stand on the prusa mini.
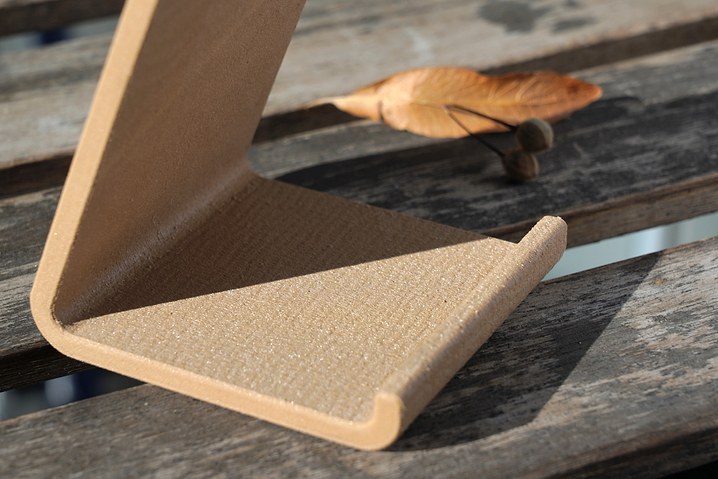 The phone stand lit by the sun.
Known issues
When processing STL files I first tesselate the geometry and then perform the displacement mapping. Luckily there is a simple tesselator built into three.js which I could use. Unfortunately it creates t-juction (when running out of iterations). The displacement mapping can also lead to self intersections.
I also included a process for directly modifying G-code to test how this process could work when integrated into the slicer. When processing g-code I simply look for the perimeter comments inserted by prusa slicer and modify the G1 movement commands. Moves are currently not sub divided.
So the tool is far from perfect but I’m quite happy with the results I got from it so far.
Possible future work
If there is enough interest in texturing features like this I think it would be pretty cool to integrate them directly into the slicer.
Obviously the wood effect isn’t the only pattern that could be achieved with this approach. Playing with different textures could definitely be fun as well.
%20procedural%20wood%20texture%0Aderived%20from%20sine%20waves%20and%20a%20bit%20of%20noise.%3C/p%3E%0A%3Ch2%3EPreliminary%20results%3C/h2%3E%0A%3Cp%3ETo%20test%20the%20process%20I%20designed%20and%20printed%20a%20very%20simple%20phone%20stand%20and%20a%203D%20benchy%20using%20%3Ca%20href%3D%22https://eu.polymaker.com/product/polywood/%22%3EPolymaker%20PolyWood%3C/a%3E%20filament.%3C/p%3E%0A%3Cp%3E%3Cimg%20src%3D%22https://29a.ch/images/photo.cache-a6b82a016258c127.jpg%22%20alt%3D%22Photo%20of%20a%20phone%20stand%20and%203d%20benchy%20with%20a%20wood%20texutre%22%20loading%3D%22lazy%22%20/%3E%0ABenchy%20and%20phone%20stand%20on%20the%20prusa%20mini.%3C/p%3E%0A%3Cp%3E%3Cimg%20src%3D%22https://29a.ch/images/sunlit.cache-6a1acb8f20ddcd4e.jpg%22%20alt%3D%22Sunlit%20phone%20stand%22%20loading%3D%22lazy%22%20/%3E%0AThe%20phone%20stand%20lit%20by%20the%20sun.%3C/p%3E%0A%3Ch2%3EKnown%20issues%3C/h2%3E%0A%3Cp%3EWhen%20processing%20STL%20files%20I%20first%20tesselate%20the%20geometry%20and%20then%20perform%20the%20displacement%20mapping.%0ALuckily%20there%20is%20a%20simple%20tesselator%20built%20into%20three.js%20which%20I%20could%20use.%20Unfortunately%20it%20creates%20t-juction%20(when%20running%20out%20of%20iterations).%0AThe%20displacement%20mapping%20can%20also%20lead%20to%20self%20intersections.%3C/p%3E%0A%3Cp%3EI%20also%20included%20a%20process%20for%20directly%20modifying%20G-code%20to%20test%20how%0Athis%20process%20could%20work%20when%20integrated%20into%20the%20slicer.%0AWhen%20processing%20g-code%20I%20simply%20look%20for%20the%20perimeter%20comments%20inserted%20by%20prusa%20slicer%20and%20modify%20the%20G1%20movement%20commands.%0AMoves%20are%20currently%20not%20sub%20divided.%3C/p%3E%0A%3Cp%3ESo%20the%20tool%20is%20far%20from%20perfect%20but%20I%26%23x2019;m%20quite%20happy%20with%20the%20results%20I%20got%20from%20it%20so%20far.%3C/p%3E%0A%3Ch2%3EPossible%20future%20work%3C/h2%3E%0A%3Cp%3EIf%20there%20is%20enough%20interest%20in%20texturing%20features%20like%20this%20I%20think%20it%20would%20be%20pretty%20cool%20to%20integrate%20them%20directly%20into%20the%20slicer.%3C/p%3E%0A%3Cp%3EObviously%20the%20wood%20effect%20isn%26%23x2019;t%20the%20only%20pattern%20that%20could%20be%20achieved%20with%20this%20approach.%20Playing%20with%20different%20textures%20could%20definitely%20be%20fun%20as%20well.%3C/p%3E)
Swirly Bokeh Lens Hood - 3D Printed 19 Sep 2021 4:42 AM (4 years ago)
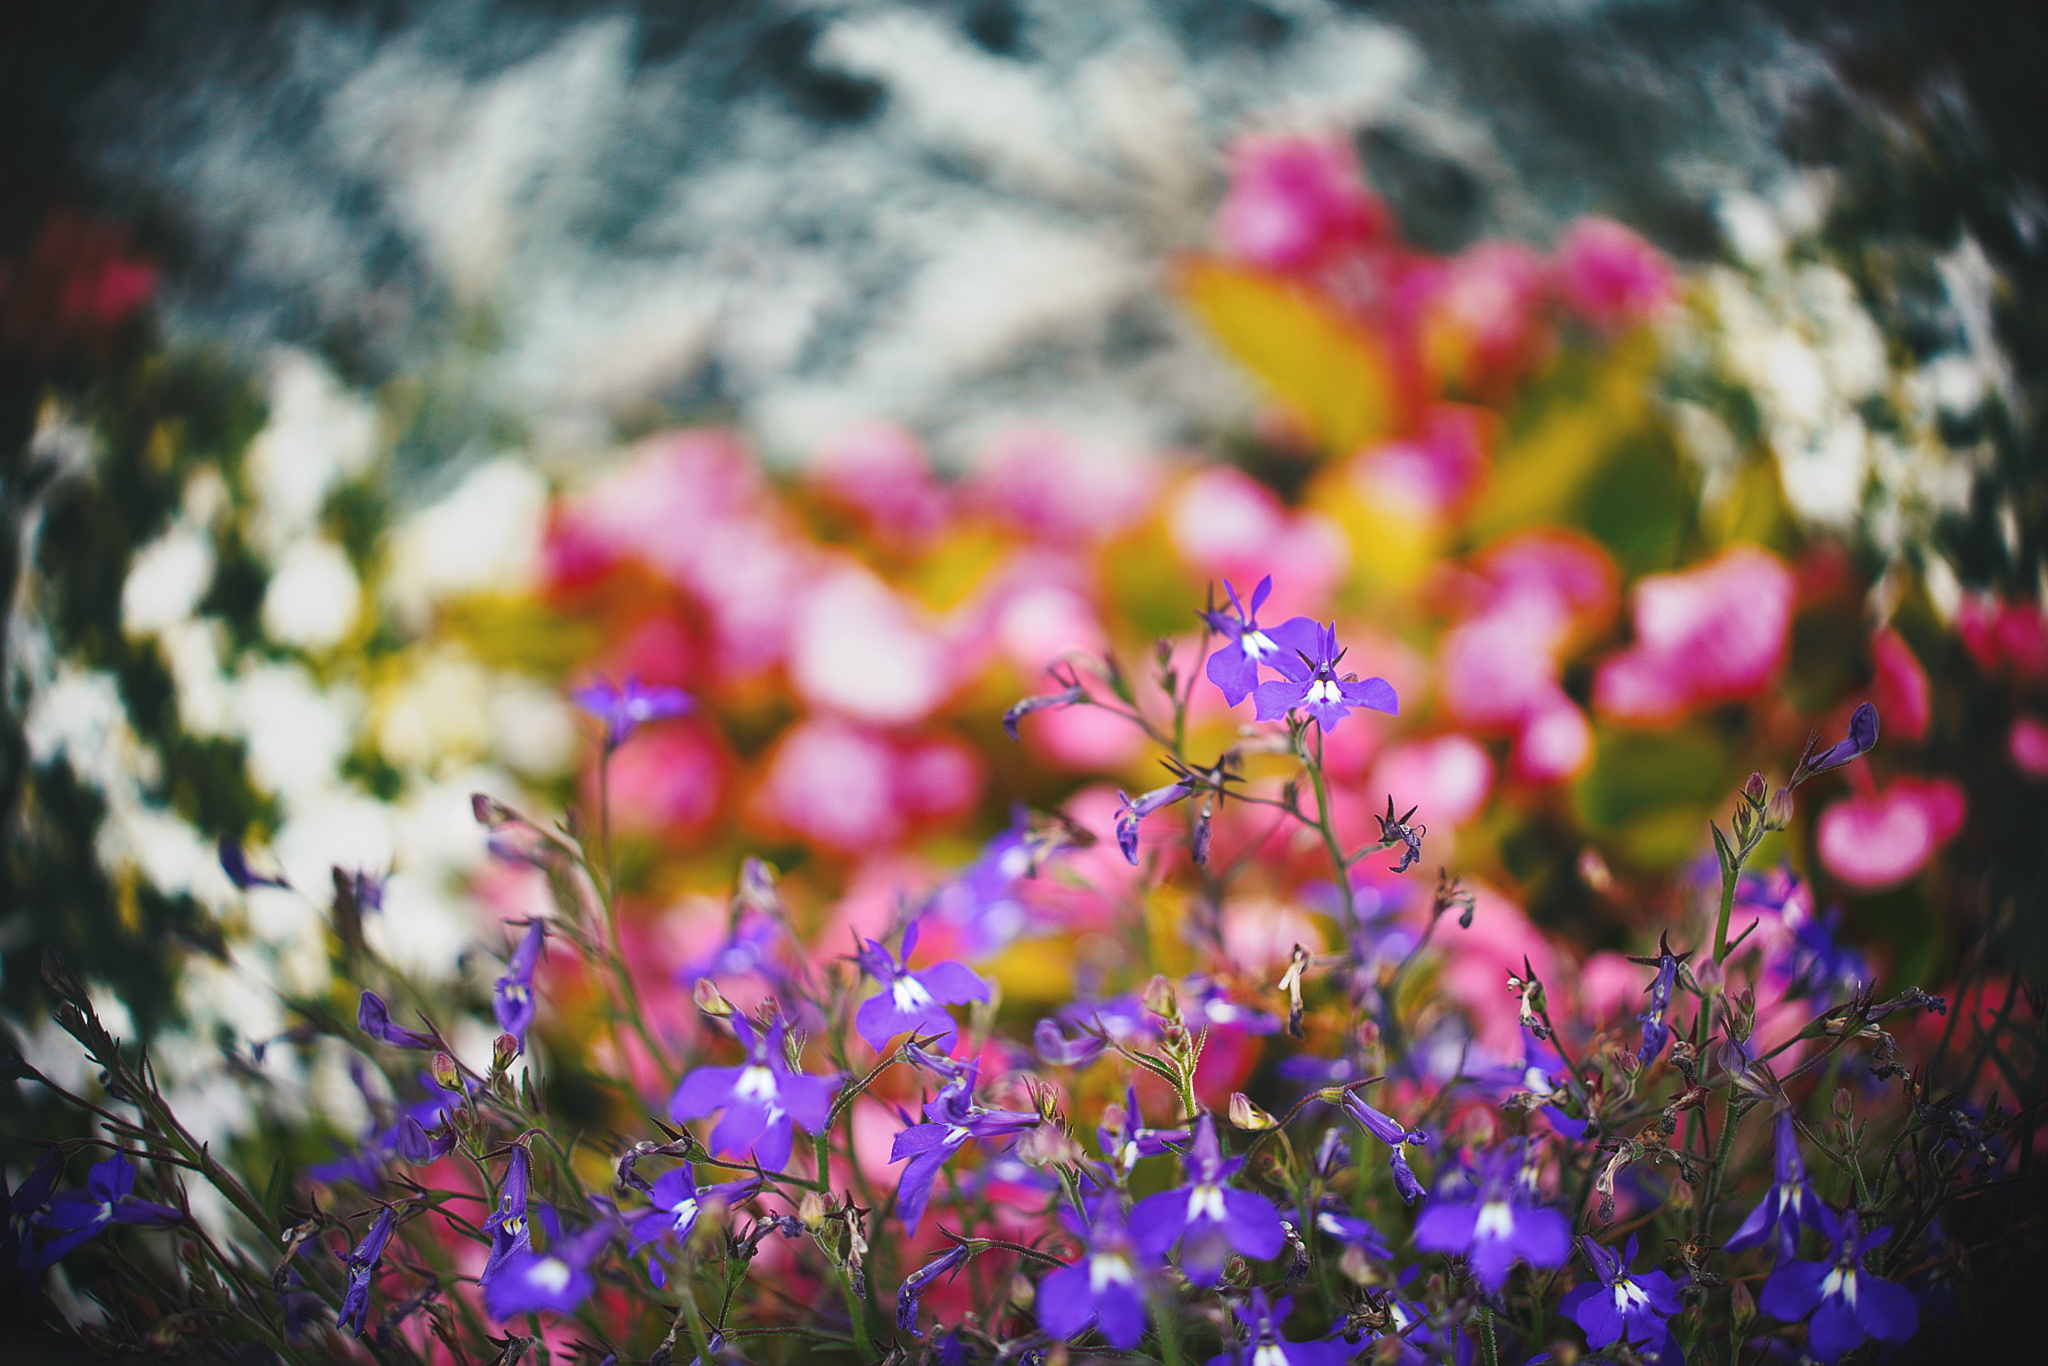 Photo taken with the 3d printed swirly lens hood.
I enjoy the swirly blur in the out of focus regions that certain lenses like the historic Petzval produce. This effect is also known is swirly bokeh.
Just not quite enough to own such a lens myself (yet). Instead I’ve chosen to emulate it by 3d printing a special lens hood for my Sony FE 55/1.8 lens.
How to get swirly bokeh with a lens hood
A similar effect to the one produced by these old lenses can be achieved using a lenshood that restricts the paths light can take into the lens. The swirly effect is essentially created by the opening of the lens hood being to small. This creates mechanical vignetting (also known as cat’s eye bokeh), blocking part of the light from hitting the sensor.
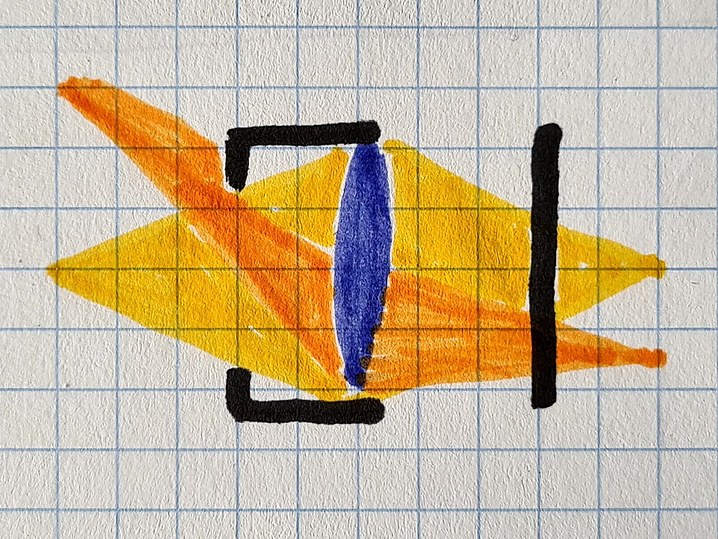 The light coming from the left (yellow, orange) is partially blocked by the lens hood (black) before hitting the lens (blue) and finally the sensor on the right (black).
In most lenses that produce this effect the vignetting happens somewhere inside the lens but the effect it has is similar.
3D printing a swirly bokeh lens hood
To test out how well this works in practice I modelled such a restrictive lens hood in freecad.
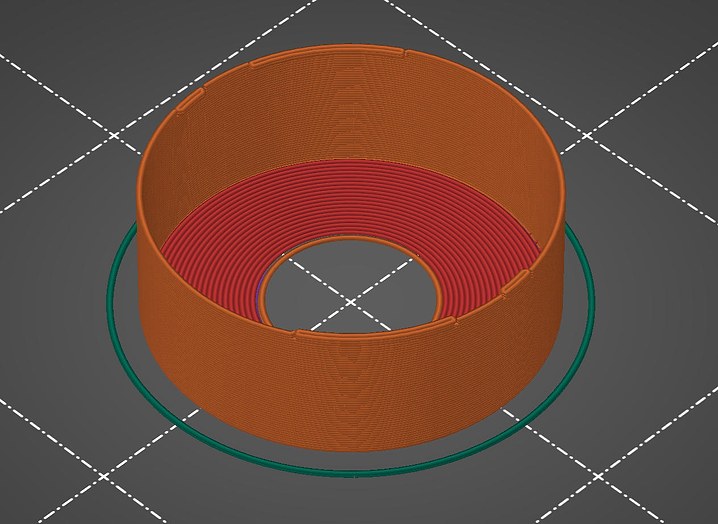 Preview of the 3D print.
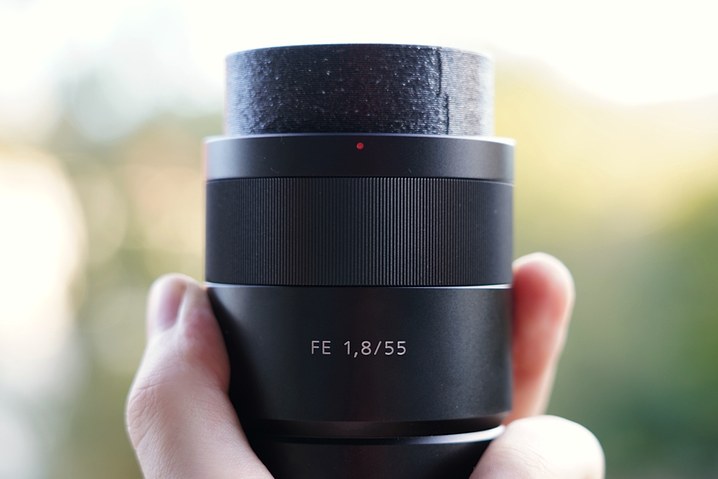 Finished product.
Definitely not the cleanest print but at a material cost of about 20 cents (EU/US) and a print time of about 15 minutes it’s well worth it.
Results
 Crop of the top right corner of some city lights at night.
Want to make your own?
I’ve thrown the source files up in a github repo for you to use jwagner/swirly-lens-hoods. With that said, I’m a very inexperienced CAD user and in this case didn’t even try to create something clean. If you can you might be better of just remodelling it to fit your own lens rather than trying to adapt it.
.%0AInstead%20I%26%23x2019;ve%20chosen%20to%20emulate%20it%20by%203d%20printing%20a%20special%20lens%20hood%0Afor%20my%20Sony%20FE%2055/1.8%20lens.%3C/p%3E%0A%3Ch2%3EHow%20to%20get%20swirly%20bokeh%20with%20a%20lens%20hood%3C/h2%3E%0A%3Cp%3EA%20similar%20effect%20to%20the%20one%20produced%20by%20these%20old%20lenses%20can%20be%20achieved%20using%20a%20lenshood%0Athat%20restricts%20the%20paths%20light%20can%20take%20into%20the%20lens.%0AThe%20swirly%20effect%20is%20essentially%20created%20by%20the%20opening%20of%20the%20lens%20hood%20being%20to%20small.%0AThis%20creates%20mechanical%20vignetting%20(also%20known%20as%20cat%26%23x2019;s%20eye%20bokeh),%0Ablocking%20part%20of%20the%20light%20from%20hitting%20the%20sensor.%3C/p%3E%0A%3Cp%3E%3Cimg%20src%3D%22https://29a.ch/images/schema.cache-a3d7b68c67bc6512.jpg%22%20alt%3D%22Schema%22%20loading%3D%22lazy%22%20/%3E%0A%3Cem%3EThe%20light%20coming%20from%20the%20left%20(yellow,%20orange)%20is%20partially%20blocked%20by%20the%20lens%20hood%20(black)%20before%20hitting%20the%20lens%20(blue)%20and%20finally%20the%20sensor%20on%20the%20right%20(black).%3C/em%3E%3C/p%3E%0A%3Cp%3EIn%20most%20lenses%20that%20produce%20this%20effect%20the%20vignetting%20happens%20somewhere%20inside%20the%20lens%20but%20the%20effect%20it%20has%20is%20similar.%3C/p%3E%0A%3Ch2%3E3D%20printing%20a%20swirly%20bokeh%20lens%20hood%3C/h2%3E%0A%3Cp%3ETo%20test%20out%20how%20well%20this%20works%20in%20practice%20I%20modelled%20such%20a%20restrictive%20lens%20hood%20in%20freecad.%3C/p%3E%0A%3Cp%3E%3Cimg%20src%3D%22https://29a.ch/images/slicer.cache-fcc8657a50bcd57f.jpg%22%20alt%3D%223D%20Print%20Preview%20in%20PrusaSlicer%22%20loading%3D%22lazy%22%20/%3E%0A%3Cem%3EPreview%20of%20the%203D%20print.%3C/em%3E%3C/p%3E%0A%3Cp%3E%3Cimg%20src%3D%22https://29a.ch/images/hood-on-lens.cache-d5c0c5fd05b4f757.jpg%22%20alt%3D%22Finished%20product%22%20loading%3D%22lazy%22%20/%3E%0A%3Cem%3EFinished%20product.%3C/em%3E%3C/p%3E%0A%3Cp%3EDefinitely%20not%20the%20cleanest%20print%20but%20at%20a%20material%20cost%20of%20about%2020%20cents%20(EU/US)%20and%20a%20print%20time%20of%20about%2015%20minutes%20it%26%23x2019;s%20well%20worth%20it.%3C/p%3E%0A%3Ch2%3EResults%3C/h2%3E%0A%3Cp%3E%3Cimg%20src%3D%22https://29a.ch/images/side-by-side.cache-241c79b471c30756.jpg%22%20alt%3D%22Side%20by%20side%22%20loading%3D%22lazy%22%20/%3E%0A%3Cem%3ECrop%20of%20the%20top%20right%20corner%20of%20some%20city%20lights%20at%20night.%3C/em%3E%3C/p%3E%0A%3Ch2%3EWant%20to%20make%20your%20own?%3C/h2%3E%0A%3Cp%3EI%26%23x2019;ve%20thrown%20the%20source%20files%20up%20in%20a%20github%20repo%20for%20you%20to%20use%20%3Ca%20href%3D%22https://github.com/jwagner/swirly-lens-hoods%22%3Ejwagner/swirly-lens-hoods%3C/a%3E.%0AWith%20that%20said,%20I%26%23x2019;m%20a%20very%20inexperienced%20CAD%20user%20and%20in%20this%20case%20didn%26%23x2019;t%20even%20try%20to%20create%20something%20clean.%0AIf%20you%20can%20you%20might%20be%20better%20of%20just%20remodelling%20it%20to%20fit%20your%20own%20lens%20rather%20than%20trying%20to%20adapt%20it.%3C/p%3E)
Procedural Lamp Shades for 3D Printing 22 Aug 2021 12:53 AM (4 years ago)
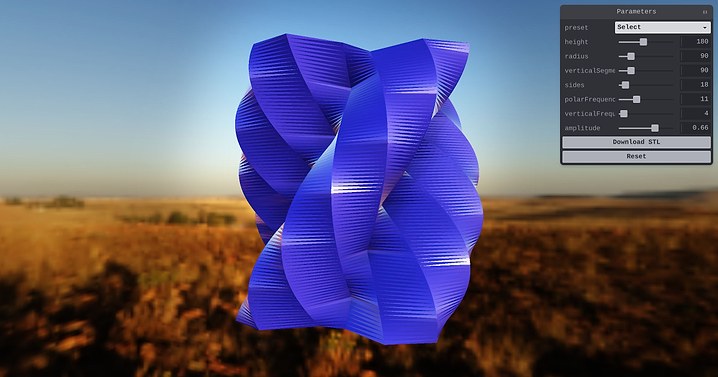 Play with generating lamp shades
I didn’t have any lamp shades in my appartment since moving out from my parents place. I’ve decided to change that and have some fun while doing it by building a generator for lamp shades.
How it works
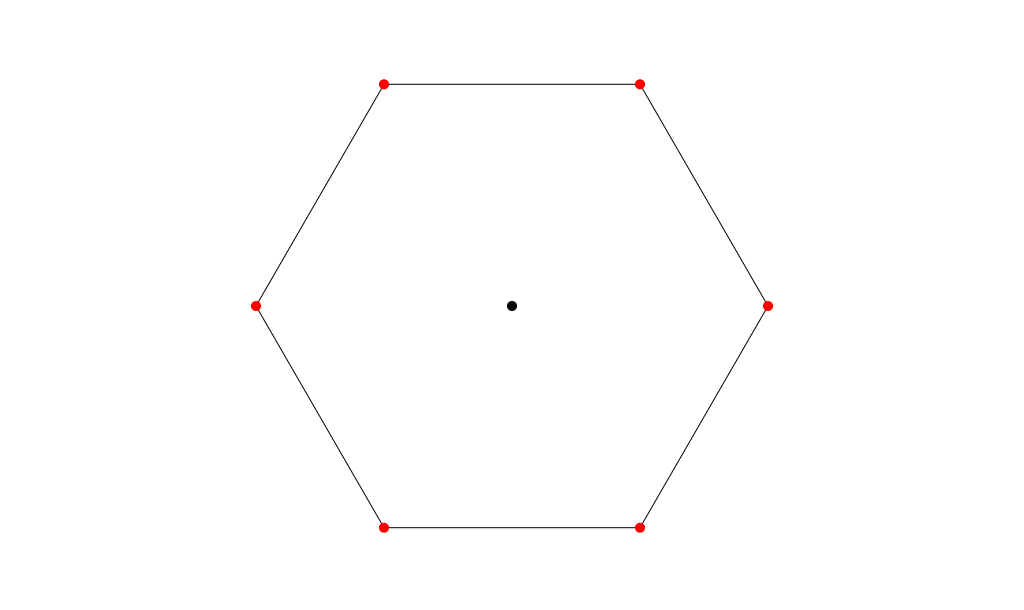
In order to test my setup with three.js.
I’ve started by generating n-gons. A hexagon in this example.
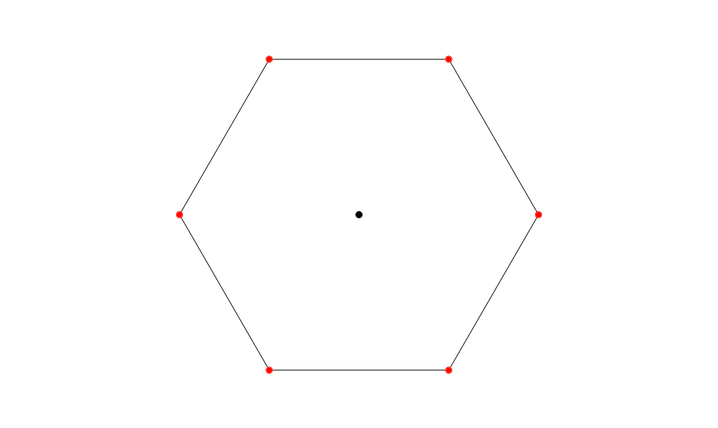
In order to make the result a bit more visually appealing I then modulated the distance from the center (radius) of each vertex using a sine wave. This results in some interesting shapes due to aliasing.
To move into the third dimension I extrude the shape and shift the phase of the sine wave a bit in order to twist the resulting shape.

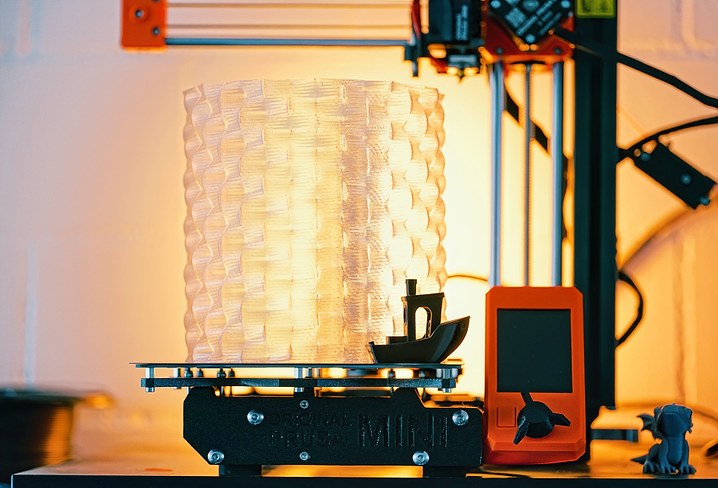
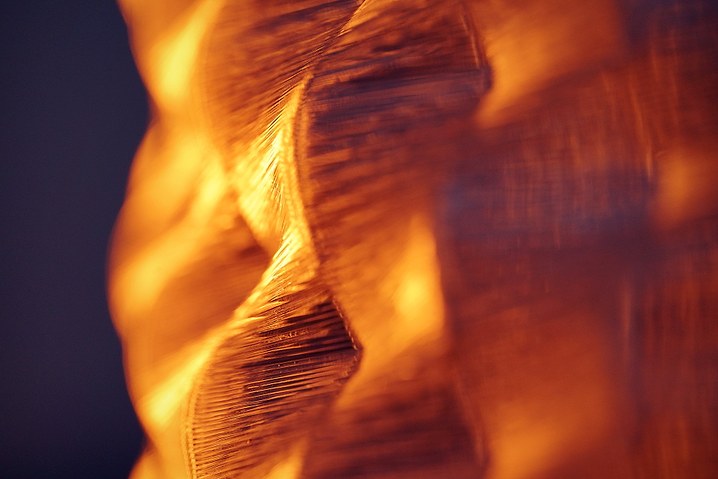
3D Printed results
Here is what one of the models looks like in the real world. 3D printed in vase mode (as a single spiral of extruded plastic) out of PETG using a 0.8mm nozzle.
%20of%20each%20vertex%0Ausing%20a%20sine%20wave.%20This%20results%20in%20some%20interesting%20shapes%20due%20to%20aliasing.%3C/p%3E%0A%3Cp%3E%3Cimg%20src%3D%22https://29a.ch/2021/08/22/procedural-lamp-shades-3d-printing/modulation-animation.webp%22%20alt%3D%22modulation%20animation%22%20/%3E%3C/p%3E%0A%3Cp%3ETo%20move%20into%20the%20third%20dimension%20I%20extrude%20the%20shape%20and%20shift%20the%0Aphase%20of%20the%20sine%20wave%20a%20bit%20in%20order%20to%20twist%20the%20resulting%20shape.%3C/p%3E%0A%3Cp%3E%3Cimg%20src%3D%22https://29a.ch/2021/08/22/procedural-lamp-shades-3d-printing/animation.webp%22%20alt%3D%22animation%22%20/%3E%3C/p%3E%0A%3Ch2%3E3D%20Printed%20results%3C/h2%3E%0A%3Cp%3EHere%20is%20what%20one%20of%20the%20models%20looks%20like%20in%20the%20real%20world.%0A3D%20printed%20in%20vase%20mode%20(as%20a%20single%20spiral%20of%20extruded%20plastic)%0Aout%20of%20PETG%20using%20a%200.8mm%20nozzle.%3C/p%3E%0A%3Cp%3E%3Cimg%20src%3D%22https://29a.ch/images/on-printer.cache-17d1585fde5f56e9.jpg%22%20alt%3D%22On%20printer%22%20loading%3D%22lazy%22%20/%3E%0A%3Cimg%20src%3D%22https://29a.ch/images/closeup.cache-0ebaaacf46e709cd.jpg%22%20alt%3D%22Close%20up%22%20loading%3D%22lazy%22%20/%3E%3C/p%3E)
I made myself a guitar tuner 20 Apr 2020 3:58 PM (5 years ago)
I first learned about the fourier transform at about the same time I started to play guitar. So obviously the first idea that came to my mind at that time was to build a tuner to tune my new guitar. While I eventually got it to work the accuracy was terrible so it never ended up seeing the light of the day.
 Try the chromatic tuner
Fast forward a bit over a decade. It’s 2020 and we are fighting a global pandemic using social distancing. I obviously tried to find ways to directly address the issue with code but in the end there is only so much that can be done on that front and a lot of really clever people on it already.
So rather than coming up with another well intended but flawed design of a mechanical ventilator I decided to revisit this old project of mine. :)
So what’s in it?
The tuner has been built with a whole lot of web tech like getUserMedia to access the microphone, WebAudio to get access to the audio data from the microphone as well as web workers to make it a bit faster. Framework wise I used React and TypeScript.
With that out of the way, the rest of the article will focus on the algorithm that makes the whole thing tick.
Disclaimer
In the following sections I will oversimplify a lot of things for the sake of accessibility and brevity.
If you already have a solid understanding of subject please excuse my oversimplifications.
If you don’t keep in mind that there is a lot more to learn and understand than what I will touch on in this description.
If you want to go deeper I highly recommend reading the papers by Philip McLeod et al. mentioned at the end. They formed the basis of this tuner.
Going beyond the fourier transform
Initially I decided to resume this project from where I stopped years ago, by doing a straight fourier transform on the input and then selecting the first significant peak (by magnitude).
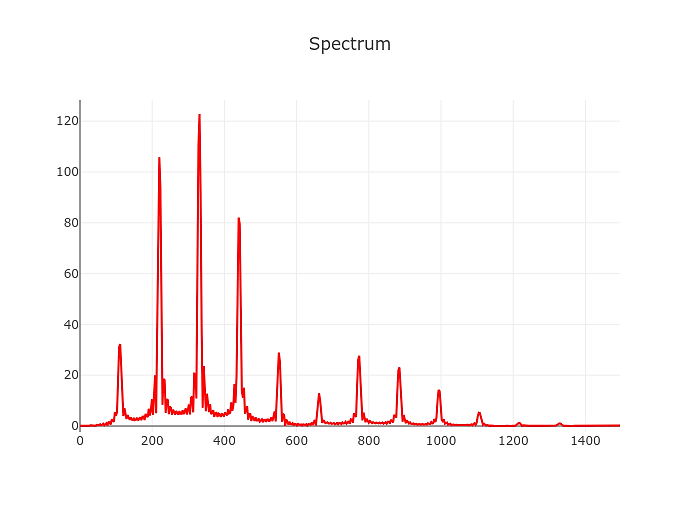
Not quite up to speed with the fourier transform? But what is the Fourier Transform? A visual introduction. is a video beautifully illustrating it.
The naive spectrum approach of course still works as badly as it did back then. In slightly oversimplified terms the frequency resolution of the discrete short-time fourier transform is sample rate divided by window size.
So taking a realistic sample rate of 48000 Hz and a (comparably large) window size of 8192 samples we arrive at a frequency resolution of about 6 Hz.
The low E of a guitar in standard tuning is at ~82 Hz. Add 6 Hz and you are already past F.
We need at least 10x that to build something resembling a tuner. In practice we should aim for a resolution of approximately 1 cent or about 100x the resolution we’d get from the straight fourier transform aproach.
There are approaches to improve the accuracy of this approach a bit, in fact we’ll meet one of them a bit later on in a different context. For now let’s focus on something a bit simpler.
Auto correlation
Compared to the fourier transform autocorrelation is fairly simple to explain. In essence it’s a measure of how similar a signal is to a shifted version of itself. This nicely reflect the frequency, or rather period of the signal we are trying to determine.
In a bit more concrete terms it’s the product of the signal and a time shifted version of the signal. In simplistic Javascript that could look a bit like this:
function autoCorrelation(signal) {
  const output = [];
  for(let lag = 0; lag < signal.length; lag++) {
    for(let i = 0; i + lag < signal.length; i++) {
      output[lag] += signal[i]*signal[i+lag]
    }
  }
  return output;
}
The result will look a bit like this:
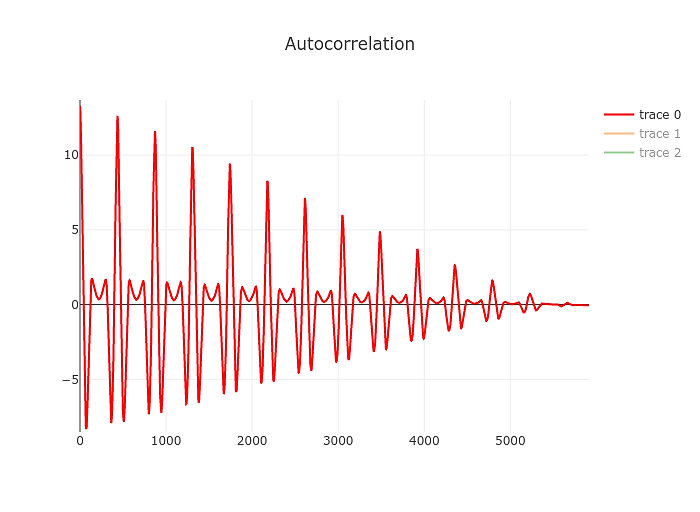
Just by eyeballing it you can tell that it’s going to be easier to find the first significant of the autocorrelation compared to the spectrum yielded by the fourier transform above. Our resolution also changed a bit, this time we are measuring the period of the signal. Our resolution is limited by the sample rate of the signal. So to take the example above the period of a 82 Hz signal is 48000/82 or 585 samples. Being off by a sample we’d end up at 82.19 Hz. Not great but at least it’s still an E. At higher frequencies things will start to look different of course but for our purposes that’s a good point to start.
The actual algorithm used in the tuner is based on McLeod, Philip & Wyvill, Geoff. (2005). A smarter way to find pitch. but the straight autocorrelation above is enough to understand what’s going on.
Picking a peak
Now that we have the graph above we’ll need a robust way of determining the first significant peak in it, which hopefully will also be the perceived fundamental frequency of the tone we are analysing.
We’ll do this in two steps, first we will find all the peaks after the initial zero crossing. We can do this by just looping over the signal and keeping track of the highest value we’ve seen and it’s offset. Once the current value drops bellow 0 we can add it to the list of peaks and reset our maximum.
From this list we’ll now pick the first peak which is bigger than the highest peak multiplied by some tolerance factor like 0.9.
At this point we have a basic tuner. It’s not very robust. It’s not very fast or accurate but it should work.
Improving accuracy
The autocorrelation algorithm mentioned above is evaluated at descrete steps matching the samples of the audio input, that limits our accuracy. We can easily improve on this a bit by interpolating. I use parabolic interpolation in my tuner.
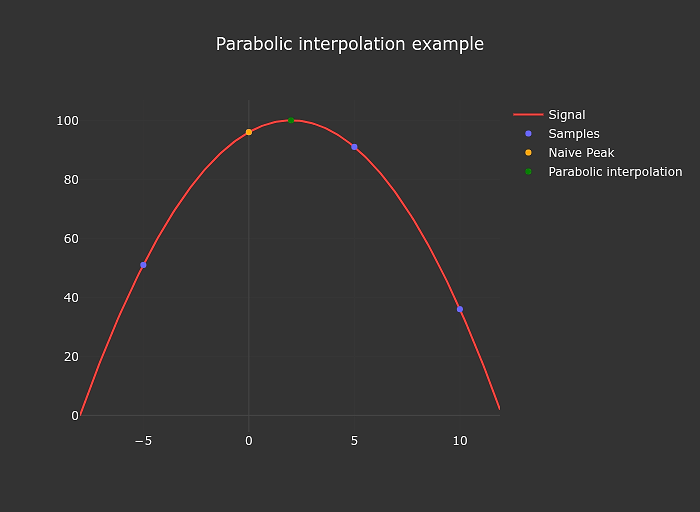
The implementation of this is also extremely simple
function parabolicPeakInterpolation(a, b, c) {
  const denominator = a - 2 * b + c;
  if (denominator === 0) return 0;
  return (a - c) / denominator / 2;
}
Improving reliability
So far everything went smoothly. I had a reasonably accurate tuner for as long as I fed it a clean signal (electric guitar straight into a nice interface).
For some reason I also wanted to get this to work using much more dirty signals from something like a smartphone microphone.
At this stage I spend quite a bit of time implementing and evaluating various noise reduction techniques like simple filters and variations on spectral subtraction. In the end their main benefit was in being able to reduce 50/60 Hz hum but the results were still miserable.
So after banging my head against the wall for a little while I embraced a bit of a paradigm shift and gave up on trying to find a magical filter that would give me a clean signal to feed the pitch detection algorithm.
 Onset Locking
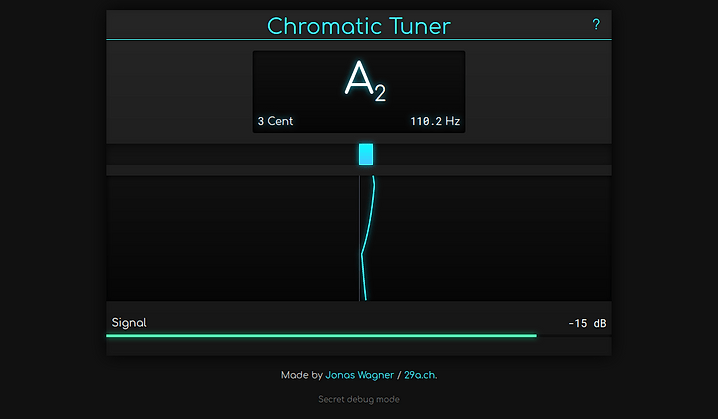
I now use the brief moment right after the note has been plucked to get a decent initial guess of the note being played. This is possible because the initial attack fo the note is fairly loud resulting in a decent signal to noise ratio.
I then use this initial guess to limit the window in which I look for the peak in the auto correlation caused by the note and combine the various measurements using a simple kalman filter.
I named the scheme onset locking in my code, but I’m certain it’s not a new idea.
Making it fast
I hope the O(n²) loop in the auto correlation section made you cringe a bit.
Don’t do it that way. Both basic auto correlation and McLeods take on it (after applying a bit of basic algebra) can be accelerated using the fast fourier transform.
Good bye n squared, hello n log n. :)
Even with the relatively slow FFT implementation I’m using the speed up is between 10 and 100x. So the opimization is definitely worth doing in practice as well.
I’m also using web workers to get the calculations off the main thread and while at it also parallelized.
The result is that the tuner runs fast enough even on my aging Galaxy S7.
What is left to do
Performance in noisy environment is still bad. Using the microphone of a macbook the tuner barely works, if the fan spins up a bit too loudly it will fail completely.
I’d definitely like to improve this in the future but I also have the suspicion that it won’t be trivial, at least without making additional assumptions about the instrument being tuned.
Another front would be to add alternative tunings, and maybe even allow custom tunings. That should be relatively easy to do but I don’t currently have any use for it.
Further reading
McLeod, Philip & Wyvill, Geoff. (2005). A smarter way to find pitch.
McLeod, Philip (2008). Fast, Accurate Pitch Detection Tools for Music Analysis.
Lap Timer and Analyser for GoPro Videos 31 Dec 2019 8:56 AM (5 years ago)
During the past two years I’ve had the occasional pleasure of riding my motorcycles on race tracks. While I’m still far away from being fast I really enjoy working on my riding.
This led me to considering different data recording and analysis solutions. A bit down the line I realized that the GoPro cameras I already owned actually contain a surprisingly good GPS unit recording data at 18hz. To make things even better GoPro also documented their meta data format and even published a parser for it on GitHub.
I was very curious how far I could get with that data and started to play around with it. Many hours and experiments later I somehow ended up with my own analysis software and filters tuned for the camera data.
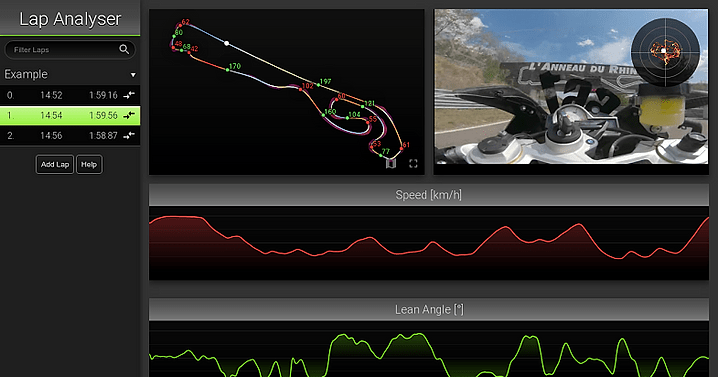 Try the lap analyser
It loads, processes and displays the data, all in a web browser.
Data Extraction and Filtering
The data extraction is performed using the gopro-telemetry library by Juan Irache.
For filtering the data I wrote a little library for kalman filters in TypeScript. The Kalman Filter book by Roger Labbe helped a lot in learning about the topic. I highly recommend it if you want to dive into the topic yourself.
In addition to the obvious line plots of speed, acceleration and lean angles I also implemented a detailed map and what I call a G Map.
Lap Map
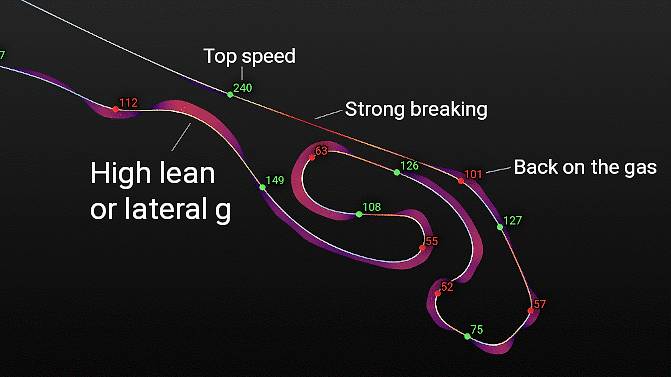
The lap map shows the line, speeds, breaking points and g forces in a spatial context. I especially like the shaded areas in the corners. They show the lateral (distance from the line) and total (color of the area) forces at play.
Looking at the map is a quick way to gauge how close to the limit one is potentially riding in each of the corners.
G-Map

The G-Map is a histogram of the G-Force acting on the vehicle over time. It can be used to gauge how close to the limit a rider is riding.
Assuming a perfect world where vehicles have isotropic grip, the vehicle sufficient power and the rider always operating it at the limit it would trace out a perfect circle, resembling the Circle of forces.
As you can see my example above is far away from that. It shows conservative riding, always staying within the 1 g that warm track tires can easily handle. It also shows that I still have a lot to learn with regards to consistency.
It also shows that the track in question has more right turns than left.
Future Plans

There is of course a lot more that can be done here.
The GoPro also has an accelerometer and gyro which could be integrated into the filters to yield more accurate results.
The additional data would yield the actual lean angle which could then be used in combination with the lateral acceleration to gauge the effectiveness of the body position/hangoff of the rider.
I also have another version of this running on a Raspberry PI coupled to an external GPS receiver. This combination results in an all in one integrated data recording solution. One can simply connect to the WiFi hotspot of the little computer onboard the vehicle and view the most recent sessions.
It’s rather nice because it doesn’t require the camera to be running all the time and is quite simple to use. The drawback is that it requires fiddling together a bunch of hardware which I guess most people don’t want to deal with.
Disclaimer
There are two things that need to be said here.
First off this is not a perfect solution and even if it was it couldn’t definitely answer the question of how close to the limit the rider is. Factors like the track surface, weight transfer and other shenanigans are not accounted for.
Secondly, this product and/or service is not affiliated with, endorsed by or in any way associated with GoPro Inc. or its products and services. GoPro, HERO and their respective logos are trademarks or registered trademarks of GoPro, Inc.
%20and%20total%20(color%20of%20the%20area)%20forces%20at%20play.%3C/p%3E%0A%3Cp%3ELooking%20at%20the%20map%20is%20a%20quick%20way%20to%20gauge%20how%20close%20to%20the%20limit%20one%20is%20potentially%20riding%20in%20each%20of%20the%20corners.%3C/p%3E%0A%3Ch2%3EG-Map%3C/h2%3E%0A%3Cp%3E%3Cimg%20src%3D%22https://29a.ch/images/gmap.cache-62f593a3443bb69c.png%22%20alt%3D%22G%20Map%22%20loading%3D%22lazy%22%20/%3E%3C/p%3E%0A%3Cp%3EThe%20G-Map%20is%20a%20histogram%20of%20the%20G-Force%20acting%20on%20the%20vehicle%20over%20time.%0AIt%20can%20be%20used%20to%20gauge%20how%20close%20to%20the%20limit%20a%20rider%20is%20riding.%3C/p%3E%0A%3Cp%3EAssuming%20a%20perfect%20world%20where%20vehicles%20have%20isotropic%20grip,%20the%20vehicle%20sufficient%20power%20and%20the%0Arider%20always%20operating%20it%20at%20the%20limit%20it%20would%20trace%20out%20a%20perfect%20circle,%20resembling%20the%20%3Ca%20href%3D%22https://en.wikipedia.org/wiki/Circle_of_forces%22%3ECircle%20of%20forces%3C/a%3E.%3C/p%3E%0A%3Cp%3EAs%20you%20can%20see%20my%20example%20above%20is%20far%20away%20from%20that.%20It%20shows%20conservative%20riding,%20always%20staying%20within%0Athe%201%20g%20that%20warm%20track%20tires%20can%20easily%20handle.%20It%20also%20shows%20that%20I%20still%20have%20a%20lot%20to%20learn%20with%20regards%0Ato%20consistency.%3C/p%3E%0A%3Cp%3EIt%20also%20shows%20that%20the%20track%20in%20question%20has%20more%20right%20turns%20than%20left.%3C/p%3E%0A%3Ch2%3EFuture%20Plans%3C/h2%3E%0A%3Cp%3E%3Cimg%20src%3D%22https://29a.ch/images/early-draft.cache-a27f064da5e65740.jpg%22%20alt%3D%22early%20draft%22%20loading%3D%22lazy%22%20/%3E%3C/p%3E%0A%3Cp%3EThere%20is%20of%20course%20a%20lot%20more%20that%20can%20be%20done%20here.%3C/p%3E%0A%3Cp%3EThe%20GoPro%20also%20has%20an%20accelerometer%20and%20gyro%20which%20could%20be%20integrated%20into%20the%20filters%20to%20yield%0Amore%20accurate%20results.%3C/p%3E%0A%3Cp%3EThe%20additional%20data%20would%20yield%20the%20actual%20lean%20angle%20which%20could%20then%20be%20used%20in%20combination%20with%20the%0Alateral%20acceleration%20to%20gauge%20the%20effectiveness%20of%20the%20body%20position/hangoff%20of%20the%20rider.%3C/p%3E%0A%3Cp%3EI%20also%20have%20another%20version%20of%20this%20running%20on%20a%20Raspberry%20PI%20coupled%20to%20an%20external%20GPS%20receiver.%0AThis%20combination%20results%20in%20an%20all%20in%20one%20integrated%20data%20recording%20solution.%20One%20can%20simply%20connect%20to%20the%0AWiFi%20hotspot%20of%20the%20little%20computer%20onboard%20the%20vehicle%20and%20view%20the%20most%20recent%20sessions.%3C/p%3E%0A%3Cp%3EIt%26%23x2019;s%20rather%20nice%20because%20it%20doesn%26%23x2019;t%20require%20the%20camera%20to%20be%20running%20all%20the%20time%20and%20is%20quite%20simple%20to%20use.%0AThe%20drawback%20is%20that%20it%20requires%20fiddling%20together%20a%20bunch%20of%20hardware%20which%20I%20guess%20most%20people%20don%26%23x2019;t%20want%20to%20deal%20with.%3C/p%3E%0A%3Ch2%3EDisclaimer%3C/h2%3E%0A%3Cp%3EThere%20are%20two%20things%20that%20need%20to%20be%20said%20here.%3C/p%3E%0A%3Cp%3EFirst%20off%20this%20is%20not%20a%20perfect%20solution%20and%20even%20if%20it%20was%20it%20couldn%26%23x2019;t%20definitely%0Aanswer%20the%20question%20of%20how%20close%20to%20the%20limit%20the%20rider%20is.%20Factors%20like%20the%20track%20surface,%0Aweight%20transfer%20and%20other%20shenanigans%20are%20not%20accounted%20for.%3C/p%3E%0A%3Cp%3ESecondly,%20this%20product%20and/or%20service%20is%20not%20affiliated%20with,%20endorsed%20by%20or%20in%20any%20way%20associated%20with%20GoPro%20Inc.%20or%20its%20products%20and%20services.%20GoPro,%20HERO%20and%20their%20respective%20logos%20are%20trademarks%20or%20registered%20trademarks%20of%20GoPro,%20Inc.%3C/p%3E)
I made myself a noise generator 25 Aug 2019 6:29 AM (6 years ago)
It’s been a while since the last release but I finally finished something again.
Noise tends to eject me from my focus and flow and sometimes noise canceling headphones just aren’t enough to prevent it. In those instances I often mask the remaining noise with less distracting pure noise.
There already are various tools for this purpose, so there isn’t really a strict need for another one. I just wanted to have some fun and build something that does exactly what I want and looks pretty while doing it. As a nice bonus it gave me an opportunity to play with some more recent web technologies.
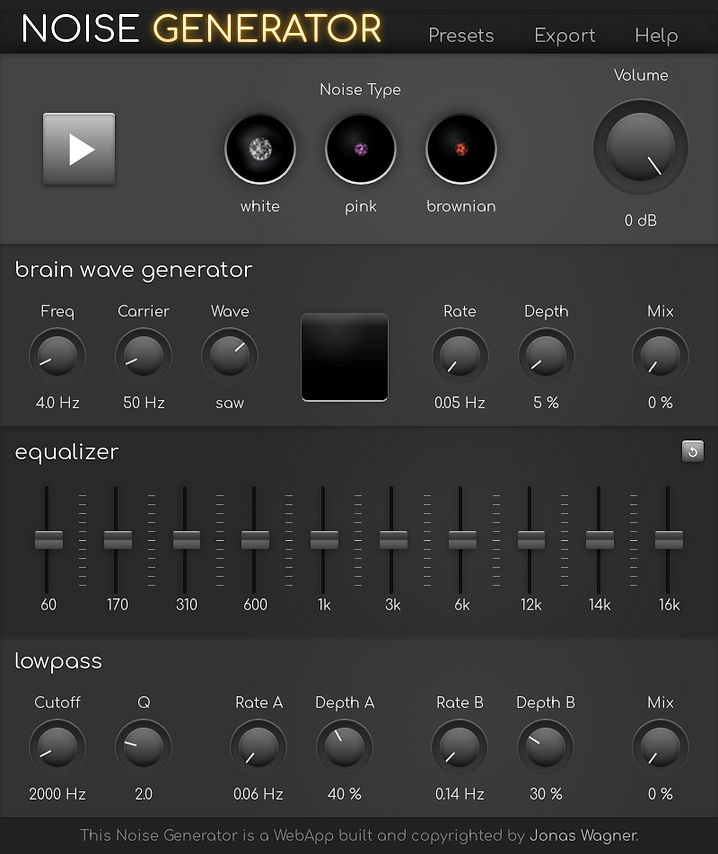
I don’t expect this to be useful to particularly many people other than myself but that’s why it’s a spare time project. :)
If you want to learn a bit more about it there is a little info on the noise generator help page.
%3C/p%3E%0A%3Cp%3EIf%20you%20want%20to%20learn%20a%20bit%20more%20about%20it%20there%20is%20a%20little%20info%20on%20the%20%3Ca%20href%3D%22https://29a.ch/noise-generator/help/%22%3Enoise%20generator%20help%20page%3C/a%3E.%3C/p%3E)
Urban Astrophotography 25 Jun 2017 11:14 AM (8 years ago)
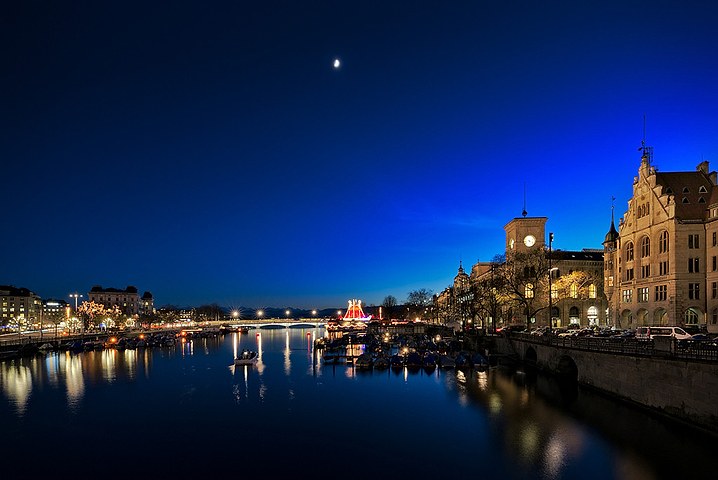
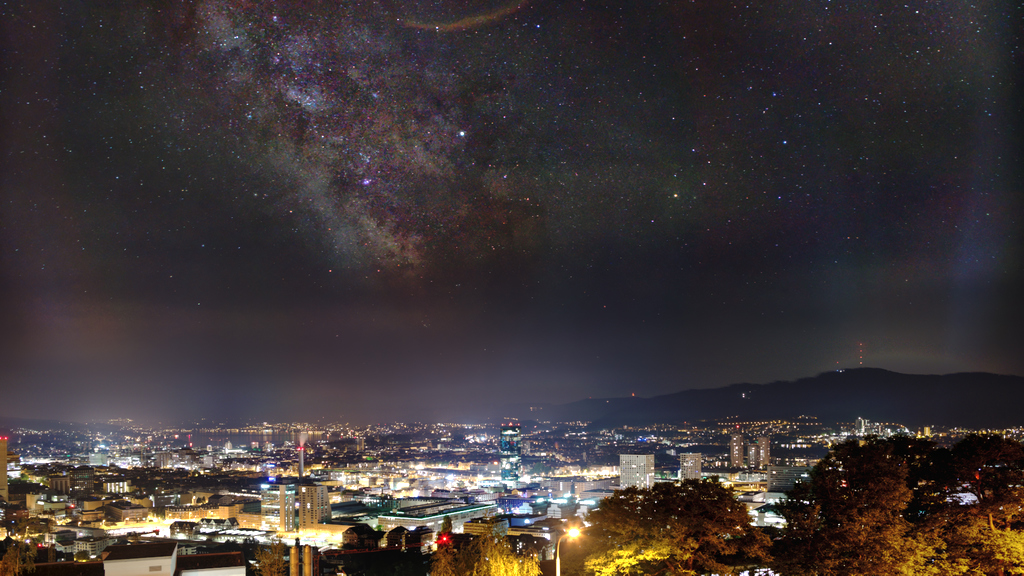 The milkyway core over Zurich.
One of the first lessons in astrophotography is that you better find a dark place, far away from the lights of civilization if you want to take good pictures of the night sky.
Wouldn’t it be beautiful if it was possible to photograph the Milky Way in the middle of a city?
I wanted to try.
Step by Step
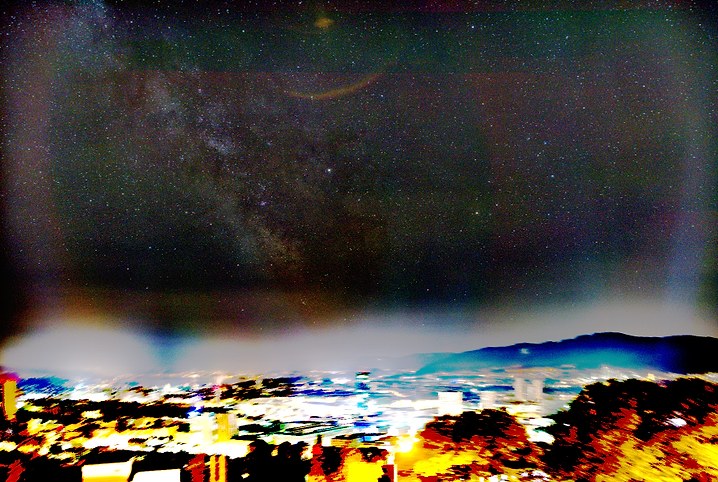
I packed my camera onto my bike and rode into night to take a few photos. This is what they looked like after I developed them using RawTherapee.

Straigh out of camera
When you take a picture of the night sky in a city this is about what you will get. At least we can see Saturn and a few stars. Let’s try to peek through the haze.
The first step is to collect more light. The more light we capture with our camera the easier it will be to separate the photons coming from the nebulae in the galactic center from the noise. We can gather more light by capturing more photographs. The only problem is of course that the stars are moving.
The stars are moving
We can fix this problem by aligning the images based on the stars. I used Hugin for this job.
The earth slowly turning
The next step is to combine (stack) all of the images into one. The ground will look blurry because it moves but the stars will remain sharp. I used Siril for this task.

Now this is where the magic happens. We remove the ground and stars from the image and then blur it a lot.

All this image now contains is the light pollution. Let’s subtract1 it.

With all of the light pollution gone darkness remains.
Now we can amplify the faint light in the image, increase contrast and denoise.
Finally we add the recovered light back to one of the original images and apply some final tweaks.

Why this is possible
This is possible because of two main reasons. Light pollution is the result of light being scattered (light bouncing of particles in the air) in the air. Unlike for instance dense smoke, light pollution does not block the light from the glowing gas clouds of the Milky Way. This means that the signal is still there just very weak compared to the city lights.
The other reason is that the light pollution, especially higher above the horizon becomes more and more even. That’s the property that allows us to separate it from the more focused light of the stars and nebula using a high pass filter.
Settings & Equipment
In case you are curious about the equipment and settings used: Nikon D810, Samyang 24/1.4 @ 2.8, ISO 100, 9 pictures @ 20s, combined using winsorized sigma clipping.
Conclusions
The result is definitely noisy and not of the highest quality but still it amazes me, that this is even possible.
A consumer grade camera and free software can reveal the center of our home galaxy behind the bright haze of city lights, showing us our place in our galaxy and the the universe beyond.
I’m curious how much farther I can push this technique with deliberately chosen framing, tweaked settings, more exposures and maybe a Didymium filter.
Further Reading
If you want to learn about astrophotography in general I recommend you to read lonelyspeck.com. Ian is a much better writer than I will ever be and he has written a lot of great articles.
1: In practice you want to use grain extract/merge here since subtraction in most graphics software clips negative values to zero.
%20all%20of%20the%20images%20into%20one.%0AThe%20ground%20will%20look%20blurry%20because%20it%20moves%20but%20the%20stars%20will%20remain%20sharp.%0AI%20used%20%3Ca%20href%3D%22https://free-astro.org/index.php/Siril%22%3ESiril%3C/a%3E%20for%20this%20task.%3C/p%3E%0A%3Cp%3E%3Cimg%20src%3D%22https://29a.ch/images/blur.cache-2c2bcbaf8ca06fef.jpg%22%20alt%3D%22Sharp%20night%20sky%20with%20blurred%20ground%22%20loading%3D%22lazy%22%20/%3E%3C/p%3E%0A%3Cp%3ENow%20this%20is%20where%20the%20magic%20happens.%20We%20remove%20the%20ground%20and%20stars%20from%20the%20image%0Aand%20then%20blur%20it%20a%20lot.%3C/p%3E%0A%3Cp%3E%3Cimg%20src%3D%22https://29a.ch/images/pollution.cache-0f363eafacdd9558.jpg%22%20alt%3D%22Light%20pollution%22%20loading%3D%22lazy%22%20/%3E%3C/p%3E%0A%3Cp%3EAll%20this%20image%20now%20contains%20is%20the%20light%20pollution.%20Let%26%23x2019;s%20subtract%3Csup%3E1%3C/sup%3E%20it.%3C/p%3E%0A%3Cp%3E%3Cimg%20src%3D%22https://29a.ch/images/darkness.cache-47a7081579589c68.jpg%22%20alt%3D%22Night%20sky%20with%20ligh%20pollution%20removed%22%20loading%3D%22lazy%22%20/%3E%3C/p%3E%0A%3Cp%3EWith%20all%20of%20the%20light%20pollution%20gone%20darkness%20remains.%3C/p%3E%0A%3Cp%3ENow%20we%20can%20amplify%20the%20faint%20light%20in%20the%20image,%20increase%20contrast%20and%20denoise.%3C/p%3E%0A%3Cp%3E%3Cimg%20src%3D%22https://29a.ch/images/faint-light.cache-69387f4715f904c3.jpg%22%20alt%3D%22Faint%20light%20amplified%22%20loading%3D%22lazy%22%20/%3E%3C/p%3E%0A%3Cp%3EFinally%20we%20add%20the%20recovered%20light%20back%20to%20one%20of%20the%20original%20images%20and%20apply%20some%20final%20tweaks.%3C/p%3E%0A%3Cp%3E%3Cimg%20src%3D%22https://29a.ch/images/cover.cache-a2b12f879b6b6b02.jpg%22%20alt%3D%22Milkyway%20Core%20over%20Zurich%22%20loading%3D%22lazy%22%20/%3E%3C/p%3E%0A%3Ch2%3EWhy%20this%20is%20possible%3C/h2%3E%0A%3Cp%3EThis%20is%20possible%20because%20of%20two%20main%20reasons.%0ALight%20pollution%20is%20the%20result%20of%20light%20being%20scattered%20(light%20bouncing%20of%20particles%20in%20the%20air)%20in%20the%20air.%0AUnlike%20for%20instance%20dense%20smoke,%20light%20pollution%20does%20not%20block%20the%20light%20from%20the%20glowing%20gas%20clouds%20of%20the%20Milky%20Way.%0AThis%20means%20that%20the%20signal%20is%20still%20there%20just%20very%20weak%20compared%20to%20the%20city%20lights.%3C/p%3E%0A%3Cp%3EThe%20other%20reason%20is%20that%20the%20light%20pollution,%20especially%20higher%20above%20the%20horizon%20becomes%20more%20and%20more%20even.%0AThat%26%23x2019;s%20the%20property%20that%20allows%20us%20to%20separate%20it%20from%20the%20more%20focused%20light%20of%20the%20stars%20and%20nebula%20using%20a%20high%20pass%20filter.%3C/p%3E%0A%3Ch2%3ESettings%20%26amp;%20Equipment%3C/h2%3E%0A%3Cp%3EIn%20case%20you%20are%20curious%20about%20the%20equipment%20and%20settings%20used:%0ANikon%20D810,%20Samyang%2024/1.4%20@%202.8,%20ISO%20100,%209%20pictures%20@%2020s,%20combined%20using%20winsorized%20sigma%20clipping.%3C/p%3E%0A%3Ch2%3EConclusions%3C/h2%3E%0A%3Cp%3EThe%20result%20is%20definitely%20noisy%20and%20not%20of%20the%20highest%20quality%20but%20still%20it%20amazes%20me,%20that%20this%20is%20even%20possible.%3C/p%3E%0A%3Cblockquote%3EA%20consumer%20grade%20camera%20and%20free%20software%20can%20reveal%20the%20center%20of%20our%20home%20galaxy%20behind%20the%20bright%20haze%20of%20city%20lights,%0Ashowing%20us%20our%20place%20in%20our%20galaxy%20and%20the%20the%20universe%20beyond.%3C/blockquote%3E%0A%0A%3Cp%3EI%26%23x2019;m%20curious%20how%20much%20farther%20I%20can%20push%20this%20technique%20with%20deliberately%20chosen%20framing,%20tweaked%20settings,%20more%20exposures%20and%20maybe%20a%20%3Ca%20href%3D%22https://en.wikipedia.org/wiki/Didymium%22%3EDidymium%3C/a%3E%20filter.%3C/p%3E%0A%3Ch2%3EFurther%20Reading%3C/h2%3E%0A%3Cp%3EIf%20you%20want%20to%20learn%20about%20astrophotography%20in%20general%20I%20recommend%20you%20to%20read%20%3Ca%20href%3D%22http://www.lonelyspeck.com%22%3Elonelyspeck.com%3C/a%3E.%0AIan%20is%20a%20much%20better%20writer%20than%20I%20will%20ever%20be%20and%20he%20has%20written%20a%20lot%20of%20great%20articles.%3C/p%3E%0A%3Cp%3E%3Csup%3E1%3C/sup%3E:%20In%20practice%20you%20want%20to%20use%20grain%20extract/merge%20here%20since%20subtraction%20in%20most%20graphics%20software%20clips%20negative%20values%20to%20zero.%3C/p%3E)
JPEG Forensics in Forensically 5 Feb 2017 4:53 AM (8 years ago)
In this brave new world of alternative facts the people need the tools to tell true from false.
Well either that or maybe I was just playing with JPEG encoding and some of that crossed over into my little web based photo forensics tool in the form of some new tools. ;)
JPEG Comments
The JPEG file format contains a section for comments marked by 0xFFFE (COM). These exist in addition to the usual Exif, IPTC and XMP data. In some cases they can contain interesting information that is either not available in the other meta data or has been stripped.
For instance images from wikipedia contain a link back to the image:
File source: https://commons.wikimedia.org/wiki/File:...
Older versions of Photoshop also seem to leave a JPEG Comment too
File written by Adobe Photoshop 4.0
Some versions of libgd (commonly used in PHP web applications) seem to leave comments indicating the version of the library used and the quality the image was saved at:
CREATOR: gd-jpeg v1.0 (using IJG JPEG v62), quality = 90
The JPEG Analysis in Forensically allows you to view these.
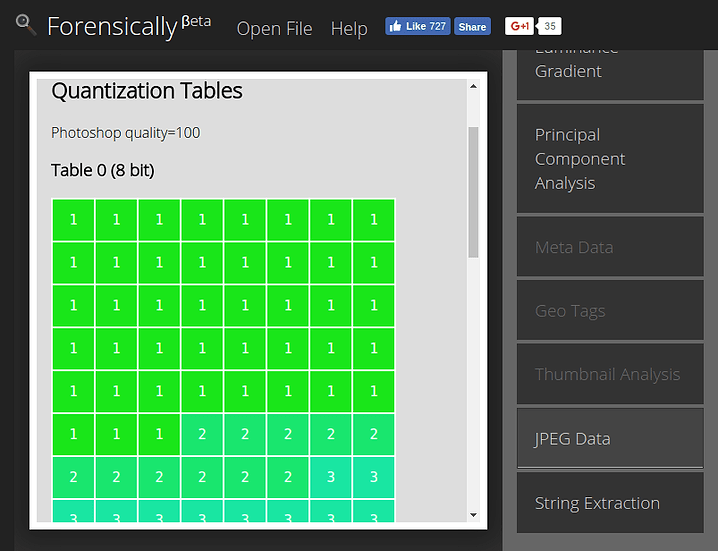
Quantization Tables
This is probably the most interesting bit of information revealed by this new tool in Forensically.
A basic understanding of how JPEG works can help in understanding this tool so I will try to give you some intuition using the noble art of hand waving.
If you already understand JPEG you should probably skip over this gross oversimplification.
JPEG is in general a lossy image compression format. It achieves good compression rates by discarding some of the information contained in the original image.
For this compression the image is divided in 8x8 pixel blocks. Rather than storing the individual pixel values for each of the 64 pixels in the block directly JPEG saves how much they are like one of 64 fixed “patterns” (coefficients). If these patterns are chosen in the right way this transform is still essentially lossless (except for rounding errors) meaning you can back the original image by combining these patterns.
JPEG Patterns
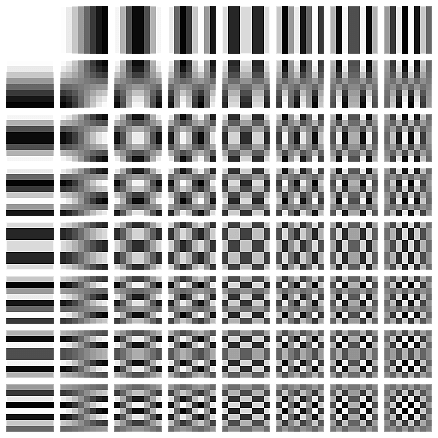
JPEG DCT Coefficients by Devcore (Public Domain)
Now that the image is expressed in terms of these patterns JPEG can selectively discard some of the detail in the image.
How much information about which pattern is discarded is defined in a set of tables that is stored inside of each JPEG image. These tables are called quantization tables.
Example quantization table for quality 95
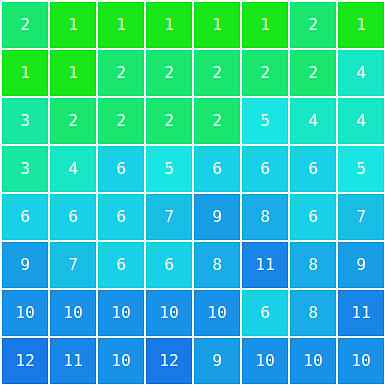
There are some suggestions in the JPEG standard on how to calculate these tables for a given quality value (1-99). As it turns out not everyone is using these same tables and quality values.
This is good for us as it means that by looking at the quantization tables used in a JPEG image we can learn something about the device that created the JPEG image.
Identifying manipulated images using JPEG quantization tables
Most computer software and internet services use the standard quantization tables. The very notable exception to this rule are Adobe products, namely Photoshop. This means that we can detect images that have been last saved using Photoshop just by looking at their quantization tables.
Many digital camera manufacturers also have their own secret sauce for creating quantization tables. Meaning that by comparing the quantization tables between different images taken with the same type of camera and setting we can identify whether an image was potentially created by that camera or not.
Automatic identification of quantization tables
Forensically currently automatically identifies quantization tables that have been created according to the standard. In that case it will display Standard JPEG Table Quality=95.
It does also automatically recognize some of the quantization tables used by photoshop.
In this case it will display Photoshop quality=85.
I’m missing a complete set of sample images for older photoshop versions using the 0-12 quality scale. If you happen to have one and would be willing to share it please let me know.
If the quantization table is not recognized it will output Non Standard JPEG Table, closest quality=82 or Unknown Table.
Summary
JPEG images contain tables that specify how the image was compressed. Different software and devices use different quantization tables therefore by looking at the quantization tables we can learn something about the device or software that saved the image.
Additional Resources
- Presentation Using JPEG Quantization Tables to Identify Imagery Processed by Software by Jesse Kornblum
- Paper Using JPEG Quantization Tables to Identify Imagery Processed by Software by Jesse Kornblum
- Digital Image Ballistics from JPEG Quantization by Hany Farid
Structural Analysis
In addition to the quantization tables the order of the different sections (markers) of a JPEG image also reveal detail about it’s creation. In short images that were created in the same way should in general have the same structure. If they don’t it’s an indication that the image may have been tampered with.
String Extraction
Sometimes images contain (meta) data in odd places. A simple way to find these is to scan the image for sequences of sensible characters. A traditional tool to do this is the strings program in Unix-like operating systems.
For example I’ve found images that have been edited with Lightroom that contained a complete xml description of all the edits done to the image hidden in the XMP metadata.
Facebook Meta Data
When using this tool on an image downloaded from facebook one will often find a string like
FBMD01000a9...
From what I can tell this string is present in images that are uploaded via the web interface. A quick google does not reveal much about it’s contents. But it’s presence is a good indicator that an image came from facebook.
I might add a ‘facebook detector’ that looks for the presence & structure of these fields in the future.
Poke around using these new tools and see what you can find! :)
Principal Component Analysis for Photo Forensics 11 Aug 2016 3:43 AM (9 years ago)
As mentioned earlier I have been playing around with Principal Component Analysis (PCA) for photo forensics. The results of this have now landed in my Photo Forensics Tool.
In essence PCA offers a different perspective on the data which allows us to find outliers more easily. For instance colors that just don’t quite fit into the image will often be more apparent when looking at the principal components of an image. Compression artifacts do also tend to be far more visible, especially in the second and third principal components. Now before you fall asleep, let me give you an example.
Example
This is a photo that I recently took:

To the naked eye this photo does not show any clear signs of manipulation. Let’s see what we can find by looking at the principal components.
First Principal Component
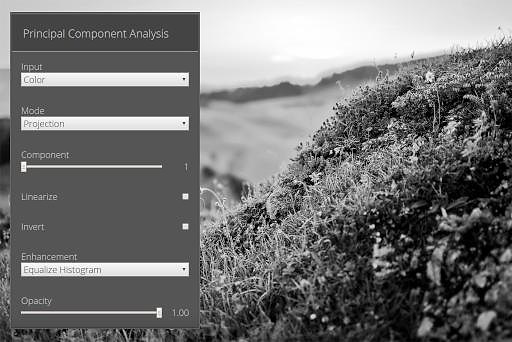
Still nothing suspicious, let’s check the second one:
Second Principal Component
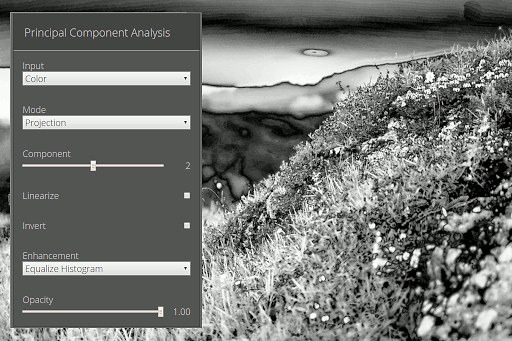
And indeed this is where I have removed an insect flying in front of the lens using the inpainting algorithm algorithm (content aware fill in photoshop speak) provided by G’MIC. If you are interested Pat David has a nice tutorial on how to use this in the GIMP.
Resistance to Compression
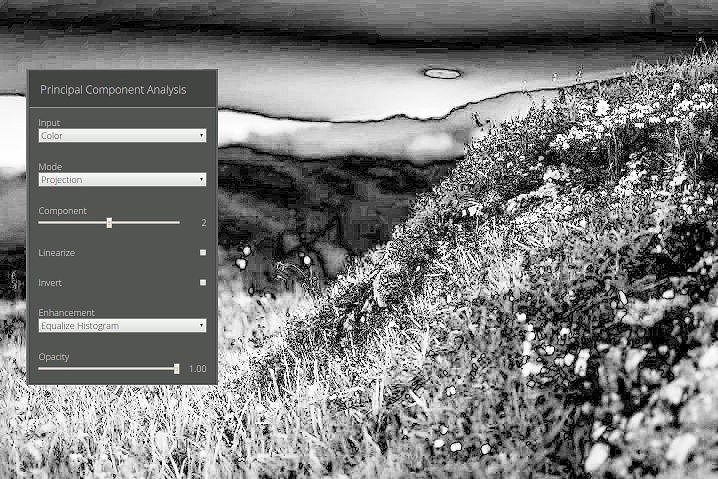
This technique does still work with more heavily compressed images. To illustrate this I have run the same analysis I did above on the smaller & more compressed version of the photo used in this article rather than the original. As you can clearly see the anomaly caused by the manipulation is still present and quite clear but not as clear as when analyzing a less compressed version of the image. You can also see that the PCA is quite good at revealing the artifacts caused by (re)compression.
Further Reading
If you found this interesting you should consider reading my article Black and White Conversion using PCA which introduces a tool which applies the very same techniques to create beautiful black and white conversions of photographs.
If you want another image to play with try the one in this post by Neal Krawetz is interesting. It can be quite revealing. :)
%0Afor%20photo%20forensics.%20The%20results%20of%20this%20have%20now%20landed%20in%20my%20%3Ca%20href%3D%22https://29a.ch/photo-forensics/%23pca%22%3EPhoto%20Forensics%20Tool%3C/a%3E.%3C/p%3E%0A%3Cp%3EIn%20essence%20%3Cem%3EPCA%3C/em%3E%20offers%20a%20different%20perspective%20on%20the%20data%20which%20allows%20us%20to%20find%20%3Ca%20href%3D%22https://en.wikipedia.org/wiki/Outlier%22%3Eoutliers%3C/a%3E%20more%20easily.%0AFor%20instance%20colors%20that%20just%20don%26%23x2019;t%20quite%20fit%20into%20the%20image%20will%20often%20be%20more%20apparent%0Awhen%20looking%20at%20the%20principal%20components%20of%20an%20image.%0ACompression%20artifacts%20do%20also%20tend%20to%20be%20far%20more%20visible,%20especially%20in%20the%0Asecond%20and%20third%20principal%20components.%20Now%20before%20you%20fall%20asleep,%20let%20me%20give%20you%20an%20example.%3C/p%3E%0A%3Ch2%3EExample%3C/h2%3E%0A%3Cp%3EThis%20is%20a%20photo%20that%20I%20recently%20took:%3C/p%3E%0A%3Cp%3E%3Ca%20href%3D%22https://www.flickr.com/photos/80225884@N06/28266828992%22%3E%3Cimg%20src%3D%22https://29a.ch/images/photo.cache-b0223e255617fa6e.jpg%22%20alt%3D%22Photo%20of%20a%20Sunset%22%20loading%3D%22lazy%22%20/%3E%3C/a%3E%3C/p%3E%0A%3Cp%3ETo%20the%20naked%20eye%20this%20photo%20does%20not%20show%20any%20clear%20signs%20of%20manipulation.%0ALet%26%23x2019;s%20see%20what%20we%20can%20find%20by%20looking%20at%20the%20principal%20components.%3C/p%3E%0A%3Ch2%3EFirst%20Principal%20Component%3C/h2%3E%0A%3Cp%3E%3Cimg%20src%3D%22https://29a.ch/images/pca1.cache-d891006b24413242.jpg%22%20alt%3D%22First%20principal%20component%22%20loading%3D%22lazy%22%20/%3E%3C/p%3E%0A%3Cp%3EStill%20nothing%20suspicious,%20let%26%23x2019;s%20check%20the%20second%20one:%3C/p%3E%0A%3Ch2%3ESecond%20Principal%20Component%3C/h2%3E%0A%3Cp%3E%3Cimg%20src%3D%22https://29a.ch/images/pca2.cache-0eba9b7c3e91ed52.gif%22%20alt%3D%22Second%20principal%20component%22%20loading%3D%22lazy%22%20/%3E%3C/p%3E%0A%3Cp%3EAnd%20indeed%20this%20is%20where%20I%20have%20removed%20an%20insect%20flying%20in%20front%20of%20the%20lens%0Ausing%20the%20%3Ca%20href%3D%22https://daisy.users.greyc.fr/papers/2013/SA/%22%3Einpainting%20algorithm%3C/a%3E%20algorithm%20(content%20aware%20fill%20in%20photoshop%20speak)%20provided%20by%20G%26%23x2019;MIC.%0AIf%20you%20are%20interested%20Pat%20David%20has%20a%20nice%20%3Ca%20href%3D%22http://blog.patdavid.net/2014/02/getting-around-in-gimp-gmic-inpainting.html%22%3Etutorial%20on%20how%20to%20use%20this%3C/a%3E%0Ain%20the%20GIMP.%3C/p%3E%0A%3Ch2%3EResistance%20to%20Compression%3C/h2%3E%0A%3Cp%3E%3Cimg%20src%3D%22https://29a.ch/images/compressed.cache-c2a721fa6492b511.jpg%22%20alt%3D%22Second%20principal%20component%22%20loading%3D%22lazy%22%20/%3E%3C/p%3E%0A%3Cp%3EThis%20technique%20does%20still%20work%20with%20more%20heavily%20compressed%20images.%0ATo%20illustrate%20this%20I%20have%20run%20the%20same%20analysis%20I%20did%20above%20on%20the%20smaller%20%26amp;%20more%20compressed%0Aversion%20of%20the%20photo%20used%20in%20this%20article%20rather%20than%20the%20original.%0AAs%20you%20can%20clearly%20see%20the%20anomaly%20caused%20by%20the%20manipulation%20is%20still%20present%0Aand%20quite%20clear%20but%20not%20as%20clear%20as%20when%20analyzing%20a%20less%20compressed%20version%20of%20the%20image.%0AYou%20can%20also%20see%20that%20the%20PCA%20is%20quite%20good%20at%20revealing%20the%20artifacts%20caused%20by%20(re)compression.%3C/p%3E%0A%3Ch2%3EFurther%20Reading%3C/h2%3E%0A%3Cp%3EIf%20you%20found%20this%20interesting%20you%20should%20consider%20reading%20my%20article%20%3Ca%20href%3D%22https://29a.ch/2016/07/08/black-white-photo-pca/%22%3EBlack%20and%20White%20Conversion%20using%20PCA%3C/a%3E%0Awhich%20introduces%20a%20tool%20which%20applies%20the%20very%20same%20techniques%20to%20create%20beautiful%20black%20and%20white%20conversions%20of%20photographs.%3C/p%3E%0A%3Cp%3EIf%20you%20want%20another%20image%20to%20play%20with%20try%20the%20one%20in%20this%0A%3Ca%20href%3D%22https://hackerfactor.com/blog/index.php?/archives/322-Body-By-Victoria.html%22%3Epost%3C/a%3E%0Aby%20Neal%20Krawetz%20is%20interesting.%20It%20can%20be%20quite%20revealing.%20:)%3C/p%3E)
Ditherlicious - 1 Bit Image Dithering 4 Aug 2016 2:29 AM (9 years ago)
While experimenting with Black and White Conversion using PCA I also investigated dithering algorithms and played with those. I found that Stucki Dithering would yield rather pleasant results. So I created a little application for just that: Ditherlicious.
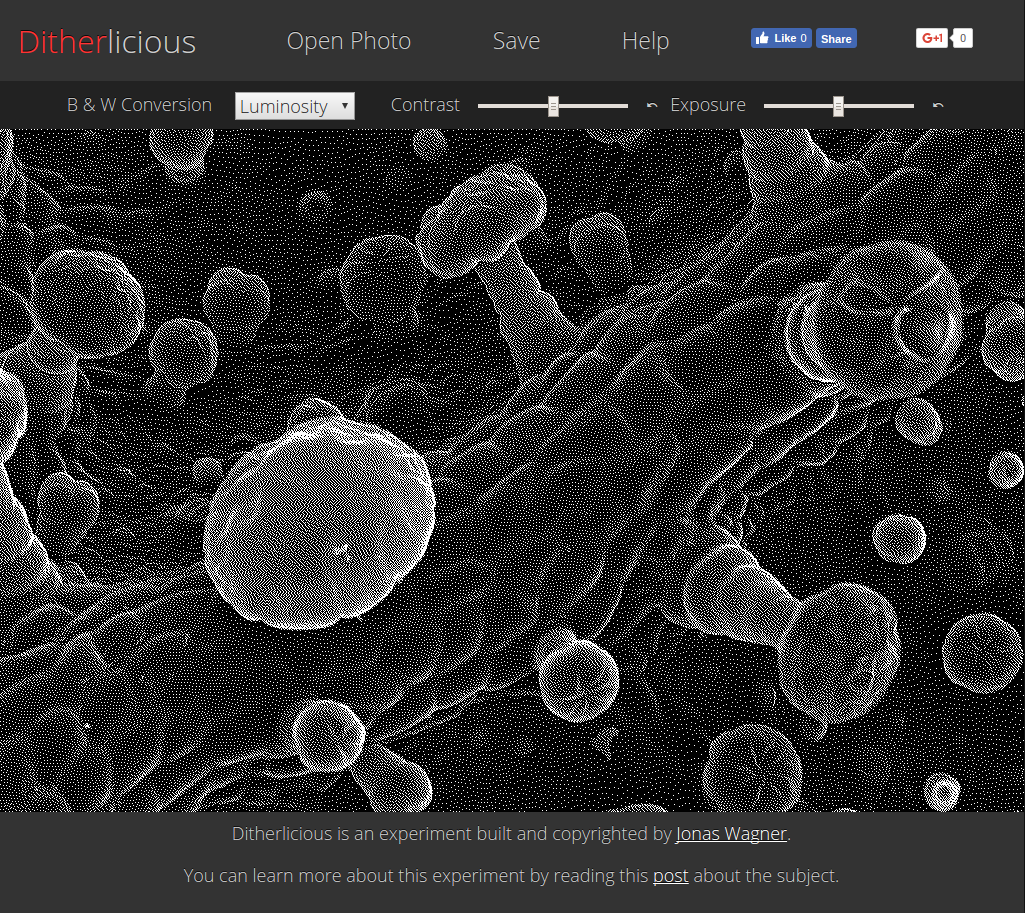
Open Ditherlicious
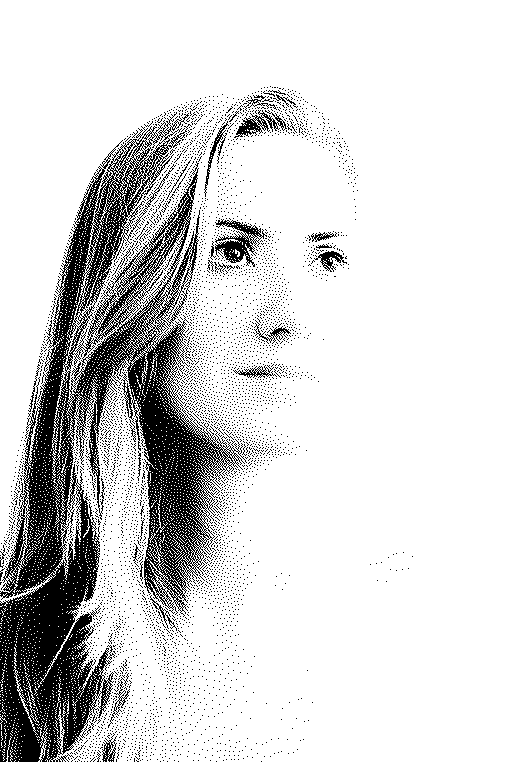
Photo by Tuncay (CC BY)
I hope you enjoy playing with it. :)
%3C/p%3E%0A%3Cp%3EI%20hope%20you%20enjoy%20playing%20with%20it.%20:)%3C/p%3E)
Black and White Conversion using PCA 8 Jul 2016 3:55 AM (9 years ago)
I have been hacking on my photo forensics tool lately. I found a few references that suggested that performing PCA on the colors of an image might reveal interesting information hidden to the naked eye. When implementing this feature I noticed that it did a quite good job at doing black & white conversions of photos. Thinking about this it does actually make some sense, the first principal component maximizes the variance of the values. So it should result in a wide tonal range in the resulting photograph. This led me to develop a tool to explore this idea in more detail.
This experimental tool is now available for you to play with:
29a.ch/sandbox/2016/monochrome-photo-pca/.
To give you a quick example let’s start with one of my own photographs:
While the composition with so much empty space is debatable, I find this photo fairly good example of an image where a straight luminosity conversion fails. This is because the really saturated colors in the sky look bright/intense even if the straight up luminosity values do not suggest that.

In this case the PCA conversion does (in my opinion) a better job at reflecting the tonality in the sky. I’d strongly suggest that you experiment with the tool yourself.
If you want a bit more detail on how exactly the conversions work please have a look at the help page.
Do I think this is the best technique for black and white conversions? No. You will always be able to get better results by manually tweaking the conversion to fit your vision. Is it an interesting result? I’d say so.
%20a%20better%20job%20at%20reflecting%20the%20tonality%20in%20the%20sky.%0AI%26%23x2019;d%20strongly%20suggest%20that%20you%20experiment%20with%20%3Ca%20href%3D%22https://29a.ch/sandbox/2016/monochrome-photo-pca/%22%3Ethe%20tool%3C/a%3E%20yourself.%3C/p%3E%0A%3Cp%3EIf%20you%20want%20a%20bit%20more%20detail%20on%20how%20exactly%20the%20conversions%20work%20please%20have%20a%20look%20at%20the%20%3Ca%20href%3D%22https://29a.ch/sandbox/2016/monochrome-photo-pca/%23help%22%3Ehelp%20page%3C/a%3E.%3C/p%3E%0A%3Cp%3EDo%20I%20think%20this%20is%20the%20best%20technique%20for%20black%20and%20white%20conversions?%20No.%0AYou%20will%20always%20be%20able%20to%20get%20better%20results%20by%20manually%20tweaking%20the%20conversion%0Ato%20fit%20your%20vision.%20Is%20it%20an%20interesting%20result?%20I%26%23x2019;d%20say%20so.%3C/p%3E)
Smartcrop.js 1.0 25 Jun 2016 9:59 AM (9 years ago)
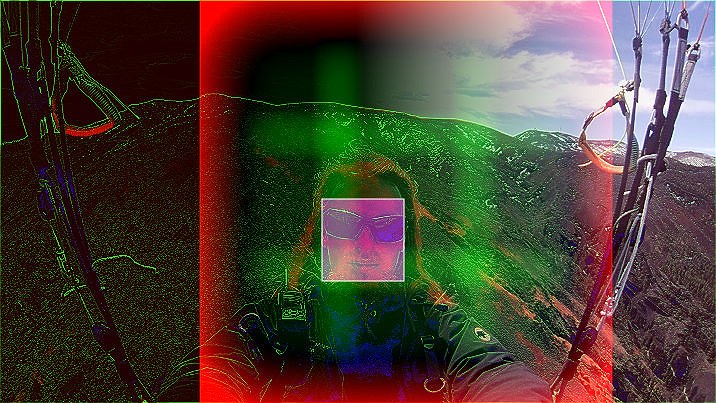
I’ve just released version 1.0 of smartcrop.js. Smartcrop.js is a javascript library I wrote to perform smart image cropping, mainly for generating good thumbnails. The new version includes much better support for node.js by dropping the canvas dependency (via smartcrop-gm and smartcrop-sharp) as well as support for face detection by providing annotations. The API has been cleaned up a little bit and is now using Promises.
Another little takeaway from this release is that I should set up CI even for my little
open source projects. I come to this conclusion after having created a
dependency mess using npm link locally which lead to everything working
fine on my machine but the published modules being broken. I’ve already set
up travis for smartcrop-gm,
smartcrop-sharp and
simplex-noise.js.
More of my projects are likely to follow.
%0Aas%20well%20as%20support%20for%20face%20detection%20by%20providing%20annotations.%0AThe%20API%20has%20been%20cleaned%20up%20a%20little%20bit%20and%20is%20now%20using%20Promises.%3C/p%3E%0A%3Cp%3EAnother%20little%20takeaway%20from%20this%20release%20is%20that%20I%20should%20set%20up%20CI%20even%20for%20my%20little%0Aopen%20source%20projects.%20I%20come%20to%20this%20conclusion%20after%20having%20created%20a%0Adependency%20mess%20using%20%3Ccode%3Enpm%20link%3C/code%3E%20locally%20which%20lead%20to%20everything%20working%0Afine%20on%20my%20machine%20but%20the%20published%20modules%20being%20broken.%20I%26%23x2019;ve%20already%20set%0Aup%20travis%20for%20%3Ca%20href%3D%22https://github.com/jwagner/smartcrop-gm%22%3Esmartcrop-gm%3C/a%3E,%0A%3Ca%20href%3D%22https://github.com/jwagner/smartcrop-sharp%22%3Esmartcrop-sharp%3C/a%3E%20and%0A%3Ca%20href%3D%22https://github.com/jwagner/simplex-noise.js%22%3Esimplex-noise.js%3C/a%3E.%0AMore%20of%20my%20projects%20are%20likely%20to%20follow.%3C/p%3E)
Normalmap.js Javascript Lighting Effects 13 Mar 2016 1:45 PM (9 years ago)
![]() Back in 2010 I did a little experiment with normal mapping and the canvas element.
The normal mapping technique makes it possible to create interactive lighting effects based on textures.
Looking for an excuse to dive into computer graphics again,
I created a new version of this demo.
Back in 2010 I did a little experiment with normal mapping and the canvas element.
The normal mapping technique makes it possible to create interactive lighting effects based on textures.
Looking for an excuse to dive into computer graphics again,
I created a new version of this demo.
This time I used WebGL Shaders and a more advanced physically inspired material system based on publications by Epic Games and Disney. I also implemented FXAA 3.11 to smooth out some of the aliasing produced by the normal maps. The results of this experiment are now available as a library called normalmap.js. Check out the demos. It’s a lot faster and better looking than the old canvas version. Maybe you find a use for it. :)
Demos
You can view larger and sharper versions of these demos on 29a.ch/sandbox/2016/normalmap.js/.
You can get the source code for this library on github.
Future
I plan to create some more demos as well as tutorials on creating normalmaps in the future.
![]()
Let's encrypt 29a.ch 27 Dec 2015 3:51 PM (9 years ago)
I migrated this website HTTPS using certificates by Let’s Encrypt. This has several benefits. The one I’m most excited about is being able to use Service Workers to provide offline support for my little apps.
![]()
Let’s Encrypt is an amazing new certificate authority which allows you to install a SSL/TLS certificate automatically and for free. This means getting a certificate installed on your server can be as little work as running a command on your server:
./letsencrypt-auto --apache
The service is currently still in beta but as you can hopefully see the certificates it produces are working just fine. I encourage you to give it a try.
If anything on this website got broken because of the move to HTTPS, please let me know!
![]()
Play it Slowly 22 Dec 2015 9:12 AM (9 years ago)
Play it Slowly is a software to play back audio files at a different speed or pitch. It does also allow you to loop over a certain part of a file. It's intended to help you learn or transcribe songs. It can also play videos thanks to gstreamer. Play it slowly is intended to be used on a GNU/Linux system like Ubuntu.
Features
- Plays every file gstreamer does (mp3, ogg vorbis, midi, even flv!)
- Can use alsa and jack
- Change speed and pitch
- Loop over certain parts
- Export to wav
Screenshot
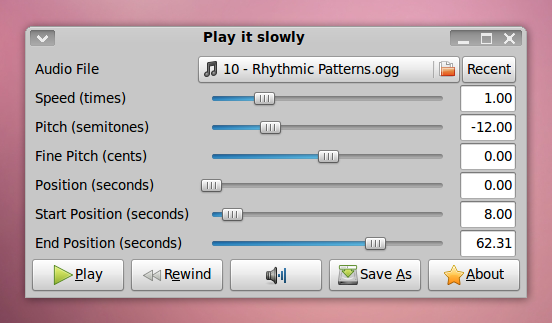
Alternative
I also created a free web based alternative to play it slowly called Timestretch Player. It features higher quality time stretching and a more fancy UI. Timestretch Player works on Windows too.
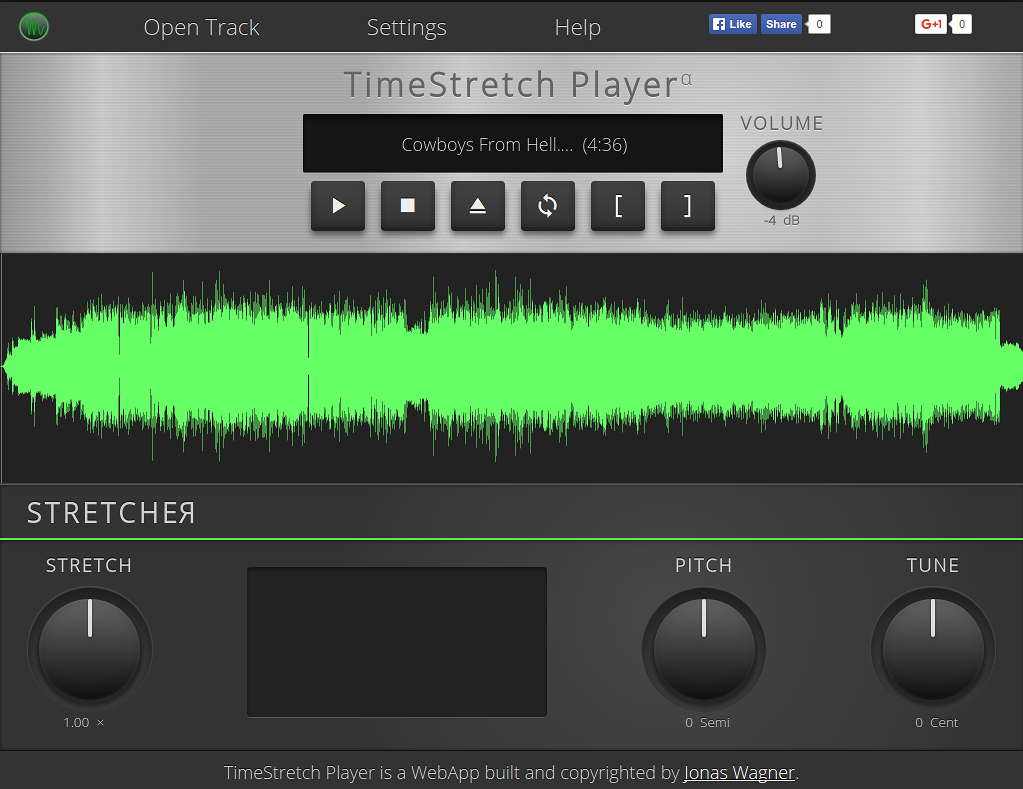
Download (Source Code)
If possible install Play it Slowly via the package manager of your linux distribution!
- playitslowly-1.5.1.tar.gz (Python3, GTK3, GStreamer 1)
- playitslowly-1.4.0.tar.gz (Legacy)
Packages
Development
Feel free to join the development of playitslowly at github.
%3C/li%3E%0A%3Cli%3ECan%20use%20alsa%20and%20jack%3C/li%3E%0A%3Cli%3EChange%20speed%20and%20pitch%3C/li%3E%0A%3Cli%3ELoop%20over%20certain%20parts%3C/li%3E%0A%3Cli%3EExport%20to%20wav%3C/li%3E%0A%3C/ul%3E%0A%0A%3Ch3%3EScreenshot%3C/h3%3E%0A%3Cp%3E%0A%3Cimg%20alt%3D%22A%20screenshot%20of%20Play%20it%20Slowly%22%20src%3D%22https://29a.ch/playitslowly/screenshot.png%22%20/%3E%0A%3C/p%3E%0A%0A%3Ch3%3EAlternative%3C/h3%3E%0A%3Cp%3EI%20also%20created%20a%20free%20web%20based%20alternative%20to%20play%20it%20slowly%20called%20%3Ca%20href%3D%22http://29a.ch/timestretch/%22%3ETimestretch%20Player%3C/a%3E.%20It%20features%20higher%20quality%20time%20stretching%20and%20a%20more%20fancy%20UI.%20Timestretch%20Player%20works%20on%20%3Cstrong%3EWindows%3C/strong%3E%20too.%3C/p%3E%0A%3Cp%3E%3Ca%20href%3D%22http://29a.ch/timestretch/%22%3E%3Cimg%20src%3D%22http://29a.ch/timestretch/screenshot.png%22%20alt%3D%22Screenshot%20of%20Timestretch%20Player%22%20/%3E%3C/a%3E%3C/p%3E%0A%0A%3Ch3%3EDownload%20(Source%20Code)%3C/h3%3E%0A%3Cp%3E%3Cstrong%3EIf%20possible%20install%20Play%20it%20Slowly%20via%20the%20package%20manager%20of%20your%20linux%20distribution!%3C/strong%3E%3C/p%3E%0A%3Cul%3E%0A%3Cli%3E%3Ca%20href%3D%22https://29a.ch/playitslowly/playitslowly-1.5.1.tar.gz%22%3Eplayitslowly-1.5.1.tar.gz%3C/a%3E%20(Python3,%20GTK3,%20GStreamer%201)%3C/li%3E%0A%3C!--%20%3Cli%3E%3Ca%20href%3D%22http://29a.ch/playitslowly-1.5.0.tar.gz%22%3Eplayitslowly-1.5.0.tar.gz%3C/a%3E%20(Python3,%20GTK3,%20GStreamer%201)%3C/li%3E%20--%3E%0A%3Cli%3E%3Ca%20href%3D%22https://29a.ch/playitslowly/playitslowly-1.4.0.tar.gz%22%3Eplayitslowly-1.4.0.tar.gz%3C/a%3E%20(Legacy)%3C/li%3E%0A%3C/ul%3E%0A%3Ch3%3EPackages%3C/h3%3E%0A%3Cul%3E%0A%3Cli%3E%3Ca%20href%3D%22https://aur.archlinux.org/packages/playitslowly/%22%3EArch%20Linux%20PGKBUILD%3C/a%3E%3C/li%3E%0A%3C/ul%3E%0A%3Ch3%3EDevelopment%3C/h3%3E%0A%3Cp%3EFeel%20free%20to%20join%20the%20development%20of%20playitslowly%20at%20%3Ca%20href%3D%22http://github.com/jwagner/playitslowly%22%3Egithub%3C/a%3E.%3C/p%3E)
Time Stretching Audio in Javascript 6 Dec 2015 8:00 AM (9 years ago)
Seven years ago I wrote a piece of software called Play it Slowly. It allows the user to change the speed and pitch of an audio file independently. This is useful for example for practicing an instrument or doing transcriptions.
Now I created a new web based version of Play it Slowly called TimeStretch Player. It’s written in Javascript and using the WebAudio API.

It features (in my opinion) much better audio quality for larger time stretches as well as a 3.14159 × cooler looking user interface. But please note that this is beta stage software it’s still far from perfect and polished.
How the time stretching works
The time stretching algorithm that I use is based on a Phase Vocoder with some simple improvements.
It works by cutting the audio input into overlapping chunks, decomposing those into their individual components using a FFT, adjusting their phase and then resynthesizing them with a different overlap.
Oversimplified Explanation
Suppose we have a simple wave like this:
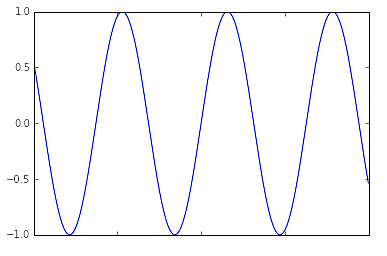
We can cut it into overlapping pieces like this:
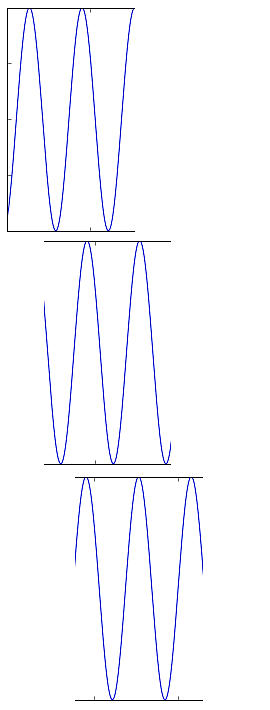
By changing the overlap between the pieces we can do the time stretching:
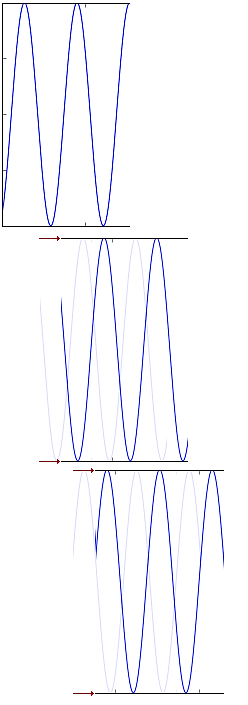
This messes up the phases so we need to fix them up:
Now we can just combine the pieces to get a longer version of the original:

In practice things are of course a bit more complicated and there are a lot of compromises to be made. ;)
Much better explanation
If you want a more precise description of the phase vocoder technique than the handwaving above I recommend you to read the paper Improved phase vocoder time-scale modification of audio by Jean Laroche and Mark Dolson. It explains the basic phase vocoder was well as some simple improvements.
If you do read it and are wondering what the eff the angle sign used in an expression like  means:
It denotes the phase - in practice the argument of the complex number of the term.
I think it took me about an hour to figure that out with any certainty.
YAY mathematical notation.
means:
It denotes the phase - in practice the argument of the complex number of the term.
I think it took me about an hour to figure that out with any certainty.
YAY mathematical notation.
Pure CSS User Interface
I had some fun by creating all the user interface elements using pure CSS, no images are used except for the logo. It’s all gradients, borders and shadows. Do I recommend this approach? Not really, but it sure is a lot of fun! Feel free to poke around with your browsers dev tools to see how it was done.
Future Features
While developing the time stretching functionality I also experimented with some other features like a karaoke mode that can cancel individual parts of an audio file while keeping the rest of the stereo field intact. This can be useful to remove or isolate parts of songs for instance the vocals or a guitar solo. However, the quality of the results was not comparable to the time stretching so I decided to remove the feature for now. But you might get to see that in another app in the future. ;)
Library Release
I might release the phase vocoder code in a standalone node library in the future but it needs a serious cleanup before that can happen.
%20much%20%3Cstrong%3Ebetter%20audio%20quality%3C/strong%3E%20for%20larger%20time%20stretches%20as%20well%20as%20a%20%3Cstrong%3E3.14159%20%26%23xD7;%20cooler%20looking%20user%20interface%3C/strong%3E.%20But%20please%20note%20that%20this%20is%20%3Cstrong%3Ebeta%3C/strong%3E%20stage%20software%20it%26%23x2019;s%20still%20far%20from%20perfect%20and%20polished.%3C/p%3E%0A%3Ch2%3EHow%20the%20time%20stretching%20works%3C/h2%3E%0A%3Cp%3EThe%20time%20stretching%20algorithm%20that%20I%20use%20is%20based%20on%20a%20%3Ca%20href%3D%22https://en.wikipedia.org/wiki/Phase_vocoder%22%3EPhase%20Vocoder%3C/a%3E%20with%20some%20simple%20improvements.%3C/p%3E%0A%3Cp%3EIt%20works%20by%20cutting%20the%20audio%20input%20into%20overlapping%20chunks,%20decomposing%20those%20into%20their%20individual%20components%20using%20a%20%3Ca%20href%3D%22https://en.wikipedia.org/wiki/Fast_Fourier_transform%22%3EFFT%3C/a%3E,%20adjusting%20their%20phase%20and%20then%20resynthesizing%20them%20with%20a%20different%20overlap.%3C/p%3E%0A%3Ch3%3EOversimplified%20Explanation%3C/h3%3E%0A%3Cp%3ESuppose%20we%20have%20a%20simple%20wave%20like%20this:%3C/p%3E%0A%3Cp%3E%3Cimg%20src%3D%22https://29a.ch/images/wave-1.cache-66332b55c180dfaf.png%22%20alt%3D%22wave1%22%20loading%3D%22lazy%22%20/%3E%3C/p%3E%0A%3Cp%3EWe%20can%20cut%20it%20into%20overlapping%20pieces%20like%20this:%3C/p%3E%0A%3Cp%3E%3Cimg%20src%3D%22https://29a.ch/images/wave-2.cache-6e81df95e4d7cdeb.png%22%20alt%3D%22wave2%22%20loading%3D%22lazy%22%20/%3E%3C/p%3E%0A%3Cp%3EBy%20changing%20the%20overlap%20between%20the%20pieces%20we%20can%20do%20the%20time%20stretching:%3C/p%3E%0A%3Cp%3E%3Cimg%20src%3D%22https://29a.ch/images/wave-3.cache-bf686a59c7162bd4.png%22%20alt%3D%22wave3%22%20loading%3D%22lazy%22%20/%3E%3C/p%3E%0A%3Cp%3EThis%20messes%20up%20the%20phases%20so%20we%20need%20to%20fix%20them%20up:%3C/p%3E%0A%3Cp%3E%3Cimg%20src%3D%22https://29a.ch/2015/12/06/time-stretching-audio-javascript/wave-4.gif%22%20alt%3D%22wave4%22%20/%3E%3C/p%3E%0A%3Cp%3ENow%20we%20can%20just%20combine%20the%20pieces%20to%20get%20a%20longer%20version%20of%20the%20original:%3C/p%3E%0A%3Cp%3E%3Cimg%20src%3D%22https://29a.ch/images/wave-5.cache-cc071b93730b94e8.png%22%20alt%3D%22wave5%22%20loading%3D%22lazy%22%20/%3E%3C/p%3E%0A%3Cp%3EIn%20practice%20things%20are%20of%20course%20a%20bit%20more%20complicated%20and%20there%20are%20a%20lot%20of%20compromises%20to%20be%20made.%20;)%3C/p%3E%0A%3Ch3%3EMuch%20better%20explanation%3C/h3%3E%0A%3Cp%3EIf%20you%20want%20a%20more%20precise%20description%20of%20the%20phase%20vocoder%20technique%20than%20the%20handwaving%20above%20I%20recommend%20you%20to%20read%20the%20paper%20%3Ca%20href%3D%22http://www.cmap.polytechnique.fr/~bacry/MVA/getpapers.php?file%253Dphase_vocoder.pdf%2526type%253Dpdf%22%3EImproved%20phase%20vocoder%20time-scale%20modification%20of%20audio%3C/a%3E%20by%20Jean%20Laroche%20and%20Mark%20Dolson.%0AIt%20explains%20the%20basic%20phase%20vocoder%20was%20well%20as%20some%20simple%20improvements.%3C/p%3E%0A%3Cp%3EIf%20you%20do%20read%20it%20and%20are%20wondering%20what%20the%20eff%20the%20angle%20sign%20used%20in%20an%20expression%20like%20%3Cimg%20src%3D%22https://29a.ch/images/phase.cache-4b3c8711cef1a53a.png%22%20alt%3D%22phase%20of%20(t%20u%20a,%20omega%20k)%22%20loading%3D%22lazy%22%20/%3E%20means:%0AIt%20denotes%20the%20phase%20-%20in%20practice%20the%20argument%20of%20the%20complex%20number%20of%20the%20term.%0AI%20think%20it%20took%20me%20about%20an%20hour%20to%20figure%20that%20out%20with%20any%20certainty.%0A%3Cstrong%3EYAY%3C/strong%3E%20mathematical%20notation.%3C/p%3E%0A%3Ch2%3EPure%20CSS%20User%20Interface%3C/h2%3E%0A%3Cp%3EI%20had%20some%20fun%20by%20creating%20all%20the%20%20user%20interface%20elements%20using%20%3Cstrong%3Epure%20CSS%3C/strong%3E,%20no%20images%20are%20used%20except%20for%20the%20logo.%0AIt%26%23x2019;s%20all%20gradients,%20borders%20and%20shadows.%0ADo%20I%20recommend%20this%20approach?%0ANot%20really,%20but%20it%20sure%20is%20a%20lot%20of%20fun!%0AFeel%20free%20to%20poke%20around%20with%20your%20browsers%20dev%20tools%20to%20see%20how%20it%20was%20done.%3C/p%3E%0A%3Ch2%3EFuture%20Features%3C/h2%3E%0A%3Cp%3EWhile%20developing%20the%20time%20stretching%20functionality%20I%20also%20experimented%20with%0Asome%20other%20features%20like%20a%20karaoke%20mode%20that%20can%20cancel%20individual%20parts%20of%20an%20audio%20file%20while%20keeping%20the%20rest%20of%20the%20stereo%20field%20intact.%0AThis%20can%20be%20useful%20to%20remove%20or%20isolate%20parts%20of%20songs%20for%20instance%20the%20vocals%20or%20a%20guitar%20solo.%0AHowever,%20the%20quality%20of%20the%20results%20was%20not%20comparable%20to%20the%20time%20stretching%20so%20I%20decided%20to%20remove%20the%20feature%20for%20now.%0ABut%20you%20might%20get%20to%20see%20that%20in%20another%20app%20in%20the%20future.%20;)%3C/p%3E%0A%3Ch2%3ELibrary%20Release%3C/h2%3E%0A%3Cp%3EI%20might%20release%20the%20phase%20vocoder%20code%20in%20a%20standalone%20node%20library%20in%20the%20future%20but%20it%20needs%20a%20serious%20cleanup%20before%20that%20can%20happen.%3C/p%3E)
Noise Analysis for Image Forensics 21 Aug 2015 12:32 PM (10 years ago)
People seem to be liking Forensically. I enjoy hacking on it. So upgraded it with a new tool - noise analysis. I also updated the help page and implemented histogram equalization for the magnifier/ELA.
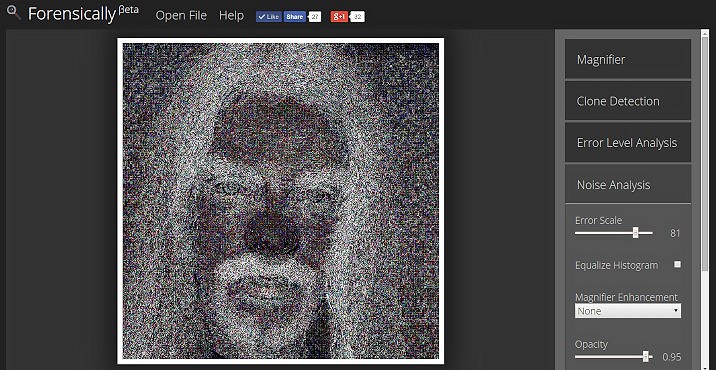
Noise Analysis
The basic idea behind this tool is very simple. Natural images are full of noise. When they are modified this often leaves visible traces in the noise in an image. But seeing the noise in an image can be hard. This is where the new tool in forensically comes in. It takes a very simple noise reduction filter (a separable Median Filter) and reverses it's results. Rather than removing the noise it removes the rest of the image.
One of the benefits of this tool is that it can recognize modifications like Airbrushing, Warps, Deforms, transformed clones that the aclone detection and error level analysis might not catch.
Please be aware that this is still a work in progress.
Example
Enough talk, let me show you an example. I gave myself a nosejob with the warp tool in gimp, just for you.

As you can see the effect is relatively subtle. Not so the traces it leaves in the noise!

The resampling done by the warp tool looses some of the high frequency noise, creating a black halo around the region.
Can you find any anomalies in the demo image using noise analysis?
A bit of code
I guess that many of the readers of this blog are fellow coders and hackers. So here is a cool hack for you. I found this in some old sorting code I wrote for a programming competition but I don't remember where I had it from originally. In order to make the median filter fast we need a fast way to find the median of three variables. A stupidly slow way to go about this could look like that:
// super slow
[a, b, c].sort()[1]
Now the obvious way to optimize this would be to transform it into a bunch of ifs. That's going to be faster. But can we do even better? Can we do it without branching?
// fast
let max = Math.max(Math.max(a,b),c),
    min = Math.min(Math.min(a,b),c),
    // the max and the min value cancel out because of the xor, the median remains
    median = a^b^c^max^min;
Mina and max can be computed without branching on most if not all cpu architectures. I didn't check how it's handled in javascript engines. But I can show you that the second approach is ~100x faster with this little benchmark.
%20and%20reverses%20it%26apos;s%20results.%0ARather%20than%20removing%20the%20noise%20it%20removes%20the%20rest%20of%20the%20image.%0A%3C/p%3E%3Cp%3EOne%20of%20the%20benefits%20of%20this%20tool%20is%20that%20it%20can%20recognize%20modifications%0Alike%20%3Cem%3EAirbrushing,%20Warps,%20Deforms,%20transformed%20clones%3C/em%3E%20that%20the%0Aaclone%20detection%20and%20error%20level%20analysis%20might%20not%20catch.%0A%3C/p%3E%0A%3Cp%3EPlease%20be%20aware%20that%20this%20is%20still%20a%20work%20in%20progress.%3C/p%3E%0A%3Ch2%3EExample%3C/h2%3E%0A%3Cp%3EEnough%20talk,%20let%20me%20show%20you%20an%20example.%20I%20gave%20myself%20a%20nosejob%20with%20the%20warp%20tool%20in%20gimp,%20just%20for%20you.%3C/p%3E%0A%3Cp%3E%3Cimg%20src%3D%22https://29a.ch/2015/08/21/noise-analysis-for-image-forensics/nosejob.gif%22%20alt%3D%22nose%20manipulation%20animation%22%20/%3E%3C/p%3E%0A%3Cp%3EAs%20you%20can%20see%20the%20effect%20is%20relatively%20subtle.%0ANot%20so%20the%20traces%20it%20leaves%20in%20the%20noise!%3C/p%3E%0A%3Cp%3E%3Cimg%20src%3D%22https://29a.ch/2015/08/21/noise-analysis-for-image-forensics/nosejob-noise.gif%22%20alt%3D%22noise%20analysis%20of%20nose%20manipulation%22%20/%3E%3C/p%3E%0A%3Cp%3EThe%20resampling%20done%20by%20the%20warp%20tool%20looses%20some%20of%20the%20high%20frequency%20noise,%20creating%20a%20black%20halo%20around%20the%20region.%3C/p%3E%0A%3Cp%3ECan%20you%20find%20any%20anomalies%20in%20the%20demo%20image%20using%20noise%20analysis?%3C/p%3E%0A%3Ch2%3EA%20bit%20of%20code%3C/h2%3E%0A%3Cp%3E%0AI%20guess%20that%20many%20of%20the%20readers%20of%20this%20blog%20are%20fellow%20coders%20and%20hackers.%0ASo%20here%20is%20a%20cool%20hack%20for%20you.%0AI%20found%20this%20in%20some%20old%20sorting%20code%20I%20wrote%20for%20a%20programming%20competition%20but%20I%20don%26apos;t%0Aremember%20where%20I%20had%20it%20from%20originally.%20In%20order%20to%20make%20the%20median%20filter%20fast%0Awe%20need%20a%20fast%20way%20to%20%3Cstrong%3Efind%20the%20median%20of%20three%20variables%3C/strong%3E.%0AA%20stupidly%20slow%20way%20to%20go%20about%20this%20could%20look%20like%20that:%0A%3C/p%3E%0A%3Cpre%3E%3Ccode%3E//%20super%20slow%0A%5Ba,%20b,%20c%5D.sort()%5B1%5D%3C/code%3E%3C/pre%3E%0A%3Cp%3ENow%20the%20obvious%20way%20to%20optimize%20this%20would%20be%20to%20transform%20it%20into%20a%20bunch%20of%20ifs.%0AThat%26apos;s%20going%20to%20be%20faster.%20But%20can%20we%20do%20even%20better?%20Can%20we%20do%20it%20%3Cem%3Ewithout%20branching%3C/em%3E?%0A%3Cpre%3E%3Ccode%3E//%20fast%0Alet%20max%20%3D%20Math.max(Math.max(a,b),c),%0A%20%20%20%20min%20%3D%20Math.min(Math.min(a,b),c),%0A%20%20%20%20//%20the%20max%20and%20the%20min%20value%20cancel%20out%20because%20of%20the%20xor,%20the%20median%20remains%0A%20%20%20%20median%20%3D%20a%5Eb%5Ec%5Emax%5Emin;%0A%3C/code%3E%3C/pre%3E%0A%3C/p%3E%3Cp%3EMina%20and%20max%20can%20be%20computed%20without%20branching%20on%20most%20if%20not%20all%20cpu%20architectures.%0AI%20didn%26apos;t%20check%20how%20it%26apos;s%20handled%20in%20javascript%20engines.%20But%20I%20can%20show%20you%20that%20the%20second%20approach%20is%20~%3Cstrong%3E100x%20faster%3C/strong%3E%20with%20this%20little%20%3Ca%20href%3D%22http://jsperf.com/fast-median-of-three%22%3Ebenchmark%3C/a%3E.%3C/p%3E)
Forensically, Photo Forensics for the Web 16 Aug 2015 12:21 PM (10 years ago)
Back in 2012 I hacked to together a little tool for performing Error Level Analysis on images. Despite being such a simple tool with, frankly, a bad UI it has been used by over 250'000 people.
A few days ago I randomly stumbled across the paper Detection of Copy-Move Forgery in Digital Images by Jessica Fridrich, David Soukal, and Jan Lukáš. I wanted to see if I could do something similar and make it run in a browser. It took a good bit of tweaking but I ended up with something that works. I took a copy of my photo film emulator as a base for the UI, adapted it a bit, ported the old ELA code and added some new tools. The result is called Forensically.
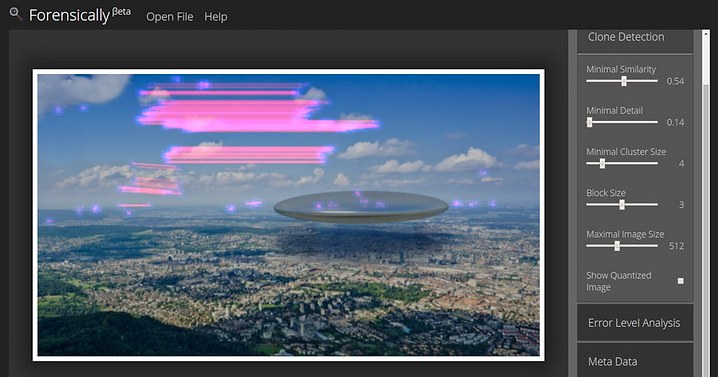
How to use Forensically
If you want some guidance on how to use forensically you get to pick your poison. On offer is a 12 minute monologue in form of a tutorial video or a whole bunch of cryptic text on the help page. I'm sorry that neither are very good.
How the Clone Detection works
I guess the most interesting feature of this new tool is the clone detection. So let me reveal to you how I made it work. I will try to keep the explanation simple. If there is interest in it I might still write a more technical description of the algorithm later.
The basic idea
Create a Table
Move a window over the image, for each position of the window
    Use all of the pixels in the window as a key
    If the key is already in the table
        We found a clone! Mark it.
    Else
        Add the key to the table
This does actually work, but it will only find perfect copies. We want the matching to be more fuzzy.
Compression
So the next key step is to make the matching more fuzzy. We do this by compressing the key to make it less unique. You can think of this step as converting each of the little blocks into a tiny JPEG and then using those pixels as a key. The actual implementation is using Haar wavelets for this step. You can see the compressed blocks that are used by clicking on Show Quantized Image in the Clone Detection Tool.
This works too but now we have too many results!
Filtering
So the next step is to filter all of the blocks and to throw away the boring ones. This is done by comparing the amount of detail in the high frequencies to a threshold. You can think of it as subtracting a blurred image of the block from the block and then looking at how much is left of the pixels. In practice the blurring is not required because the wavelet step has already done it for us. You can see the rejected blocks as black spots in the quantized image.
At this stage the algorithm works but it does still show a lot of uninteresting copies of blocks that just happen to look similar.
Clustering
So now we take another look at all of the clones that we found. If the distance between the source and destination is too small we reject them. Next we look at clones that start from a similar place and are copied into a similar direction. If we find less than Minimal Cluster Size other clones that are similar we discard the clone as noise.
Source Code
I haven't figured out how I want to license the code and assets yet. But I do plan to release it in some form.
Feedback
As always, feedback is appreciated both on the app and on the post. Would you like future posts to be more in depth and technical or do you like the current format?

Light Leaks in the Film Emulator 28 Jul 2015 3:20 PM (10 years ago)
Inspired by the feature in the recent release of g'mic, I added a new feature to my Film Emulator, light leaks.

G'mic seems to use predefined images for the light leaks. I decided to go another route and created a procedural version of it. The benefits are clear: Now big images to download, and an infinite variation of light leaks.
The implementation is also rather straight forward, in fact it shares most of the code with the already existing grain code. It uses simplex noise at a fairly low frequency to create a colored plasma. Three octaves of simplex noise are used for the luminance, and a single octave of simplex noise is used to randomize each color channel. This was just my first approximation but in my opinion it works better than it has any right to, so I'll stick to it for now.

Javascript Film Emulation 7 Jun 2015 12:36 PM (10 years ago)
I hacked together a little analog film emulation tool in Javascript. It's based on the awesome work of Pat David. I wrote it mainly to play with some new tech but I liked the result enough to share it with you. You can try it here:
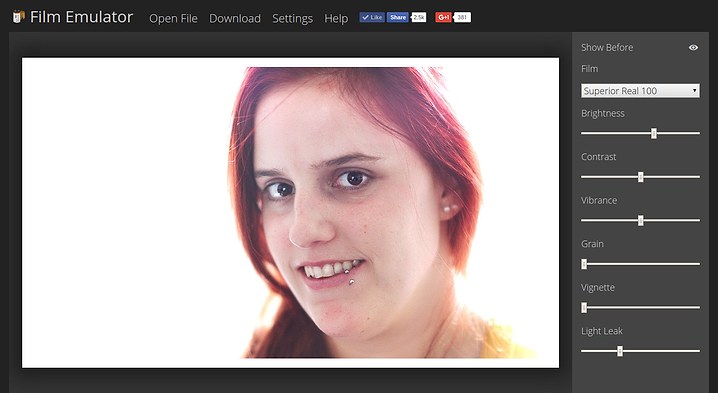
It also works on android phones running chrome, give it a try!
How the Film Emulation works
I guess the most interesting part for most people is the actual film emulation code. It's using Color Lookup Tables (cluts).
So in simplistic terms:
For every pixel in the image
Take it's color values r, g, b
Look up it's new color value in the lookup table
r', g', b' = colorLookupTable[r, g, b]
Set the pixel to the color values (r', g', b')
In practice there are a few more considerations. Most cluts don't contain values for all 16 777 216 (224) colors in the rgb space. A simplistic solution to this problem would be to always just use the closest color (nearest-neighbor interpolation). This is fast but results in very ugly banding artifacts.
So to keep things fast I use random dithering for the previews and trilinear filtering for the final output. The random dithering is probably a suboptimal choice, but it was easy to implement.
You can find more details about how the lookup tables were create on Pat Davids website.
Technology
As stated at the beginning I wrote this application to play with new technology, so there is a lot going on in this little application.
The entire code is written in Javascript (ES6 to be precise). Which is then converted to more mainstream javascript using babel.js.
It is using the canvas API for accessing the pixel data of images and then processes them in web workers for parallelism using transferable objects to avoid copies.
WebGL would obviously also be suitable for this task, I might even write an implementation in the future
The css makes heavy use of flexible boxes and is written in scss. The icon font was generated using fontello.
The whole thing is built using grunt and browserify.
Of course these are just a few of the bits of tech that I played with to make this append. If you want to know even more, just look at the source.
Source Code
You can find the source code of this tool on github. The code is not licensed under an open source license and does not come with all the data files in order to prevent lazy people from just copying everything and pretending it is their own work. You are of course free to study the code and takes bits and pieces, I consider this fair use. Just attribute them to me properly. If you have grander plans for it and the lack of a license prevents you from following up on them feel free to contact me.
.%3C/p%3E%0A%3Cp%3ESo%20in%20simplistic%20terms:%3C/p%3E%0A%3Cpre%3EFor%20every%20pixel%20in%20the%20image%0ATake%20it%26apos;s%20color%20values%20r,%20g,%20b%0ALook%20up%20it%26apos;s%20new%20color%20value%20in%20the%20lookup%20table%0Ar%26apos;,%20g%26apos;,%20b%26apos;%20%3D%20colorLookupTable%5Br,%20g,%20b%5D%0ASet%20the%20pixel%20to%20the%20color%20values%20(r%26apos;,%20g%26apos;,%20b%26apos;)%0A%3C/pre%3E%0A%3Cp%3EIn%20practice%20there%20are%20a%20few%20more%20considerations.%20Most%20cluts%20don%26apos;t%20contain%20values%20for%20all%0A16%20777%20216%20(2%3Csup%3E24%3C/sup%3E)%20colors%20in%20the%20rgb%20space.%20A%20simplistic%20solution%20to%20this%20problem%20would%0Abe%20to%20always%20just%20use%20the%20closest%20color%20(%3Ca%20href%3D%22http://en.wikipedia.org/wiki/Nearest-neighbor_interpolation%22%3Enearest-neighbor%20interpolation%3C/a%3E).%0AThis%20is%20fast%20but%20results%20in%0Avery%20ugly%20%3Ca%20href%3D%22http://en.wikipedia.org/wiki/Colour_banding%22%3Ebanding%20artifacts%3C/a%3E.%3C/p%3E%0A%3Cp%3ESo%20to%20keep%20things%20fast%20I%20use%20random%20%3Ca%20href%3D%22http://en.wikipedia.org/wiki/Dither%22%3Edithering%3C/a%3E%0Afor%20the%20previews%20and%20%3Ca%20href%3D%22http://en.wikipedia.org/wiki/Trilinear_filtering%22%3Etrilinear%20filtering%3C/a%3E%20for%20the%20final%20output.%20The%20random%20dithering%20is%20probably%20a%20suboptimal%20choice,%20but%20it%20was%20easy%20to%20implement.%3C/p%3E%0A%0A%3Cp%3EYou%20can%20find%20more%20details%20about%20how%20the%20lookup%20tables%20were%20create%20on%0A%3Ca%20href%3D%22http://blog.patdavid.net/2013/09/film-emulation-presets-in-gmic-gimp.html%22%3EPat%20Davids%20website.%3C/a%3E%0A%0A%3C/p%3E%3Ch2%3ETechnology%3C/h2%3E%0A%3Cp%3EAs%20stated%20at%20the%20beginning%20I%20wrote%20this%20application%20to%20play%20with%20new%20technology,%20so%20there%20is%20a%0Alot%20going%20on%20in%20this%20little%20application.%3C/p%3E%0A%3Cp%3EThe%20entire%20code%20is%20written%20in%20Javascript%20(%3Ca%20href%3D%22https://github.com/lukehoban/es6features%22%3EES6%3C/a%3E%20to%20be%20precise).%20Which%20is%20then%20converted%20to%20more%20mainstream%20javascript%20using%20%3Ca%20href%3D%22https://babeljs.io/%22%3Ebabel.js%3C/a%3E.%3C/p%3E%0A%3Cp%3EIt%20is%20using%20the%20%3Ca%20href%3D%22https://developer.mozilla.org/en-US/docs/Web/API/Canvas_API%22%3Ecanvas%3C/a%3E%20API%20for%20accessing%20the%20pixel%20data%20of%20images%20and%20then%20processes%0Athem%20in%20%3Ca%20href%3D%22https://developer.mozilla.org/en-US/docs/Web/API/Web_Workers_API/Using_web_workers%22%3Eweb%20workers%3C/a%3E%20for%20parallelism%20using%20%3Ca%20href%3D%22https://developer.mozilla.org/en-US/docs/Web/API/Transferable%22%3Etransferable%20objects%3C/a%3E%20to%20avoid%20copies.%3C/p%3E%0A%3Cp%3EWebGL%20would%20obviously%20also%20be%20suitable%20for%20this%20task,%20I%20might%20even%20write%20an%20implementation%20in%20the%20future%3C/p%3E%0A%3Cp%3EThe%20css%20makes%20heavy%20use%20of%20%3Ca%20href%3D%22https://developer.mozilla.org/en-US/docs/Web/Guide/CSS/Flexible_boxes%22%3Eflexible%20boxes%3C/a%3E%20and%20is%20written%20in%20%3Ca%20href%3D%22http://sass-lang.com/%22%3Escss%3C/a%3E.%0AThe%20icon%20font%20was%20generated%20using%20%3Ca%20href%3D%22http://fontello.com/%22%3Efontello%3C/a%3E.%3C/p%3E%0A%0A%3Cp%3EThe%20whole%20thing%20is%20built%20using%20%3Ca%20href%3D%22http://gruntjs.com/%22%3Egrunt%3C/a%3E%20and%20%3Ca%20href%3D%22http://browserify.org/%22%3Ebrowserify%3C/a%3E.%3C/p%3E%0A%3Cp%3EOf%20course%20these%20are%20just%20a%20few%20of%20the%20bits%20of%20tech%20that%20I%20played%20with%20to%20make%20this%20append.%0AIf%20you%20want%20to%20know%20even%20more,%20just%20look%20at%20the%20source.%3C/p%3E%0A%0A%3Ch2%3ESource%20Code%3C/h2%3E%0A%3Cp%3EYou%20can%20find%20the%20source%20code%20of%20this%20tool%20on%20%3Ca%20href%3D%22https://github.com/jwagner/analog-film-emulator%22%3Egithub%3C/a%3E.%0AThe%20code%20is%20not%20licensed%20under%20an%20open%20source%20license%20and%20does%20not%20come%20with%20all%20the%20data%20files%0Ain%20order%20to%20prevent%20lazy%20people%20from%20just%20copying%20everything%20and%20pretending%20it%20is%20their%20own%20work.%0AYou%20are%20of%20course%20free%20to%20study%20the%20code%20and%20takes%20bits%20and%20pieces,%20I%20consider%20this%20fair%20use.%0AJust%20attribute%20them%20to%20me%20properly.%20If%20you%20have%20grander%0Aplans%20for%20it%20and%20the%20lack%20of%20a%20license%20prevents%20you%20from%20following%20up%20on%0Athem%20feel%20free%20to%20%3Ca%20href%3D%22https://29a.ch/about%22%3Econtact%20me%3C/a%3E.%3C/p%3E)
Full-text search example using lunr.js 3 Dec 2014 1:00 PM (10 years ago)
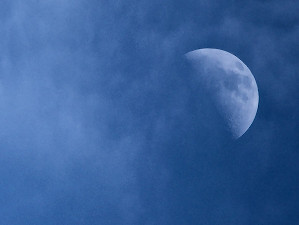
I did a little experiment today. I added full-text search to this website using lunr.js. Lunr is a simple full-text search engine that can run inside of a web browser using Javascript.
Lunr is a bit like solr, but much smaller and not as bright, as the author Oliver beautifully puts it.
With it I was able to add full text search to this site in less than an hour. That's pretty cool if you ask me. :)
You can try out the search function I built on the articles page of this website.
I also enabled source maps so you can see how I hacked together the search interface. But let me give you a rough overview.
Indexing
The indexing is performed when I build the static site. It's pretty simple.
// create the index
var index = lunr(function(){
    // boost increases the importance of words found in this field
    this.field('title', {boost: 10});
    this.field('abstract', {boost: 2});
    this.field('content');
    // the id
    this.ref('href');
});

// this is a store with some document meta data to display
// in the search results.
var store = {};

entries.forEach(function(entry){
    index.add({
        href: entry.href,
        title: entry.title,
        abstract: entry.abstract,
        // hacky way to strip html, you should do better than that ;)
        content: cheerio.load(entry.content.replace(/<[^>]*>/g, ' ')).root().text()
    });
    store[entry.href] = {title: entry.title, abstract: entry.abstract};
});

fs.writeFileSync('public/searchIndex.json', JSON.stringify({
    index: index.toJSON(),
    store: store
}));
The resulting index is 1.3 MB, gzipping brings it down to a more reasonable 198 KB.
Search Interface
The other part of the equation is the search interface. I went for some simple jQuery hackery.
jQuery(function($) {
    var index,
        store,
        data = $.getJSON(searchIndexUrl);

    data.then(function(data){
        store = data.store,
        // create index
        index = lunr.Index.load(data.index)
    });

    $('.search-field').keyup(function() {
        var query = $(this).val();
        if(query === ''){
            jQuery('.search-results').empty();
        }
        else {
            // perform search
            var results = index.search(query);
            data.then(function(data) {
                $('.search-results').empty().append(
                    results.length ?
                    results.map(function(result){
                        var el = $('<p>')
                            .append($('<a>')
                                .attr('href', result.ref)
                                .text(store[result.ref].title)
                            );
                        if(store[result.ref].abstract){
                            el.after($('<p>').text(store[result.ref].abstract));
                        }
                        return el;
                    }) : $('<p><strong>No results found</strong></p>')
                );
            });
        }
    });
});
Learn More
If you want to learn more about how lunr works I recommend you to read this article by the author.
If you still want to learn more about search, then I can recommend this great free book on the subject called Introduction to Information Retrieval by Christopher D. Manning, Prabhakar Raghavan and Hinrich Schütze.
%3C/p%3E%0A%3Cp%3E%3Cstrong%3EYou%20can%20try%20out%20the%20search%20function%20I%20built%20on%20the%0A%3Ca%20href%3D%22https://29a.ch/articles%22%3Earticles%3C/a%3E%20page%20of%20this%20website.%3C/strong%3E%3C/p%3E%0A%0A%3Cp%3EI%20also%20enabled%20source%20maps%20so%20you%20can%20see%20how%20I%20hacked%20together%0Athe%20search%20interface.%20But%20let%20me%20give%20you%20a%20rough%20overview.%3C/p%3E%0A%0A%3Ch2%3EIndexing%3C/h2%3E%0A%3Cp%3EThe%20indexing%20is%20performed%20when%20I%20build%20the%20static%20site.%0AIt%26apos;s%20pretty%20simple.%3C/p%3E%0A%3Cpre%3E%3Ccode%3E//%20create%20the%20index%0Avar%20index%20%3D%20lunr(function()%7B%0A%20%20%20%20//%20boost%20increases%20the%20importance%20of%20words%20found%20in%20this%20field%0A%20%20%20%20this.field(%26apos;title%26apos;,%20%7Bboost:%2010%7D);%0A%20%20%20%20this.field(%26apos;abstract%26apos;,%20%7Bboost:%202%7D);%0A%20%20%20%20this.field(%26apos;content%26apos;);%0A%20%20%20%20//%20the%20id%0A%20%20%20%20this.ref(%26apos;href%26apos;);%0A%7D);%0A%0A//%20this%20is%20a%20store%20with%20some%20document%20meta%20data%20to%20display%0A//%20in%20the%20search%20results.%0Avar%20store%20%3D%20%7B%7D;%0A%0Aentries.forEach(function(entry)%7B%0A%20%20%20%20index.add(%7B%0A%20%20%20%20%20%20%20%20href:%20entry.href,%0A%20%20%20%20%20%20%20%20title:%20entry.title,%0A%20%20%20%20%20%20%20%20abstract:%20entry.abstract,%0A%20%20%20%20%20%20%20%20//%20hacky%20way%20to%20strip%20html,%20you%20should%20do%20better%20than%20that%20;)%0A%20%20%20%20%20%20%20%20content:%20cheerio.load(entry.content.replace(/%3C%5B%5E%3E%5D*%26gt;/g,%20%26apos;%20%26apos;)).root().text()%0A%20%20%20%20%7D);%0A%20%20%20%20store%5Bentry.href%5D%20%3D%20%7Btitle:%20entry.title,%20abstract:%20entry.abstract%7D;%0A%7D);%0A%0Afs.writeFileSync(%26apos;public/searchIndex.json%26apos;,%20JSON.stringify(%7B%0A%20%20%20%20index:%20index.toJSON(),%0A%20%20%20%20store:%20store%0A%7D));%3C/%5B%5E%3E%3C/code%3E%3C/pre%3E%0A%3Cp%3EThe%20resulting%20index%20is%201.3%20MB,%20gzipping%20brings%20it%20down%20to%20a%20more%20reasonable%20198%20KB.%3C/p%3E%0A%0A%3Ch2%3ESearch%20Interface%3C/h2%3E%0A%3Cp%3EThe%20other%20part%20of%20the%20equation%20is%20the%20search%20interface.%0AI%20went%20for%20some%20simple%20jQuery%20hackery.%3C/p%3E%0A%3Cpre%3E%3Ccode%3EjQuery(function($)%20%7B%0A%20%20%20%20var%20index,%0A%20%20%20%20%20%20%20%20store,%0A%20%20%20%20%20%20%20%20data%20%3D%20$.getJSON(searchIndexUrl);%0A%0A%20%20%20%20data.then(function(data)%7B%0A%20%20%20%20%20%20%20%20store%20%3D%20data.store,%0A%20%20%20%20%20%20%20%20//%20create%20index%0A%20%20%20%20%20%20%20%20index%20%3D%20lunr.Index.load(data.index)%0A%20%20%20%20%7D);%0A%0A%20%20%20%20$(%26apos;.search-field%26apos;).keyup(function()%20%7B%0A%20%20%20%20%20%20%20%20var%20query%20%3D%20$(this).val();%0A%20%20%20%20%20%20%20%20if(query%20%3D%3D%3D%20%26apos;%26apos;)%7B%0A%20%20%20%20%20%20%20%20%20%20%20%20jQuery(%26apos;.search-results%26apos;).empty();%0A%20%20%20%20%20%20%20%20%7D%0A%20%20%20%20%20%20%20%20else%20%7B%0A%20%20%20%20%20%20%20%20%20%20%20%20//%20perform%20search%0A%20%20%20%20%20%20%20%20%20%20%20%20var%20results%20%3D%20index.search(query);%0A%20%20%20%20%20%20%20%20%20%20%20%20data.then(function(data)%20%7B%0A%20%20%20%20%20%20%20%20%20%20%20%20%20%20%20%20$(%26apos;.search-results%26apos;).empty().append(%0A%20%20%20%20%20%20%20%20%20%20%20%20%20%20%20%20%20%20%20%20results.length%20?%0A%20%20%20%20%20%20%20%20%20%20%20%20%20%20%20%20%20%20%20%20results.map(function(result)%7B%0A%20%20%20%20%20%20%20%20%20%20%20%20%20%20%20%20%20%20%20%20%20%20%20%20var%20el%20%3D%20$(%26apos;%26lt;p%26gt;%26apos;)%0A%20%20%20%20%20%20%20%20%20%20%20%20%20%20%20%20%20%20%20%20%20%20%20%20%20%20%20%20.append($(%26apos;%26lt;a%26gt;%26apos;)%0A%20%20%20%20%20%20%20%20%20%20%20%20%20%20%20%20%20%20%20%20%20%20%20%20%20%20%20%20%20%20%20%20.attr(%26apos;href%26apos;,%20result.ref)%0A%20%20%20%20%20%20%20%20%20%20%20%20%20%20%20%20%20%20%20%20%20%20%20%20%20%20%20%20%20%20%20%20.text(store%5Bresult.ref%5D.title)%0A%20%20%20%20%20%20%20%20%20%20%20%20%20%20%20%20%20%20%20%20%20%20%20%20%20%20%20%20);%0A%20%20%20%20%20%20%20%20%20%20%20%20%20%20%20%20%20%20%20%20%20%20%20%20if(store%5Bresult.ref%5D.abstract)%7B%0A%20%20%20%20%20%20%20%20%20%20%20%20%20%20%20%20%20%20%20%20%20%20%20%20%20%20%20%20el.after($(%26apos;%26lt;p%26gt;%26apos;).text(store%5Bresult.ref%5D.abstract));%0A%20%20%20%20%20%20%20%20%20%20%20%20%20%20%20%20%20%20%20%20%20%20%20%20%7D%0A%20%20%20%20%20%20%20%20%20%20%20%20%20%20%20%20%20%20%20%20%20%20%20%20return%20el;%0A%20%20%20%20%20%20%20%20%20%20%20%20%20%20%20%20%20%20%20%20%7D)%20:%20$(%26apos;%26lt;p%26gt;%26lt;strong%26gt;No%20results%20found%26lt;/strong%26gt;%26lt;/p%26gt;%26apos;)%0A%20%20%20%20%20%20%20%20%20%20%20%20%20%20%20%20);%0A%20%20%20%20%20%20%20%20%20%20%20%20%7D);%20%0A%20%20%20%20%20%20%20%20%7D%0A%20%20%20%20%7D);%20%0A%7D);%0A%3C/code%3E%3C/pre%3E%0A%0A%3Ch2%3ELearn%20More%3C/h2%3E%0A%3Cp%3EIf%20you%20want%20to%20learn%20more%20about%20how%20lunr%20works%20I%20recommend%20you%20to%20read%20this%20%0A%3Ca%20href%3D%22https://www.new-bamboo.co.uk/blog/2013/02/26/full-text-search-in-your-browser/%22%3Earticle%3C/a%3E%20%0Aby%20the%20author.%3C/p%3E%0A%3Cp%3EIf%20you%20still%20want%20to%20learn%20more%20about%20search,%20then%20I%20can%20recommend%20this%20great%20free%20book%20on%20the%20subject%20called%0A%3Ca%20href%3D%22http://nlp.stanford.edu/IR-book/pdf/irbookonlinereading.pdf%22%3EIntroduction%20to%20Information%20Retrieval%3C/a%3E%0Aby%20Christopher%20D.%20Manning,%20Prabhakar%20Raghavan%20and%20Hinrich%20Sch%26%23xFC;tze.%3C/p%3E)
Source Maps with Grunt, Browserify and Mocha 20 Nov 2014 2:32 AM (10 years ago)
If you have been using source maps in your projects you have probably also encountered that they do not work with all tools. For instance, if I run my browserifyd tests with mocha I get something like this:
ReferenceError: dyanmic0 is not defined
    at Context.<anonymous> (http://0.0.0.0:8000/test/tests.js:4342:44)
    at callFn (http://0.0.0.0:8000/test/mocha.js:4428:21)
    at timeslice (http://0.0.0.0:8000/test/mocha.js:5989:27)
    ...
That's not exactly very helpful. After some searching I found a node module to solve this problem: node-source-map-support. It's easy to use and magically makes things work.
Simply:
npm install --save-dev source-map-supportrequire('source-map-support').install();I place it in a file called dev.js that I include in all development builds.
Now you get nice stack traces in mocha, jasmine, q and most other tools:
ReferenceError: dyanmic0 is not defined
    at Context.<anonymous> (src/physics-tests.js:44:1)
    ...
Nicely enough this also works together with Qs long stack traces:
require('source-map-support').install();
var Q = require('q');
Q.longStackSupport = true;
Q.onerror = function (e) {
    console.error(e && e.stack);
};

function theDepthsOfMyProgram() {
  Q.delay(100).then(function(){
  }).done(function explode() {
    throw new Error("boo!");
  });
}
Will result in:
Error: boo!
    at explode (src/dev.js:12:1)
From previous event:
    at theDepthsOfMyProgram (src/dev.js:11:1)
    at Object./home/jonas/dev/sandbox/atomic-action/src/dev.js.q (src/dev.js:16:1)
    ...
That's more helpful. :) Thank you Evan!
Desktop rdiff-backup Script 13 Nov 2014 7:50 AM (10 years ago)
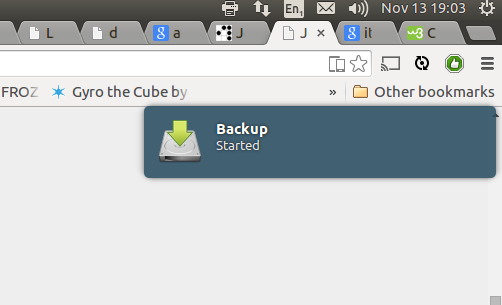
Updated for Ubuntu 15.10.
I have recently revamped the way I backup my desktop. In this post I document the thoughts that went into this. This is mostly for myself but you might still find it interesting.
To encrypt or not to encrypt
I do daily incremental backups of my desktop to an external harddrive. This drive is unencrypted.
Encrypting your backups has obvious benefits - it protects your data from falling into the wrong hands. But at the same time it also makes your backups much more fragile. A single corrupted bit can spell disaster for anything from a single block to your entire backup history. You also need to find a safe place to store a strong key - no easy task.
Most of my data I'd rather have stolen than lost. A lot of it is open source anyway. :)
The data that I'd rather lose than having it fall into the wrong hands (mostly keys) is stored and backed up in encrypted form only. For this I use the gpg agent and ecryptfs.
Encrypting only the sensitive data rather than the whole disk increases the risk of it being leaked. Recovering those leaked keys will however require a fairly powerful adversary which would have other ways of getting his hands on that data anyway so I consider this strategy to be a good tradeoff.
As a last line of defense I have an encrypted disk stored away offsite. I manually update it a few times a year to reduce the chance of loosing all of my data in case of a break in, fire or another catastrophic event.
Before showing you the actual backup script I'd like to explain you to why I'm back to using rdiff-backup for my backups.
Duplicity vs rdiff-backup vs rsync and hardlinks
Duplicity and rdiff backup are some of the post popular options to do incremental backups on linux (ignoring the more enterprisey stuff like bacula). Using rsnapshot which is using rsync and hardlinks is another one.
The main drawback to using rsync and hardlinks is that it stores full copies of every when it changes. This can be a good tradeoff especially when fast random access to historic backups is needed. This combined with snapshots is what I would most likely use for backing up production servers, where getting back some (or all) files of a specific historic version as fast as possible is usually what is needed. For my desktop however incremental backups are more of a backup of a backup. Fast access is not needed but I want to have the history around just in case I get the order of the -iname and -delete arguments to find wrong again without noticing.
Duplicity backs up your data by producting compressed (and optionally encrypted) tars that contain diffs of a full backup. This allows it to work with dumb storage (like s3) and makes encrypted backups relatively easy. However if even just a few bits get corrupted any backups after the corruption can be unreadable. This can be somewhat mitigated by doing frequent full backups, but that takes up space and increases the time needed to transfer backups.
rdiff-backup works the other way around. It always stores the most recent version of your data as a full mirror. So you can just cp that one file you need in a pinch. Increments are stored as 'reverse diffs' from the most current version. So if a diff is corrupted only historic data is affected. Corruption to a file will only corrupt that file, which is what I prefer.
The Script
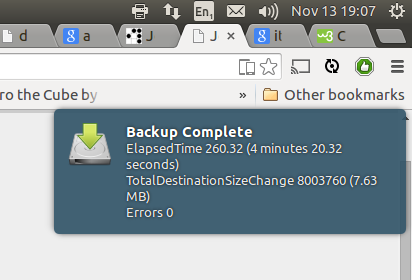
Most backup scripts you find on the net are written for backing up servers or headless machines. For backing up Desktop Linux machines the most popular solution seems to be deja-dup which is a frontend for duplicity.
As I want to use rdiff-backup I hacked together my own script. Here is what it roughly does.
- Mounts backup device by label via udisks
- Communicates start of backup via desktop notifications using notify-send
- Runs backup via rdiff-backup
- Deletes old increments after 8 weeks
- Communicates errors or success via desktop notifications.
#!/bin/bash
BACKUP_DEV_LABEL="backup0"
BACKUP_DEV="/dev/disk/by-label/$BACKUP_DEV_LABEL"
BACKUP_DEST="/media/$USER/$BACKUP_DEV_LABEL/fortress-home"
BACKUP_LOG="$HOME/.local/tmp/backup.log"
BACKUP_LOG_ERROR="$HOME/.local/tmp/backup.err.log"
# delay backup a bit after the login
sleep 3600
# unmount if already mounted, ensures it's always properly mounted in /media
udisksctl unmount -b $BACKUP_DEV
# Mounting disks via udisks, this doesn't require root
udisksctl mount -b $BACKUP_DEV 2> $BACKUP_LOG_ERROR > $BACKUP_LOG
notify-send -i document-save Backup Started
rdiff-backup --print-statistics --exclude /home/jonas/Private --exclude MY_OTHER_EXCLUDES $HOME $BACKUP_DEST 2>> $BACKUP_LOG_ERROR >> $BACKUP_LOG
if [ $? != 0 ]; then
{
    echo "BACKUP FAILED!"
    # notification
    MSG=$(tail -n 5 $BACKUP_LOG_ERROR)
    notify-send -u critical -i error "Backup Failed" "$MSG"
    # dialog
    notify-send -u critical -t 0 -i error "Backup Failed" "$MSG"
    exit 1
} fi
rdiff-backup --remove-older-than 8W $BACKUP_DEST
udisks --unmount $BACKUP_DEV
STATS=$(cat $BACKUP_LOG|grep '^Errors\|^ElapsedTime\|^TotalDestinationSizeChange')
notify-send -t 1000 -i document-save "Backup Complete" "$STATS"
This script runs whenever I login. I added it via the Startup Applications settings in Ubuntu.
The backup ignores the ecryptfs Private folder but does include the encrypted .Private folder thereby only backing up the cipher texts of sensitive files.
I like using disk labels for my drives. The disk label can easily be set using e2label:
e2label /dev/sdc backup0The offsite backup I do by manually mounting the LUKS encrypted disk and running a simple rsync script. I might migrate this to amazon glacier at some point.
I hope this post is useful to someone including future me. ;)
smartcrop.js ken burns effect 9 May 2014 3:00 AM (11 years ago)
This is an experiment that multiple people have suggested to me after I have shown them smartcrop.js. The idea is to let smartcrop pick the start and end viewports for the ken burns effect.. This could be useful to automatically create slide shows from a bunch of photos. Given that smartcrop.js is designed for a different task it does work quite well. But see for yourself.

I'm sure it could be much improved by actually trying to zoom on the center of interest rather than just having it in frame. The actual animation was implemented using css transforms and transitions. If you want to have a look you can find the source code on github.

Introducing smartcrop.js 3 Apr 2014 2:00 PM (11 years ago)
Image cropping is a common task in many web applications. Usually just cutting out the center of the image works out ok. It's often a compromise and sometimes it fails miserably.

Can we do better than that? I wanted to try.
Smartcrop.js is the result of my experiments with content aware image cropping. It uses fairly simple image processing and a few rules to attempt to create better crops of images.
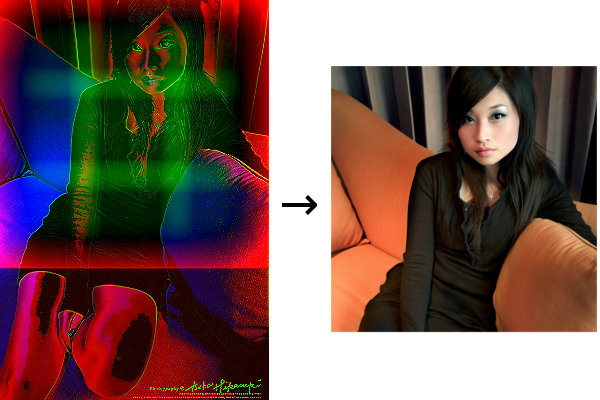
This library is still in it's infancy but the early results look promising. So true to the open source mantra of release early, release often, I'm releasing version 0.0.0 of smartcrop.js.
Source Code: github.com/jwagner/smartcrop.js
Examples: test suite with over 100 images and test bed to test your own images.
Command line interface: github.com/jwagner/smartcrop-cli

2D Wingsuit Game - first preview 31 Oct 2013 2:00 PM (11 years ago)
I'm not dead. I'm working on a 2D wingsuit game based on hand drawn levels. It's going to be cool. :) What do you think?
Wild WebGL Raymarching 25 Sep 2013 11:48 AM (12 years ago)
It's been way too long since I've released a demo. So the time was ripe to have some fun again. This time I looked into raymarching distance fields. I've found that I got some wild results by limiting the amount of samples taken along the rays.
Demo
Behind the scenes
If you are interested in the details, view the source. If left it unminified for you. The interesting stuff is mainly in the fragment shader.
Essentially the scene is just an infinite number of spheres arranged in a grid. If it is properly sampled it looks pretty boring:
Yes, I do love functions gone wild and glitchy. :)
%3C/h3%3E)
New Website 28 Aug 2013 2:48 PM (12 years ago)
Updating this website has been long overdue. It has been running on zine, a blog system that's no longer maintained since 2009, for way too long. After looking for a replacement and not finding anything I liked I decided that it would be fun to write my own. ;)
I tried hard not to break any existing content. If something is not working anymore, let me know.
A few details about the system
My new website is maintained by a static website generator and server using nginx. This has the benefit of speed and trivial deployments via rsync. Comments are now handled with disqus.
The system is fairly simple, it takes index.html and meta.json files from content/ and indexes them into a bunch of json files in data/. The html content is then processed using Cheerio. This involves fixing relative links and extracting meta data. After this step the pages are rendered using a few Jade templates. All of this is held together by a small set of Grunt tasks.
Goodbye old website

%3C/p%3E%0A%3Cp%3E%3Cstrong%3EI%20tried%20hard%20not%20to%20break%20any%20existing%20content.%20If%20something%20is%20not%20working%20anymore,%20let%20me%20know.%3C/strong%3E%3C/p%3E%0A%3Ch2%3EA%20few%20details%20about%20the%20system%3C/h2%3E%0A%3Cp%3EMy%20new%20website%20is%20maintained%20by%20a%20static%20website%20generator%20and%20server%20using%20nginx.%0AThis%20has%20the%20benefit%20of%20speed%20and%20trivial%20deployments%20via%20rsync.%0AComments%20are%20now%20handled%20with%20disqus.%3C/p%3E%0A%3Cp%3E%0AThe%20system%20is%20fairly%20simple,%20it%20takes%20index.html%20and%20meta.json%20files%20from%20%3Cem%3Econtent/%3C/em%3E%20and%20indexes%20them%20into%20a%20bunch%20of%20json%20files%20in%20%3Cem%3Edata/%3C/em%3E.%0AThe%20html%20content%20is%20then%20processed%20using%20%3Ca%20href%3D%22https://github.com/MatthewMueller/cheerio%22%3ECheerio%3C/a%3E.%0AThis%20involves%20fixing%20relative%20links%20and%20extracting%20meta%20data.%0AAfter%20this%20step%20the%20pages%20are%20rendered%20using%20a%20few%0A%3Ca%20href%3D%22http://jade-lang.com/%22%3EJade%3C/a%3E%20templates.%0AAll%20of%20this%20is%20held%20together%20by%20a%20small%20set%20of%0A%3Ca%20href%3D%22http://gruntjs.com/%22%3EGrunt%3C/a%3E%20tasks.%20%3C/p%3E%0A%3Ch2%3EGoodbye%20old%20website%3C/h2%3E%0A%3Cp%3E%3Cimg%20src%3D%22https://29a.ch/2013/8/28/new-website/old.jpg%22%20/%3E%3C/p%3E)
Fixing bash autocomplete on ubuntu 13.04 9 Aug 2013 2:48 PM (12 years ago)
The updated git package in ubuntu 13.04 changed the way bash completion works for git. Which resulted in the following error:
completion: function `_git' not found.This is because git completion is now using autoloading which does not work with aliases. The solution is to simply manually source the bash-completion function:
# from my bashrc
alias g='git'
source /usr/share/bash-completion/completions/git
complete -o default -o nospace -F _git g
xbox360 wireless controller on Ubuntu/Steam with xboxdrv 24 Feb 2013 1:48 PM (12 years ago)
The driver for the xbox controller built into the kernel (xpad) seems to be quite broken. Luckily there is an alternative. Here is how to set it up under Ubuntu, other Linux distributions might differ.
Blacklist xpad kernel driver
The first step is to blacklist the xpad kernel driver to prevent it from being loaded.
# as root
echo "blacklist xpad" >> /etc/modprobe.d/blacklist.conf
#unload module if already loaded
rmmod xpad
Install xboxdrv
# as root
apt-get install xboxdrv
Start xboxdrv
I start xboxdrv manually (as root) before I play. I tried to automate it but it wasn't very reliable.
# check it is working
xboxdrv
# Should output something like
# Your Xbox/Xbox360 controller should now be available as:
# /dev/input/js0
For actually playing I tend to start it with --silent.
This solves all the xbox gamepad issues for me. Steam, Shank, Overgrowth all work fine with xboxdrv.
WebGL Fluid Simulation 16 Dec 2012 6:16 AM (12 years ago)
A little while ago I released a canvas based fluid simulation demo. Now I have the WebGL version ready. It's doing roughly the same thing as the canvas one. It's nicely illustrating how much faster the GPU accelerated WebGL version is compared to the canvas one. As an added benefit, it does not explode anymore because the boundary conditions are now properly enforced.
Demo
View WebGL fluid simulation demo
Code Overview
Most of the interesting code for this demo lives in shaders. Here is an overview of the data flowing between the shaders.
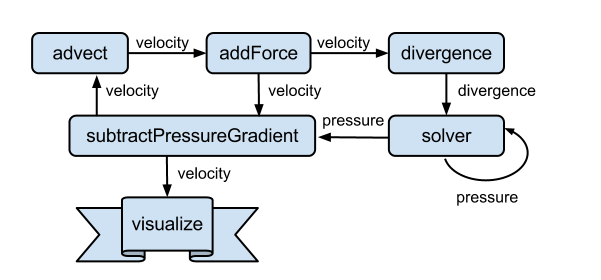
The flow is defined inside the main.js file. All the other logic is in the shader files.
If you are wondering why I left out diffusion in this demo. The way the algorithm works seems to introduce a fair amount of diffusion already so I figured I'd just drop that term. :)
Resources
- The original paper - Stable Fluids by Jos Stam
- Fast Fluid Dynamics Simulation on the GPU - GPU Gems
- Game Physics by David H. Eberly
%3C/p%3E%0A%0A%3Ch2%3EResources%3C/h2%3E%0A%3Cul%3E%0A%3Cli%3E%3Ca%20href%3D%22http://www.dgp.toronto.edu/people/stam/reality/Research/pdf/ns.pdf%22%3EThe%20original%20paper%20-%20Stable%20Fluids%20by%20Jos%20Stam%3C/a%3E%3C/li%3E%0A%3Cli%3E%3Ca%20href%3D%22http://http.developer.nvidia.com/GPUGems/gpugems_ch38.html%22%3EFast%20Fluid%20Dynamics%20Simulation%20on%20the%20GPU%20-%20GPU%20Gems%3C/a%3E%3C/li%3E%0A%3Cli%3E%3Ca%20href%3D%22http://www.amazon.co.uk/Game-Physics-David-H-Eberly/dp/0123749034/ref%3Dsr_1_1?ie%253DUTF8%2526qid%253D1361881845%2526sr%253D8-1%22%3EGame%20Physics%20by%20David%20H.%20Eberly%3C/a%3E%3C/li%3E%0A%3C/ul%3E)
WebGL Voxel Worlds 9 Dec 2012 6:05 AM (12 years ago)
I have worked on this demo for quite a while. The initial plan was to do a voxel based multiplayer shooter. It didn't turn out to be all that much fun (the movement is clunky and blowing stuff up doesn't provide too much lasting entertainment). So rather than just leaving it all to rot in a dark corner on my disk I decided to just release my prototype as it is.
Experiment
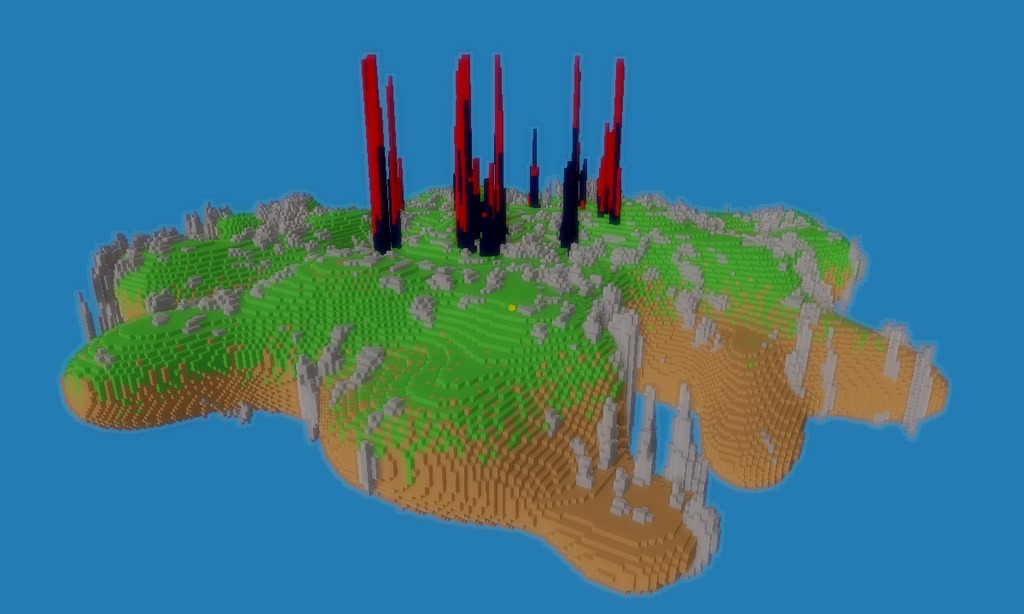
Play with the WebGL Voxel Worlds Demo
Video
Talk
I gave a 30 minute talk on some of the things in this demo at the super awesome ongamestart conference in Poland.
Also at ~12:00 you can see my notebook falling off the lectern. ;)
Source Code
I pushed the source code of this demo to github.
It is really hacky prototype code. Feel free to learn from it (and my mistakes), don't use it in production. If you have questions, feel free to ask. :)
.%20So%20rather%20than%20just%20leaving%20it%20all%20to%20rot%0Ain%20a%20dark%20corner%20on%20my%20disk%20I%20decided%20to%20just%20release%20my%20prototype%20as%20it%20is.%3C/p%3E%0A%0A%3Ch3%3EExperiment%3C/h3%3E%0A%3Cp%3E%3Ca%20href%3D%22https://29a.ch/sandbox/2012/voxelworld/%22%3E%3Cimg%20width%3D%22512%22%20src%3D%22https://29a.ch/sandbox/2012/voxelworld/screenshot.jpg%22%20/%3E%3C/a%3E%3Cbr%3E%0APlay%20with%20the%20%3Ca%20href%3D%22https://29a.ch/sandbox/2012/voxelworld/%22%3EWebGL%20Voxel%20Worlds%20Demo%3C/a%3E%3C/p%3E%0A%0A%3Ch3%3EVideo%3C/h3%3E%0A%0A%0A%0A%0A%3Ch3%3ETalk%3C/h3%3E%0A%3Cp%3EI%20gave%20a%2030%20minute%20talk%20on%20some%20of%20the%20things%20in%20this%20demo%20at%20the%20super%20awesome%20%3Ca%20href%3D%22http://ongamestart.com/%22%3Eongamestart%3C/a%3E%20conference%20in%20Poland.%3C/p%3E%0A%3Cp%3E%3C/p%3E%0A%3Cp%3EAlso%20at%20~12:00%20you%20can%20see%20my%20notebook%20falling%20off%20the%20lectern.%20;)%3C/p%3E%0A%0A%3Ch3%3ESource%20Code%3C/h3%3E%0A%3Cp%3EI%20pushed%20the%20source%20code%20of%20this%20demo%20to%20%3Ca%20href%3D%22https://github.com/jwagner/voxelworlds/%22%3Egithub%3C/a%3E.%3C/p%3E%0A%3Cp%3EIt%20is%20%3Cem%3Ereally%20hacky%20prototype%20code%3C/em%3E.%20Feel%20free%20to%20learn%20from%20it%20(and%20my%20mistakes),%20%3Cstrong%3Edon%26apos;t%20use%20it%20in%20production.%3C/strong%3E%20If%20you%20have%20questions,%20feel%20free%20to%20ask.%20:)%3C/p%3E)
HTML 5 Canvas Fluid Simulation 5 Nov 2012 9:30 AM (12 years ago)
I started to look into fluid simulation a little while ago. It turned out that it's not quite as trivial as I had hoped. That is unless you go for the hacky way as I did back in 2010.
So after getting familiar with the problem and some solutions I implemented a simple fluid simulation using the canvas element. You can find it in my sandbox.
The plan for the next step is to create a WebGL version. I hope that the final result will be a worthy successor to the immensely popular (by my standards) Neon Flames experiment I did last year.
%0A%3Ca%20href%3D%22https://29a.ch/sandbox/2011/neonflames/%22%3ENeon%20Flames%3C/a%3E%20experiment%20I%20did%20last%20year.%3C/p%3E)
Simplex Noise in Javascript 7 Aug 2012 12:59 PM (13 years ago)
I extracted the simplex noise implementation of my recent voxel experiments into a simple library. You can of course find the source on github. Check out the READ ME or the npm package for more details.
Simple demo
WebGL Terrain, Ocean, Fog 19 Jul 2012 6:11 AM (13 years ago)
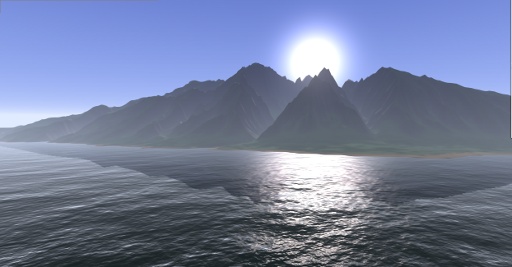
I'm happy to finally release something new. I have been playing around with terrain rendering using webgl for quite a while now. I initially planned to release the finished result as a simple game or flight simulator. But because I'm very busy learning to paraglide right now I simply don't have the time for this at the moment. Rather than releasing nothing I decided to just make a little demo out of it. I hope you like it.
Features
- Terrain LOD using CDLOD
- Frustum culling
- Reflective Water
- Emulating user defined clipping planes for reflections using oblique frustums.
- Volumetric fog (kind of)
- Simple collision detection
It's currently not streaming the terrain (loading it all in one go), and there are some other quirks but it mostly works.
Video
If you can't view the actual demo for some reason, I have also created a video demonstrating the different effects in this demo.
Evolution
Here a few shots from the evolution of this demo.
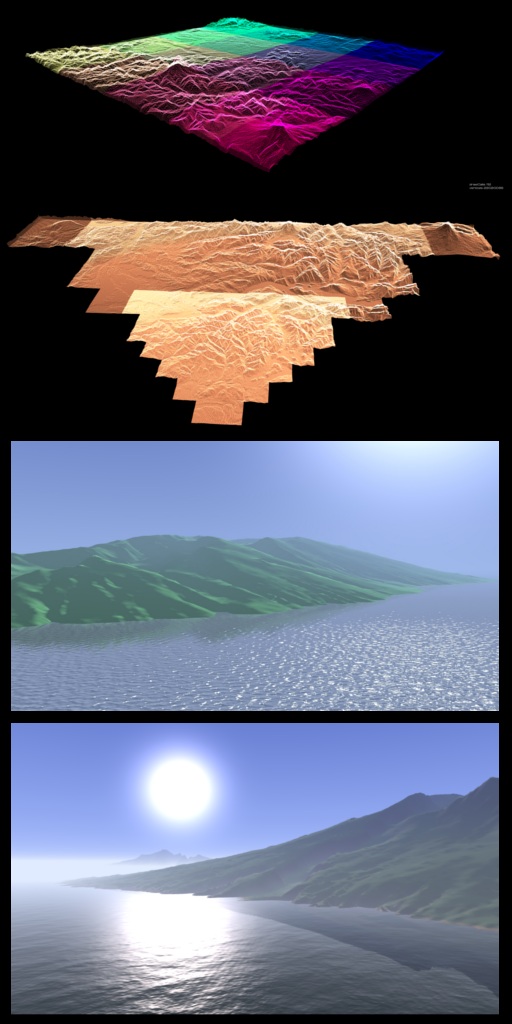
Data
The dataset used for this demo is of the Island of Maui. I got it from from NOAA's National Ocean Service (NOS), National Centers for Coastal Ocean Science (NCCOS). The vertical extents and sea level are not to scale. For the conversion into a usable format I used gdal. The normal map was created in the gimp.
Source
You can find the source on github. The most of the code for the terrain is stuffed into terrain.js. The WebGL implementation of oblique view frustums to emulate user defined clipping planes is in scene.js Keep in mind that this is hacky proof of concept code, that needs a good deal of scrutiny before any production use.
%3C/li%3E%0A%3Cli%3ESimple%20collision%20detection%3C/li%3E%0A%3C/ul%3E%0A%3Cp%3EIt%26apos;s%20currently%20not%20streaming%20the%20terrain%20(loading%20it%20all%20in%20one%20go),%20and%20there%20are%20some%20other%20quirks%20but%20it%20mostly%20works.%3C/p%3E%0A%3Ch3%3EVideo%3C/h3%3E%0A%0A%3Cp%3EIf%20you%20can%26apos;t%20view%20the%20actual%20demo%20for%20some%20reason,%20I%20have%20also%20created%20a%20video%20demonstrating%20the%20different%20effects%20in%20this%20demo.%3C/p%3E%0A%3Ch3%3EEvolution%3C/h3%3E%0A%3Cp%3EHere%20a%20few%20shots%20from%20the%20evolution%20of%20this%20demo.%3C/p%3E%0A%3Cp%3E%3Cimg%20src%3D%22https://29a.ch/images/evolution.jpg%22%20alt%3D%22evolution%22%20/%3E%3C/p%3E%0A%3Ch3%3EData%3C/h3%3E%0A%3Cp%3EThe%20dataset%20used%20for%20this%20demo%20is%20of%20the%20Island%20of%20Maui.%20I%20got%20it%20from%20from%20%3Ca%20href%3D%22http://www.soest.hawaii.edu/coasts/data/maui/dem.html%22%3ENOAA%26apos;s%20National%20Ocean%20Service%20(NOS),%20National%20Centers%20for%20Coastal%20Ocean%20Science%20(NCCOS)%3C/a%3E.%20The%20vertical%20extents%20and%20sea%20level%20are%20not%20to%20scale.%20For%20the%20conversion%20into%20a%20usable%20format%20I%20used%20%3Ca%20href%3D%22http://www.gdal.org/%22%3Egdal%3C/a%3E.%20The%20normal%20map%20was%20created%20in%20the%20gimp.%3C/p%3E%0A%3Ch3%3ESource%3C/h3%3E%0A%3Cp%3EYou%20can%20find%20the%20source%20on%20%3Ca%20href%3D%22https://github.com/jwagner/terrain%22%3Egithub%3C/a%3E.%20The%20most%20of%20the%20code%20for%20the%20terrain%20is%20stuffed%20into%20%3Ca%20href%3D%22https://github.com/jwagner/terrain/blob/master/src/engine/terrain.js%23L195%22%3Eterrain.js%3C/a%3E.%20The%20WebGL%20implementation%20of%20oblique%20view%20frustums%20to%20emulate%20user%20defined%20clipping%20planes%20is%20in%20%3Ca%20href%3D%22https://github.com/jwagner/terrain/blob/master/src/engine/scene.js%23L246%22%3Escene.js%3C/a%3E%20Keep%20in%20mind%20that%20this%20is%20hacky%20proof%20of%20concept%20code,%20that%20needs%20a%20good%20deal%20of%20scrutiny%20before%20any%20production%20use.%3C/p%3E)
Using CSS Preprocessors Effectively 17 Jun 2012 5:35 AM (13 years ago)
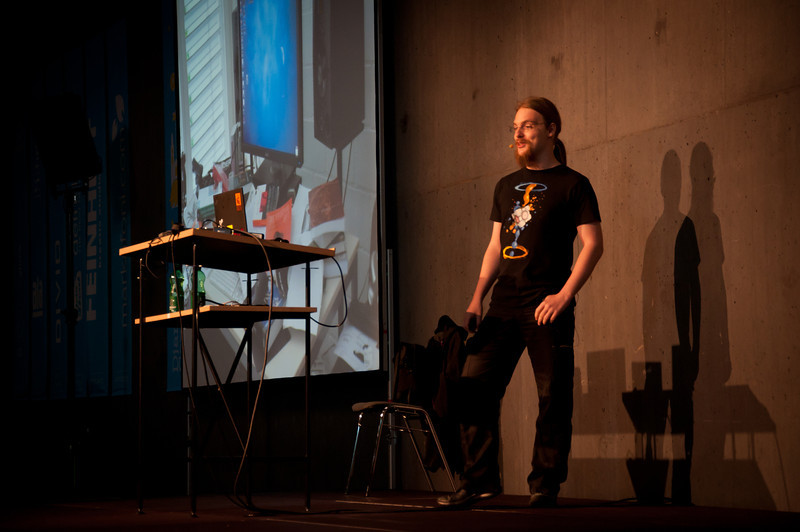
I recently did a talk on css preprocessors at djangocon.eu. They did a good job at recording it so you can enjoy the talk even if you were not there.
Links

Analyzing the talk
The great thing about having a video is of course that I can analyze my performance. So here are my conclusions:
Plus
- Dry mouth management went well except for the very end.
- Except for the little hiccup with the syntax highlighting it went very smoothly.
Minus
- I seem to handle the presenter in a very stiff way -> posture.
- I don't sound very enthusiastic, except for when I'm being zynical.
But frankly I am a bit like that in private too.
What I want to improve
I think to two big things to improve would be to make a better case for why you need them (Jonathan Verrecchia did that really well). Also it was a bit boring and 'flat' for the lack of a better word. But I found it really hard to try to find something exciting AND relevant.
.%20Also%20it%20was%20a%20bit%20boring%20and%20%26apos;flat%26apos;%20for%20the%20lack%20of%20a%20better%20word.%20But%20I%20found%20it%20really%20hard%20to%20try%20to%20find%20something%20exciting%20AND%20relevant.%3C/p%3E)
Image Error Level Analysis with HTML5 15 Apr 2012 6:40 AM (13 years ago)
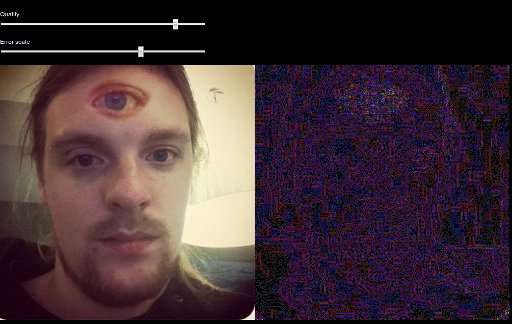 Click here to open the tool!
Image error level analysis is a technique that can help to identify manipulations to compressed (JPEG) images by detecting the distribution of error introduced after resaving the image at a specific compression rate. I stumbled across this technique in this presentation by Neal Krawetz and decided to do a quick implementation in JavaScript.
How to use this tool
To analyse an image simply drag and drop it onto the page (requires a modern browser like firefox or chrome). Then play with the quality slider to spot anomalies in the error level. The image I analyzed in the screenshot above is a picture of myself that I modified in GIMP. As you can see the error level on the fake part is quite significantly higher than on the rest of the image. There are no such anomalies on the original.
Having that said the algorithm is not exactly reliable, especially with images that have been rescaled and compressed often/intensely. So take it with a pinch of salt and feel free to have a look at the simple source code.
%20images%20by%20detecting%20the%20distribution%20of%20error%20introduced%20after%20resaving%20the%20image%20at%20a%20specific%20compression%20rate.%20I%20stumbled%20across%20this%20technique%20in%20this%20%3Ca%20href%3D%22http://www.wired.com/images_blogs/threatlevel/files/bh-usa-07-krawetz.pdf%22%3Epresentation%3C/a%3E%20by%20Neal%20Krawetz%20and%20decided%20to%20do%20a%20quick%20implementation%20in%20JavaScript.%3C/p%3E%0A%3Ch3%3EHow%20to%20use%20this%20tool%3C/h3%3E%0A%3Cp%3ETo%20analyse%20an%20image%20simply%20drag%20and%20drop%20it%20onto%20the%20page%20(requires%20a%20modern%20browser%20like%20firefox%20or%20chrome).%0AThen%20play%20with%20the%20quality%20slider%20to%20spot%20anomalies%20in%20the%20error%20level.%20The%20image%20I%20analyzed%20in%20the%20screenshot%20above%20is%20a%20%3Ca%20href%3D%22https://29a.ch/sandbox/2012/imageerrorlevelanalysis/fake.jpg%22%3Epicture%20of%20myself%3C/a%3E%20that%20I%20modified%20in%20GIMP.%0AAs%20you%20can%20see%20the%20error%20level%20on%20the%20fake%20part%20is%20quite%20significantly%20higher%20than%20on%20the%20rest%20of%20the%20image.%20There%20are%20no%20such%20anomalies%20on%20the%20%3Ca%20href%3D%22https://29a.ch/sandbox/2012/imageerrorlevelanalysis/original.jpg%22%3Eoriginal%3C/a%3E.%3C/p%3E%0A%3Cp%3E%3Cimg%20src%3D%22https://29a.ch/sandbox/2012/imageerrorlevelanalysis/original_screenshot.jpg%22%20/%3E%3C/p%3E%0A%3Cp%3EHaving%20that%20said%20the%20algorithm%20is%20not%20exactly%20reliable,%20especially%20with%20images%20that%20have%20been%20rescaled%20and%20compressed%20often/intensely.%20So%20take%20it%20with%20a%20pinch%20of%20salt%20and%20feel%20free%20to%20have%20a%20look%20at%20the%20simple%20%3Ca%20href%3D%22https://29a.ch/sandbox/2012/imageerrorlevelanalysis/iela.js%22%3Esource%20code%3C/a%3E.%3C/p%3E)
rvm on ubuntu 11.10 27 Oct 2011 11:54 PM (13 years ago)
2012-03-02 - updated to use ruby 1.9.3 and official instead of system rvm.
When trying to install ruby 1.9.2 using rvm I got a nasty suprise:
ossl_ssl.c:110:1: error: ‘SSLv2_method’ undeclared here (not in a function)
ossl_ssl.c:111:1: error: ‘SSLv2_server_method’ undeclared here (not in a function)
ossl_ssl.c:112:1: error: ‘SSLv2_client_method’ undeclared here (not in a function)
make[1]: *** [ossl_ssl.o] Error 1
make[1]: Leaving directory `/var/cache/ruby-rvm/src/ruby-1.9.2-p180/ext/openssl'
make: *** [mkmain.sh] Error 1
The solution
# install rvm
bash -s stable < <(curl -s https://raw.github.com/wayneeseguin/rvm/master/binscripts/rvm-installer )
# make sure we have $rvm_path
source /etc/profile
# don't use ubuntus openssl
rvm pkg install openssl
rvm install 1.9.3-p125 --with-openssl-dir=$rvm_path/usr
fuckNaN(), seriously 20 Oct 2011 7:44 AM (14 years ago)
I generally like dynamic languages and in generally don't run into much trouble with them. Having that said, I hate the way undefined and NaN work in Javascript.

This turns a simple typo into a NaN apocalypse. After half of your numbers have turned into NaNs it's hard to find out where they came from.
var o = {y: 0},
#NaN
1/o;
#NaN
var x = 1/o.x;
#NaN
var y = x*10;
Setting up traps
So how do you catch stray NaNs? You set up traps. Because it can become very tedious and error prone to have asserts everywhere I wrote a little helper, fuckNaN().
function fuckNaN(obj, name){
    var key = '__' + name;
    obj.__defineGetter__(name, function(){
        return this[key];
    });
    obj.__defineSetter__(name, function(v) {
        // you can also check for isFinite() in here if you'd like to
        if(typeof v !== 'number' || isNaN(v)){
            throw new TypeError(name + ' isNaN');
        }
        this[key] = v;
    });
}

// Examples
var o = {x: 0};
fuckNaN(o, 'x');
// throws TypeError: x isNaN
o.x = 1/undefined;

// Also works with prototypes
function O(){
    this.x = 0;
}
fuckNaN(O.prototype, 'x');
var o = new O();

// throws TypeError: x isNaN
o.x = 1/undefined;
Place some of those traps during debug mode in critical locations like your Vector and Matrix classes and they will bring doom and destruction to those NaNs..
Note: This doesn't work in IE<=8 and you shouldn't use it in production. Use it as a tool during development to make your code fail early.
,%20seriously%26bodytext%3D%3Cp%3EI%20generally%20like%20dynamic%20languages%20and%20in%20generally%20don%26apos;t%20run%20into%20much%20trouble%20with%20them.%0AHaving%20that%20said,%20%3Cstrong%3EI%20hate%20the%20way%20undefined%20and%20NaN%20work%20in%20Javascript%3C/strong%3E.%3C/p%3E%0A%3Cp%3E%3Ca%20href%3D%22http://www.flickr.com/photos/bigbadwolfmedia/5971077584/%22%20title%3D%22Zombie%20in%20Blue%20by%20Bigbadwolfmedia,%20on%20Flickr%22%3E%3Cimg%20src%3D%22http://farm7.static.flickr.com/6006/5971077584_a9f499ffb3.jpg%22%20width%3D%22500%22%20height%3D%22333%22%20alt%3D%22Zombie%20in%20Blue%22%20/%3E%3C/a%3E%3C/p%3E%0A%3Cp%3E%3Cstrong%3EThis%20turns%20a%20simple%20typo%20into%20a%20NaN%20apocalypse.%3C/strong%3E%20After%20half%20of%20your%20numbers%20have%20turned%20into%20NaNs%0Ait%26apos;s%20hard%20to%20find%20out%20where%20they%20came%20from.%3C/p%3E%0A%3Cdiv%3E%3Cpre%3E%3Cspan%3Evar%3C/span%3E%20%3Cspan%3Eo%3C/span%3E%20%3Cspan%3E%3D%3C/span%3E%20%3Cspan%3E%7B%3C/span%3E%3Cspan%3Ey%3C/span%3E%3Cspan%3E:%3C/span%3E%20%3Cspan%3E0%3C/span%3E%3Cspan%3E%7D%3C/span%3E%3Cspan%3E,%3C/span%3E%0A%3Cspan%3E%23%3C/span%3E%3Cspan%3ENaN%3C/span%3E%0A%3Cspan%3E1%3C/span%3E%3Cspan%3E/%3C/span%3E%3Cspan%3Eo%3C/span%3E%3Cspan%3E;%3C/span%3E%0A%3Cspan%3E%23%3C/span%3E%3Cspan%3ENaN%3C/span%3E%0A%3Cspan%3Evar%3C/span%3E%20%3Cspan%3Ex%3C/span%3E%20%3Cspan%3E%3D%3C/span%3E%20%3Cspan%3E1%3C/span%3E%3Cspan%3E/%3C/span%3E%3Cspan%3Eo%3C/span%3E%3Cspan%3E.%3C/span%3E%3Cspan%3Ex%3C/span%3E%3Cspan%3E;%3C/span%3E%0A%3Cspan%3E%23%3C/span%3E%3Cspan%3ENaN%3C/span%3E%0A%3Cspan%3Evar%3C/span%3E%20%3Cspan%3Ey%3C/span%3E%20%3Cspan%3E%3D%3C/span%3E%20%3Cspan%3Ex%3C/span%3E%3Cspan%3E*%3C/span%3E%3Cspan%3E10%3C/span%3E%3Cspan%3E;%3C/span%3E%0A%3C/pre%3E%3C/div%3E%0A%0A%3Ch2%3ESetting%20up%20traps%3C/h2%3E%0A%3Cp%3ESo%20how%20do%20you%20catch%20stray%20NaNs?%20You%20set%20up%20traps.%20Because%20it%20can%20become%20very%20tedious%20and%20error%20prone%20to%20have%0Aasserts%20everywhere%20I%20wrote%20a%20little%20helper,%20%3Cstrong%3EfuckNaN()%3C/strong%3E.%3C/p%3E%0A%3Cdiv%3E%3Cpre%3E%3Cspan%3Efunction%3C/span%3E%20%3Cspan%3EfuckNaN%3C/span%3E%3Cspan%3E(%3C/span%3E%3Cspan%3Eobj%3C/span%3E%3Cspan%3E,%3C/span%3E%20%3Cspan%3Ename%3C/span%3E%3Cspan%3E)%7B%3C/span%3E%0A%20%20%20%20%3Cspan%3Evar%3C/span%3E%20%3Cspan%3Ekey%3C/span%3E%20%3Cspan%3E%3D%3C/span%3E%20%3Cspan%3E%26apos;__%26apos;%3C/span%3E%20%3Cspan%3E+%3C/span%3E%20%3Cspan%3Ename%3C/span%3E%3Cspan%3E;%3C/span%3E%0A%20%20%20%20%3Cspan%3Eobj%3C/span%3E%3Cspan%3E.%3C/span%3E%3Cspan%3E__defineGetter__%3C/span%3E%3Cspan%3E(%3C/span%3E%3Cspan%3Ename%3C/span%3E%3Cspan%3E,%3C/span%3E%20%3Cspan%3Efunction%3C/span%3E%3Cspan%3E()%7B%3C/span%3E%0A%20%20%20%20%20%20%20%20%3Cspan%3Ereturn%3C/span%3E%20%3Cspan%3Ethis%3C/span%3E%3Cspan%3E%5B%3C/span%3E%3Cspan%3Ekey%3C/span%3E%3Cspan%3E%5D;%3C/span%3E%0A%20%20%20%20%3Cspan%3E%7D);%3C/span%3E%0A%20%20%20%20%3Cspan%3Eobj%3C/span%3E%3Cspan%3E.%3C/span%3E%3Cspan%3E__defineSetter__%3C/span%3E%3Cspan%3E(%3C/span%3E%3Cspan%3Ename%3C/span%3E%3Cspan%3E,%3C/span%3E%20%3Cspan%3Efunction%3C/span%3E%3Cspan%3E(%3C/span%3E%3Cspan%3Ev%3C/span%3E%3Cspan%3E)%3C/span%3E%20%3Cspan%3E%7B%3C/span%3E%0A%20%20%20%20%20%20%20%20%3Cspan%3E//%20you%20can%20also%20check%20for%20isFinite()%20in%20here%20if%20you%26apos;d%20like%20to%3C/span%3E%0A%20%20%20%20%20%20%20%20%3Cspan%3Eif%3C/span%3E%3Cspan%3E(%3C/span%3E%3Cspan%3Etypeof%3C/span%3E%20%3Cspan%3Ev%3C/span%3E%20%3Cspan%3E!%3D%3D%3C/span%3E%20%3Cspan%3E%26apos;number%26apos;%3C/span%3E%20%3Cspan%3E%7C%7C%3C/span%3E%20%3Cspan%3EisNaN%3C/span%3E%3Cspan%3E(%3C/span%3E%3Cspan%3Ev%3C/span%3E%3Cspan%3E))%7B%3C/span%3E%0A%20%20%20%20%20%20%20%20%20%20%20%20%3Cspan%3Ethrow%3C/span%3E%20%3Cspan%3Enew%3C/span%3E%20%3Cspan%3ETypeError%3C/span%3E%3Cspan%3E(%3C/span%3E%3Cspan%3Ename%3C/span%3E%20%3Cspan%3E+%3C/span%3E%20%3Cspan%3E%26apos;%20isNaN%26apos;%3C/span%3E%3Cspan%3E);%3C/span%3E%0A%20%20%20%20%20%20%20%20%3Cspan%3E%7D%3C/span%3E%0A%20%20%20%20%20%20%20%20%3Cspan%3Ethis%3C/span%3E%3Cspan%3E%5B%3C/span%3E%3Cspan%3Ekey%3C/span%3E%3Cspan%3E%5D%3C/span%3E%20%3Cspan%3E%3D%3C/span%3E%20%3Cspan%3Ev%3C/span%3E%3Cspan%3E;%3C/span%3E%0A%20%20%20%20%3Cspan%3E%7D);%3C/span%3E%0A%3Cspan%3E%7D%3C/span%3E%0A%0A%3Cspan%3E//%20Examples%3C/span%3E%0A%3Cspan%3Evar%3C/span%3E%20%3Cspan%3Eo%3C/span%3E%20%3Cspan%3E%3D%3C/span%3E%20%3Cspan%3E%7B%3C/span%3E%3Cspan%3Ex%3C/span%3E%3Cspan%3E:%3C/span%3E%20%3Cspan%3E0%3C/span%3E%3Cspan%3E%7D;%3C/span%3E%0A%3Cspan%3EfuckNaN%3C/span%3E%3Cspan%3E(%3C/span%3E%3Cspan%3Eo%3C/span%3E%3Cspan%3E,%3C/span%3E%20%3Cspan%3E%26apos;x%26apos;%3C/span%3E%3Cspan%3E);%3C/span%3E%0A%3Cspan%3E//%20throws%20TypeError:%20x%20isNaN%3C/span%3E%0A%3Cspan%3Eo%3C/span%3E%3Cspan%3E.%3C/span%3E%3Cspan%3Ex%3C/span%3E%20%3Cspan%3E%3D%3C/span%3E%20%3Cspan%3E1%3C/span%3E%3Cspan%3E/%3C/span%3E%3Cspan%3Eundefined%3C/span%3E%3Cspan%3E;%3C/span%3E%0A%0A%3Cspan%3E//%20Also%20works%20with%20prototypes%3C/span%3E%0A%3Cspan%3Efunction%3C/span%3E%20%3Cspan%3EO%3C/span%3E%3Cspan%3E()%7B%3C/span%3E%0A%20%20%20%20%3Cspan%3Ethis%3C/span%3E%3Cspan%3E.%3C/span%3E%3Cspan%3Ex%3C/span%3E%20%3Cspan%3E%3D%3C/span%3E%20%3Cspan%3E0%3C/span%3E%3Cspan%3E;%3C/span%3E%0A%3Cspan%3E%7D%3C/span%3E%0A%3Cspan%3EfuckNaN%3C/span%3E%3Cspan%3E(%3C/span%3E%3Cspan%3EO%3C/span%3E%3Cspan%3E.%3C/span%3E%3Cspan%3Eprototype%3C/span%3E%3Cspan%3E,%3C/span%3E%20%3Cspan%3E%26apos;x%26apos;%3C/span%3E%3Cspan%3E);%3C/span%3E%0A%3Cspan%3Evar%3C/span%3E%20%3Cspan%3Eo%3C/span%3E%20%3Cspan%3E%3D%3C/span%3E%20%3Cspan%3Enew%3C/span%3E%20%3Cspan%3EO%3C/span%3E%3Cspan%3E();%3C/span%3E%0A%0A%3Cspan%3E//%20throws%20TypeError:%20x%20isNaN%3C/span%3E%0A%3Cspan%3Eo%3C/span%3E%3Cspan%3E.%3C/span%3E%3Cspan%3Ex%3C/span%3E%20%3Cspan%3E%3D%3C/span%3E%20%3Cspan%3E1%3C/span%3E%3Cspan%3E/%3C/span%3E%3Cspan%3Eundefined%3C/span%3E%3Cspan%3E;%3C/span%3E%0A%3C/pre%3E%3C/div%3E%0A%0A%3Cp%3EPlace%20some%20of%20those%20traps%20during%20debug%20mode%20in%20critical%20locations%20like%20your%20Vector%20and%20Matrix%20classes%20%3Cstrong%3Eand%20they%20will%20bring%20doom%20and%20destruction%20to%20those%20NaNs.%3C/strong%3E.%3C/p%3E%0A%3Cp%3E%3Cstrong%3ENote:%20This%20doesn%26apos;t%20work%20in%20IE%26lt;%3D8%20and%20you%20shouldn%26apos;t%20use%20it%20in%20production.%20Use%20it%20as%20a%20tool%20during%20development%20to%20make%20your%20code%20fail%20early.%3C/strong%3E%3C/p%3E)
Review: Ubuntu Linux 11.10 on Thinkpad X1 14 Oct 2011 10:07 AM (14 years ago)
 I got myself a new toy - a Thinkpad X1. I wasn't really sure whether I should get the X1 or a Macbook Air.
The main reason I decided to get the Thinkpad is because I prefer Linux for coding and I actually prefer the style
of the hardware. It looks like a hackers tool and not like a shiny fashion accessory, but that's of course just my taste.
It's also a lot more powerful in terms of CPU and connectivity (RJ45 jack, HDMI out, USB3, built in 3G modem).
The downside is the display, the IPS displays Apple uses are just SO much better. But hey, I'm a developer not a designer.
I got myself a new toy - a Thinkpad X1. I wasn't really sure whether I should get the X1 or a Macbook Air.
The main reason I decided to get the Thinkpad is because I prefer Linux for coding and I actually prefer the style
of the hardware. It looks like a hackers tool and not like a shiny fashion accessory, but that's of course just my taste.
It's also a lot more powerful in terms of CPU and connectivity (RJ45 jack, HDMI out, USB3, built in 3G modem).
The downside is the display, the IPS displays Apple uses are just SO much better. But hey, I'm a developer not a designer.
This post describes the tweaks I did to make this notebook even better. They are also a documentation for myself. It targets advanced users.
TL;DR
Everything works out of the box, but a few tweaks make it way more awesome.
Thinkfan
The default fan settings are very aggressive and result in a lot of noise. I use thinkfan for manual fan control. This reduces the noise significantly.
#/etc/thinkfan.conf
sensor /sys/devices/platform/coretemp.0/temp1_input
sensor /sys/devices/platform/coretemp.0/temp2_input
sensor /sys/devices/platform/coretemp.0/temp3_input
sensor /sys/devices/virtual/hwmon/hwmon0/temp1_input

(0,	0,	60)
(1,	60,	70)
#(2,	76,	61)
#(3,	52,	63)
#(4,	56,	65)
#(5,	59,	66)
(7,	70,	32767)
Note that those are pretty extreme settings, use with caution and don't blame me.
Reducing power consumption
In order to improve battery life and to keep the device cool I tweaked some settings and disabled all unused devices in the bios. The changes save almost 10 watt!
#/etc/default/grub
GRUB_CMDLINE_LINUX_DEFAULT="quiet splash i915.i915_enable_rc6=1"
# run update-grub after change
#/etc/rc.local
echo 1500 > /proc/sys/vm/dirty_writeback_centisecs
for i in /sys/bus/usb/devices/*/power/autosuspend; do echo 1 > $i; done
echo min_power > /sys/class/scsi_host/host0/link_power_management_policy
echo min_power > /sys/class/scsi_host/host1/link_power_management_policy
Also you should consider using flashblock for firefox/chrome. Flash will drain your battery. If you don't believe it just look at the cpu wakeups it creates using powertop.
SSD TRIMing
I use an Intel SSD in the Notebook. The installation was a bit fiddly but the performance is just incredible. The thing boots in seconds. In order to get TRIM support I added discard to the partition options in /etc/fstab.
#/etc/fstab
UUID=b38561bd-9ca9-44a6-848d-ec90f31e1955 /               ext4    discard,errors=remount-ro 0       1
Wireless
802.11N seemed to create problems with my WLAN so I disabled it.
#/etc/modprobe.d/_wlan.conf
options iwlagn 11n_disable=1
HDAPS
HDAPS offers you access to the accelerometer and advanced battery functions. It's simple to install:
sudo apt-get install tp-smapi-dkms
sudo modprobe -a tp_smapi hdaps
# get battery details
grep -r . /sys/devices/platform/smapi/BAT0/
# load on boot
echo "tp_smapi" >> /etc/modules
echo "hdaps" >> /etc/modules
Conclusion
With all those tweaks done the Thinkpad X1 becomes a durable, light, quiet and fast notebook with a lousy screen.
.%0AThe%20downside%20is%20the%20display,%20the%20IPS%20displays%20Apple%20uses%20are%20just%20%3Cem%3ESO%3C/em%3E%20much%20better.%20But%20hey,%20I%26apos;m%20a%20developer%20not%20a%20designer.%0A%3C/p%3E%3Cp%3E%0A%3Cstrong%3EThis%20post%20describes%20the%20tweaks%20I%20did%20to%20make%20this%20notebook%20even%20better.%20They%20are%20also%20a%20documentation%20for%20myself.%20%3Cem%3EIt%20targets%20advanced%20users.%3C/em%3E%3C/strong%3E%3C/p%3E%0A%3Ch2%3ETL;DR%3C/h2%3E%0A%3Cp%3EEverything%20works%20out%20of%20the%20box,%20but%20a%20few%20tweaks%20make%20it%20way%20more%20awesome.%3C/p%3E%0A%3Ch2%3EThinkfan%3C/h2%3E%0A%3Cp%3EThe%20default%20fan%20settings%20are%20very%20aggressive%20and%20result%20in%20a%20lot%20of%20noise.%20I%20use%20thinkfan%20for%20manual%20fan%20control.%0AThis%20reduces%20the%20noise%20significantly.%20%0A%3Cpre%3E%0A%23/etc/thinkfan.conf%0Asensor%20/sys/devices/platform/coretemp.0/temp1_input%0Asensor%20/sys/devices/platform/coretemp.0/temp2_input%0Asensor%20/sys/devices/platform/coretemp.0/temp3_input%0Asensor%20/sys/devices/virtual/hwmon/hwmon0/temp1_input%0A%0A(0,%090,%0960)%0A(1,%0960,%0970)%0A%23(2,%0976,%0961)%0A%23(3,%0952,%0963)%0A%23(4,%0956,%0965)%0A%23(5,%0959,%0966)%0A(7,%0970,%0932767)%0A%3C/pre%3E%0A%3C/p%3E%3Cp%3ENote%20that%20those%20are%20pretty%20extreme%20settings,%20use%20with%20caution%20and%20don%26apos;t%20blame%20me.%3C/p%3E%0A%3Ch2%3EReducing%20power%20consumption%3C/h2%3E%0A%3Cp%3EIn%20order%20to%20improve%20battery%20life%20and%20to%20keep%20the%20device%20cool%20I%20tweaked%20some%20settings%20and%20disabled%20all%20unused%20devices%20in%20the%20bios.%20%3Cstrong%3EThe%20changes%20save%20almost%2010%20watt!%3C/strong%3E%3C/p%3E%0A%3Cpre%3E%0A%23/etc/default/grub%0AGRUB_CMDLINE_LINUX_DEFAULT%3D%26quot;quiet%20splash%20i915.i915_enable_rc6%3D1%26quot;%0A%23%20run%20update-grub%20after%20change%0A%3C/pre%3E%0A%3Cpre%3E%0A%23/etc/rc.local%0Aecho%201500%20%26gt;%20/proc/sys/vm/dirty_writeback_centisecs%0Afor%20i%20in%20/sys/bus/usb/devices/*/power/autosuspend;%20do%20echo%201%20%26gt;%20$i;%20done%0Aecho%20min_power%20%26gt;%20/sys/class/scsi_host/host0/link_power_management_policy%0Aecho%20min_power%20%26gt;%20/sys/class/scsi_host/host1/link_power_management_policy%0A%3C/pre%3E%0A%3Cp%3EAlso%20you%20should%20consider%20using%20flashblock%20for%20firefox/chrome.%20%3Cstrong%3EFlash%20will%20drain%20your%20battery.%3C/strong%3E%0AIf%20you%20don%26apos;t%20believe%20it%20just%20look%20at%20the%20cpu%20wakeups%20it%20creates%20using%20powertop.%20%3C/p%3E%0A%3Ch2%3ESSD%20TRIMing%3C/h2%3E%0A%3Cp%3EI%20use%20an%20Intel%20SSD%20in%20the%20Notebook.%20The%20installation%20was%20a%20bit%20fiddly%20but%20the%20performance%20is%20just%20incredible.%20The%20thing%20boots%20in%20seconds.%20In%20order%20to%20get%20TRIM%20support%20I%20added%20%3Cem%3Ediscard%3C/em%3E%20to%20the%20partition%20options%20in%20/etc/fstab.%3C/p%3E%0A%3Cpre%3E%0A%23/etc/fstab%0AUUID%3Db38561bd-9ca9-44a6-848d-ec90f31e1955%20/%20%20%20%20%20%20%20%20%20%20%20%20%20%20%20ext4%20%20%20%20discard,errors%3Dremount-ro%200%20%20%20%20%20%20%201%0A%3C/pre%3E%0A%3Ch2%3EWireless%3C/h2%3E%0A%3Cp%3E802.11N%20seemed%20to%20create%20problems%20with%20my%20WLAN%20so%20I%20disabled%20it.%3C/p%3E%0A%3Cpre%3E%0A%23/etc/modprobe.d/_wlan.conf%20%0Aoptions%20iwlagn%2011n_disable%3D1%0A%3C/pre%3E%0A%3Ch2%3EHDAPS%3C/h2%3E%0A%3Cp%3EHDAPS%20offers%20you%20access%20to%20the%20accelerometer%20and%20advanced%20battery%20functions.%20It%26apos;s%20simple%20to%20install:%3C/p%3E%0A%3Cpre%3E%0Asudo%20apt-get%20install%20tp-smapi-dkms%0Asudo%20modprobe%20-a%20tp_smapi%20hdaps%0A%23%20get%20battery%20details%0Agrep%20-r%20.%20/sys/devices/platform/smapi/BAT0/%0A%23%20load%20on%20boot%0Aecho%20%26quot;tp_smapi%26quot;%20%26gt;%26gt;%20/etc/modules%0Aecho%20%26quot;hdaps%26quot;%20%26gt;%26gt;%20/etc/modules%0A%3C/pre%3E%0A%3Ch2%3EConclusion%3C/h2%3E%0A%3Cp%3EWith%20all%20those%20tweaks%20done%20the%20Thinkpad%20X1%20becomes%20a%20durable,%20light,%20quiet%20and%20fast%20notebook%20with%20a%20lousy%20screen.%3C/p%3E)
Swiss Address Visualization with WebGL 10 Oct 2011 10:16 AM (14 years ago)
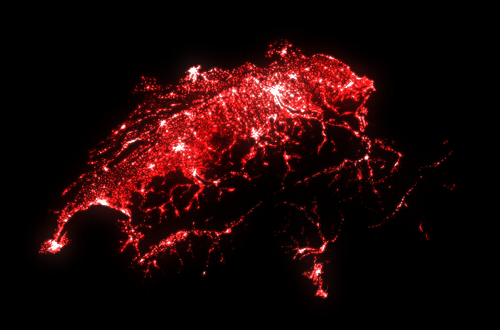
29a.ch/sandbox/2011/addresscloud/
As some of you know I work for local.ch. I was looking for cool visualizations to do with our data for quite a while, missing the obvious - plotting all our 3.7 million geocoded addresses in 3D using WebGL! I'm actually quite impressed by the accuracy of the data. But go and have a look for your self.
Controls
WASD + Mouse (drag). Velocity is scaled with altitude.
Video
If you can't see the demo for some reason I uploaded a short video of the demo to youtube.
Techniques
The points are encoded in a Float32Array, then sorted and gziped using a python script. Sorting the data improves the compression ratio by over 200% so it's well worth the effort. This brings the original 100mb file down to 7mb.
The file is then loaded using XHR level 2, which supports binary files and progress events. The points are then rendered using WebGL as GL_POINTS and additive blending is used to give it a glow effect. In the future I might add HDR rendering and blooming.
There is no level of detail or culling performed so this will require a relatively powerful rig. Also note that for some reason Firefox Aurora (9) seems to be quicker than Chrome Dev (16) for some mysterious reason. I would expect all of the work to be done by OpenGL so I'm not sure about where this comes from. It could be chromes process isolation.
Sourcecode
You can find the source code on github if you want to get into some hacking. Note that the data belongs to local.ch and may not be used.
.%20Velocity%20is%20scaled%20with%20altitude.%3C/p%3E%0A%3Ch2%3EVideo%3C/h2%3E%0A%3Cp%3EIf%20you%20can%26apos;t%20see%20the%20demo%20for%20some%20reason%20I%20uploaded%20a%20short%20%3Ca%20href%3D%22https://www.youtube.com/watch?v%253DORI1Jdk5e5g%22%3Evideo%20of%20the%20demo%3C/a%3E%20to%20youtube.%3C/p%3E%0A%3Ch2%3ETechniques%3C/h2%3E%0A%3Cp%3EThe%20points%20are%20encoded%20in%20a%20Float32Array,%20then%20sorted%20and%20gziped%20using%20a%20python%20script.%20%3Cstrong%3ESorting%20the%20data%20improves%20the%20compression%20ratio%20by%20over%20200%25%3C/strong%3E%20so%20it%26apos;s%20well%20worth%20the%20effort.%20This%20brings%20the%20original%20%3Cstrong%3E100mb%20file%20down%20to%207mb%3C/strong%3E.%3C/p%3E%0A%3Cp%3EThe%20file%20is%20then%20loaded%20using%20%3Cstrong%3EXHR%20level%202%3C/strong%3E,%0Awhich%20supports%20binary%20files%20and%20progress%20events.%20The%20points%20are%20then%20rendered%20using%20WebGL%20as%20GL_POINTS%20and%20additive%20blending%20is%0Aused%20to%20give%20it%20a%20glow%20effect.%20In%20the%20future%20I%20might%20add%20HDR%20rendering%20and%20blooming.%3C/p%3E%0A%3Cp%3EThere%20is%20no%20level%20of%20detail%20or%20culling%20performed%20so%20%3Cstrong%3Ethis%20will%20require%20a%20relatively%20powerful%20rig%3C/strong%3E.%0AAlso%20note%20that%20for%20some%20reason%20Firefox%20Aurora%20(9)%20seems%20to%20be%20quicker%20than%20Chrome%20Dev%20(16)%20for%20some%20mysterious%20reason.%0AI%20would%20expect%20all%20of%20the%20work%20to%20be%20done%20by%20OpenGL%20so%20I%26apos;m%20not%20sure%20about%20where%20this%20comes%20from.%20It%20could%20be%20chromes%0Aprocess%20isolation.%3C/p%3E%0A%3Ch2%3ESourcecode%3C/h2%3E%0A%3Cp%3EYou%20can%20find%20the%20source%20code%20on%20%3Ca%20href%3D%22https://github.com/jwagner/addresscloud%22%3Egithub%3C/a%3E%20if%20you%20want%20to%20get%20into%20some%20hacking.%0ANote%20that%20the%20%3Cstrong%3Edata%20belongs%20to%20local.ch%20and%20may%20not%20be%20used%3C/strong%3E.%3C/p%3E)
High-performance Particles on a Canvas 6 Oct 2011 11:20 AM (14 years ago)
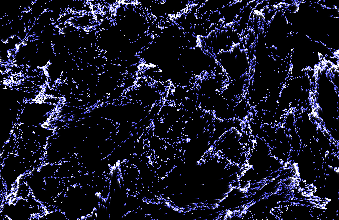
Some of you might remember my Chaotic Particles demo from last year. That demo was featuring 10'000 particles on a plain old 2d canvas. I decided to optimize that demo a bit in order to support 100'000 particles. I also fixed a little issue where numeric inaccuracy allowed particles to escape and made the influence map more fine grained.
Want to see the source? Just use view source and feel free to ask questions.
Next up: 4'000'000 Particles using WebGL.

Neonflames generative art demo 27 Sep 2011 11:46 AM (14 years ago)
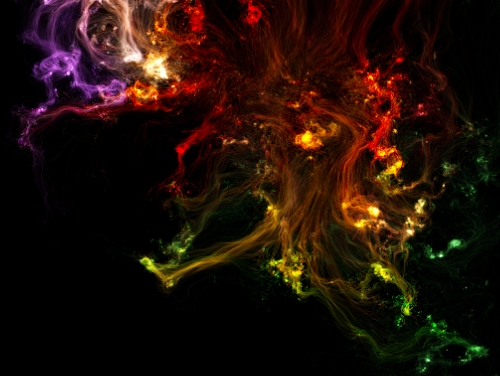
I think this is my favorite canvas demo I have created so far. It is an interactive drawing tool based on particle effects. It is the result of me trying to create some generative art using canvas. The techniques used are actually pretty similar to the ones shown in my frontendconf talk on particle systems. In short:
p.vx = p.vx*0.8 + getNoise(p.x, p.y, 0)*4+fuzzy(0.1);
p.vy = p.vy*0.8 + getNoise(p.x, p.y, 1)*4+fuzzy(0.1);

p.x += p.vx;
p.y += p.vy;

data[index] = tonemap(hdrdata[index] += r);
data[index+1] = tonemap(hdrdata[index+1] += g);
data[index+2] = tonemap(hdrdata[index+2] += b);
I'm planning to play with a few improvements especially in tone mapping and controls in the future but feel free to take a look at the source on github. I hope you enjoy it.
%3C/span%3E%3Cspan%3E*%3C/span%3E%3Cspan%3E4%3C/span%3E%3Cspan%3E+%3C/span%3E%3Cspan%3Efuzzy%3C/span%3E%3Cspan%3E(%3C/span%3E%3Cspan%3E0.1%3C/span%3E%3Cspan%3E);%3C/span%3E%0A%3Cspan%3Ep%3C/span%3E%3Cspan%3E.%3C/span%3E%3Cspan%3Evy%3C/span%3E%20%3Cspan%3E%3D%3C/span%3E%20%3Cspan%3Ep%3C/span%3E%3Cspan%3E.%3C/span%3E%3Cspan%3Evy%3C/span%3E%3Cspan%3E*%3C/span%3E%3Cspan%3E0.8%3C/span%3E%20%3Cspan%3E+%3C/span%3E%20%3Cspan%3EgetNoise%3C/span%3E%3Cspan%3E(%3C/span%3E%3Cspan%3Ep%3C/span%3E%3Cspan%3E.%3C/span%3E%3Cspan%3Ex%3C/span%3E%3Cspan%3E,%3C/span%3E%20%3Cspan%3Ep%3C/span%3E%3Cspan%3E.%3C/span%3E%3Cspan%3Ey%3C/span%3E%3Cspan%3E,%3C/span%3E%20%3Cspan%3E1%3C/span%3E%3Cspan%3E)%3C/span%3E%3Cspan%3E*%3C/span%3E%3Cspan%3E4%3C/span%3E%3Cspan%3E+%3C/span%3E%3Cspan%3Efuzzy%3C/span%3E%3Cspan%3E(%3C/span%3E%3Cspan%3E0.1%3C/span%3E%3Cspan%3E);%3C/span%3E%0A%0A%3Cspan%3Ep%3C/span%3E%3Cspan%3E.%3C/span%3E%3Cspan%3Ex%3C/span%3E%20%3Cspan%3E+%3D%3C/span%3E%20%3Cspan%3Ep%3C/span%3E%3Cspan%3E.%3C/span%3E%3Cspan%3Evx%3C/span%3E%3Cspan%3E;%3C/span%3E%0A%3Cspan%3Ep%3C/span%3E%3Cspan%3E.%3C/span%3E%3Cspan%3Ey%3C/span%3E%20%3Cspan%3E+%3D%3C/span%3E%20%3Cspan%3Ep%3C/span%3E%3Cspan%3E.%3C/span%3E%3Cspan%3Evy%3C/span%3E%3Cspan%3E;%3C/span%3E%0A%0A%3Cspan%3Edata%3C/span%3E%3Cspan%3E%5B%3C/span%3E%3Cspan%3Eindex%3C/span%3E%3Cspan%3E%5D%3C/span%3E%20%3Cspan%3E%3D%3C/span%3E%20%3Cspan%3Etonemap%3C/span%3E%3Cspan%3E(%3C/span%3E%3Cspan%3Ehdrdata%3C/span%3E%3Cspan%3E%5B%3C/span%3E%3Cspan%3Eindex%3C/span%3E%3Cspan%3E%5D%3C/span%3E%20%3Cspan%3E+%3D%3C/span%3E%20%3Cspan%3Er%3C/span%3E%3Cspan%3E);%3C/span%3E%0A%3Cspan%3Edata%3C/span%3E%3Cspan%3E%5B%3C/span%3E%3Cspan%3Eindex%3C/span%3E%3Cspan%3E+%3C/span%3E%3Cspan%3E1%3C/span%3E%3Cspan%3E%5D%3C/span%3E%20%3Cspan%3E%3D%3C/span%3E%20%3Cspan%3Etonemap%3C/span%3E%3Cspan%3E(%3C/span%3E%3Cspan%3Ehdrdata%3C/span%3E%3Cspan%3E%5B%3C/span%3E%3Cspan%3Eindex%3C/span%3E%3Cspan%3E+%3C/span%3E%3Cspan%3E1%3C/span%3E%3Cspan%3E%5D%3C/span%3E%20%3Cspan%3E+%3D%3C/span%3E%20%3Cspan%3Eg%3C/span%3E%3Cspan%3E);%3C/span%3E%0A%3Cspan%3Edata%3C/span%3E%3Cspan%3E%5B%3C/span%3E%3Cspan%3Eindex%3C/span%3E%3Cspan%3E+%3C/span%3E%3Cspan%3E2%3C/span%3E%3Cspan%3E%5D%3C/span%3E%20%3Cspan%3E%3D%3C/span%3E%20%3Cspan%3Etonemap%3C/span%3E%3Cspan%3E(%3C/span%3E%3Cspan%3Ehdrdata%3C/span%3E%3Cspan%3E%5B%3C/span%3E%3Cspan%3Eindex%3C/span%3E%3Cspan%3E+%3C/span%3E%3Cspan%3E2%3C/span%3E%3Cspan%3E%5D%3C/span%3E%20%3Cspan%3E+%3D%3C/span%3E%20%3Cspan%3Eb%3C/span%3E%3Cspan%3E);%3C/span%3E%0A%3C/pre%3E%3C/div%3E%0A%0A%0A%3Cp%3EI%26apos;m%20planning%20to%20play%20with%20a%20few%20improvements%20especially%20in%20tone%20mapping%20and%20controls%20in%20the%20future%20but%20feel%20free%20to%20take%20a%20look%20at%20the%20%3Ca%20href%3D%22https://github.com/jwagner/Neonflames%22%3Esource%20on%20github%3C/a%3E.%20I%20hope%20you%20enjoy%20it.%3C/p%3E)
Frontendconf 2011 talk on canvas and particles 12 Sep 2011 4:16 AM (14 years ago)
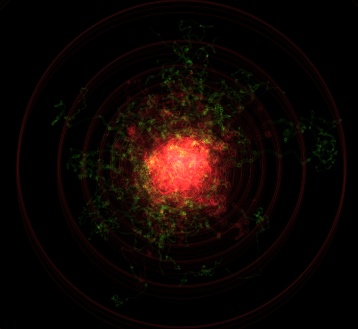
Video
Video from my talk at frontendconf on particles and html5 canvas, 100% live coding.
Demo
Sourcecode
Note
This is an experiment. It's hacky and you should not use it as an example of good style - it's not.

Uploading directly from HTML5 canvas to imgur 11 Sep 2011 6:28 AM (14 years ago)
For an upcoming canvas project I want to give the users the ability to upload the content of the canvas to an image sharing service. When looking for a suitable API I came across imgur.com the registration was trivial, and they support CORS and base64/dataurl uploads, perfect!
// trigger me onclick
function share(){
    try {
        var img = canvas.toDataURL('image/jpeg', 0.9).split(',')[1];
    } catch(e) {
        var img = canvas.toDataURL().split(',')[1];
    }
    // open the popup in the click handler so it will not be blocked
    var w = window.open();
    w.document.write('Uploading...');
    // upload to imgur using jquery/CORS
    // https://developer.mozilla.org/En/HTTP_access_control
    $.ajax({
        url: 'http://api.imgur.com/2/upload.json',
        type: 'POST',
        data: {
            type: 'base64',
            // get your key here, quick and fast http://imgur.com/register/api_anon
            key: 'YOUR-API-KEY',
            name: 'neon.jpg',
            title: 'test title',
            caption: 'test caption',
            image: img
        },
        dataType: 'json'
    }).success(function(data) {
        w.location.href = data['upload']['links']['imgur_page'];
    }).error(function() {
        alert('Could not reach api.imgur.com. Sorry :(');
        w.close();
    });
}
%7B%3C/span%3E%0A%20%20%20%20%3Cspan%3Etry%3C/span%3E%20%3Cspan%3E%7B%3C/span%3E%0A%20%20%20%20%20%20%20%20%3Cspan%3Evar%3C/span%3E%20%3Cspan%3Eimg%3C/span%3E%20%3Cspan%3E%3D%3C/span%3E%20%3Cspan%3Ecanvas%3C/span%3E%3Cspan%3E.%3C/span%3E%3Cspan%3EtoDataURL%3C/span%3E%3Cspan%3E(%3C/span%3E%3Cspan%3E%26apos;image/jpeg%26apos;%3C/span%3E%3Cspan%3E,%3C/span%3E%20%3Cspan%3E0.9%3C/span%3E%3Cspan%3E).%3C/span%3E%3Cspan%3Esplit%3C/span%3E%3Cspan%3E(%3C/span%3E%3Cspan%3E%26apos;,%26apos;%3C/span%3E%3Cspan%3E)%5B%3C/span%3E%3Cspan%3E1%3C/span%3E%3Cspan%3E%5D;%3C/span%3E%0A%20%20%20%20%3Cspan%3E%7D%3C/span%3E%20%3Cspan%3Ecatch%3C/span%3E%3Cspan%3E(%3C/span%3E%3Cspan%3Ee%3C/span%3E%3Cspan%3E)%3C/span%3E%20%3Cspan%3E%7B%3C/span%3E%0A%20%20%20%20%20%20%20%20%3Cspan%3Evar%3C/span%3E%20%3Cspan%3Eimg%3C/span%3E%20%3Cspan%3E%3D%3C/span%3E%20%3Cspan%3Ecanvas%3C/span%3E%3Cspan%3E.%3C/span%3E%3Cspan%3EtoDataURL%3C/span%3E%3Cspan%3E().%3C/span%3E%3Cspan%3Esplit%3C/span%3E%3Cspan%3E(%3C/span%3E%3Cspan%3E%26apos;,%26apos;%3C/span%3E%3Cspan%3E)%5B%3C/span%3E%3Cspan%3E1%3C/span%3E%3Cspan%3E%5D;%3C/span%3E%0A%20%20%20%20%3Cspan%3E%7D%3C/span%3E%0A%20%20%20%20%3Cspan%3E//%20open%20the%20popup%20in%20the%20click%20handler%20so%20it%20will%20not%20be%20blocked%3C/span%3E%0A%20%20%20%20%3Cspan%3Evar%3C/span%3E%20%3Cspan%3Ew%3C/span%3E%20%3Cspan%3E%3D%3C/span%3E%20%3Cspan%3Ewindow%3C/span%3E%3Cspan%3E.%3C/span%3E%3Cspan%3Eopen%3C/span%3E%3Cspan%3E();%3C/span%3E%0A%20%20%20%20%3Cspan%3Ew%3C/span%3E%3Cspan%3E.%3C/span%3E%3Cspan%3Edocument%3C/span%3E%3Cspan%3E.%3C/span%3E%3Cspan%3Ewrite%3C/span%3E%3Cspan%3E(%3C/span%3E%3Cspan%3E%26apos;Uploading...%26apos;%3C/span%3E%3Cspan%3E);%3C/span%3E%0A%20%20%20%20%3Cspan%3E//%20upload%20to%20imgur%20using%20jquery/CORS%3C/span%3E%0A%20%20%20%20%3Cspan%3E//%20https://developer.mozilla.org/En/HTTP_access_control%3C/span%3E%0A%20%20%20%20%3Cspan%3E$%3C/span%3E%3Cspan%3E.%3C/span%3E%3Cspan%3Eajax%3C/span%3E%3Cspan%3E(%7B%3C/span%3E%0A%20%20%20%20%20%20%20%20%3Cspan%3Eurl%3C/span%3E%3Cspan%3E:%3C/span%3E%20%3Cspan%3E%26apos;http://api.imgur.com/2/upload.json%26apos;%3C/span%3E%3Cspan%3E,%3C/span%3E%0A%20%20%20%20%20%20%20%20%3Cspan%3Etype%3C/span%3E%3Cspan%3E:%3C/span%3E%20%3Cspan%3E%26apos;POST%26apos;%3C/span%3E%3Cspan%3E,%3C/span%3E%0A%20%20%20%20%20%20%20%20%3Cspan%3Edata%3C/span%3E%3Cspan%3E:%3C/span%3E%20%3Cspan%3E%7B%3C/span%3E%0A%20%20%20%20%20%20%20%20%20%20%20%20%3Cspan%3Etype%3C/span%3E%3Cspan%3E:%3C/span%3E%20%3Cspan%3E%26apos;base64%26apos;%3C/span%3E%3Cspan%3E,%3C/span%3E%0A%20%20%20%20%20%20%20%20%20%20%20%20%3Cspan%3E//%20get%20your%20key%20here,%20quick%20and%20fast%20http://imgur.com/register/api_anon%3C/span%3E%0A%20%20%20%20%20%20%20%20%20%20%20%20%3Cspan%3Ekey%3C/span%3E%3Cspan%3E:%3C/span%3E%20%3Cspan%3E%26apos;YOUR-API-KEY%26apos;%3C/span%3E%3Cspan%3E,%3C/span%3E%0A%20%20%20%20%20%20%20%20%20%20%20%20%3Cspan%3Ename%3C/span%3E%3Cspan%3E:%3C/span%3E%20%3Cspan%3E%26apos;neon.jpg%26apos;%3C/span%3E%3Cspan%3E,%3C/span%3E%0A%20%20%20%20%20%20%20%20%20%20%20%20%3Cspan%3Etitle%3C/span%3E%3Cspan%3E:%3C/span%3E%20%3Cspan%3E%26apos;test%20title%26apos;%3C/span%3E%3Cspan%3E,%3C/span%3E%0A%20%20%20%20%20%20%20%20%20%20%20%20%3Cspan%3Ecaption%3C/span%3E%3Cspan%3E:%3C/span%3E%20%3Cspan%3E%26apos;test%20caption%26apos;%3C/span%3E%3Cspan%3E,%3C/span%3E%0A%20%20%20%20%20%20%20%20%20%20%20%20%3Cspan%3Eimage%3C/span%3E%3Cspan%3E:%3C/span%3E%20%3Cspan%3Eimg%3C/span%3E%0A%20%20%20%20%20%20%20%20%3Cspan%3E%7D%3C/span%3E%3Cspan%3E,%3C/span%3E%0A%20%20%20%20%20%20%20%20%3Cspan%3EdataType%3C/span%3E%3Cspan%3E:%3C/span%3E%20%3Cspan%3E%26apos;json%26apos;%3C/span%3E%0A%20%20%20%20%3Cspan%3E%7D).%3C/span%3E%3Cspan%3Esuccess%3C/span%3E%3Cspan%3E(%3C/span%3E%3Cspan%3Efunction%3C/span%3E%3Cspan%3E(%3C/span%3E%3Cspan%3Edata%3C/span%3E%3Cspan%3E)%3C/span%3E%20%3Cspan%3E%7B%3C/span%3E%0A%20%20%20%20%20%20%20%20%3Cspan%3Ew%3C/span%3E%3Cspan%3E.%3C/span%3E%3Cspan%3Elocation%3C/span%3E%3Cspan%3E.%3C/span%3E%3Cspan%3Ehref%3C/span%3E%20%3Cspan%3E%3D%3C/span%3E%20%3Cspan%3Edata%3C/span%3E%3Cspan%3E%5B%3C/span%3E%3Cspan%3E%26apos;upload%26apos;%3C/span%3E%3Cspan%3E%5D%5B%3C/span%3E%3Cspan%3E%26apos;links%26apos;%3C/span%3E%3Cspan%3E%5D%5B%3C/span%3E%3Cspan%3E%26apos;imgur_page%26apos;%3C/span%3E%3Cspan%3E%5D;%3C/span%3E%0A%20%20%20%20%3Cspan%3E%7D).%3C/span%3E%3Cspan%3Eerror%3C/span%3E%3Cspan%3E(%3C/span%3E%3Cspan%3Efunction%3C/span%3E%3Cspan%3E()%3C/span%3E%20%3Cspan%3E%7B%3C/span%3E%0A%20%20%20%20%20%20%20%20%3Cspan%3Ealert%3C/span%3E%3Cspan%3E(%3C/span%3E%3Cspan%3E%26apos;Could%20not%20reach%20api.imgur.com.%20Sorry%20:(%26apos;%3C/span%3E%3Cspan%3E);%3C/span%3E%0A%20%20%20%20%20%20%20%20%3Cspan%3Ew%3C/span%3E%3Cspan%3E.%3C/span%3E%3Cspan%3Eclose%3C/span%3E%3Cspan%3E();%3C/span%3E%0A%20%20%20%20%3Cspan%3E%7D);%3C/span%3E%0A%3Cspan%3E%7D%3C/span%3E%0A%3C/pre%3E%3C/div%3E)
WebGL Error Statistics for my Demo 23 Jun 2011 1:52 AM (14 years ago)
A few days ago I released my first WebGL demo which was using some slightly advanced WebGL features. I was well aware of the fact that this would mean that my demo won't run on a lot of setups. The two features in question are texture access from vertex shaders and floating point textures. Texture access from vertex shaders is used for displacement mapping. I used floating point textures for high definition range rendering and to fake support for attaching textures to the depth attachment by storing the z value in the alpha channel of the color attachment. Because I was curious about what the reasons for errors would be in the real world I added google analytics events to my demo and this are the results.
The Platforms
Mac OS X and Chrome win. Except, this is the only combination where I had complete system freezes while developing. ;) Internet Explorer is not even on the list because it didn't even get to the WebGL initialization code for some reason, but it's only accounting for about ~1% of the unique page views anyway.
The Errors
This is pretty much the numbers that I expected. no-OES_texture_float is so low because MAX_VERTEX_TEXTURE_UNITS is checked before. no-vertext-texture-units very strongly correlates to the ANGLE layer used to emulate OpenGL ES on top of direct x which does not support accessing textures from vertex shaders which is needed to do displacement mapping. no-OES_texture_float is mostly firefox 4 on platforms other than windows.
Other statistics
Florian Boesch has written a similar more in depth round up about his WebGL demo which I recommend you to read. I think the really interesting thing will be the development of those numbers over time. I expect that at least no-OES_texture_float will die with the release of firefox 6.