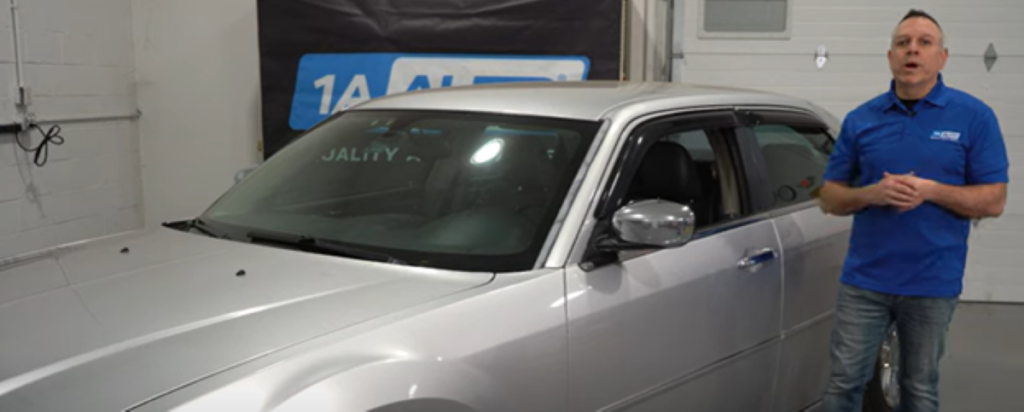
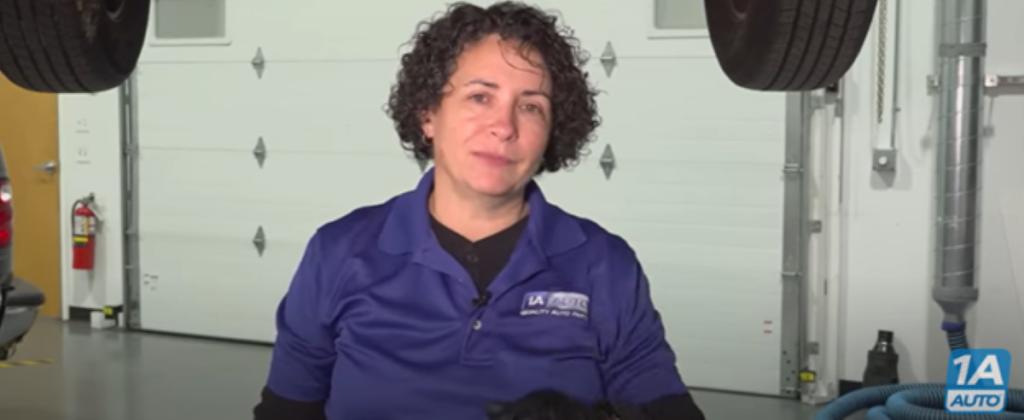
Top 5 2005 to 2010 Chrysler 300C Problems: 8th Generation 3 Mar 2023 7:27 AM (2 years ago)
A 2005 to 2010 Chrysler 300C with problems like the power windows not working is common for this 8th generation of models. Here’s the top 5 most common issues may run into and their fixes.
Top 5 Most Common Problems with the 8th Generation Chrysler 300C, Years 2005 to 2010
1. Power Windows Not Working
Symptoms of Power Windows Not Working
- Power window switch doesn’t move the window
Causes of Power Windows Not Working
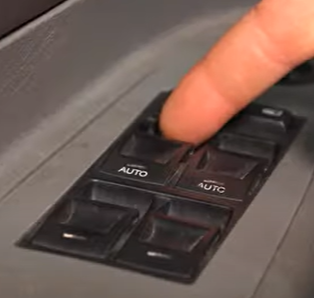
The window might not move in the 8th gen Chrysler 300C but the window motor in the door could make a noise. Problems with the window switch could be from a bad window motor, bad or broken window regulator, or defective or damaged wiring.
How to Fix Problems with the Power Windows in the 2005 to 2010 Chrysler 300C
Inspect the wiring behind the boot for damage. See if any have been pinched or spliced open. The window motor may be defective, or there may be an issue with the window regulator. You can remove the door panel to access and test what’s causing the problem. With the door panel removed, inspect the window regulator for damage, like for a broken cable.
Read:
- Why Are My Power Windows Working Intermittently?
- Car Window Won’t Go Up? How to Tell If It’s the Window Motor or Switch
- Power Windows Not Working at the Front? How to Diagnose & Fix
2. Squeak from Steering Wheel
Symptoms of a Steering Wheel Squeak
- Steering wheel squeaks when turned left or right
Causes of a Squeaky Steering Wheel
The seal at the base of the steering shaft is known to cause a squeaking noise from the steering wheel when in use.
How to Fix a Squeaky Steering Wheel
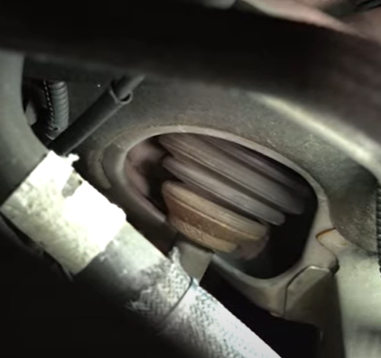
You can find the seal at the steering shaft’s base from the engine compartment. Lubricating the seal and turning the steering wheel back and forth until the noise stops can fix this problem.
3. Issues with the Transmission Shifting
Symptoms of Problems with the Transmission in the 2008 to 2015 Chrysler 300C
- Hard shifting
- Transmission shuttering
Causes of Problems with the Transmission
You might run into problems with the transmission hard shifting or shuttering while driving. This is likely from a problem with the control module.
How to Fix Transmission Shifting Problems
Contact your dealership with your car’s VIN number. They might need to update the car’s control module. If the car doesn’t need updating but still has this problem, the transmission will need further diagnosing.
What Causes Transmission Shudder? How to Diagnose Problems with the Transmission
4. Engine Misfires
Symptoms of Engine Misfires
- Check engine light
- Engine misfiring
Causes of a Misfiring Engine
Carbon is known to build up on the back side of the valves and cause misfires.
How to Fix an Engine Misfire
If the engine is shaking and the check engine light is on, connect the scanner to the OBD-II port to scan for codes. Usually these symptoms will trigger a P0300 misfire code.
Since this problem is usually caused by carbon build-up, have the engine cleaned professionally.
The dealership is also known to offer updated valve spring retainers to prevent this issue
5. Oil Pressure Sending Unit
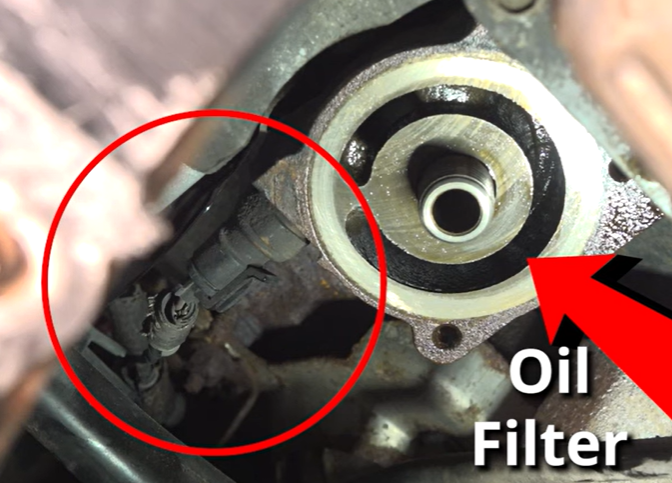
Symptoms of a Damaged Oil Pressure Sending Unit
- Check engine light for P0520
How to Fix the Oil Pressure Sending Unit
Replace the oil pressure sending unit underneath the engine beside the oil filter. Disconnect the connector, replace the part, and clear the code.
If the code returns, diagnose the problem further with a wiring diagram.
8th Generation Chrysler 300C Model Years
- 2005 Chrysler 300C
- 2006 Chrysler 300C
- 2007 Chrysler 300C
- 2008 Chrysler 300C
- 2009 Chrysler 300C
- 2010 Chrysler 300C
Read more:
Shop Quality Auto Parts – Free Shipping

The post Top 5 2005 to 2010 Chrysler 300C Problems: 8th Generation appeared first on 1A Auto.


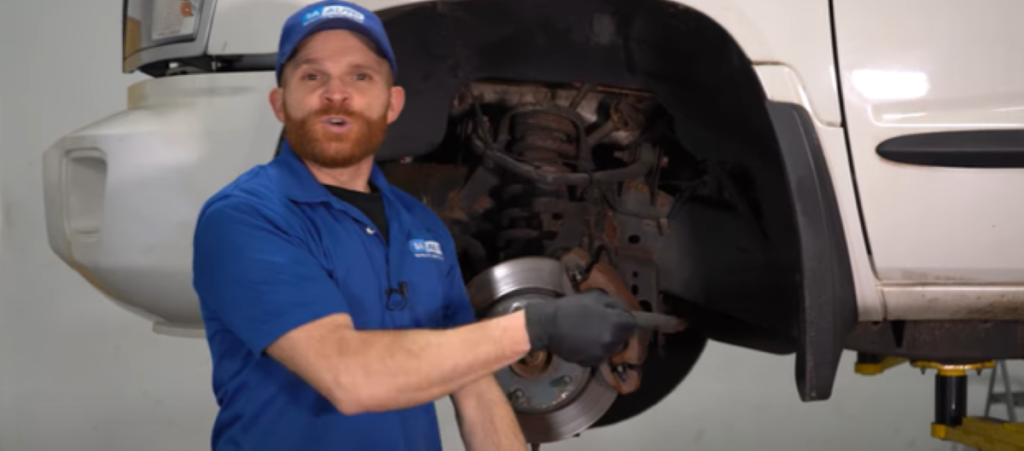
Top 5 2005 to 2010 Dodge Dakota Problems (3rd Generation) 2 Mar 2023 5:57 AM (2 years ago)
A 2005 to 2010 Dodge Dakota with problems like squeaking from the front end is common. Here’s the top 5 problems owners may find with the 3rd generation Dakota.
Common 3rd Gen Dodge Dakota Problems: Years 2005 to 2010
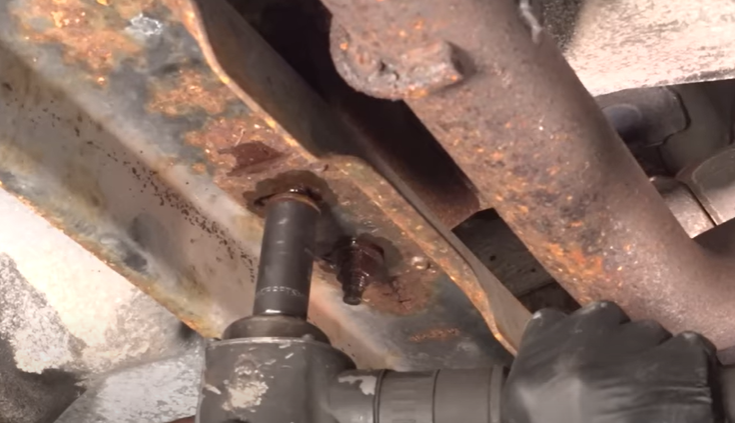
1. Worn Upper Ball Joints
Symptoms of a Bad Upper Ball Joint
- Tires wearing out, like feathering or chopping
- Clunking when driving over bumps
Causes of Worn Upper Ball Joints
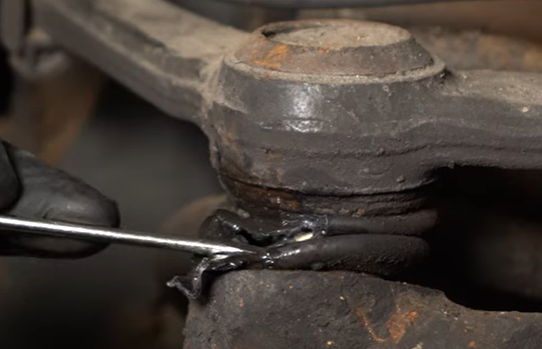
The upper ball joints on the 2005 to 2010 Dodge Dakota are known to wear. This can cause an issue with the truck’s alignment, which can feather or chop the tires.
How to Fix Defective Upper Ball Joints
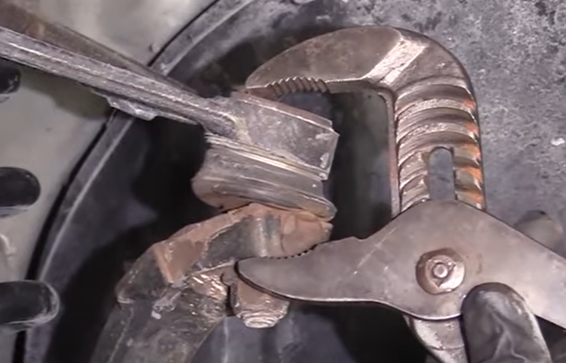
You can raise and secure the truck with a jack and jack stands and grab the tire from the 12 and 6 o’clock position. Wiggle the tire in and out and feel for excessive movement, which is a sign of wear.
You can also loosen the lug nuts from the tire with a breaker bar as the wheel’s on the ground, raise and secure the truck with a jack and jack stands, and remove the lugs nuts and tire. Pinch the upper ball joint with pliers and check for looseness or a lot of movement. Also check the ball joint for damage like tears.
The control arm and ball joint come as an assembly on the 3rd gen Dakota, so if the ball joint is damaged, both parts will need to be replaced together.
More on diagnosing parts making a noise when driving over bumps
2. Clunking Noise from the Front
Symptoms of a Bad Steering Shaft
- Clunking noise heard in the cabin while driving
- Steering wheel turns without turning the wheels
Causes of Problems with the Steering Shaft in the 2005 to 2010 Dodge Dakota
The 3rd gen Dakota’s steering shaft has two u-joints. It also has an area that needs to compress and decompress, and it has a vibration dampener its center. A creaking or clunking noise could arise if there’s a problem with any of these components.
How to Fix a Bad Steering Shaft
The steering shaft is located under the hood, on the left side of the engine and under the brake master cylinder. The shaft can be accessed from either end. If there is an issue with any of the steering shaft’s components that are causing this problem, the entire steering shaft assembly will need replacing. The truck will also need an alignment after this repair.
Read: Popping Noise When Turning the Steering Wheel in Your GM Vehicle?
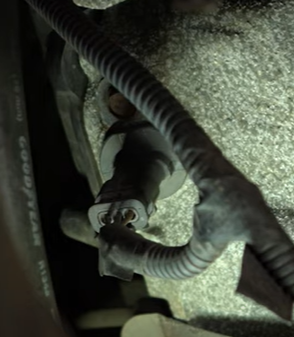
3. Camshaft Position Sensor Failure
Symptoms of a Bad Camshaft Position Sensor
- Engine stalls out after trying to start it
- Engine cranks but won’t start
How to Fix a Bad Camshaft Position Sensor
The camshaft position sensor is located on the engine head on the passenger side of the engine. It’s placed underneath the valve cover. The sensor can be reached from above, underneath the engine, and it can also be accessed by removing the tire and wheel well.
Make sure the sensor is connected to the electrical connector. Check the wiring for damage, and replace the sensor if needed.
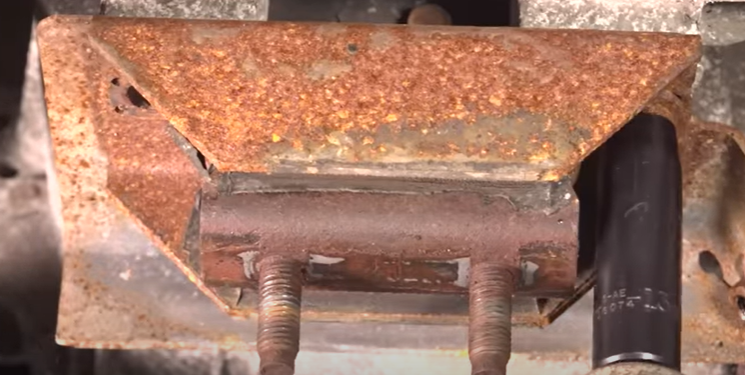
4. Problems with the Exhaust Manifold
Symptoms of Problems with the Exhaust Manifold on the 2005 to 2010 Dodge Dakota
- Ticking noise from a cold engine at start-up
Causes of a Ticking Noise
A ticking noise is usually from a broken piece of the exhaust manifold’s hardware.
More on how a bad exhaust manifold can cause a ticking sound
How to Fix a Bad Exhaust Manifold
The exhaust manifolds are located on each side of the engine. They can be reached from above or below the engine, and also through the wheel well.
If the exhaust manifold is leaking, it should be fixed promptly. A damaged exhaust manifold and leak exhaust fumes into the passenger compartment. When replacing the exhaust manifolds, we recommend replacing the gasket at the same time.
5. Transfer Case Shift Motor
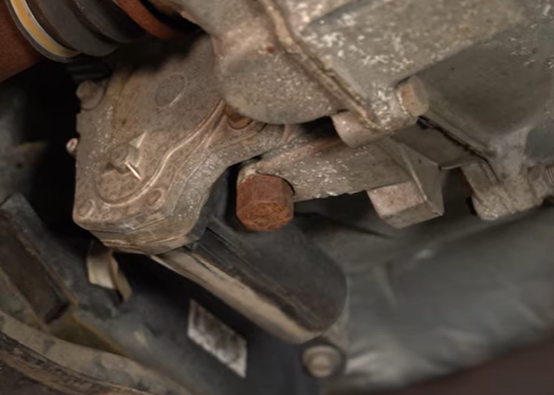
Symptoms of Problems with the Transfer Case Shift Motor in the 3rd Gen Dodge Dakota
- Truck won’t shift from 2WD to 4WD
- Truck shifts to 2WD or 4WD unprompted
Causes of Issues with the Transfer Case Shift Motor
If the transfer case shift motor has an issue, it can be catastrophic] to the transfer case. If there is an issue, the motor could shift the truck from 2WD to 4WD, or turn on while driving.
How to Fix the Transfer Case Shift Motor
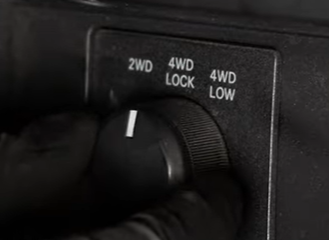
Test the switch inside the passenger compartment. Trace the wiring and check for damage, like, for example, if a rodent chewed the wiring. If the switches and wiring are working, the transfer case shift motor on the transfer case shift motor will need replacing before it damages the transfer case.
3rd Generation Dodge Dakota Model Years
- 2005 Dodge Dakota
- 2006 Dodge Dakota
- 2007 Dodge Dakota
- 2008 Dodge Dakota
- 2009 Dodge Dakota
- 2010 Dodge Dakota
Read more:
Save Money – Quality Auto Parts – DIY How-to Videos
The post Top 5 2005 to 2010 Dodge Dakota Problems (3rd Generation) appeared first on 1A Auto.
The Top 5 Problems with the Mazda CX-9: 1st Generation (2007 to 2015) 24 Feb 2023 7:28 AM (2 years ago)
While there’s nothing generally wrong with the 1st gen Mazda CX-9, all models have their own common issues. Here’s the most common problems with the Mazda CX-9, years 2007 to 2015.
Common 1st Generation Mazda CX-9 Problems: Model Years 2007 to 2015
1. Front End Squeaking
Symptoms of Bad Strut Bushings
- Squeaking from the front of the 1st gen Mazda CX-9 that can be heard from underneath the dash and/or the bumper.
- Squeaking from the front when driving over bumps
Causes of Bad Strut Bushings
Bad strut bushings are a common cause of a squeaking noise from the front on the 1st gen CX-9.
How to Fix Worn Strut Bushings
To fix a strut bushing causing a squeaking noise from the front of the 2007 to 2015 Mazda CX-9, you’ll want to check the condition of the bushing on the passenger and driver side.
More on how to inspect strut bushings
1A Auto How-to Video: How to Replace a Strut on Any Vehicle
2. Worn Wheel Bearings
Symptoms of Bad Wheel Bearings
- Squeaking noise from the wheels while driving
Causes of a Squeaking Noise from the Wheels of the 2007 to 2015 Mazda CX-9
Worn wheel bearings are a typical cause of a squeaking noise from the wheel while driving, like when turning or just driving down the road.
How to Fix Issues with Squeaky Wheels on the 1st Gen Mazda CX-9
If the wheel bearing is worn and making a squeaking noise, it will need replacing.
Tips to check your own wheel bearings
1A Auto How-to Video: How to Replace a Front Wheel Hub Bearing on a 2007 to 2014 Chevrolet Silverado
3. Water-Damaged Computer
Symptoms of a Water-Damaged BCM in the 2007 to 2015 Mazda CX-9
- Different electrical problems like the turn signals not working
Causes of a Water-Damaged Computer
The sunroof drain can clog and water-damage the body control module (BCM).
How to Fix a Water-Damaged BCM
The BCM is located on the driver side behind the kick panel and near the driver’s left foot. To prevent this issue, inspect the sunroof and sunroof drain periodically.
More on how to inspect a sunroof and sunroof drain tube
4. Transmission Problems
Symptoms of Problems with the 1st Gen Mazda CX-9 Transmission
- Transmission slipping
- Hard shifting
Causes of Issues with the Transmission
This problem is more likely to happen while driving. The transmission may cause a slip or jerk sensation while shifting when the CX-9 is warmed up, and this may happen without a check engine light turning on.
How to Fix a Transmission Slipping
Problems with the transmission shifting will be from the CX-9’s computer. The dealership can fix this problem.
Read more: What Causes Transmission Shudder? How to Diagnose Problems with the Transmission
5. Ignition Coil Failure
Symptoms of Bad Ignition Coils
- Check engine light for a P0300 misfire code
- Rough running engine
Causes of Bad Ignition Coils
The ignition coils are a common cause of misfires in the 2007 to 2015 Mazda CX-9.
How to Fix Defective Ignition Coils
To replace the ignition coils on the 1st gen Mazda CX-9, steps include disconnecting the wiring harness, loosening and removing the bolts, and lifting the ignition coil up and out. We recommend replacing the spark plugs and coils together.
More on diagnosing engine misfires
1st Generation Mazda CX-9 Model Years
- 2007 Mazda CX-9
- 2008 Mazda CX-9
- 2009 Mazda CX-9
- 2010 Mazda CX-9
- 2011 Mazda CX-9
- 2012 Mazda CX-9
- 2013 Mazda CX-9
- 2014 Mazda CX-9
- 2015 Mazda CX-9
Shop Quality Auto Parts
The post The Top 5 Problems with the Mazda CX-9: 1st Generation (2007 to 2015) appeared first on 1A Auto.
DIY Catalytic Converter Repair Tips: Easy Way to Install a Stolen or Broken Catalytic Converter 3 Feb 2023 9:53 AM (2 years ago)
If you have a catalytic converter that was stolen or is broken, this catalytic converter kit featured in the video below is an easy replacement part that fits directly and won’t require welding. This means you can do a DIY catalytic converter repair, save money, and possibly have a better install than with a professional.
DIY Catalytic Converter Kit & Repair for Damaged or Stolen Catalytic Converters
What Happens When a Catalytic Converter Is Stolen?
Usually, the catalytic converter is stolen with a reciprocating saw. This can damage parts like the oxygen (O2) sensor and leave you with a damaged exhaust pipe that could be welded. We recommend replacing all of the O2 sensors at the same time as the stolen or broken catalytic converter.
Typical Steps for a DIY Catalytic Converter Repair
With a catalytic converter kit like the one shown in the video above at 3:05, the hangers included make it easy to replace a stolen or damaged catalytic converters yourself without having to weld or clamp the new converter to any old, cut, or damaged exhaust pipes.
General steps to install a catalytic converter kit
- Remove Any Protective Shields
Remove any protective shields beneath the pipes or transfer case. Usually there will be a shield held in by a few fasteners.
- Remove the Crossmember If Needed
You may need to remove the crossmember beneath the transfer case and then support (not lift) the transfer case with a lift jack or a floor jack with a solid piece of 4×4 or 6×6 wood.
- Dismount and Lower the Exhaust Pipe
Dismount the exhaust by dismounting or removing any parts like hangers, mounts, and bolts to lower and remove the exhaust pipe.
- Install and Mount the New Exhaust Pipe Before Tightening
Before tightening any bolts or mounts to the new exhaust pipe, first install and mount it into place. Make sure the exhaust pipe is away from contacting any parts like crossmembers or heat shields before tightening all the components, like the bolts or clamps.
Tighten all of the fasteners slowly by hand, front to rear, and confirm the exhaust pipe is pulled up in place and not contacting other parts. This will prevent any rattling or vibration from the exhaust while driving.
- Install New Oxygen (O2) Sensors
Once the new catalytic converter kit has been installed, install brand new O2 sensors. Install the sensors after the exhaust kit has been installed to prevent damage.
- Adjust the Exhaust If Needed
Once all of the parts are installed, re-check the exhaust to confirm it’s not contacting other components like the heat shield. Adjust the exhaust if needed.
For example, as mentioned by our expert mechanic Sue, the metal hanger brackets can bend, which is not a big issue but may need to be adjusted with a pry bar.
More Car Repair & Automotive Tips for All DIYers & Mechanics
- Signs of a Stolen Catalytic Converter, What to Do When Replacing One, and More
- What Causes a Catalytic Converter to Go Bad?
- Your Car Smells Like Rotten Eggs – Code P0430
- P0420 and P0430 codes: Diagnose and fix like a mechanic [how-to guide + videos]
- Top 5 Ford Escape Issues: 2nd Generation (2008 to 2012)
Shop Quality Auto Parts – Free Shipping – Direct Fit
The post DIY Catalytic Converter Repair Tips: Easy Way to Install a Stolen or Broken Catalytic Converter appeared first on 1A Auto.
Oil Filter Housing Leak? How to Fix It Yourself 3 Feb 2023 8:07 AM (2 years ago)
An oil leak at the top of the engine, along the sides, or making a puddle under your car are signs that the oil filter housing could be leaking. To see if your car or truck’s oil filter housing has a leak, check out these tips and instructions to fix it yourself and learn more about diagnosing oil leaks with this article and video.
How to Fix an Oil Filter Housing That Has a Leak
If your oil filter housing is leaking oil, here’s how to fix it.
Steps to inspect an oil filter housing leaking oil
- Check the Oil Level
A low oil level is one sign of an oil leak.
General Steps to Check the Engine Oil
– You can check the oil level of many vehicles that are equipped with an oil dipstick. With the engine cold and the vehicle parked on a level surface for a more accurate reading, remove the oil dipstick and wipe it clean with a cloth rag.
– Reinsert the dipstick into the oil dipstick tube. Remove the oil level dipstick. The oil level should measure somewhere between the two markings on the dipstick. If the measurement is below the two markings, you can add a quart of oil recommended by the vehicle manufacturer. You can tell if you need more than one quart by adding oil and taking another measurement. If the measurement falls below the two markings after adding a quart, you’ll know the engine needs one more quart or more depending on future measurements.
You’ll need to have the proper oil level to diagnose this problem and not end up with more, like a rod knock.
How-to Video: How to Check the Oil of a 2008 to 2019 Ford F-150
How-to Video: How to Change Engine Oil on Any Vehicle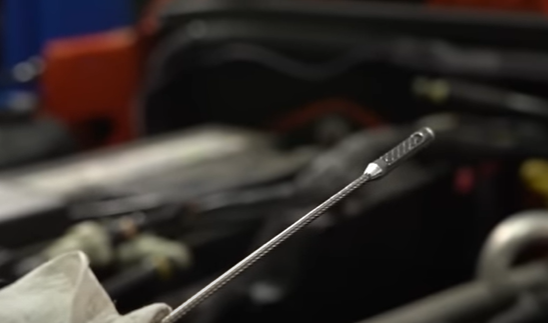
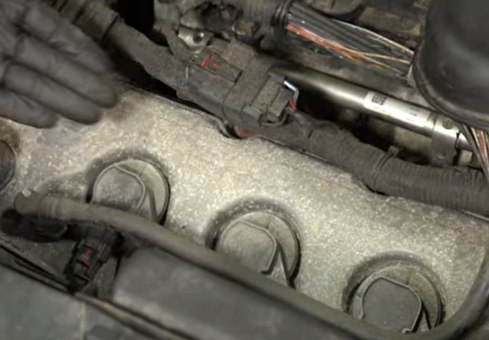
Read: How Often Should You Change Your Oil? - Check for Oil Leaks on the Top and Sides of the Engine & the Bell Housing
Check for any signs of an oil leak on top of the engine, which can be a symptom of a problem like blow-by. Look for an indication of a large oil leak with a flashlight.
The oil filter housing featured in this article’s featured video above at 2:20 is on a block mounted to the top of the engine block. The housing has small O-ring gaskets that can leak oil.
Check along the engine block for leaks. Oil leaking from the housing can stain down the engine.
Check the back of the bell housing. You may think an oil leak from this area is from a bad valve gasket, but it could be the oil filter housing leaking. If you find a lot of oil covering the area, that’s a sign of a major leak and needs to be fixed as soon as possible. If this is the case, you can wash the oil off and with the proper amount of oil in the engine, try to run the car, and see if you can find the oil leak.
More on how to clean an engine bay
Check all of the angles of the engine to see if oil is leaking from a part like a gasket. In our example the top of the bell housing was covered in oil and dripping. A rear main seal could cause this large of a leak, but it wouldn’t leak engine oil on top of the bell housing. You could find an oil leak on the outside of the bell housing at the bottom, but this is because it has drains so oil can escape in the case of internal leaks. With this kind of leak, it could be the valve cover or the oil filter housing.
More on how to fix a valve cover leak
Removing the parts like upper intake plenum and some fuel lines will allow you to see the oil filter housing mounted to the top of the block. After removing and disconnecting all of the parts, oil sitting on top of the engine block is a sign oil is leaking from the oil filter housing O-ring gaskets. The gaskets can crush and flatten over time, leading to oil leaks.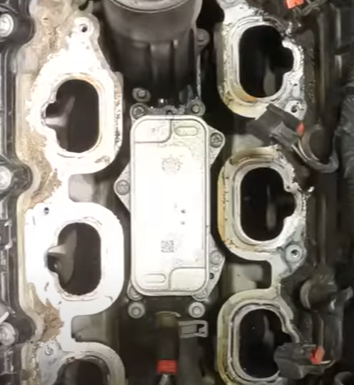
- Look Underneath the Vehicle for Oil Leak Puddles
Check underneath the vehicle for puddles of oil collected on the ground. If the oil filter housing has an oil leak, oil will drip down to the ground and form over time while the vehicle is parked.
- Check for OBD-II Codes with a Scan Tool If the Check Engine Light Is On
If the check engine light is on, search for OBD-II codes with a scan tool to see if any are related to the oil filter housing. The code that appeared in this example was P06DD, which is a code related to Chrysler for low oil pressure. An oil leak from the engine oil filter housing could trigger this code.
Read more:
What Is OBD II and How Does It Work?
How to Use an OBD2 Scan Tool (Car Tester)
Why Is My Service Engine Soon Light On?
How Much Does It Cost to Replace an Oil Filter Housing?

Replacing an oil filter housing can cost up to $2,000 at a professional mechanic repair shop.
Replacing an oil filter housing yourself as a DIY repair will likely cost around $400.
How Long Will It Take to Replace an Oil Filter Housing Myself?
Replacing an oil filter housing yourself as a DIY repair can last from around 3 to 4 hours.
We recommend replacing the upper and lower intake plenum gaskets at the same time.
Read more:
- Oil Leak in Your Car? How to Find and Fix a Car Leaking Oil When Parked
- Why Is My Car Leaking Oil?
- Where to Add Oil in a Car, How to Add Oil, and How to Check the Oil Level
- What Fluid is Leaking From My Car?
Shop Quality Auto Parts – Oil Filter Housing Kits & More – Free Shipping
The post Oil Filter Housing Leak? How to Fix It Yourself appeared first on 1A Auto.