Page 124: September 2017 11 Sep 2017 3:54 AM (8 years ago)
Finally a nice Scrapbook update again! Lots of thanks to all contributors and I hope you will be inspired!
I also have some news: I have set up a Patreon page here: https://www.patreon.com/carendt_com
If you are willing to become a Patron of Carendt.com, I will be able to create more new/original content to enjoy.
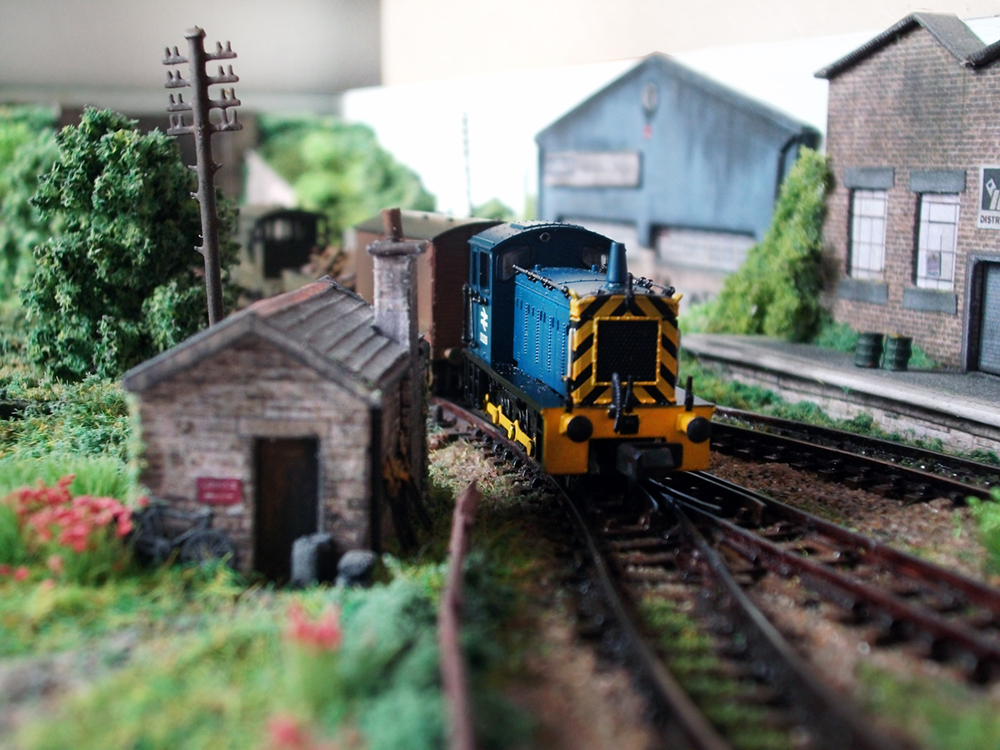
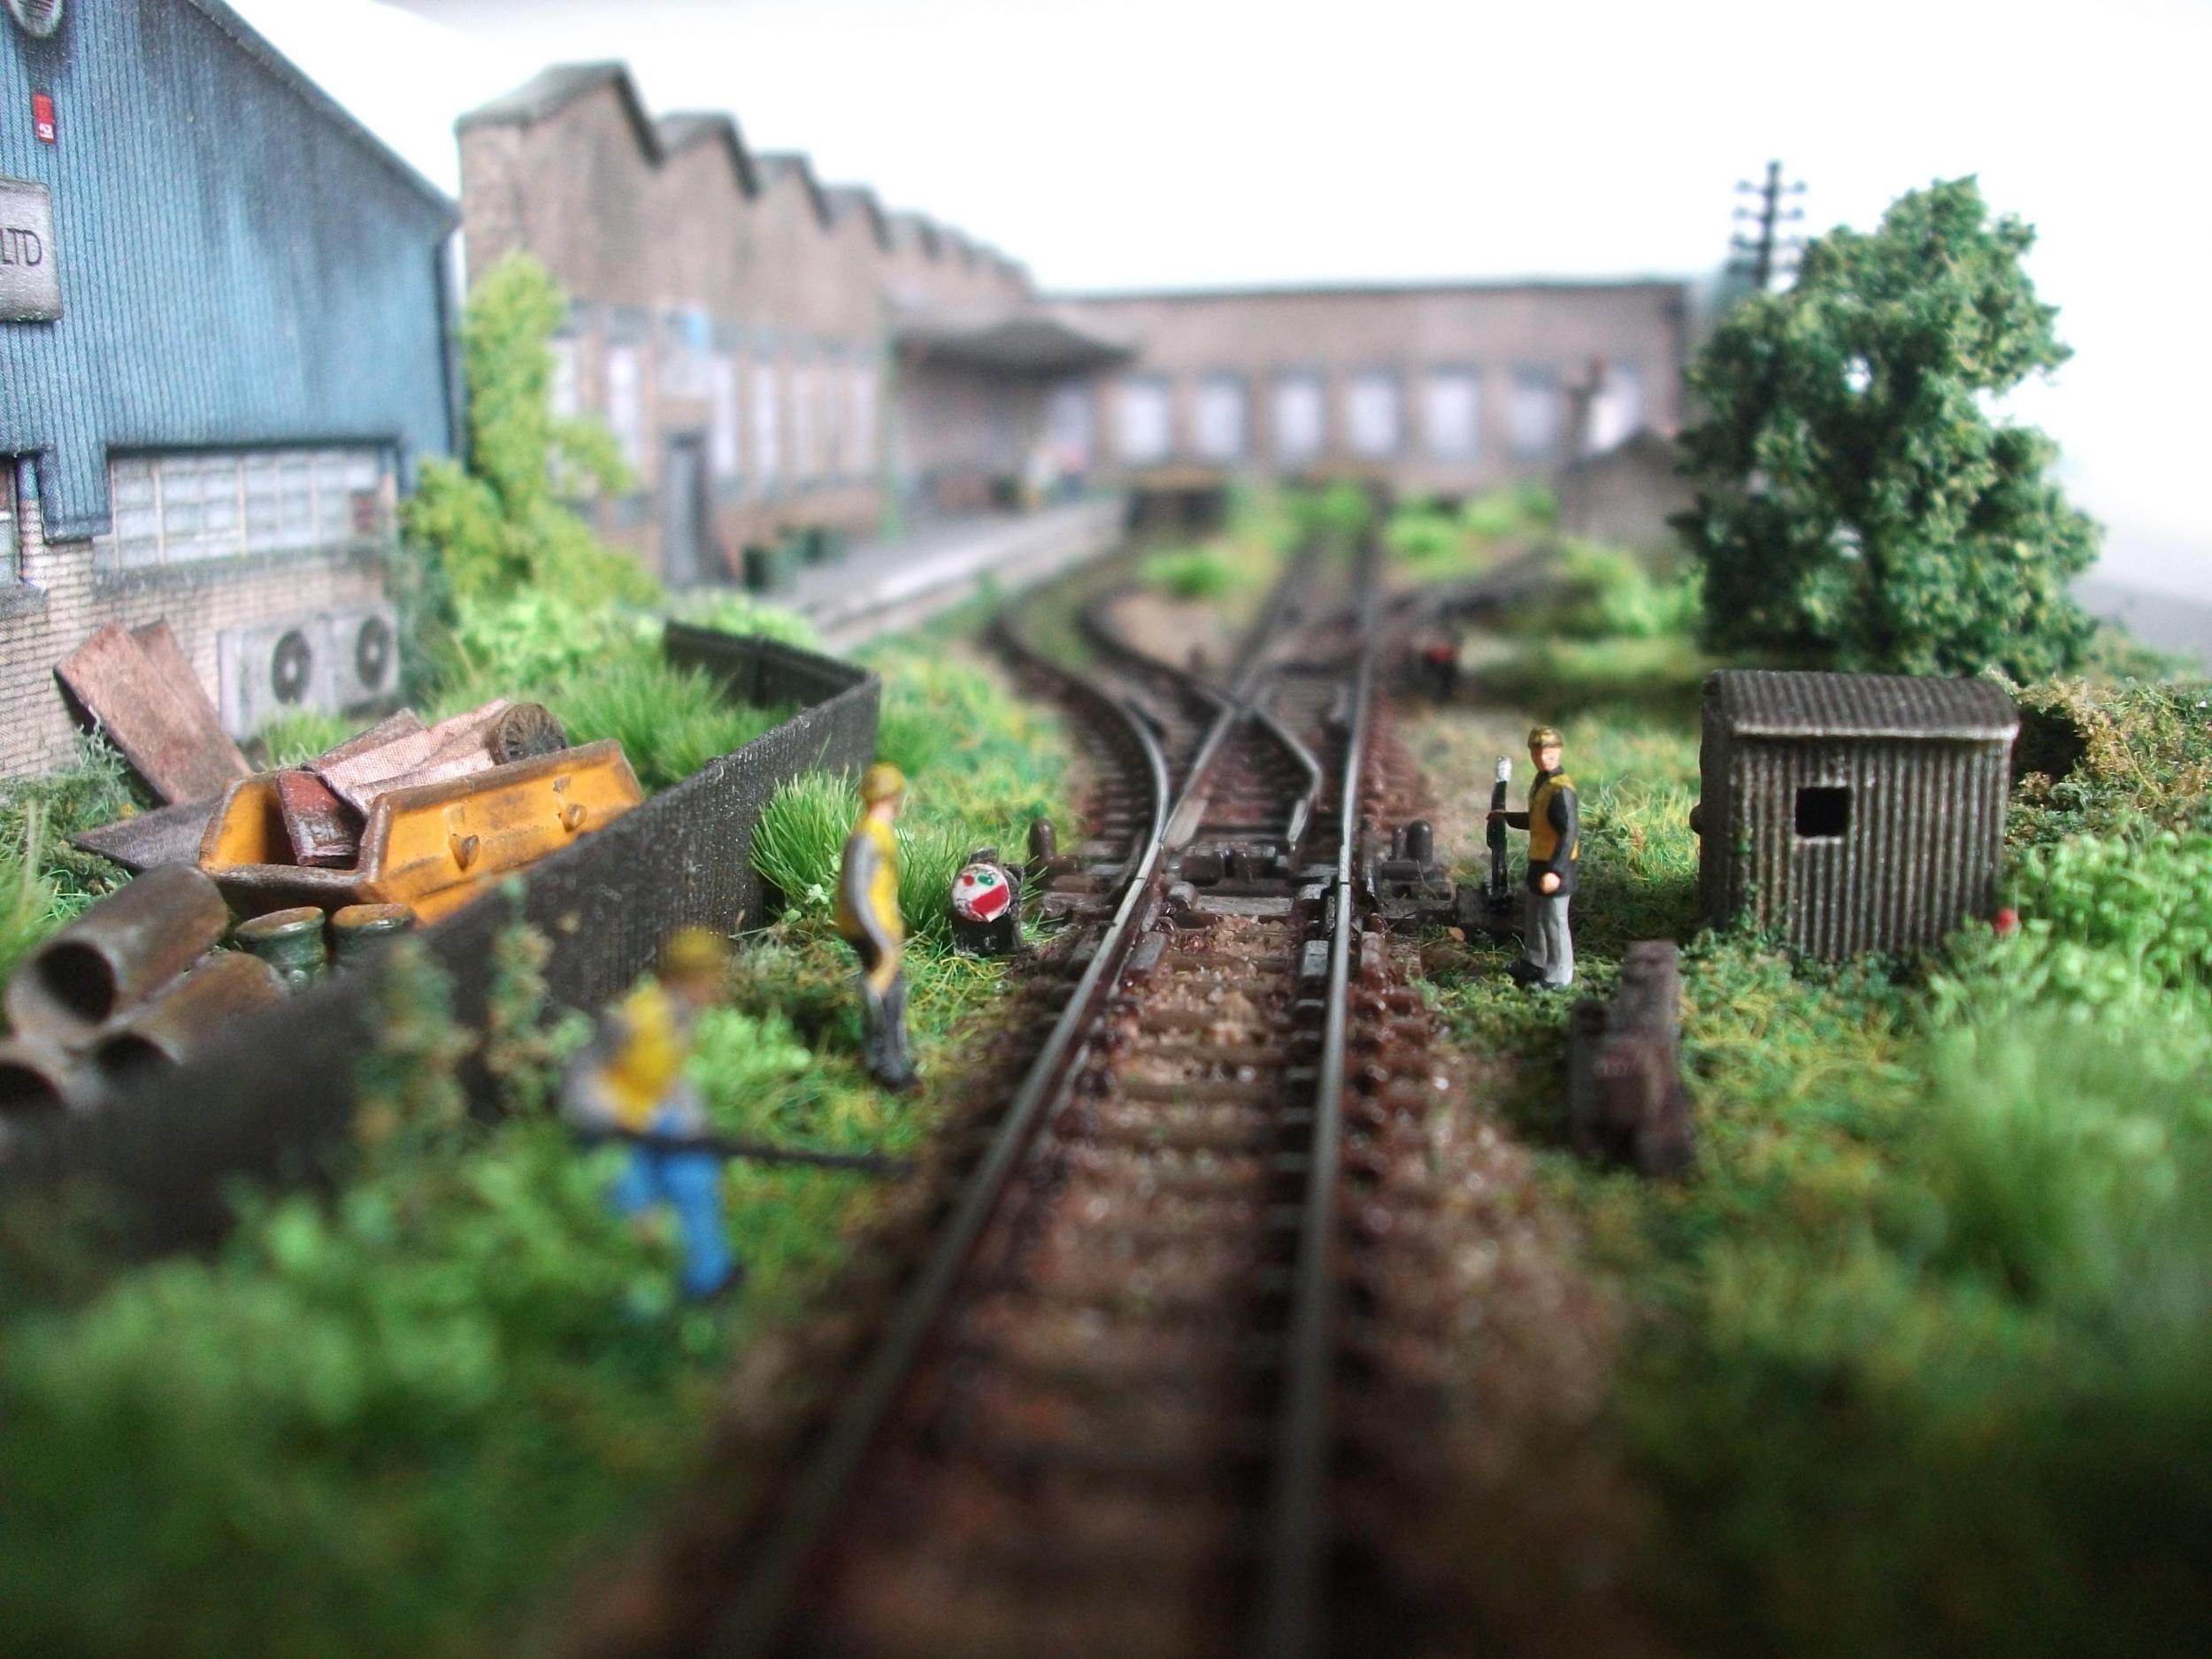
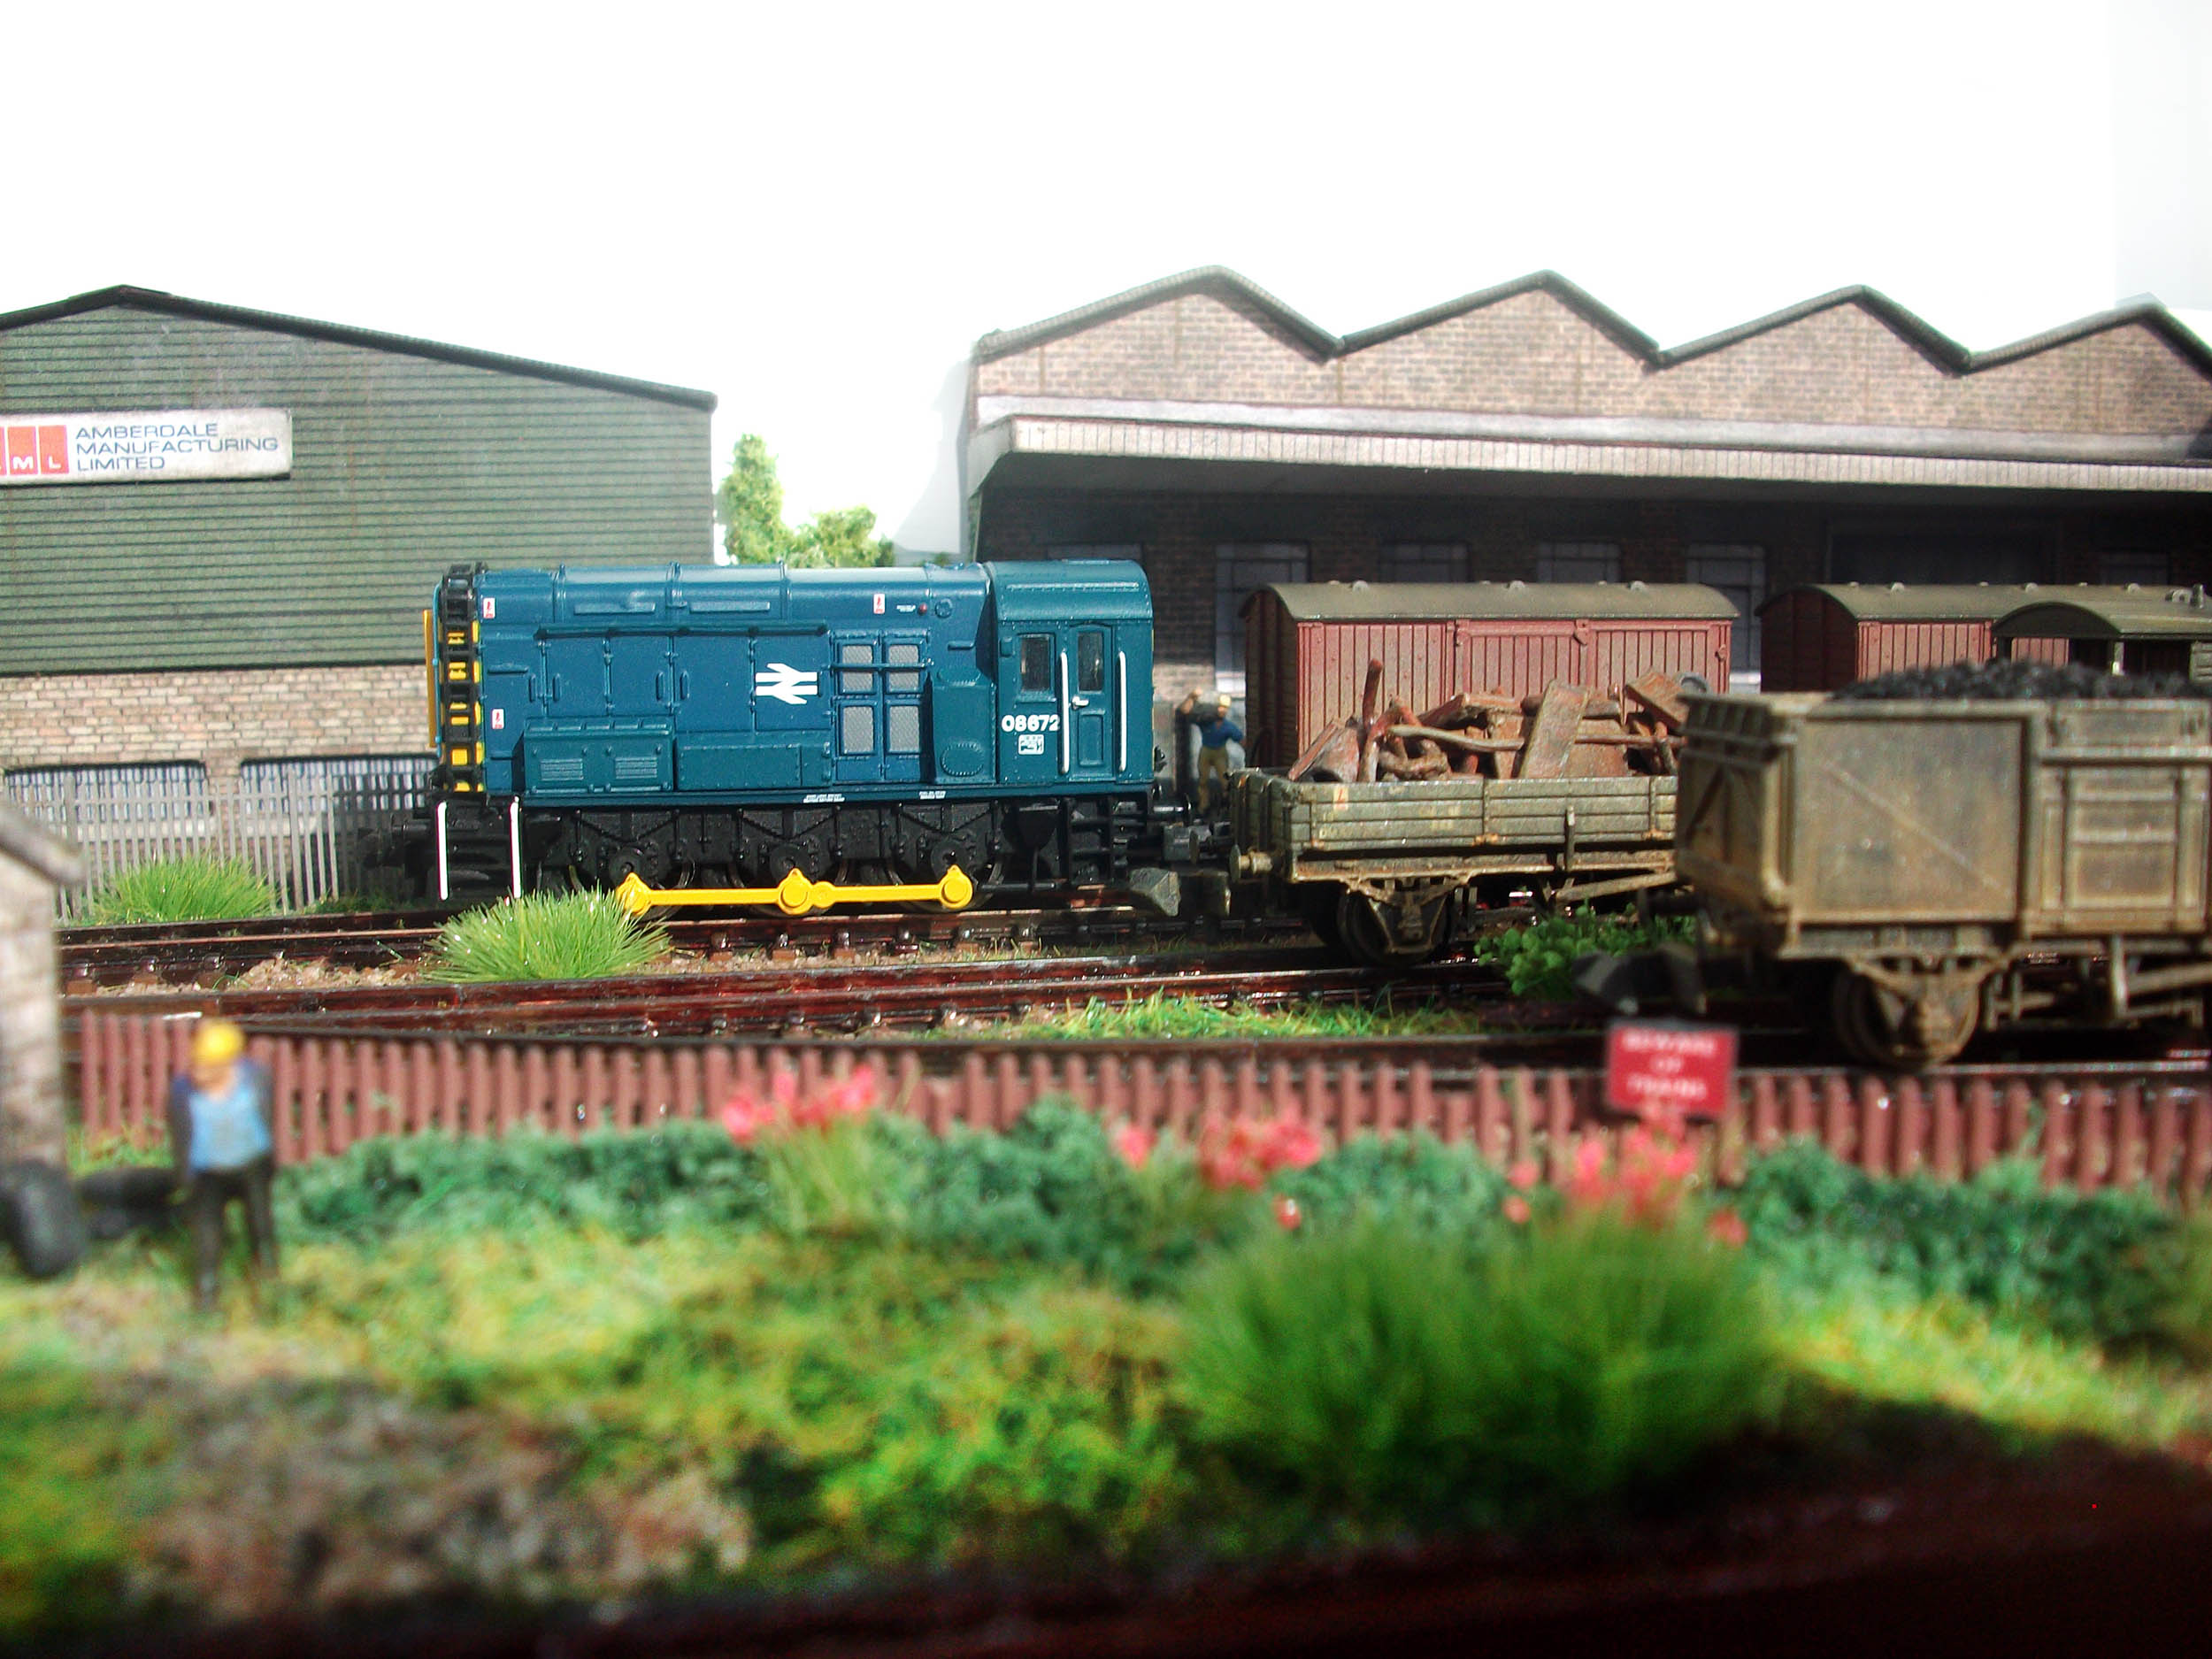
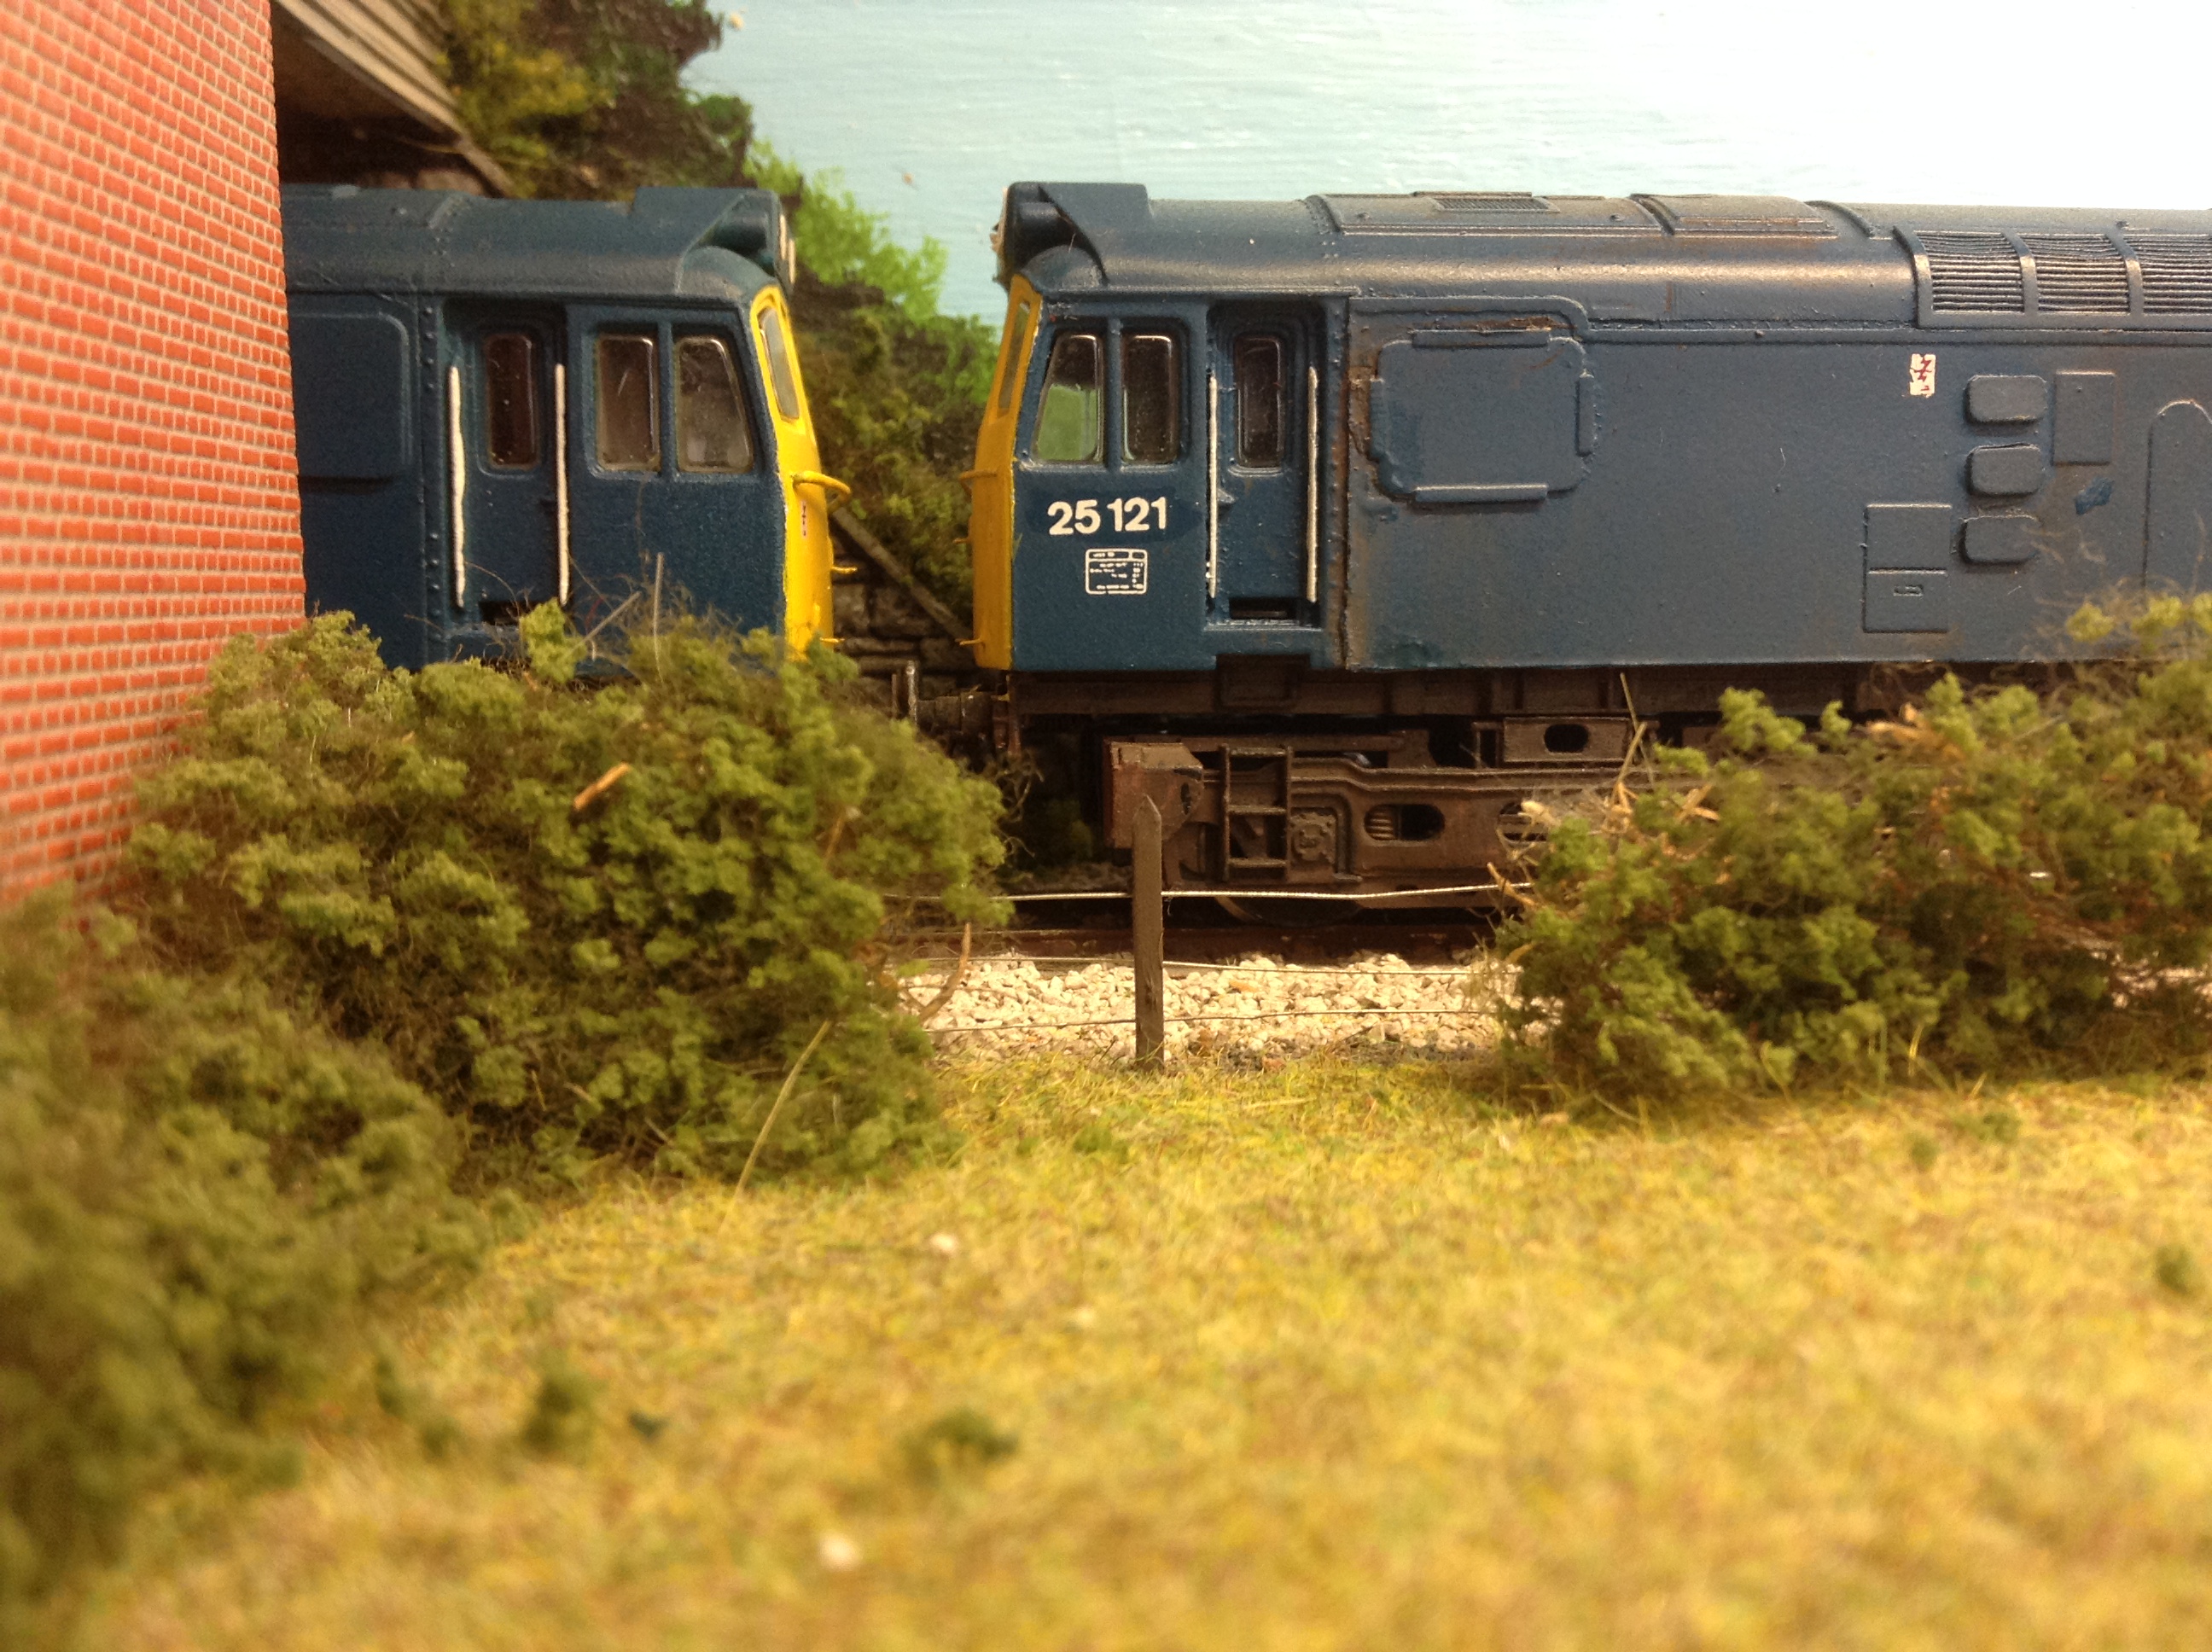
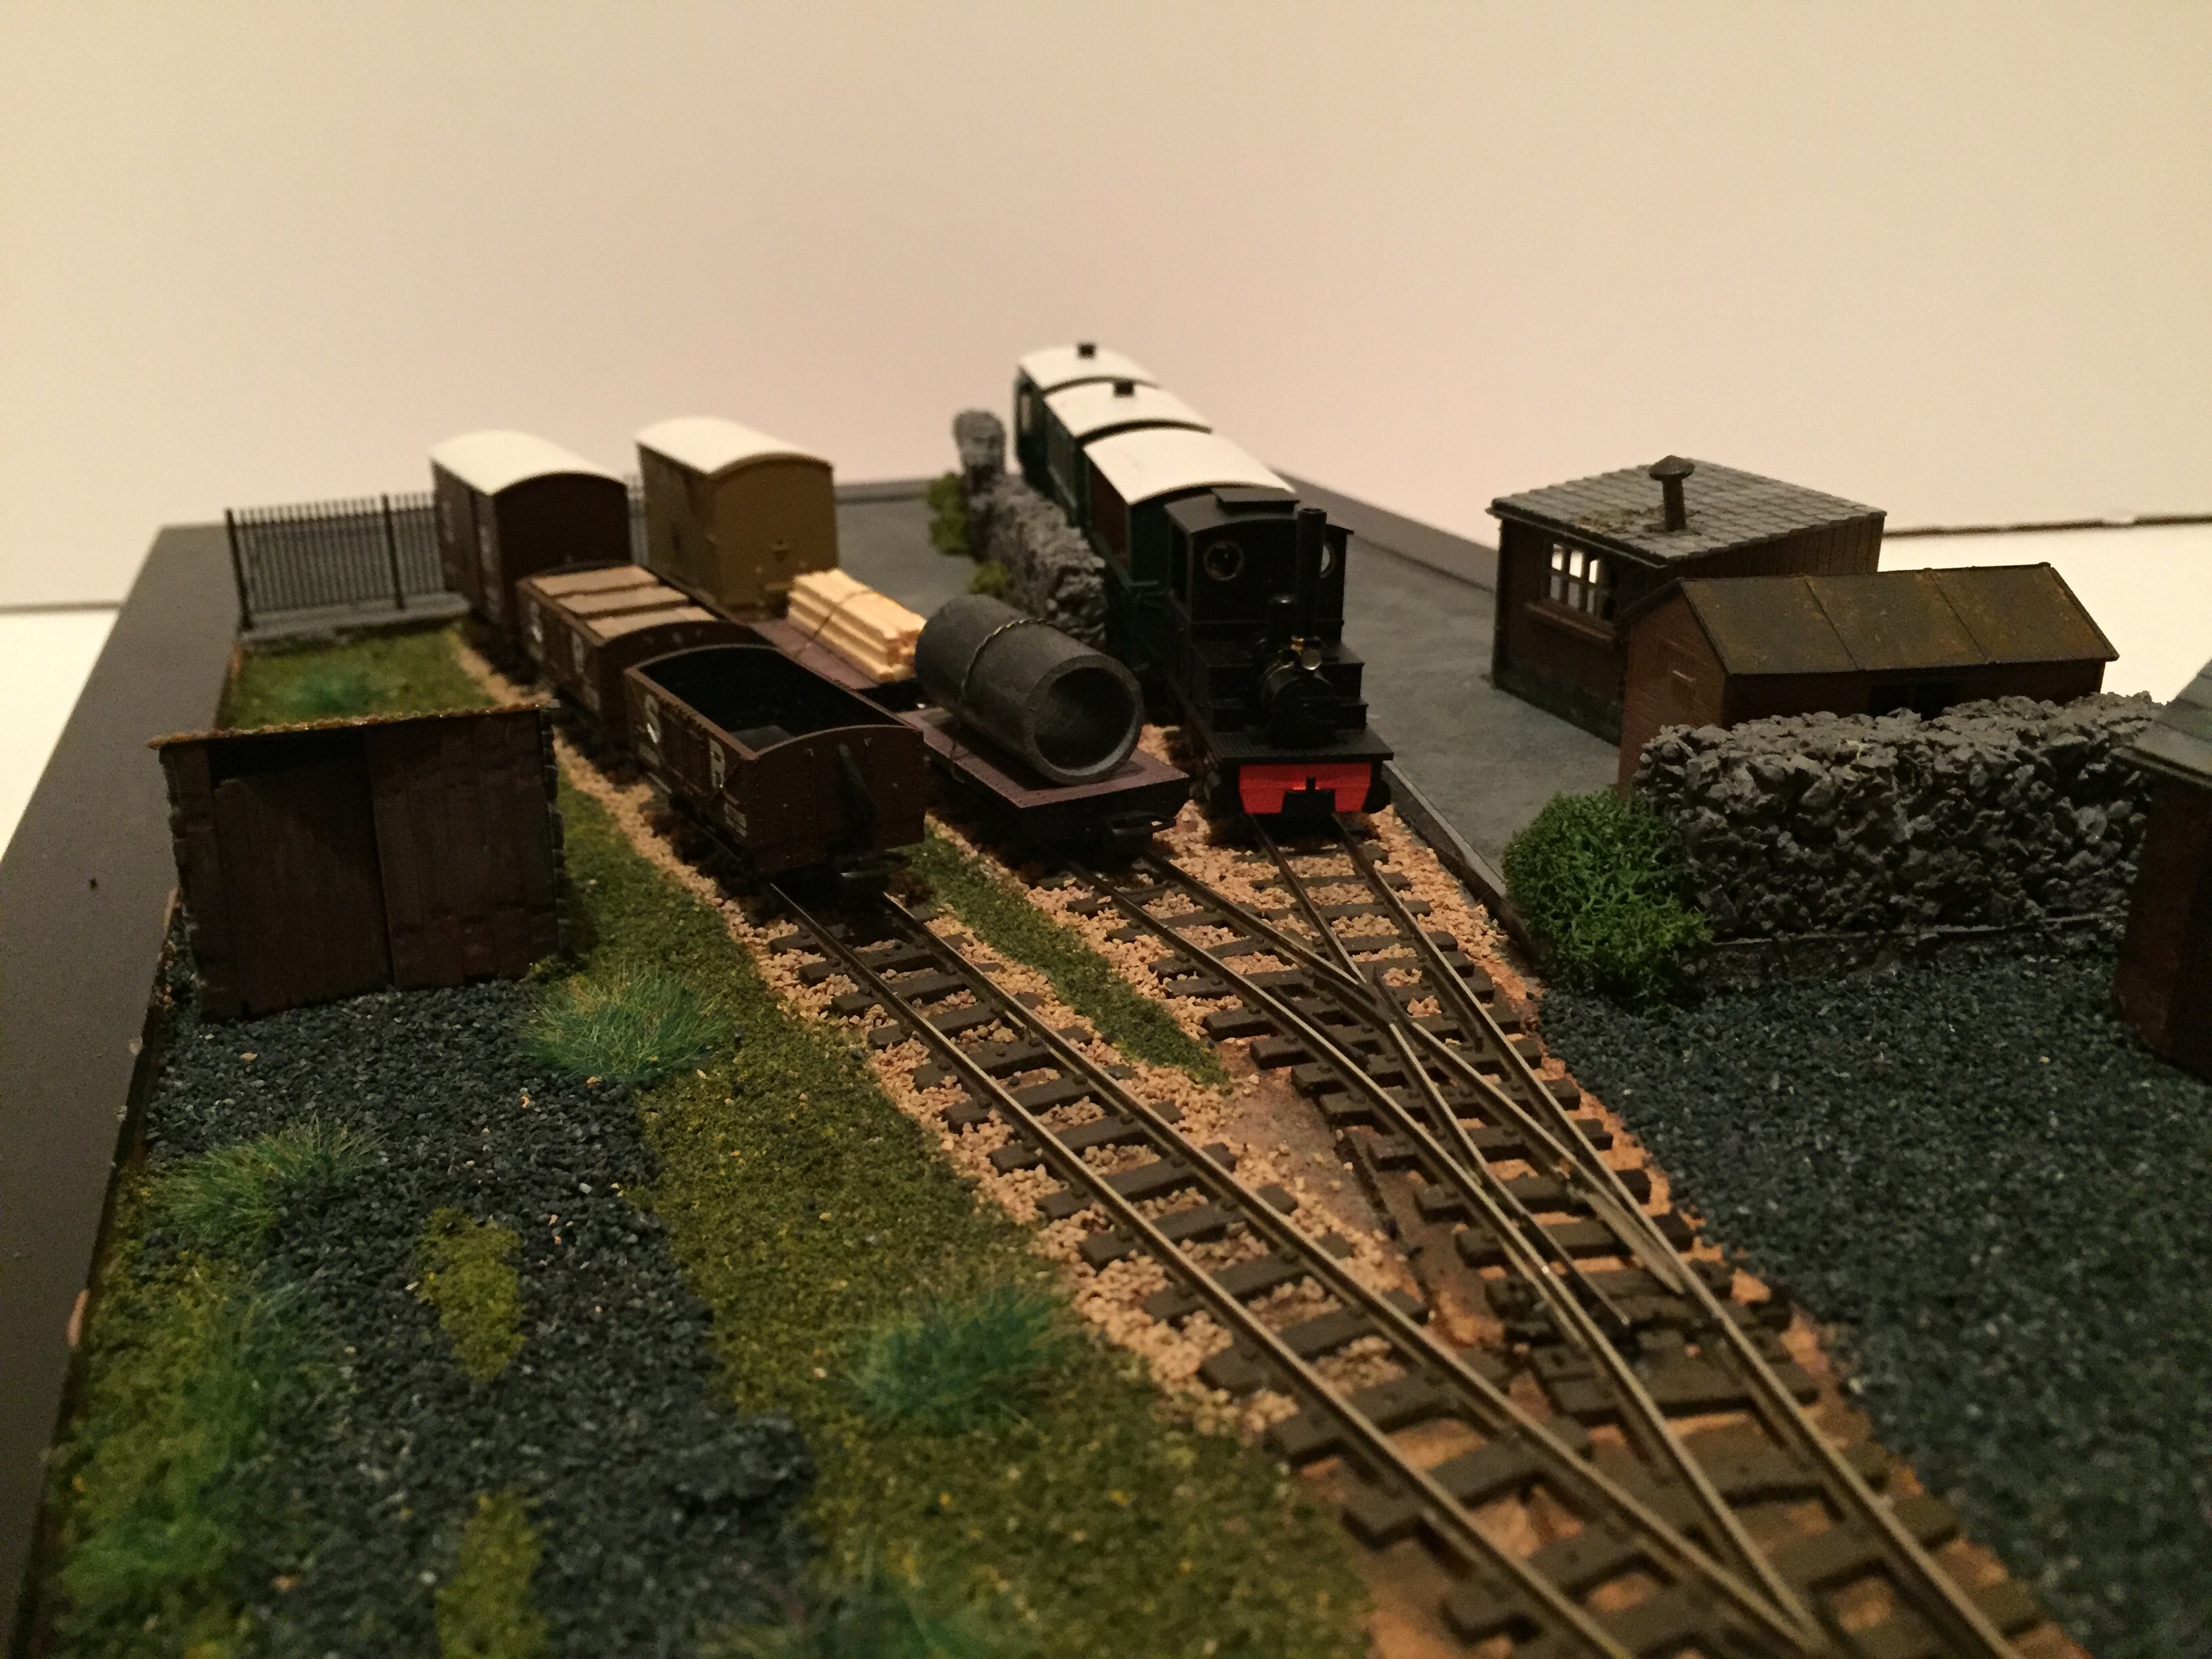
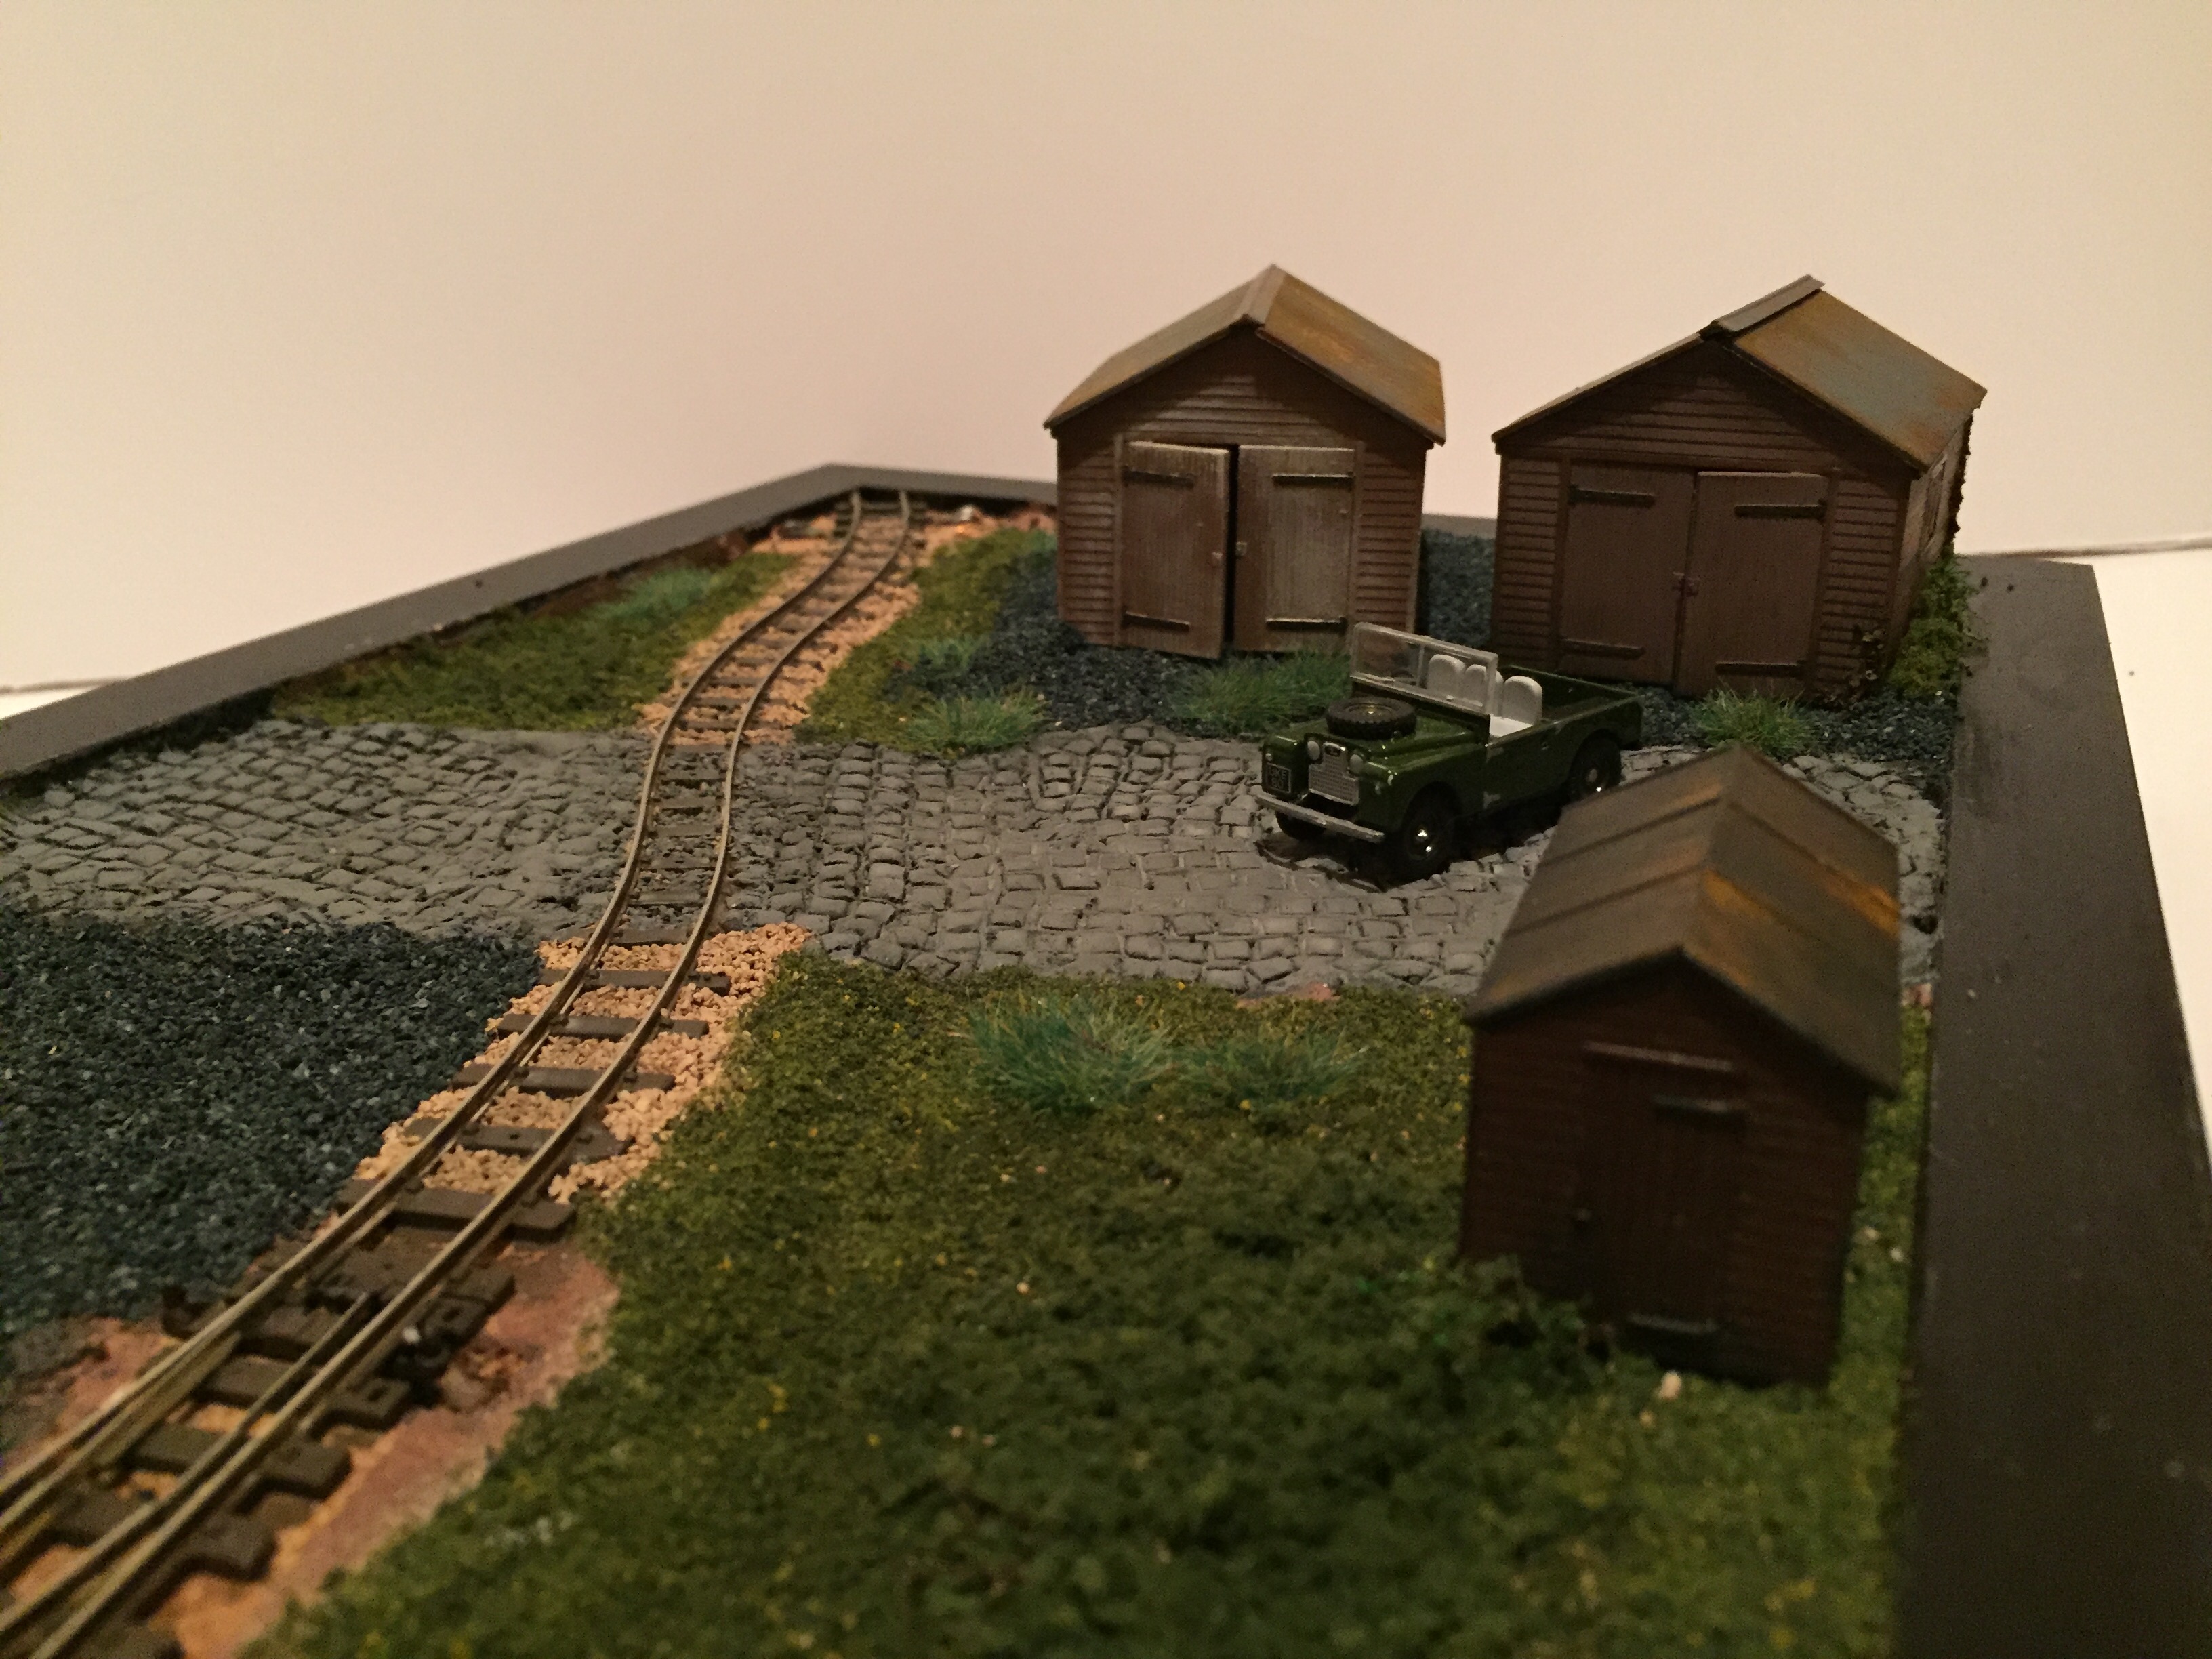
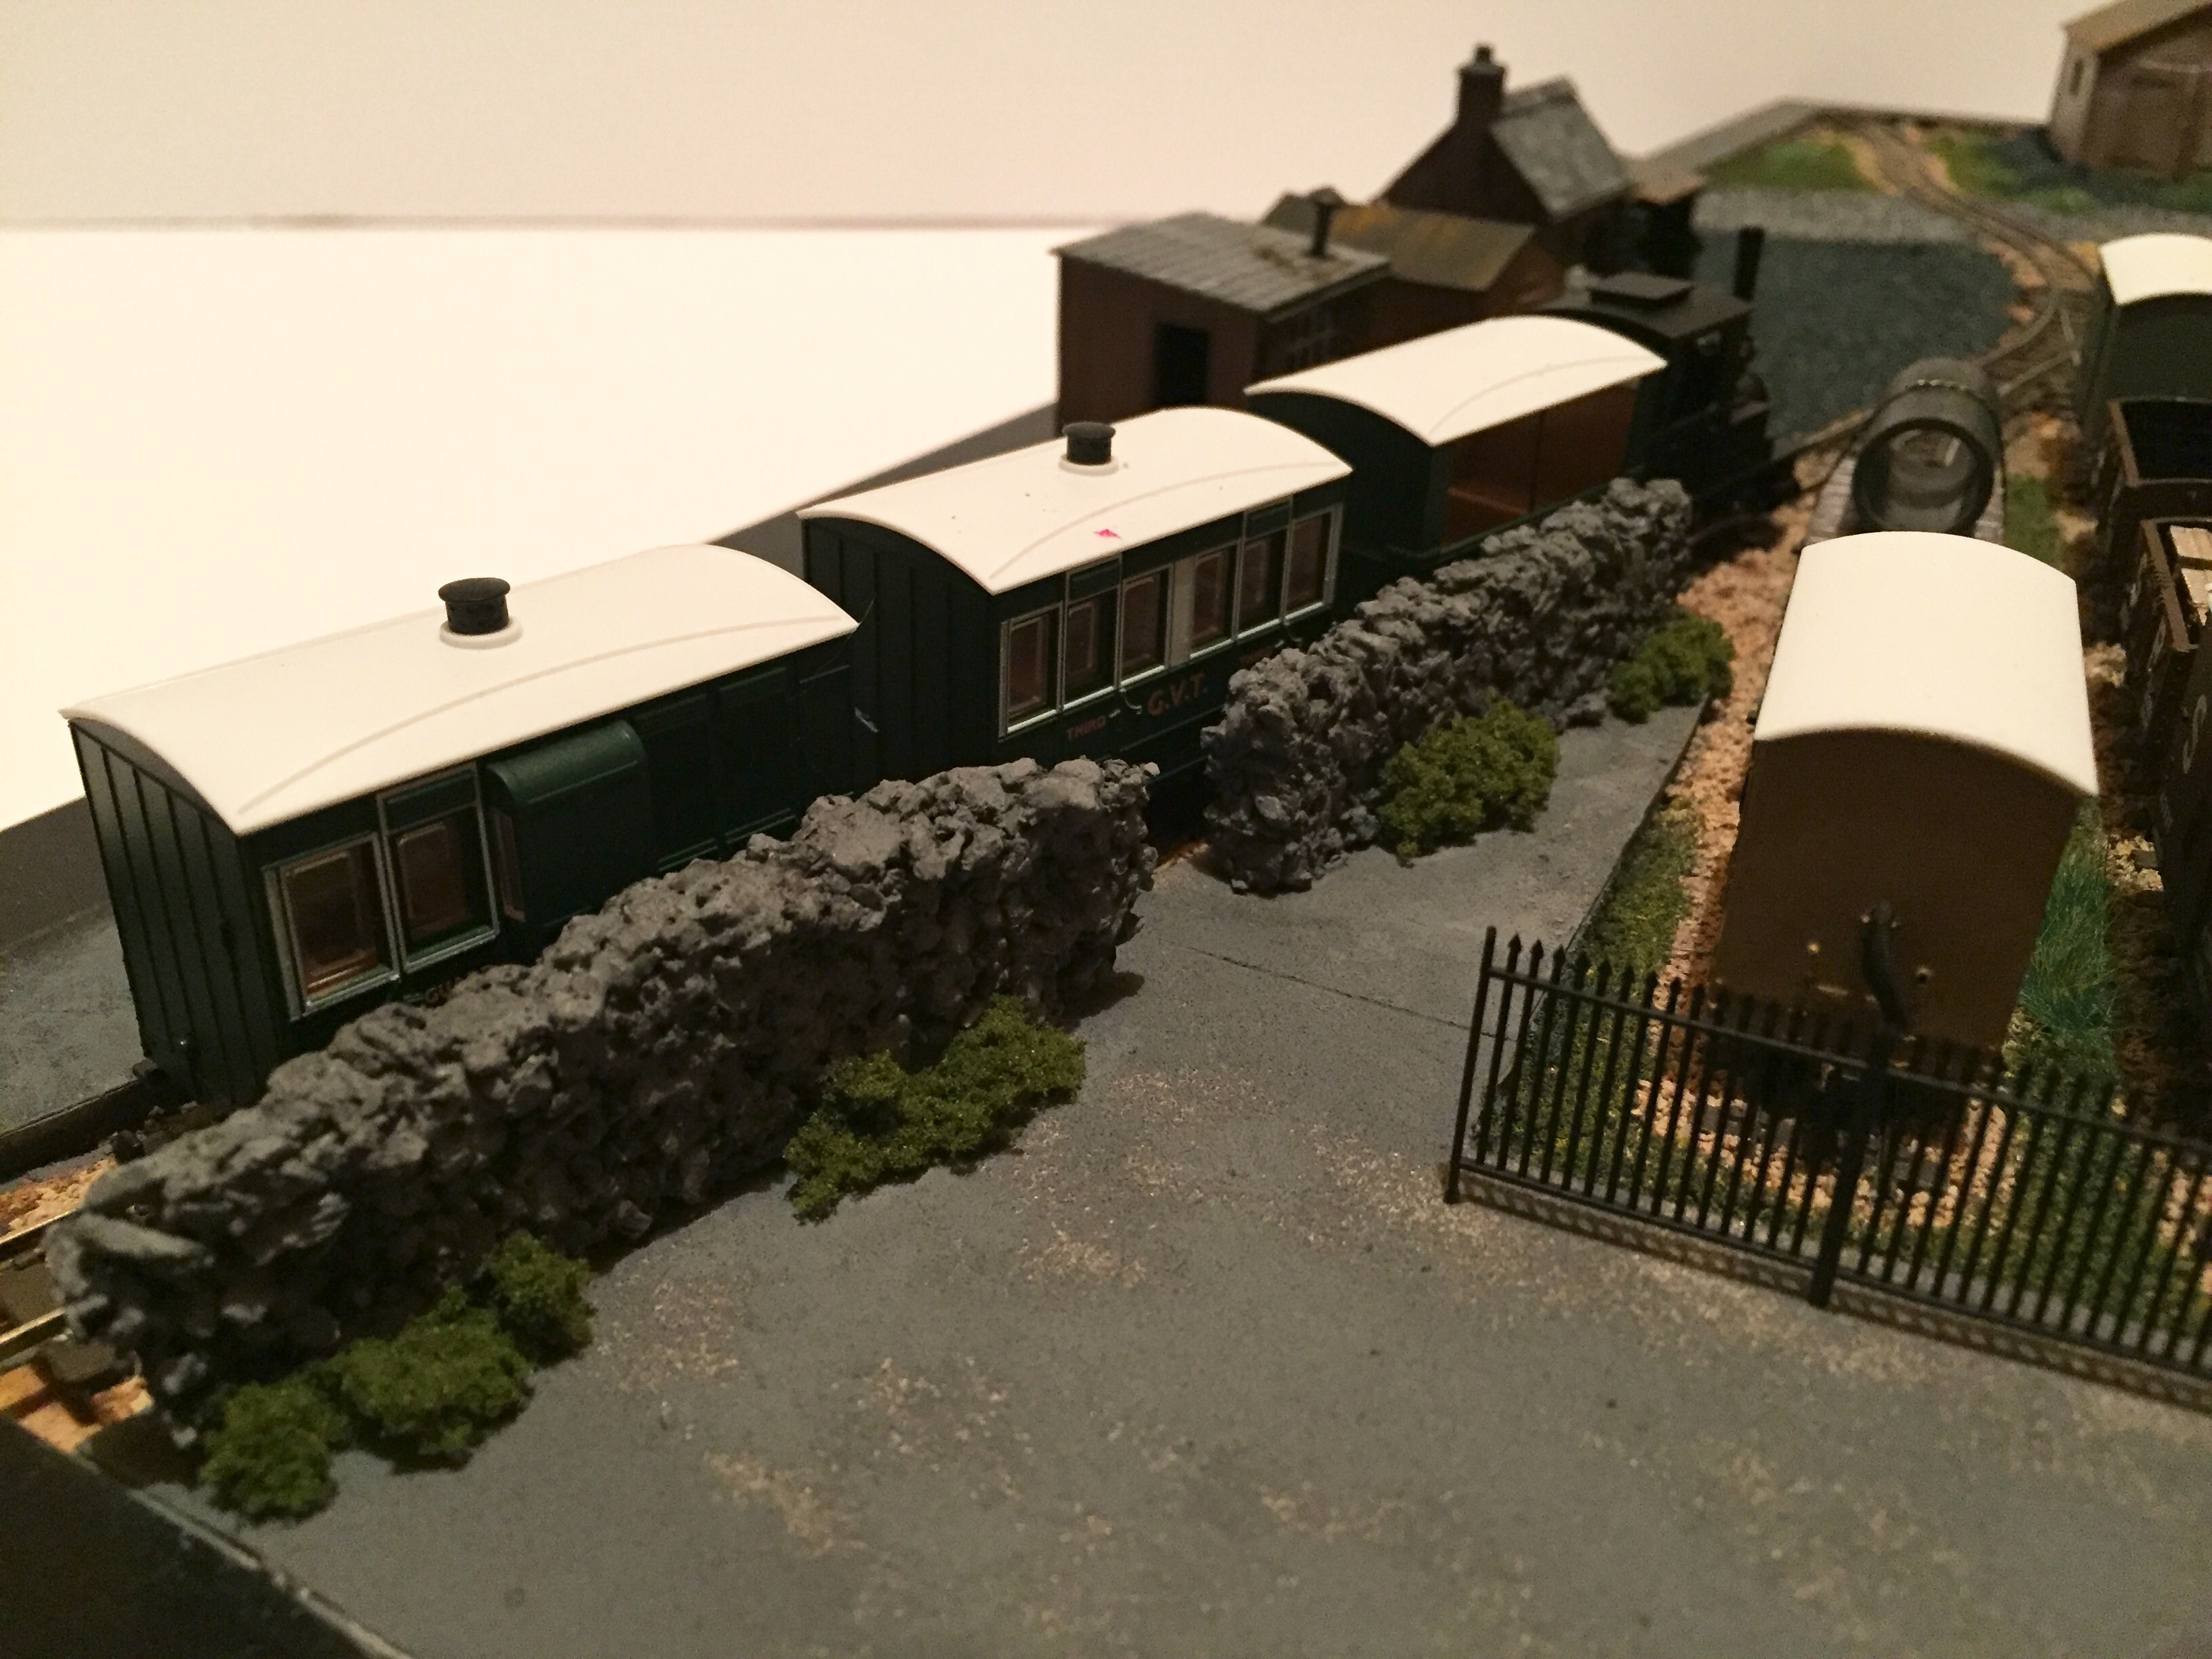
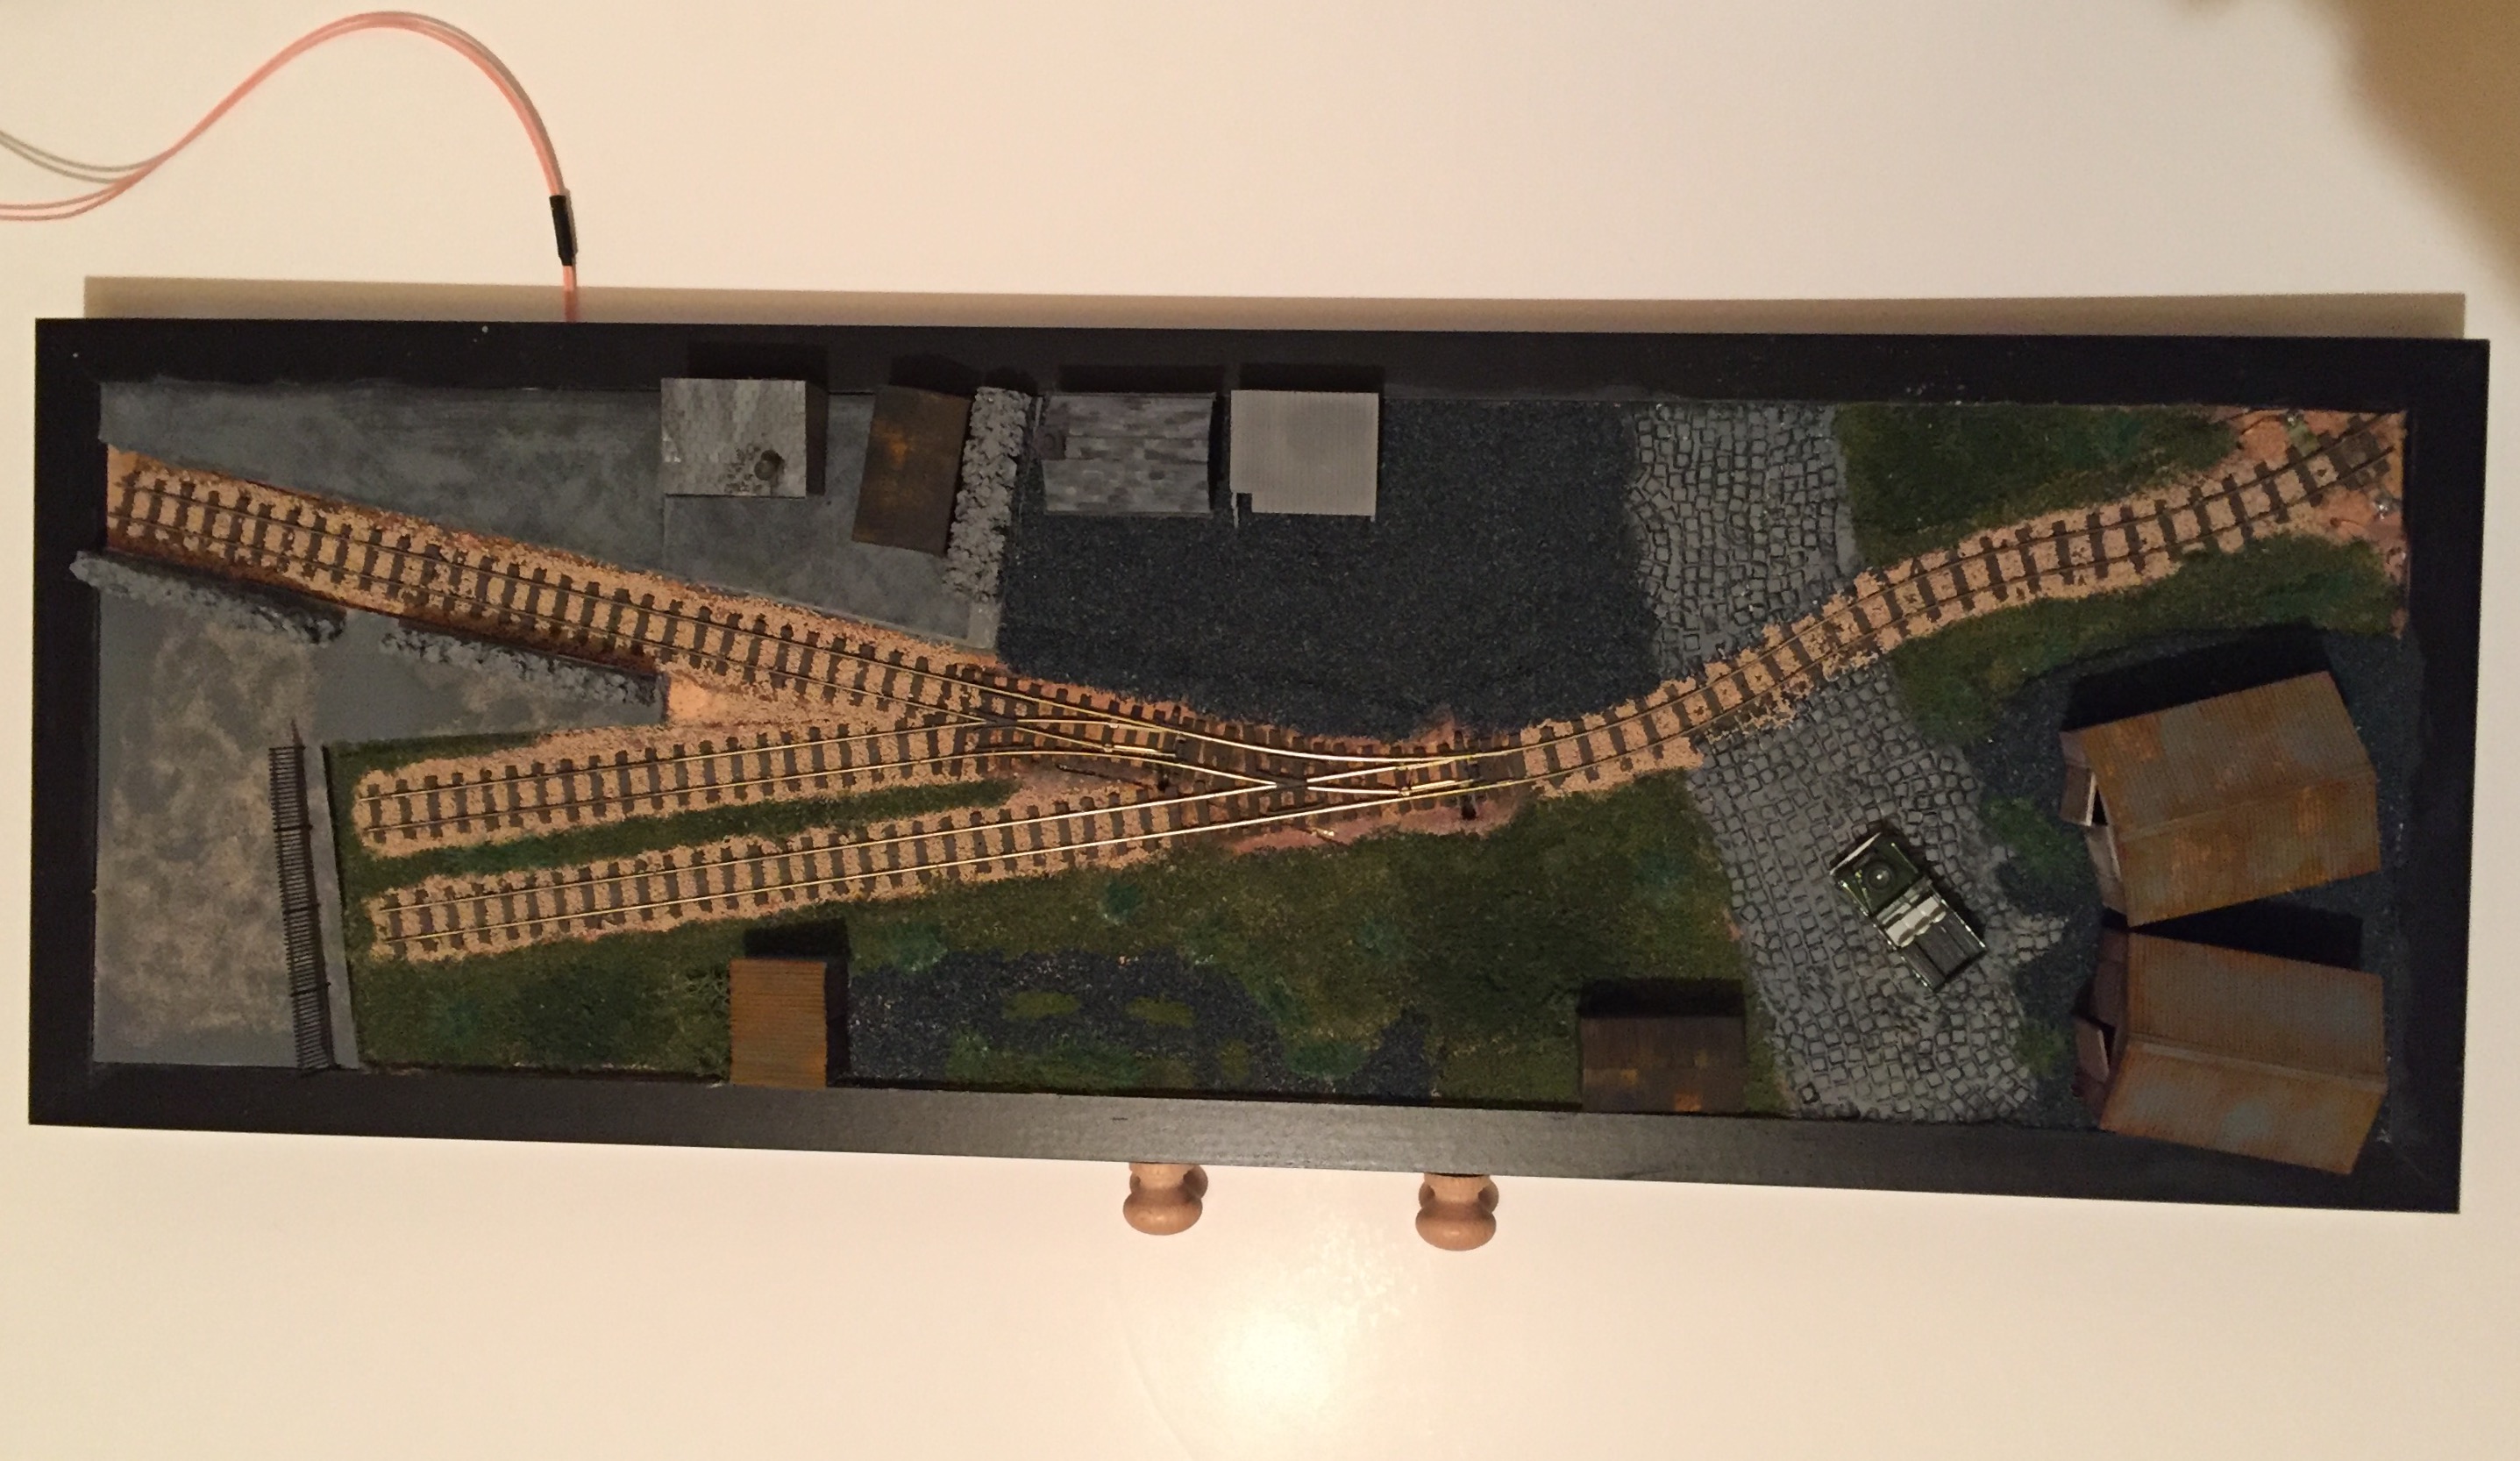
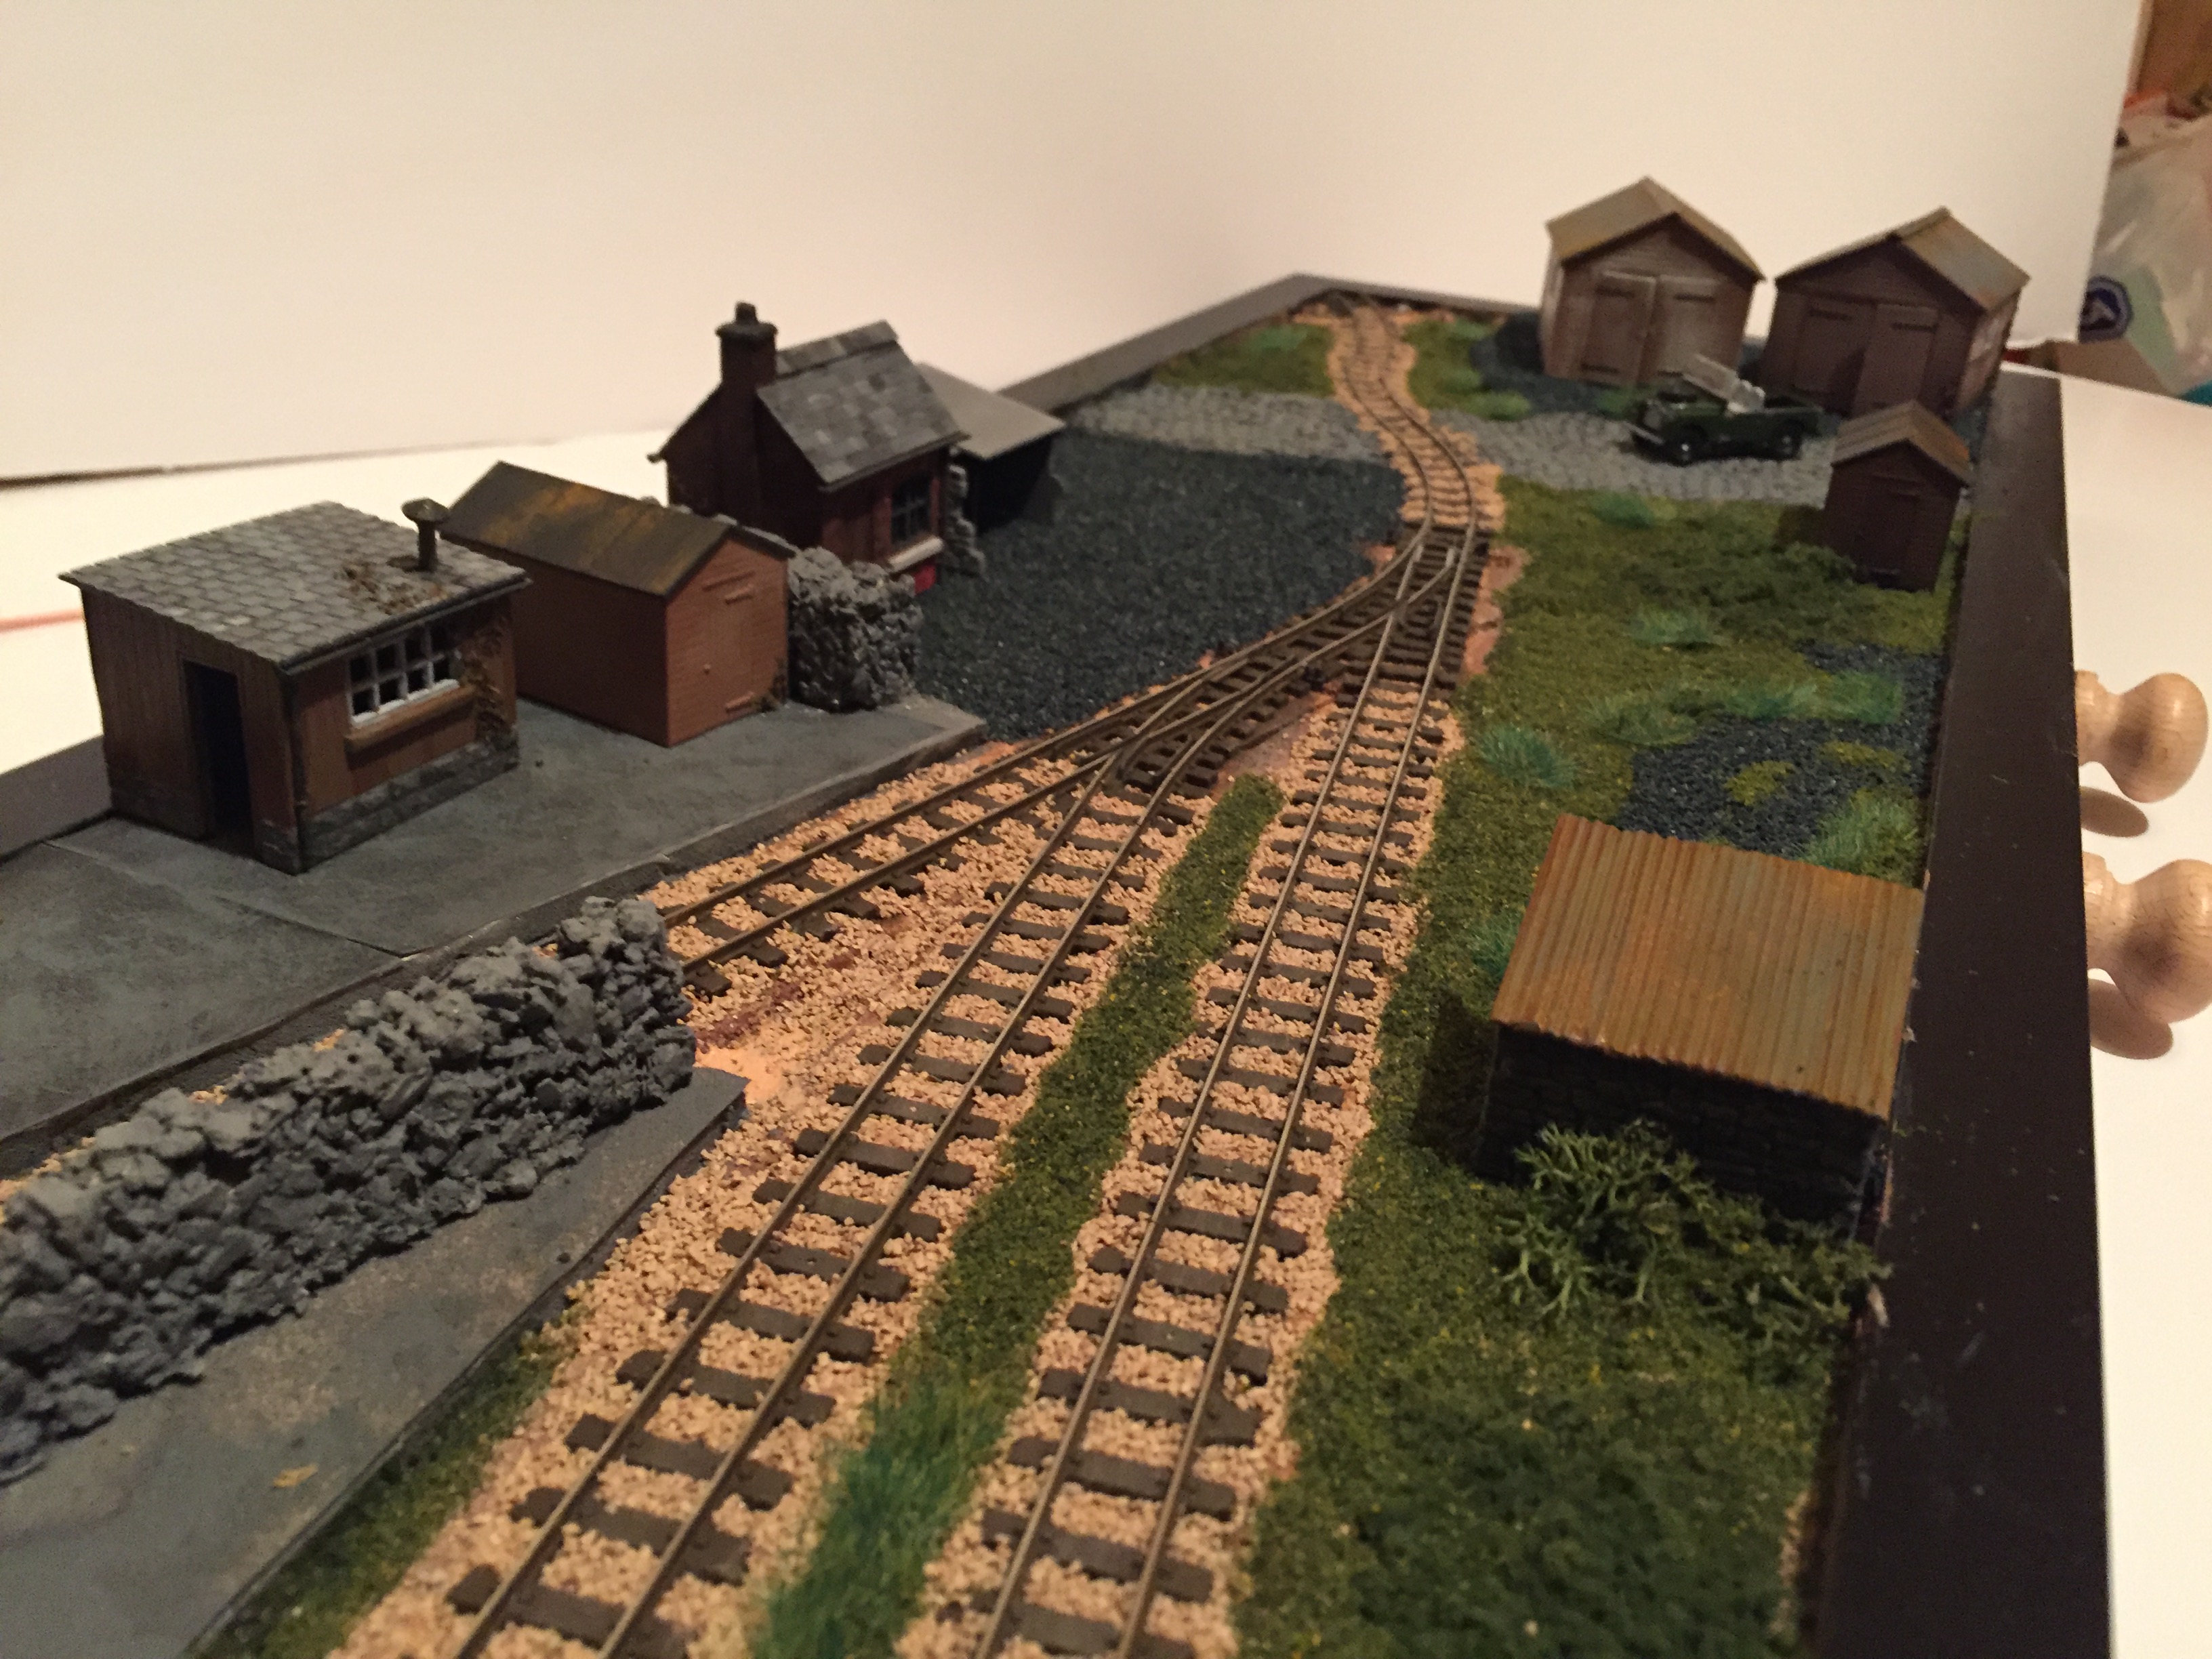
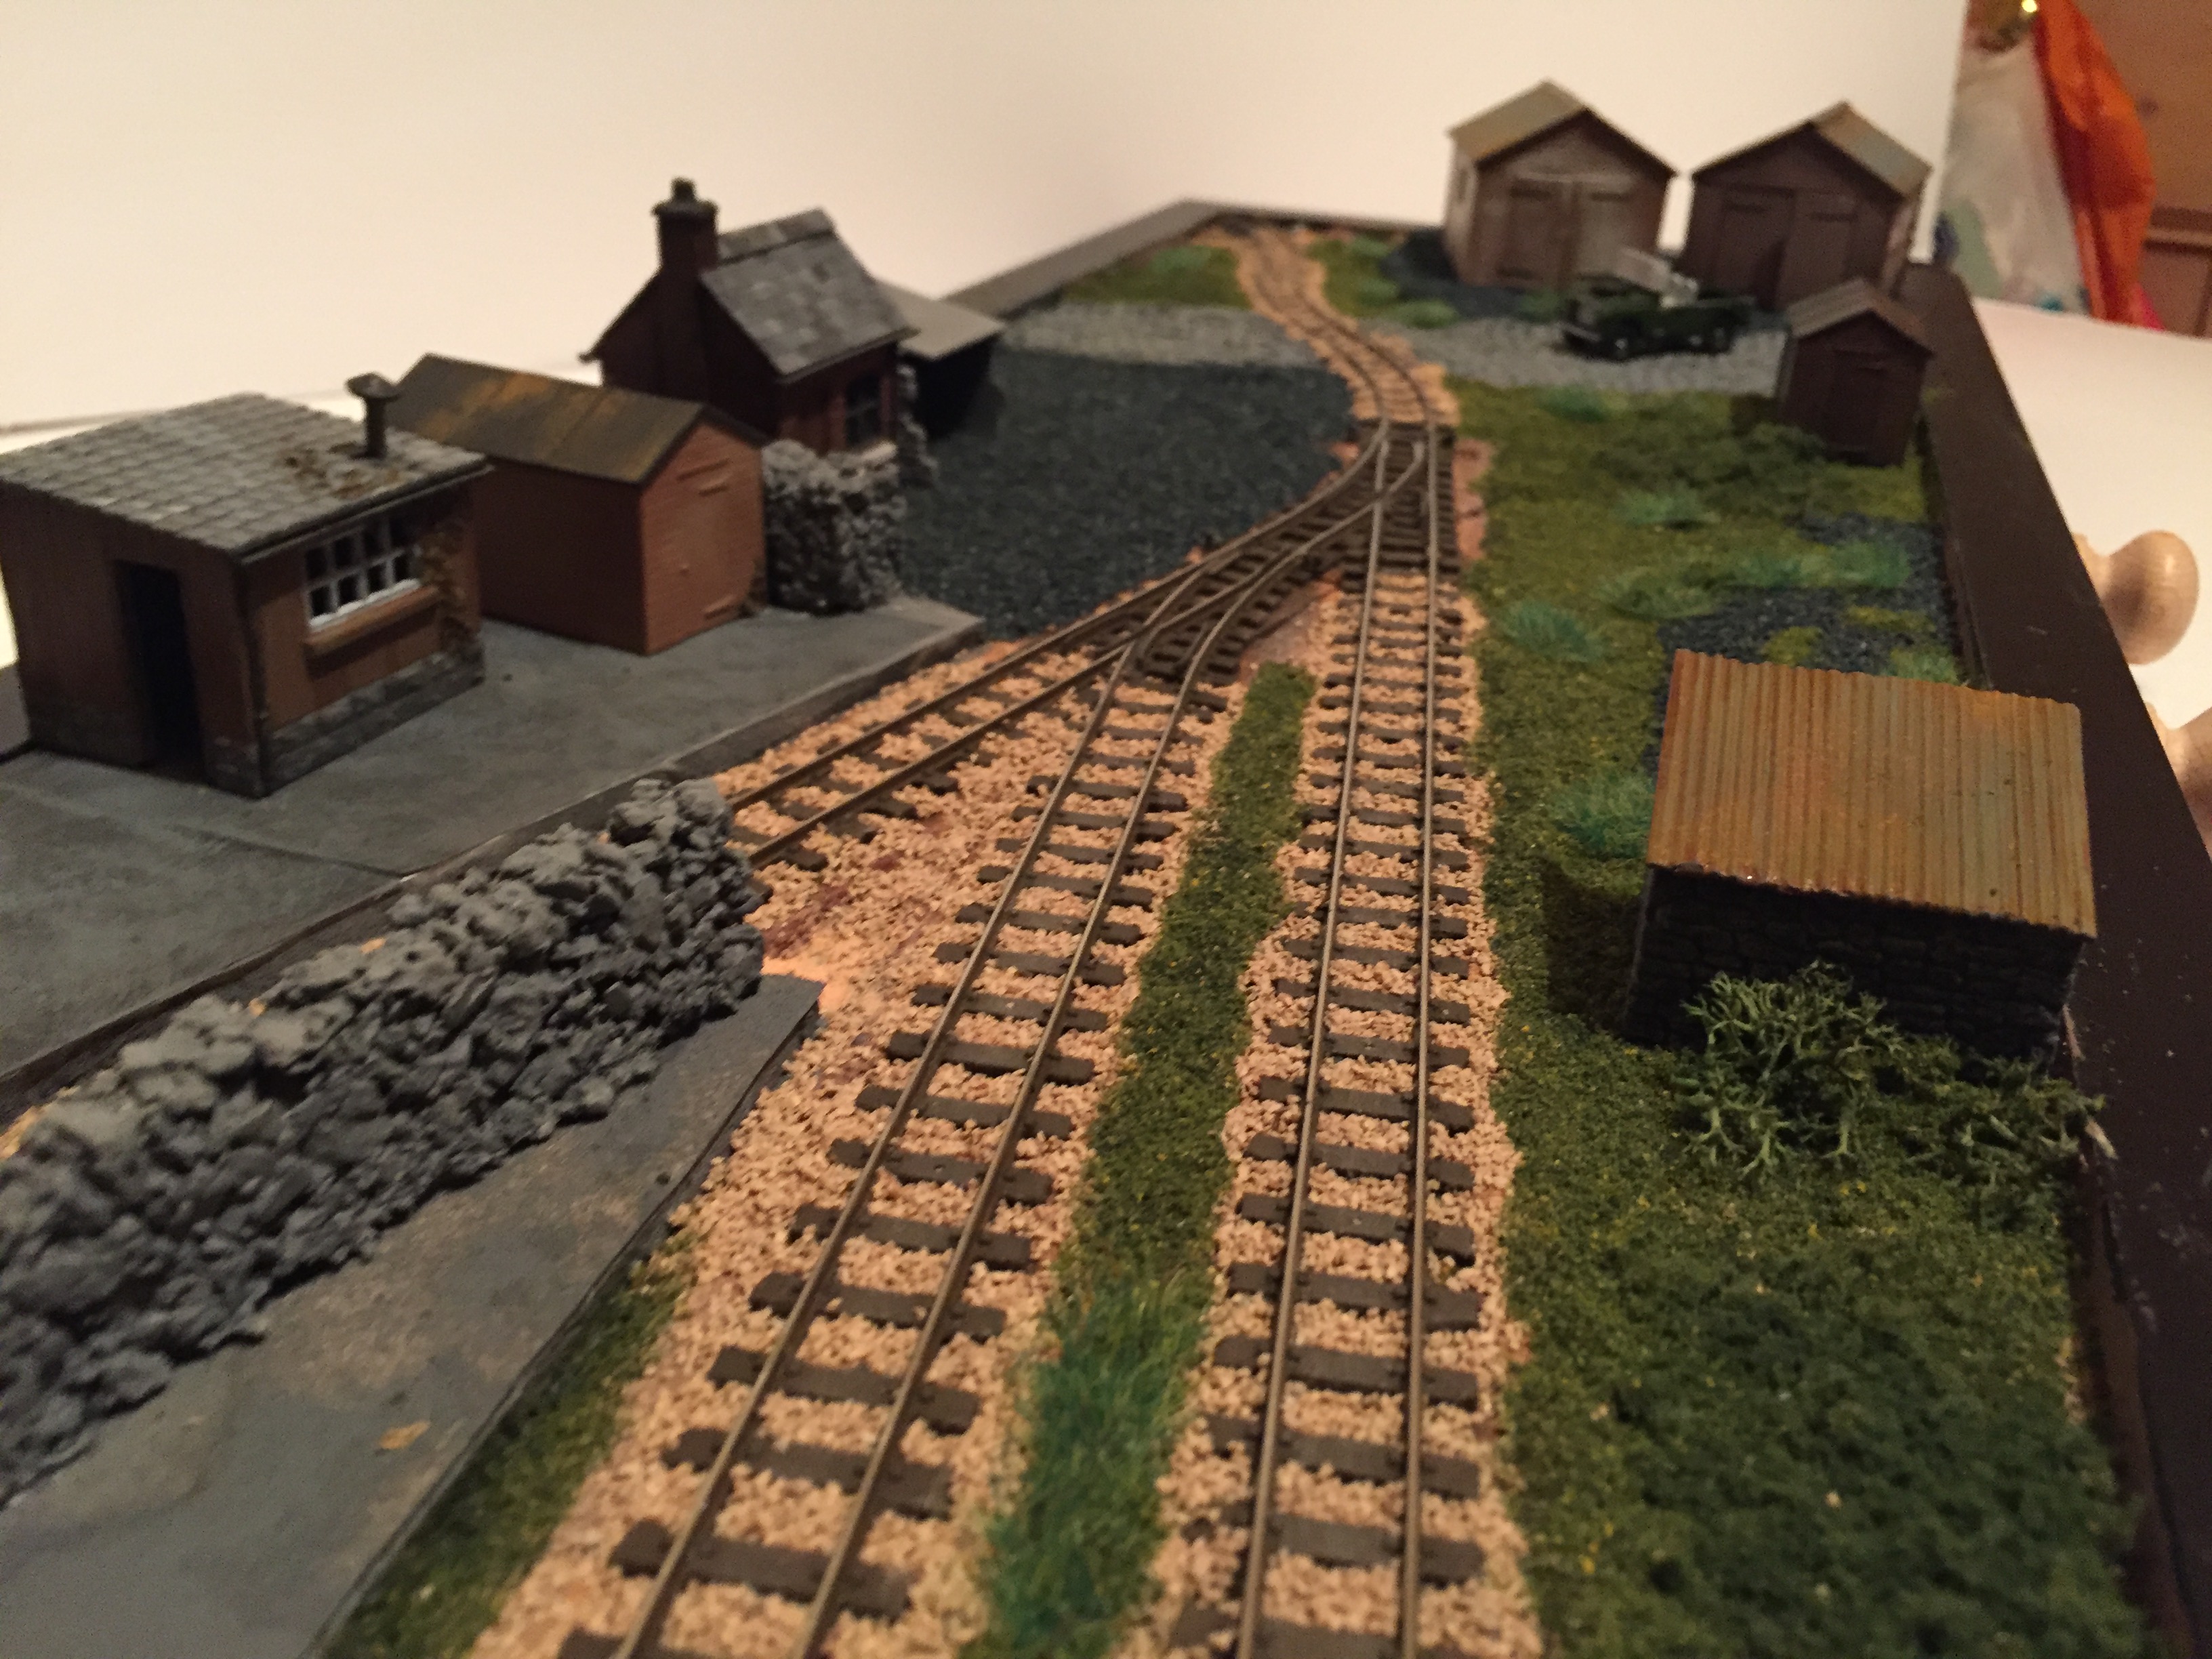
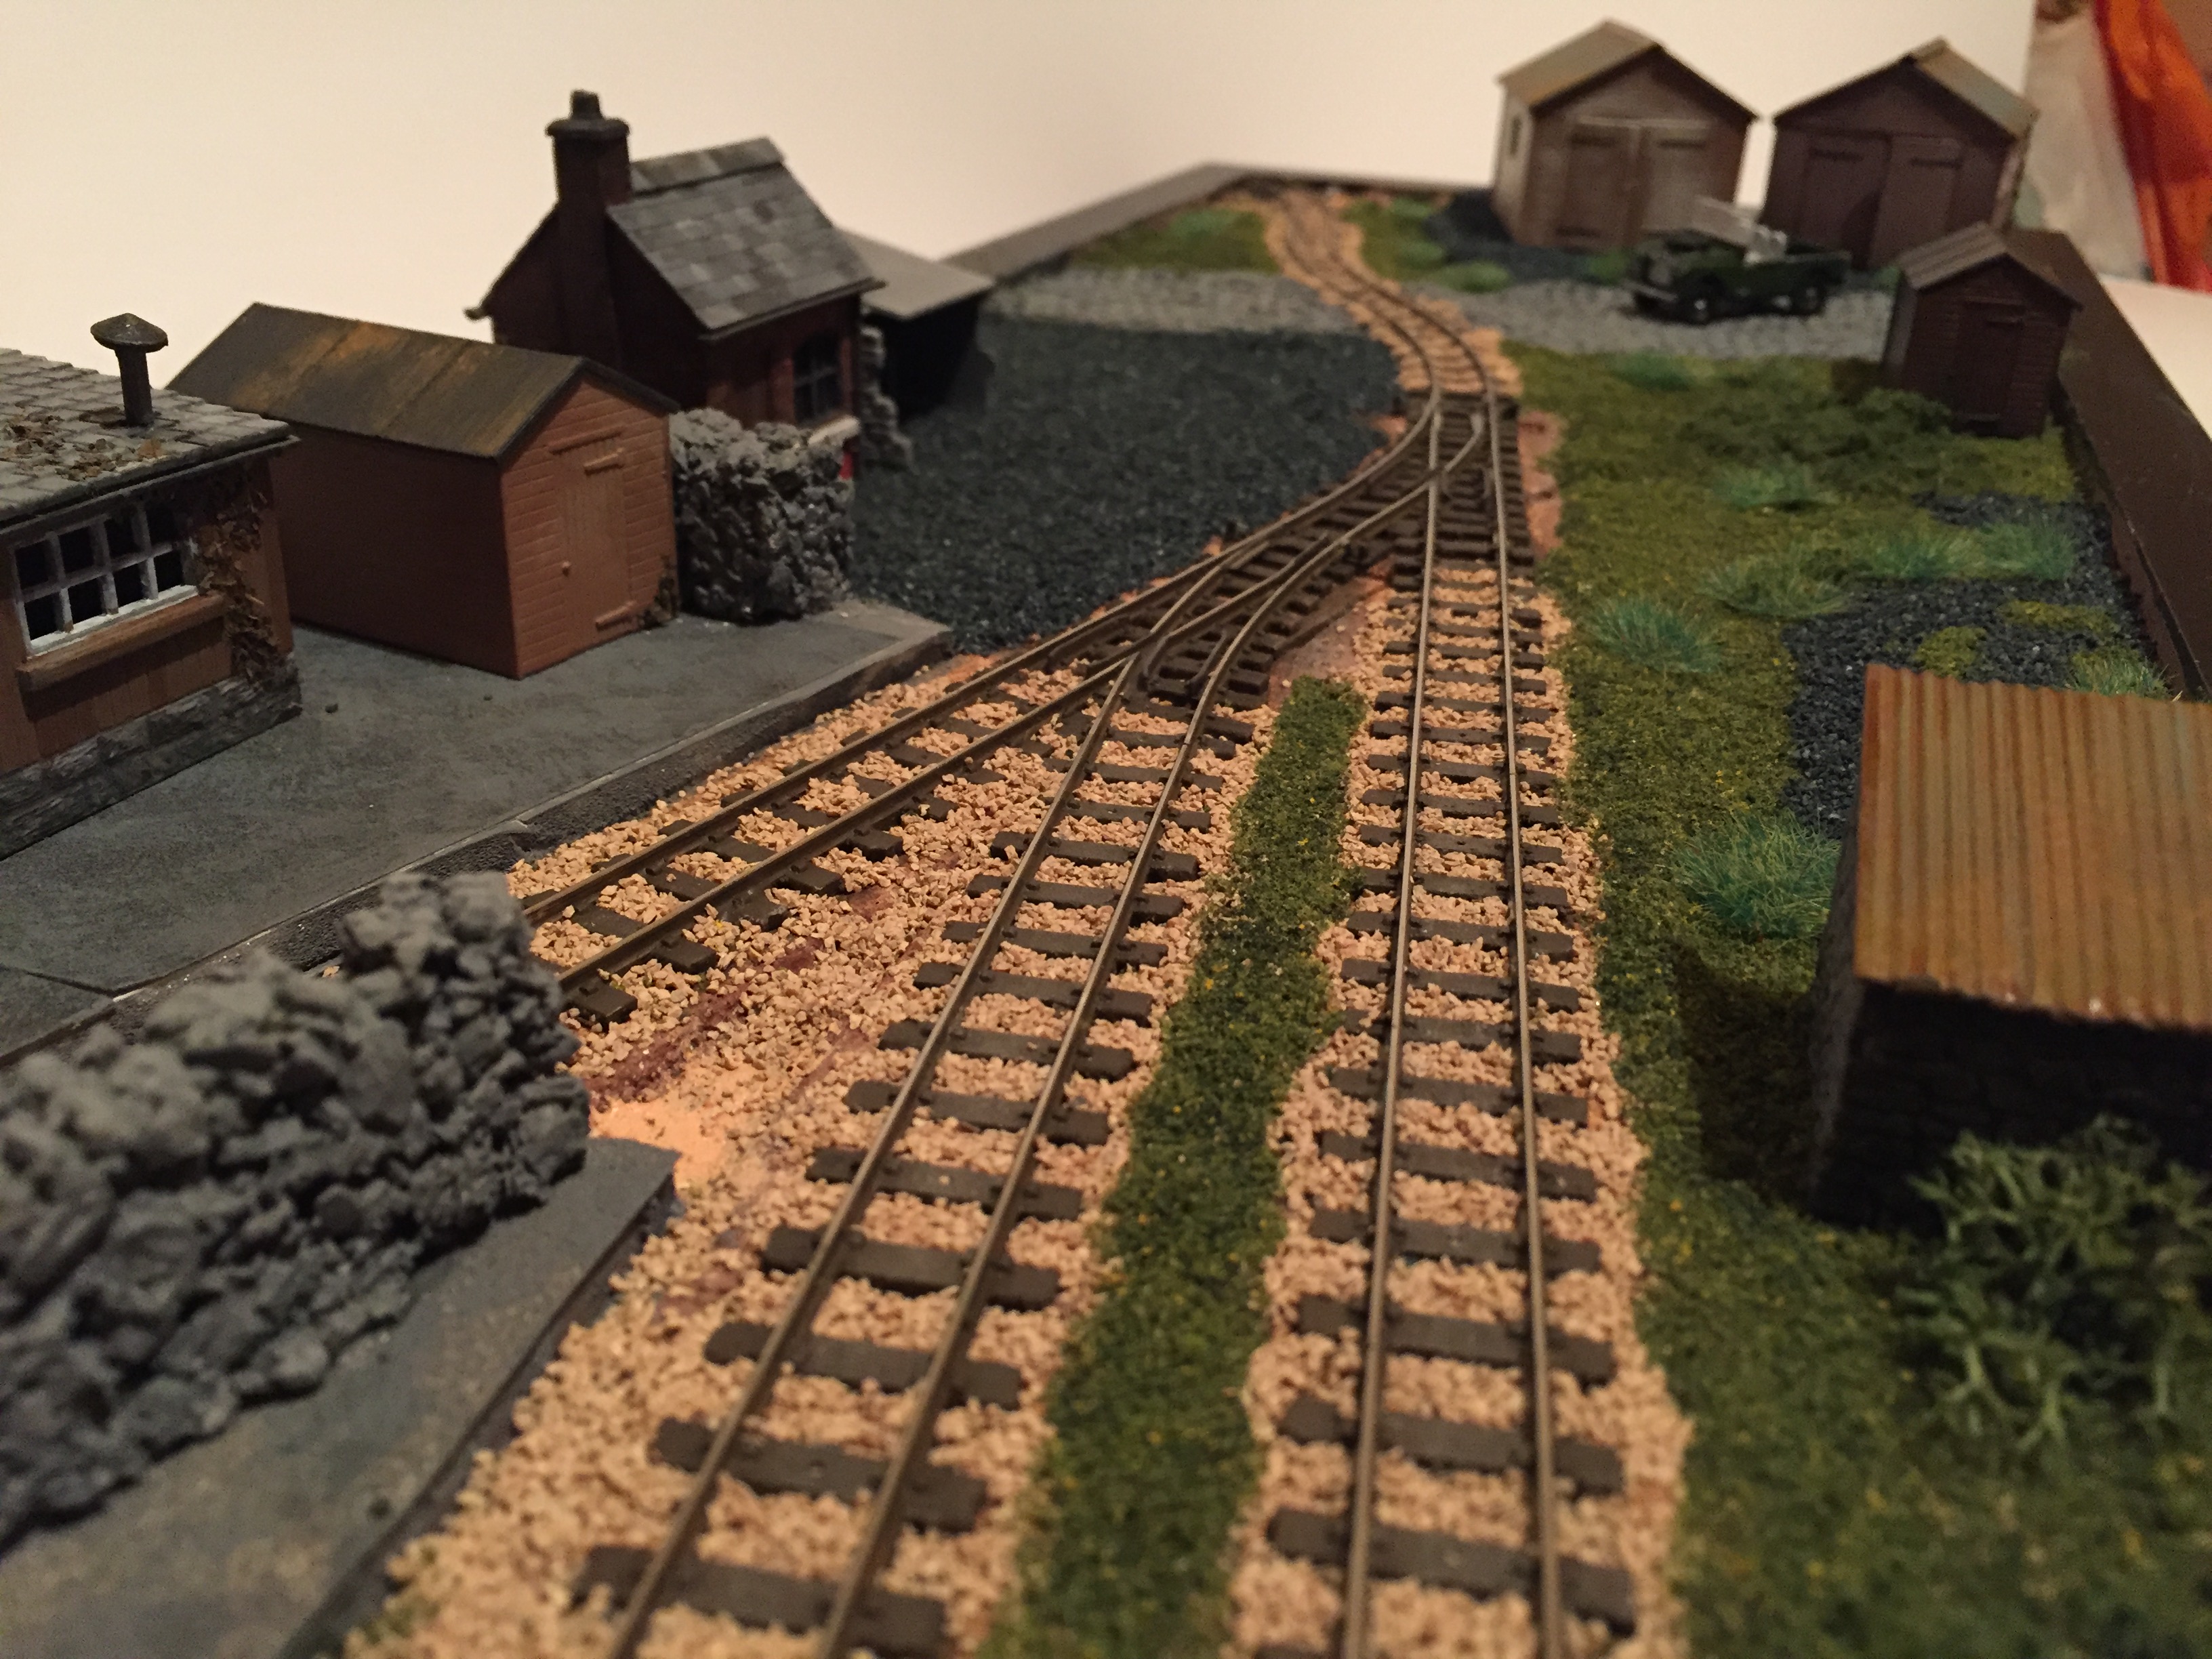
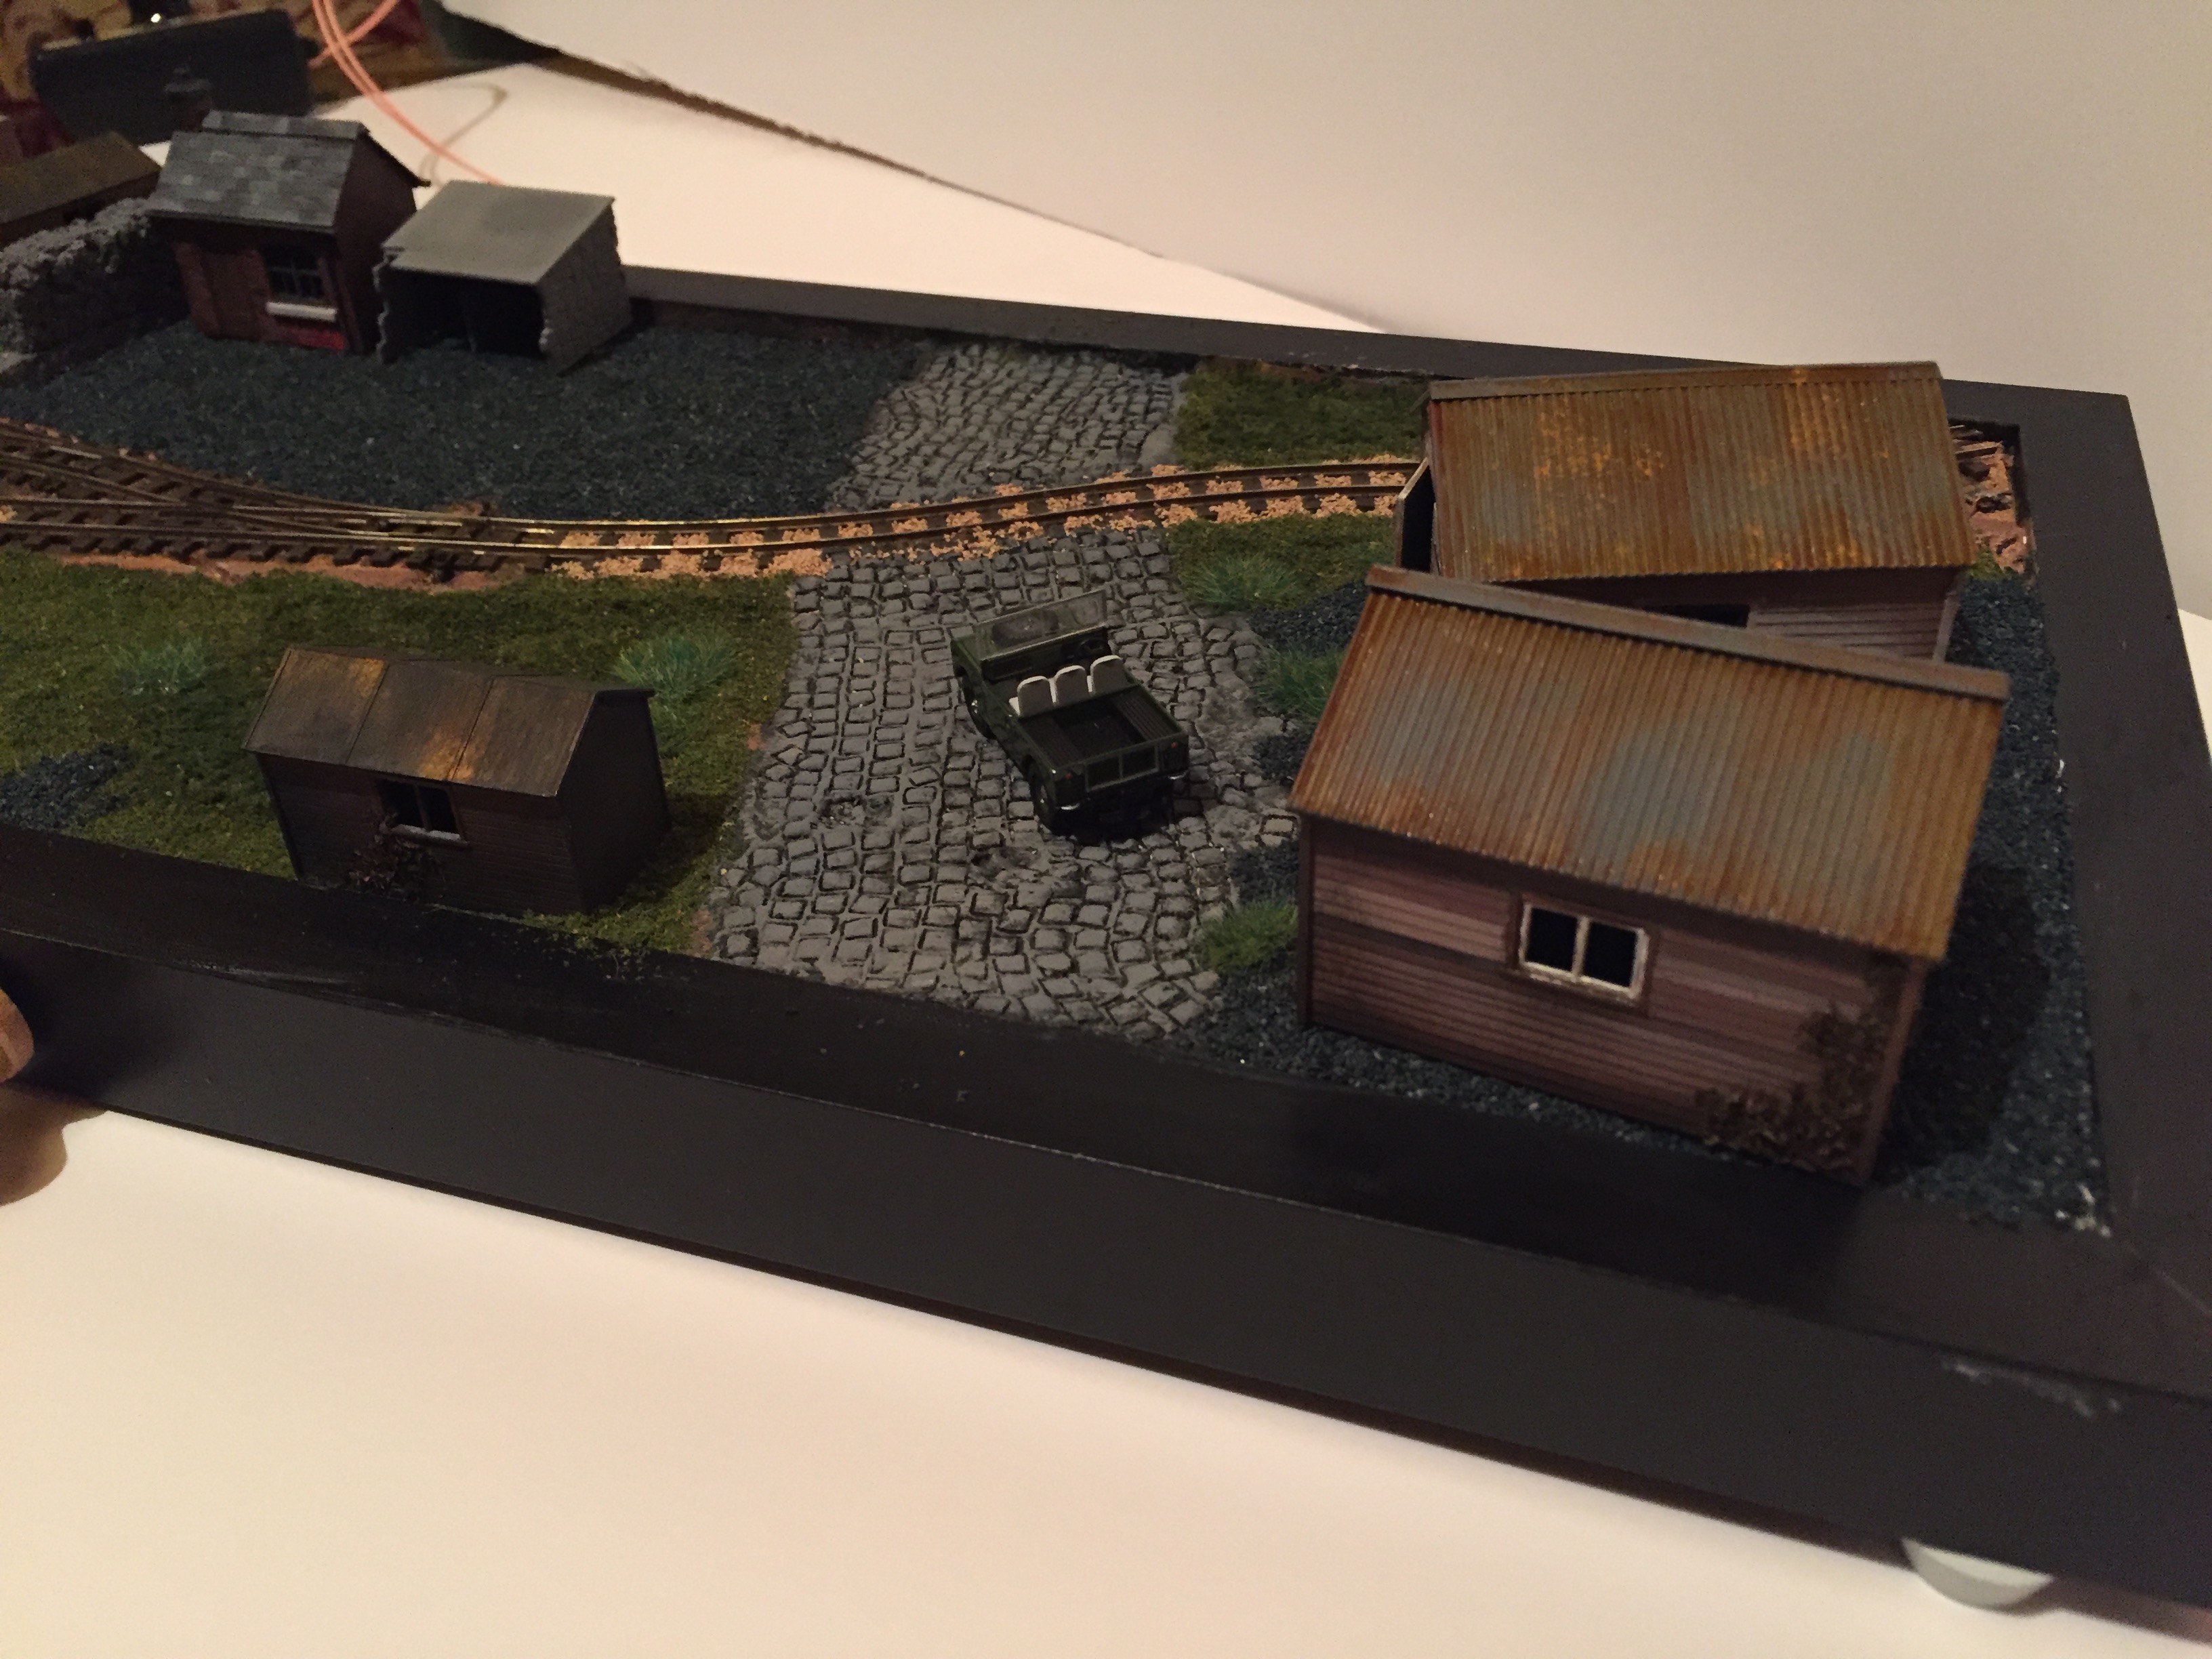
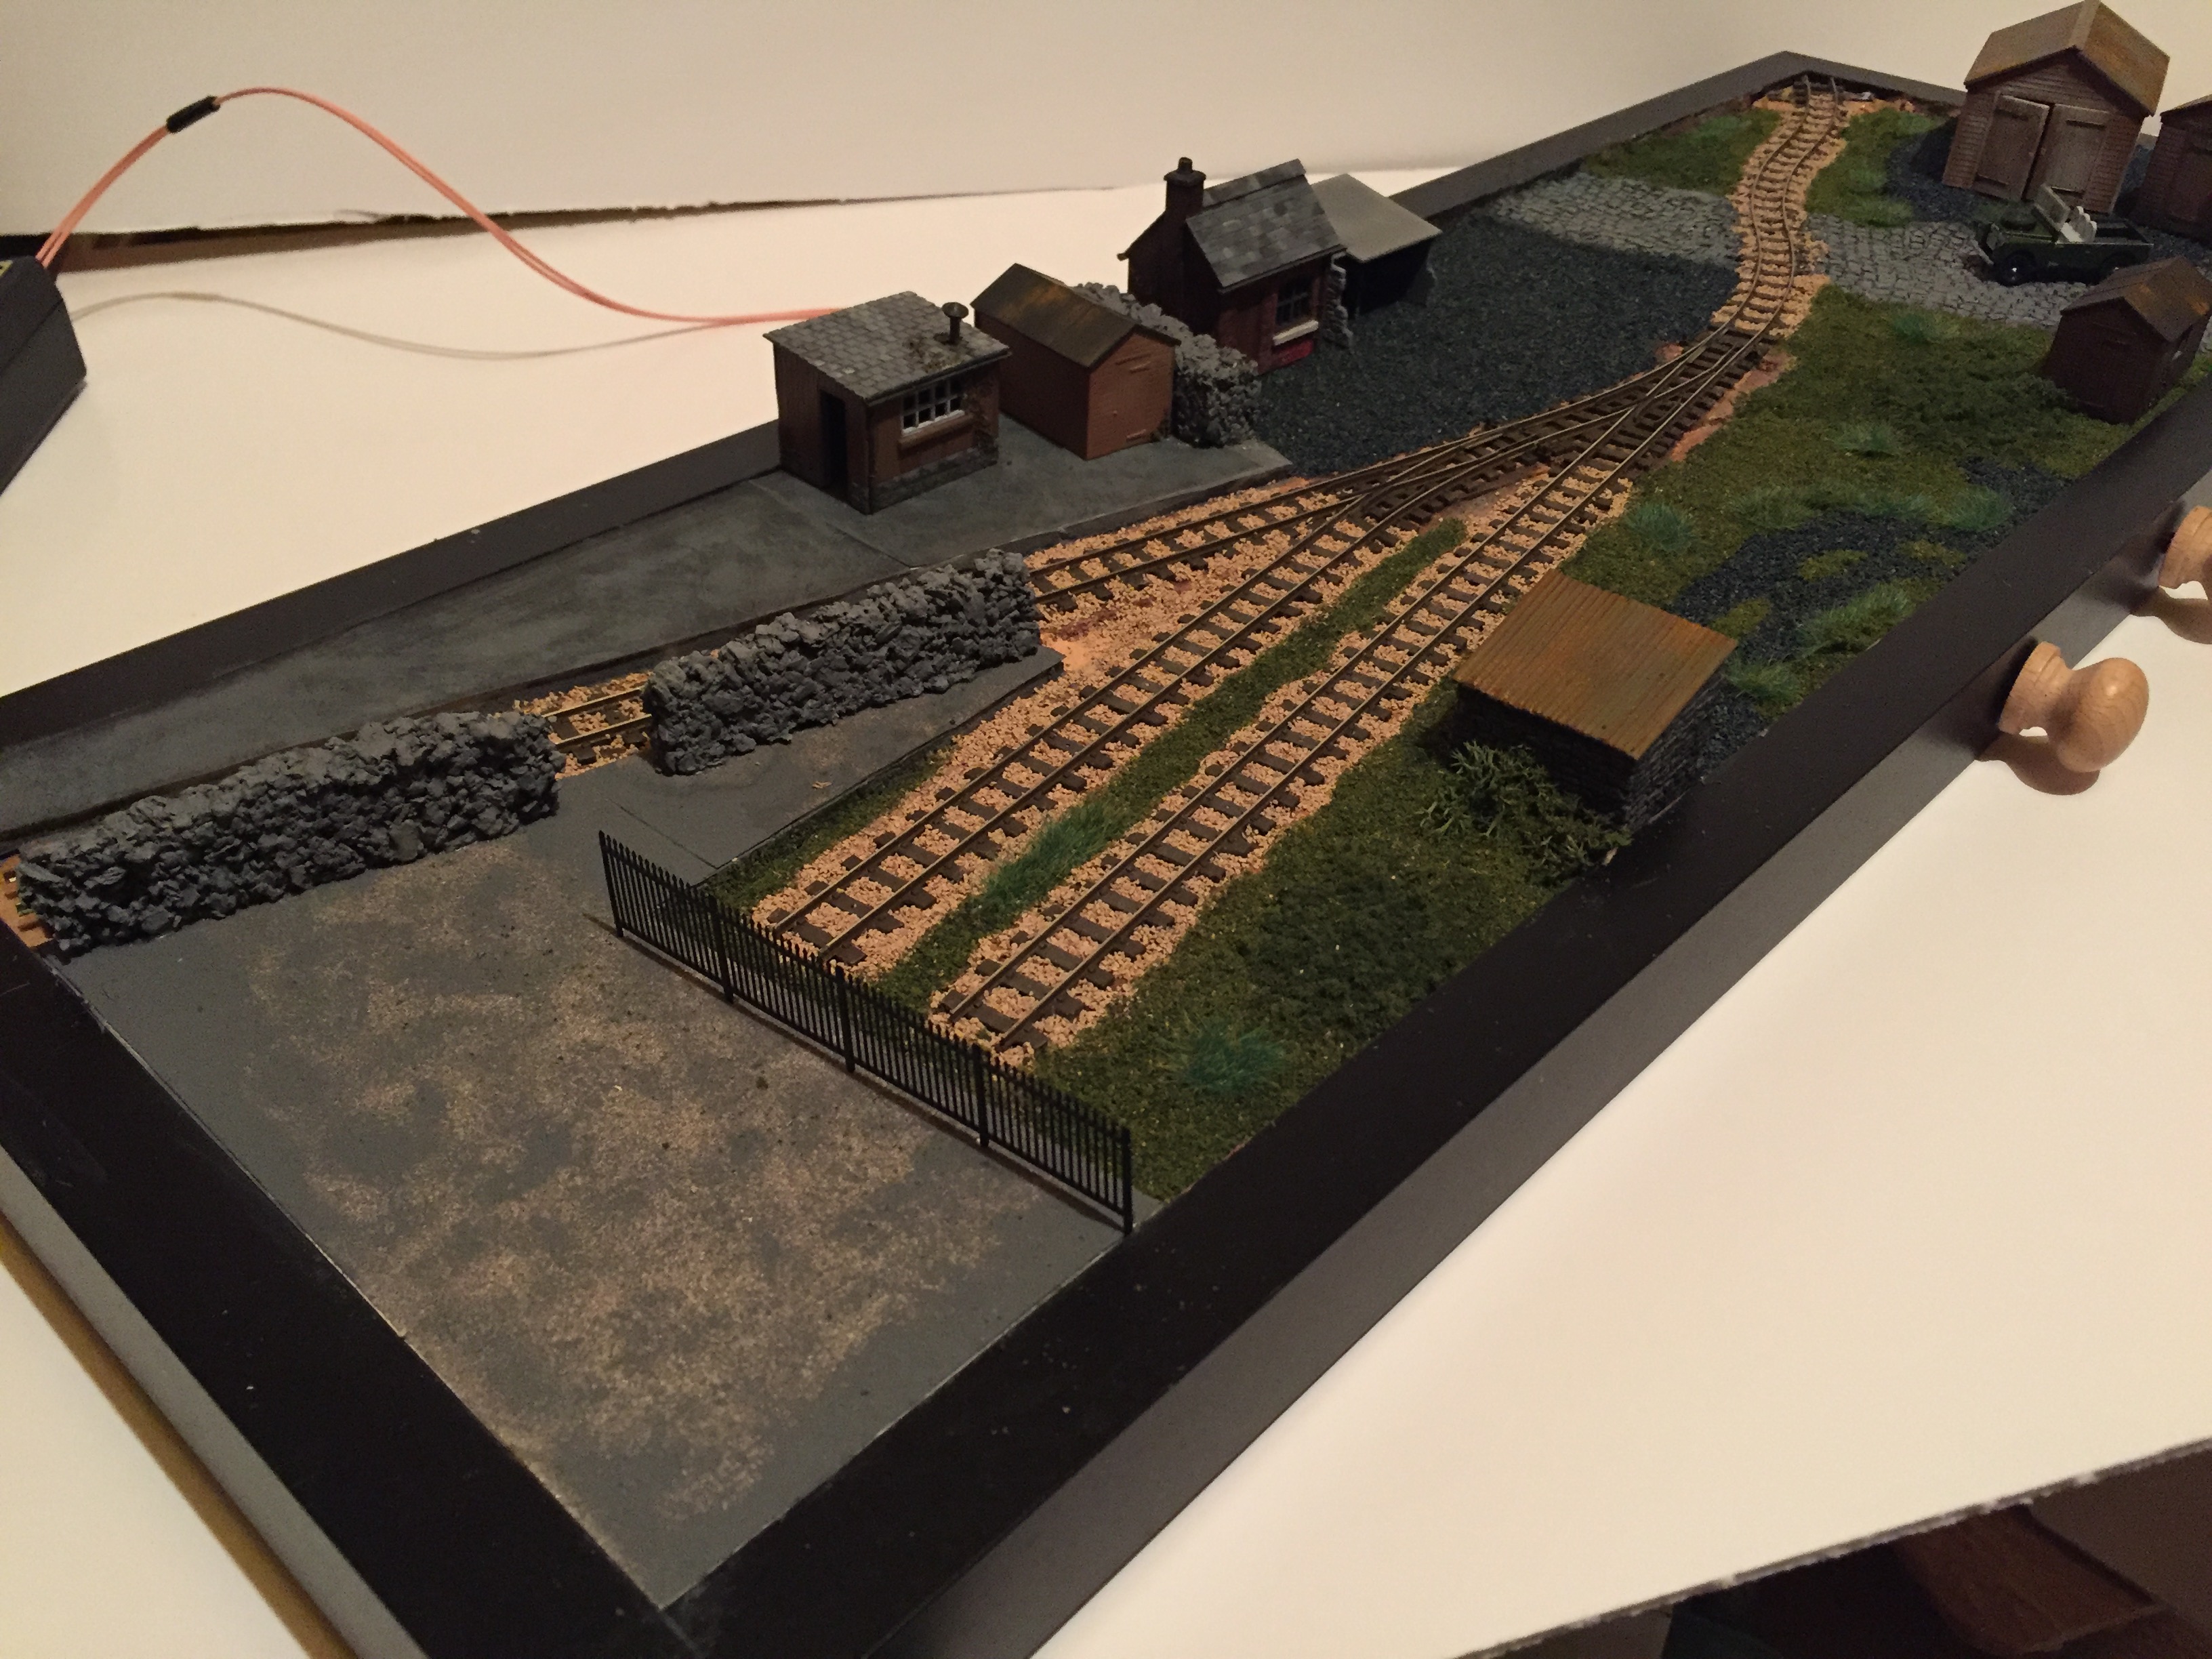
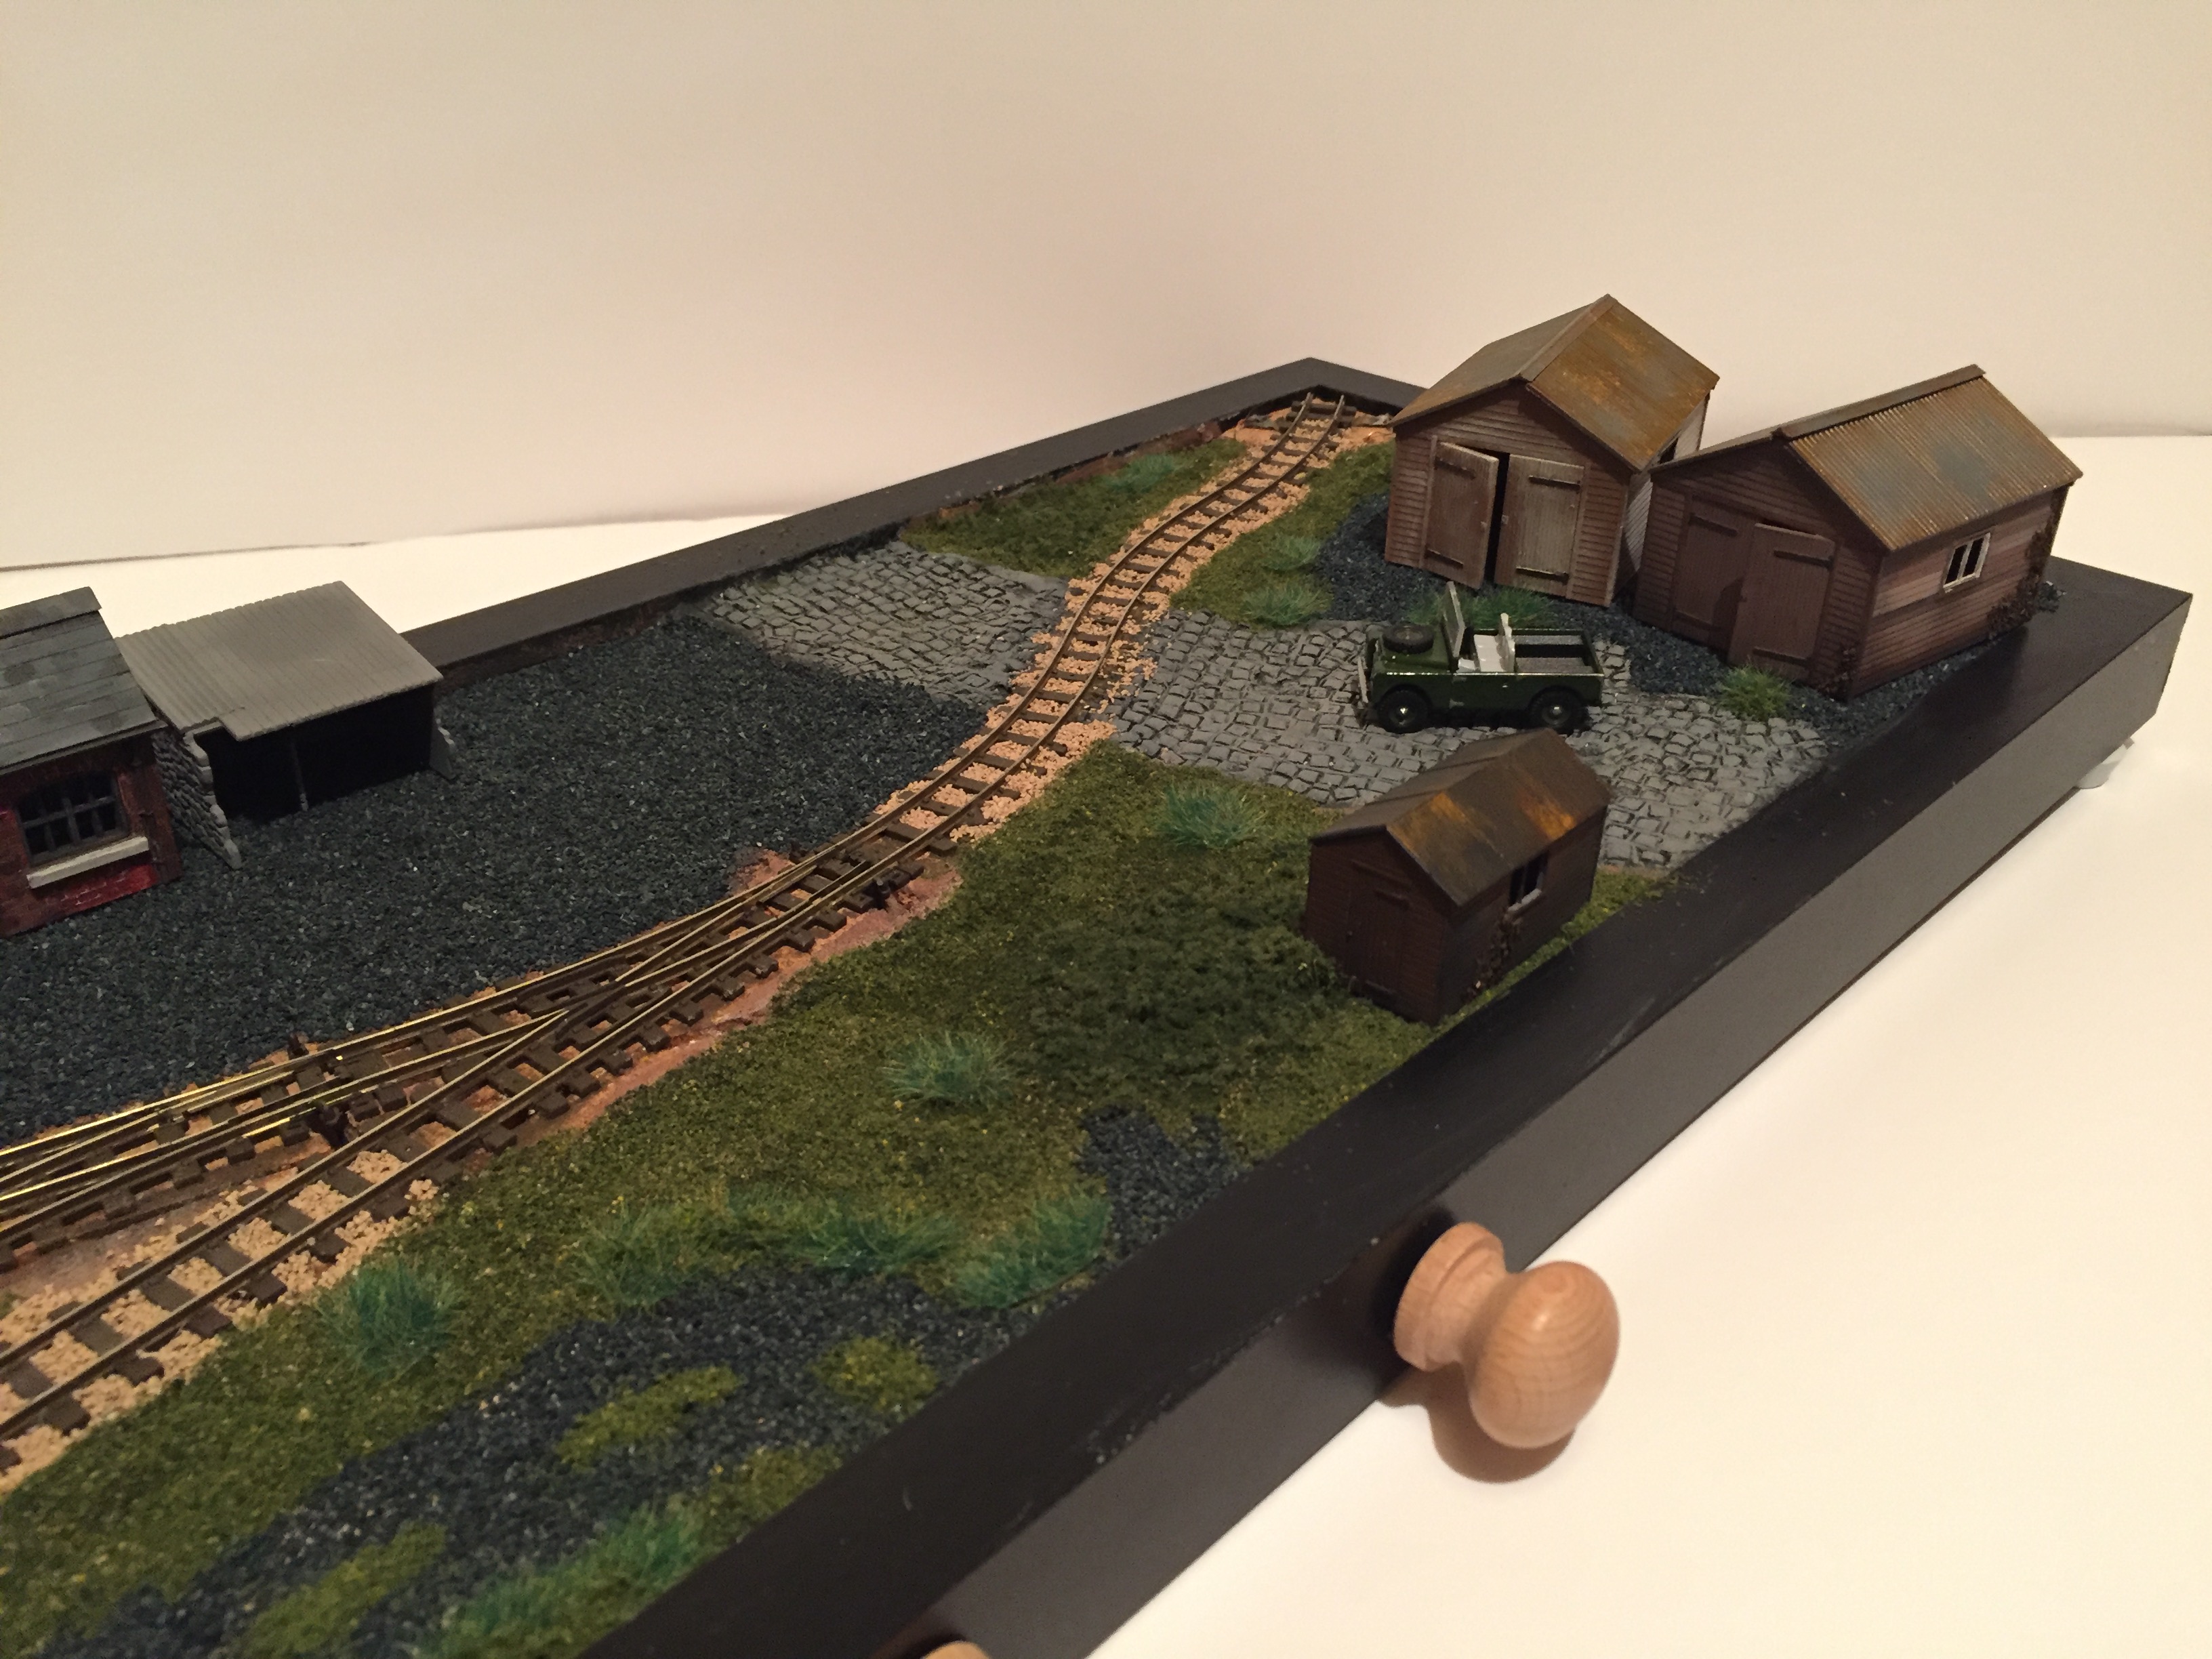
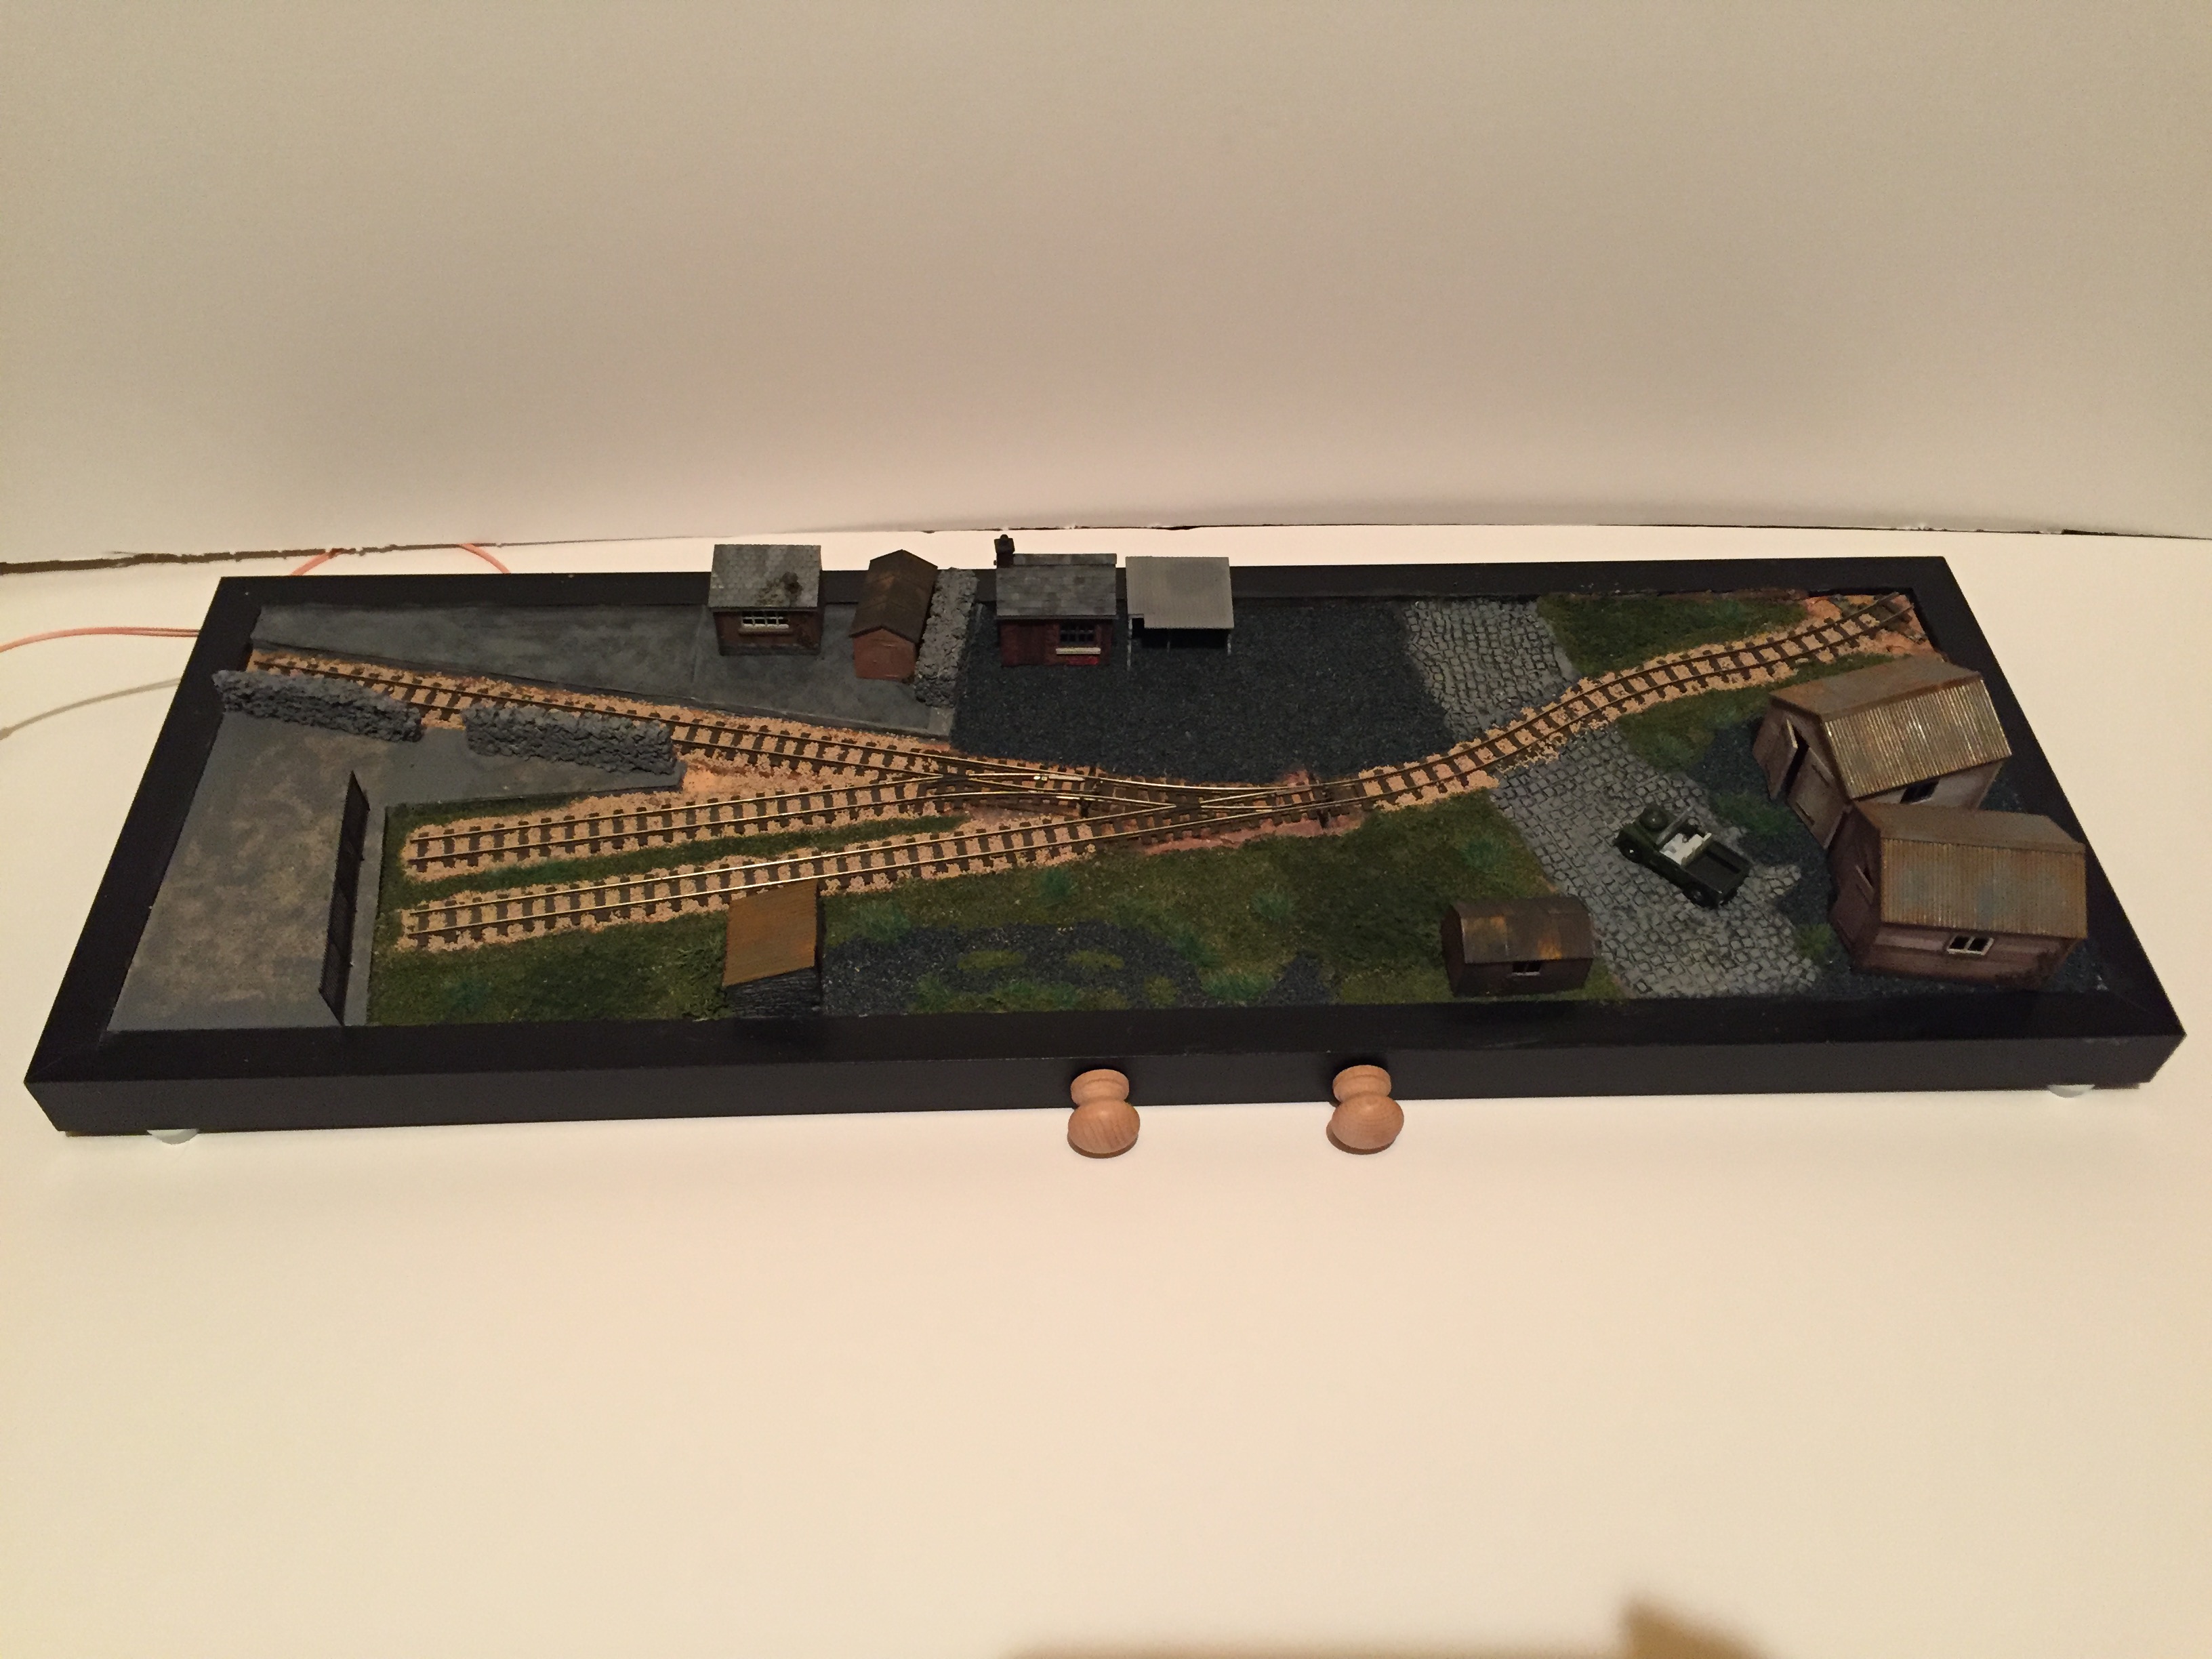
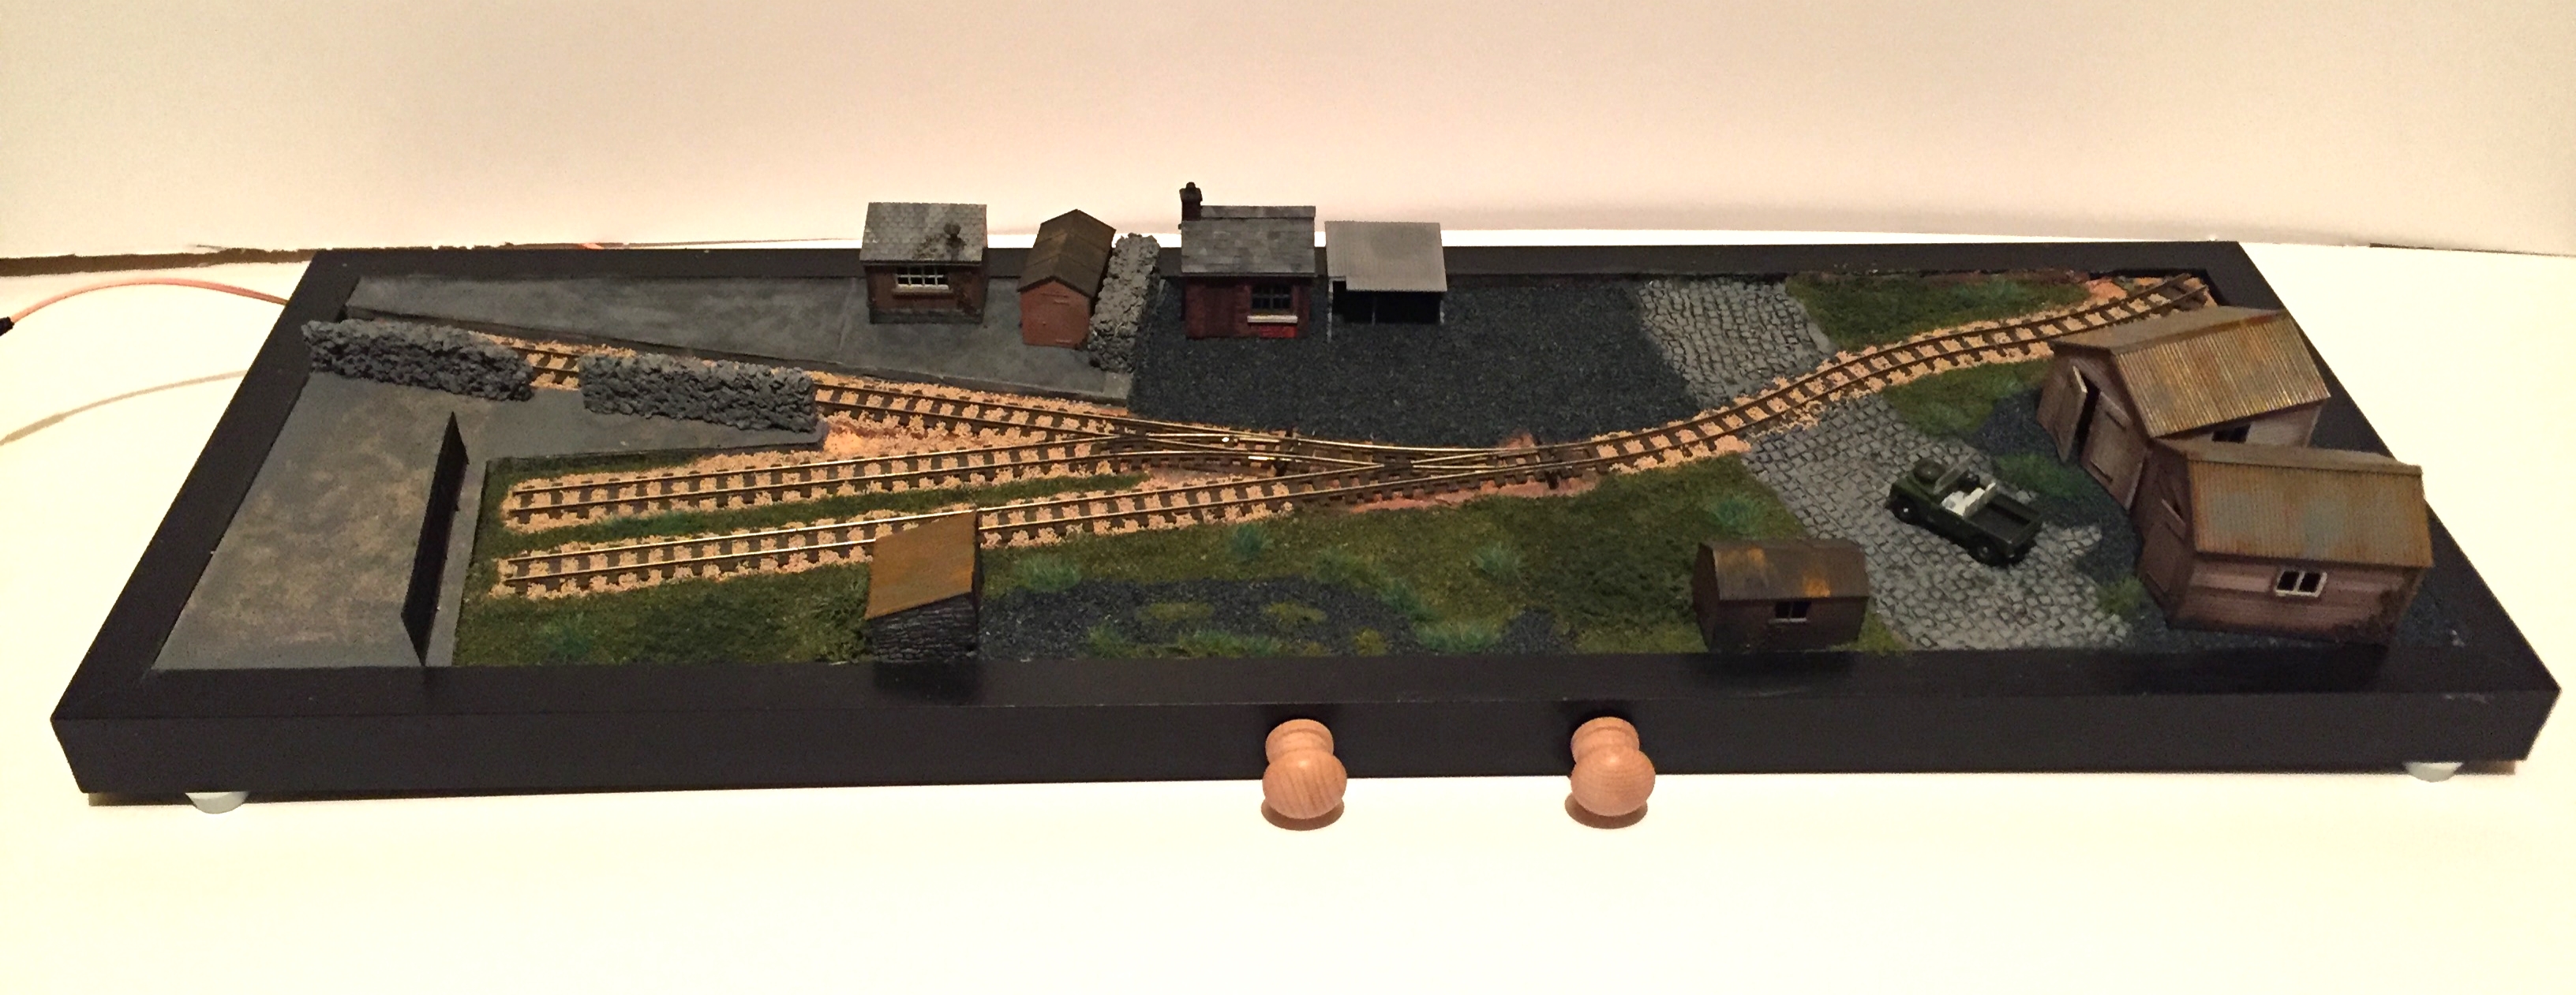
N gauge micro – by Ian Glover
It has been made in two gift boxes attached together. Overall it measures around 60cm long by 18cm deep, with the box height only 9 cm. The baseboard is made from an old artists canvas frame as was already the right length. This was then cut down to fit the depth of the box, and a layer of mdf attached on top.
The track layout is based on a self contained 322 Inglenook shunting puzzle, with wire in tube point control. This allows for some basic operational movements. The overall concept for the layout is a set of sidings serving a warehouse. As the line is in its last days of service, everything has a semi run down look and feel.
To keep the construction costs down, all the buildings are made from card models that have been downloaded online and printed.
American Micro Layout – by Chris Jenks
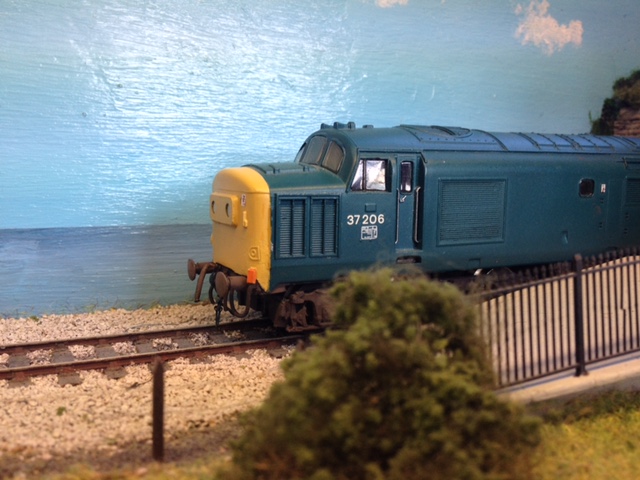
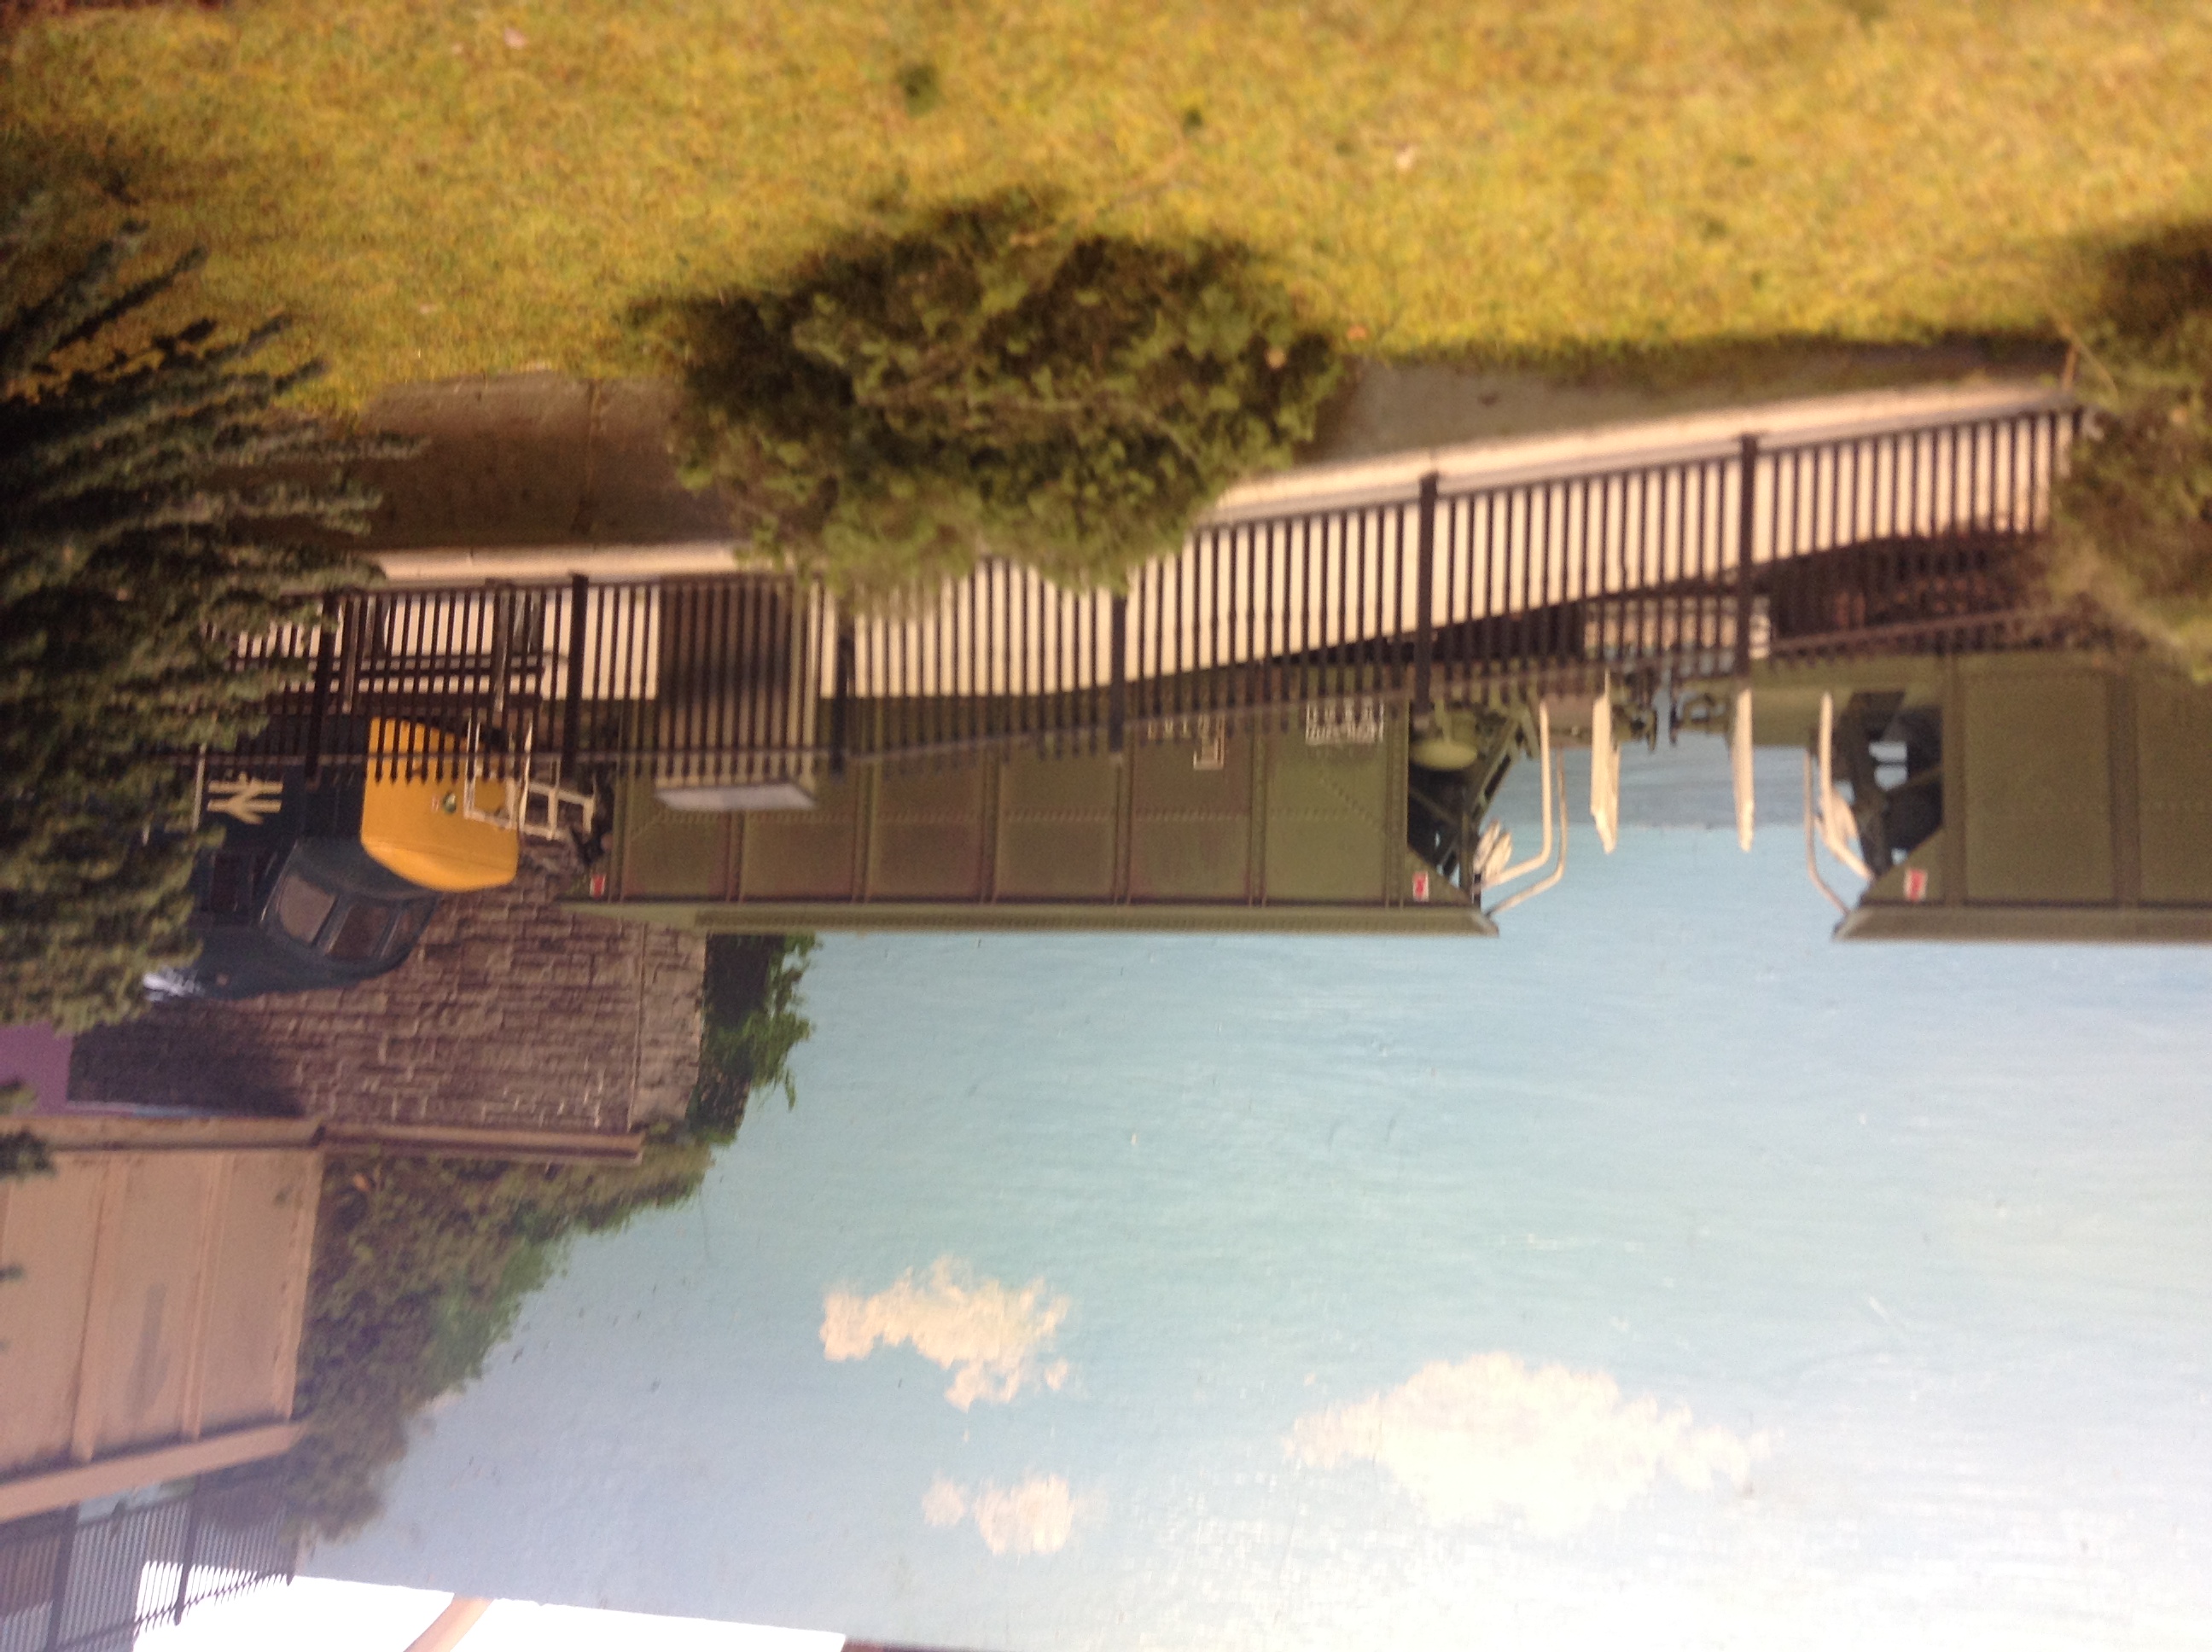
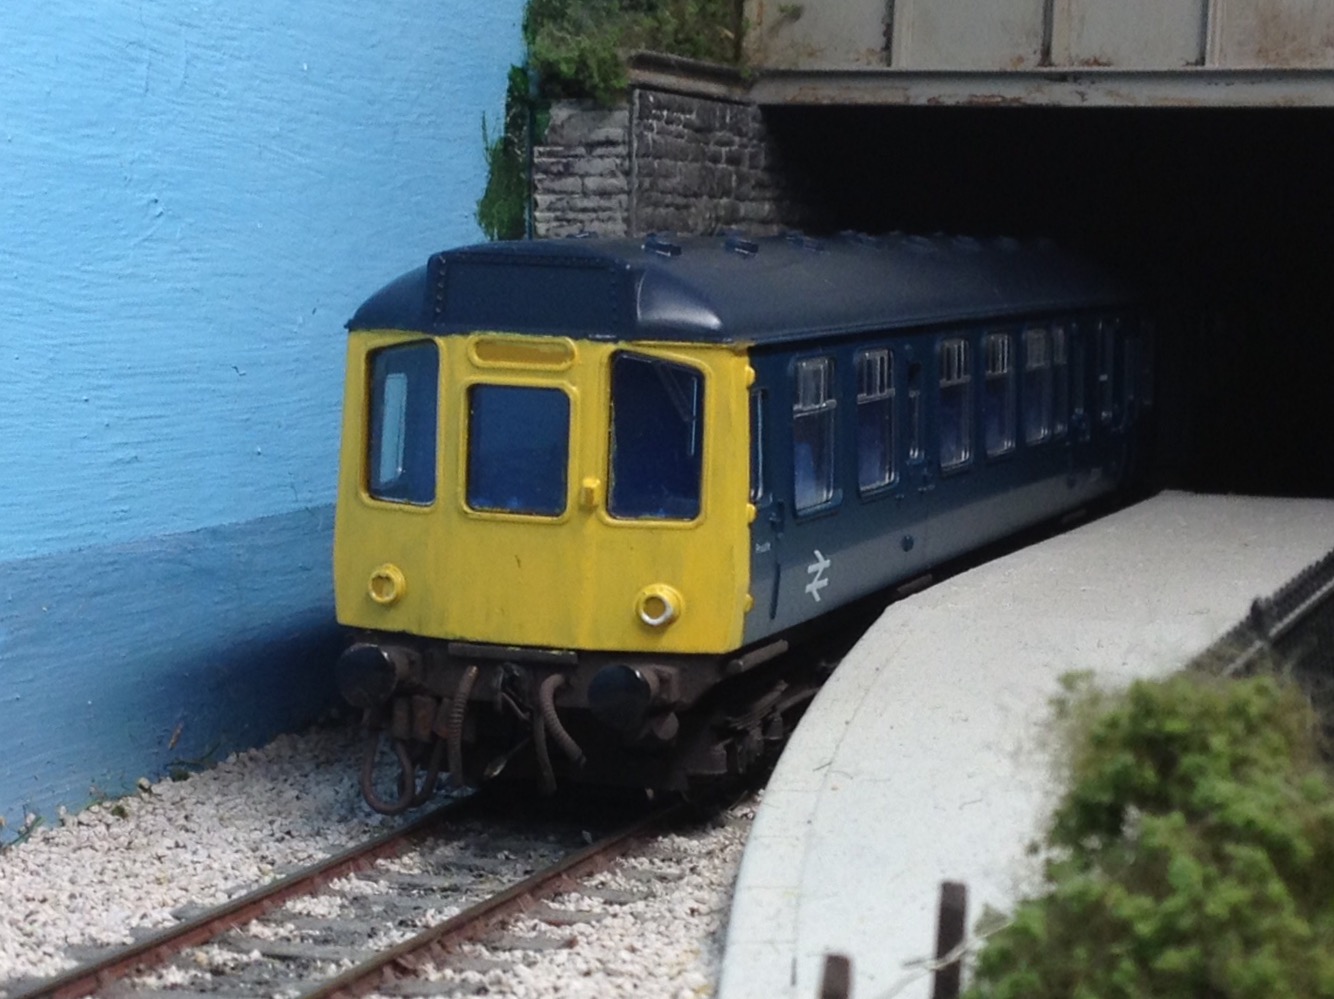
I have built and operated 3 micro layouts, all in oo gauge and using smp track recovered from a garage layout my dad and I started building back in 1972ish!
The first one is a single track set up with 4 foot fiddle yards at each end. I called it ‘The Railway Fields’ and based it on my childhood, seeing all sorts of trains running along the branchline into my home down. Trains were sometimes diverted from the mainline and I saw all manner of freight and passenger/parcels trains clanking past! It is based in the 1978-1982 period of British Rail and kept me amused for quite a while. I could sit up in the loft and run trains as I remembered from my early youth (and indeed in some cases had been building since then!). Here are some pictures!
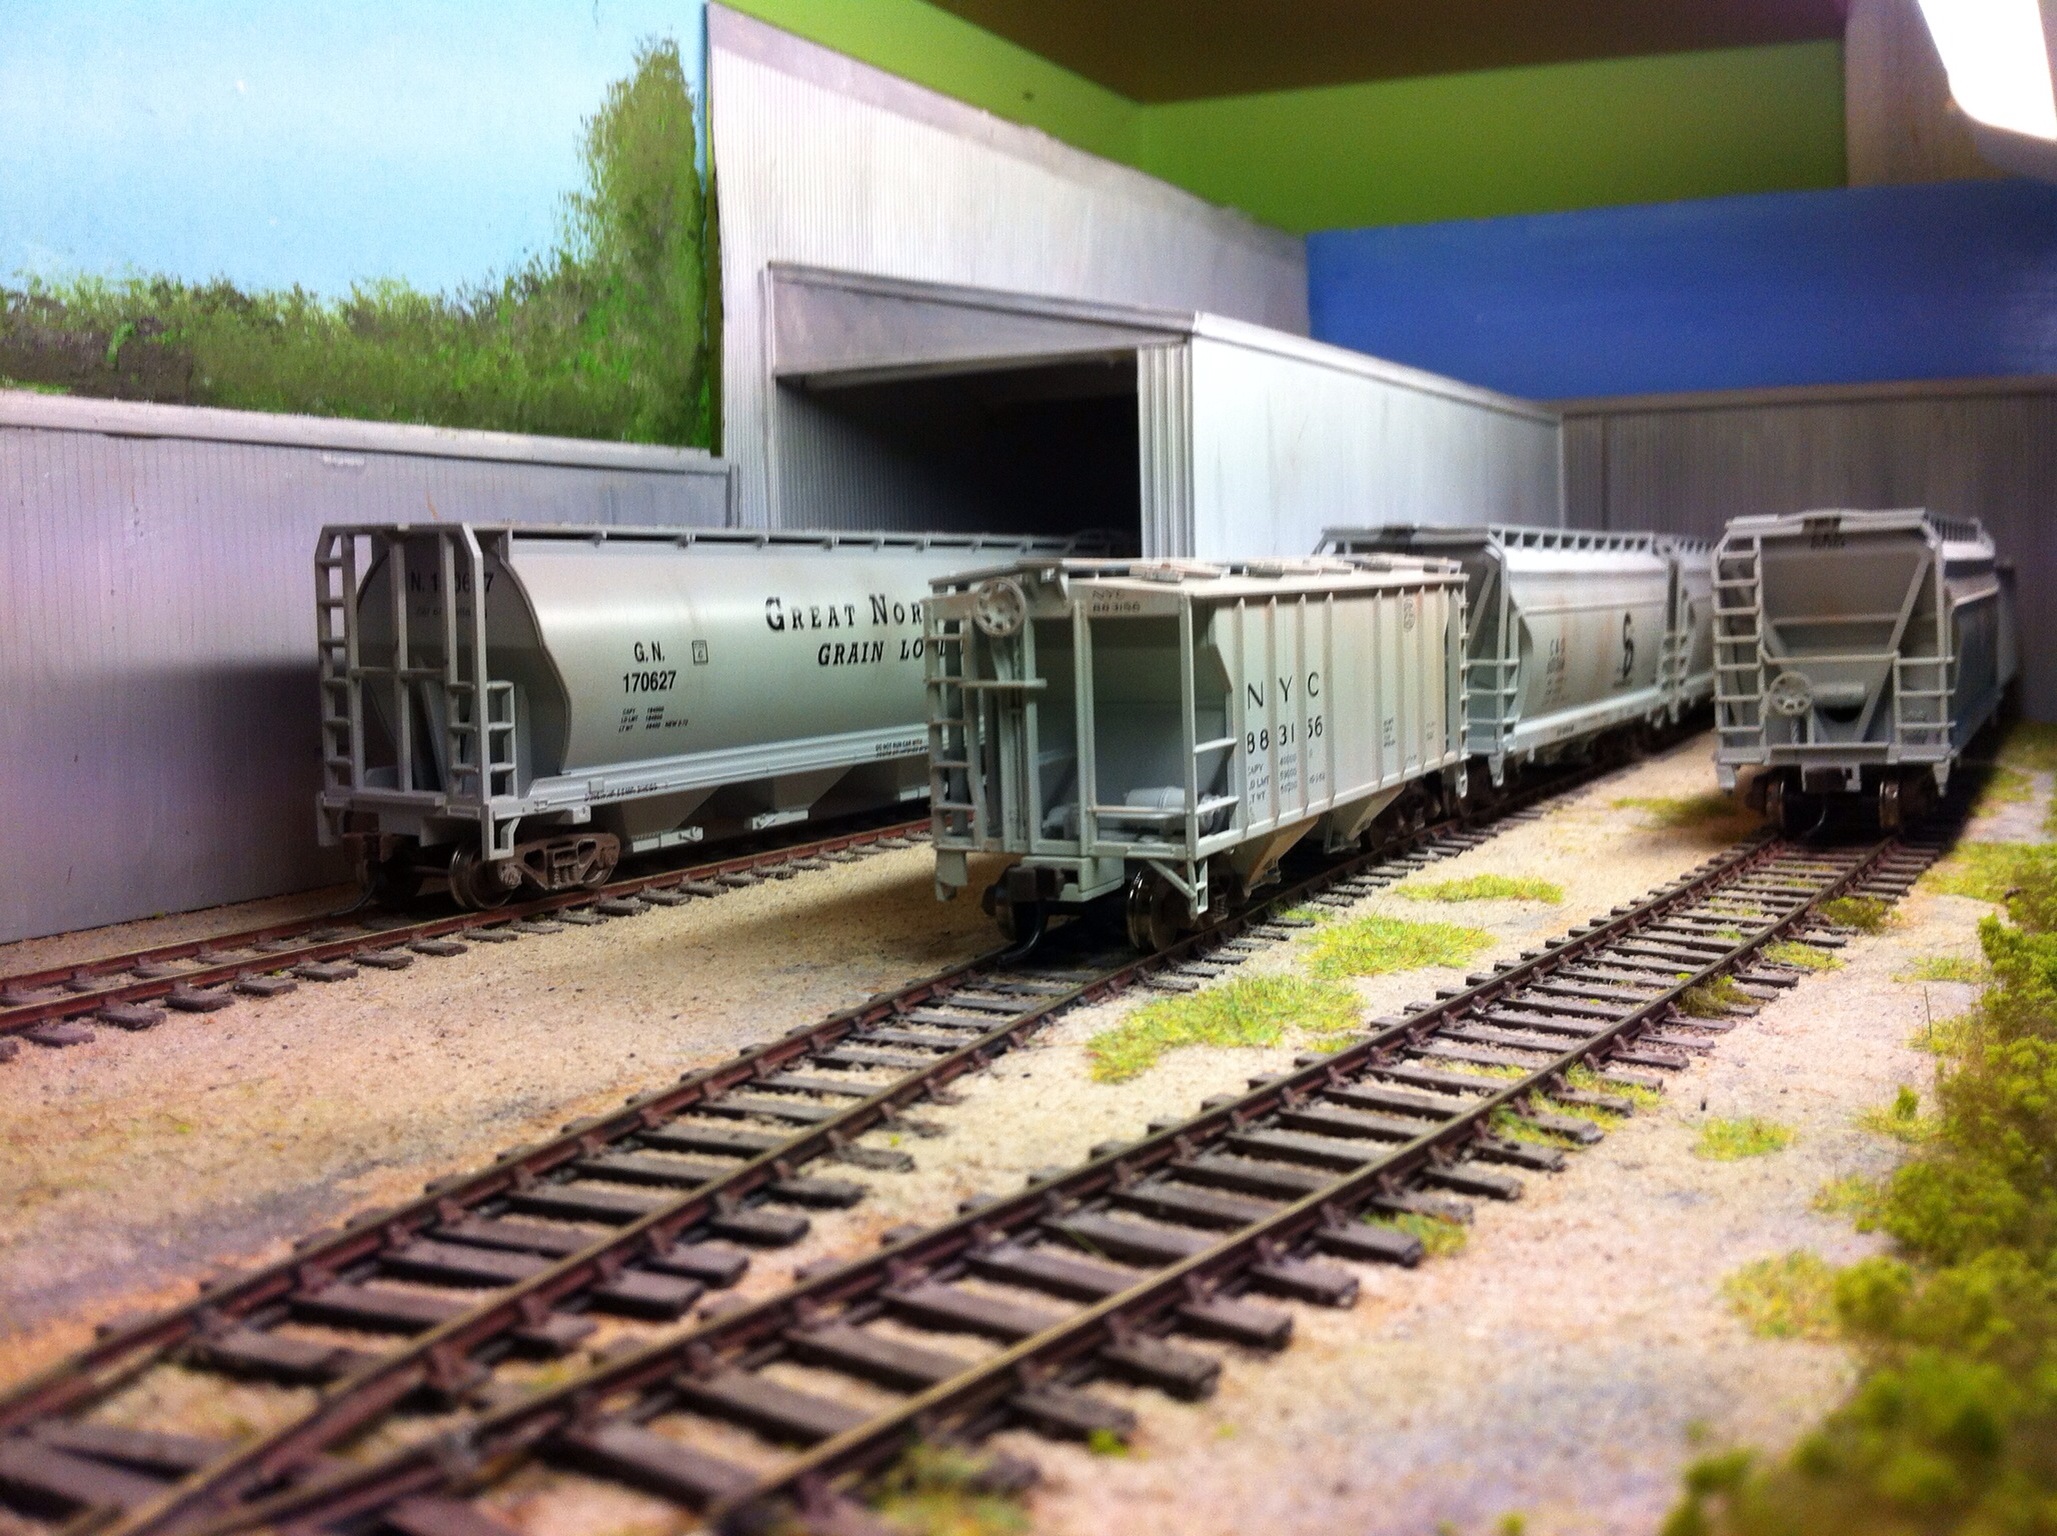
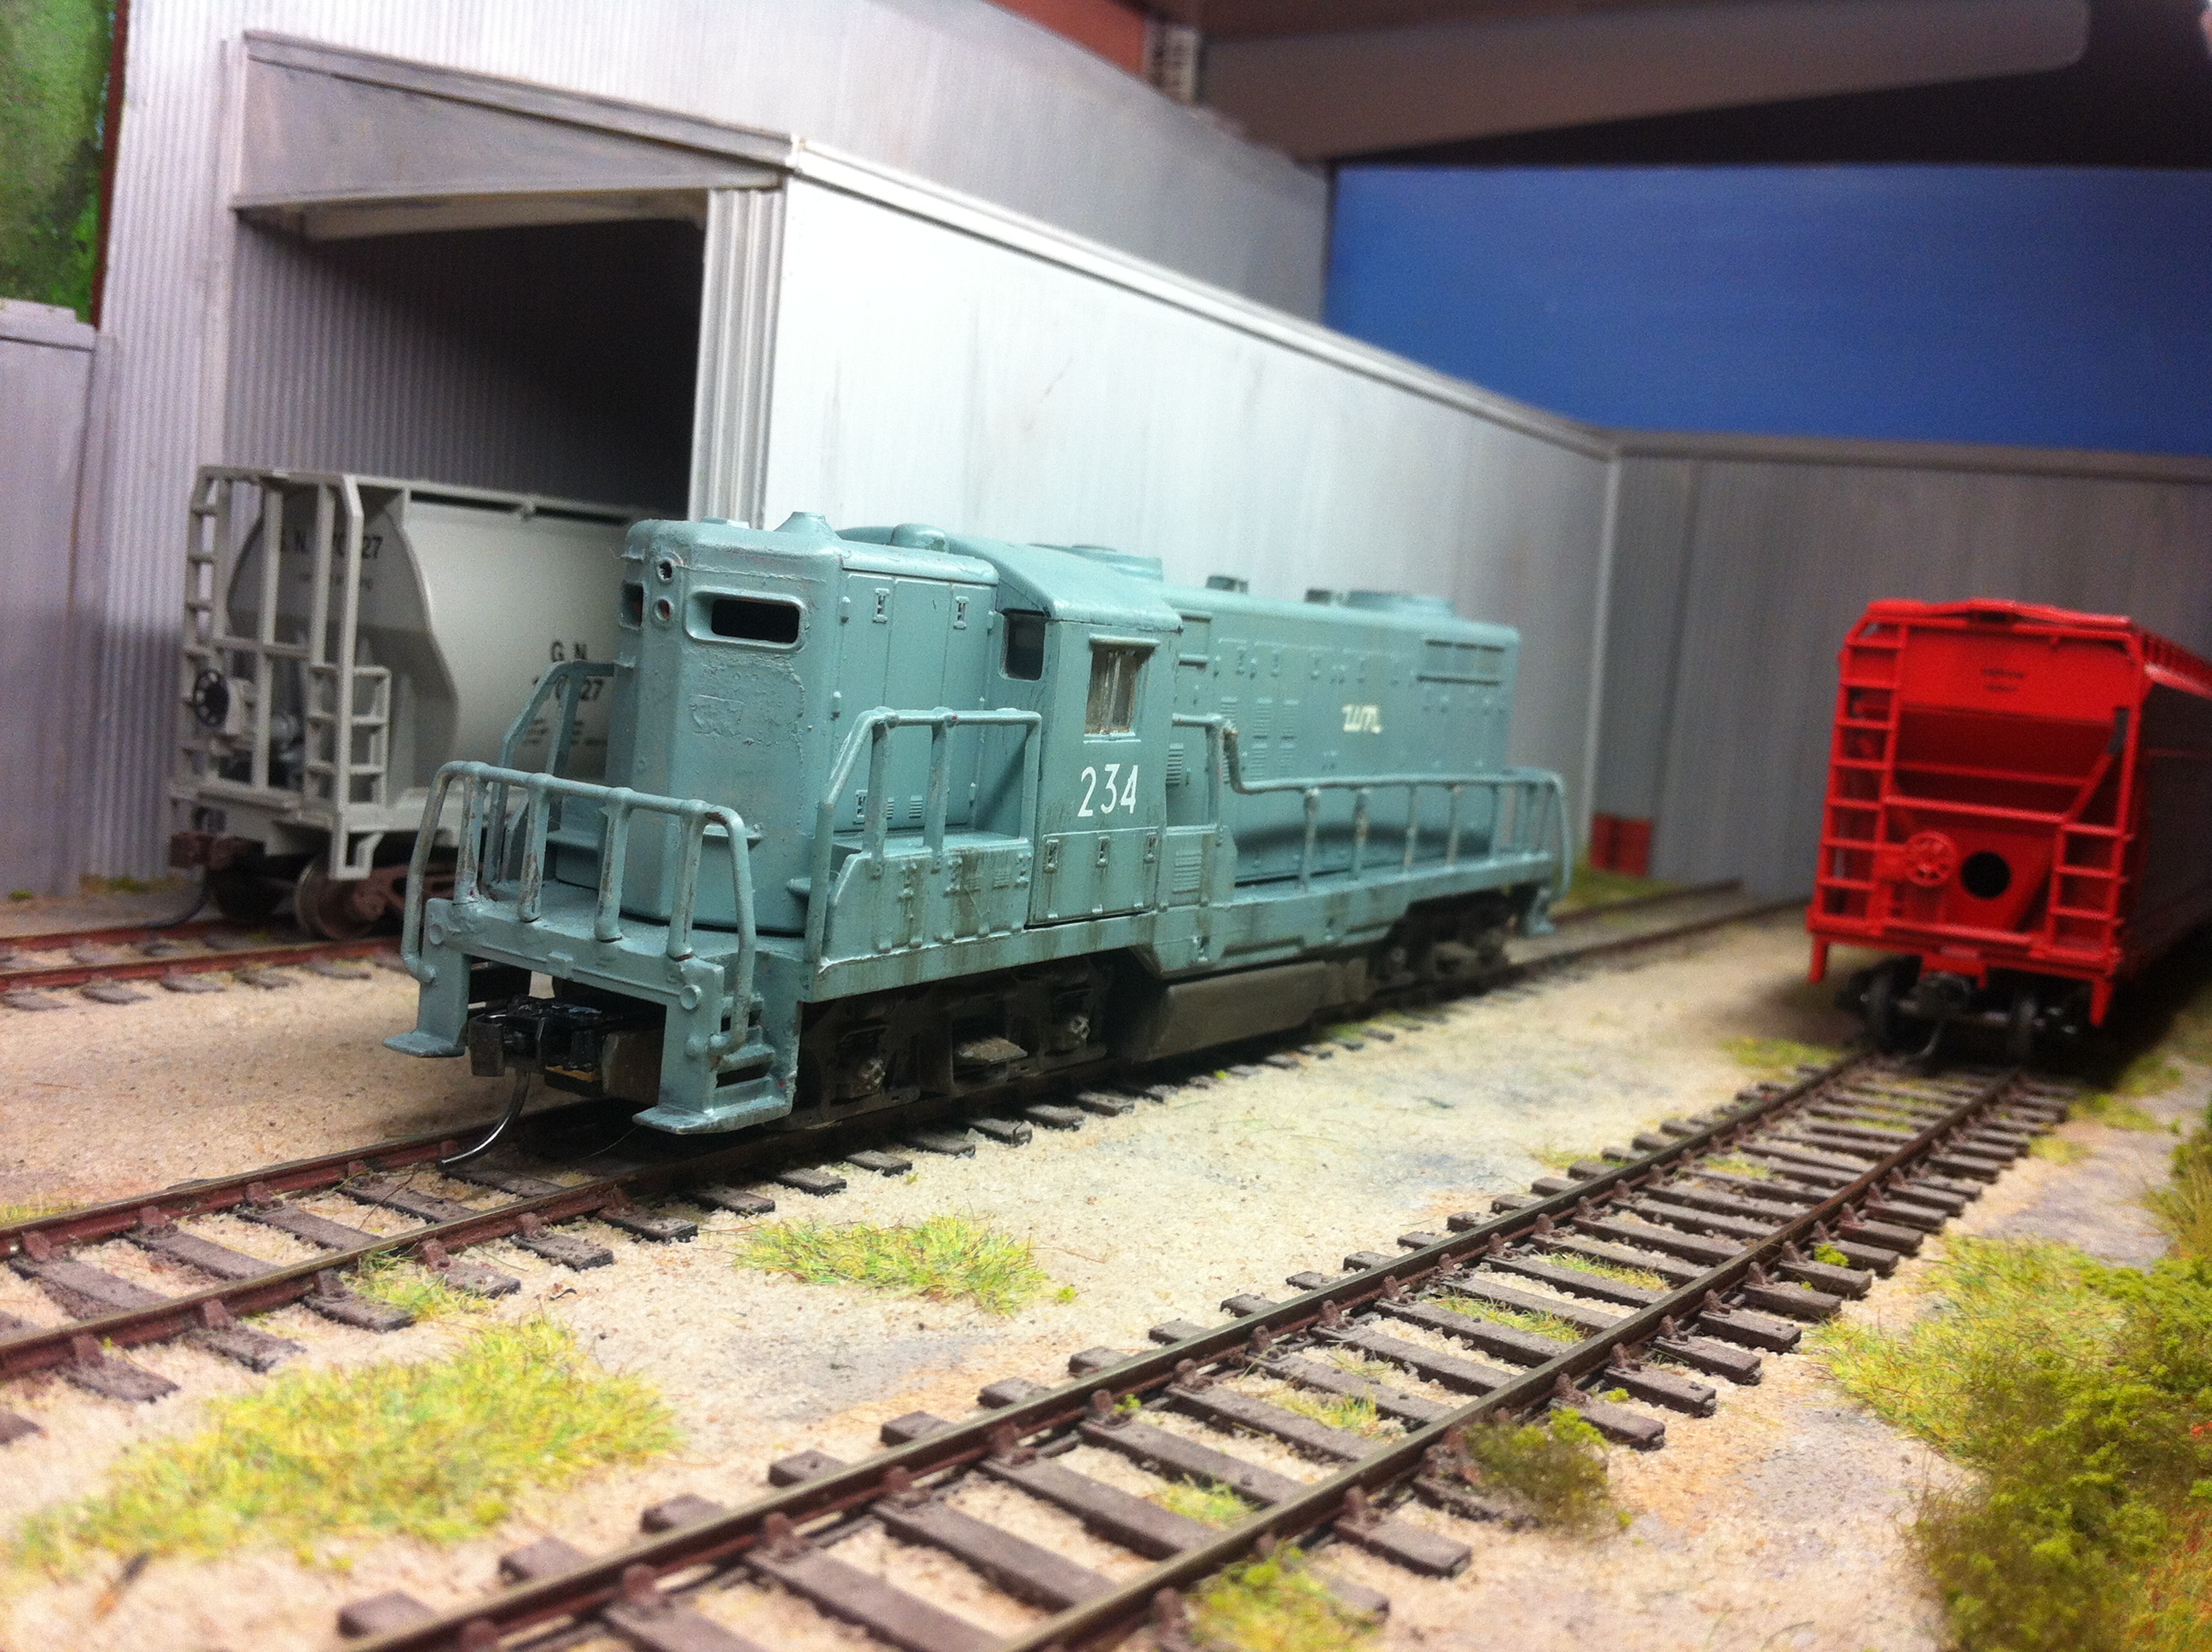
This is my second micro layout based on American H0 stock. Made of plywood measuring 25×76 and H0 gauge. It is a small US grain and powdered cement handling terminal and used to be in my kids playroom, high up! I could do some switching whilst helping in Sunday roast lunch prep and the dear wife was nice the wiser!
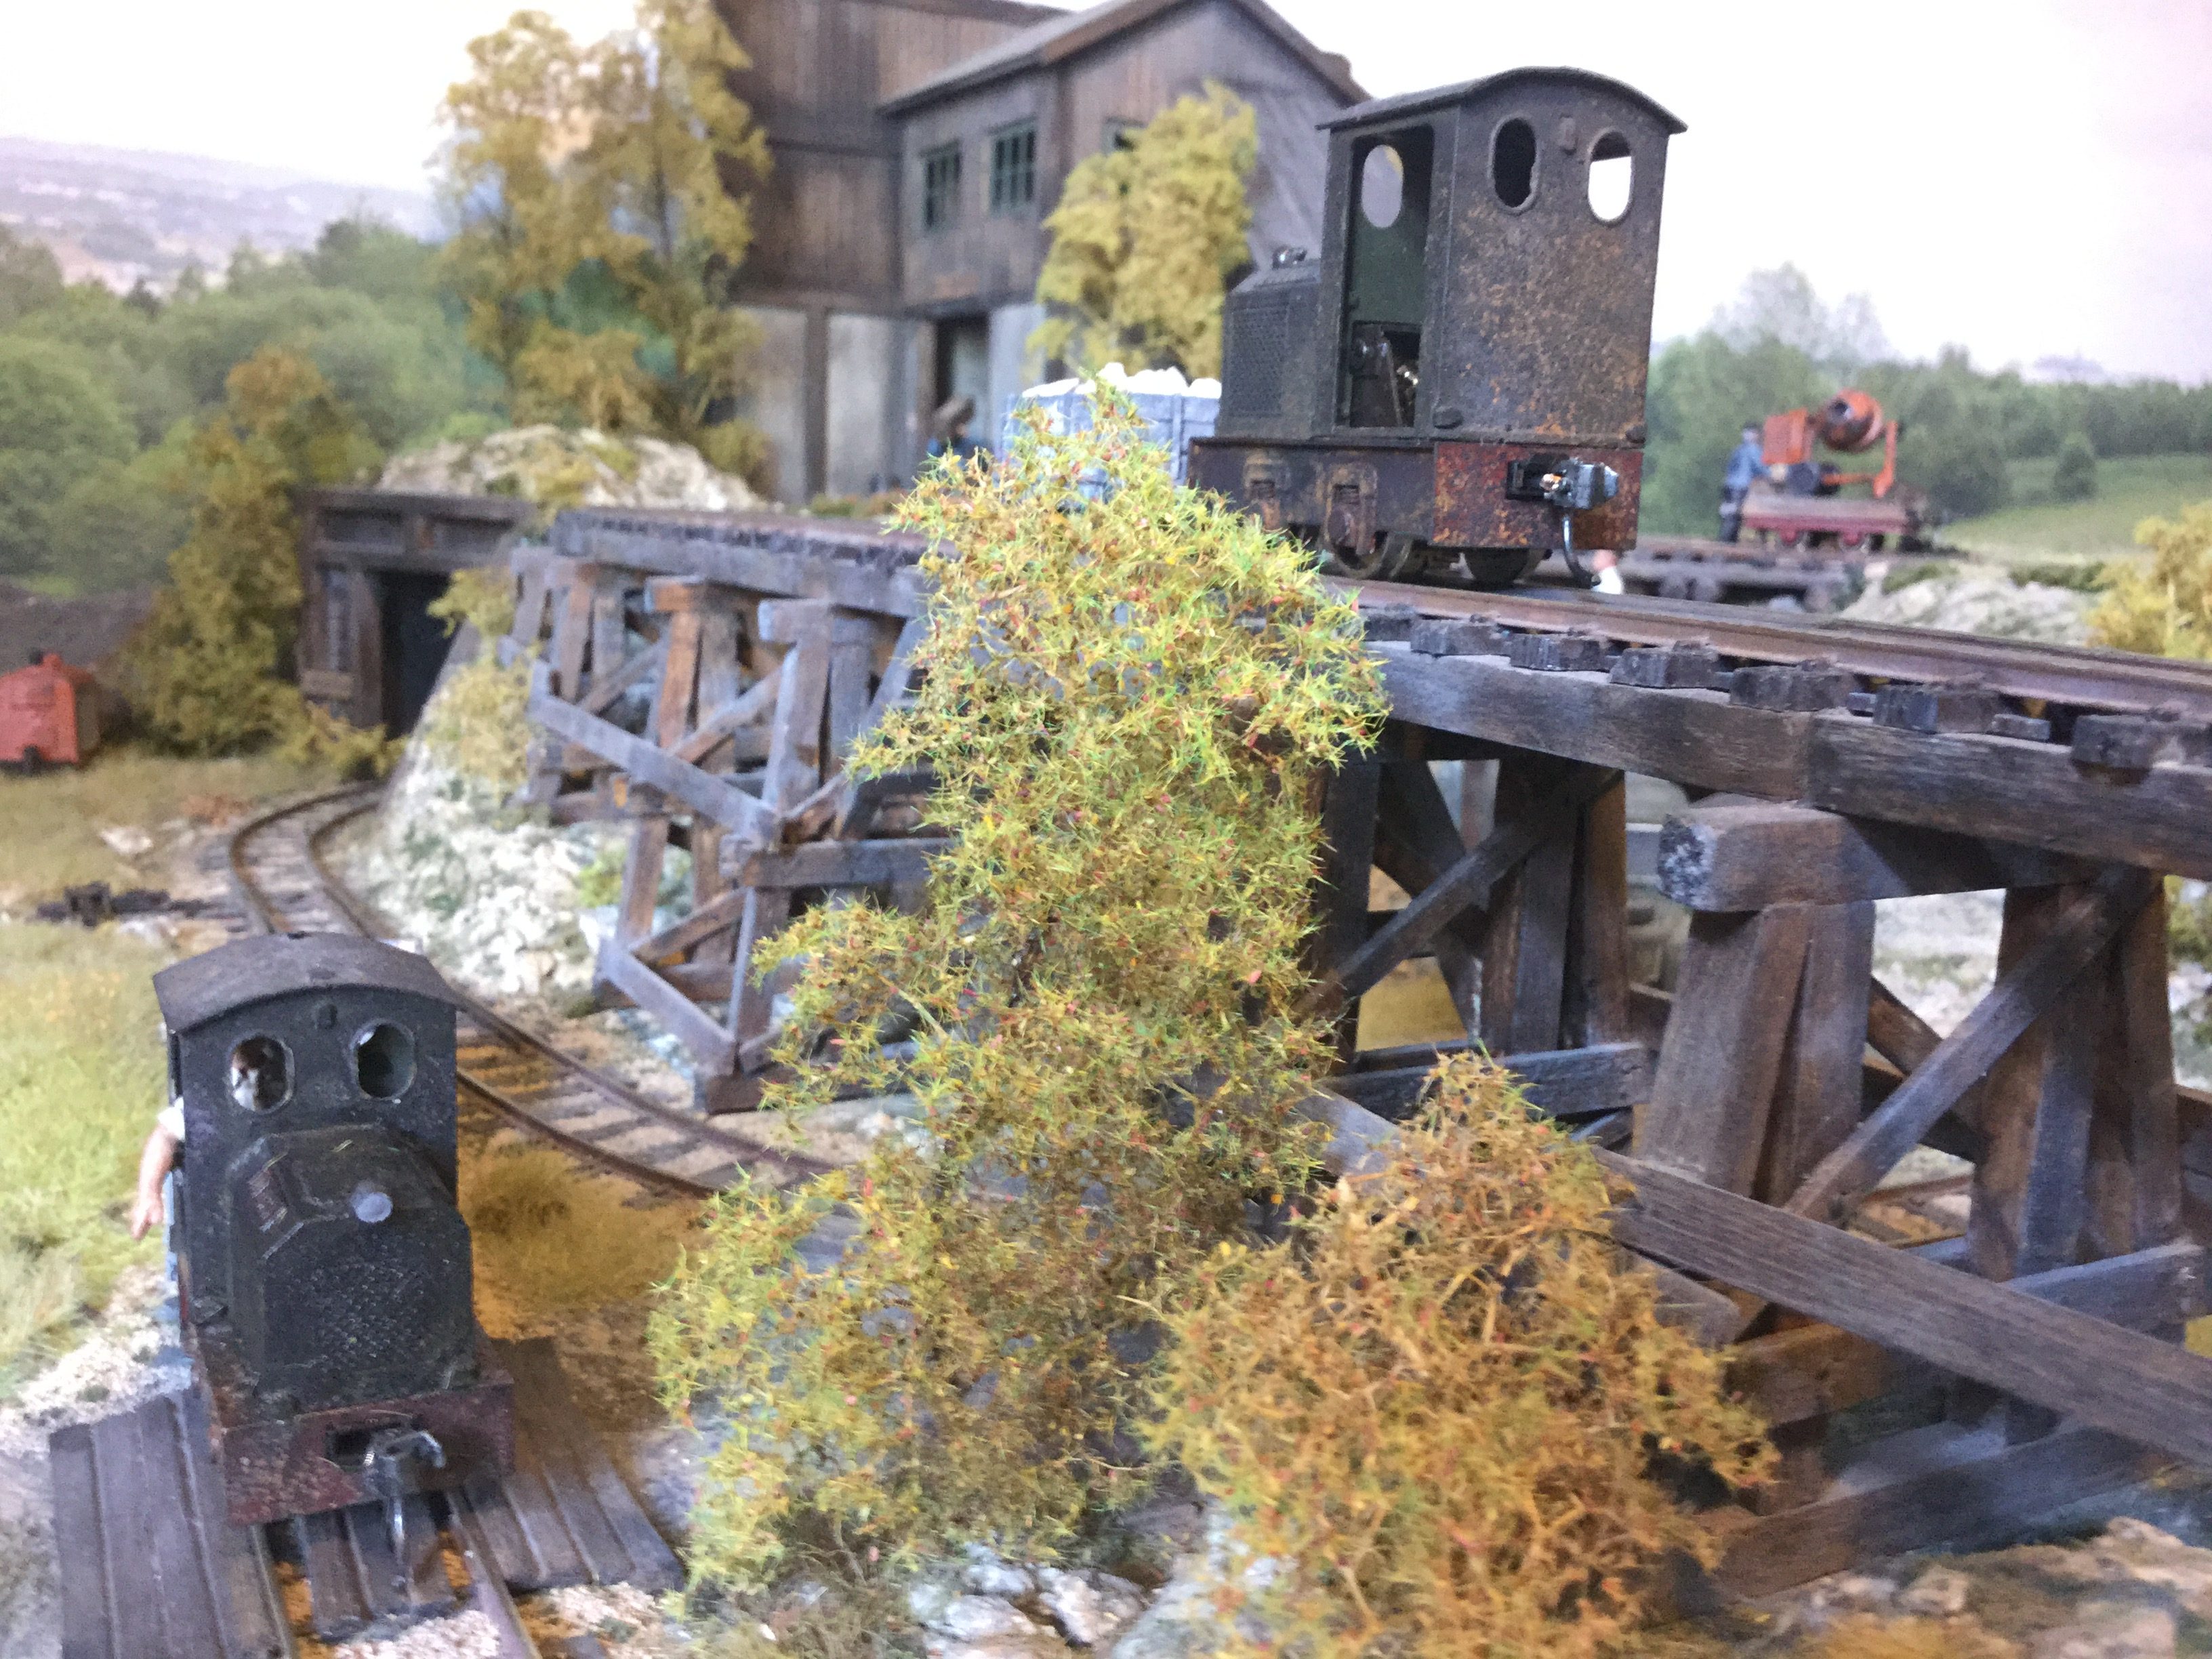
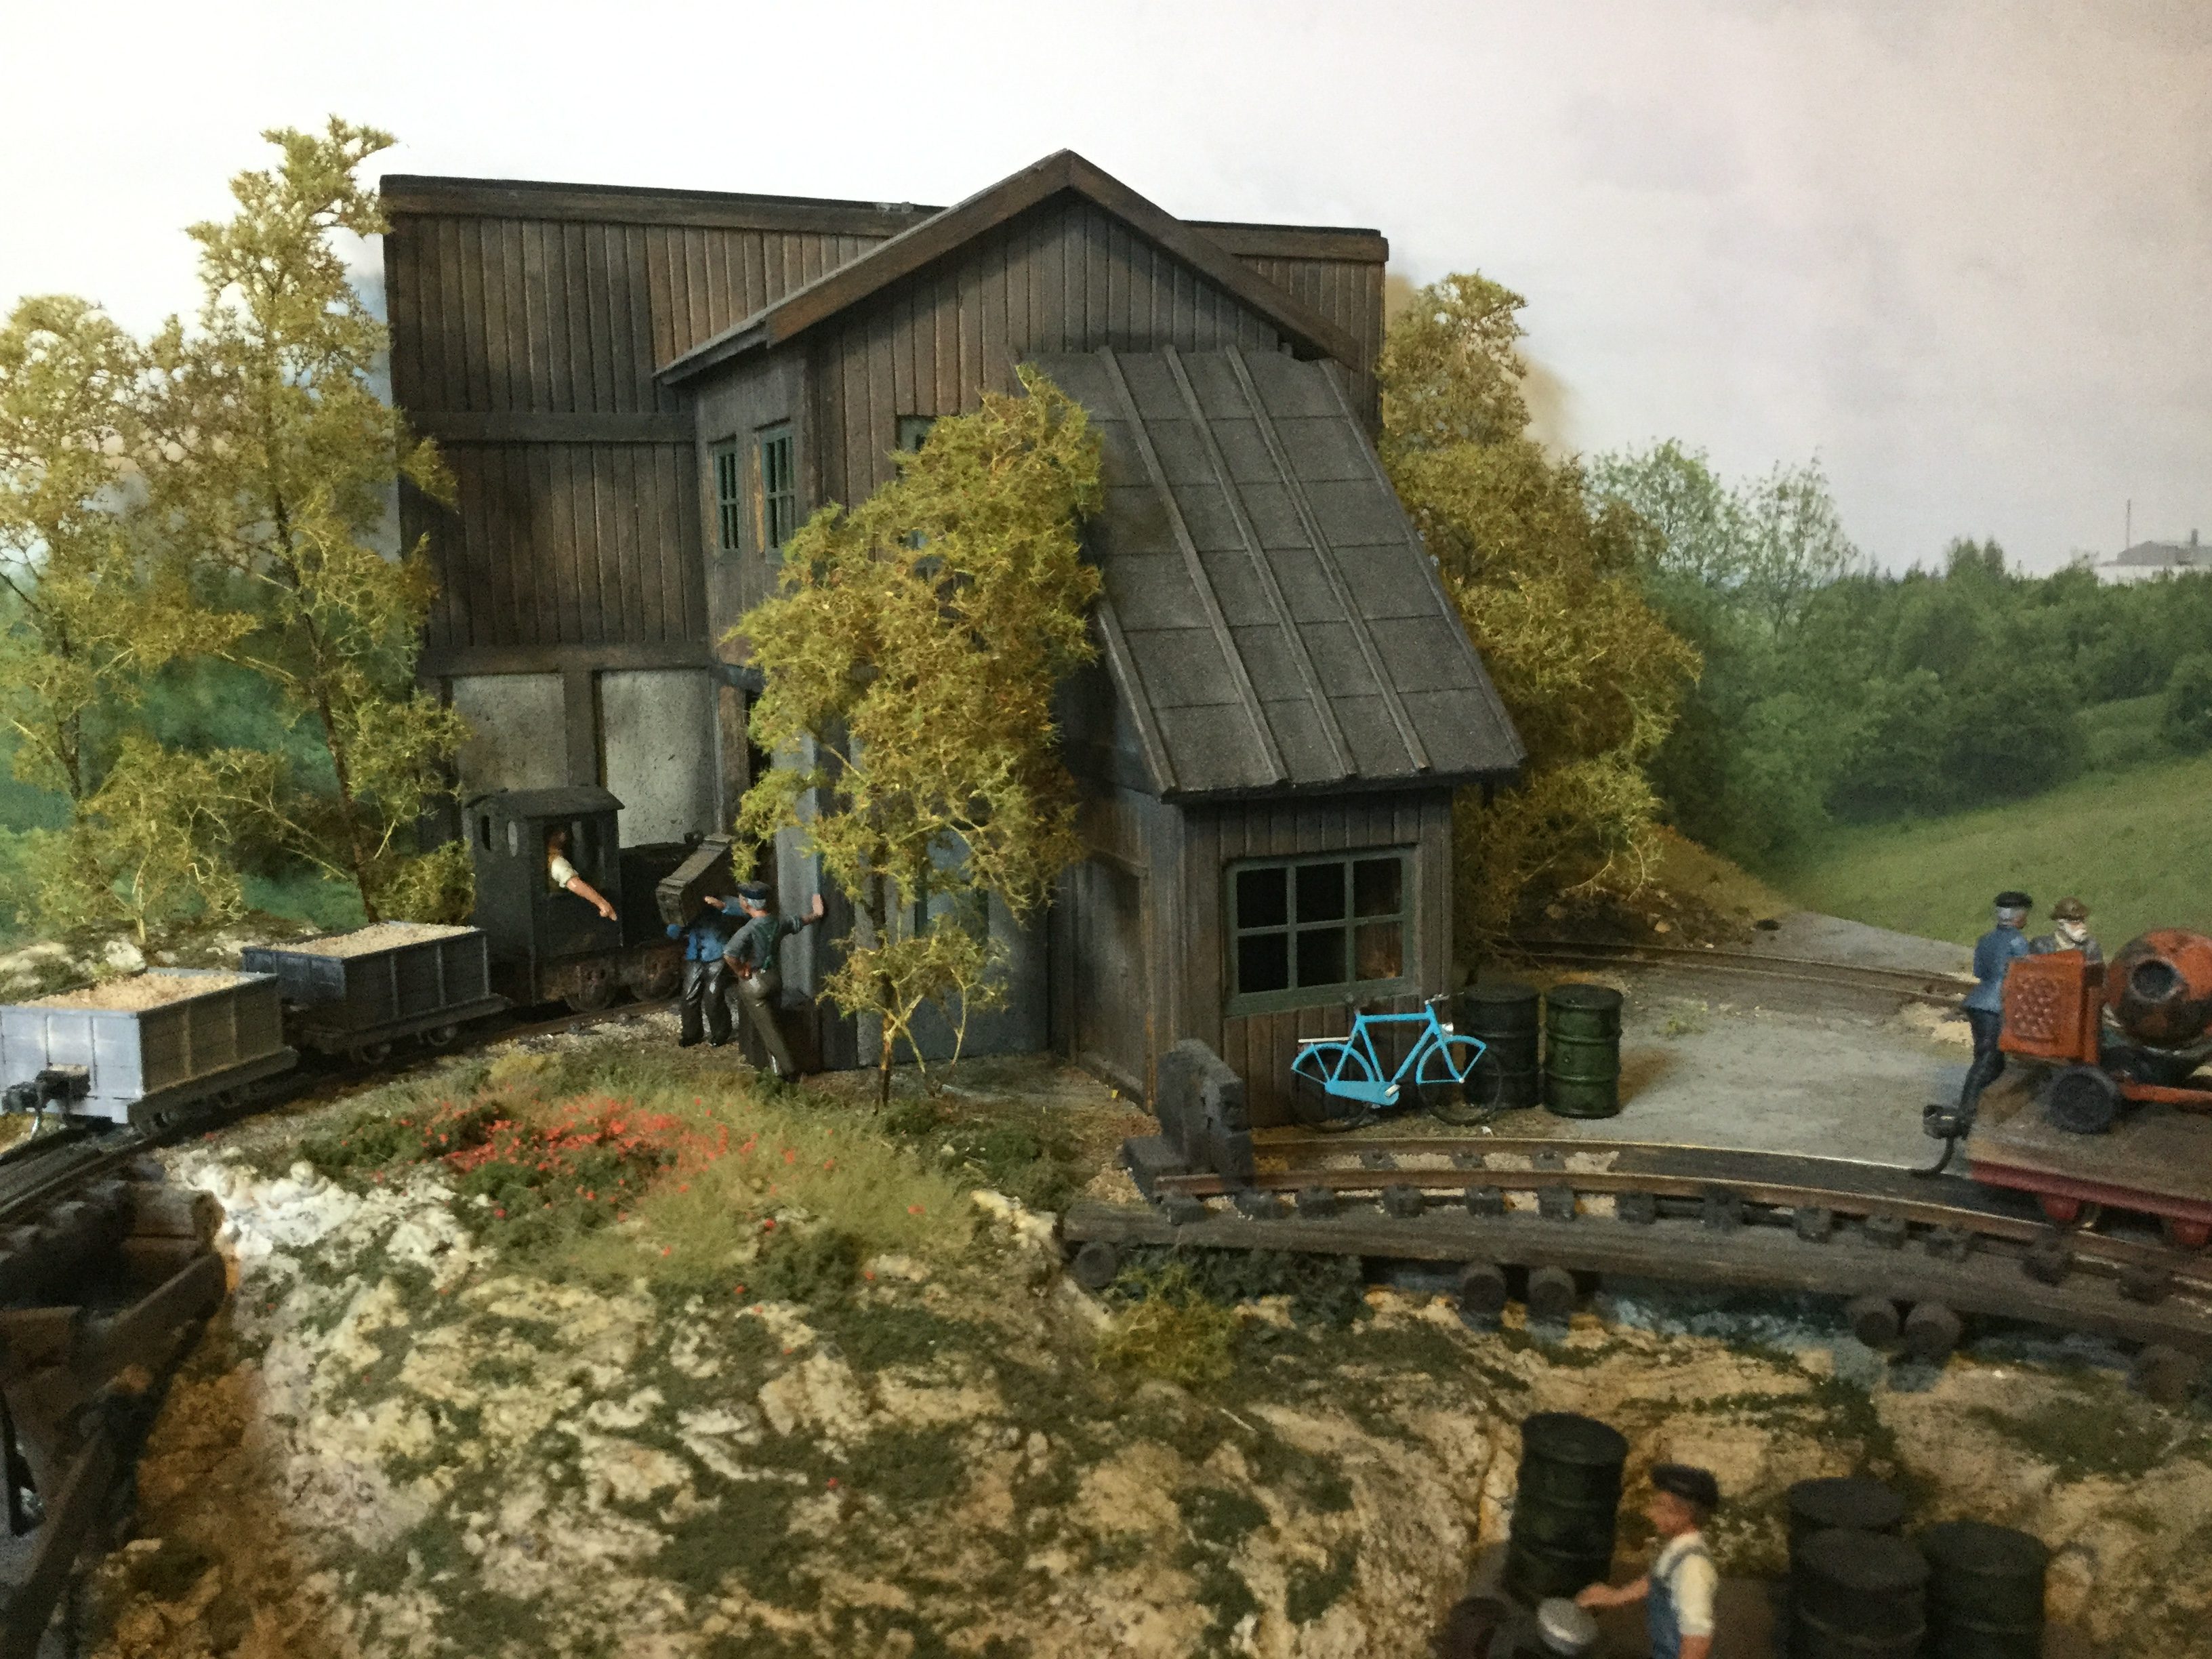
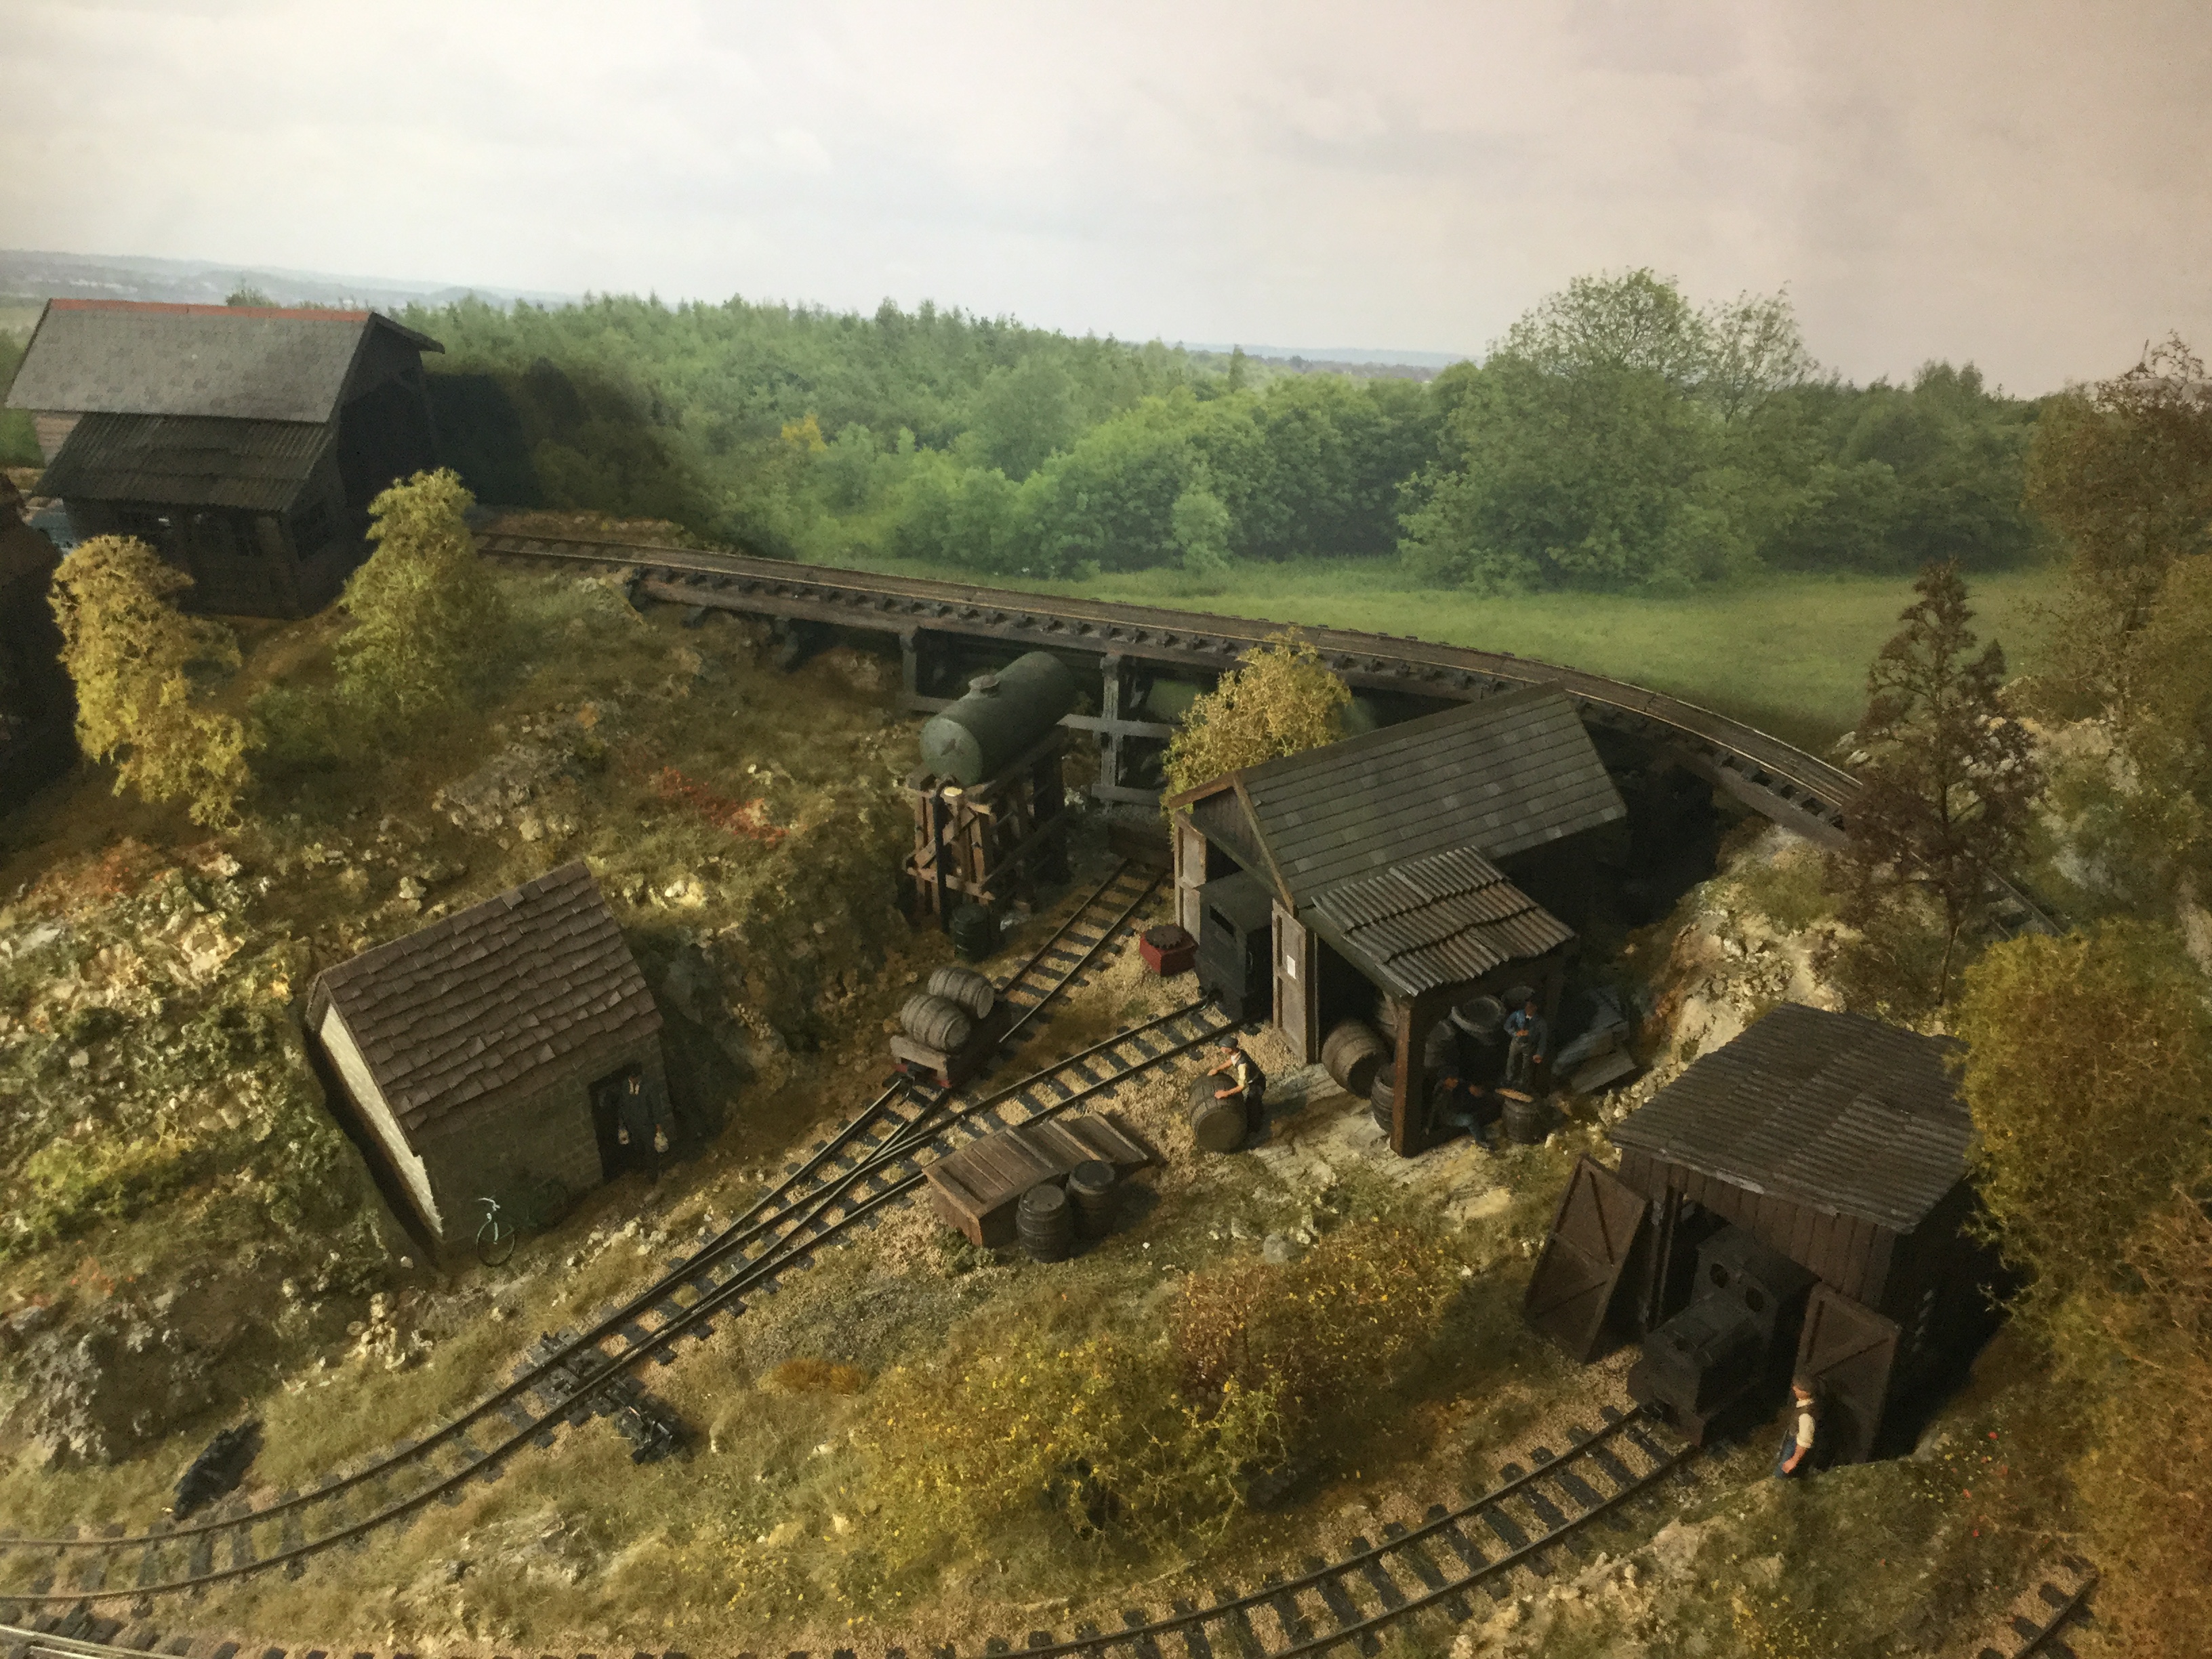
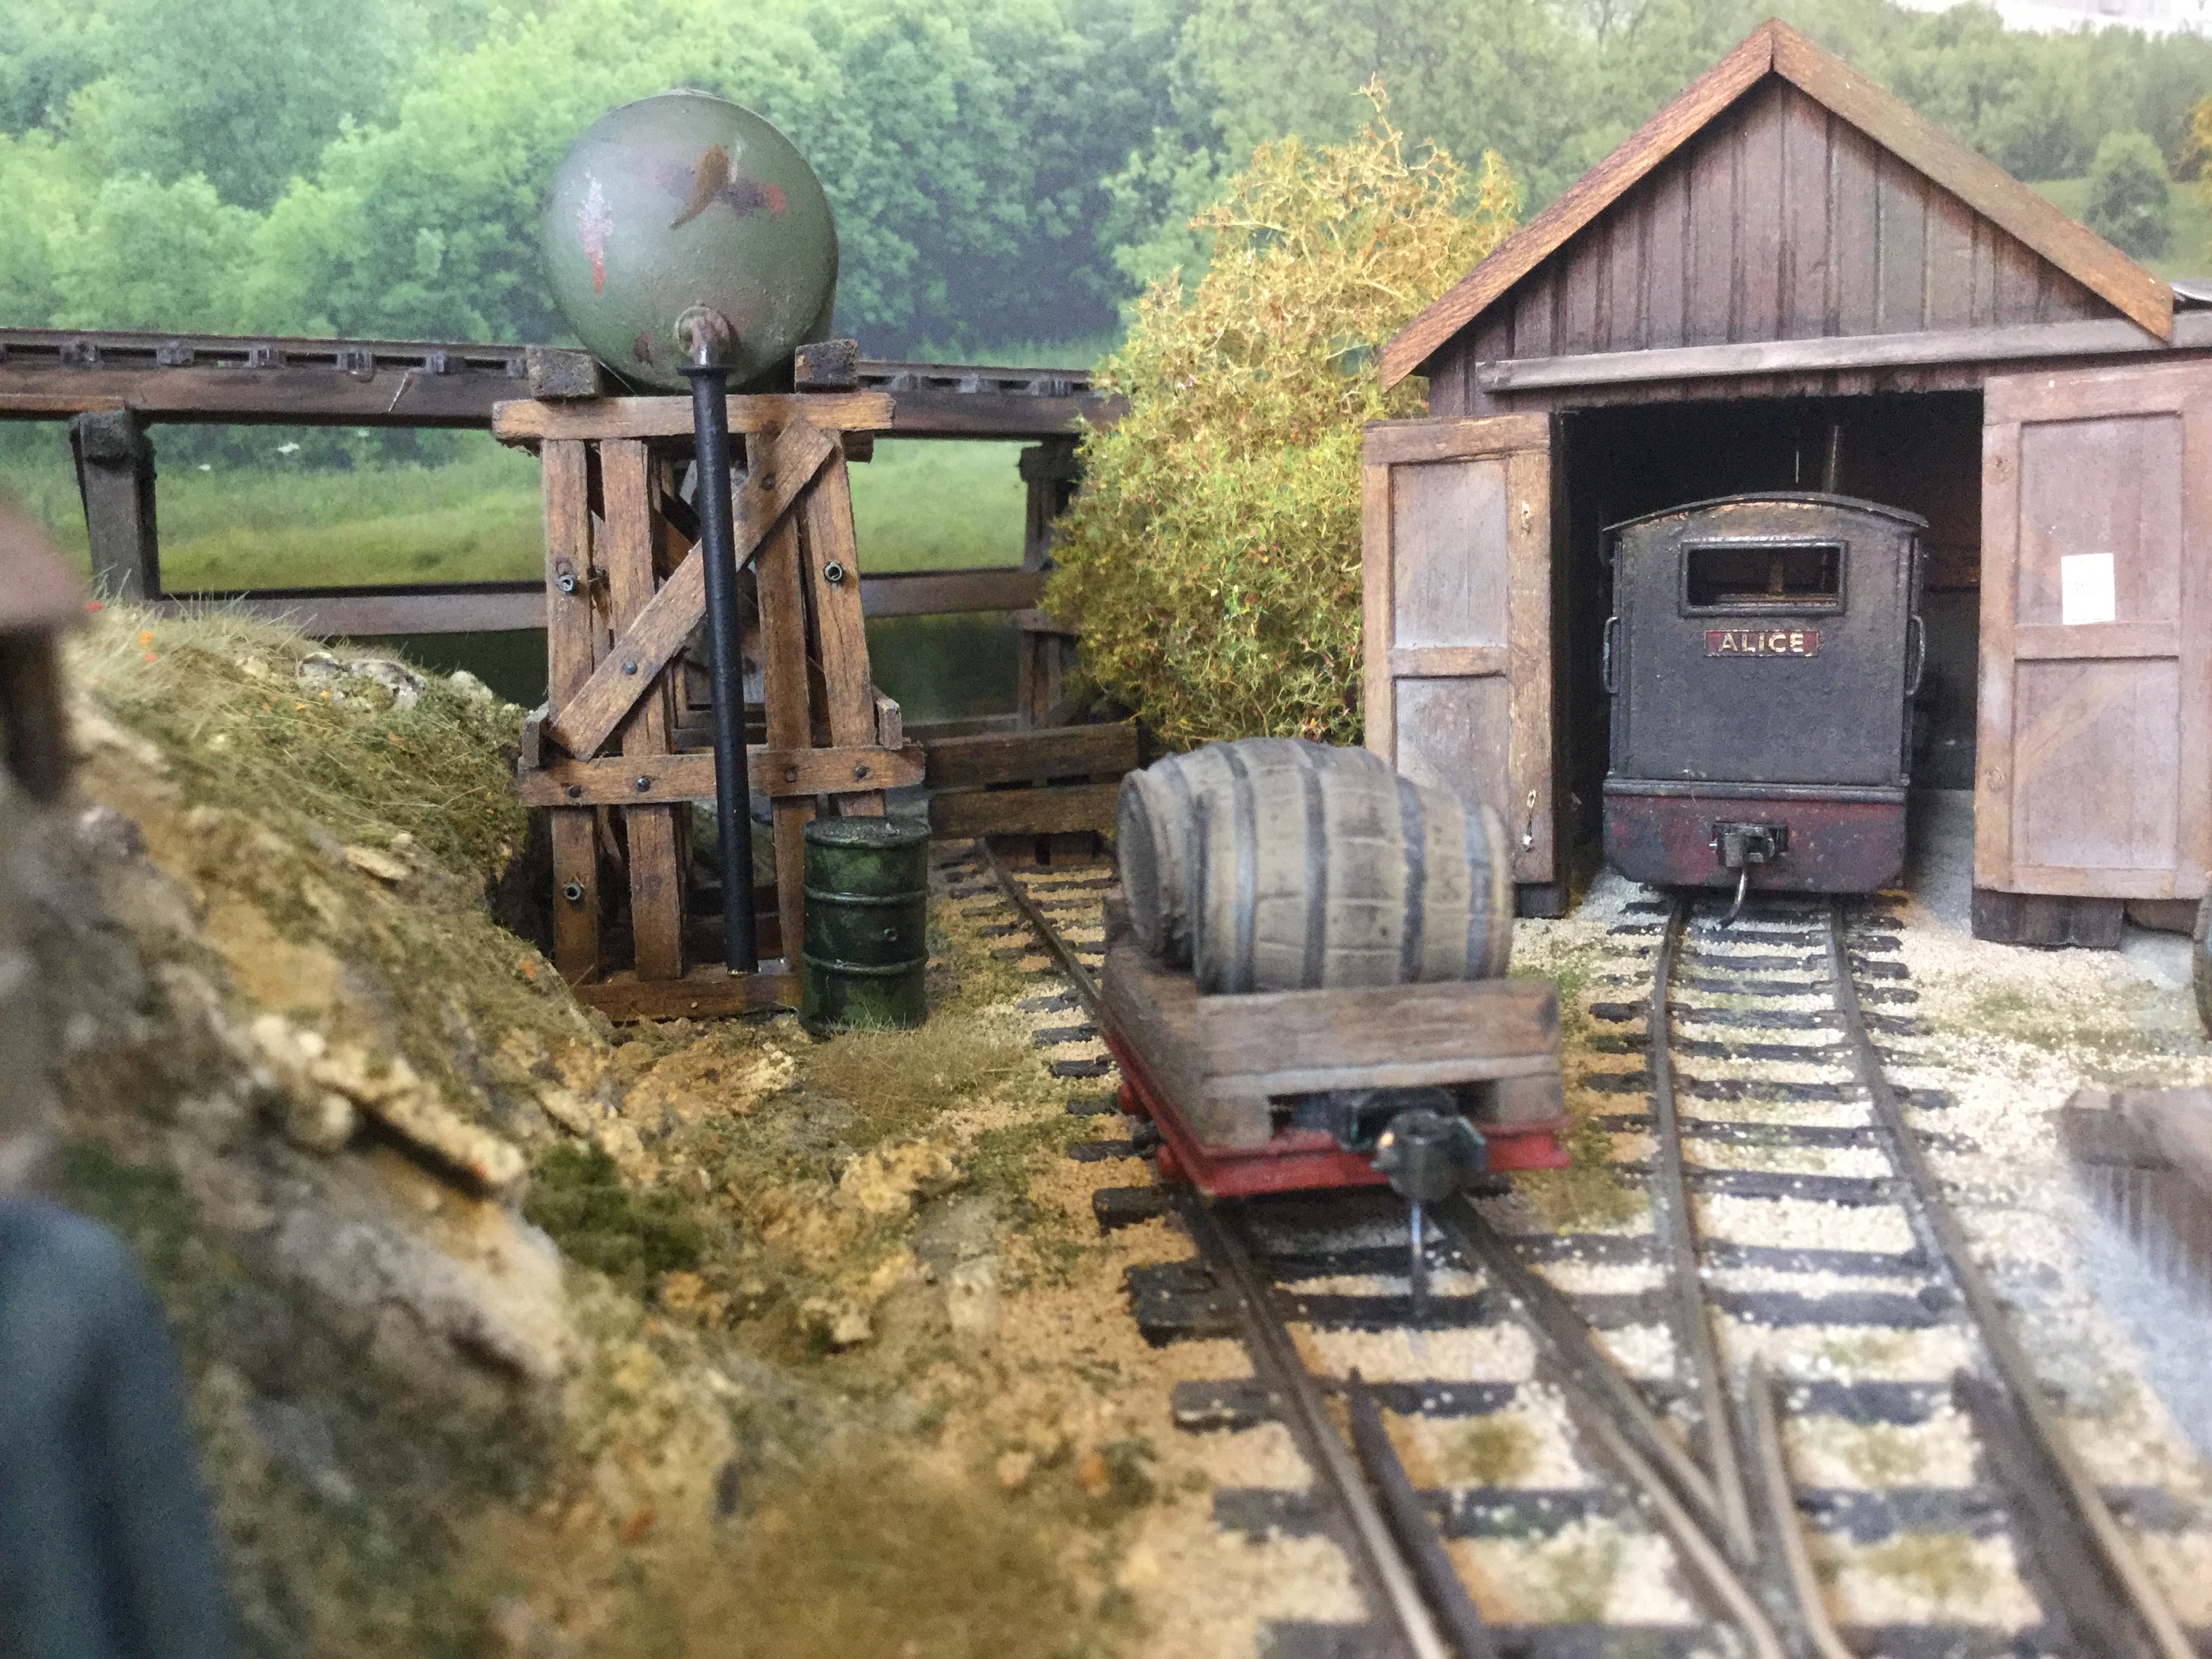
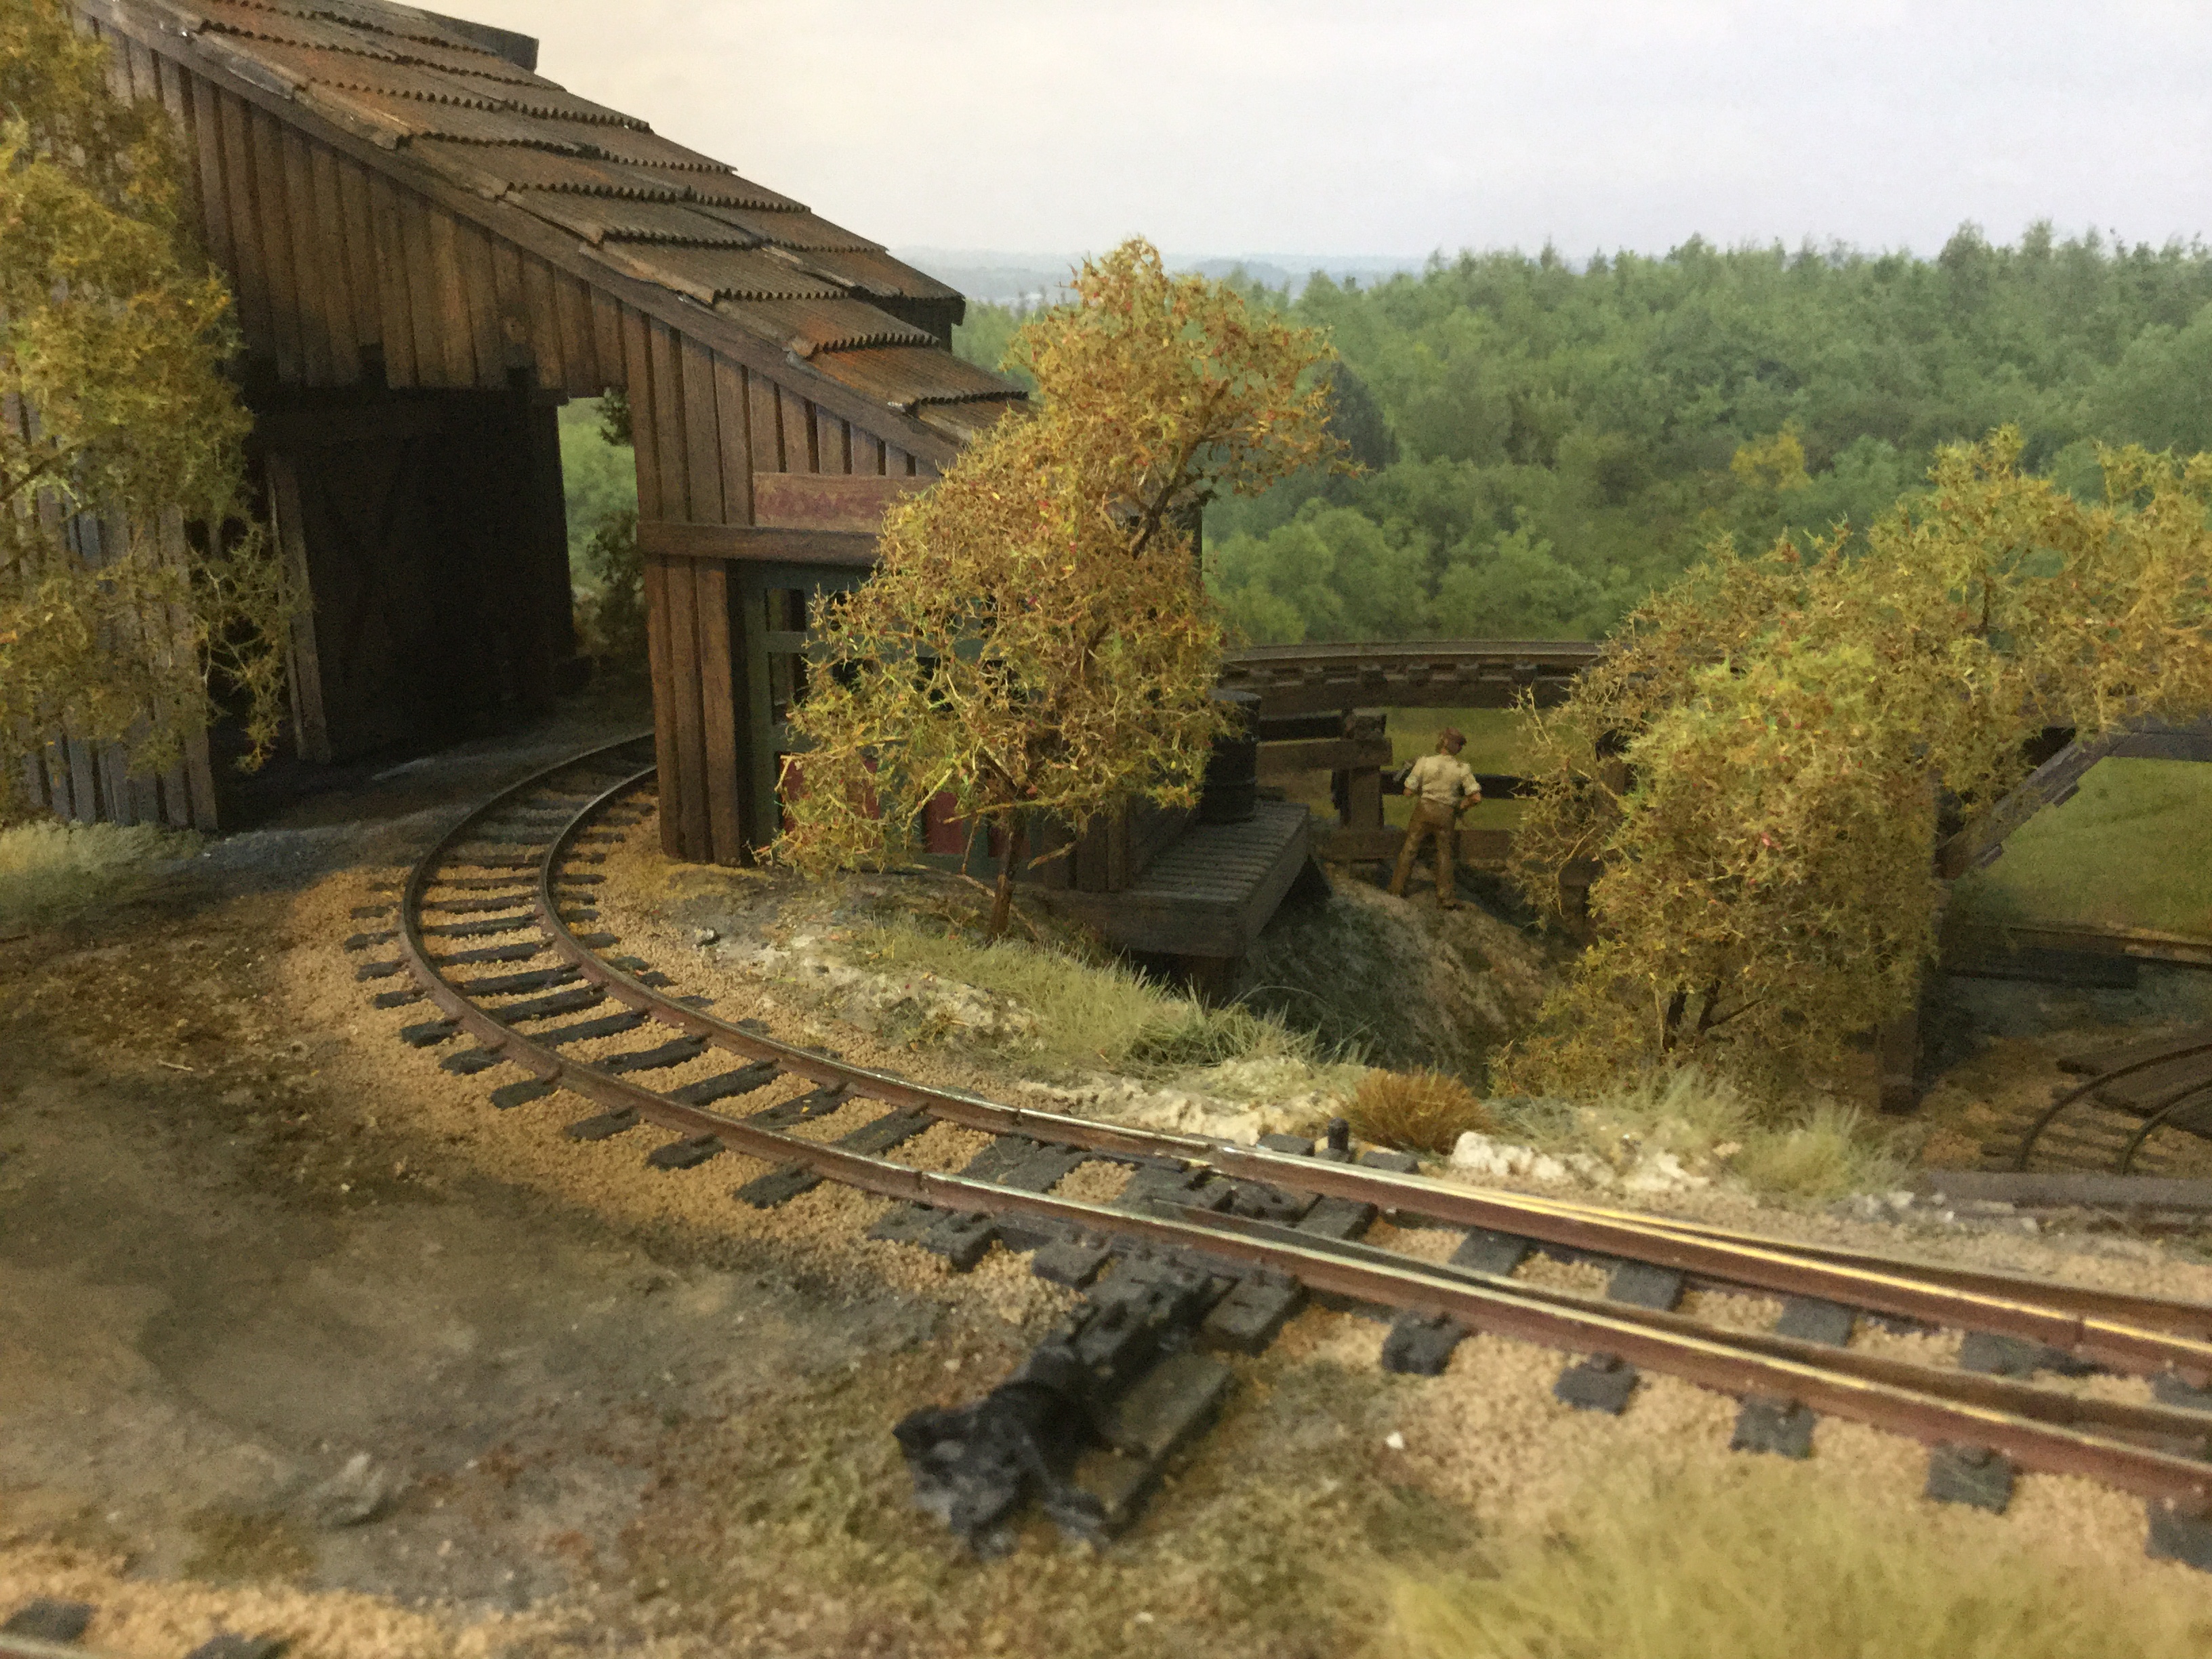
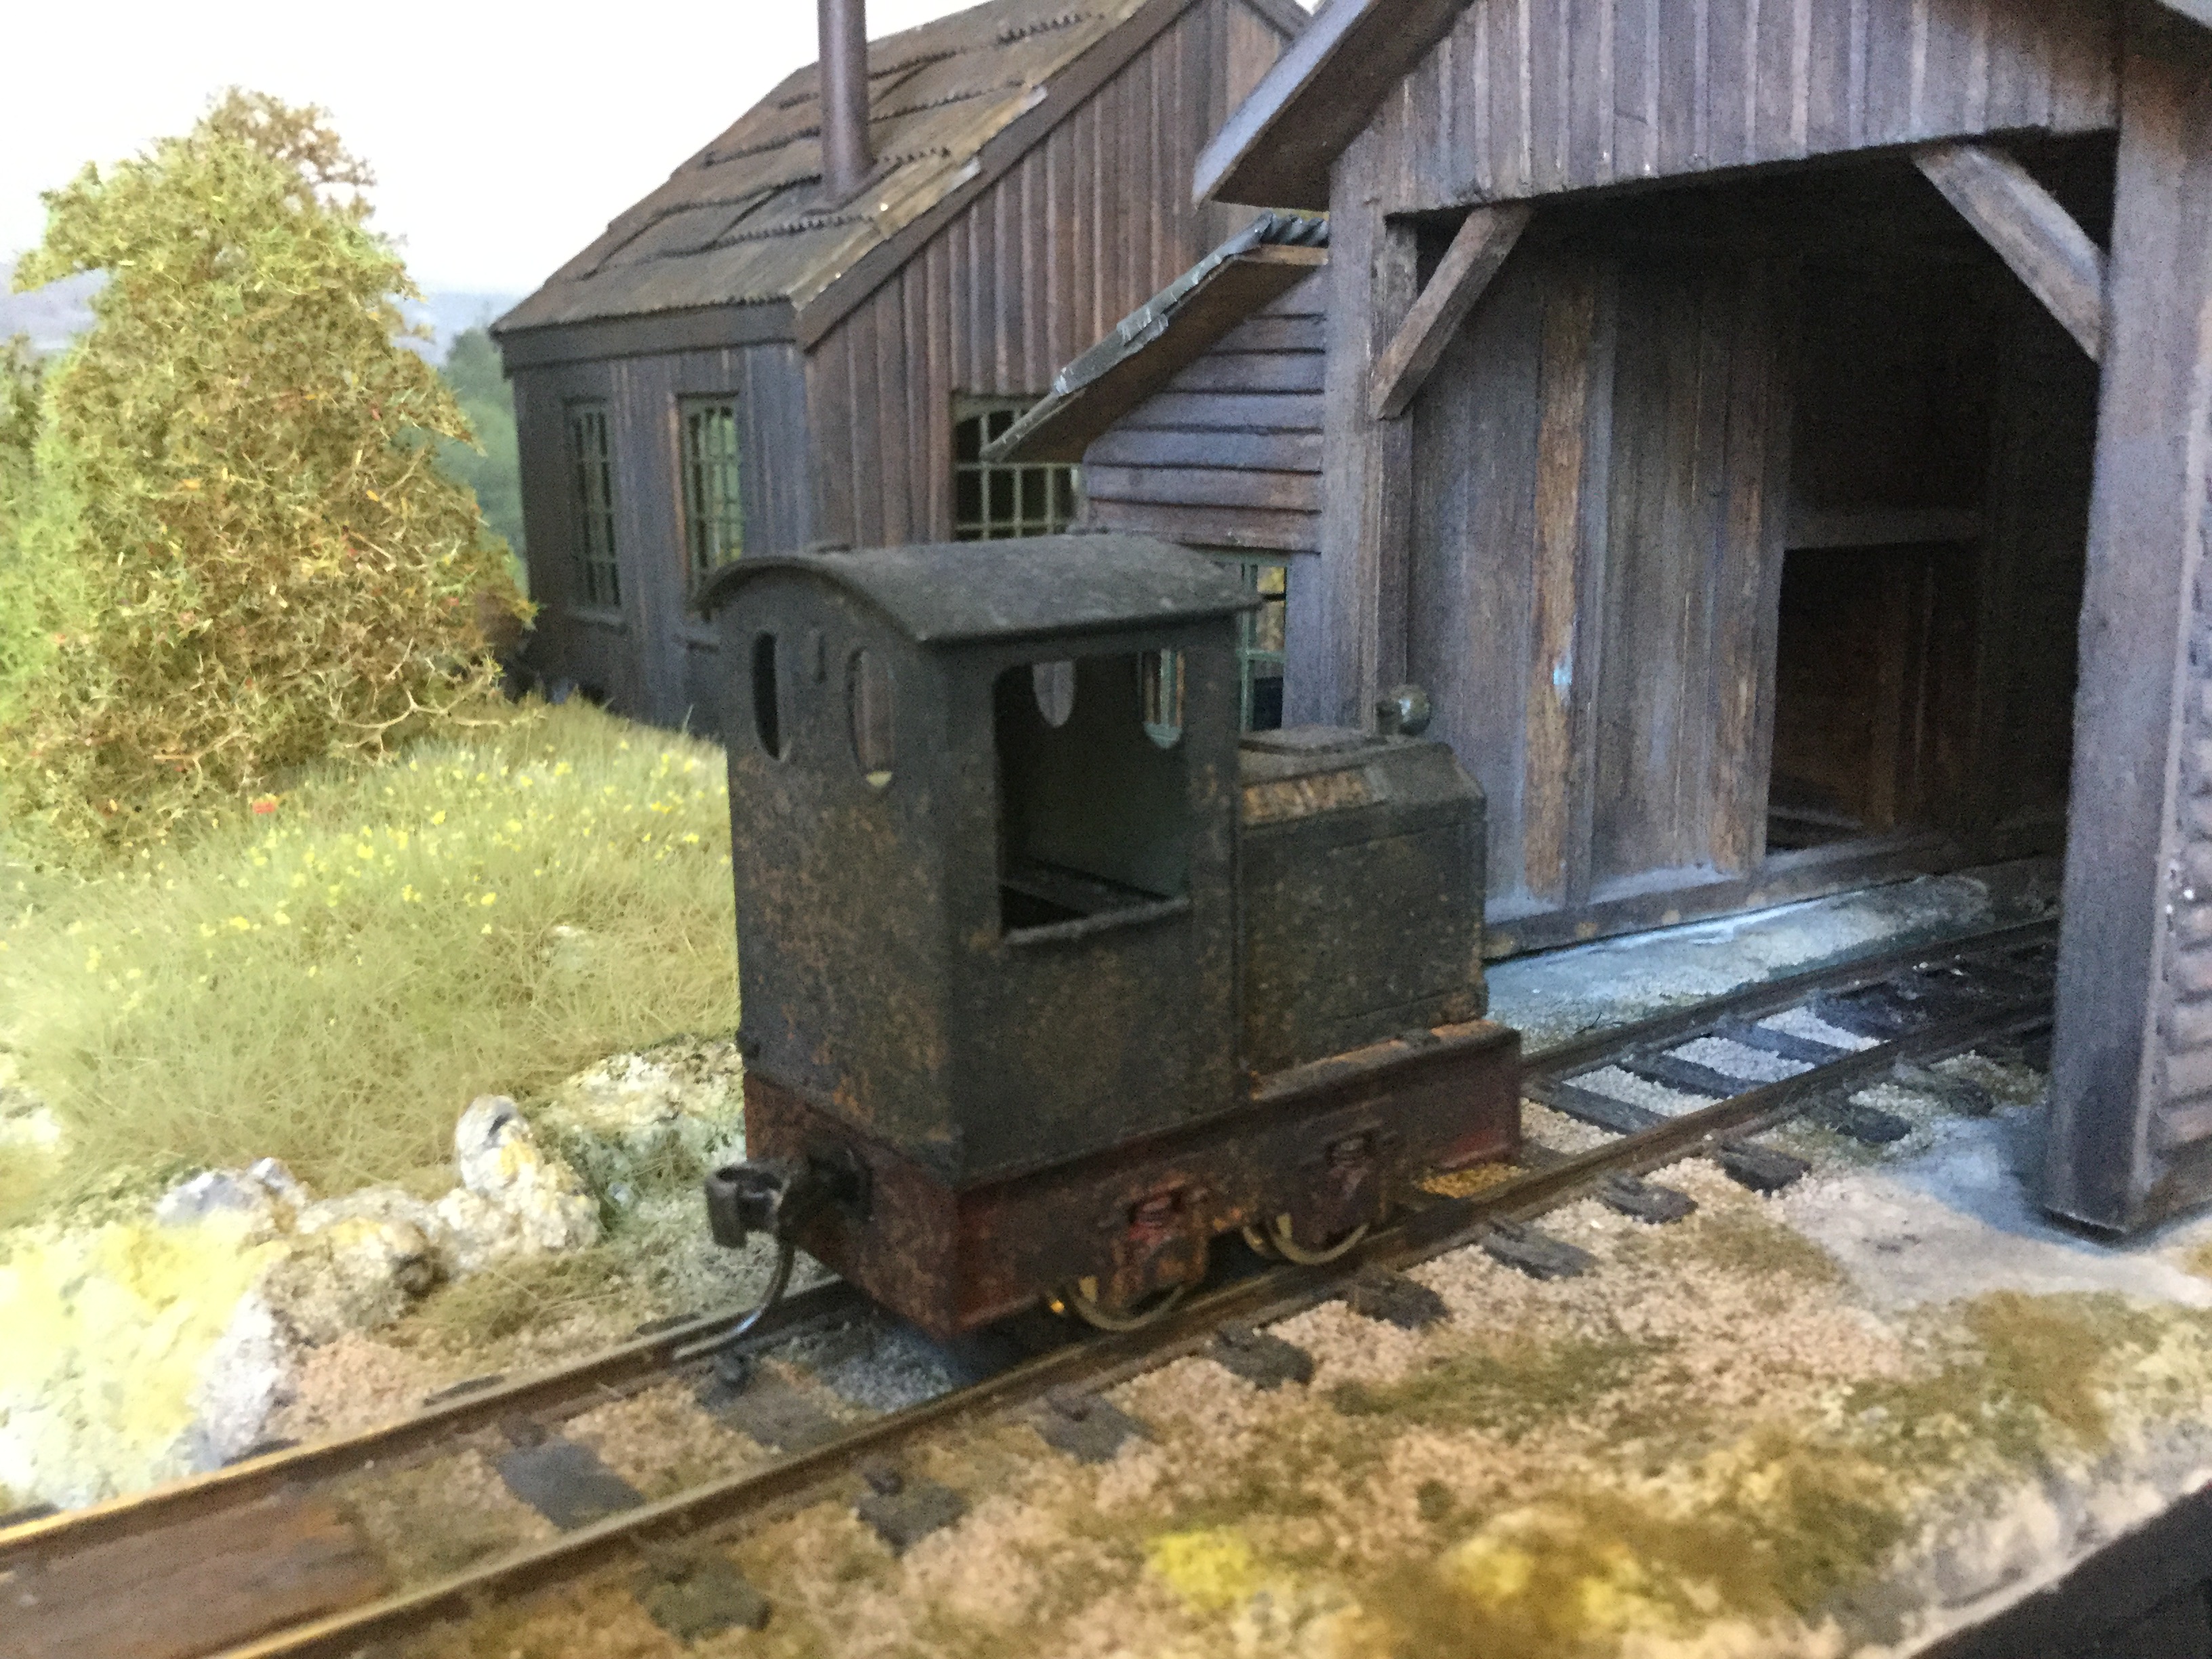
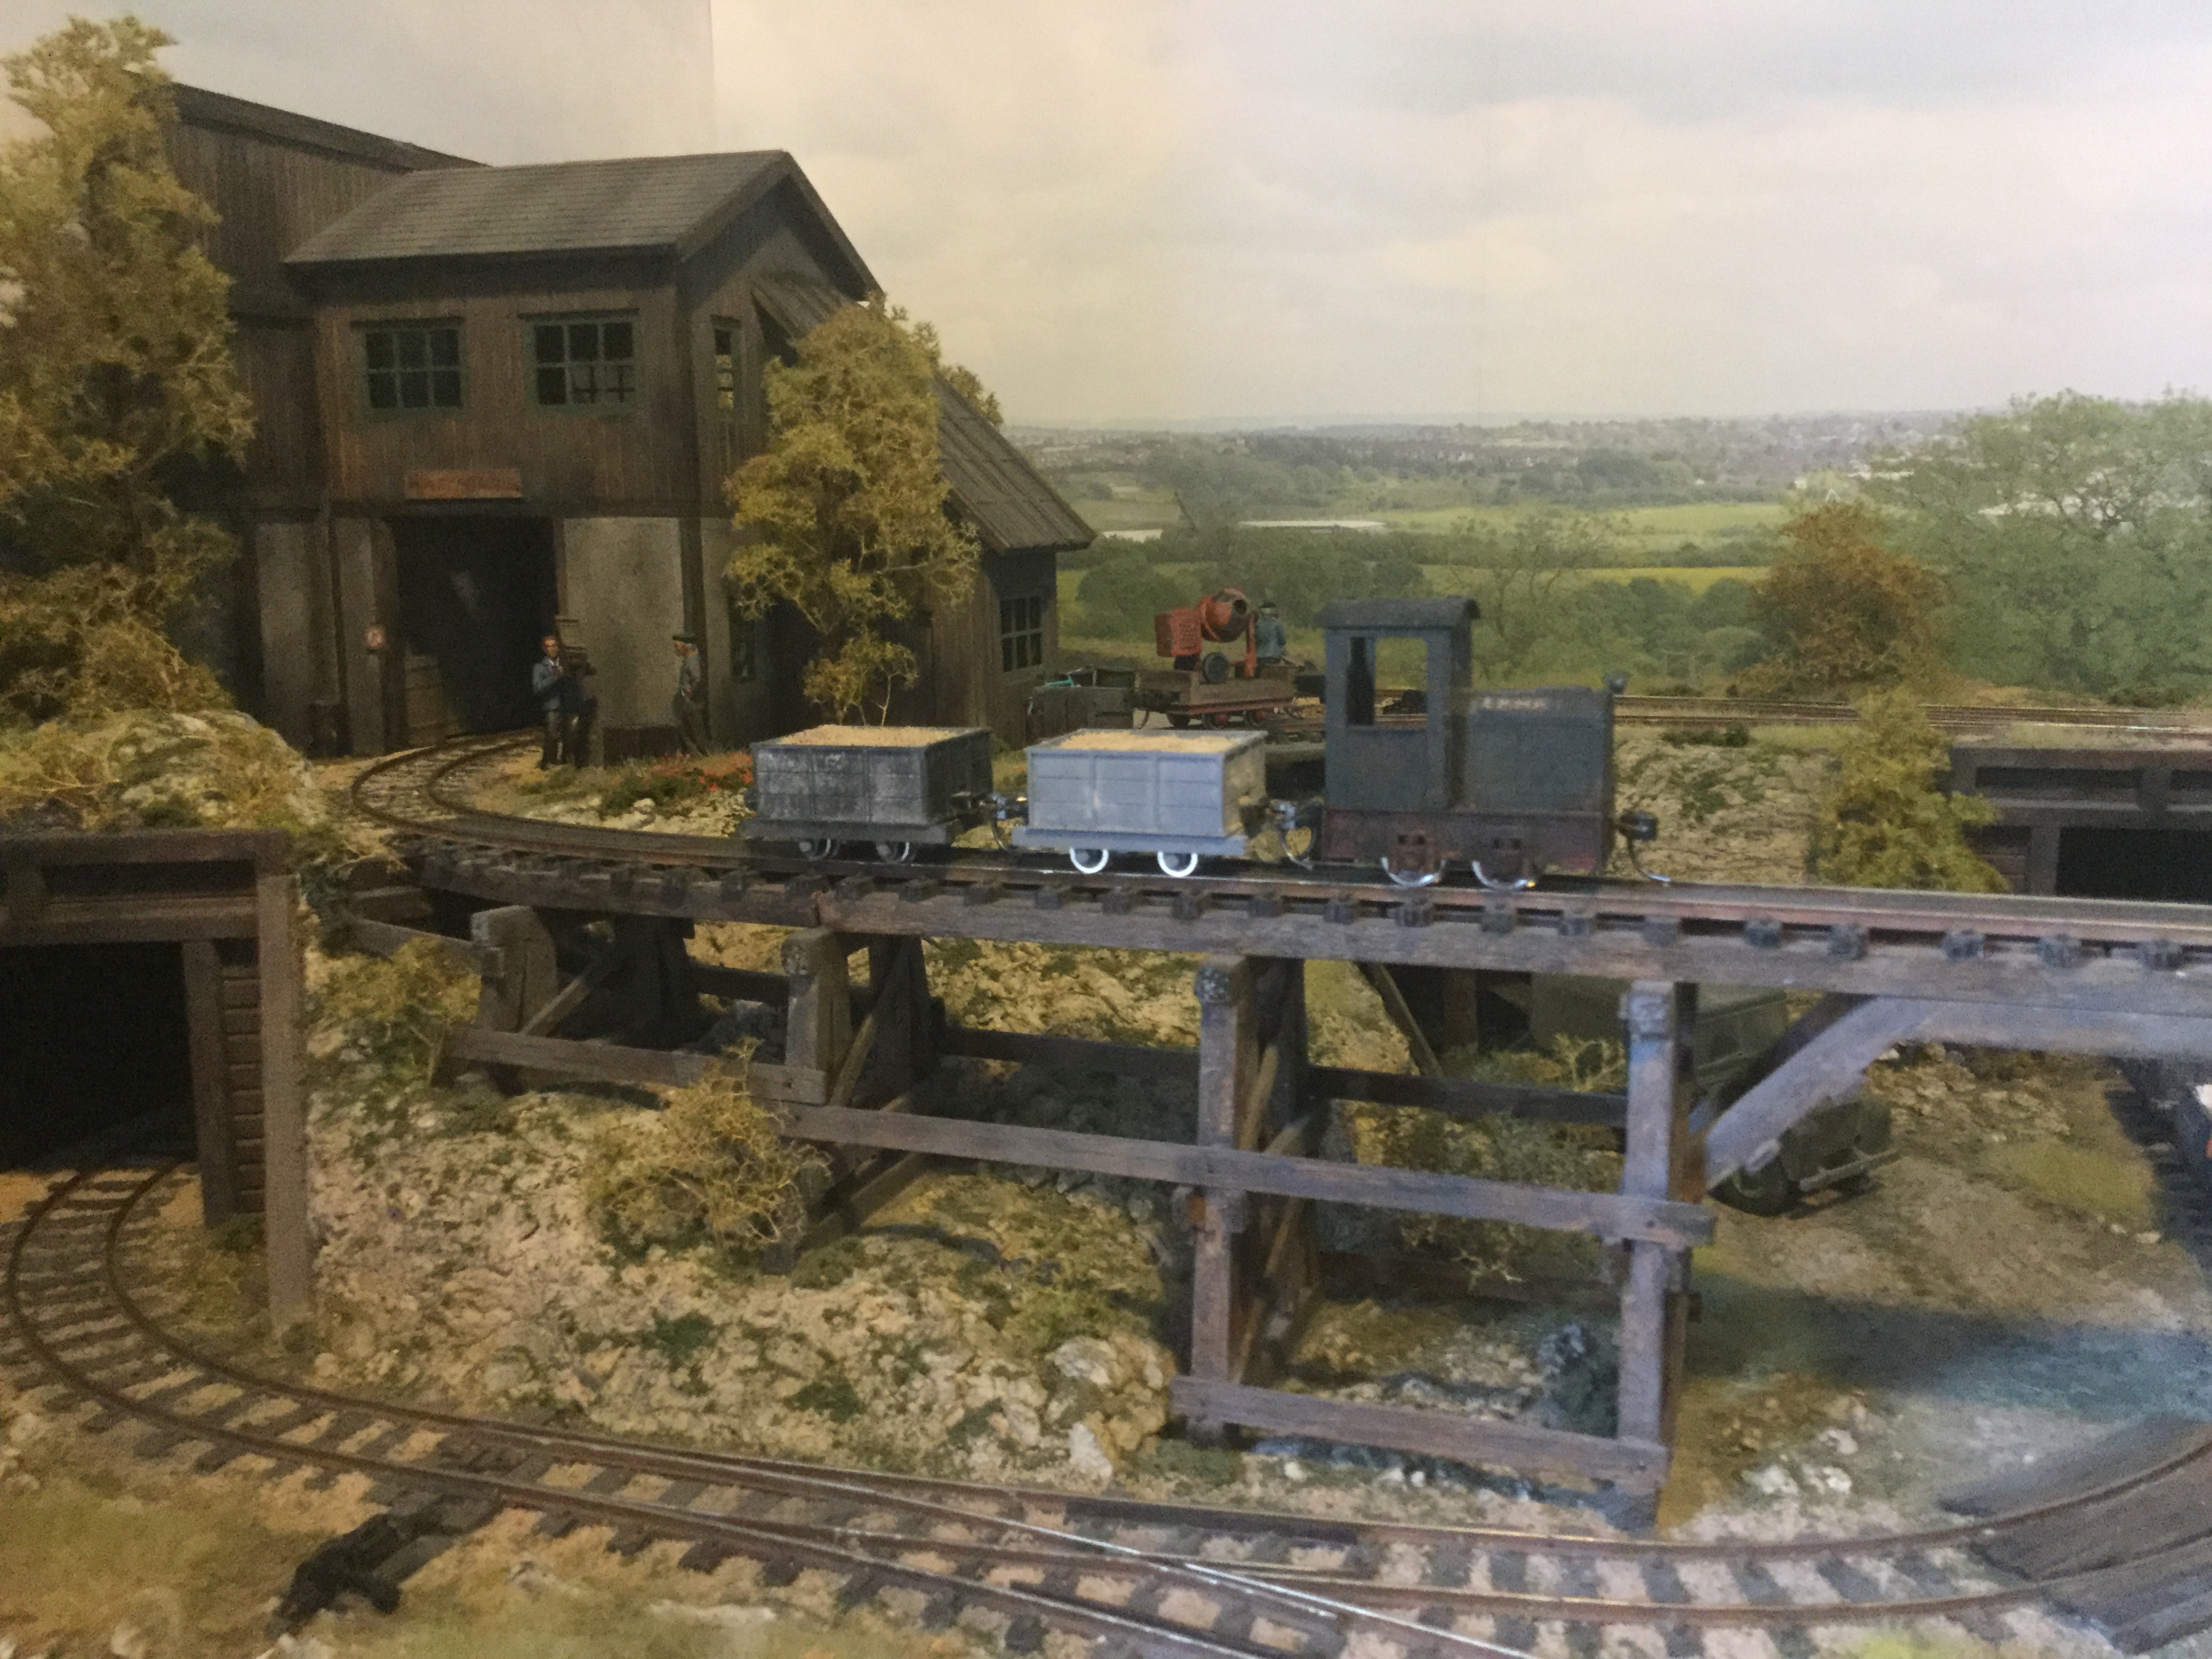
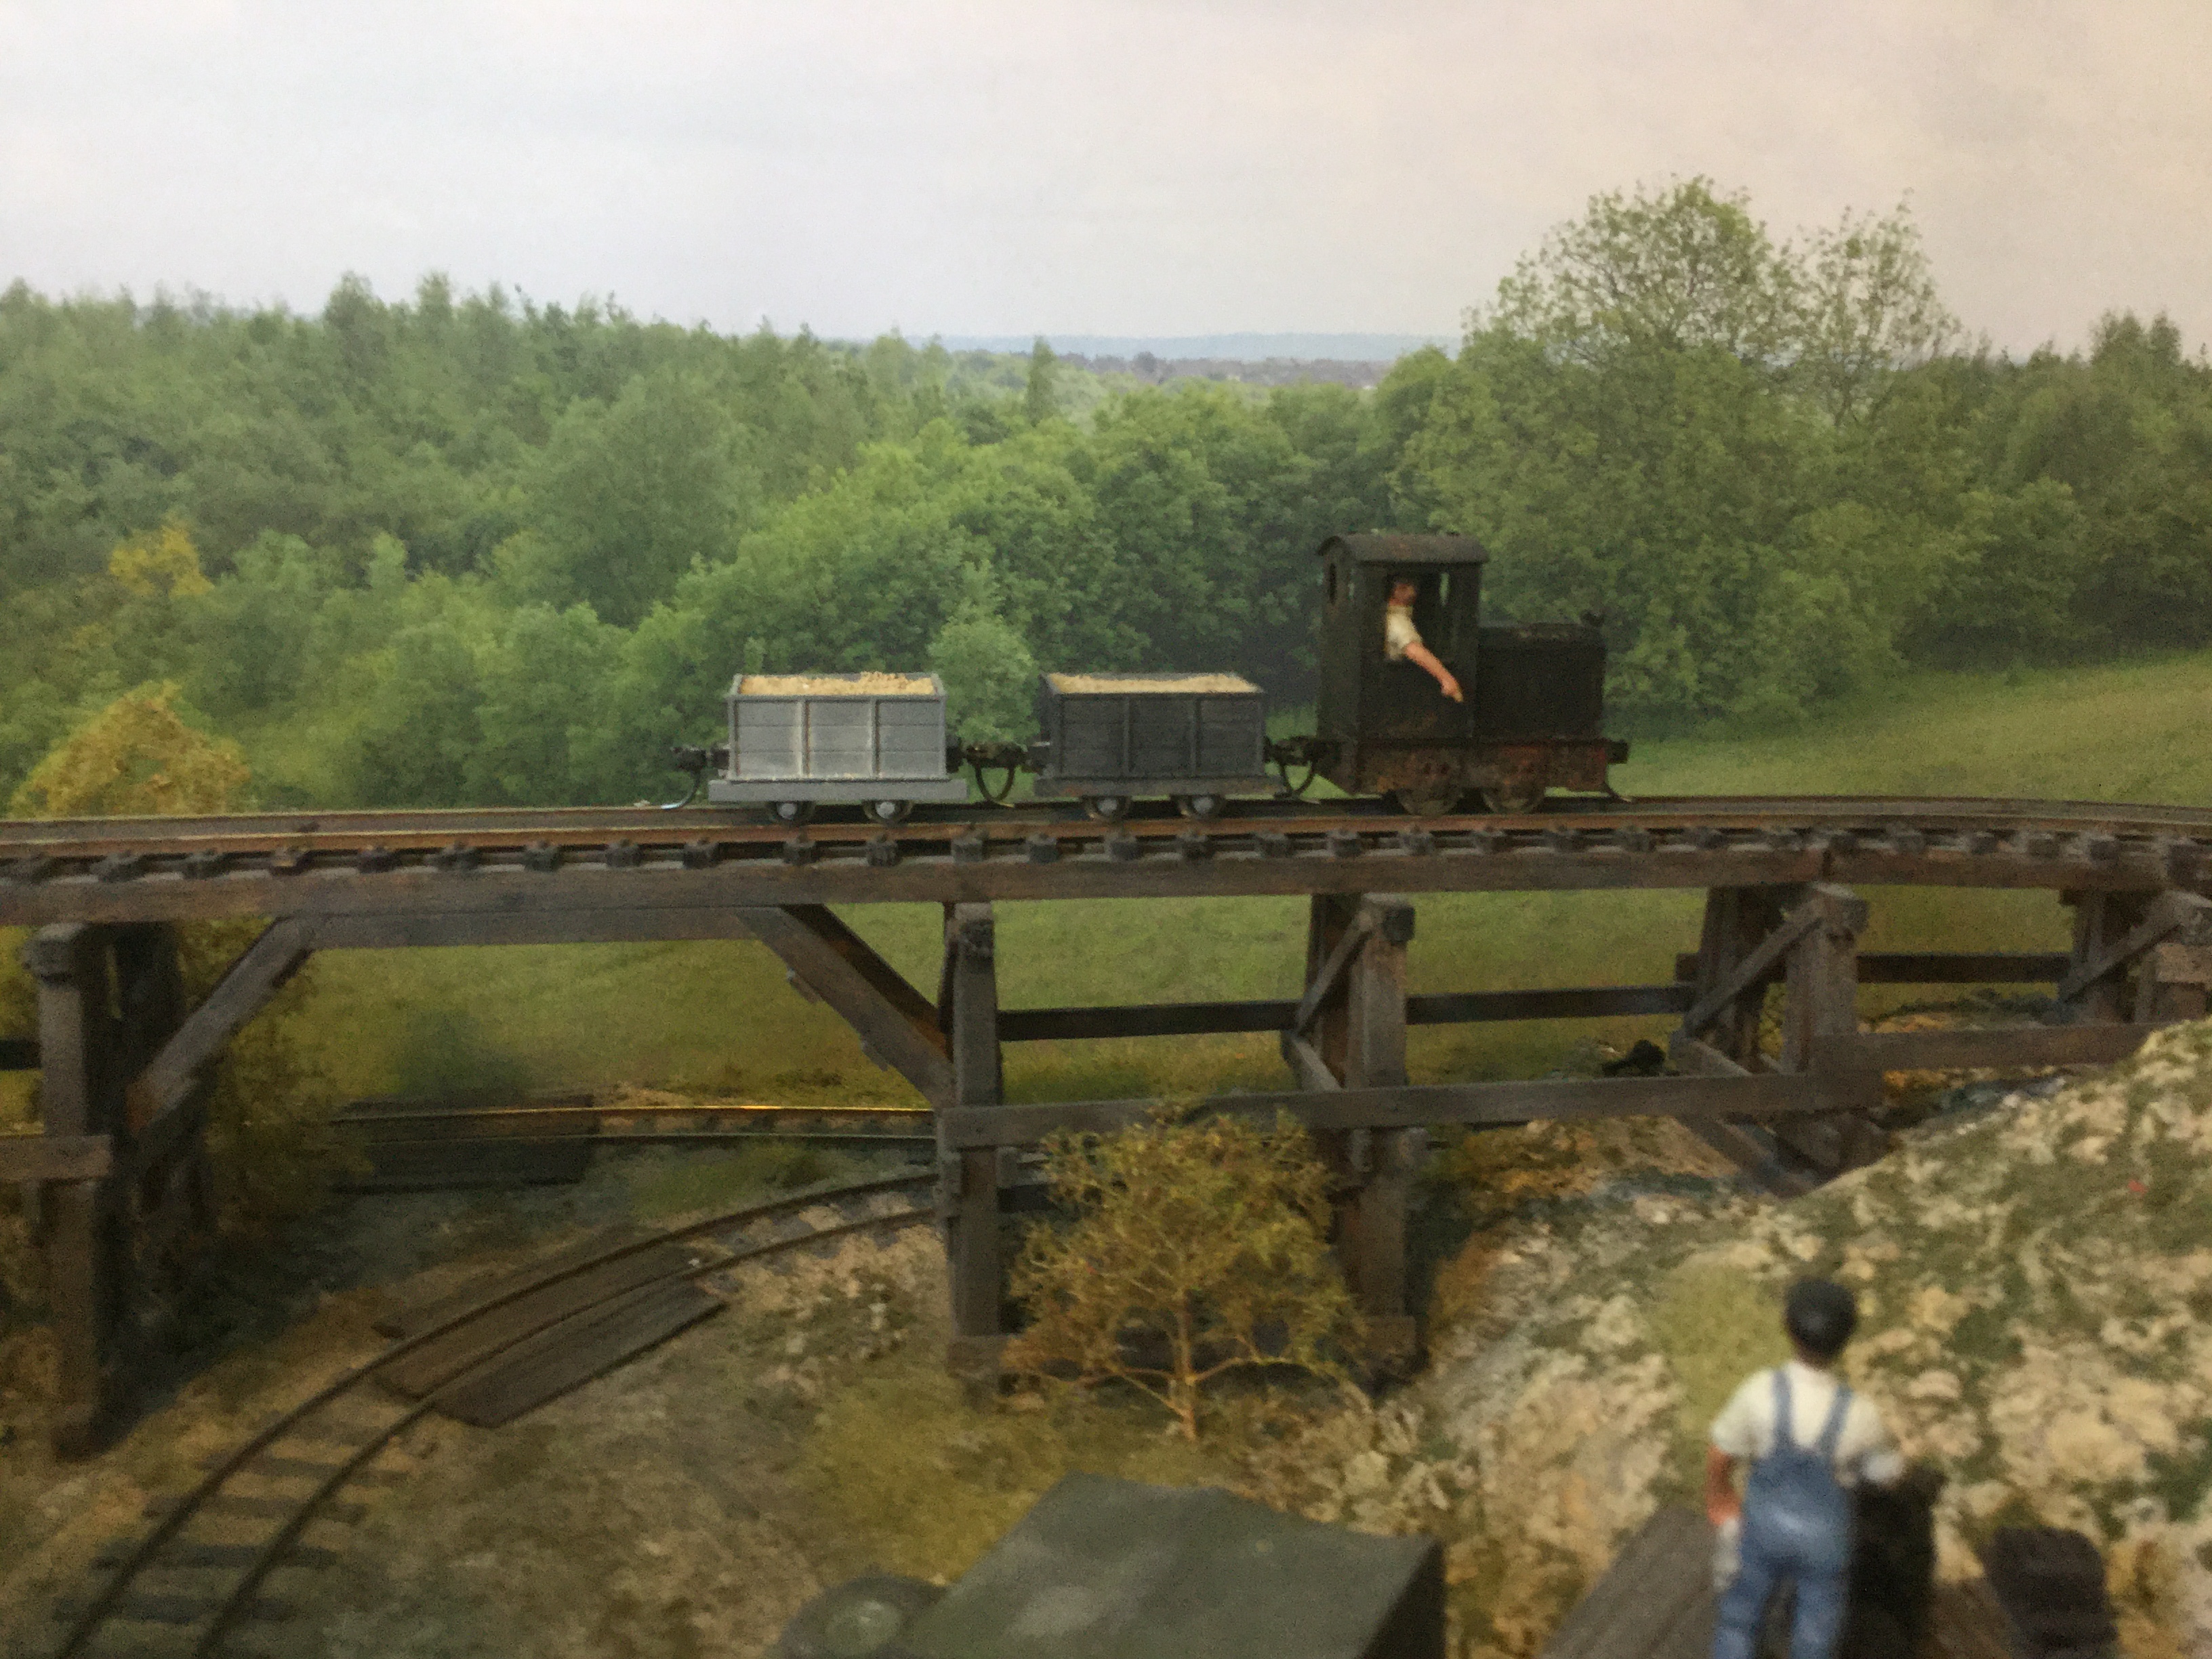
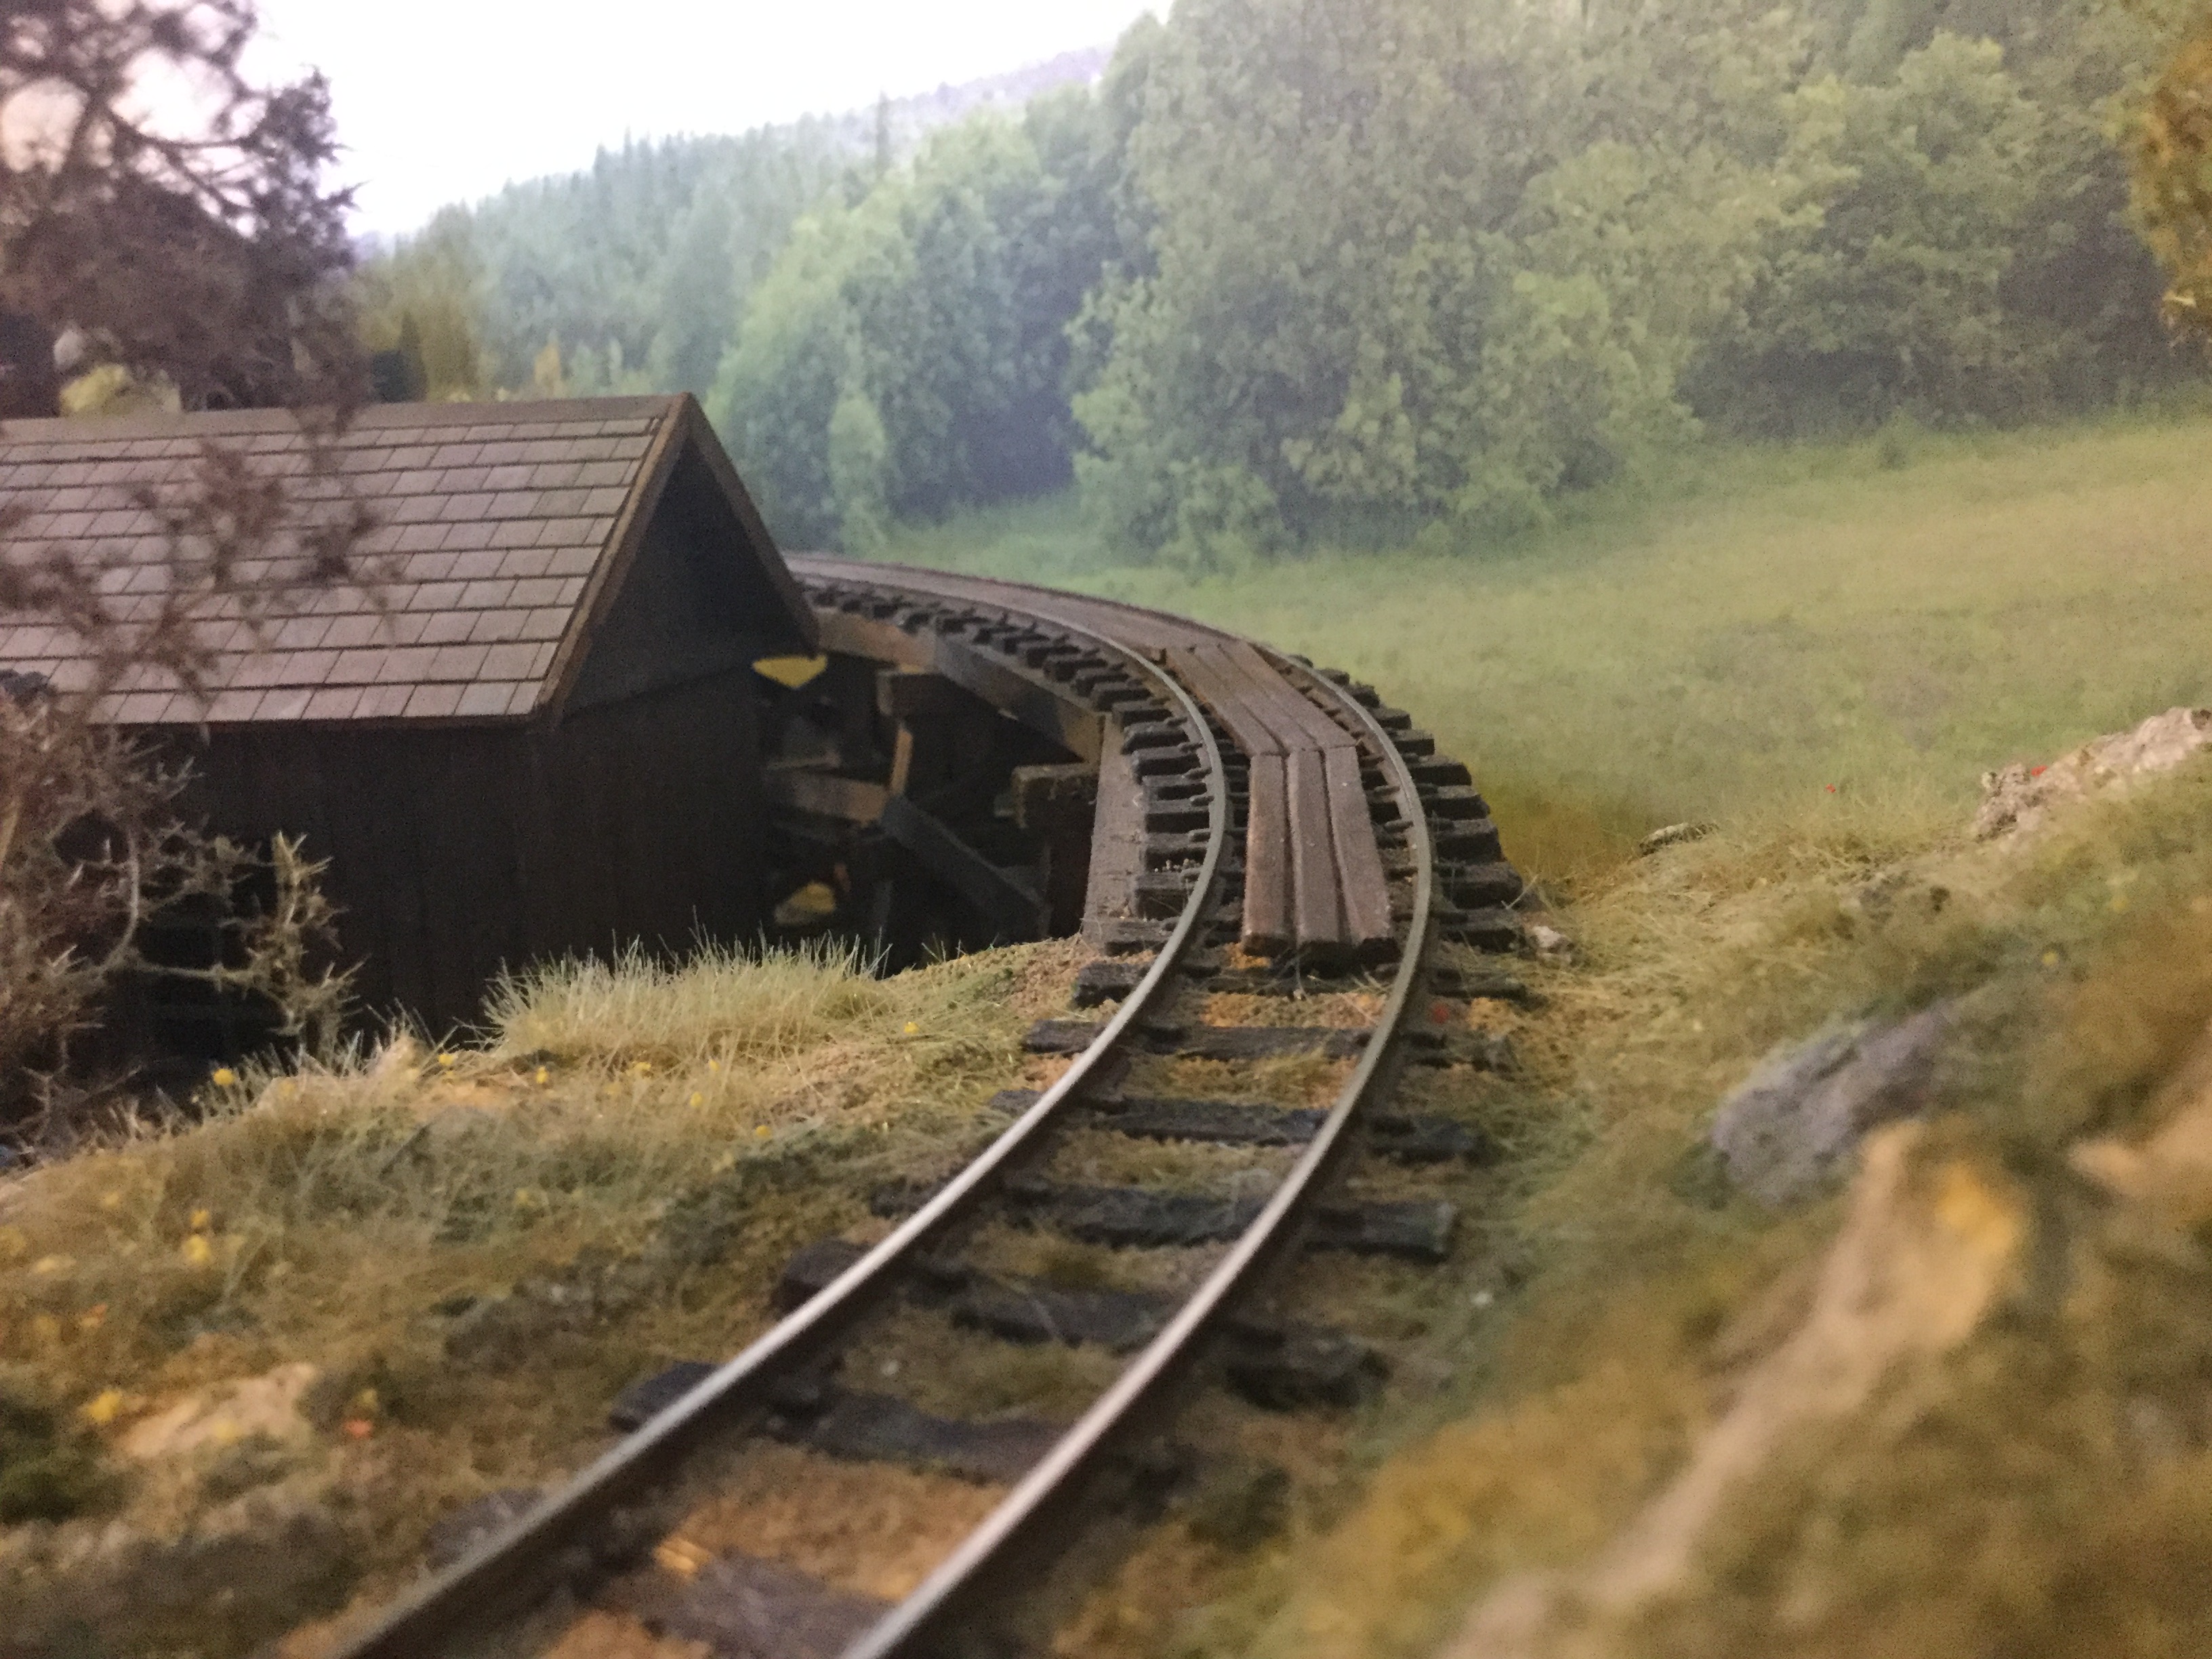
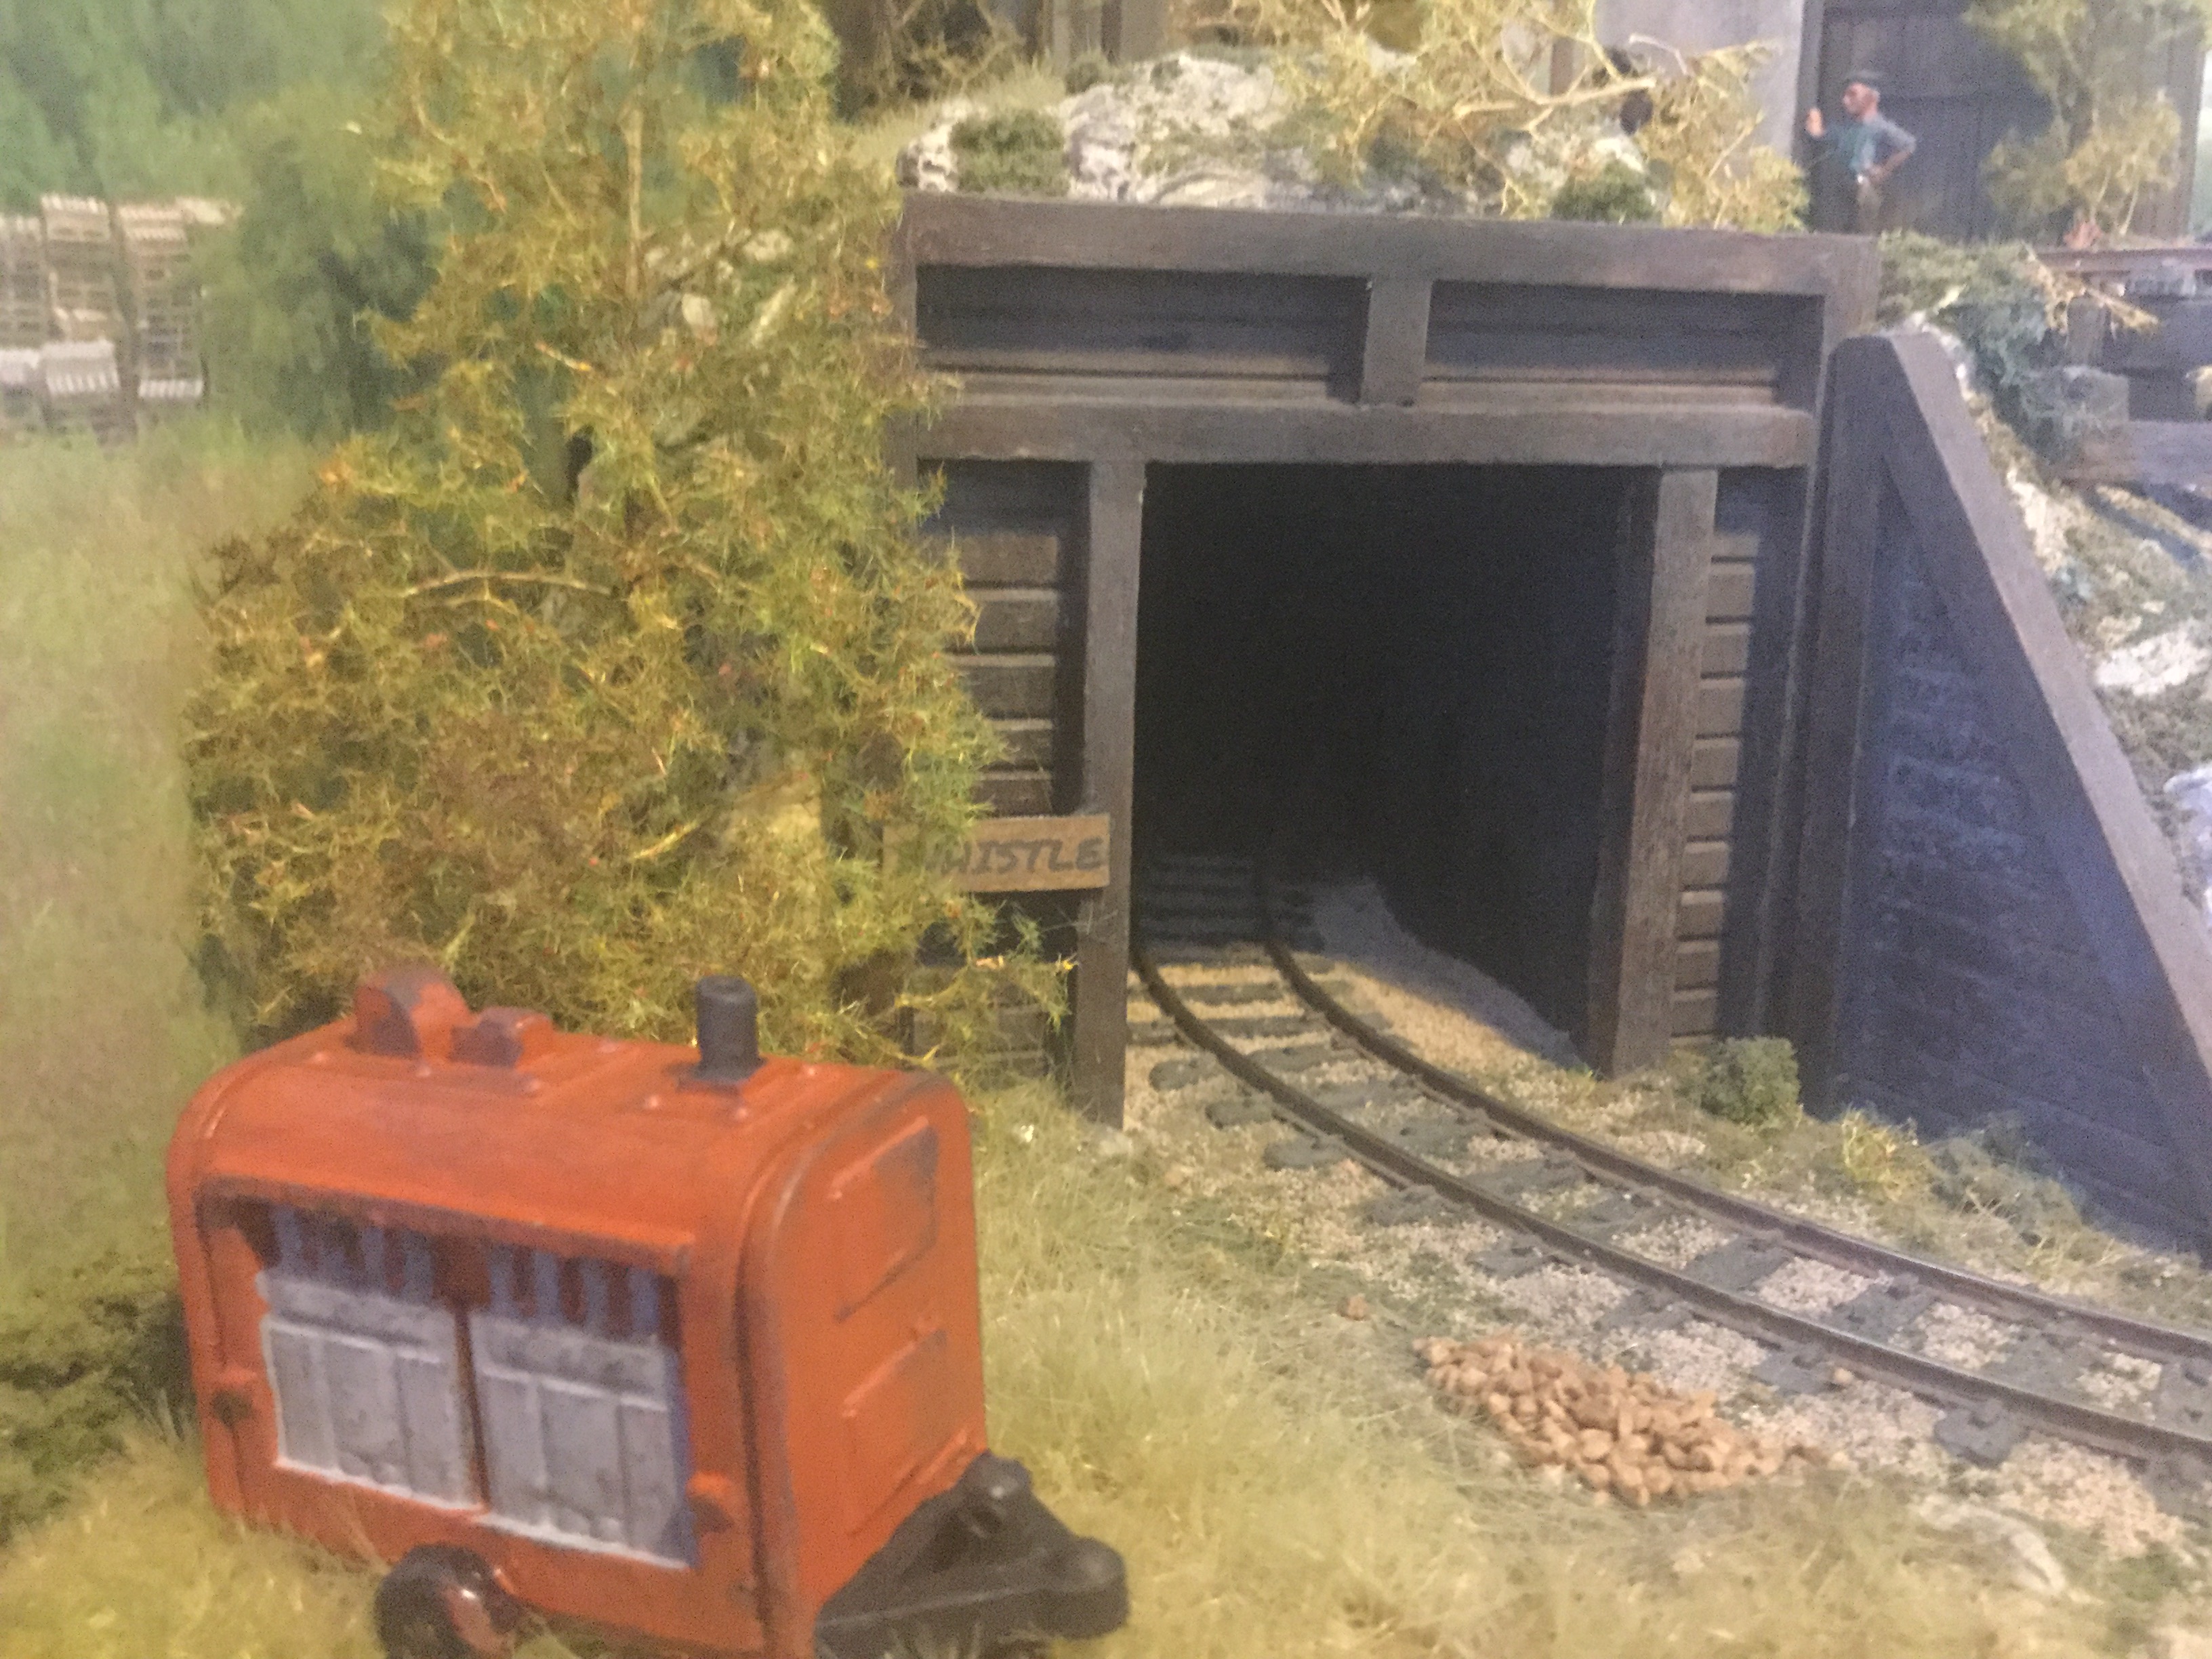
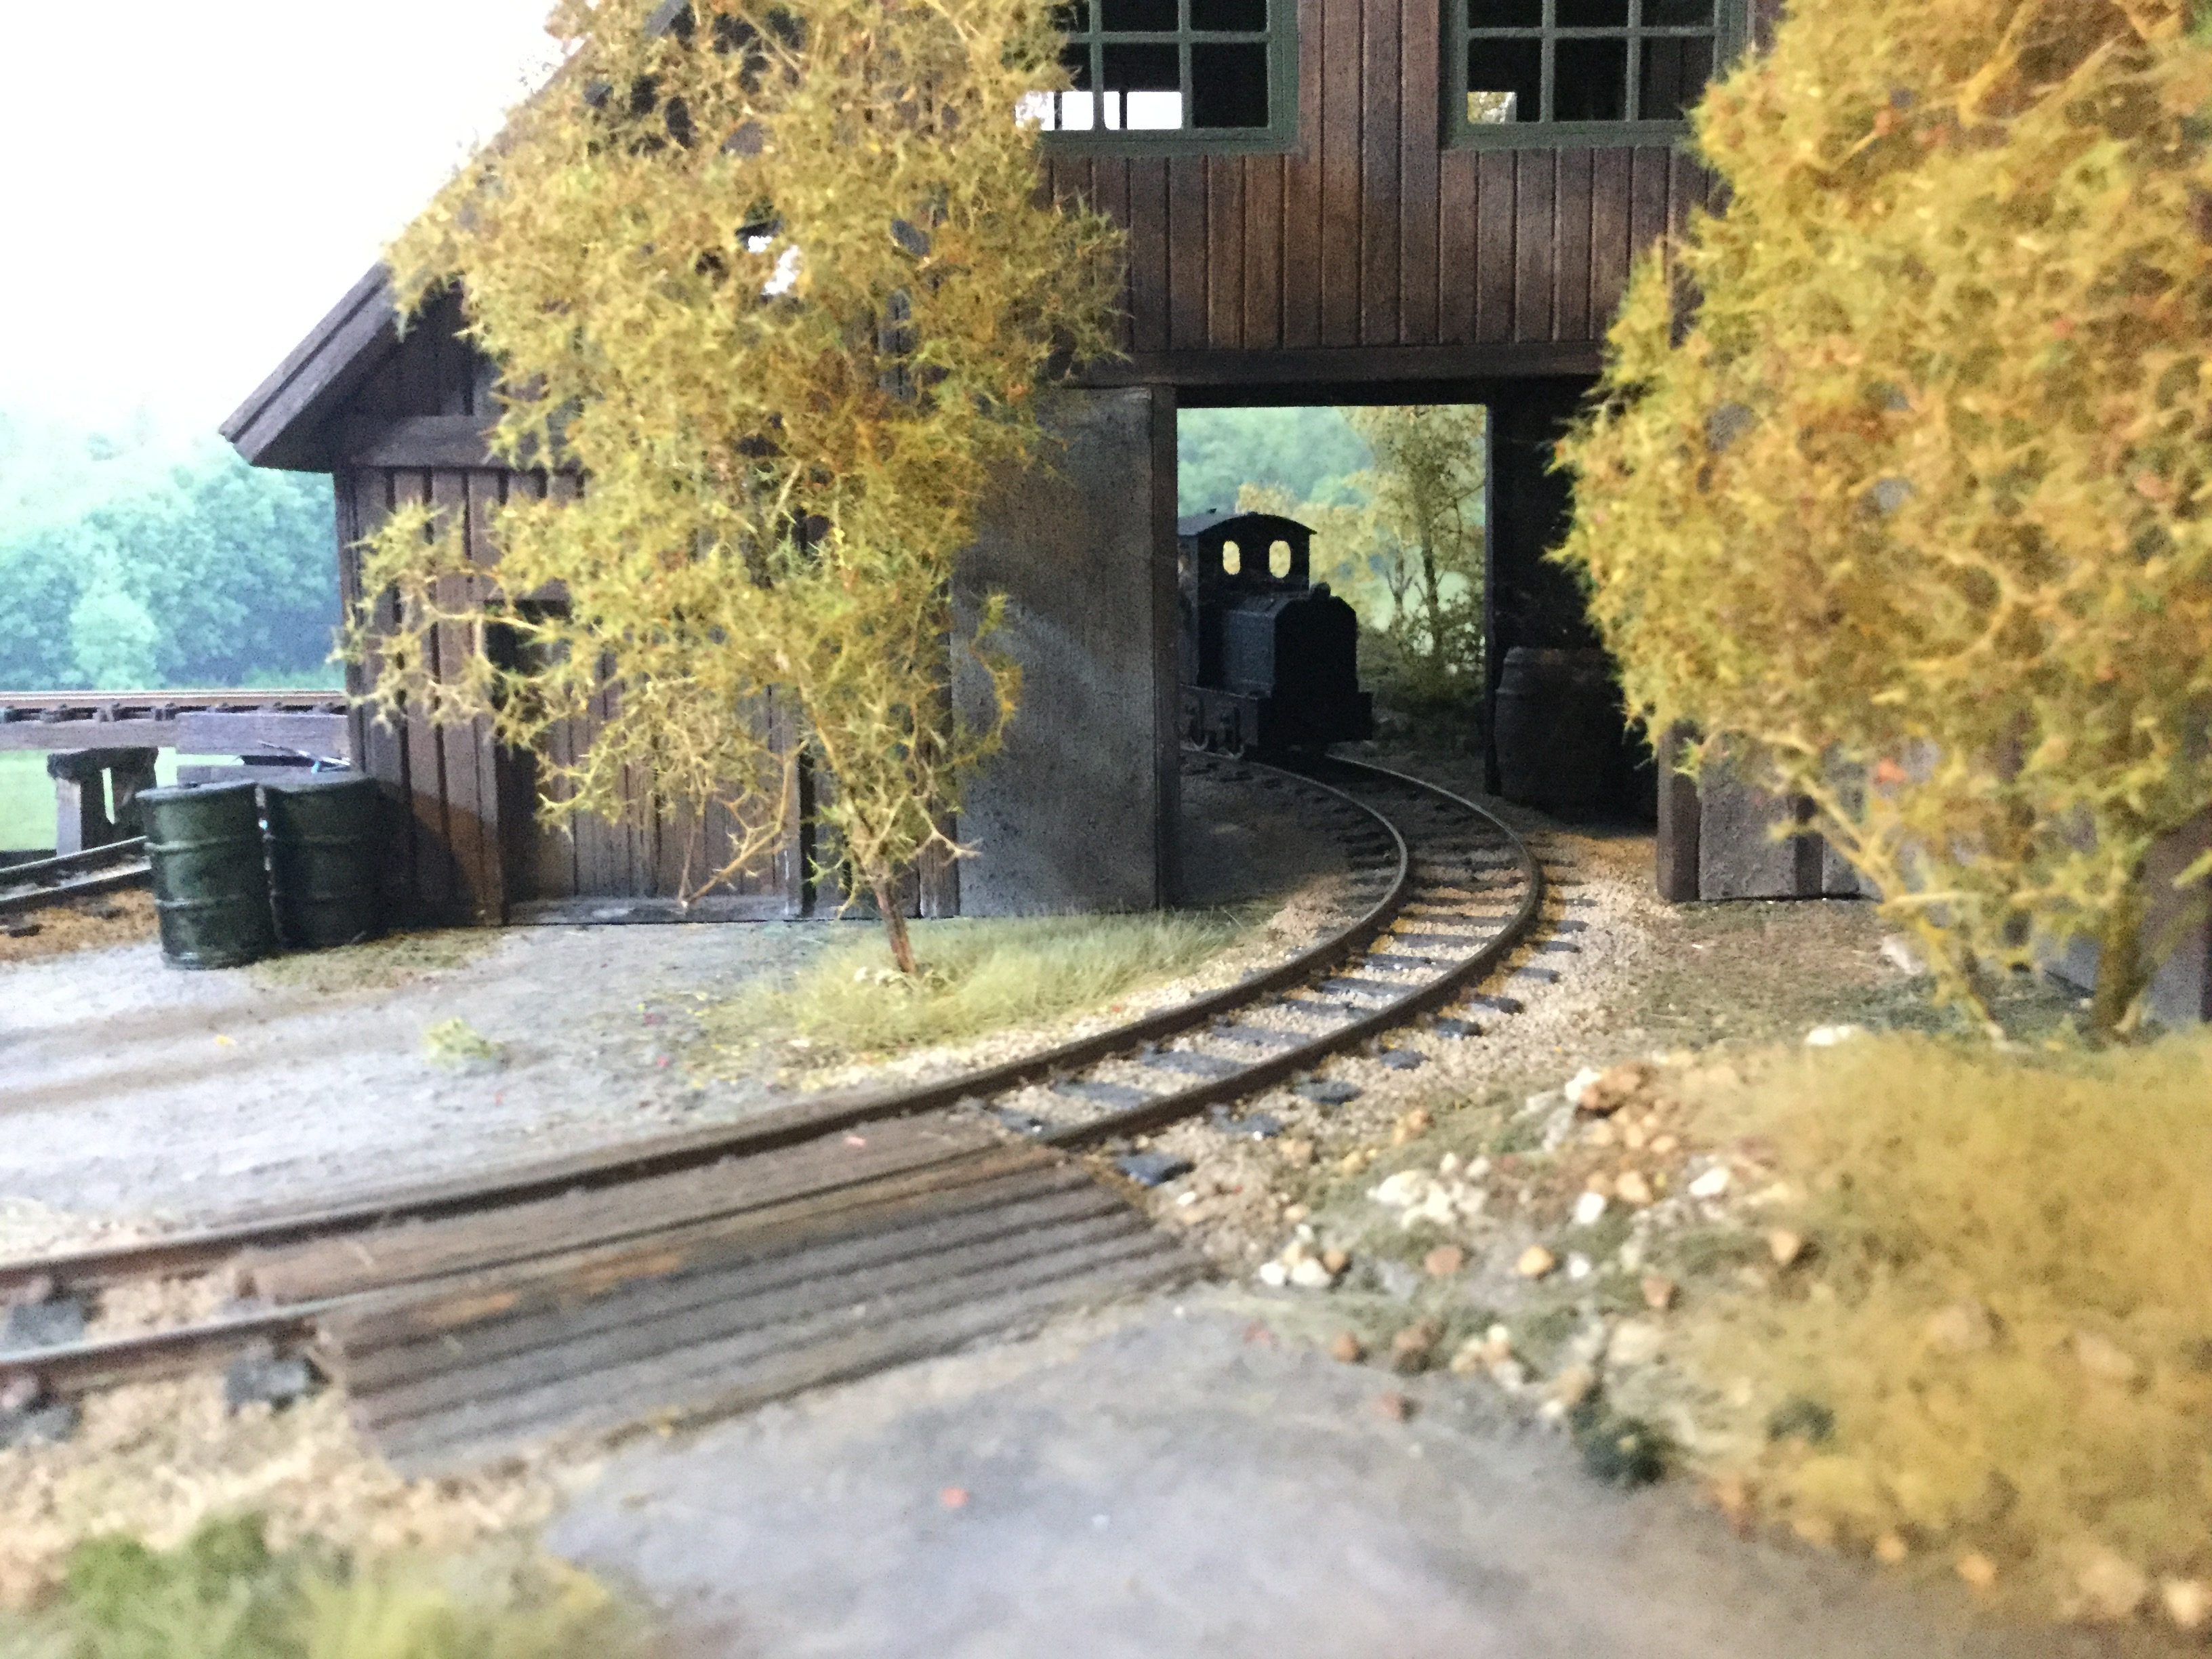
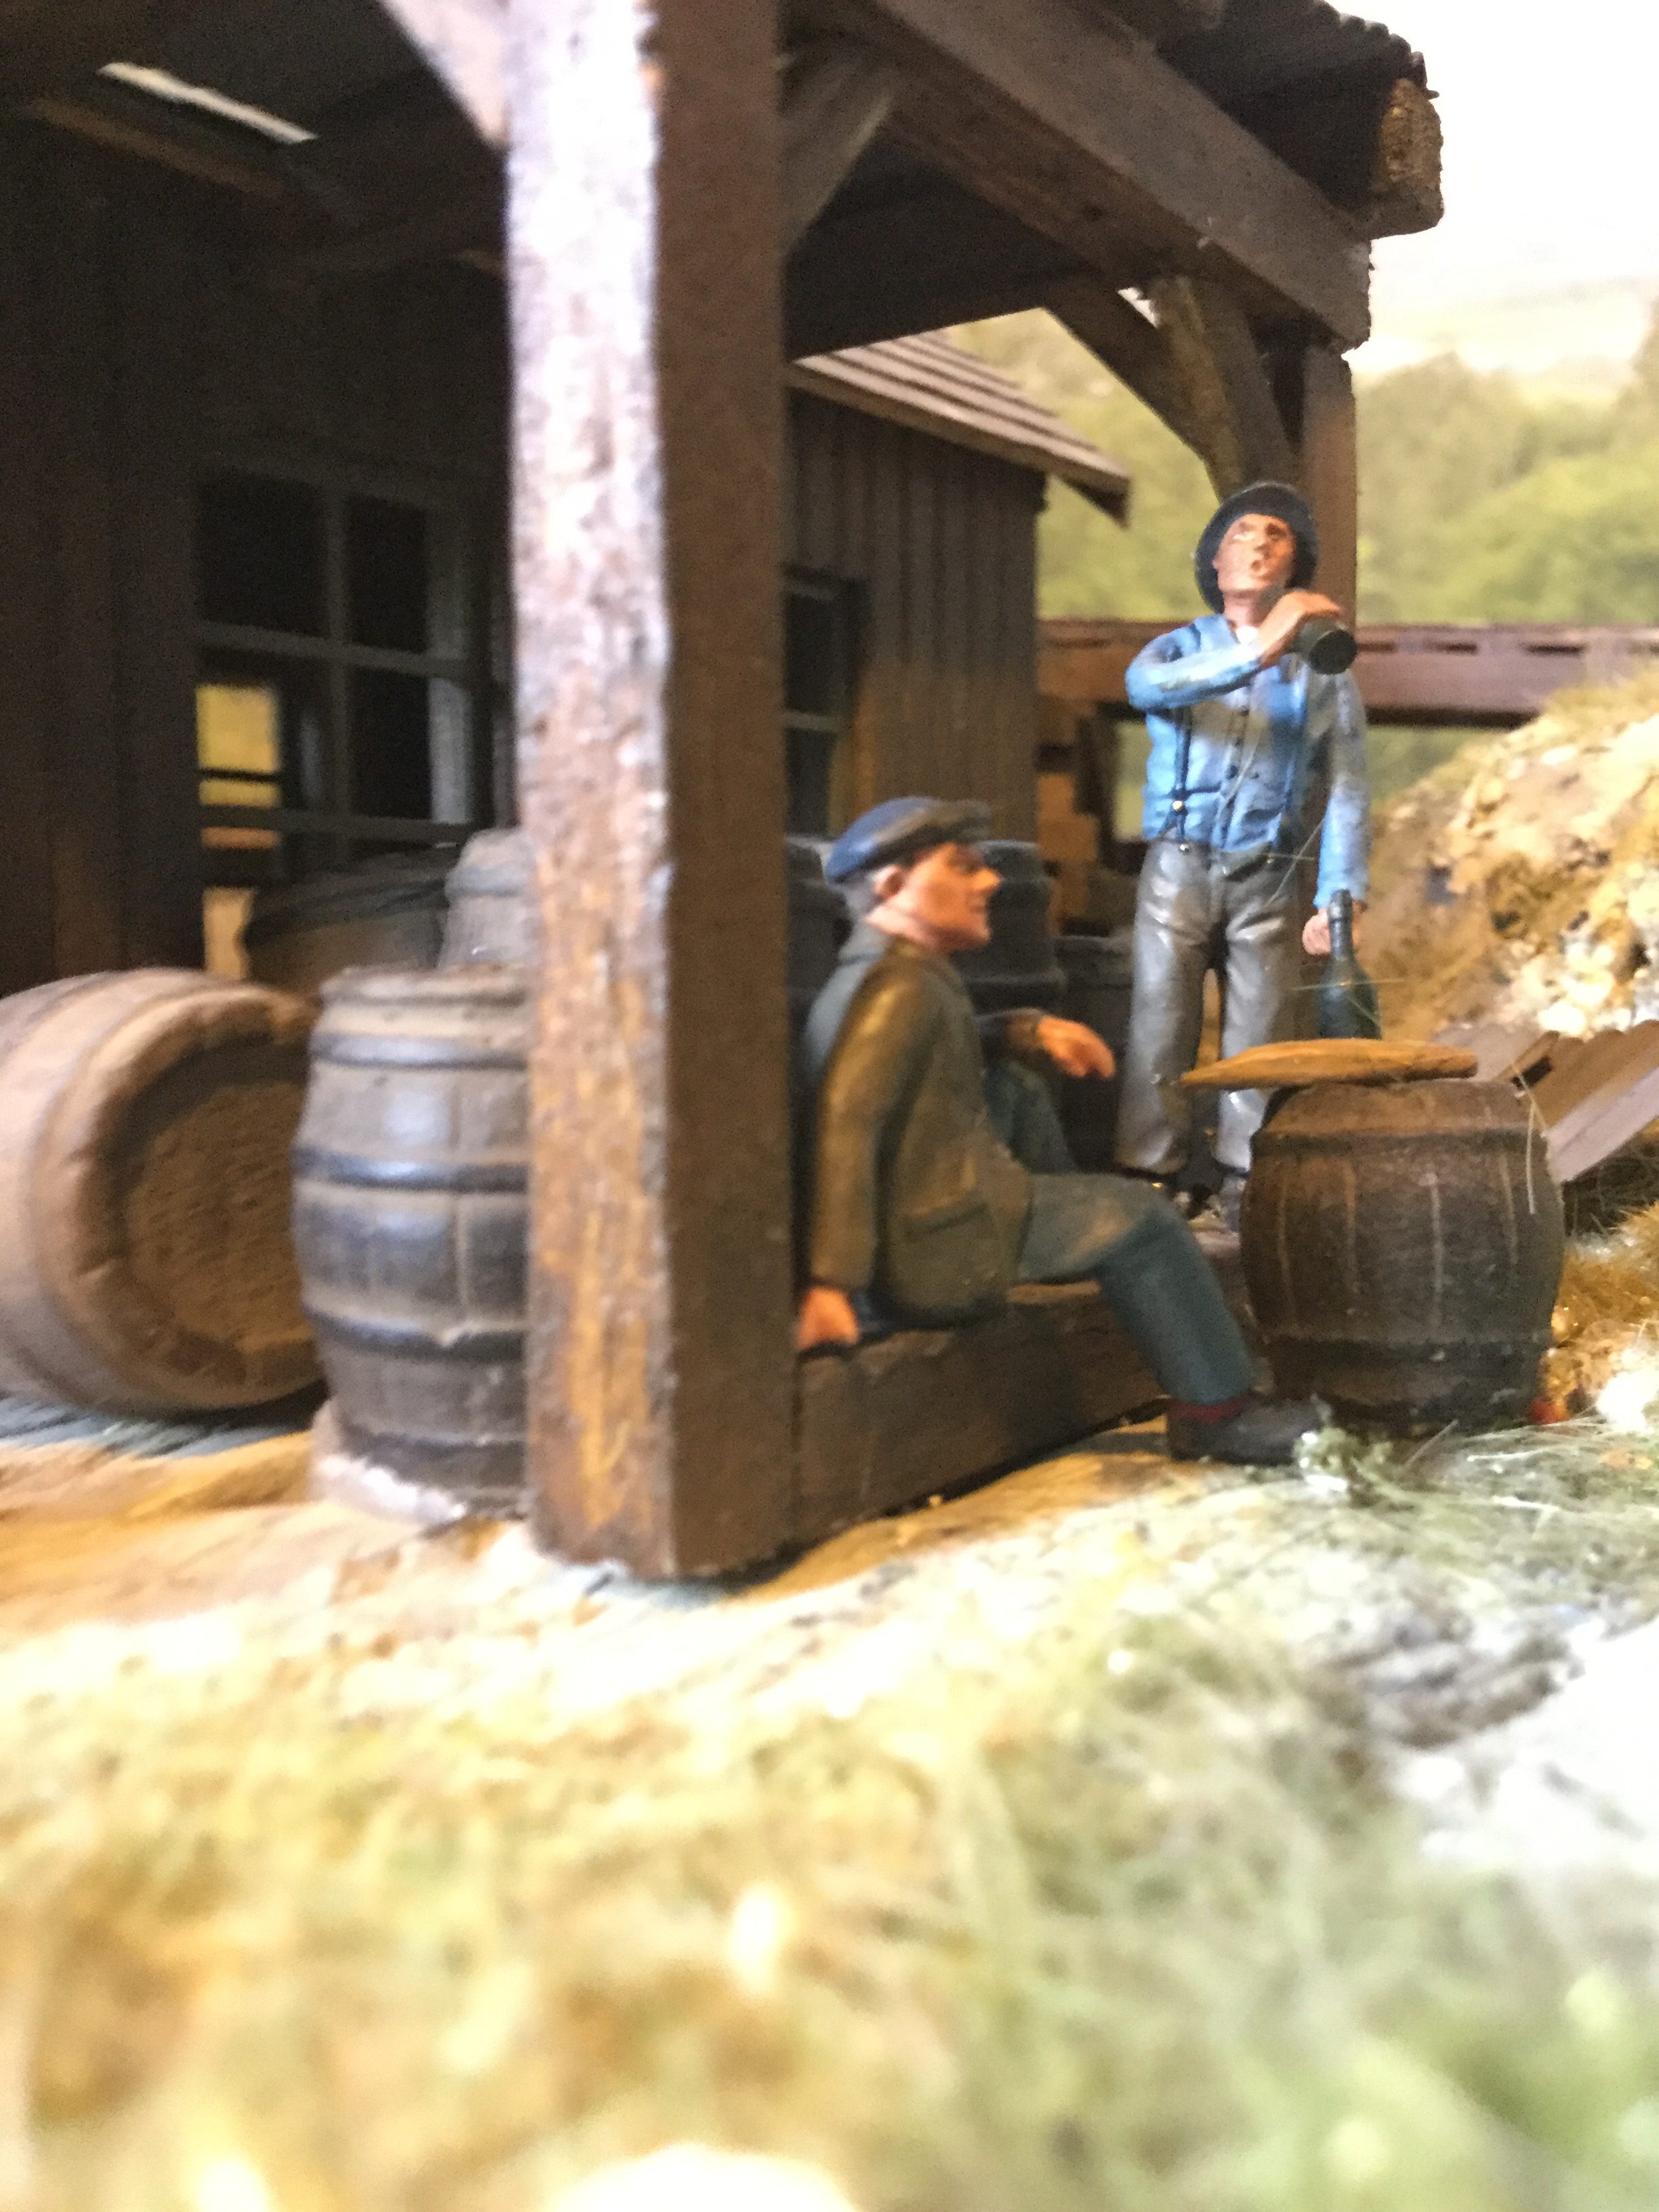
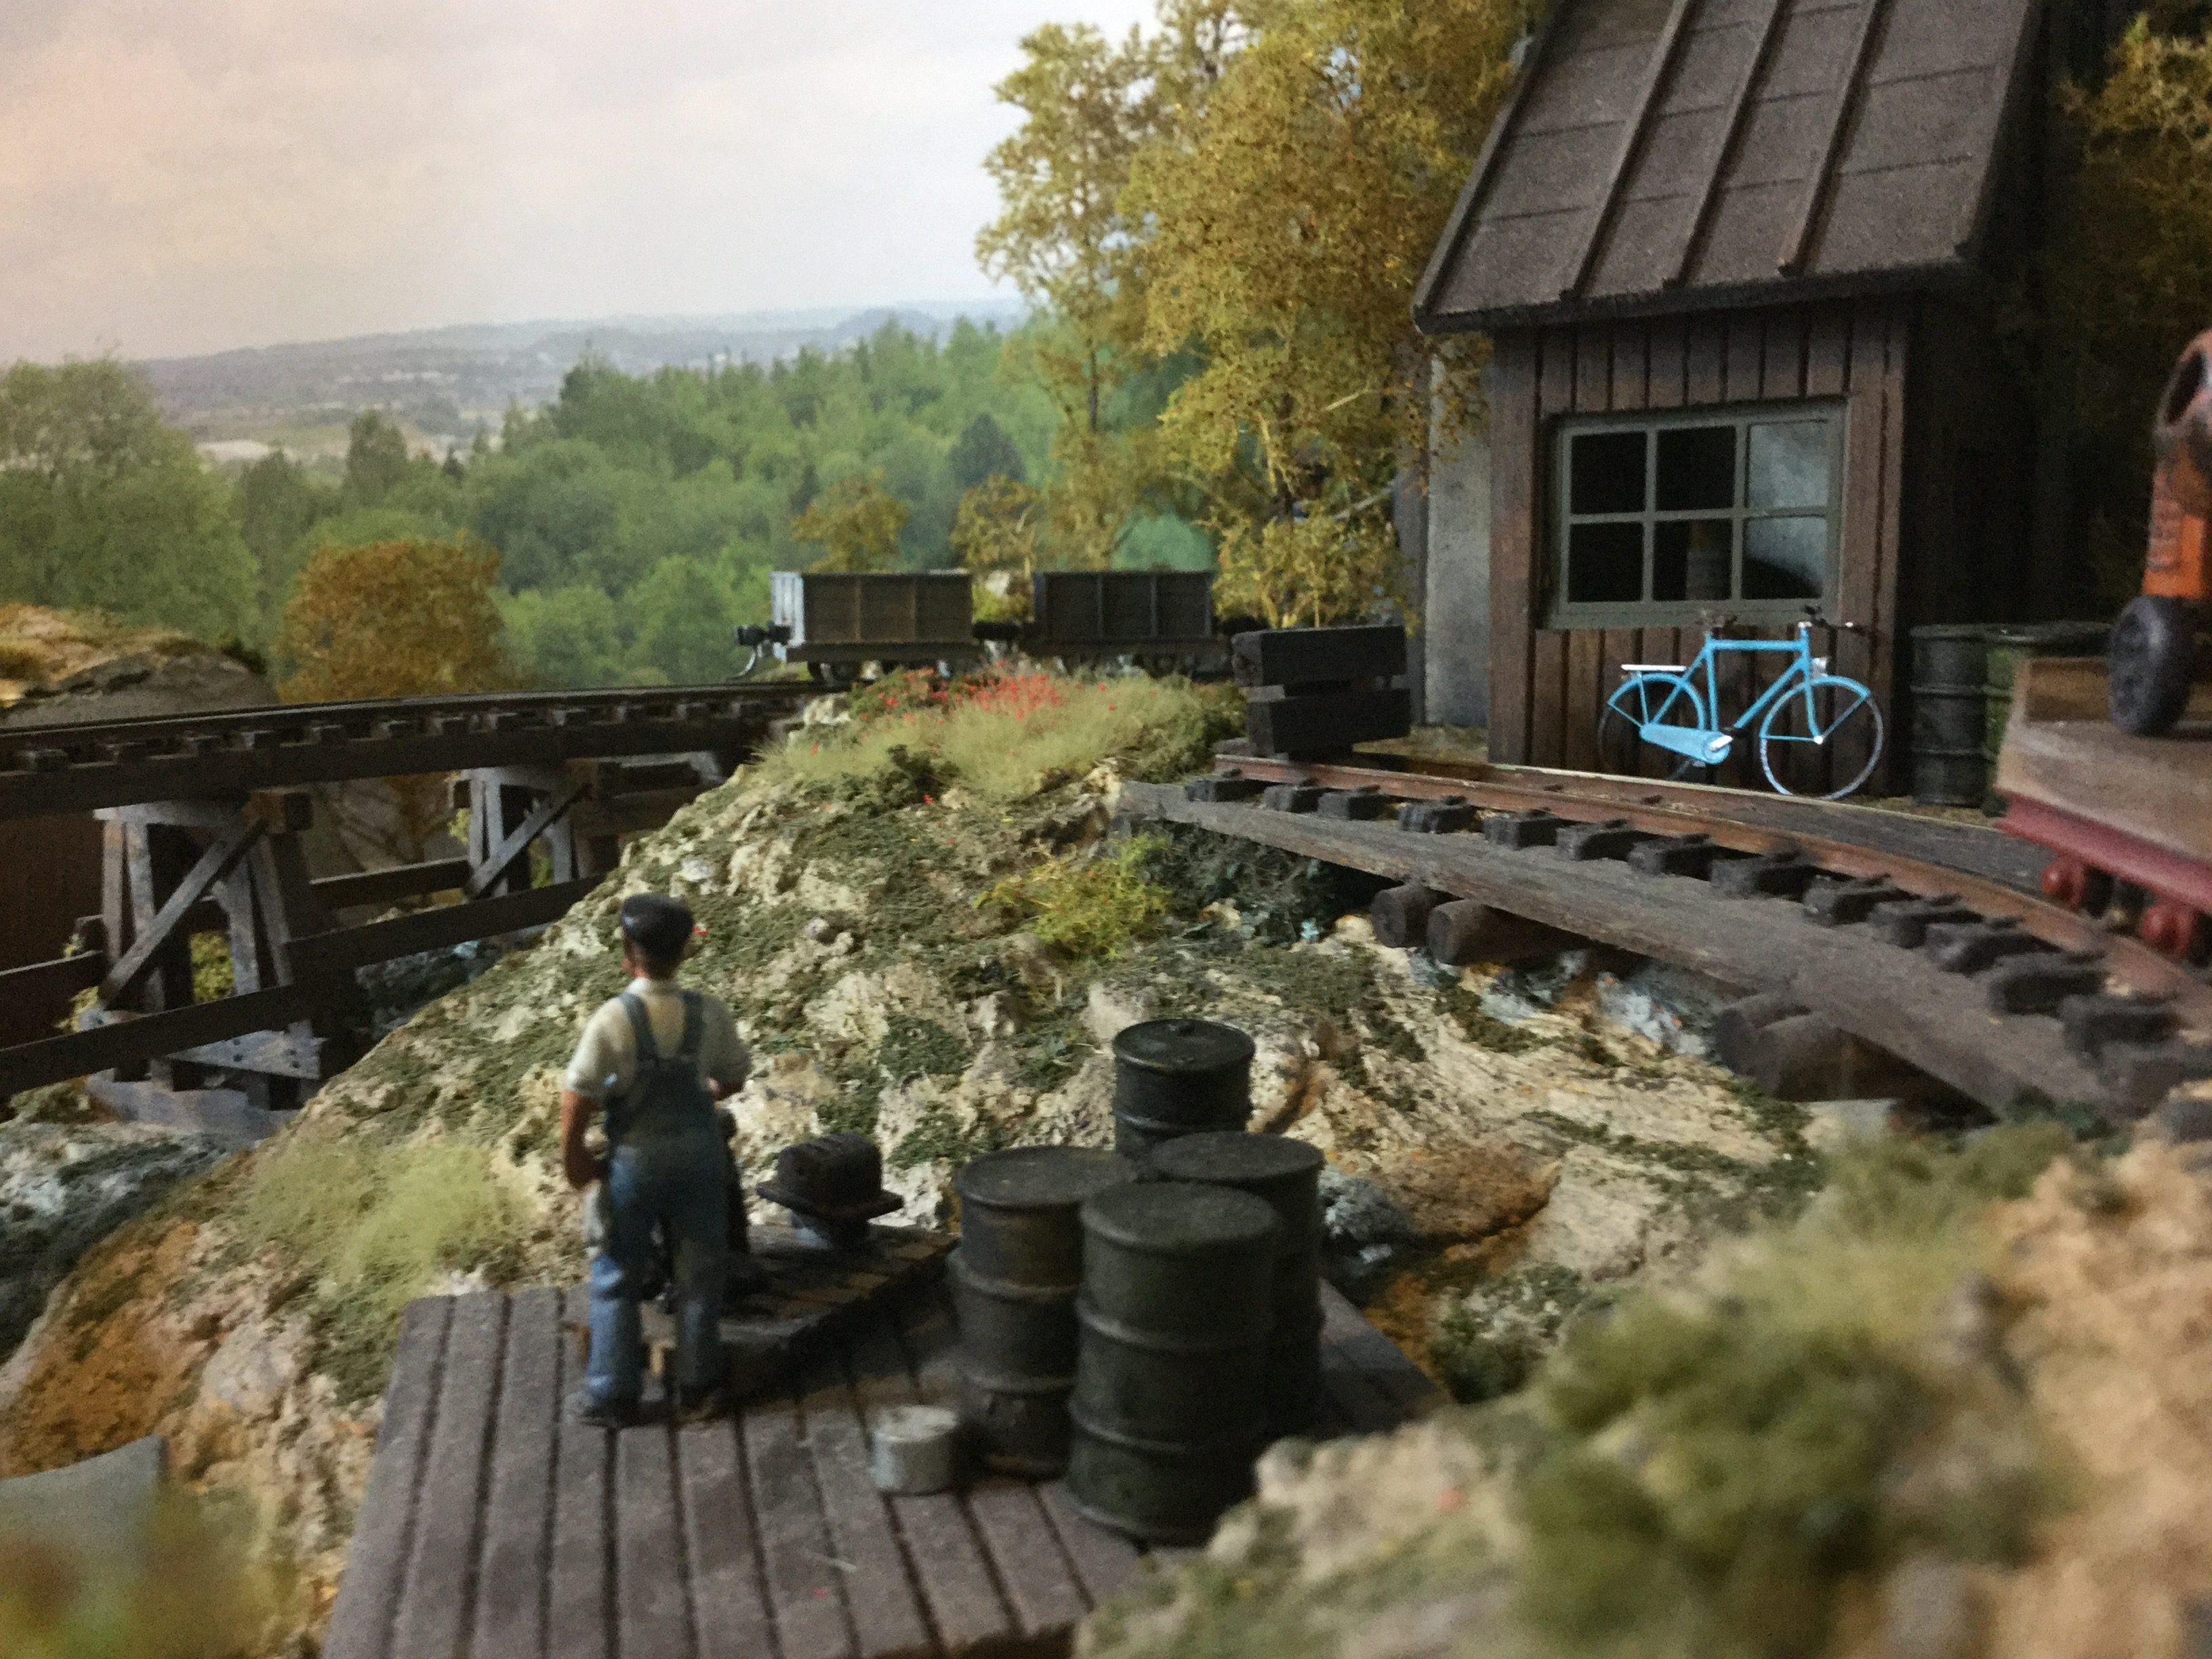
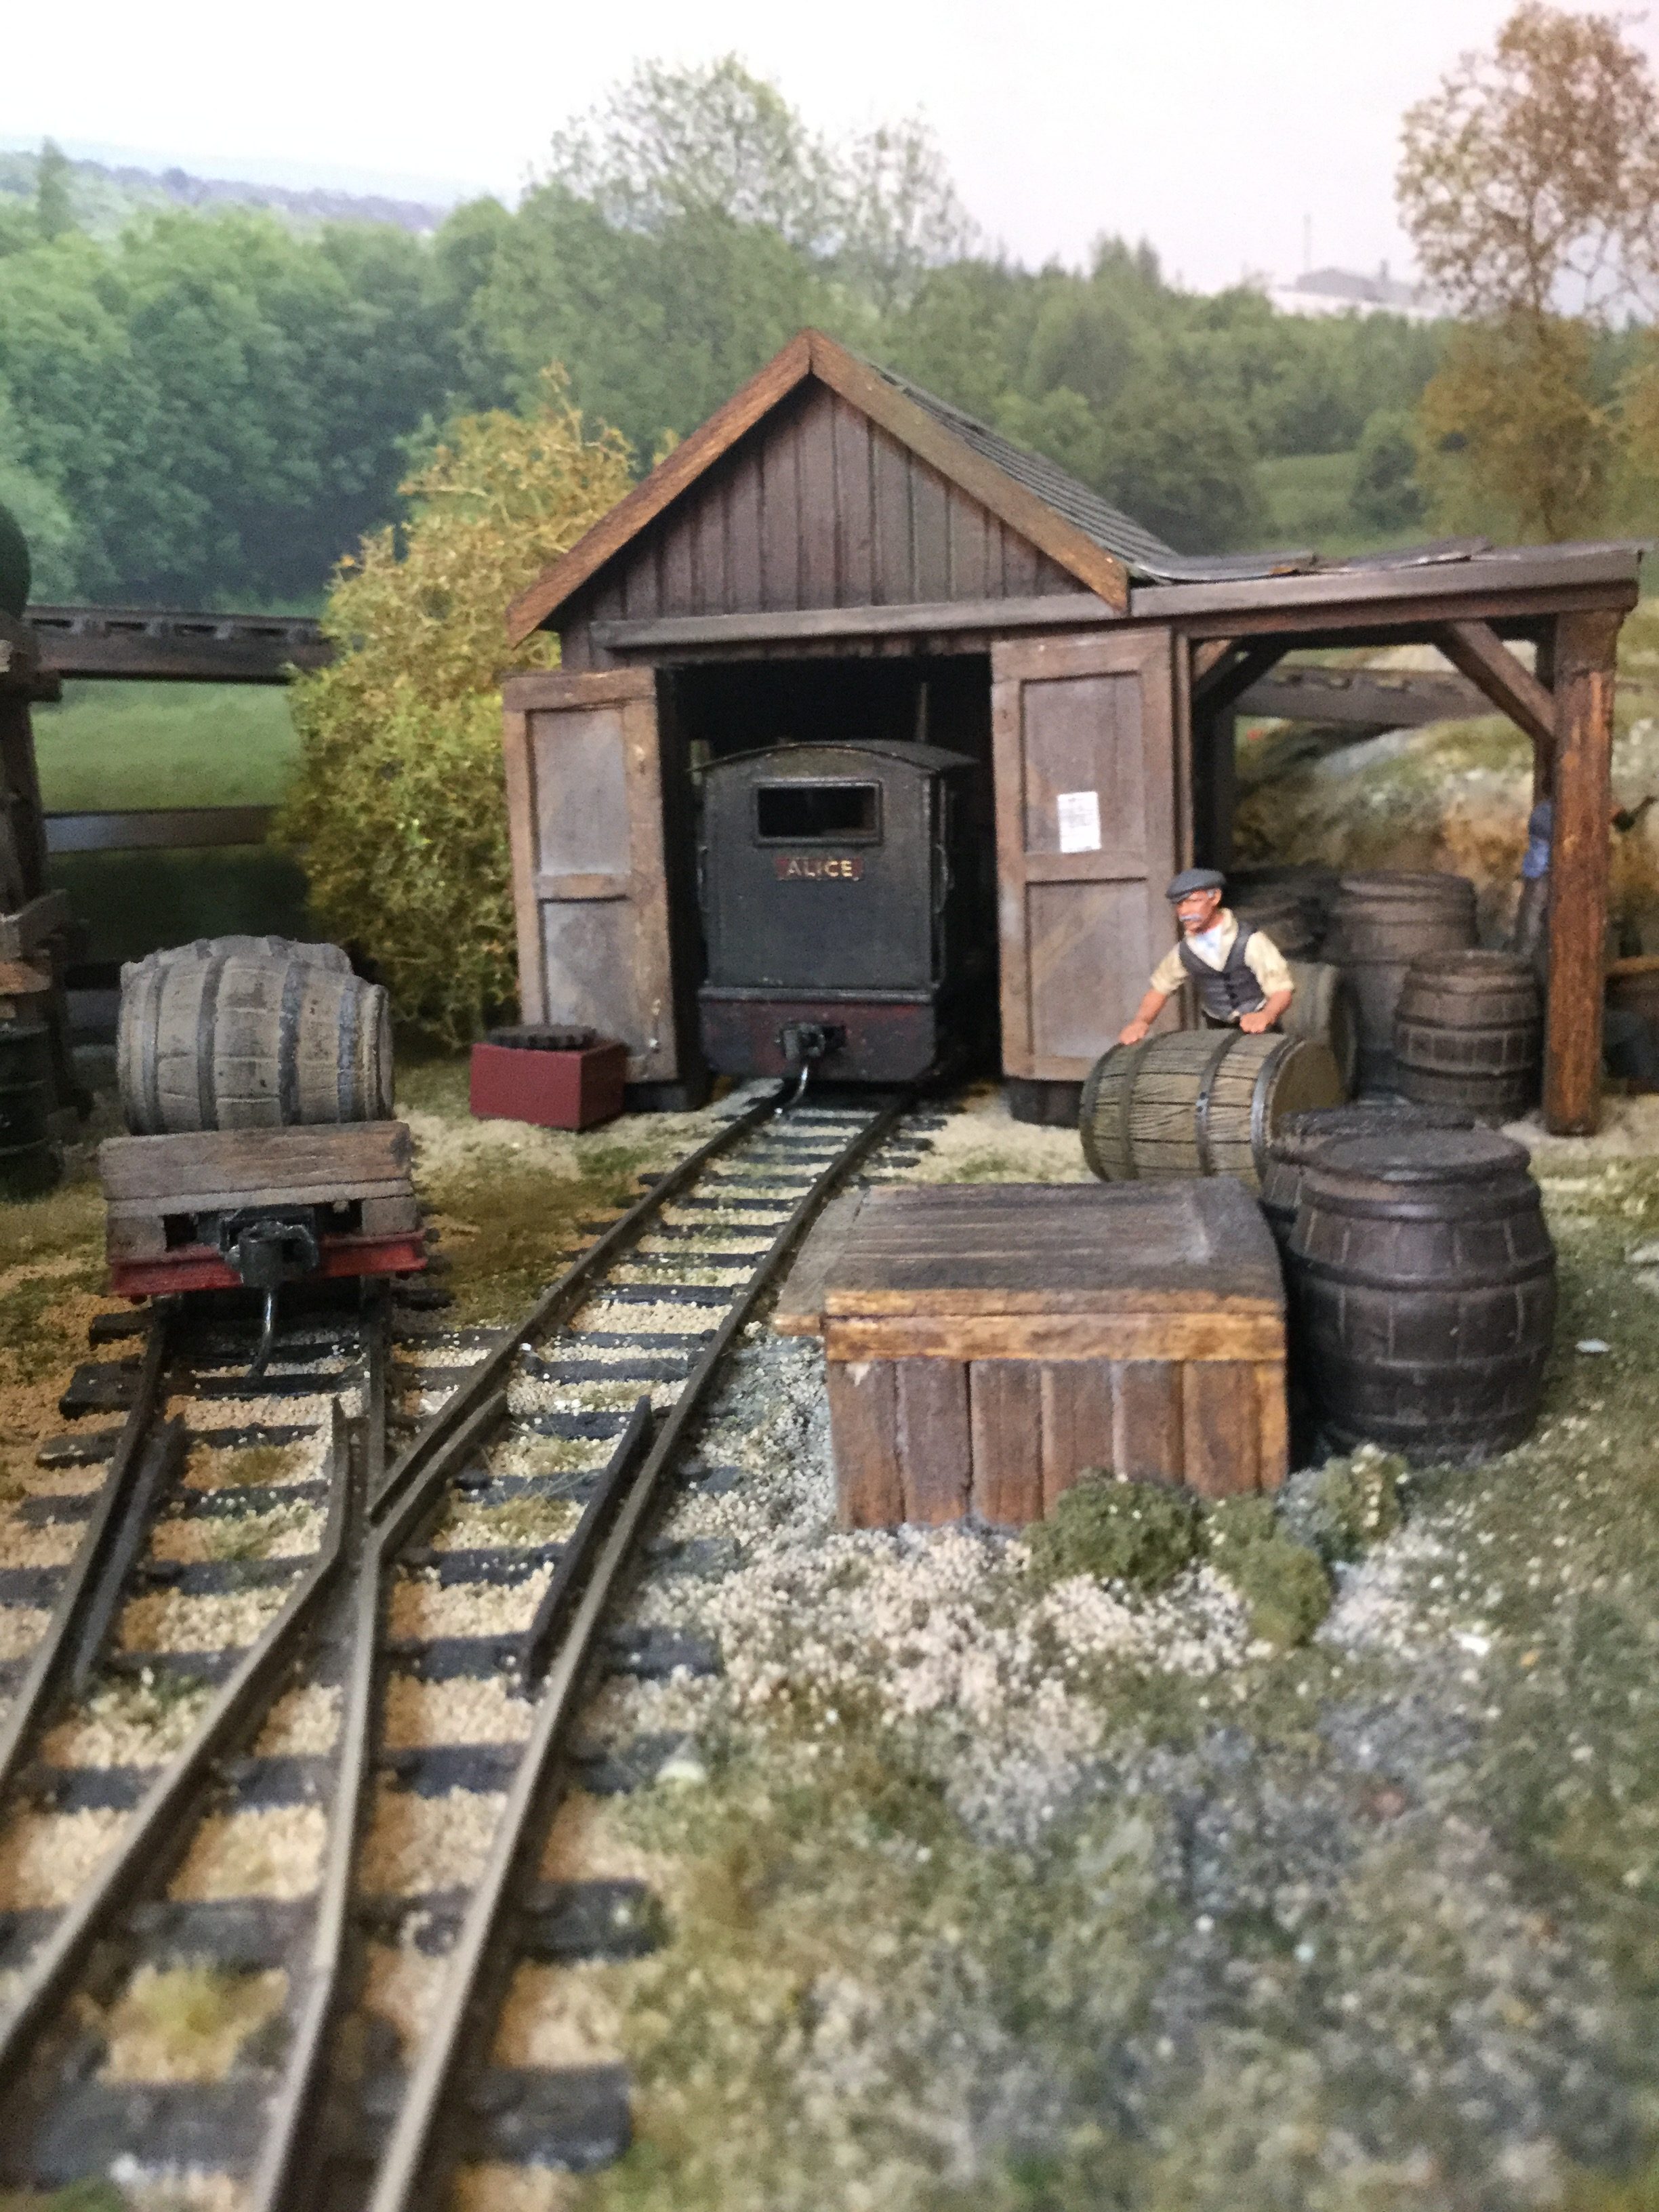
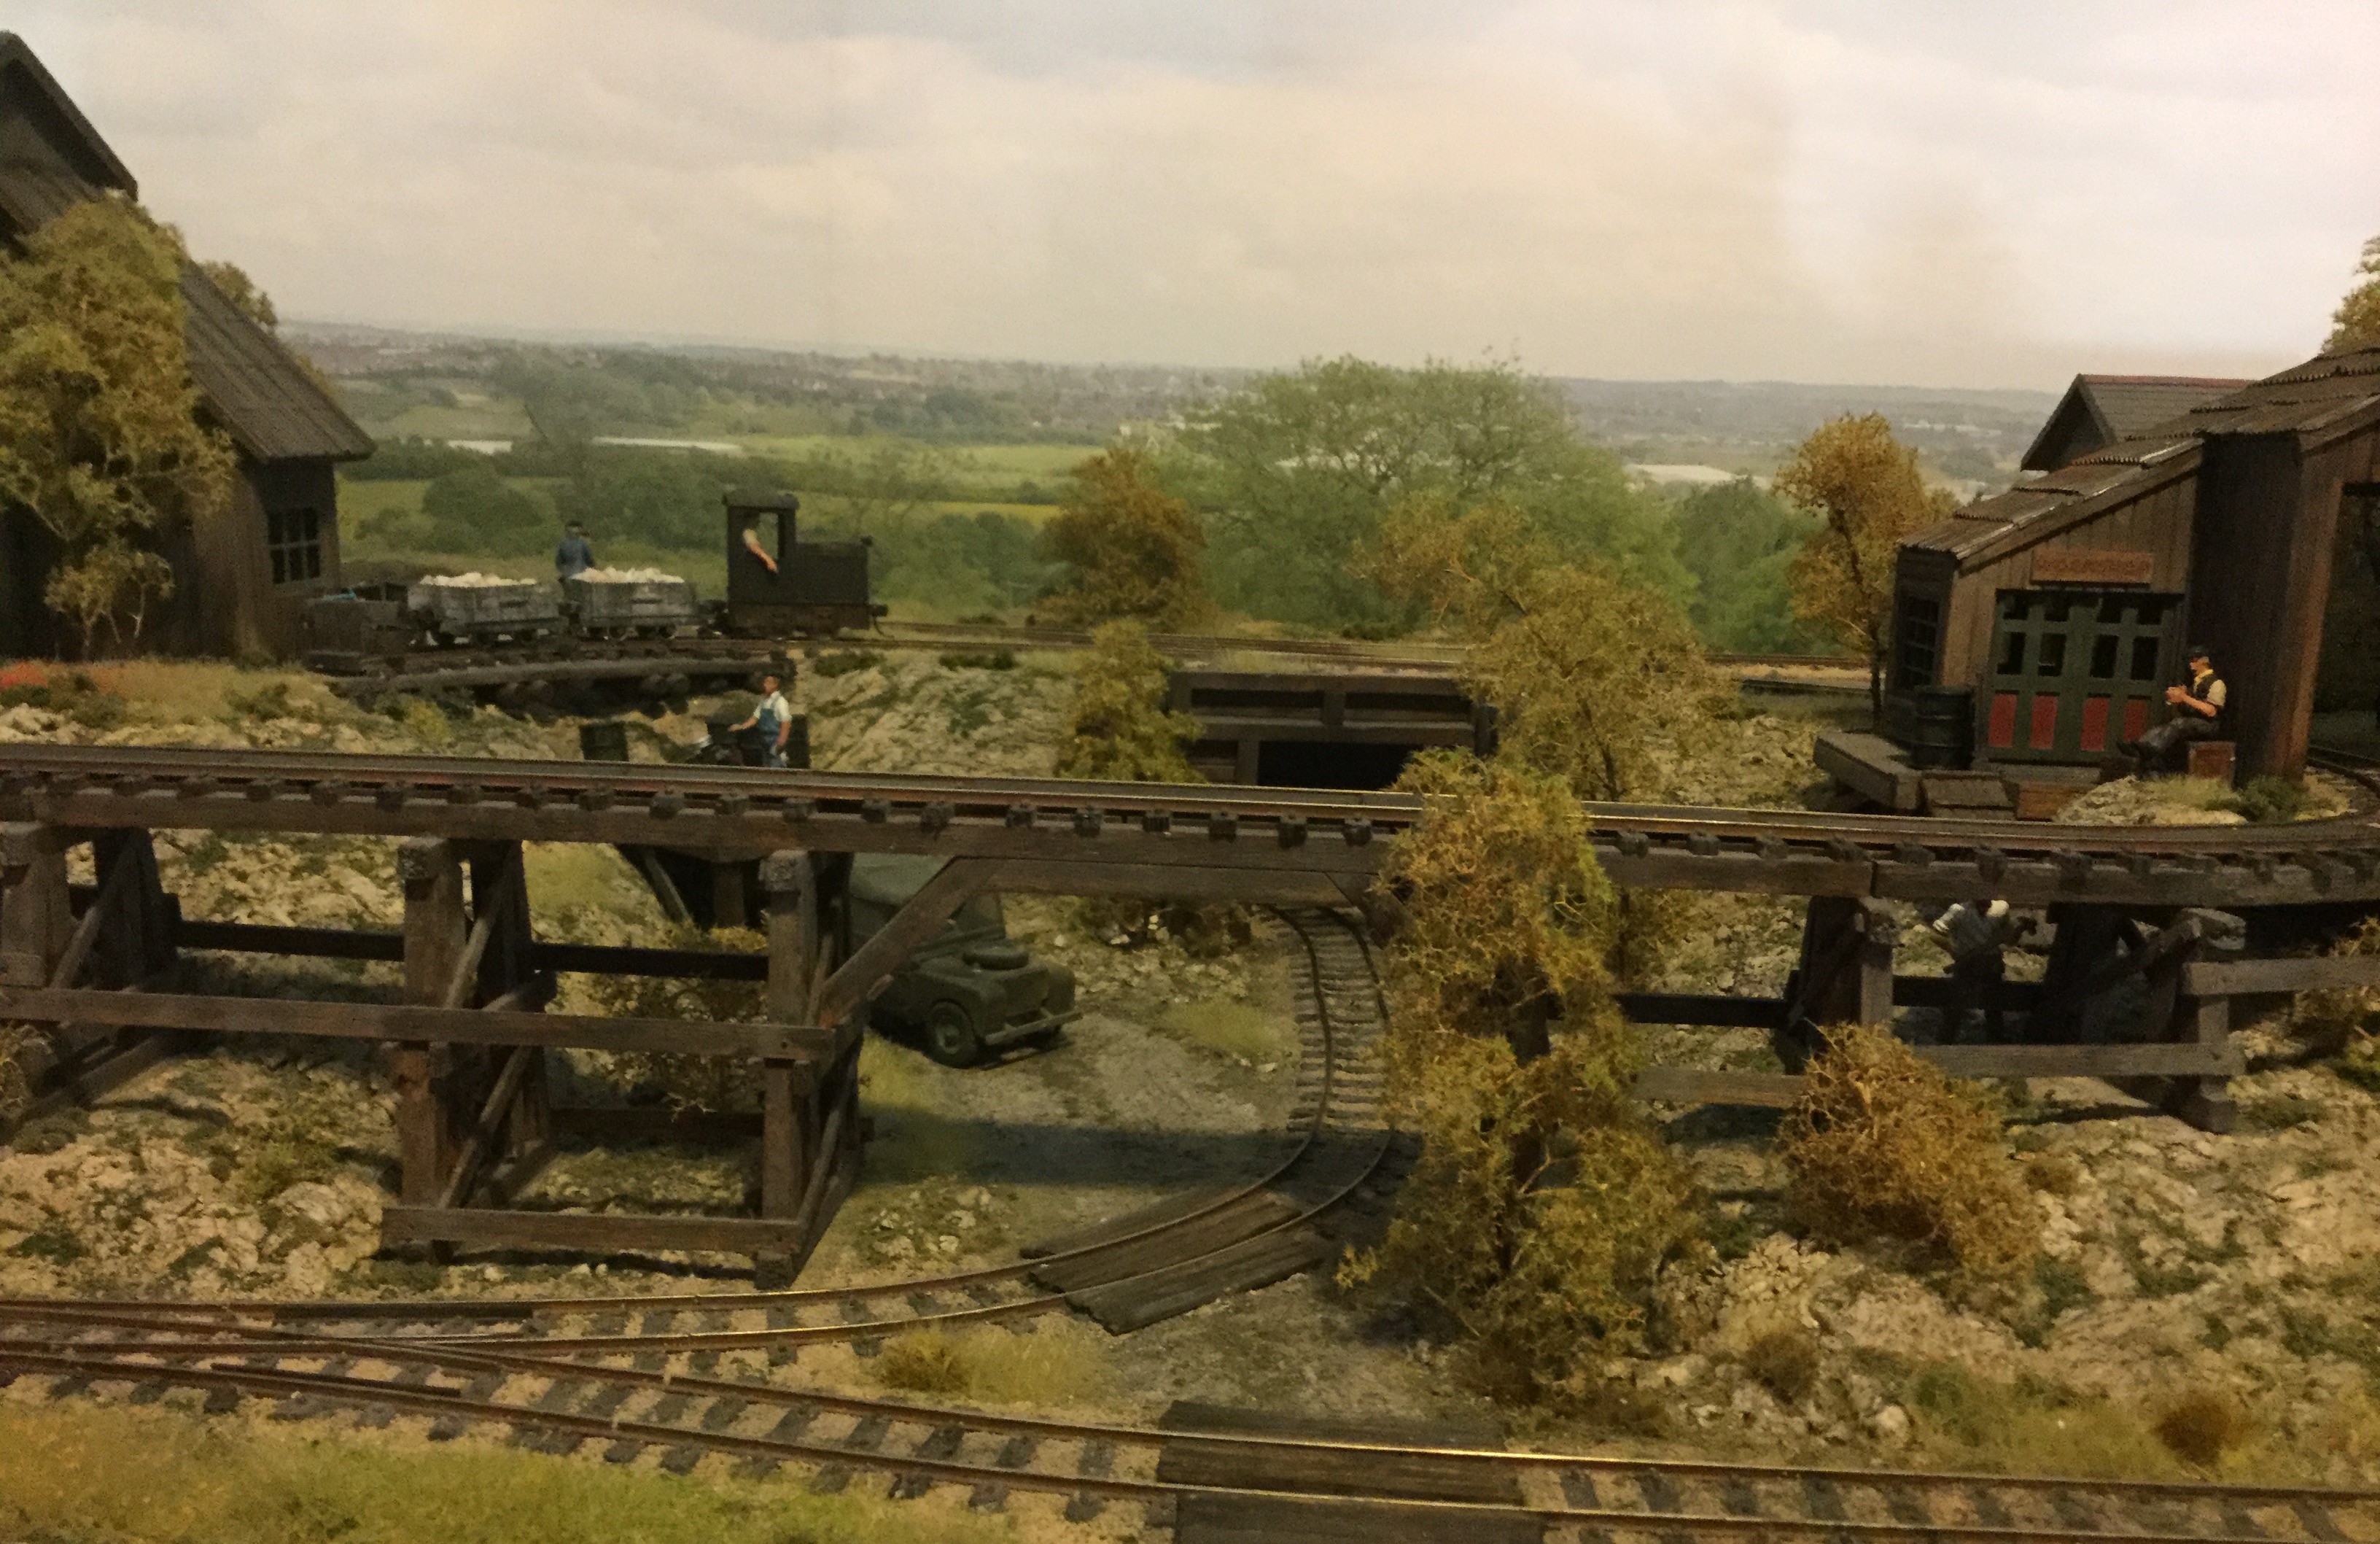
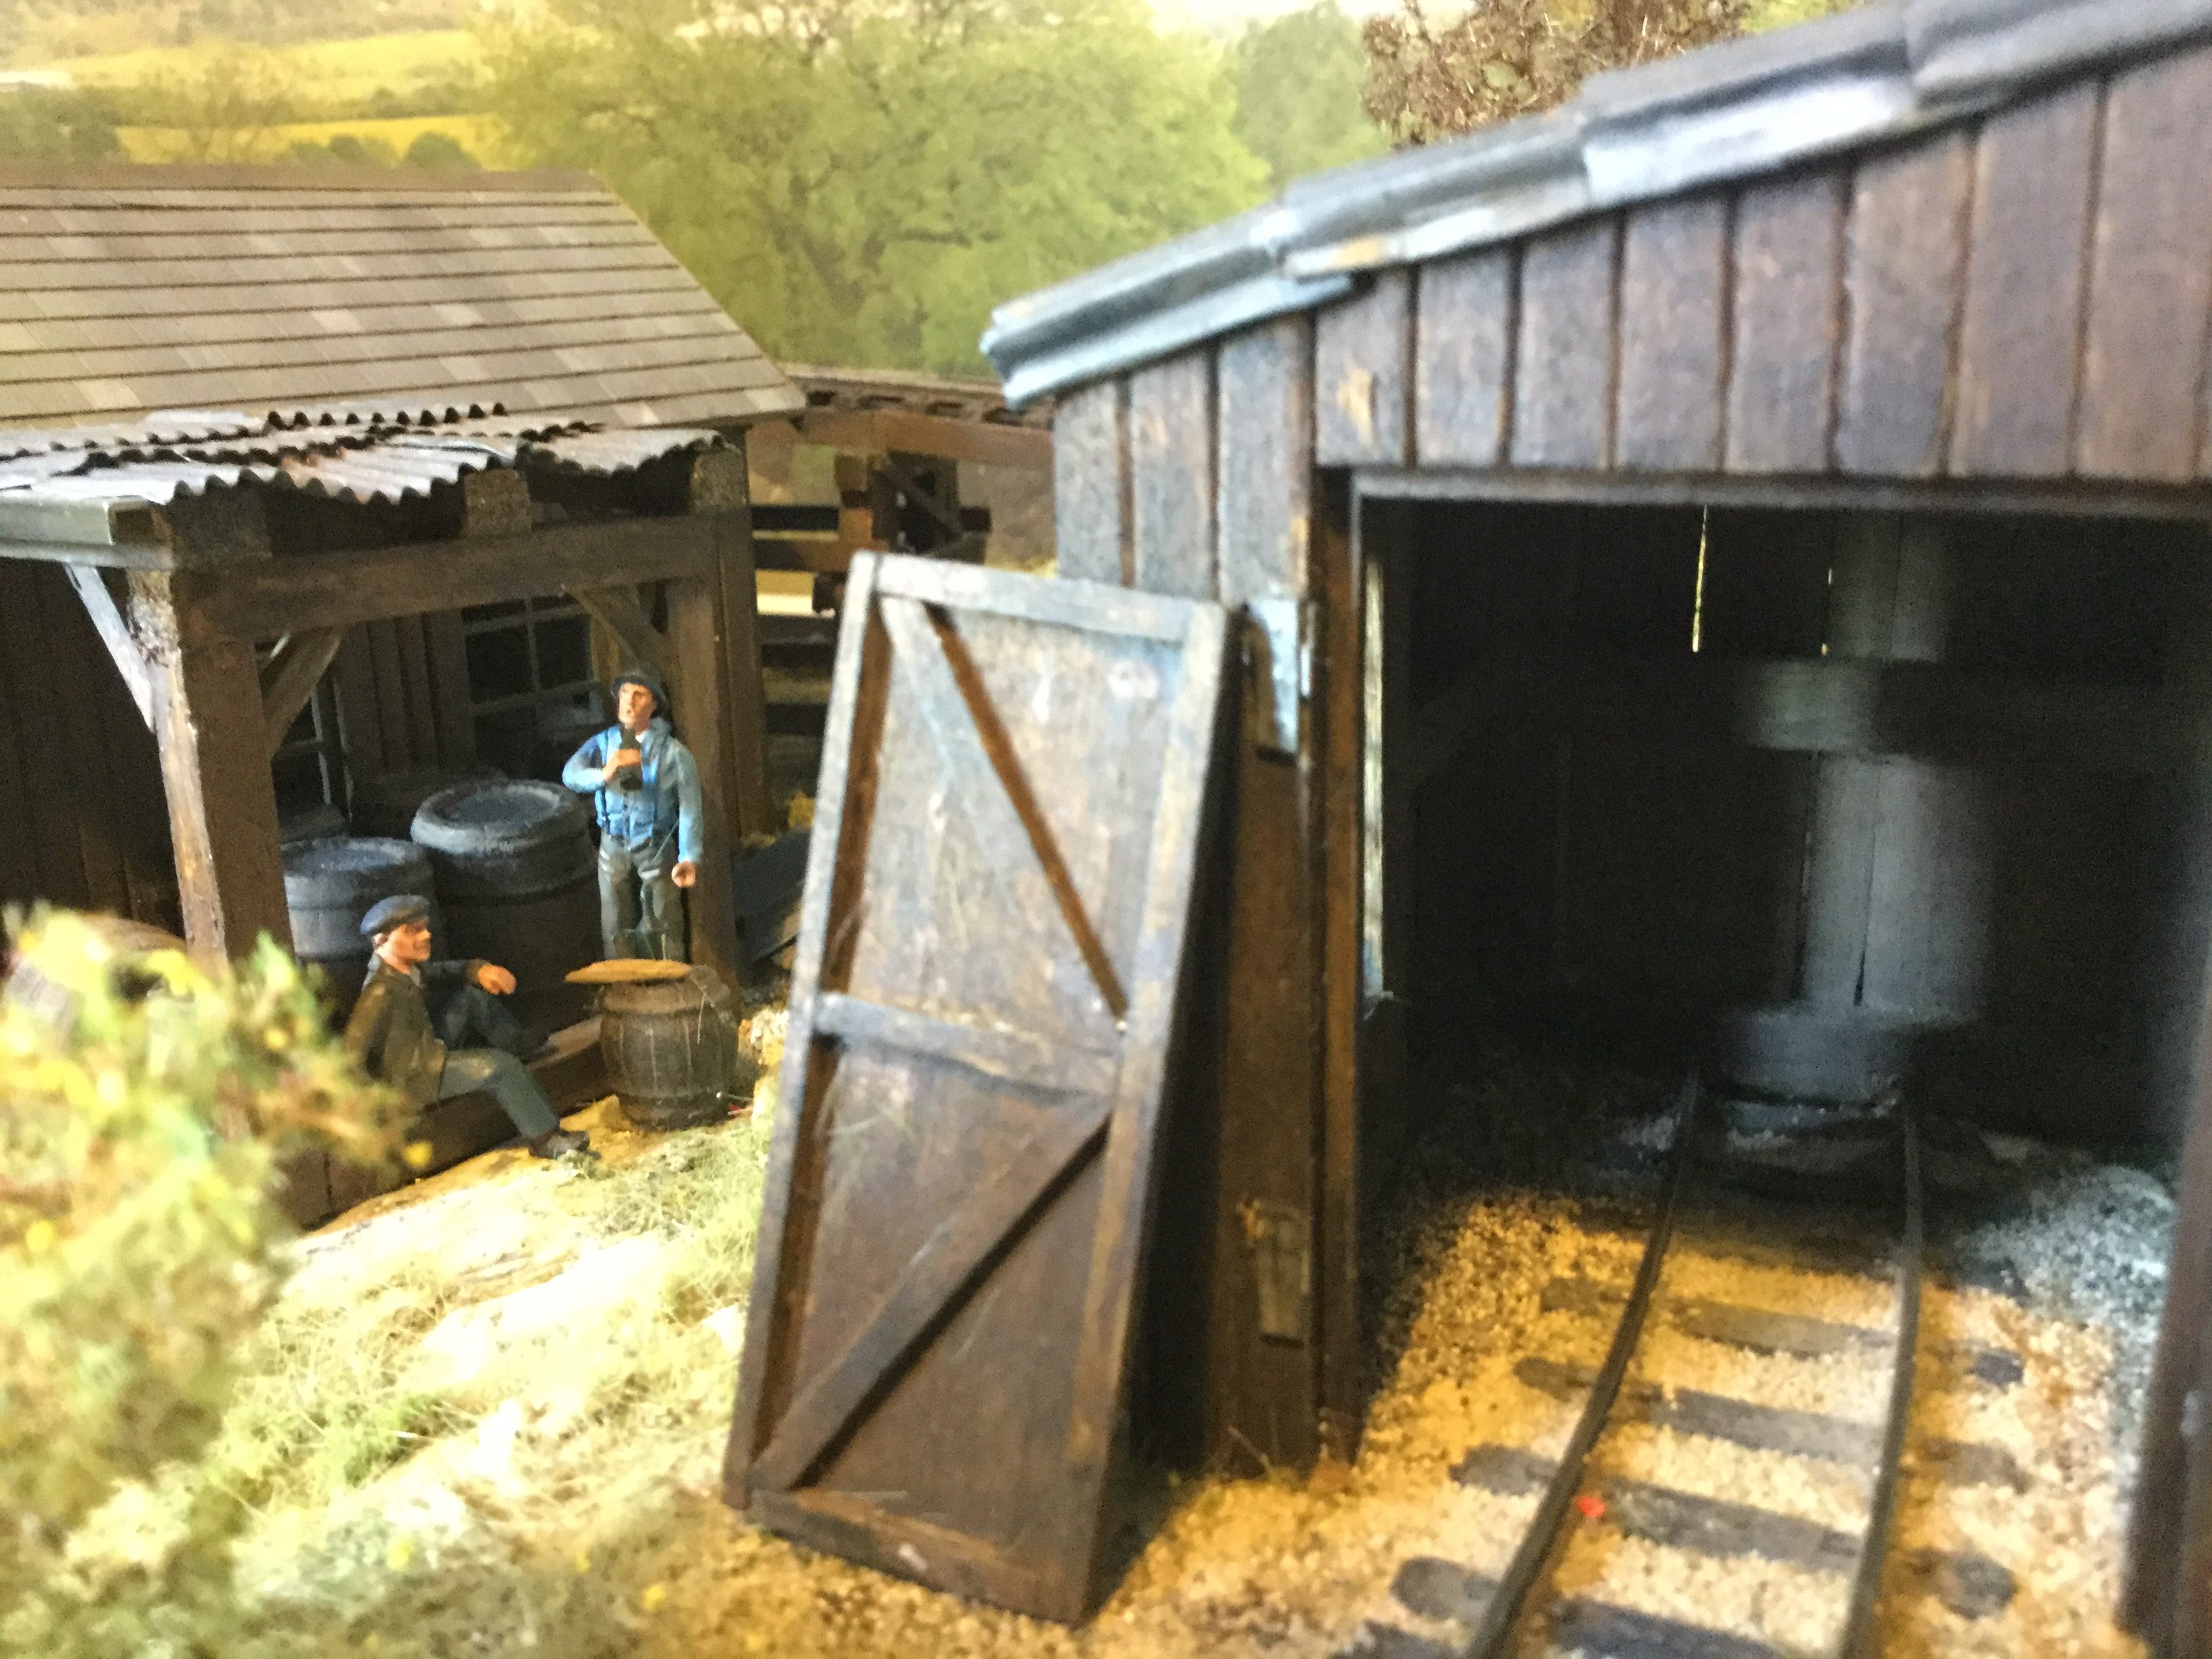
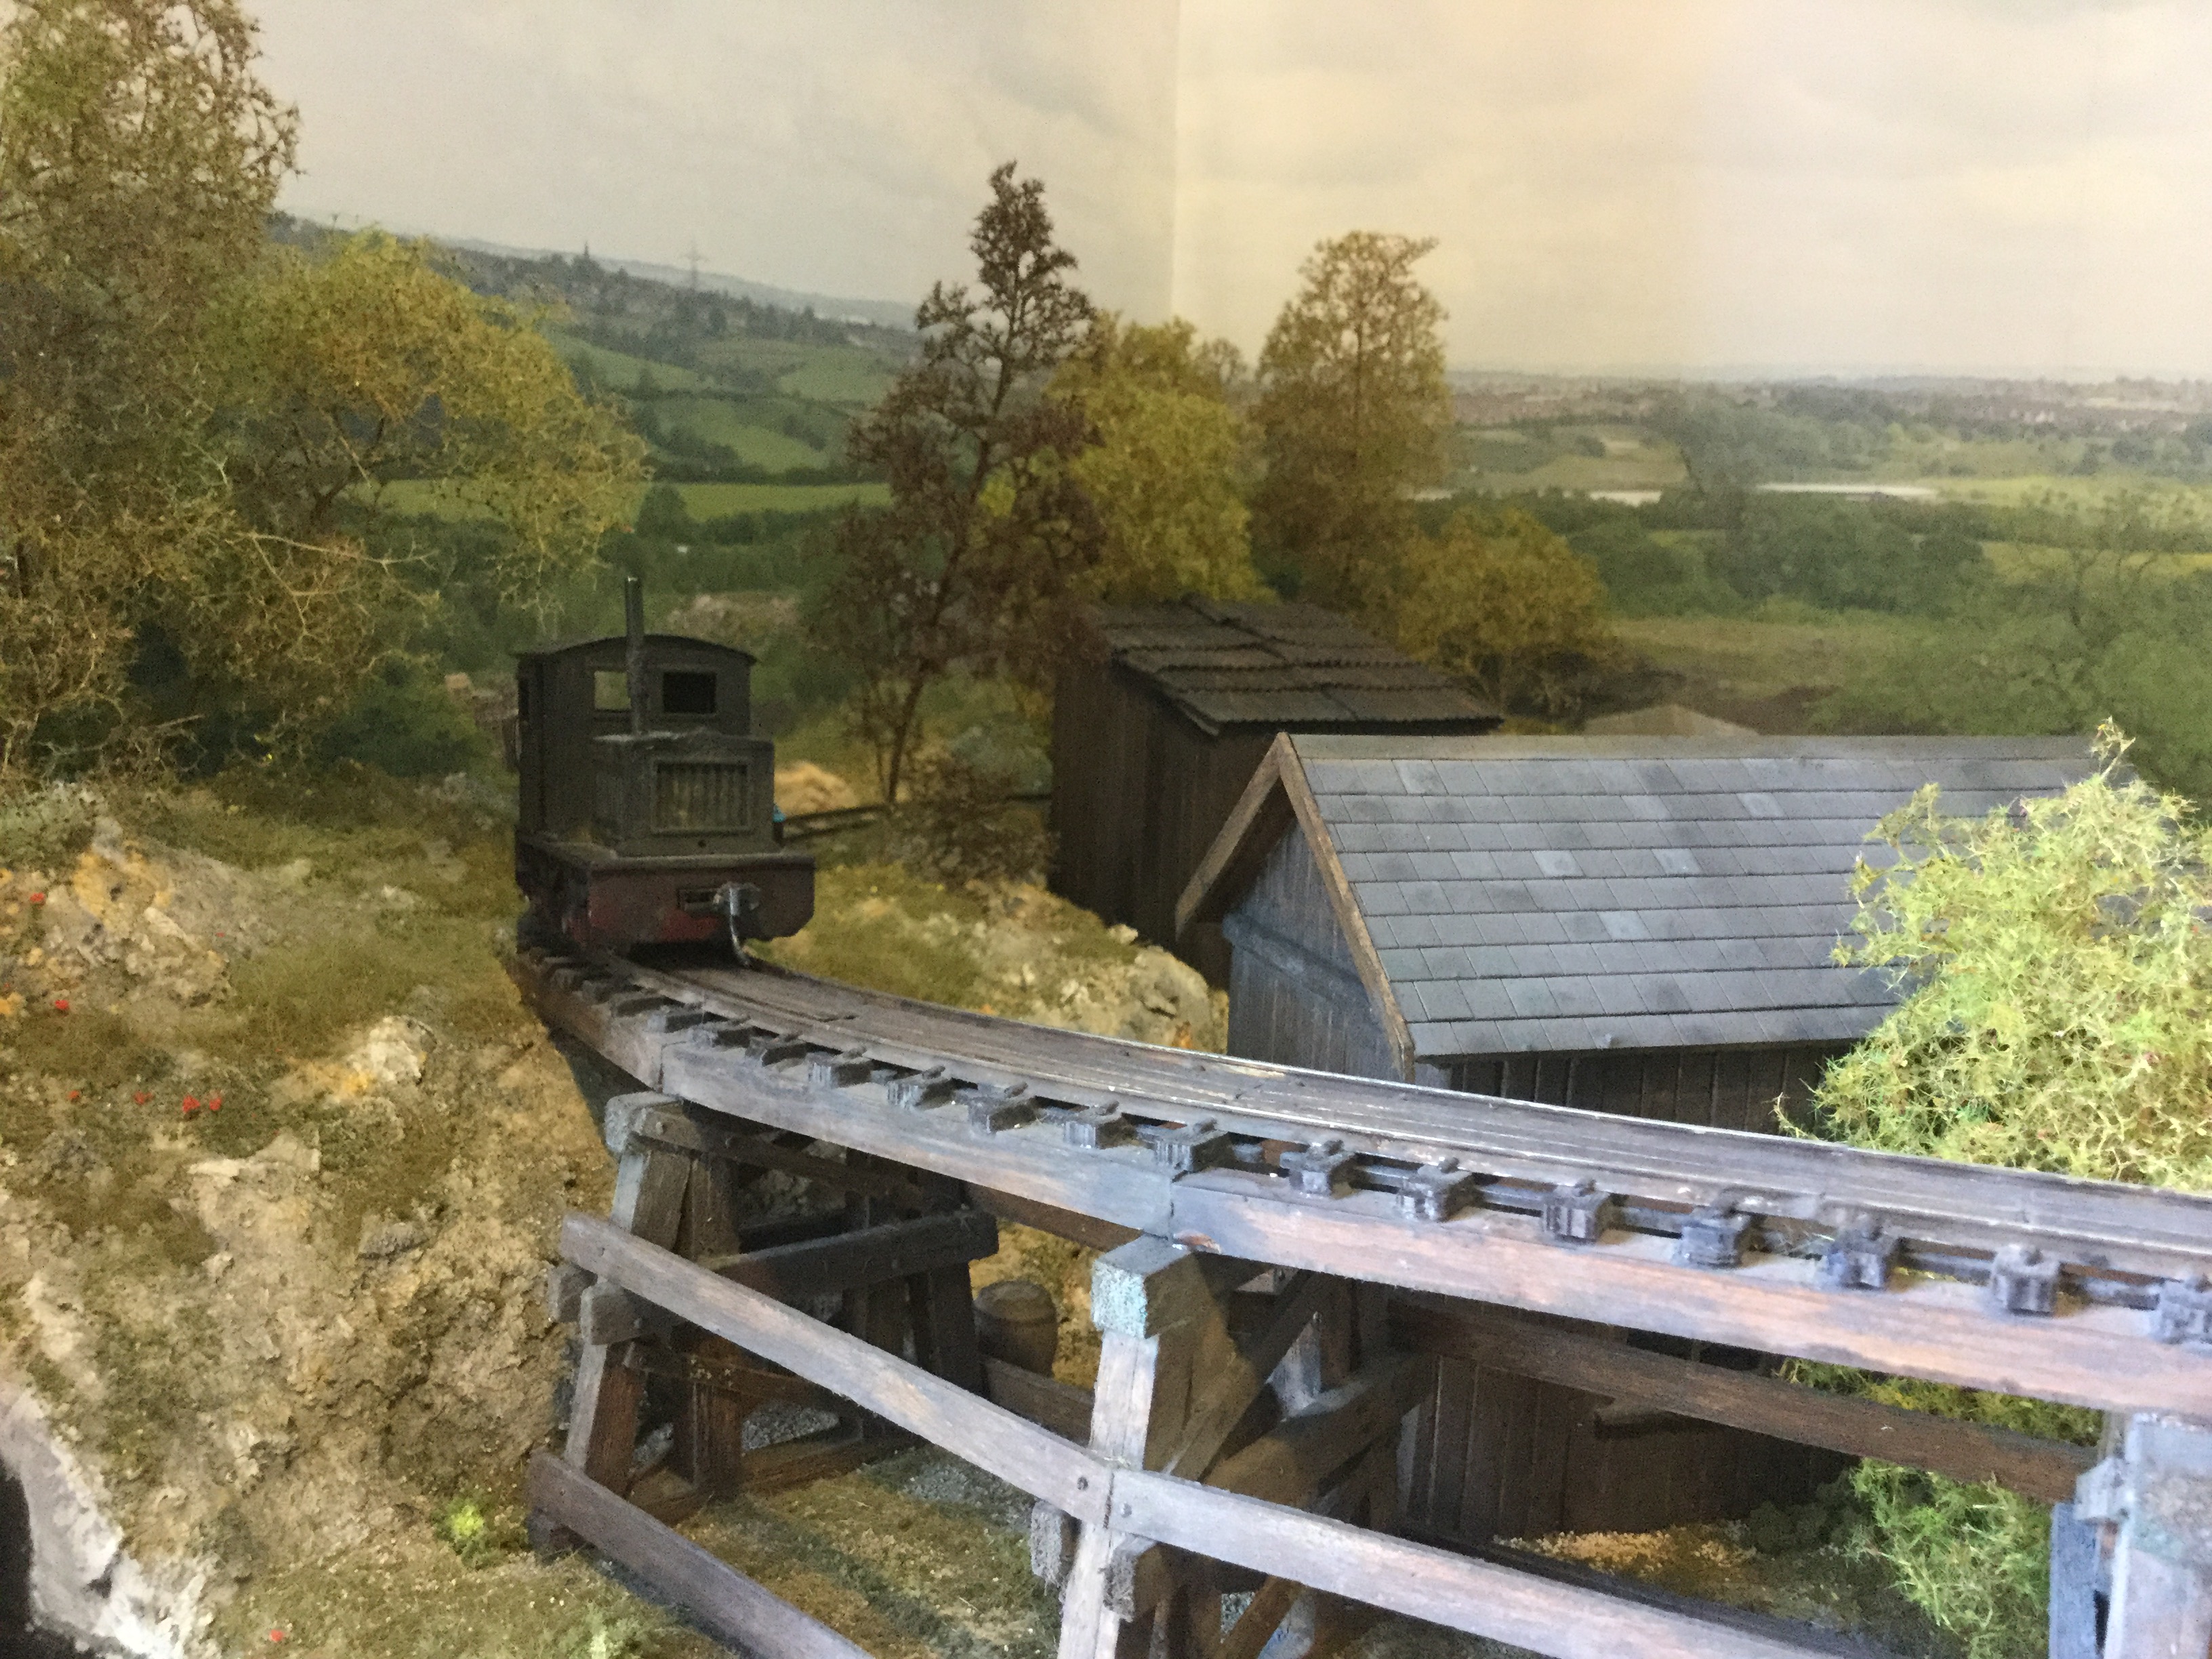
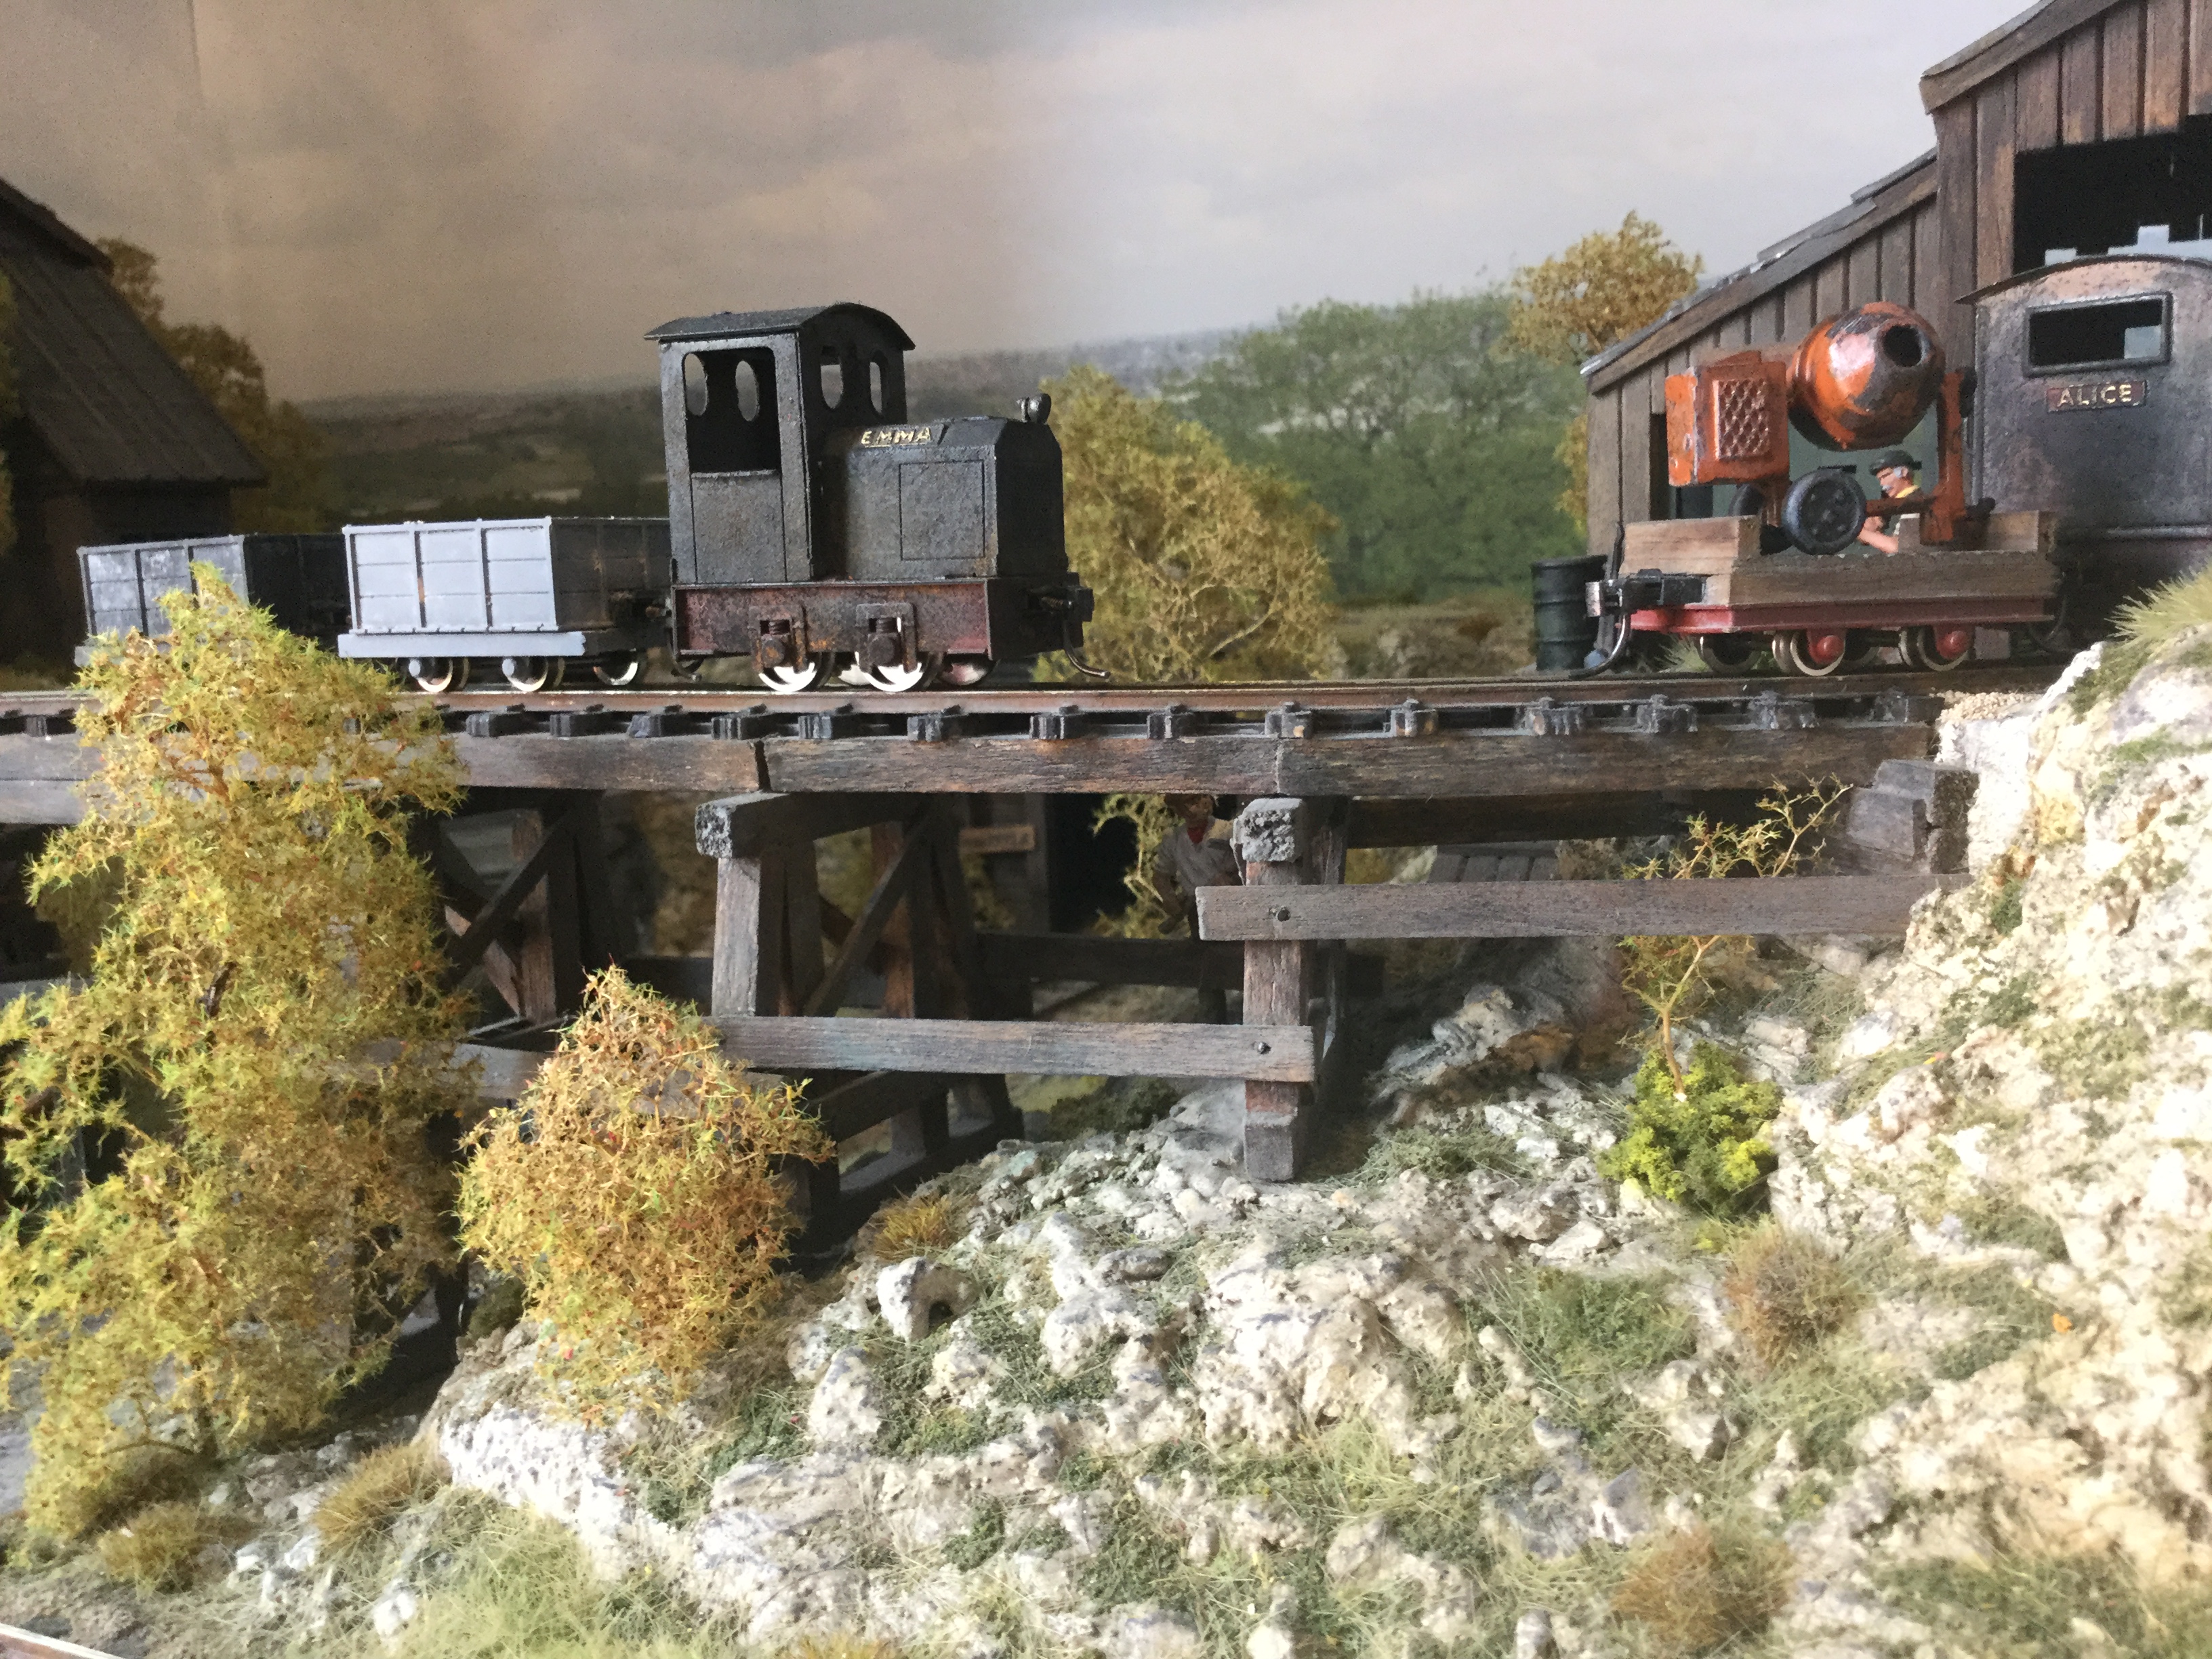
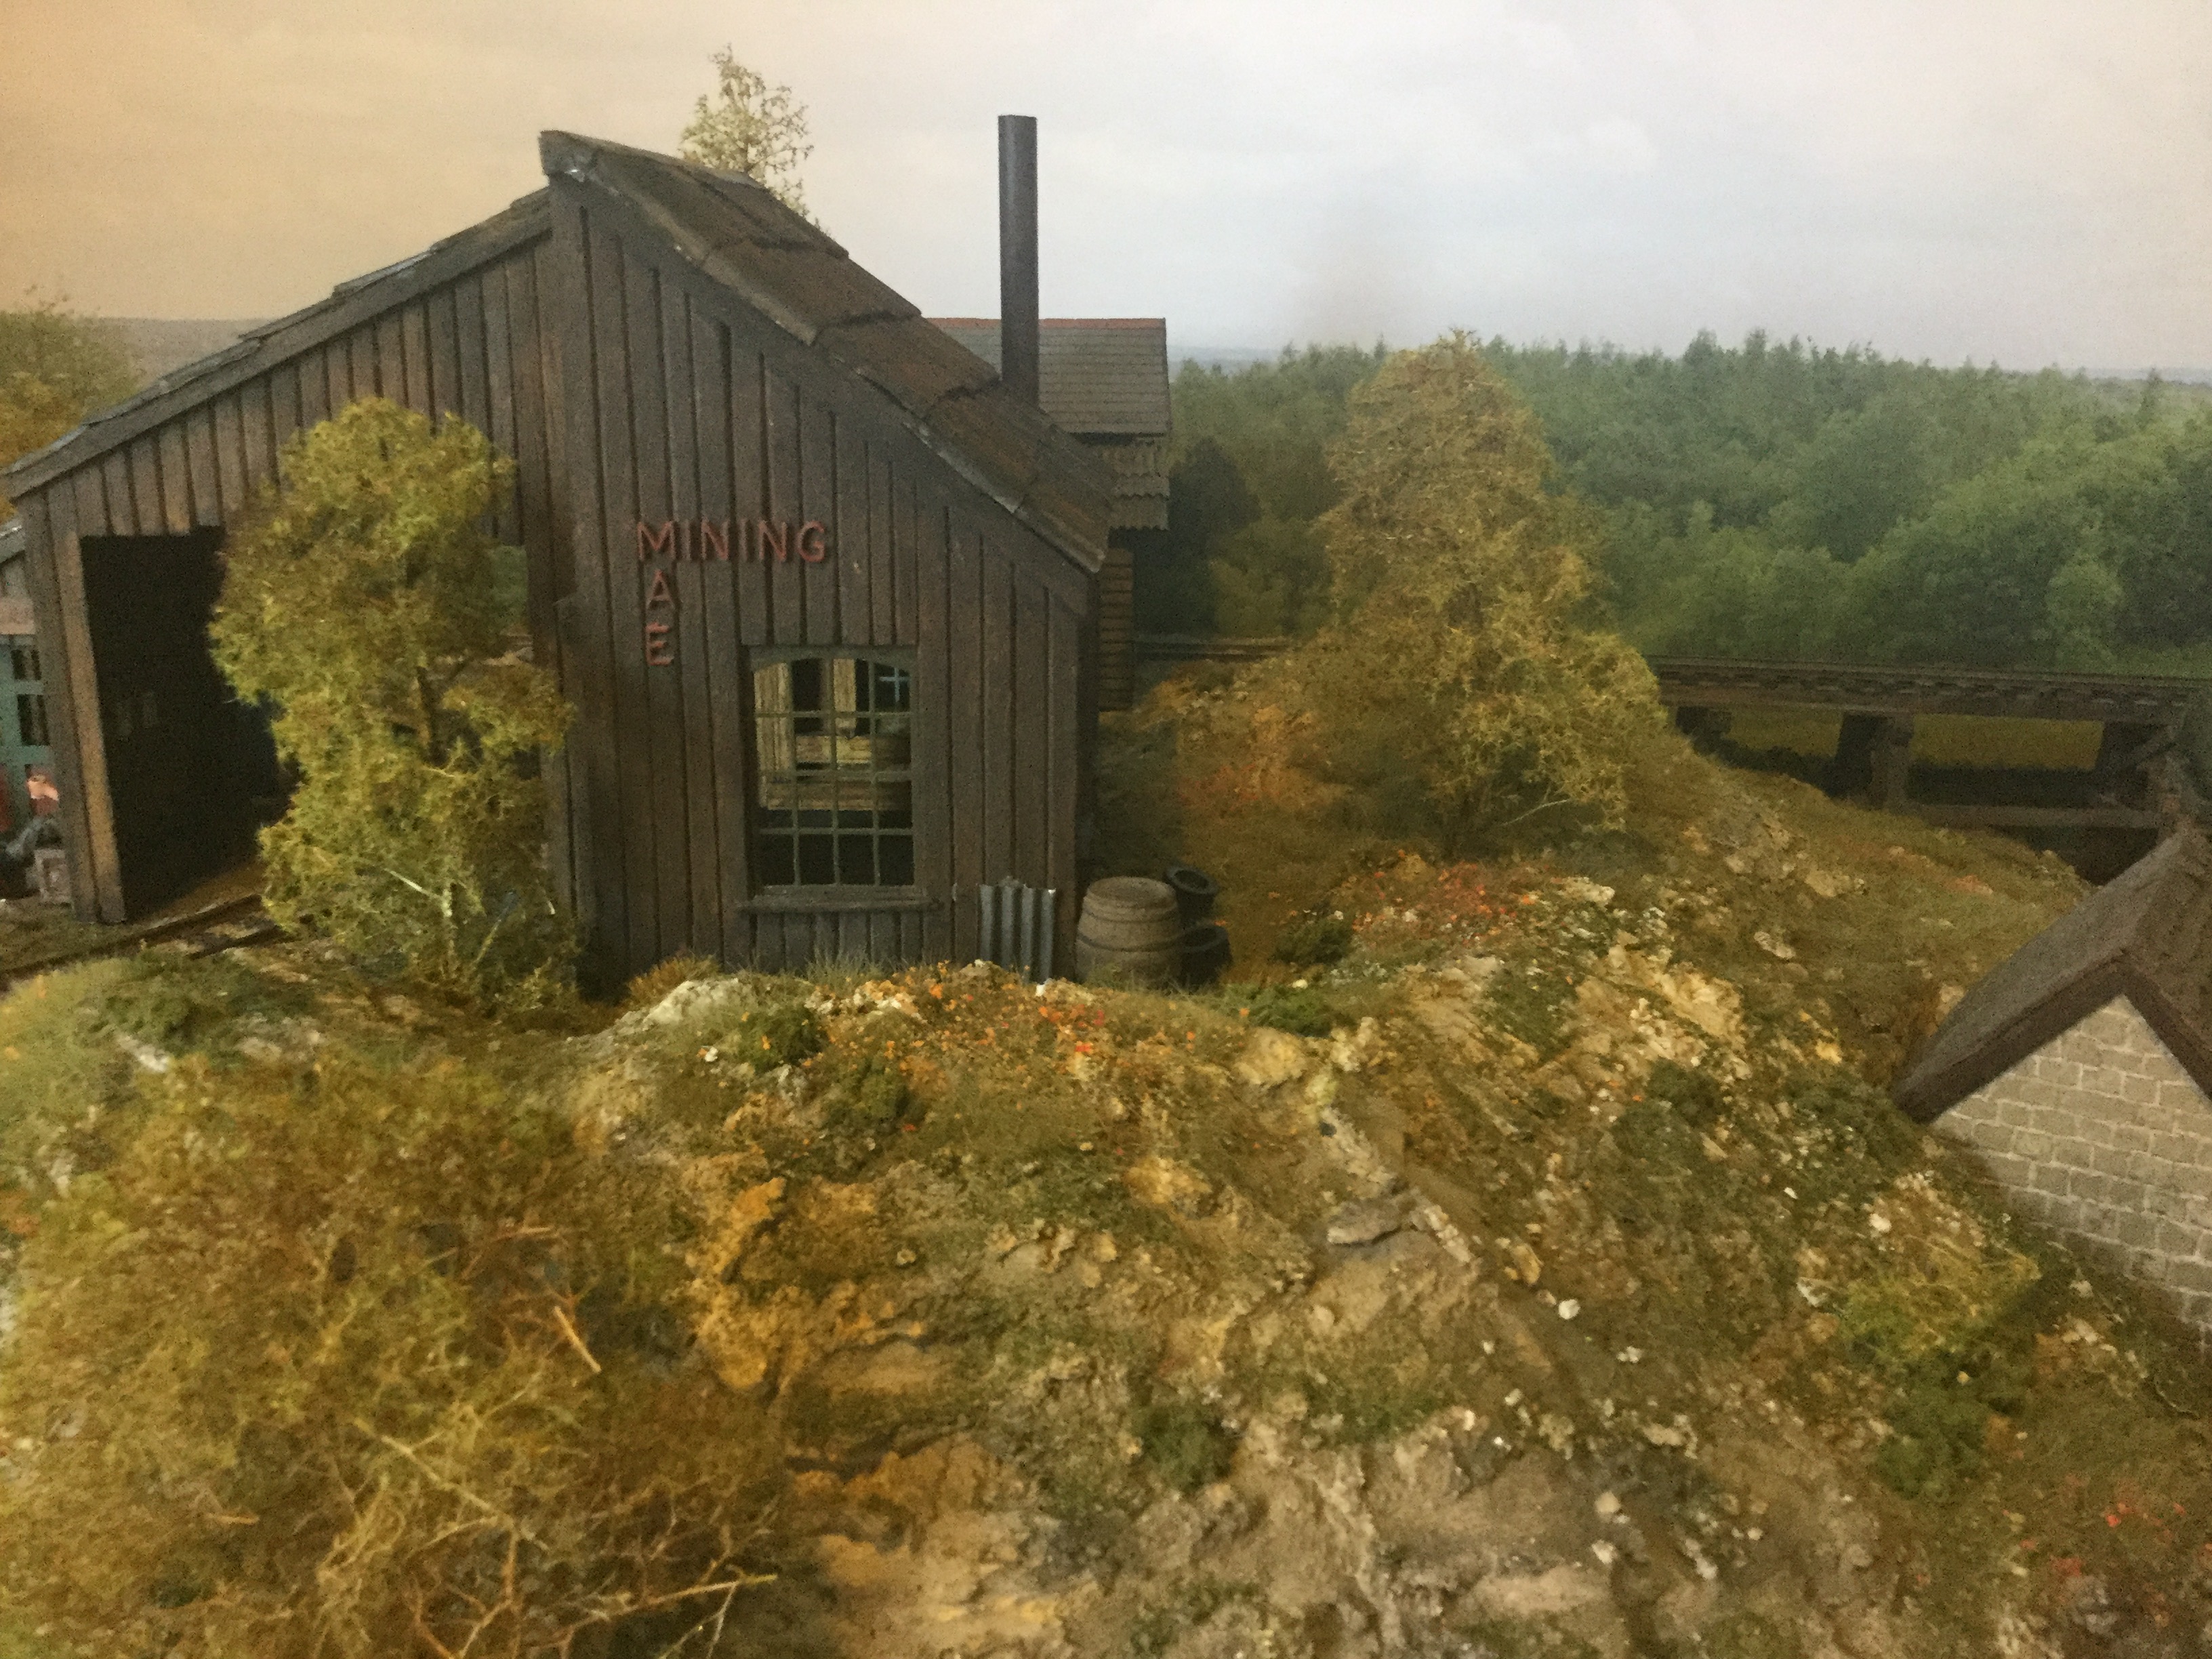
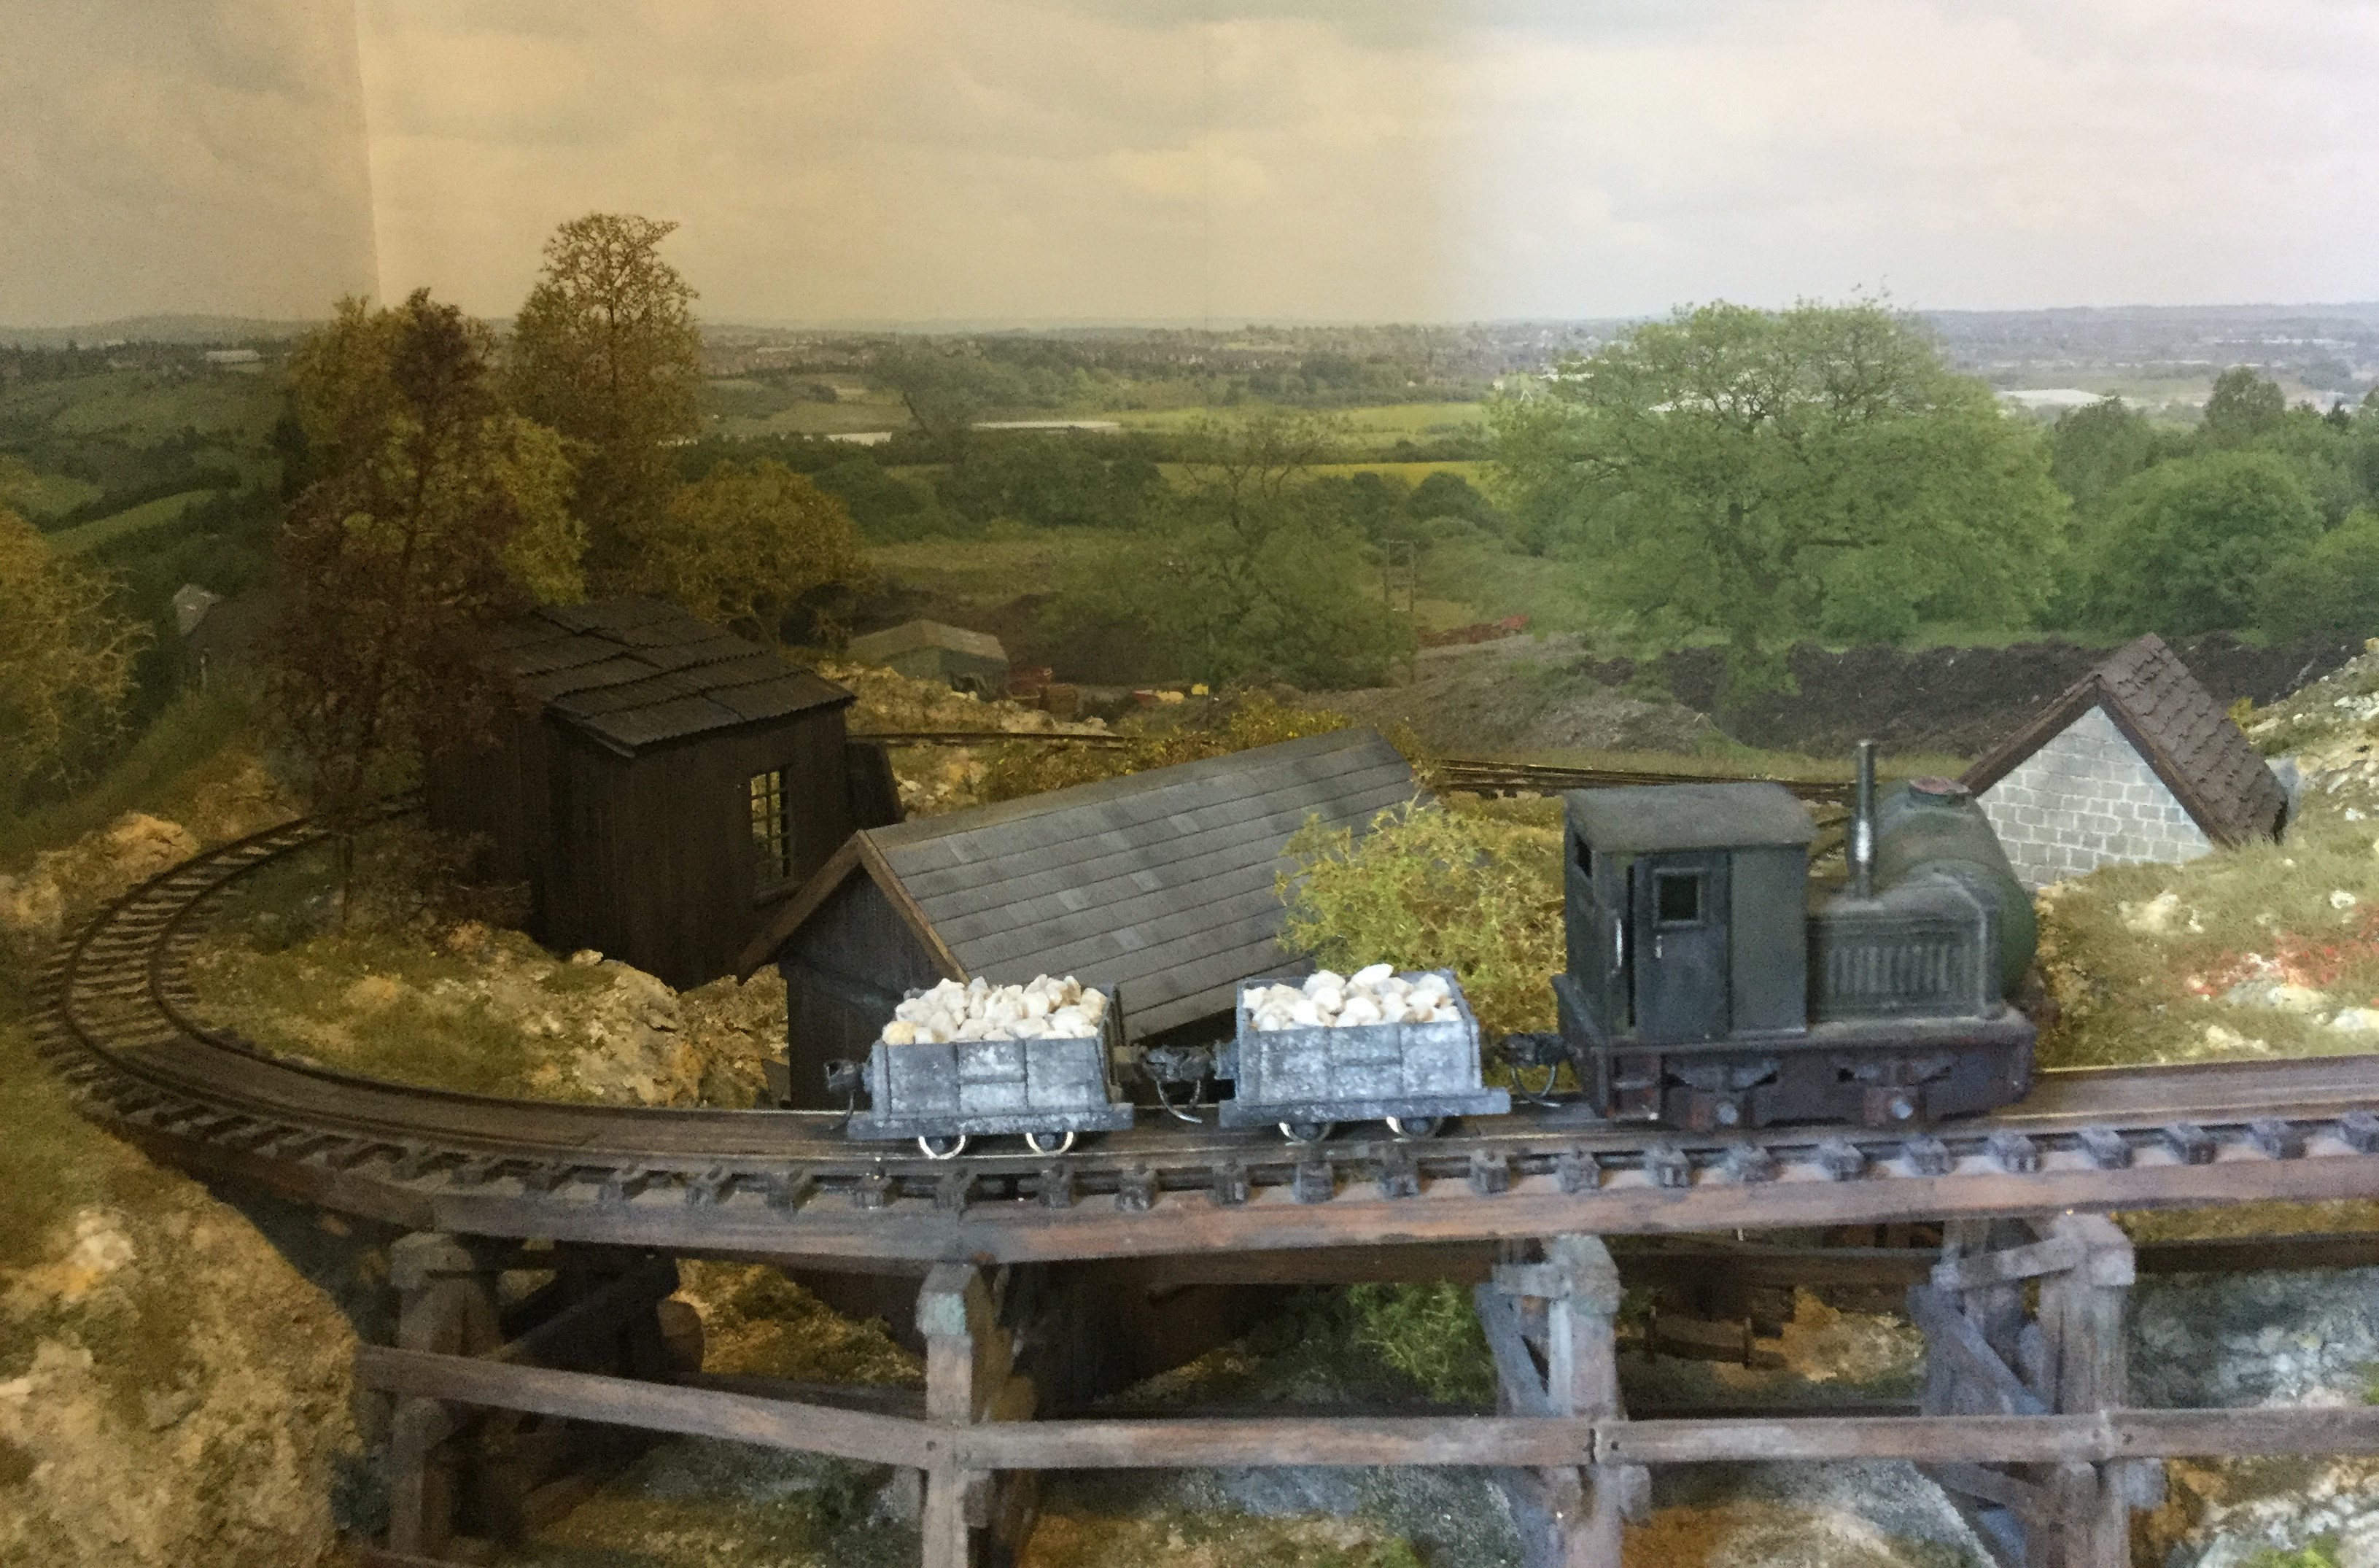
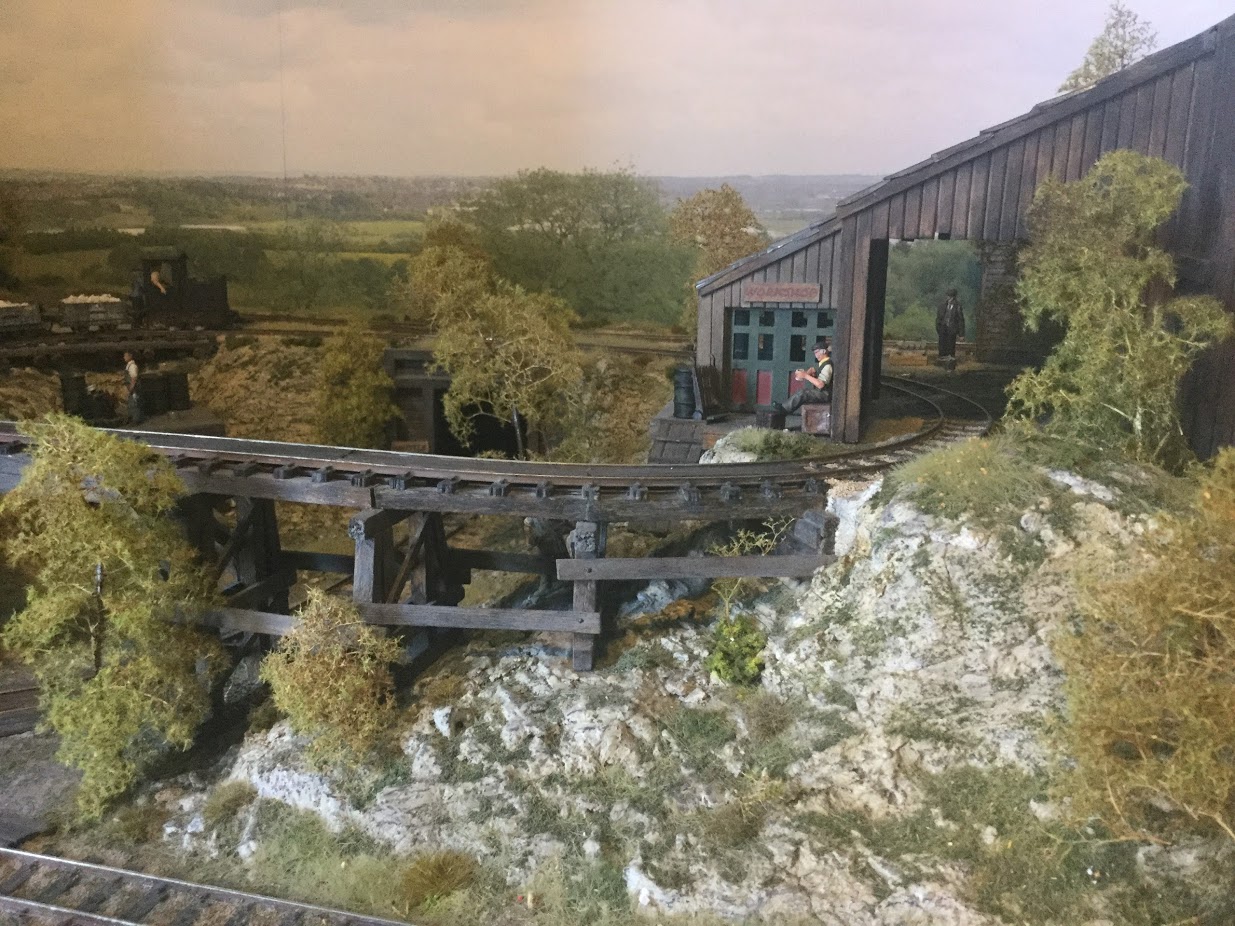
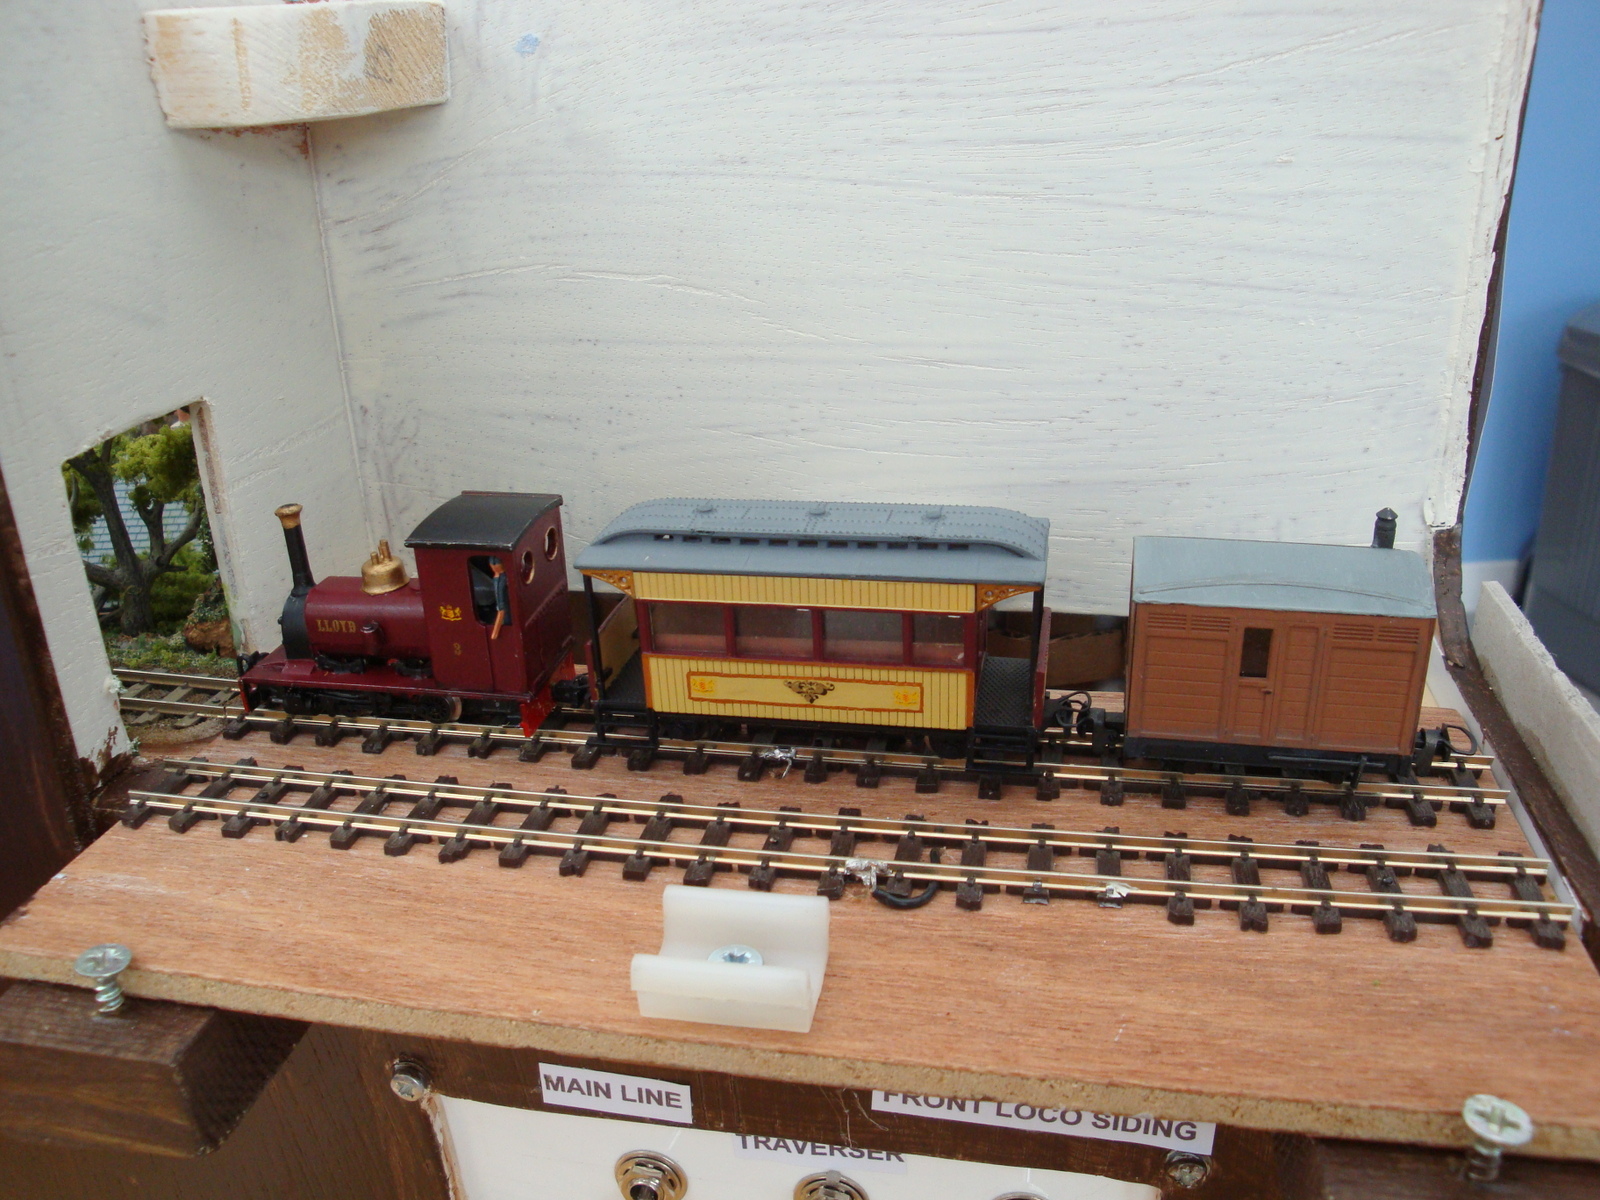
Tribute to the Nigorigo Tramway – by Steve Grist
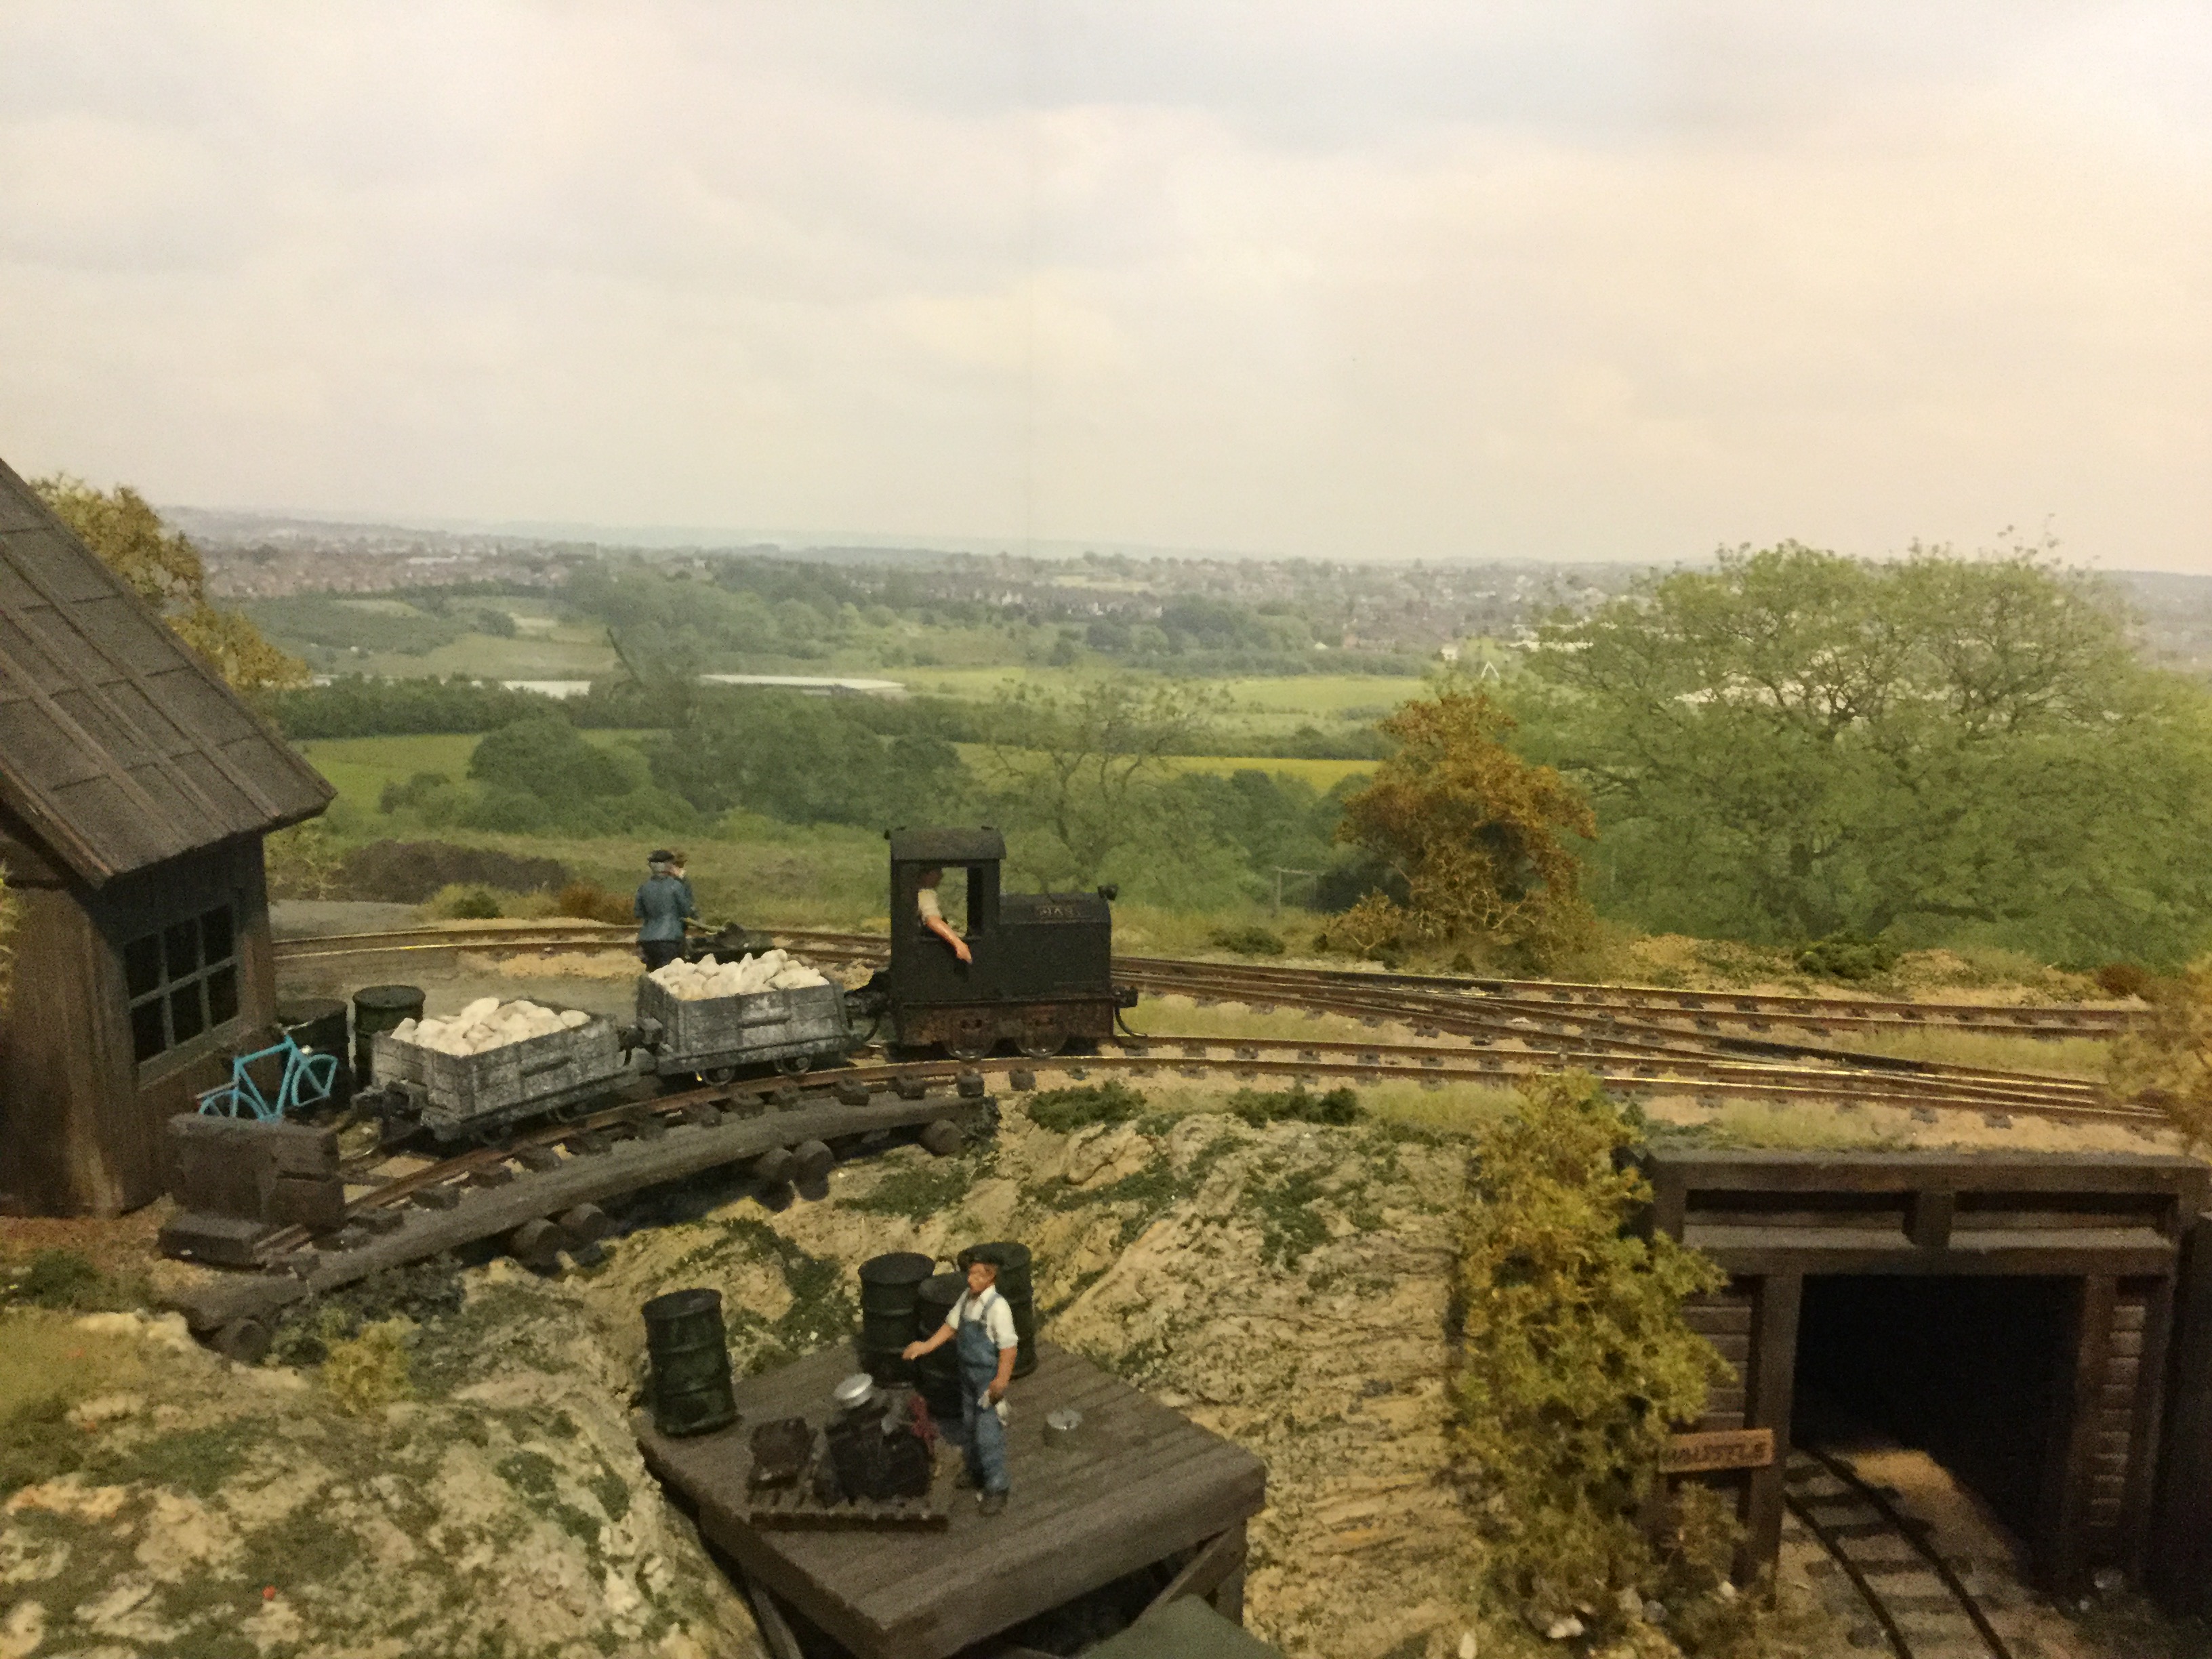
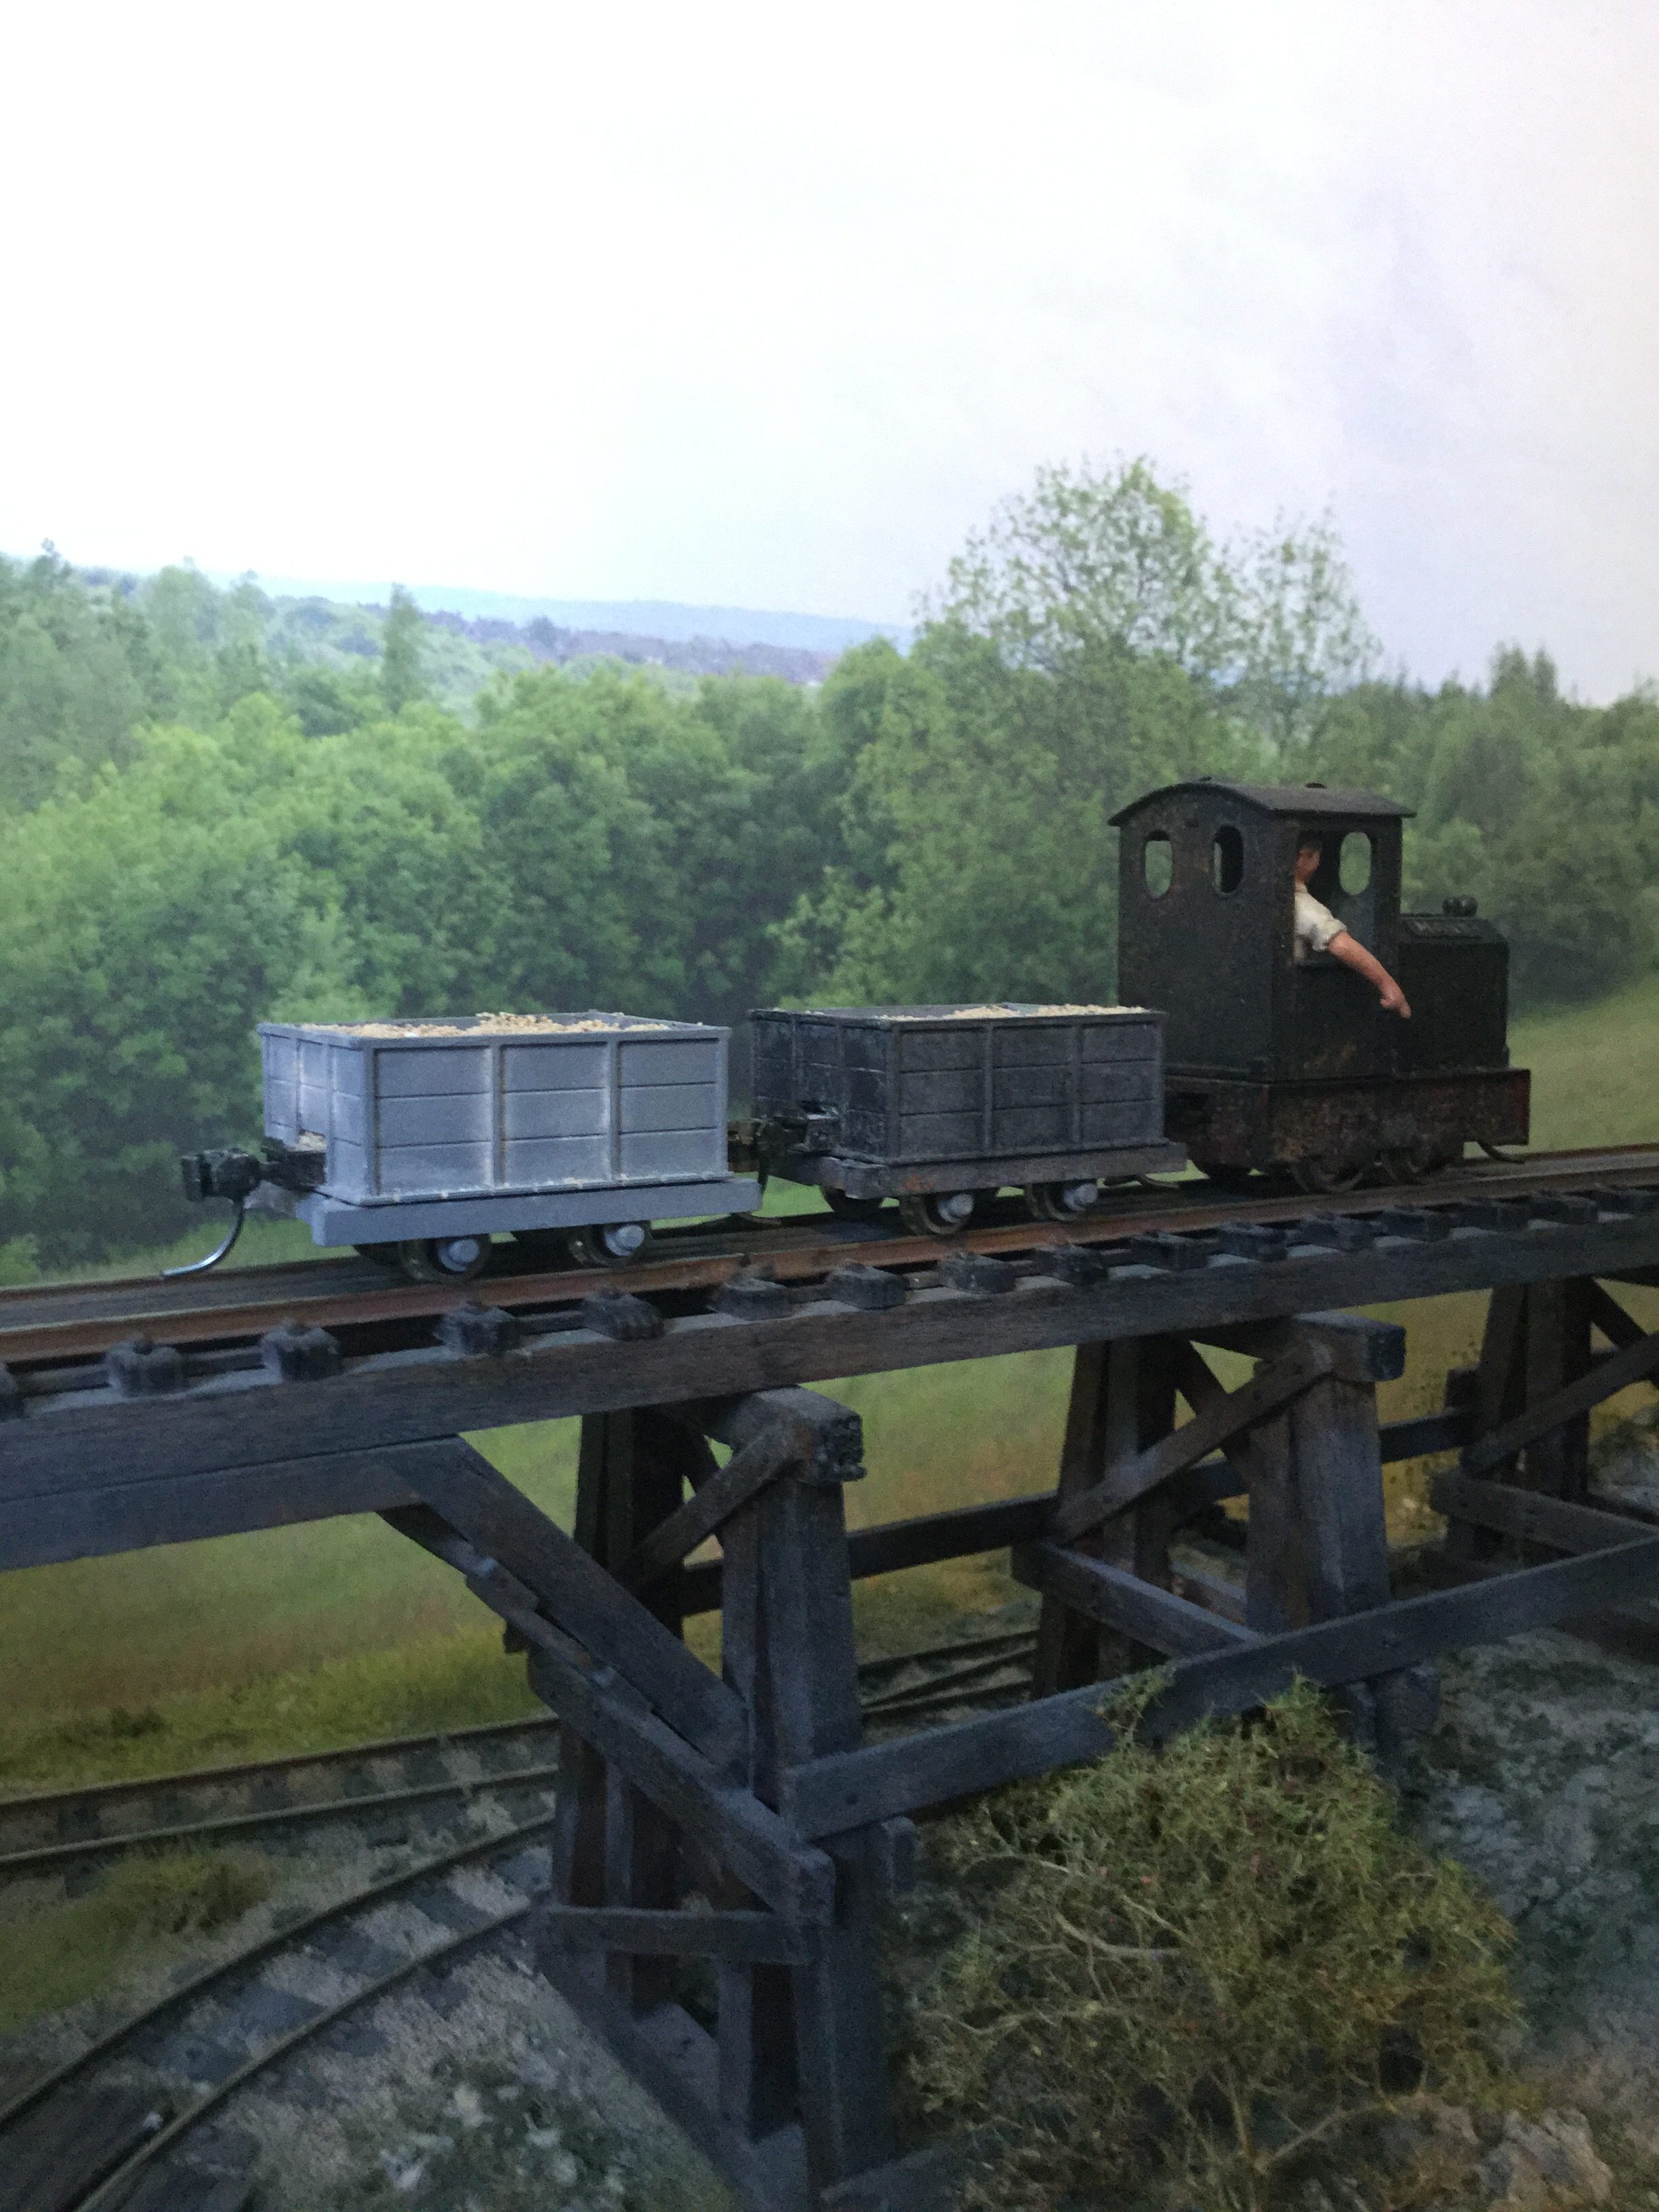
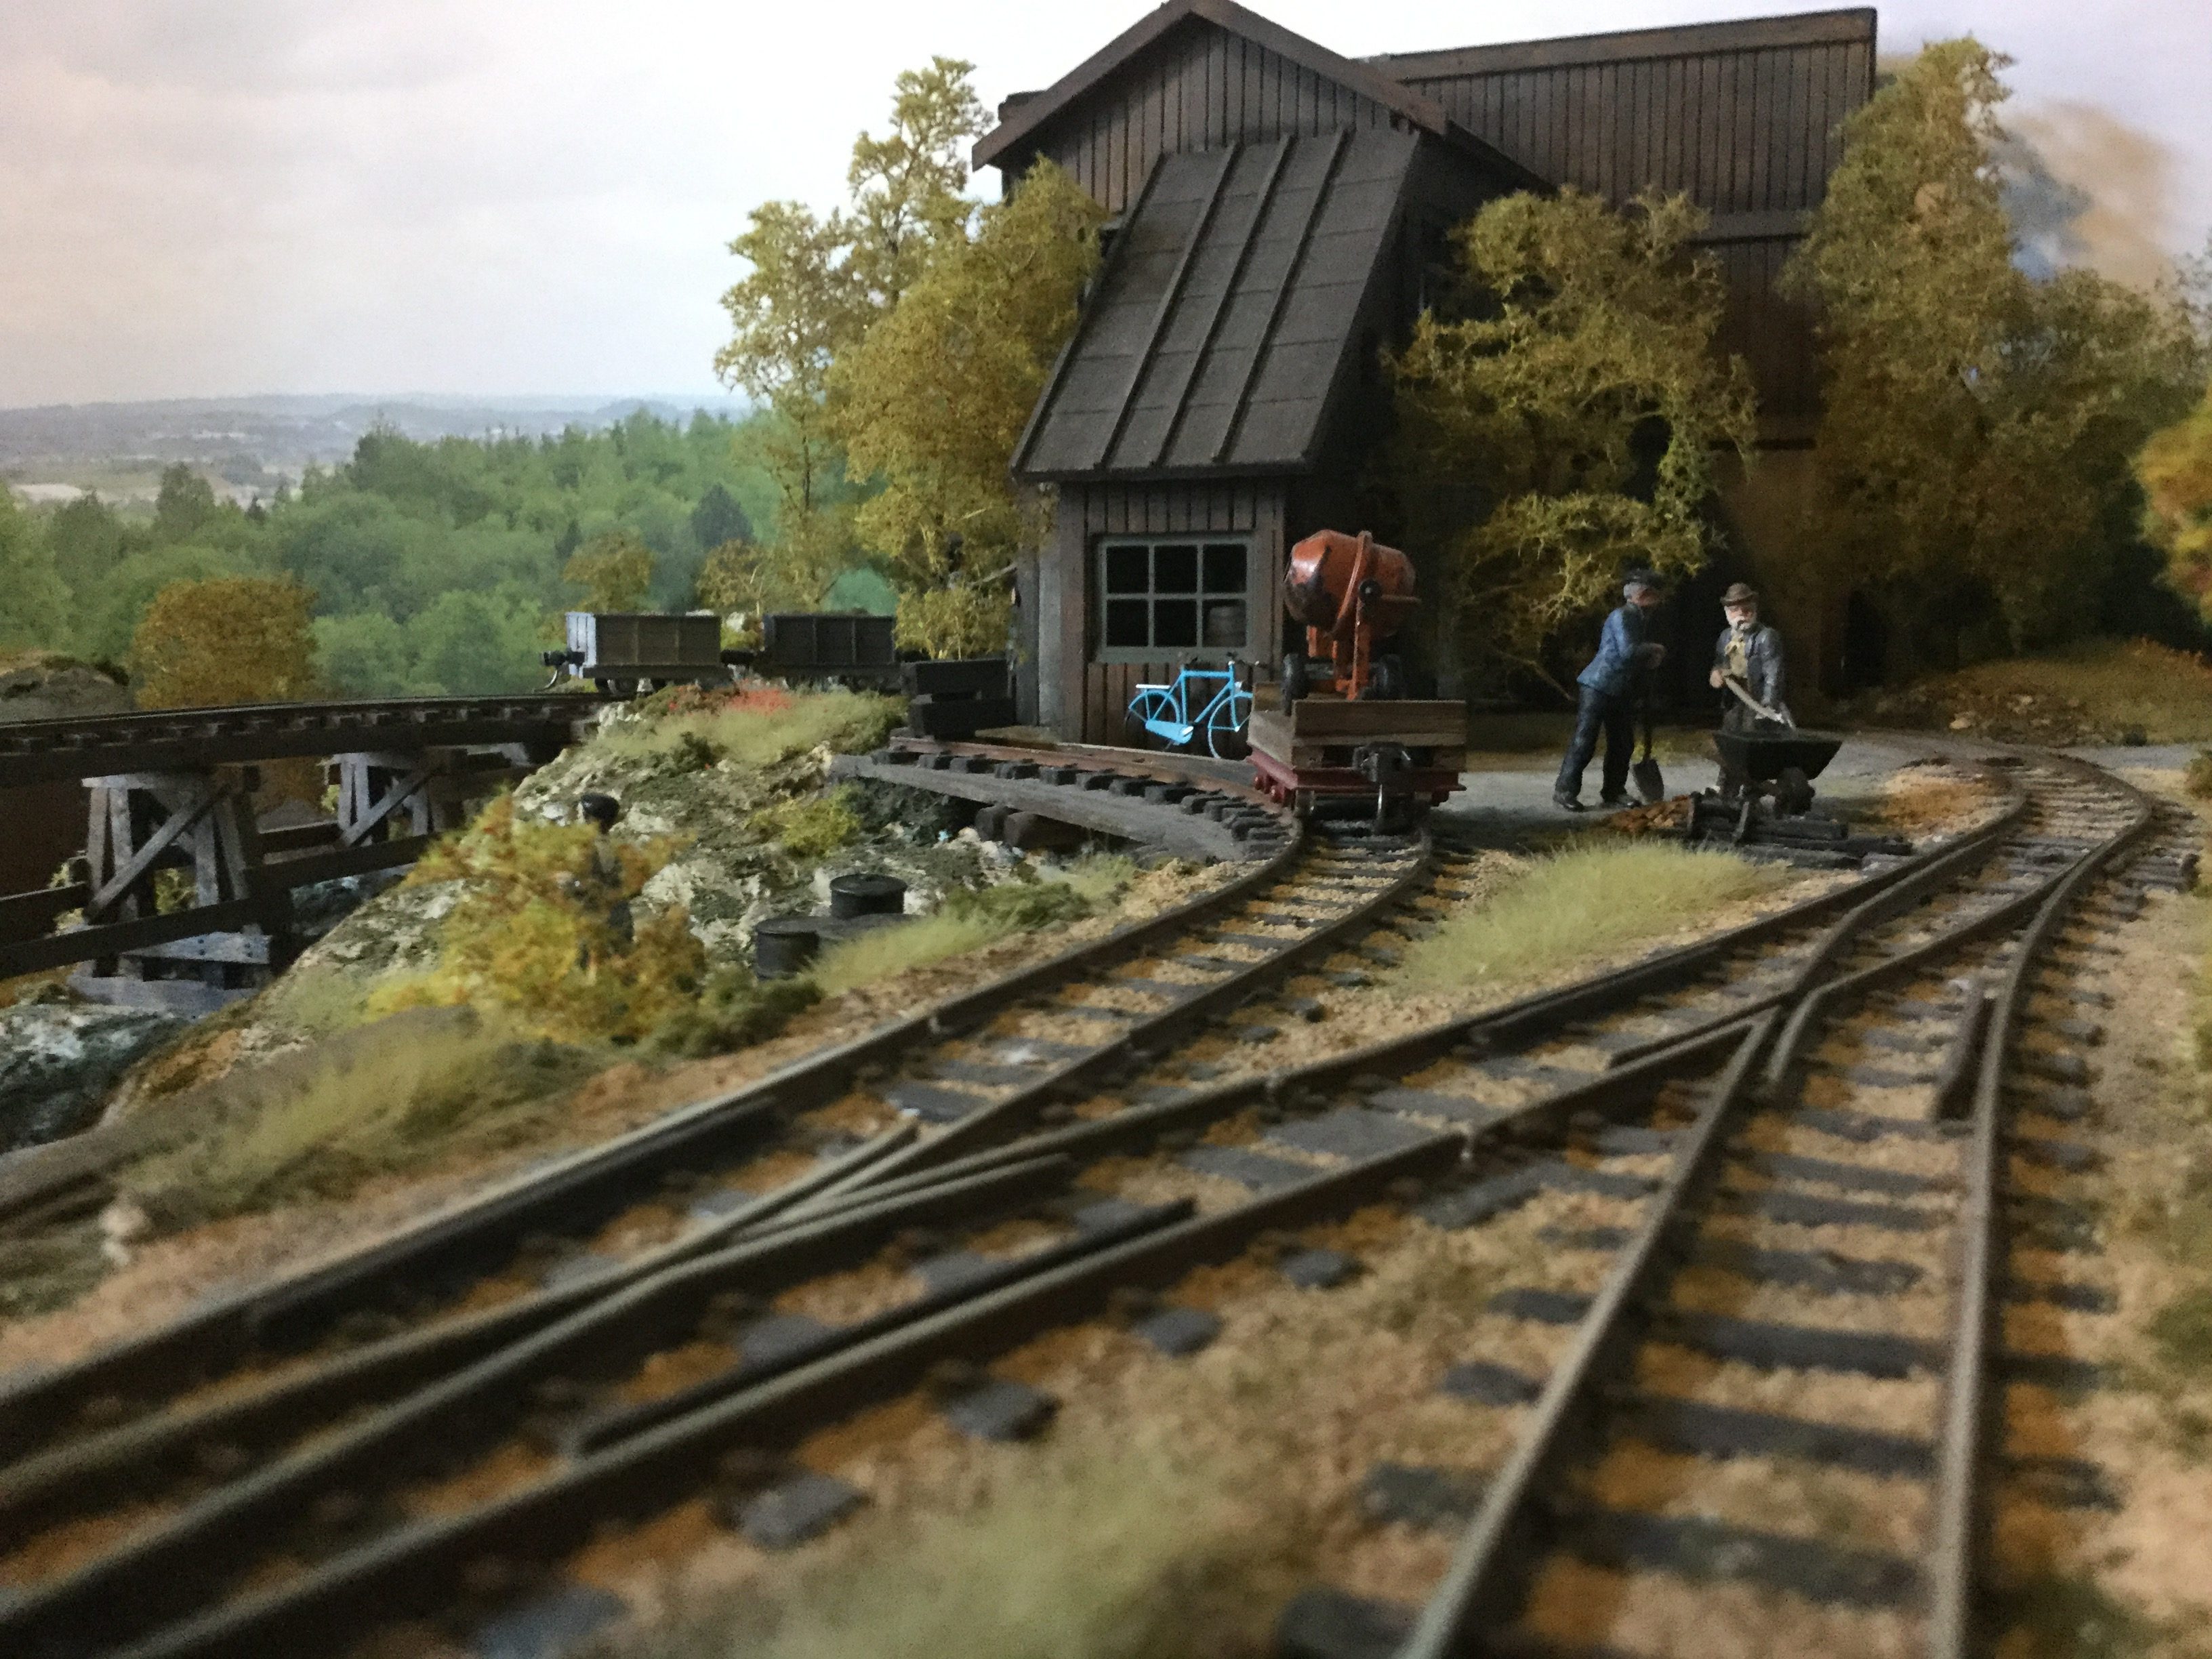
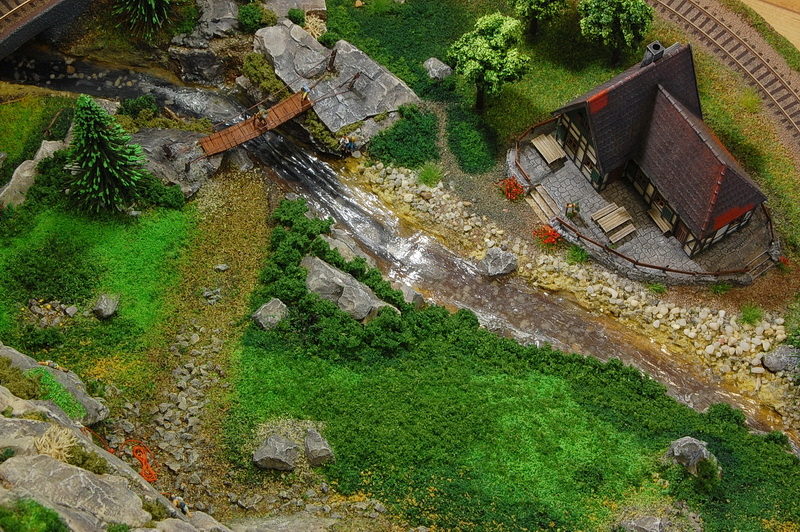
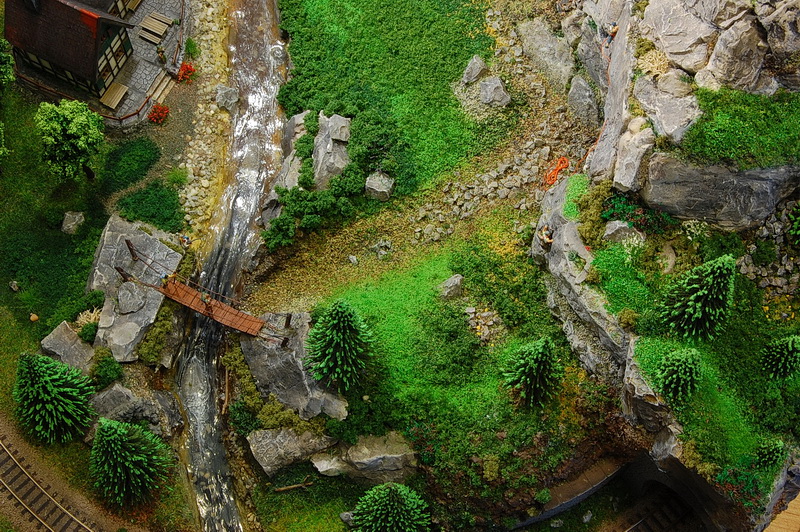
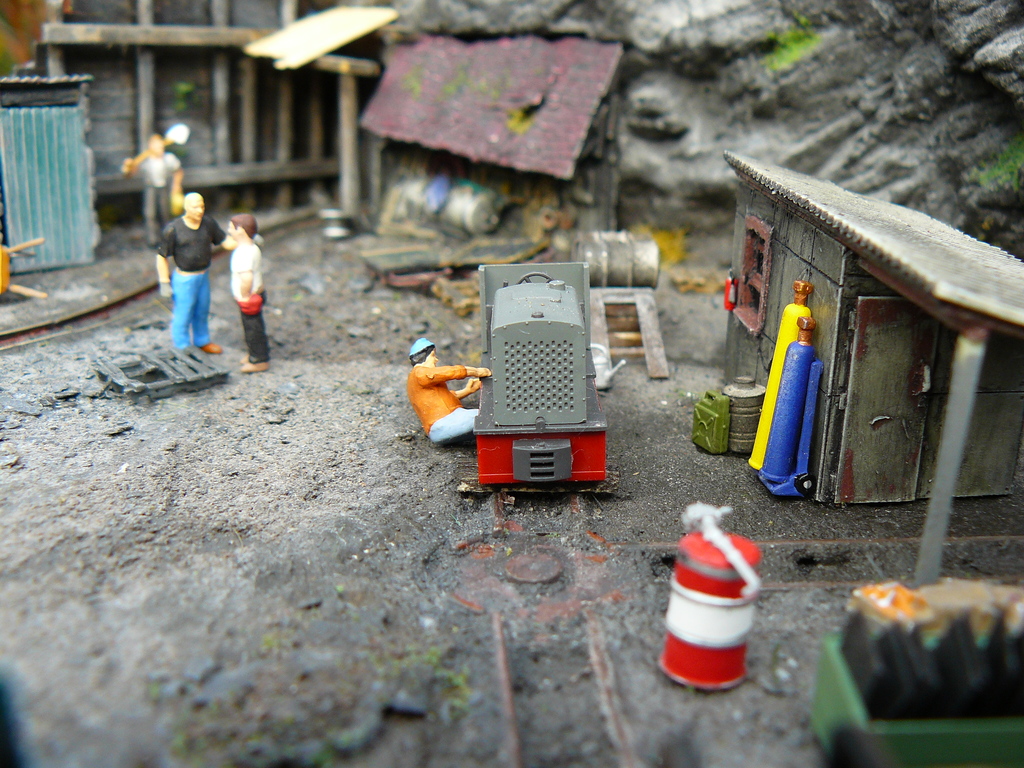
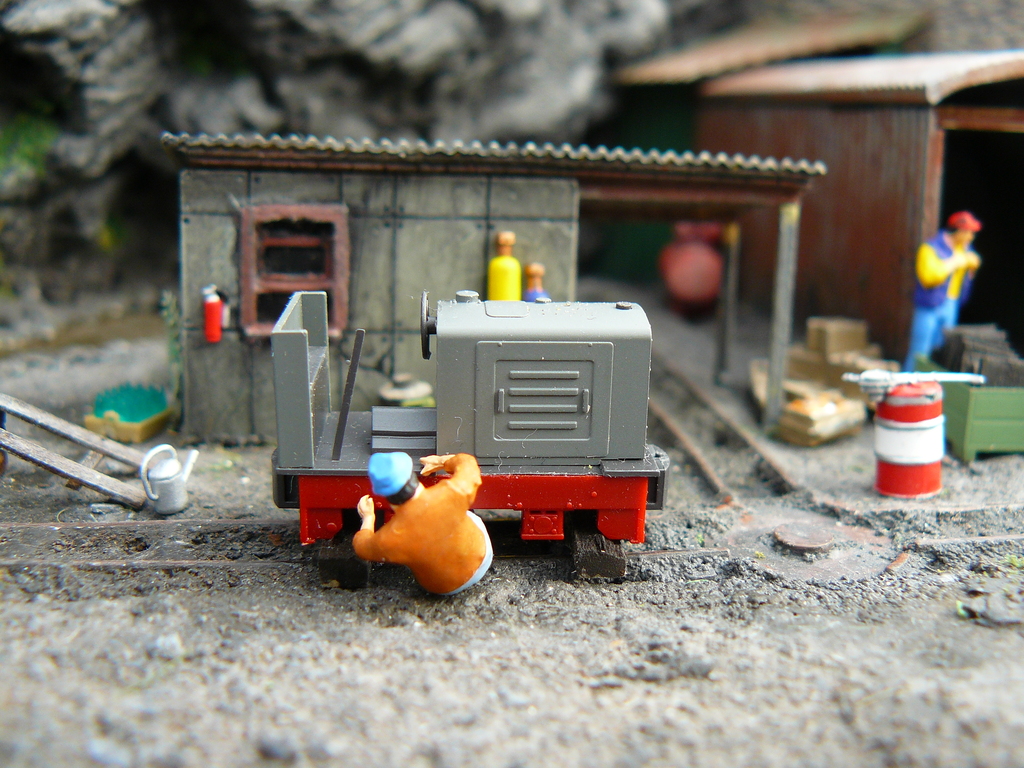
This layout is my tribute to the Nigorigo Tramway which is a 0-16.5 mm narrow gauge line. After working with N gauge models for many years I needed something in a larger scale to help with my podgy fingers and failing eyesight which didn’t take up to much space . I turned for inspiration to a book called ” O scale industrial narrow gauge modelling ” by Nobuo Koizumi . For somebody working in this scale for the first time the book is invaluable with full plans and details of how to build the layout . However what you see in the photos is double the plan given in the book as I have taken the original and extended it to the right hand side in order to join the top and bottom layers of track together .This gives a total layout size of 1680mm x 600mm.
The rolling stock are all kit built models by ” ARU” Japan and have a maximum wheel base of 26 mm which copes with small radius curves and the one in seventeen incline without any difficulty. Buildings are made from balsa strip and some Wilkos oak wood dye followed by soft pastel weathering. Hand operated points keep things simple as does the Peco track work. Trees are Seafoam and scatter.
As to what happens in this imaginary land I have never been too certain. People move barrels from A to B , some sort of mining for minerals seems to go on and engines are maintained in the company’s own facilities. All I know is that I have a lot of fun playing trains and rule one applies , That is to say its my railway and I can do what ever I want. A Gauge Master dual controller is all the power needed and away we go.

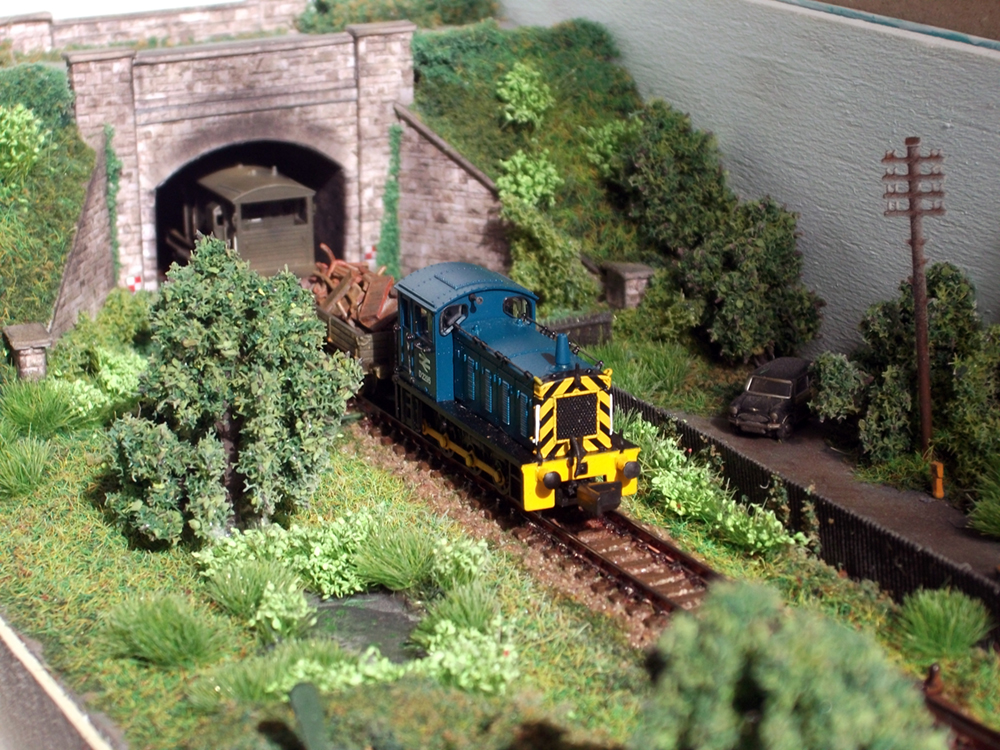
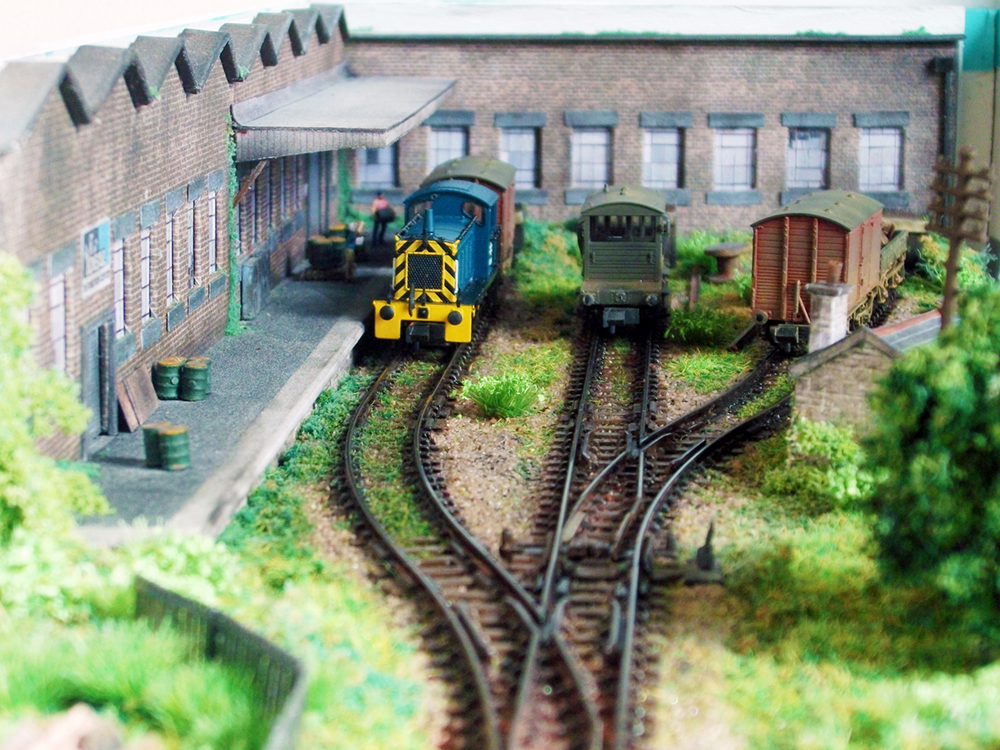
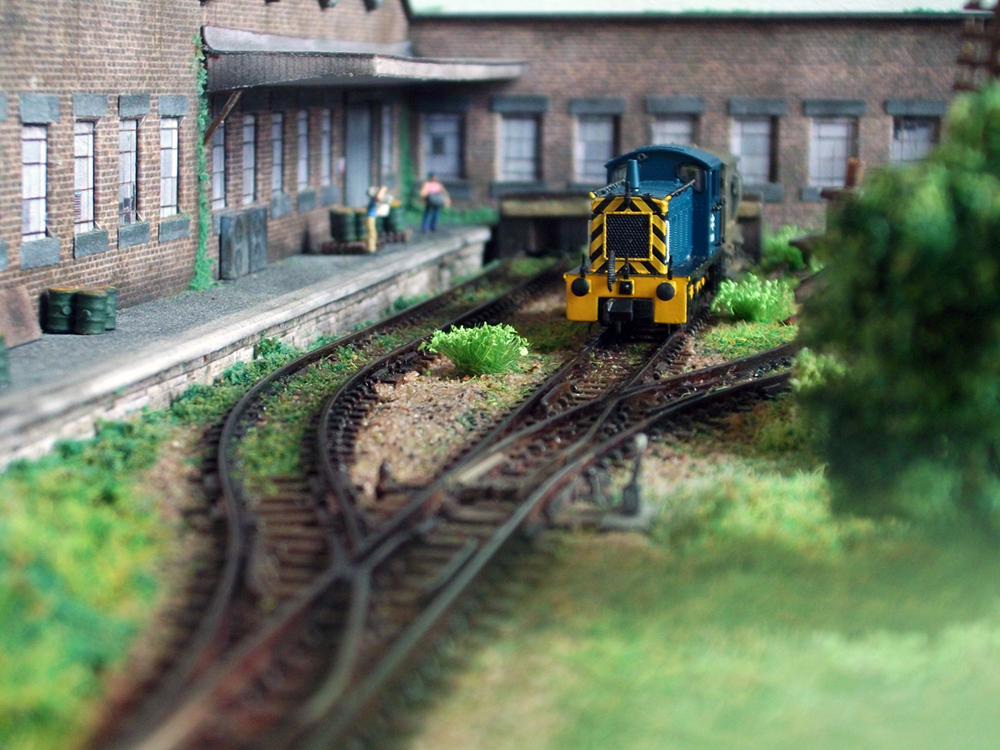
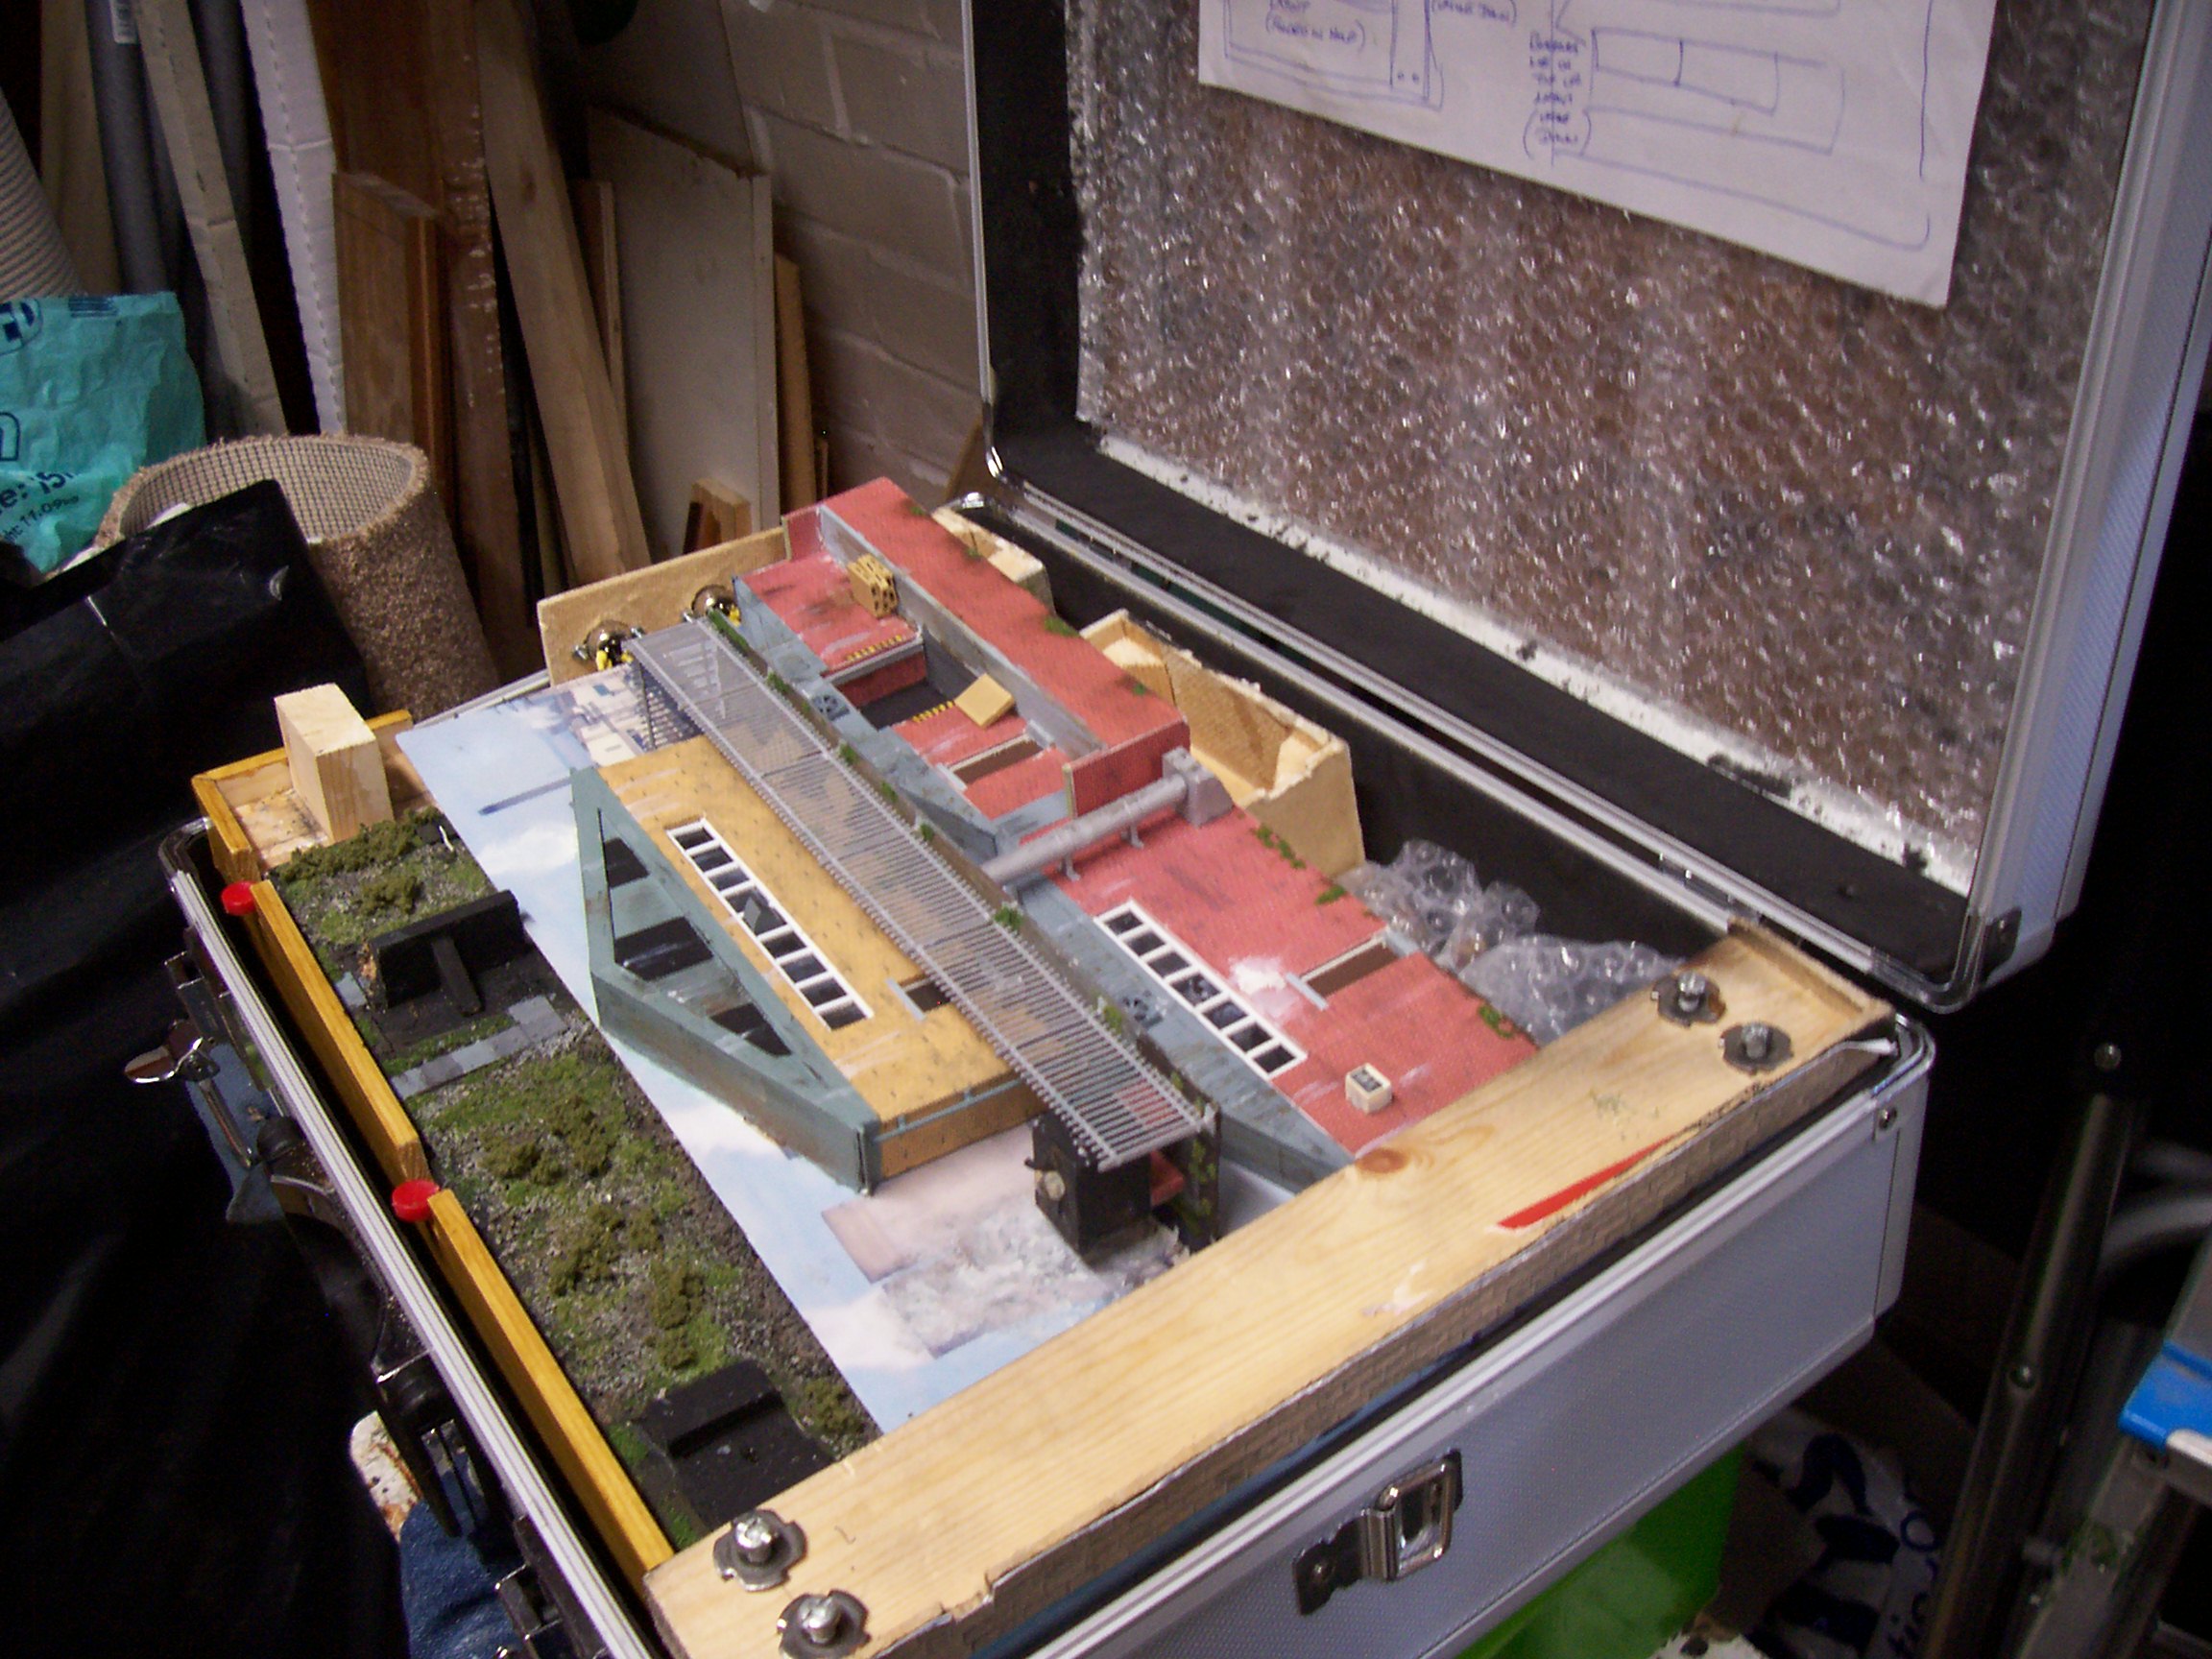
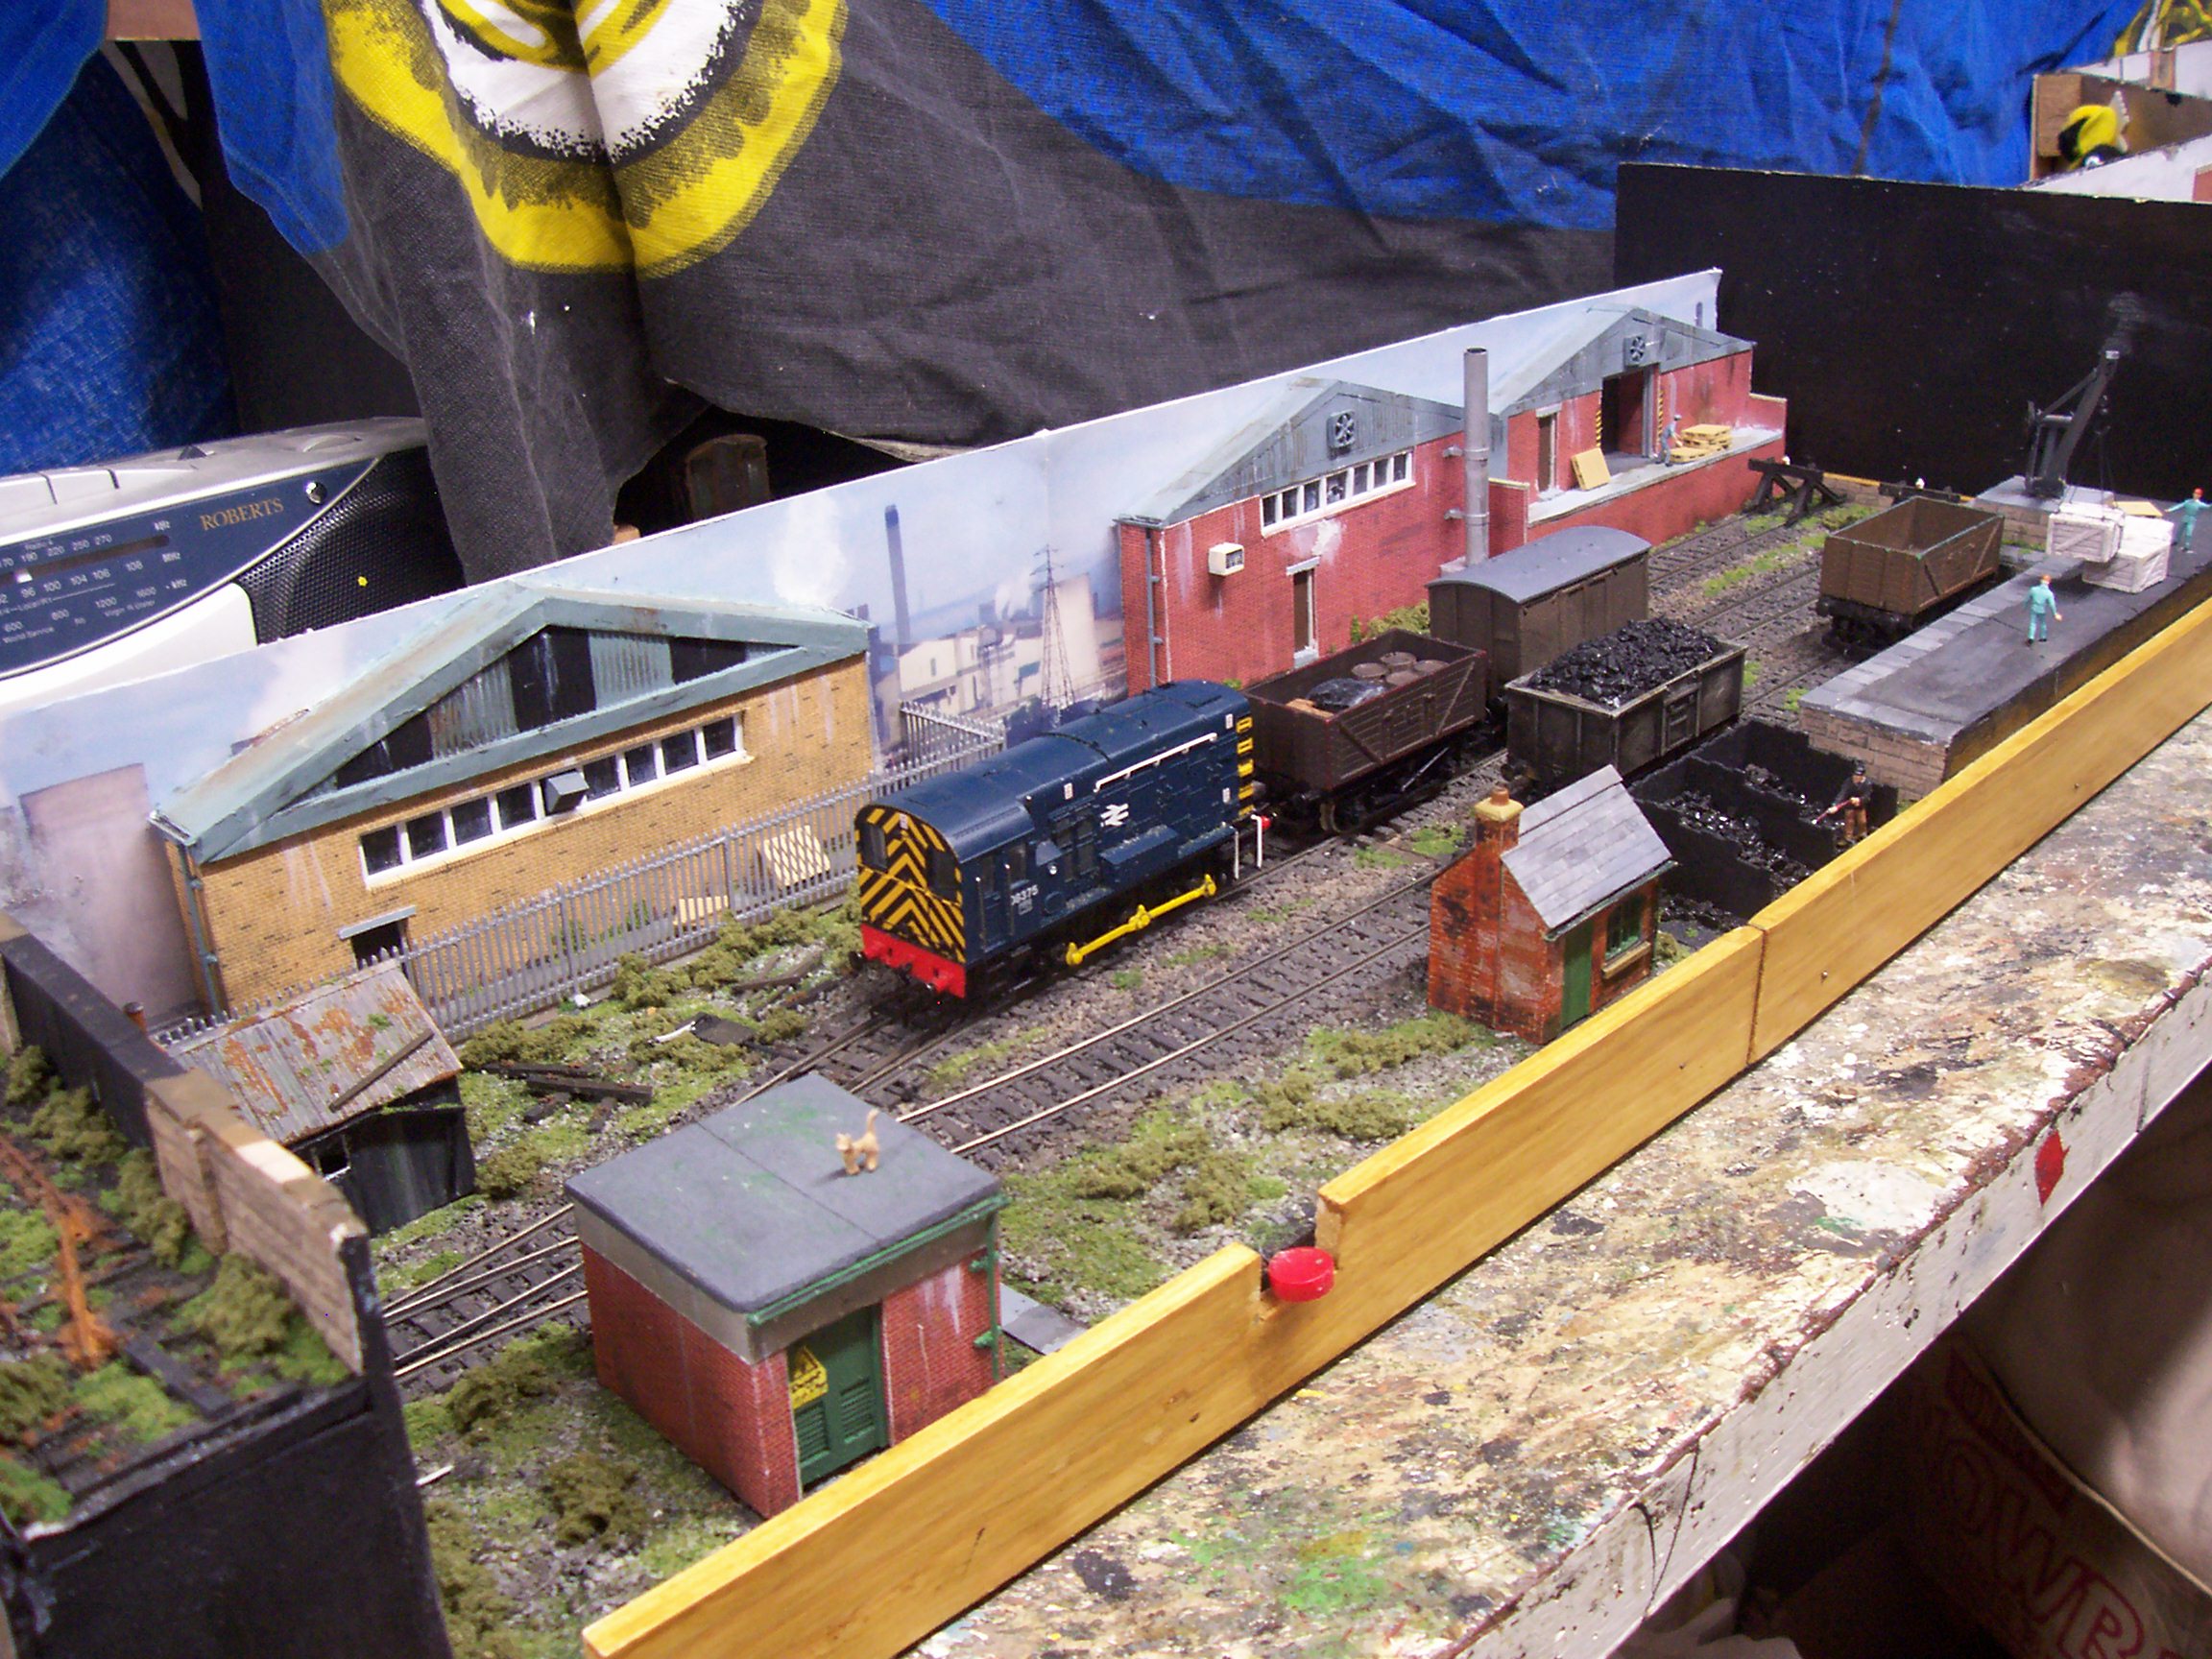
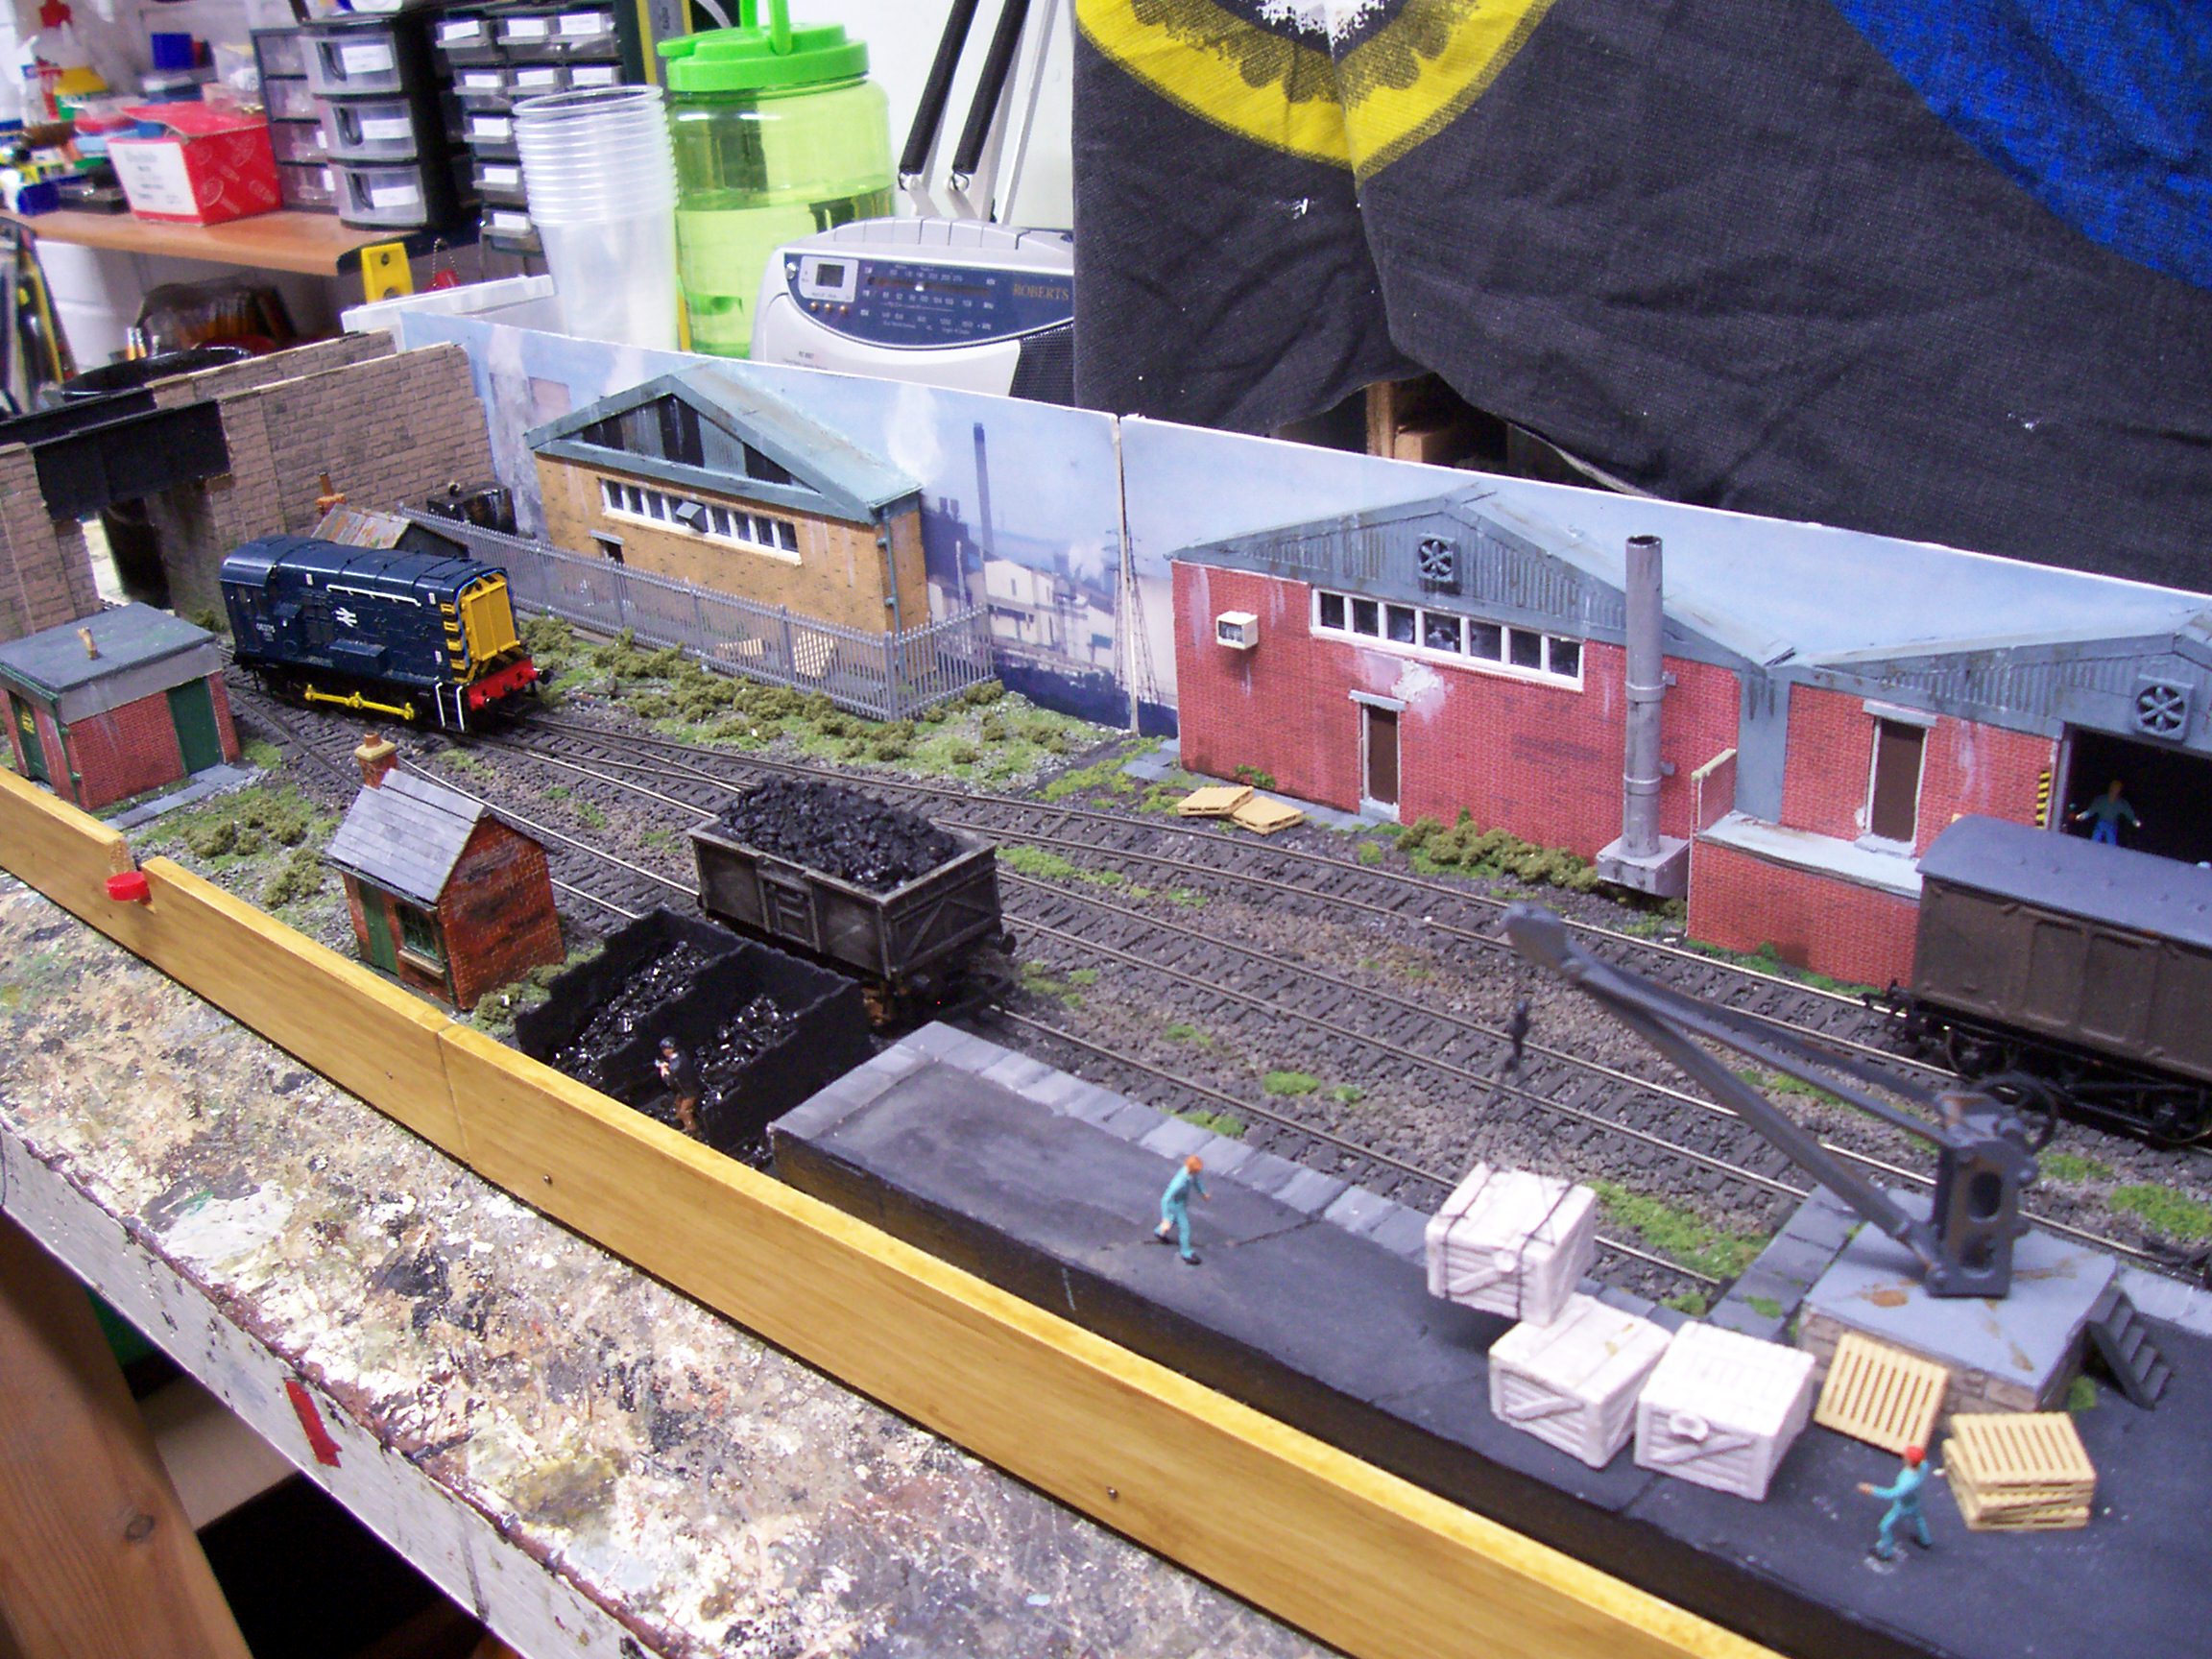
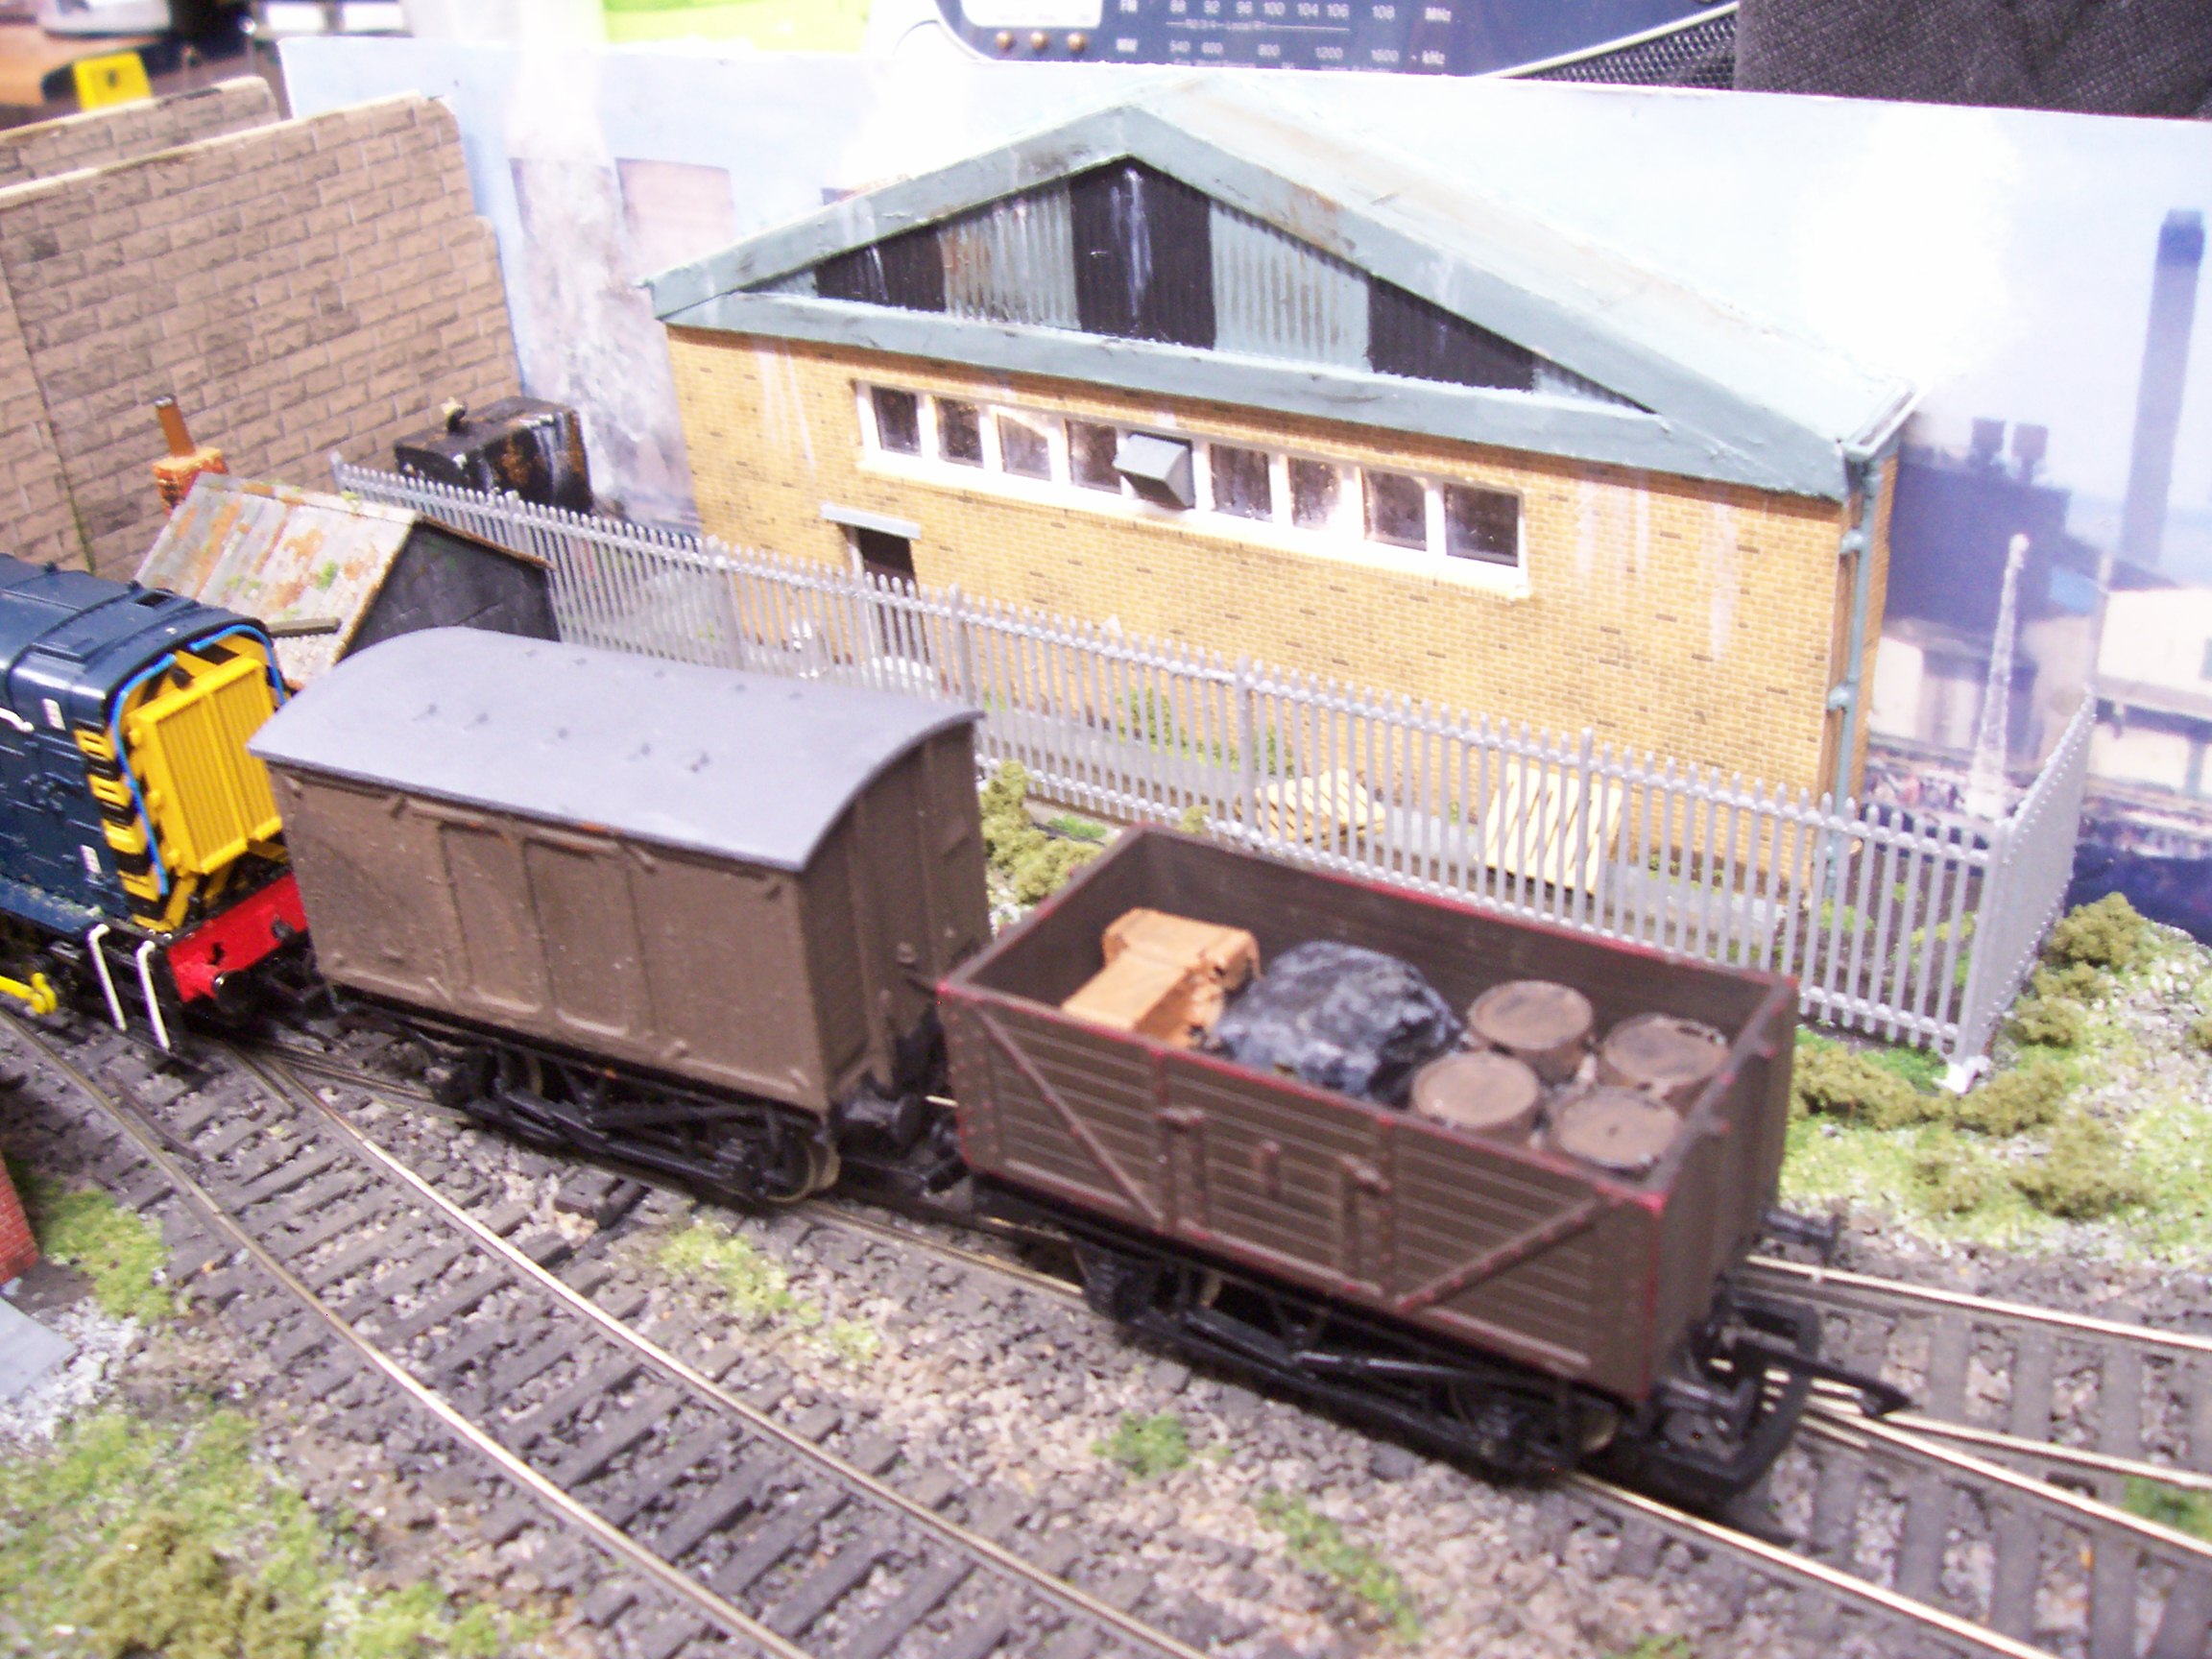
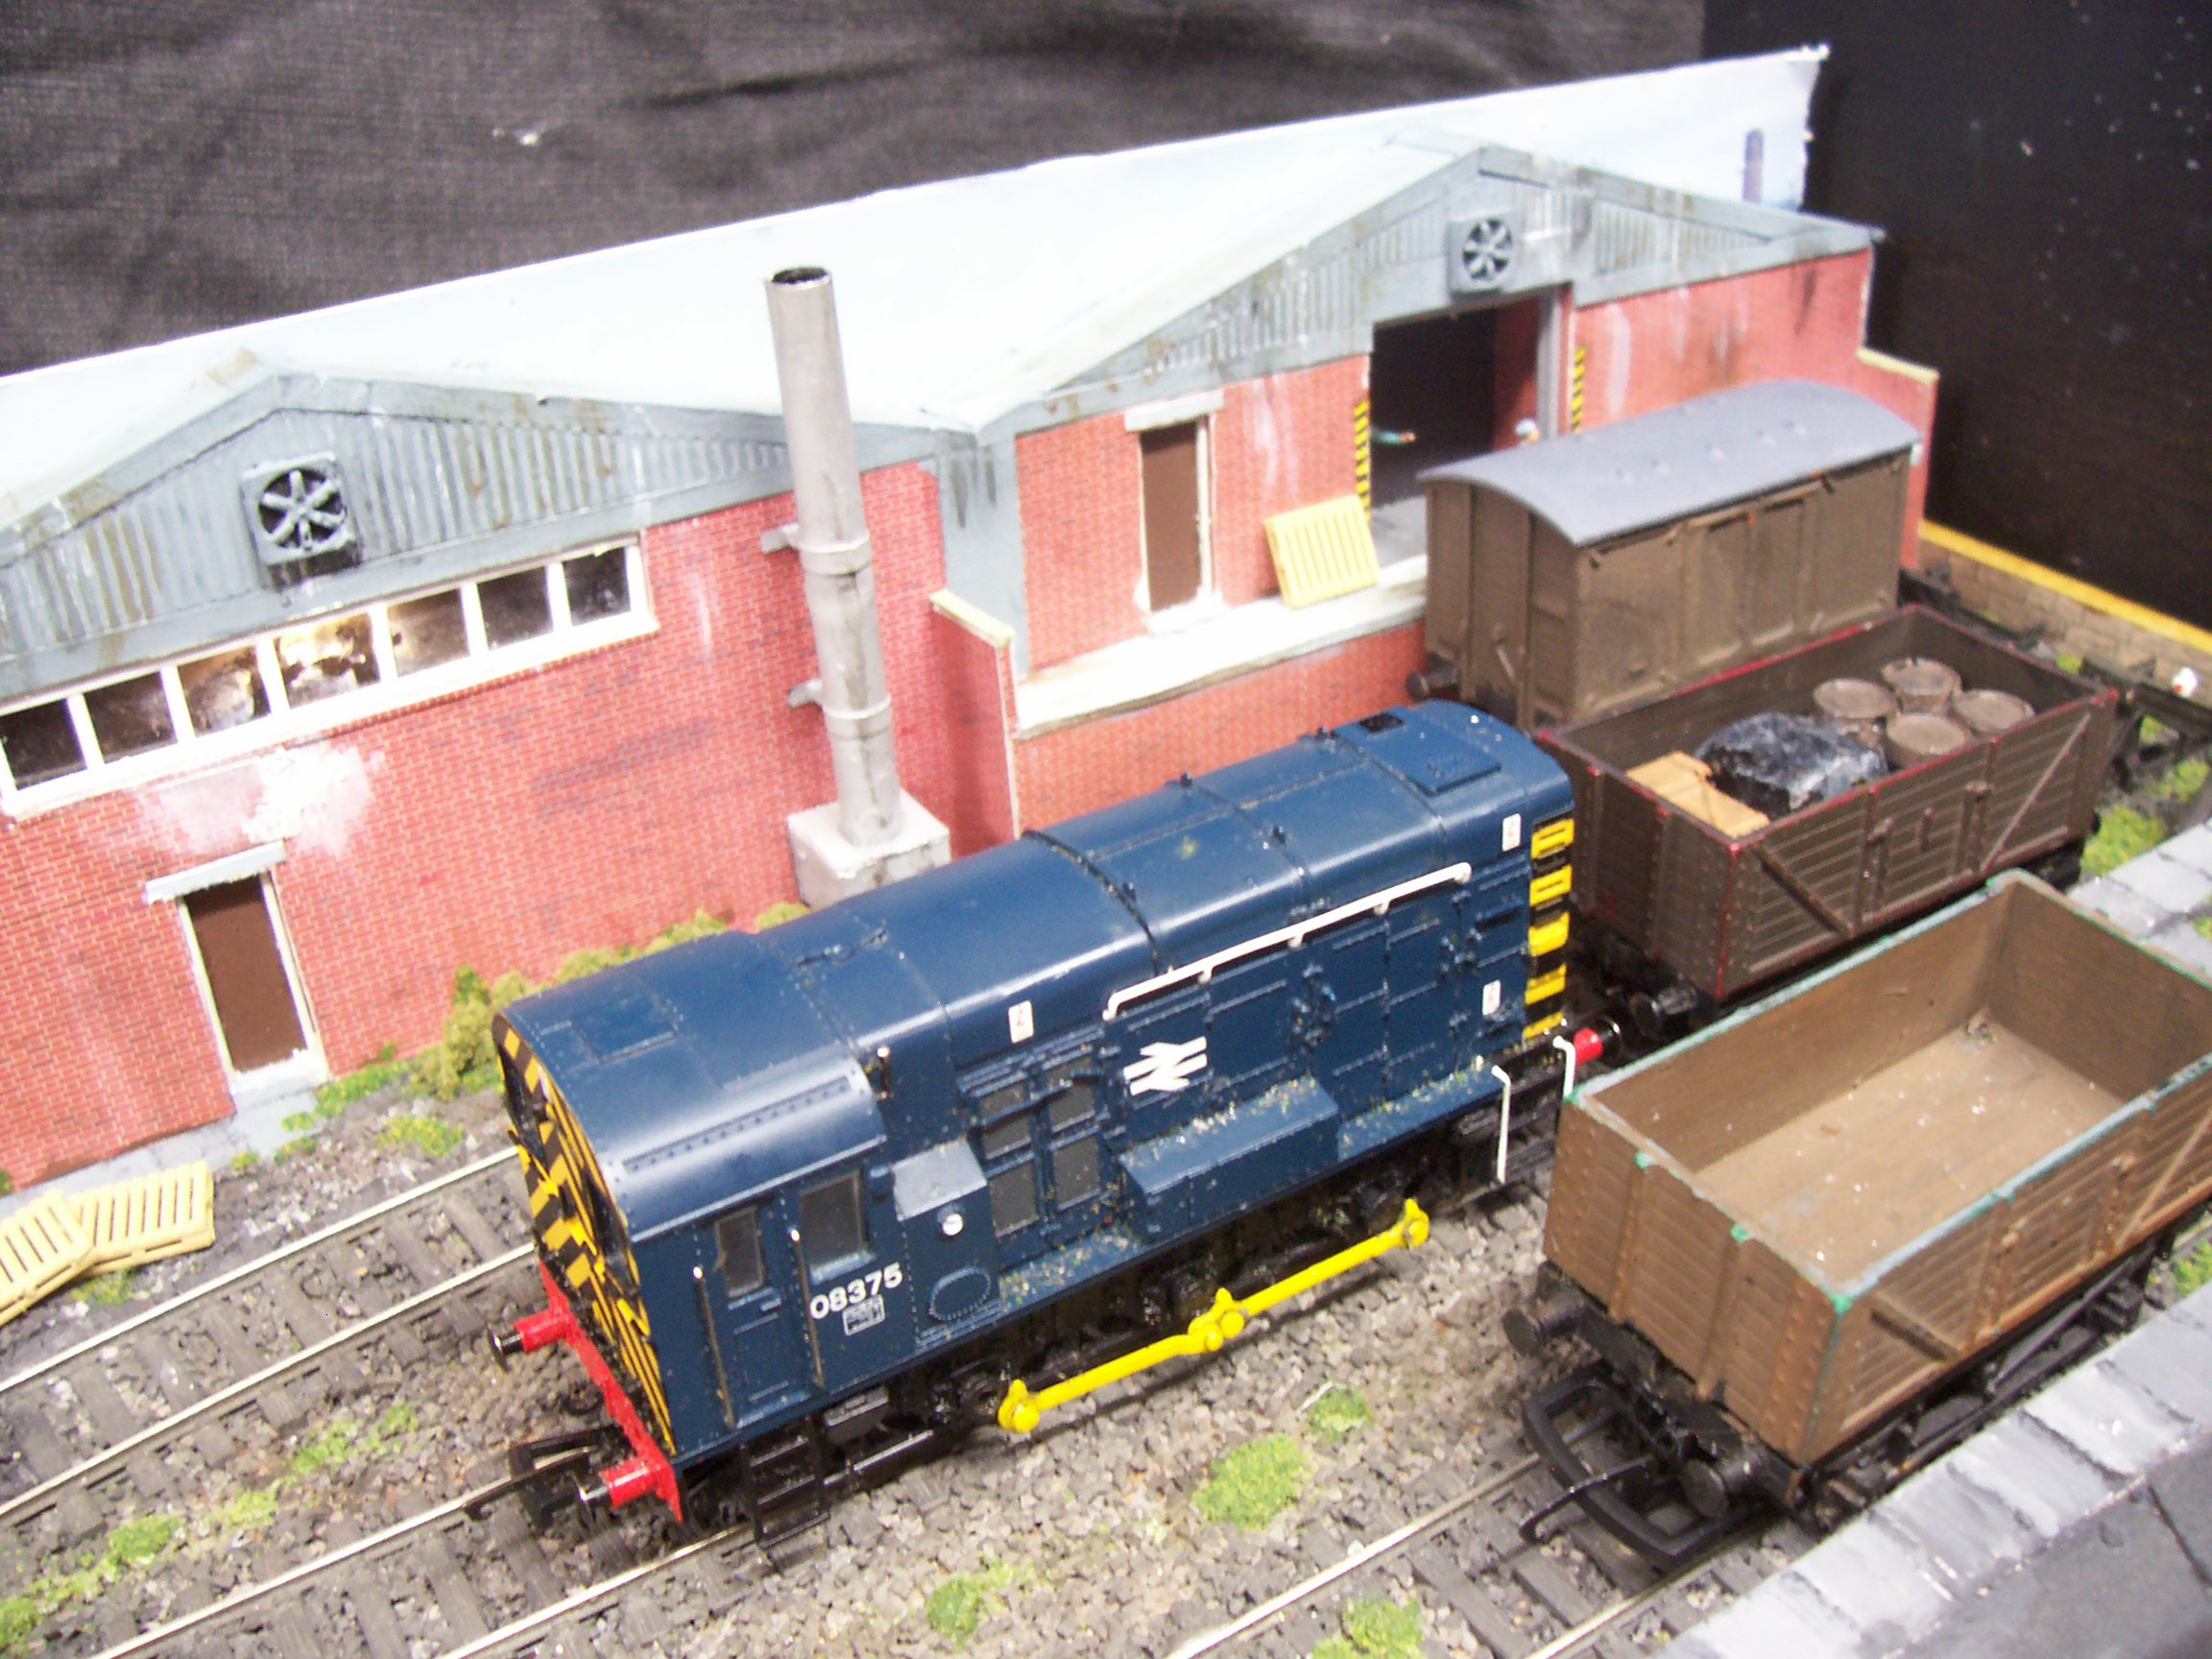
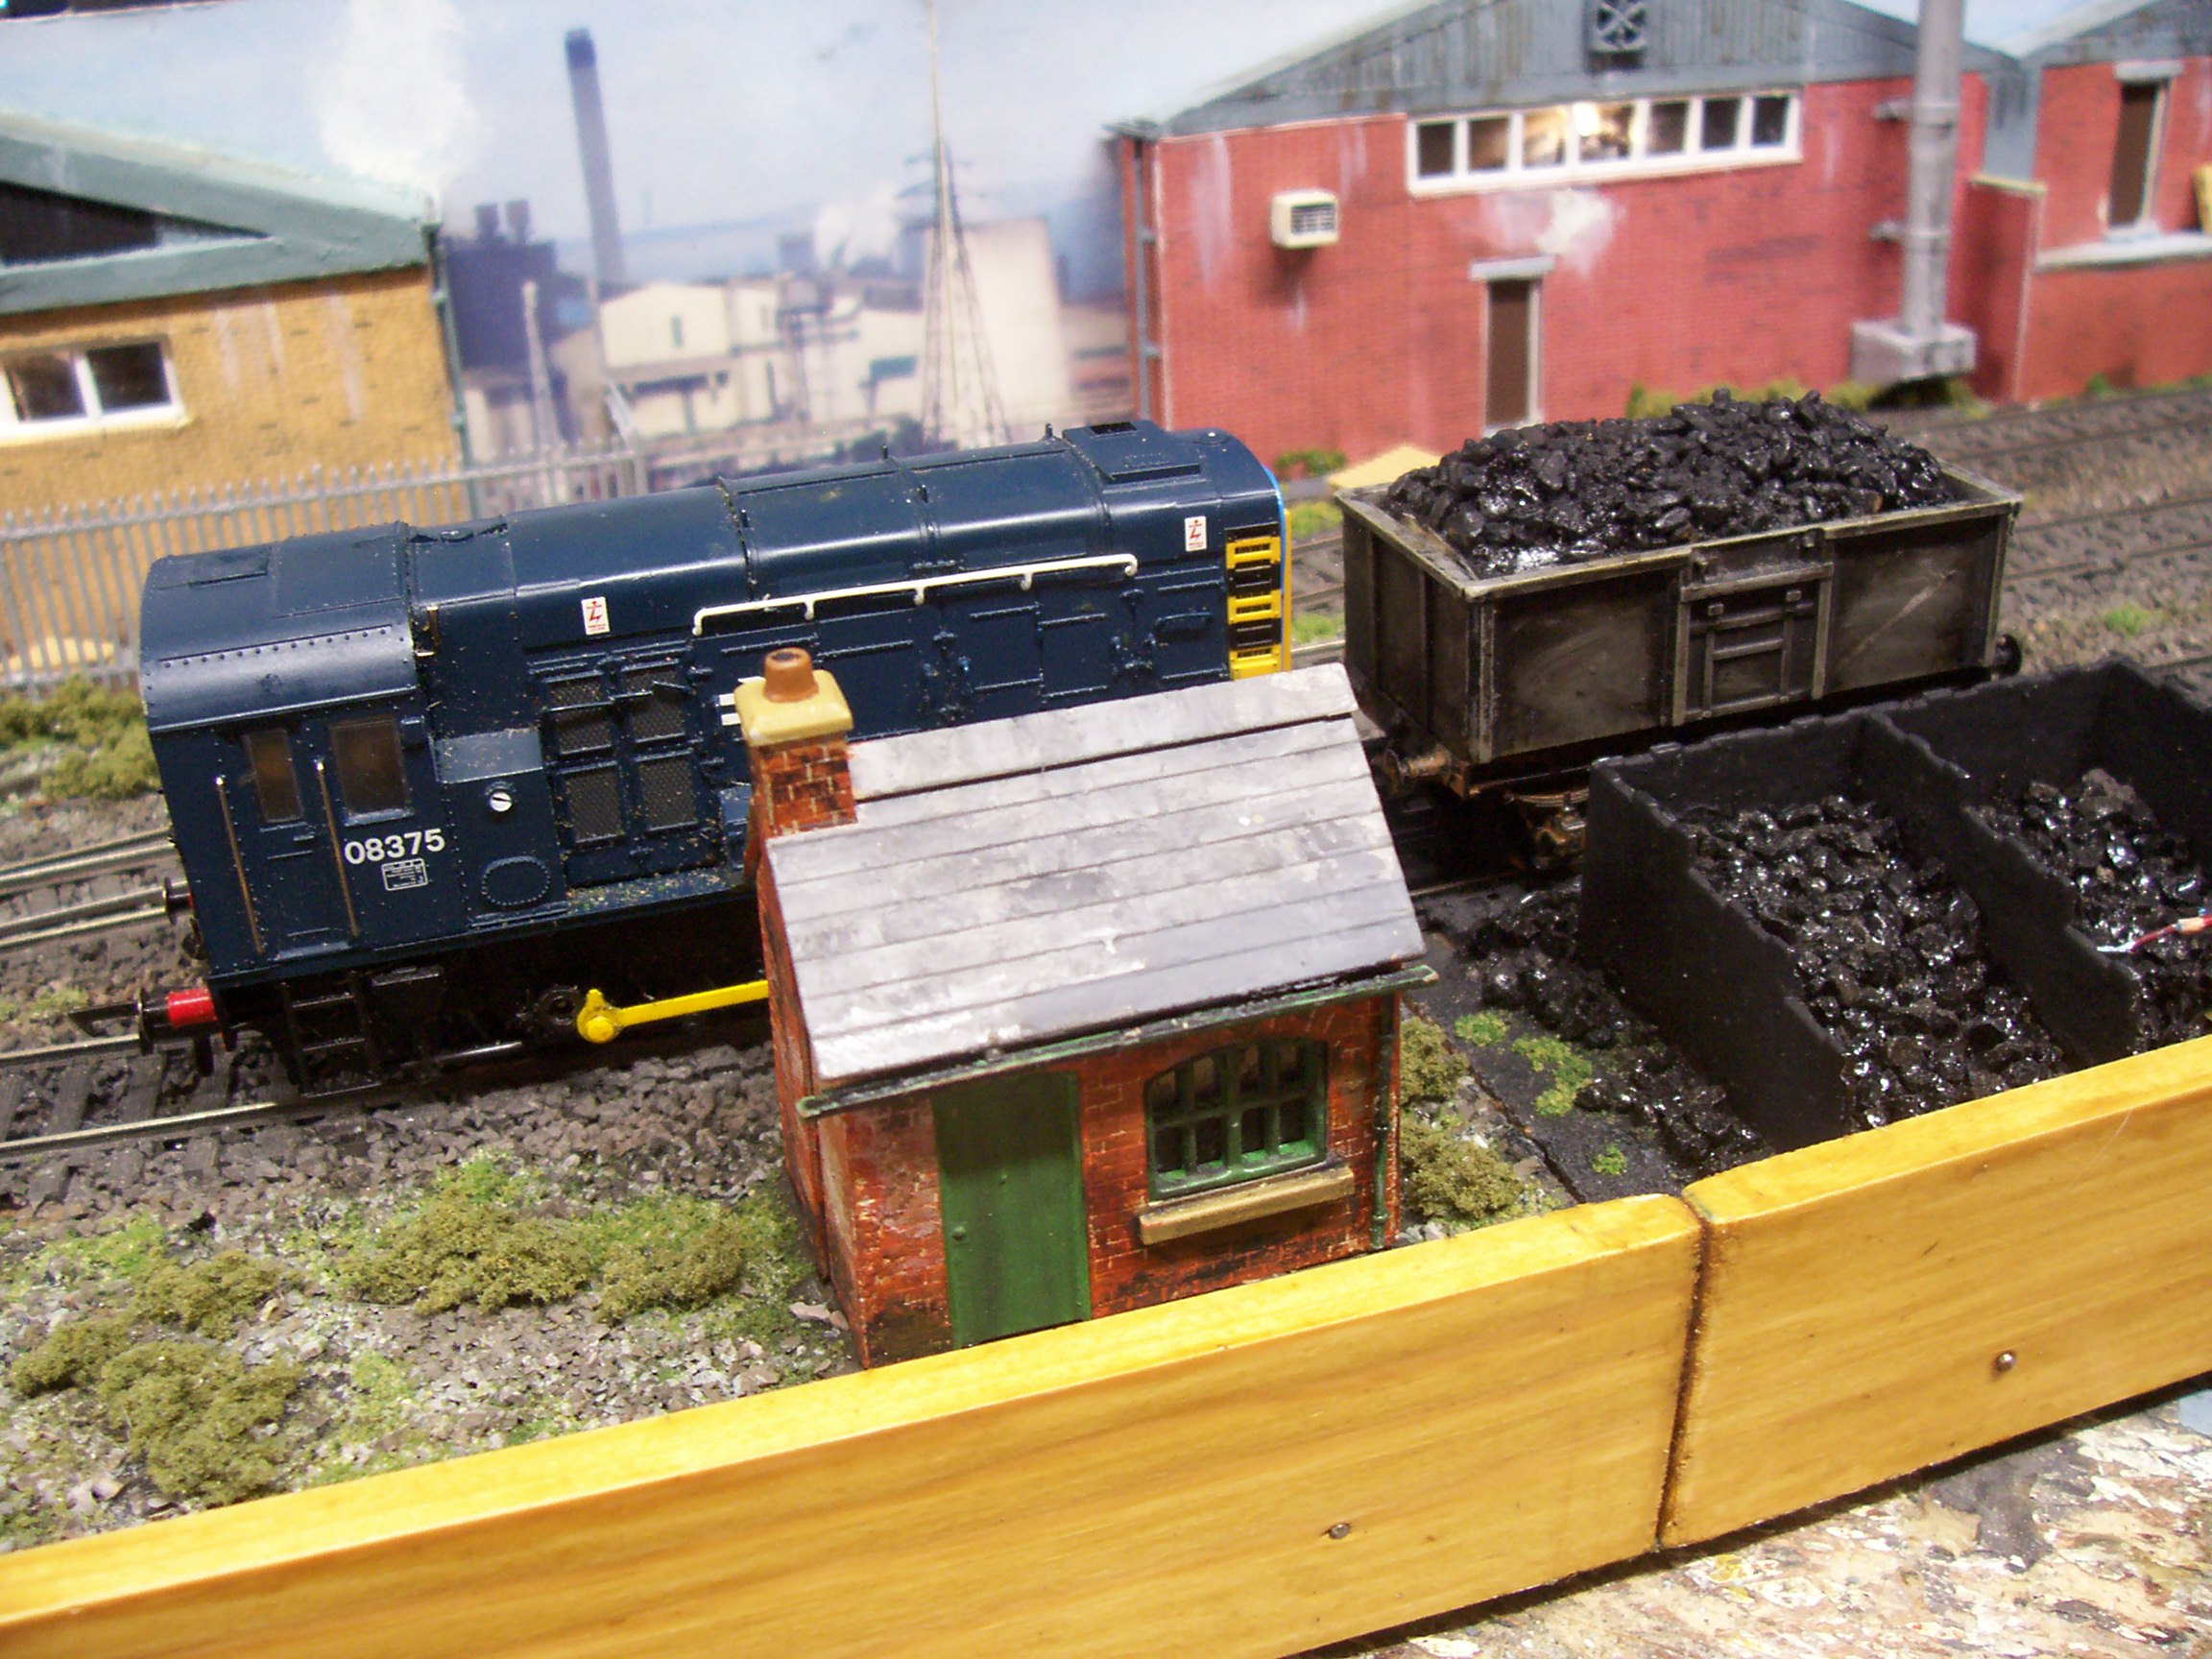
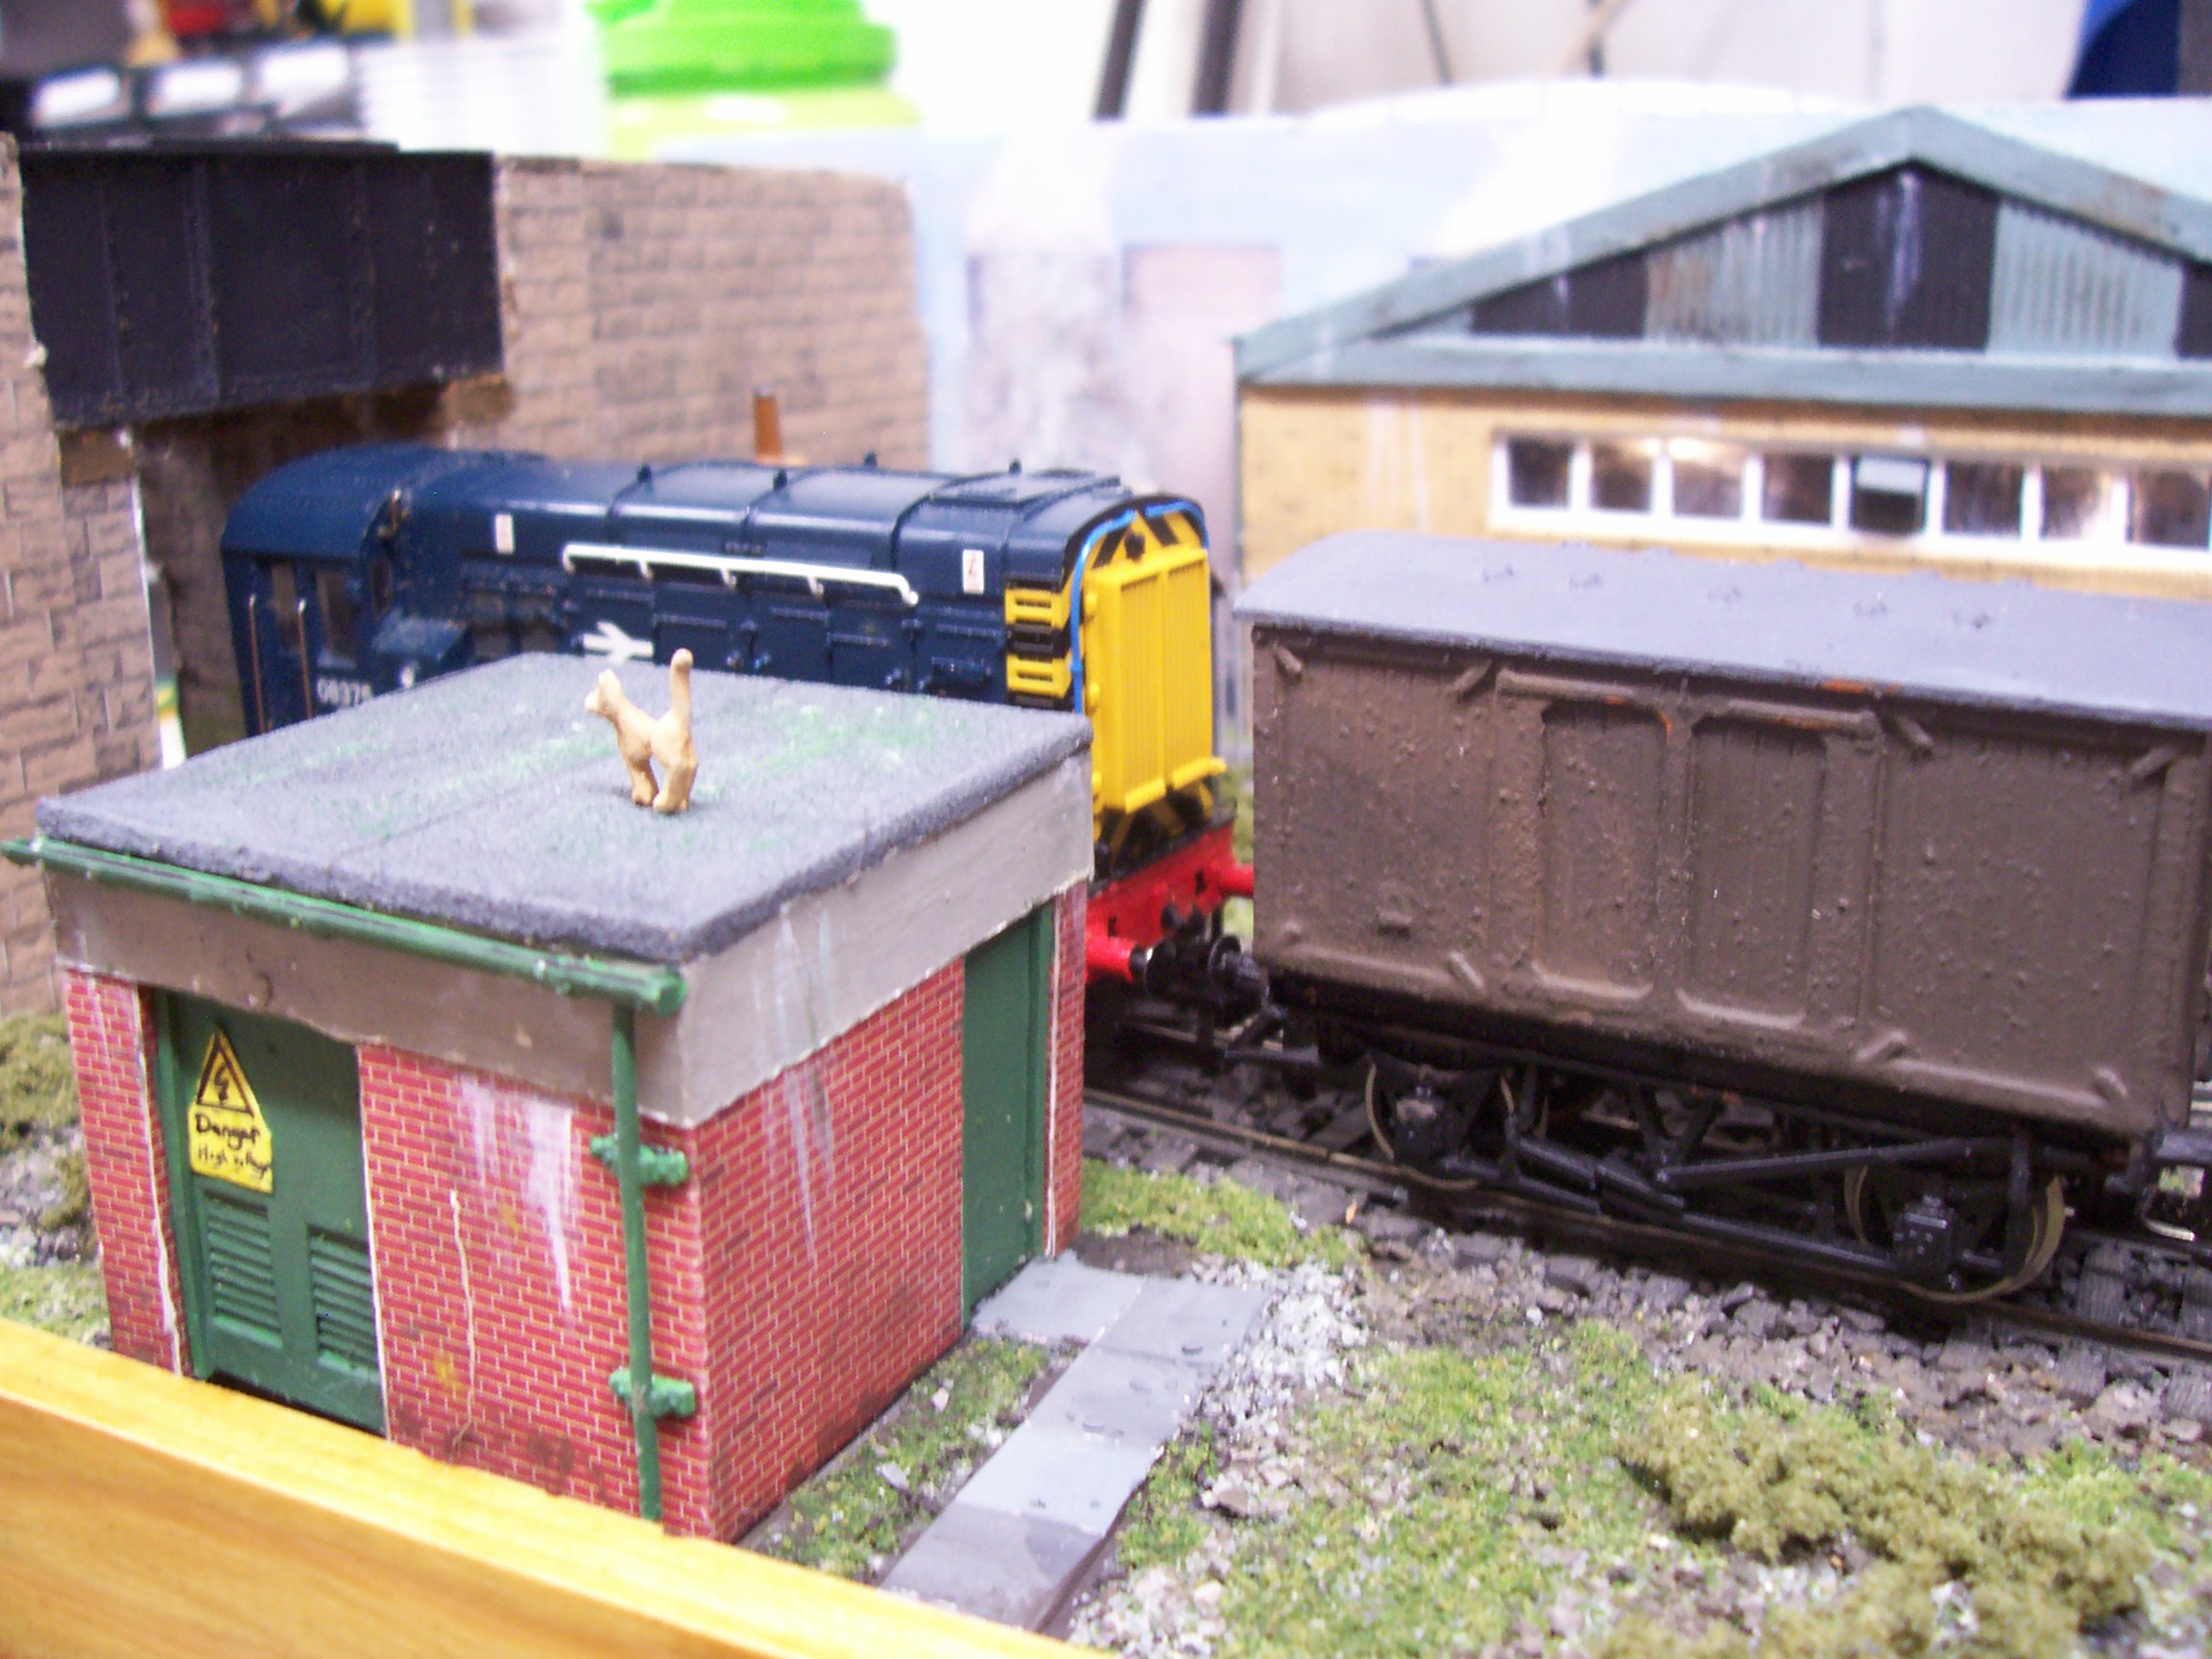
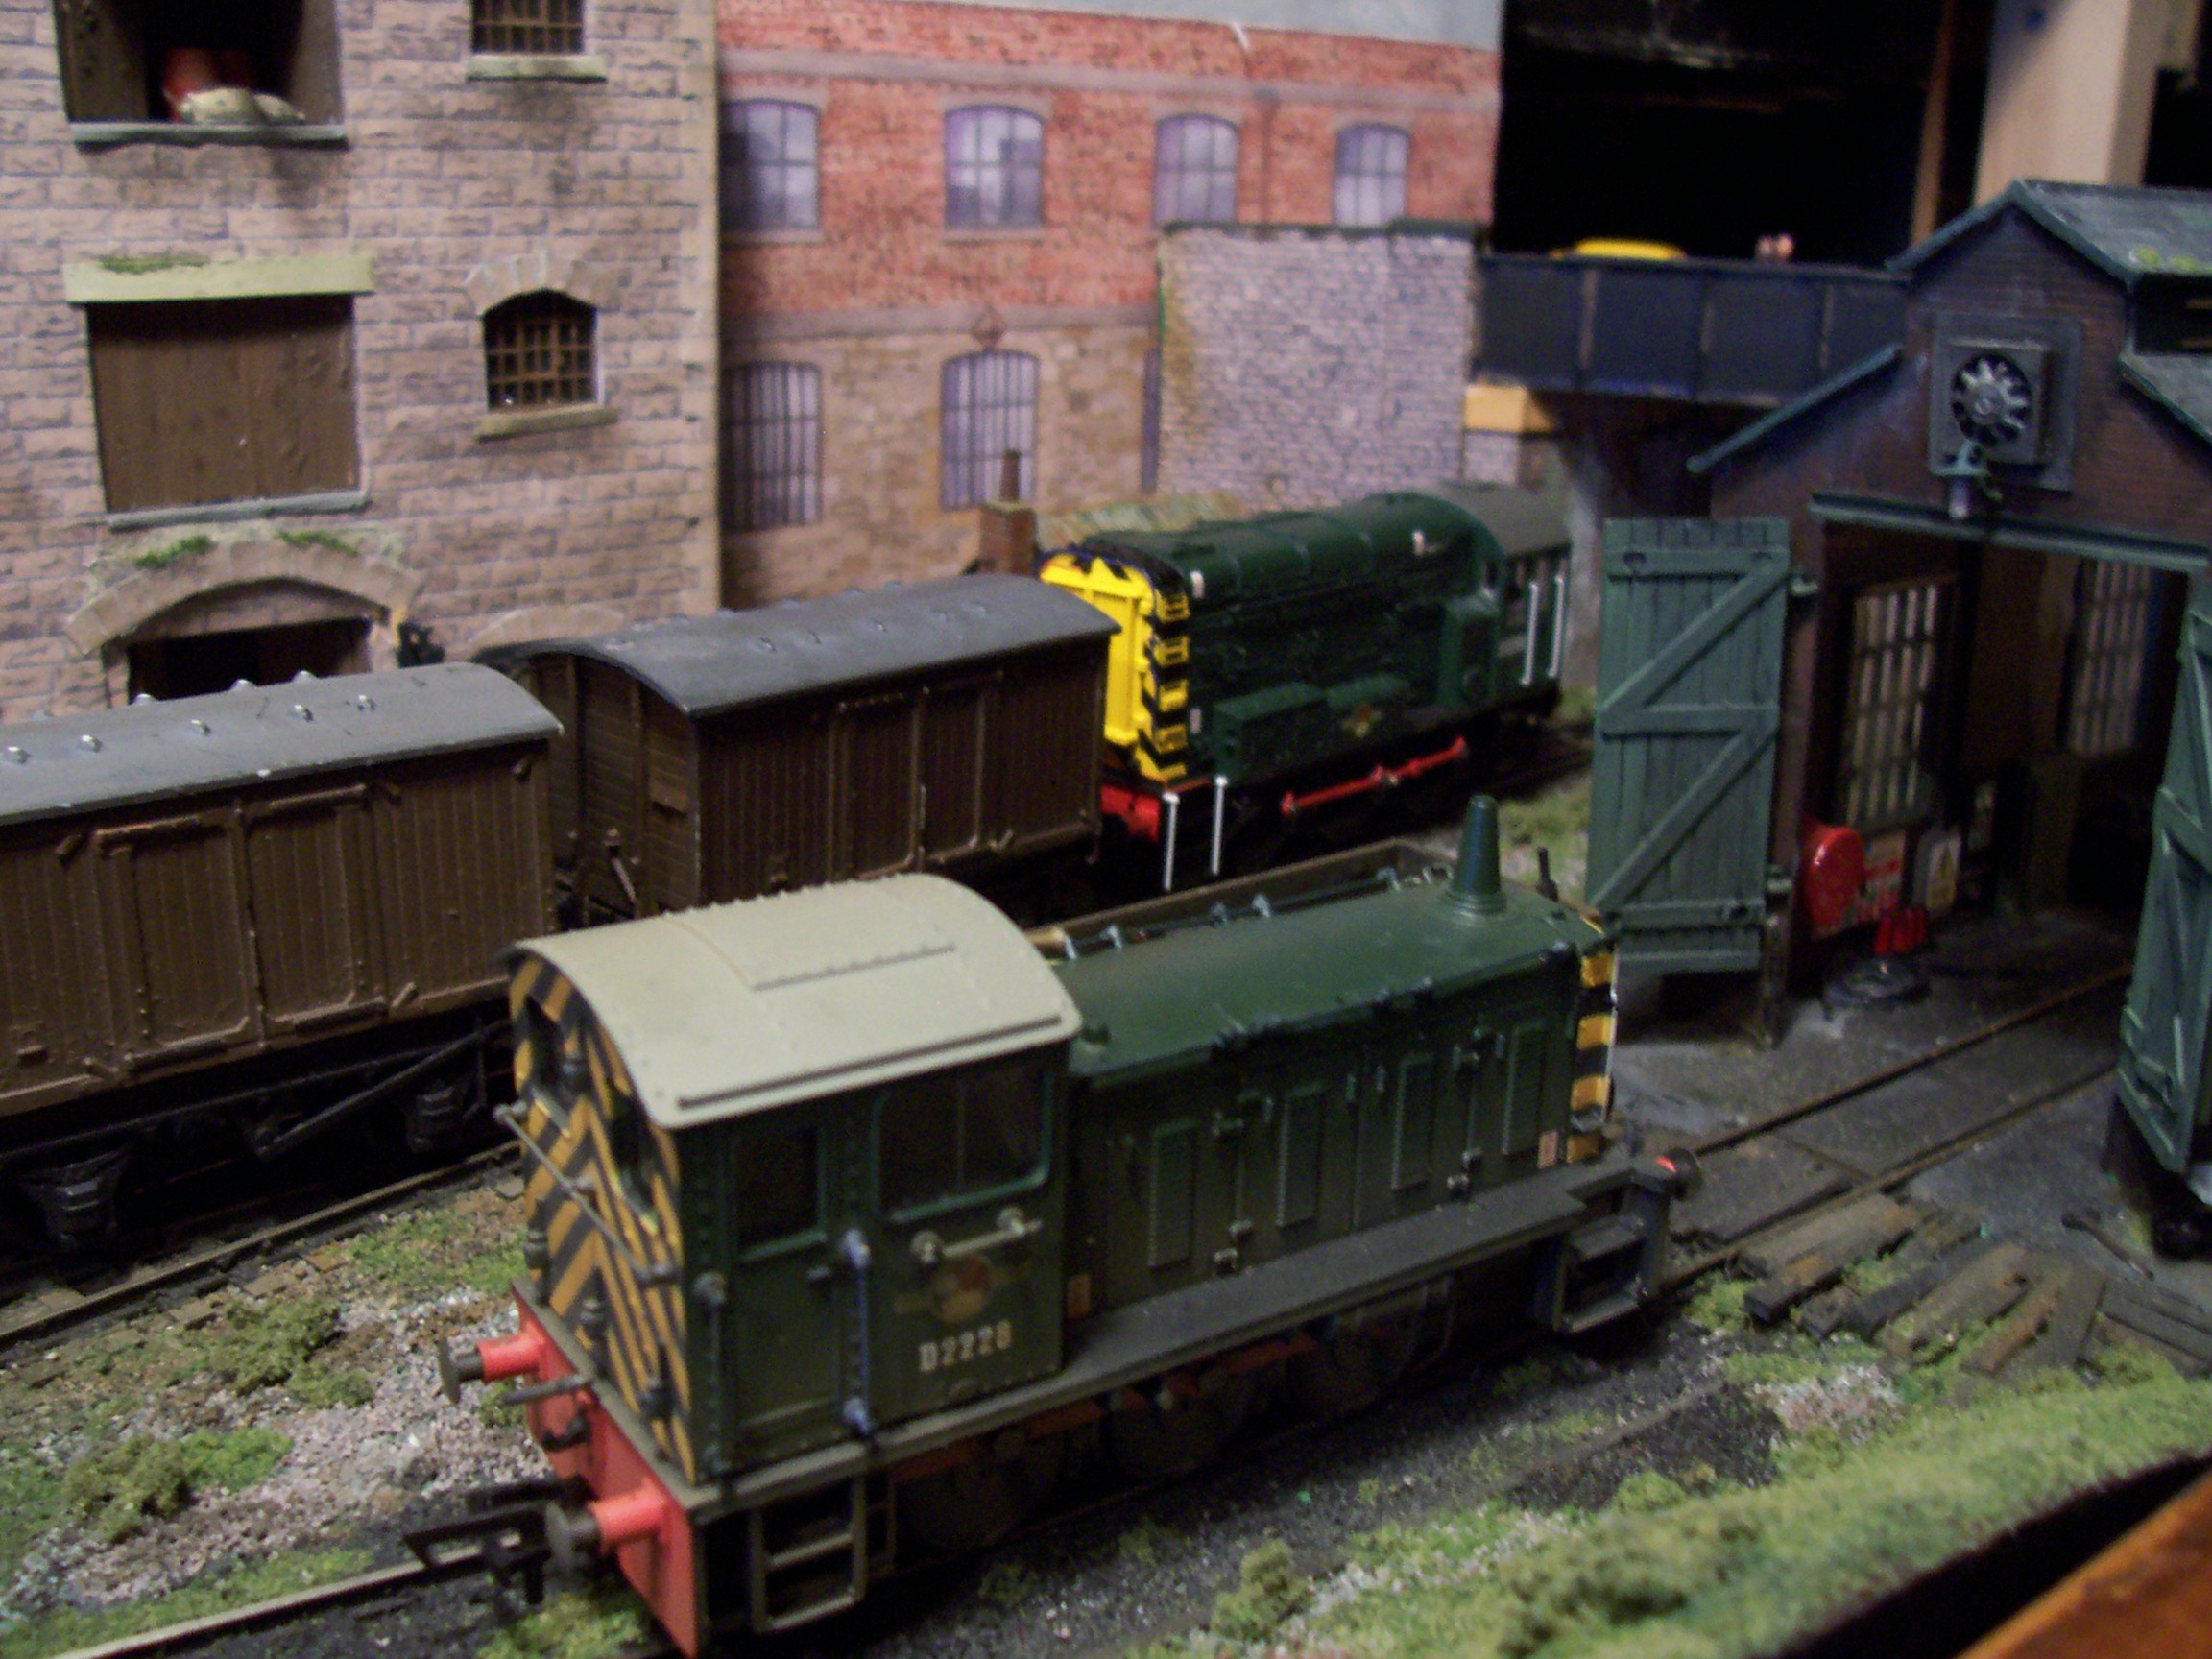
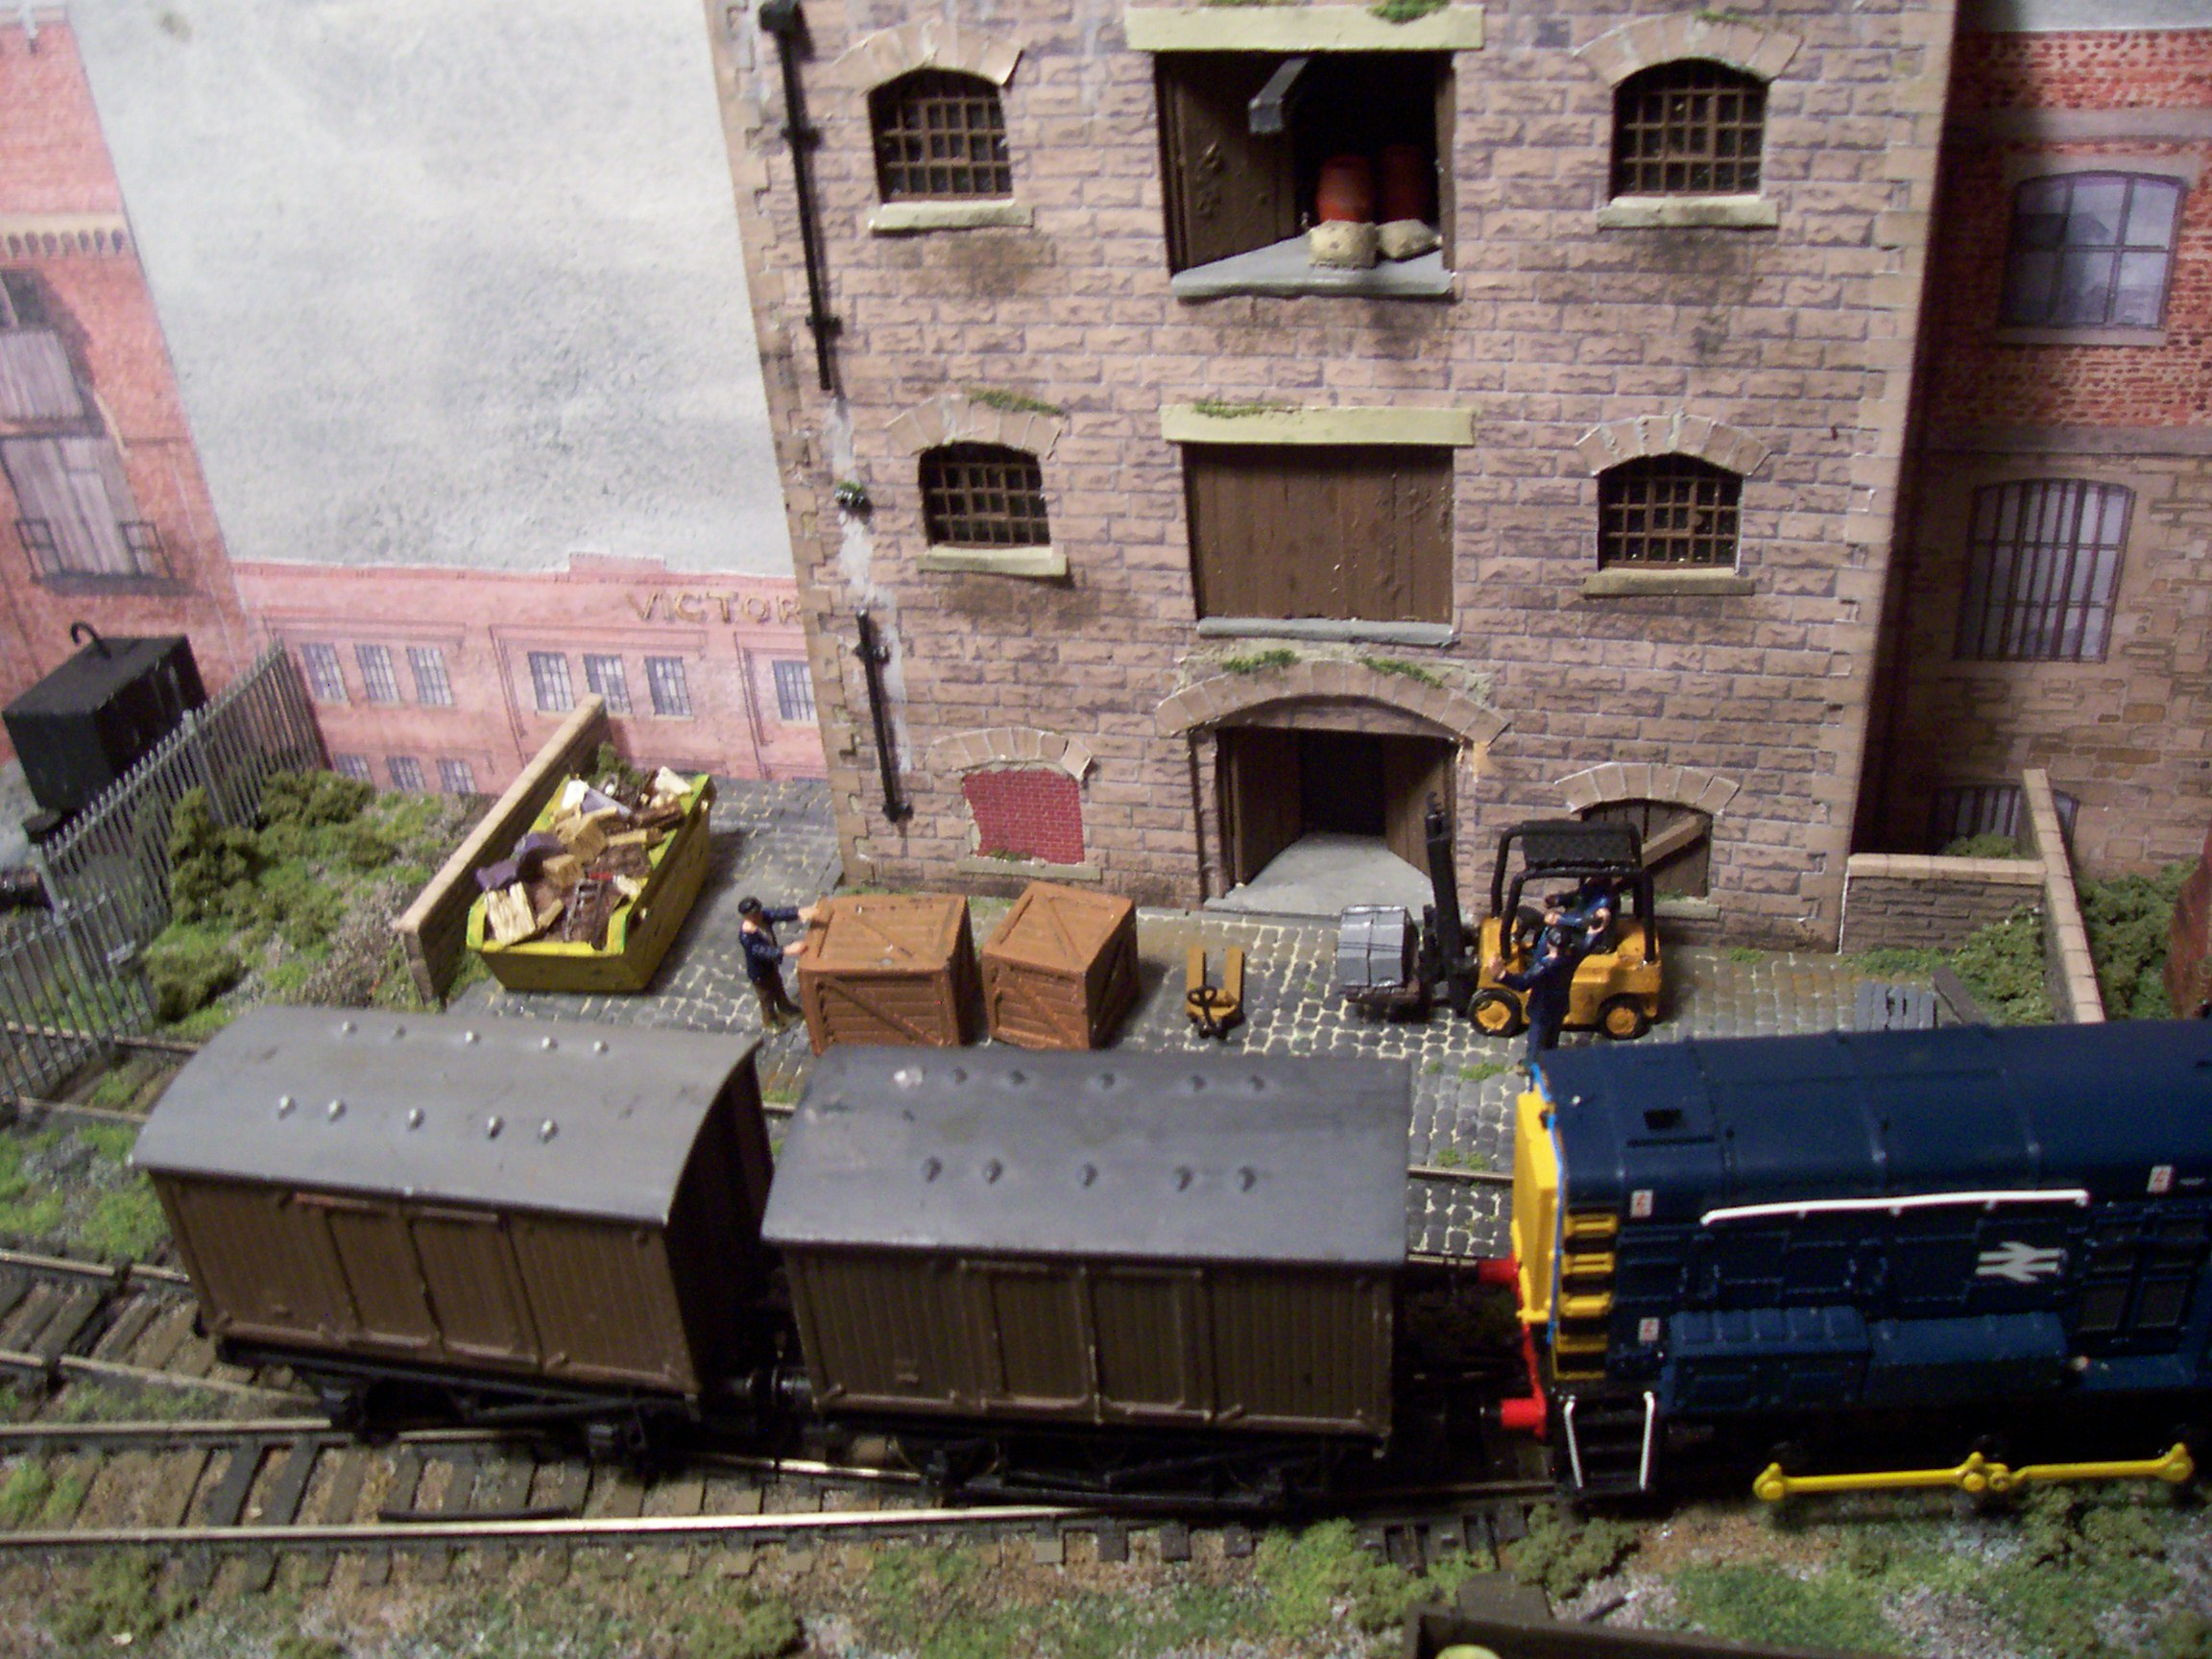
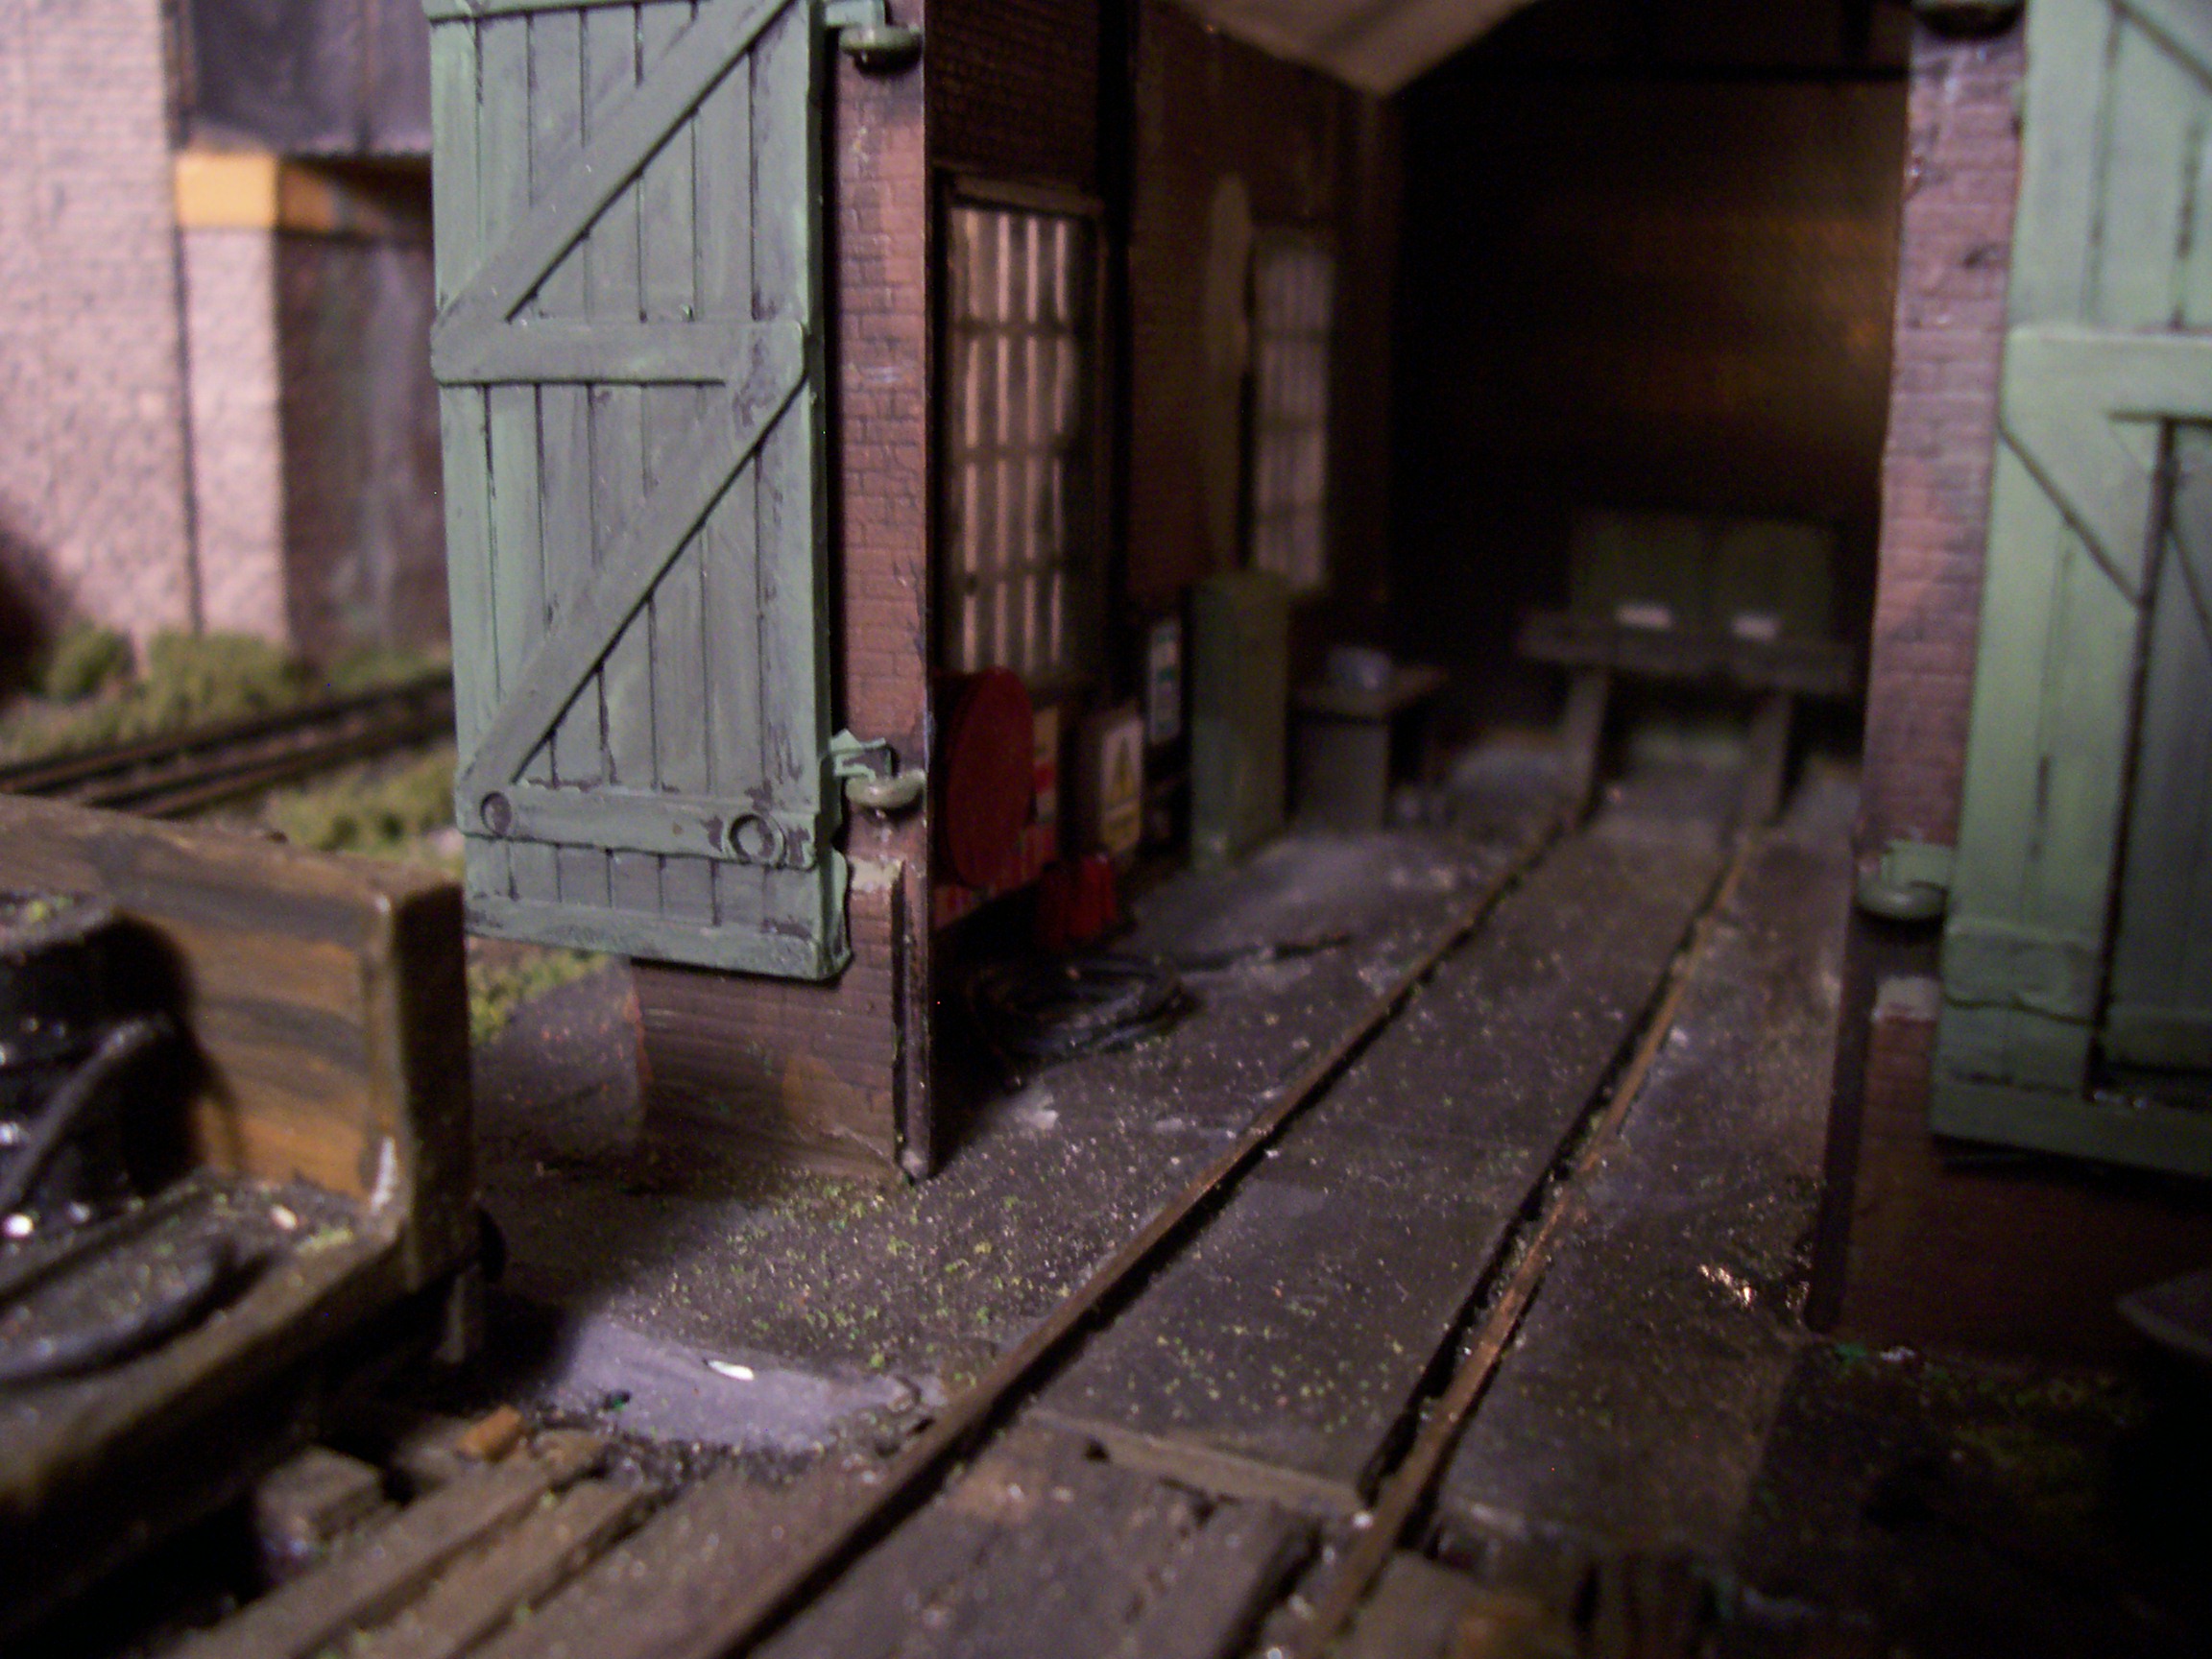
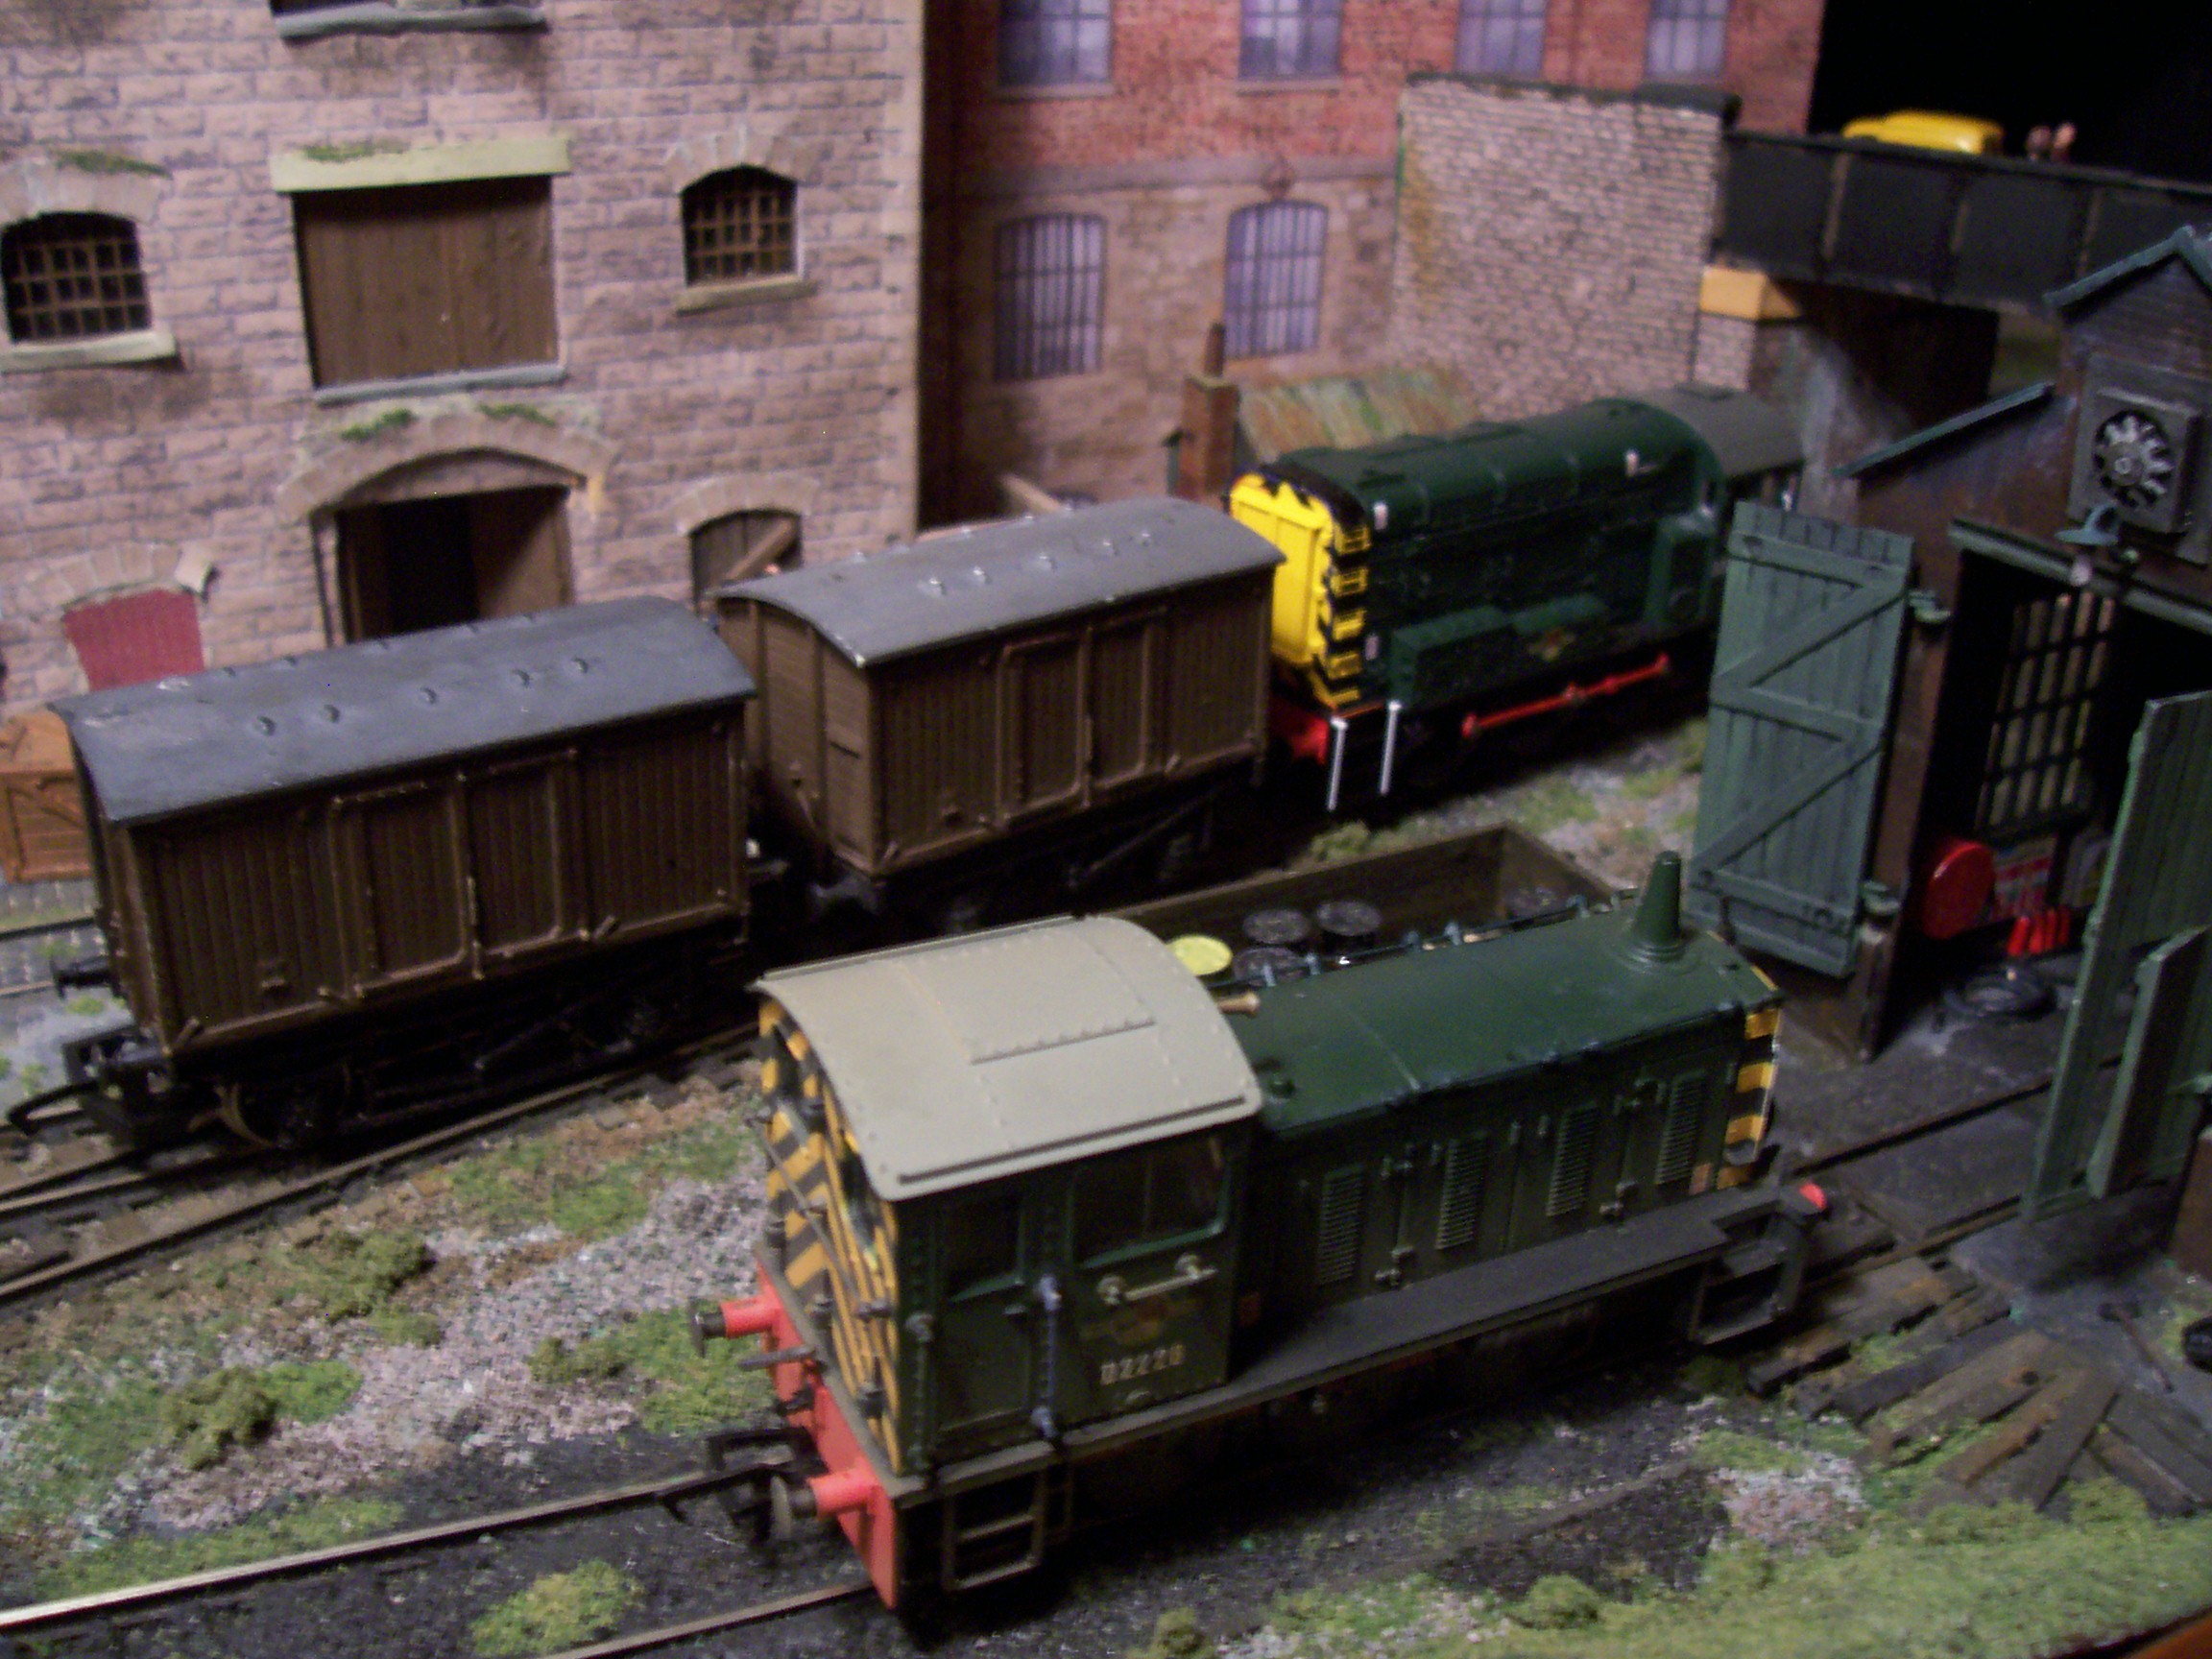
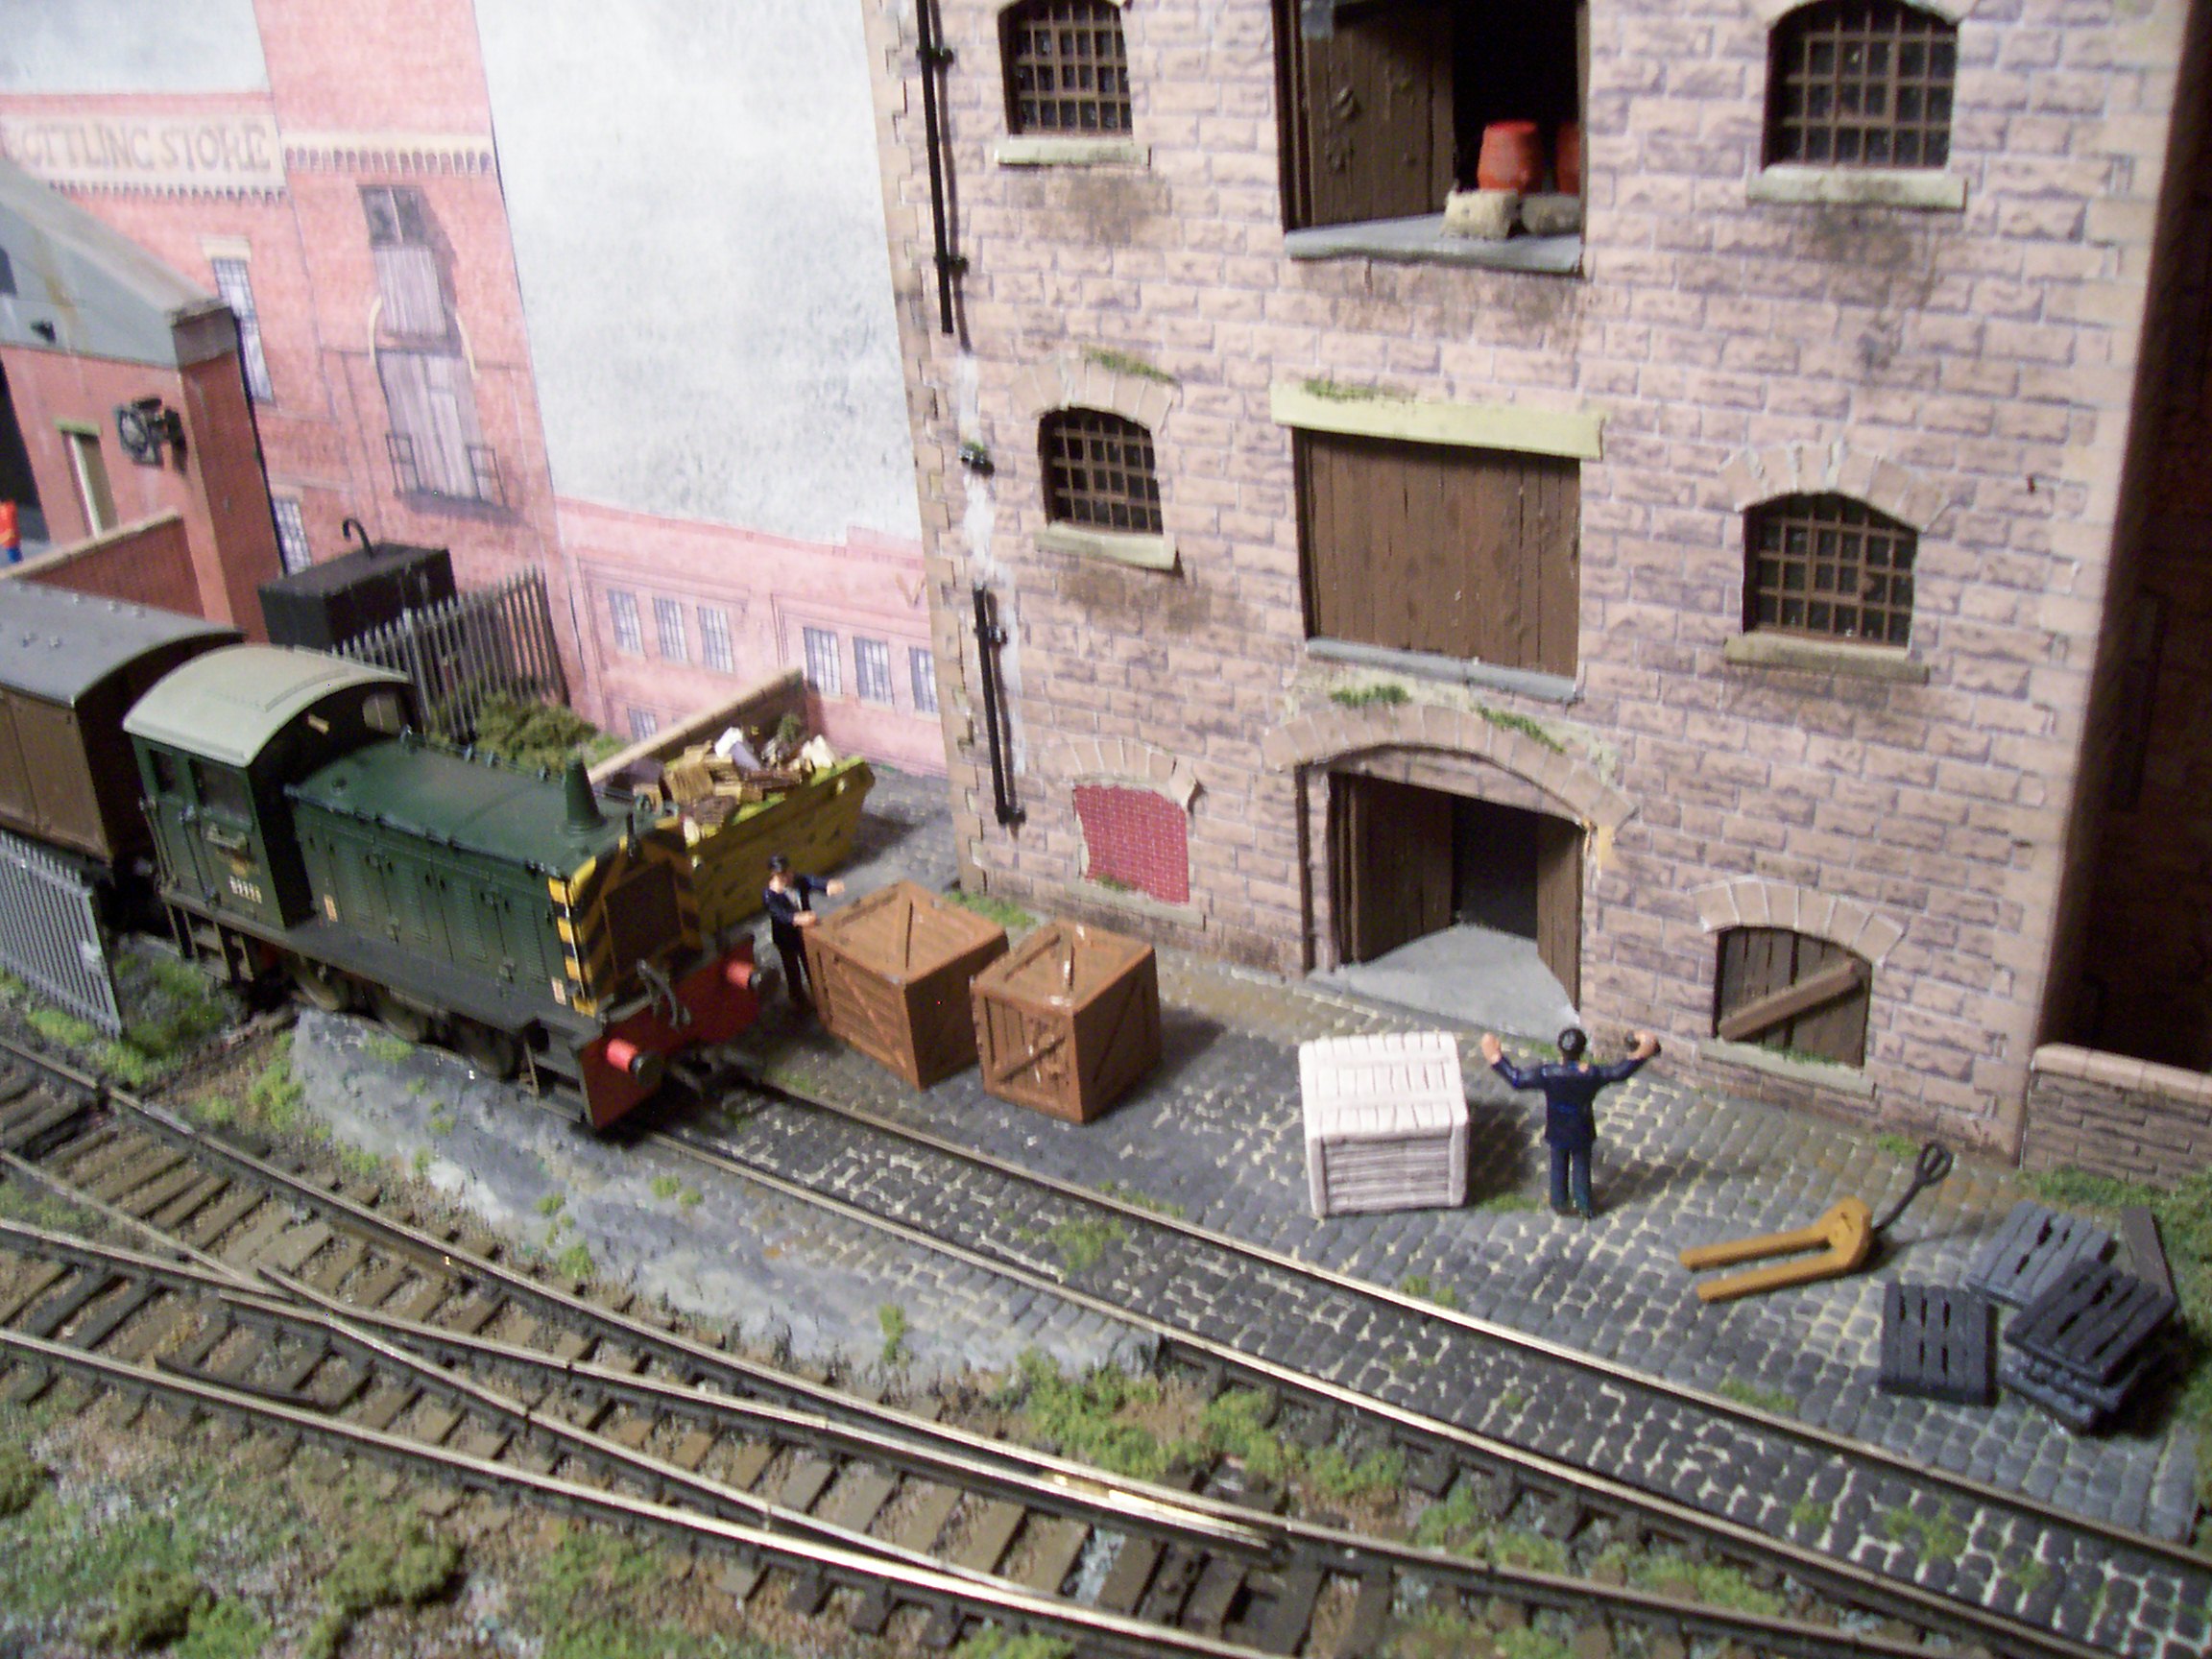
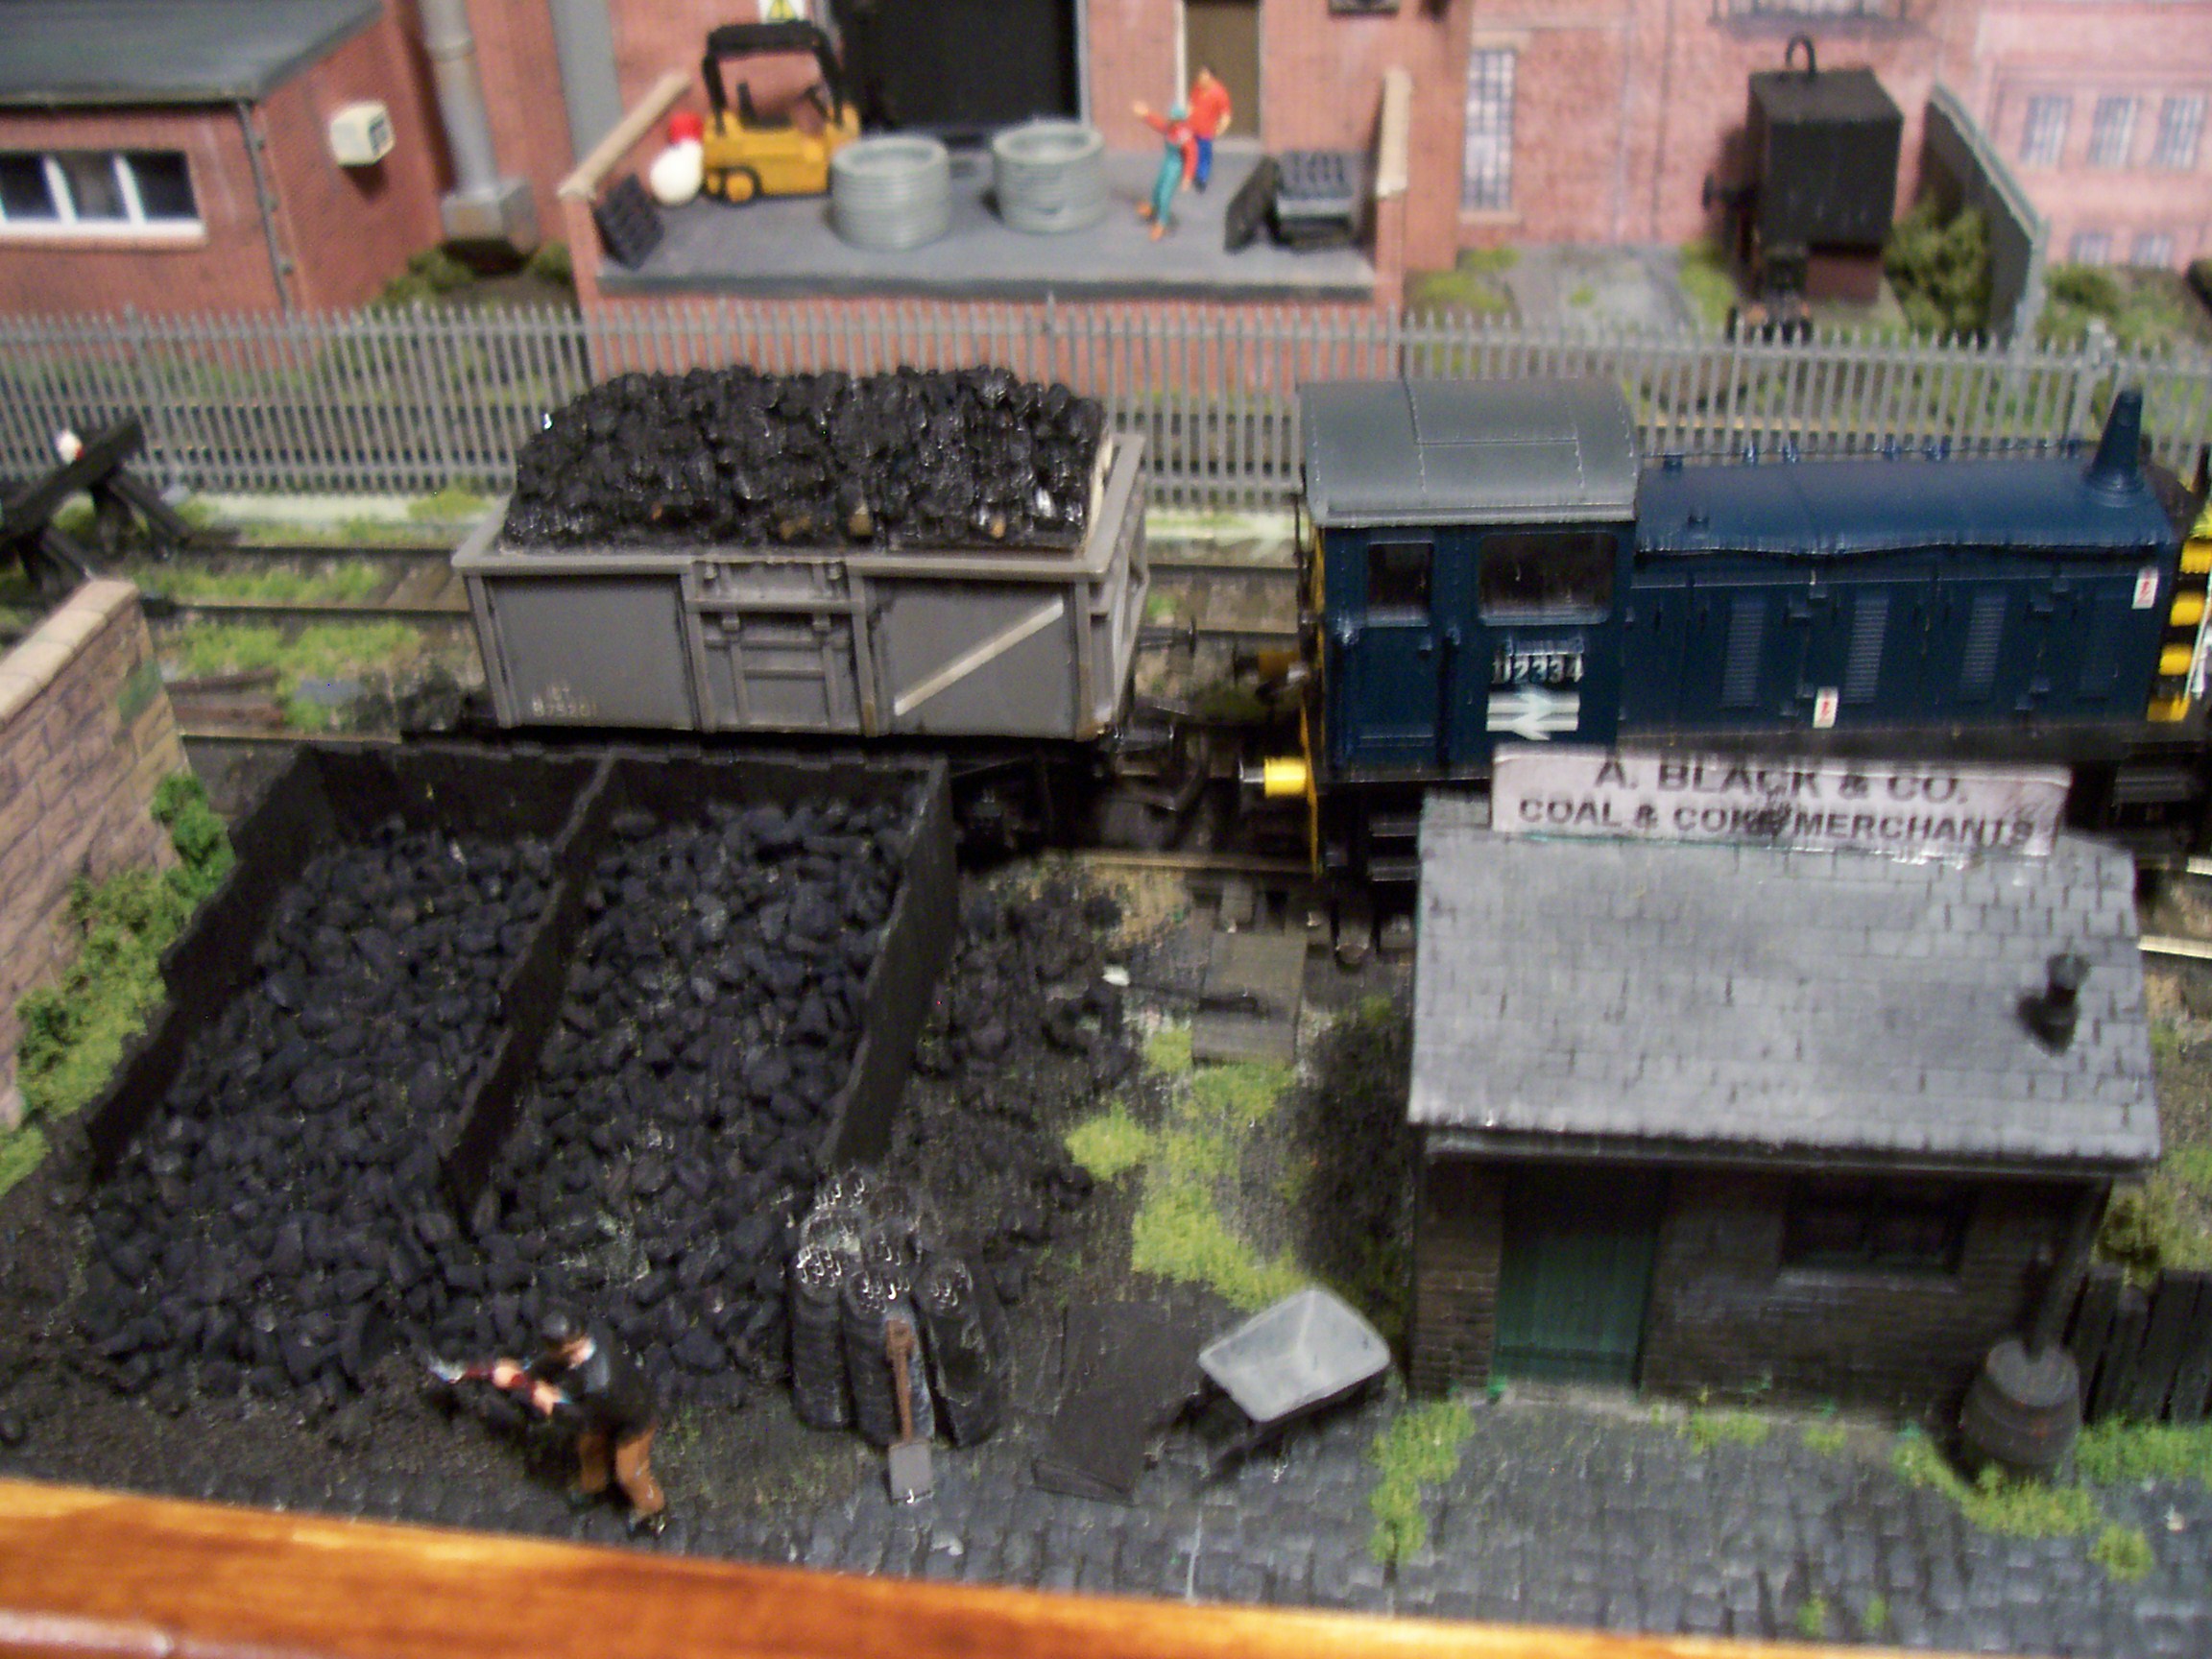
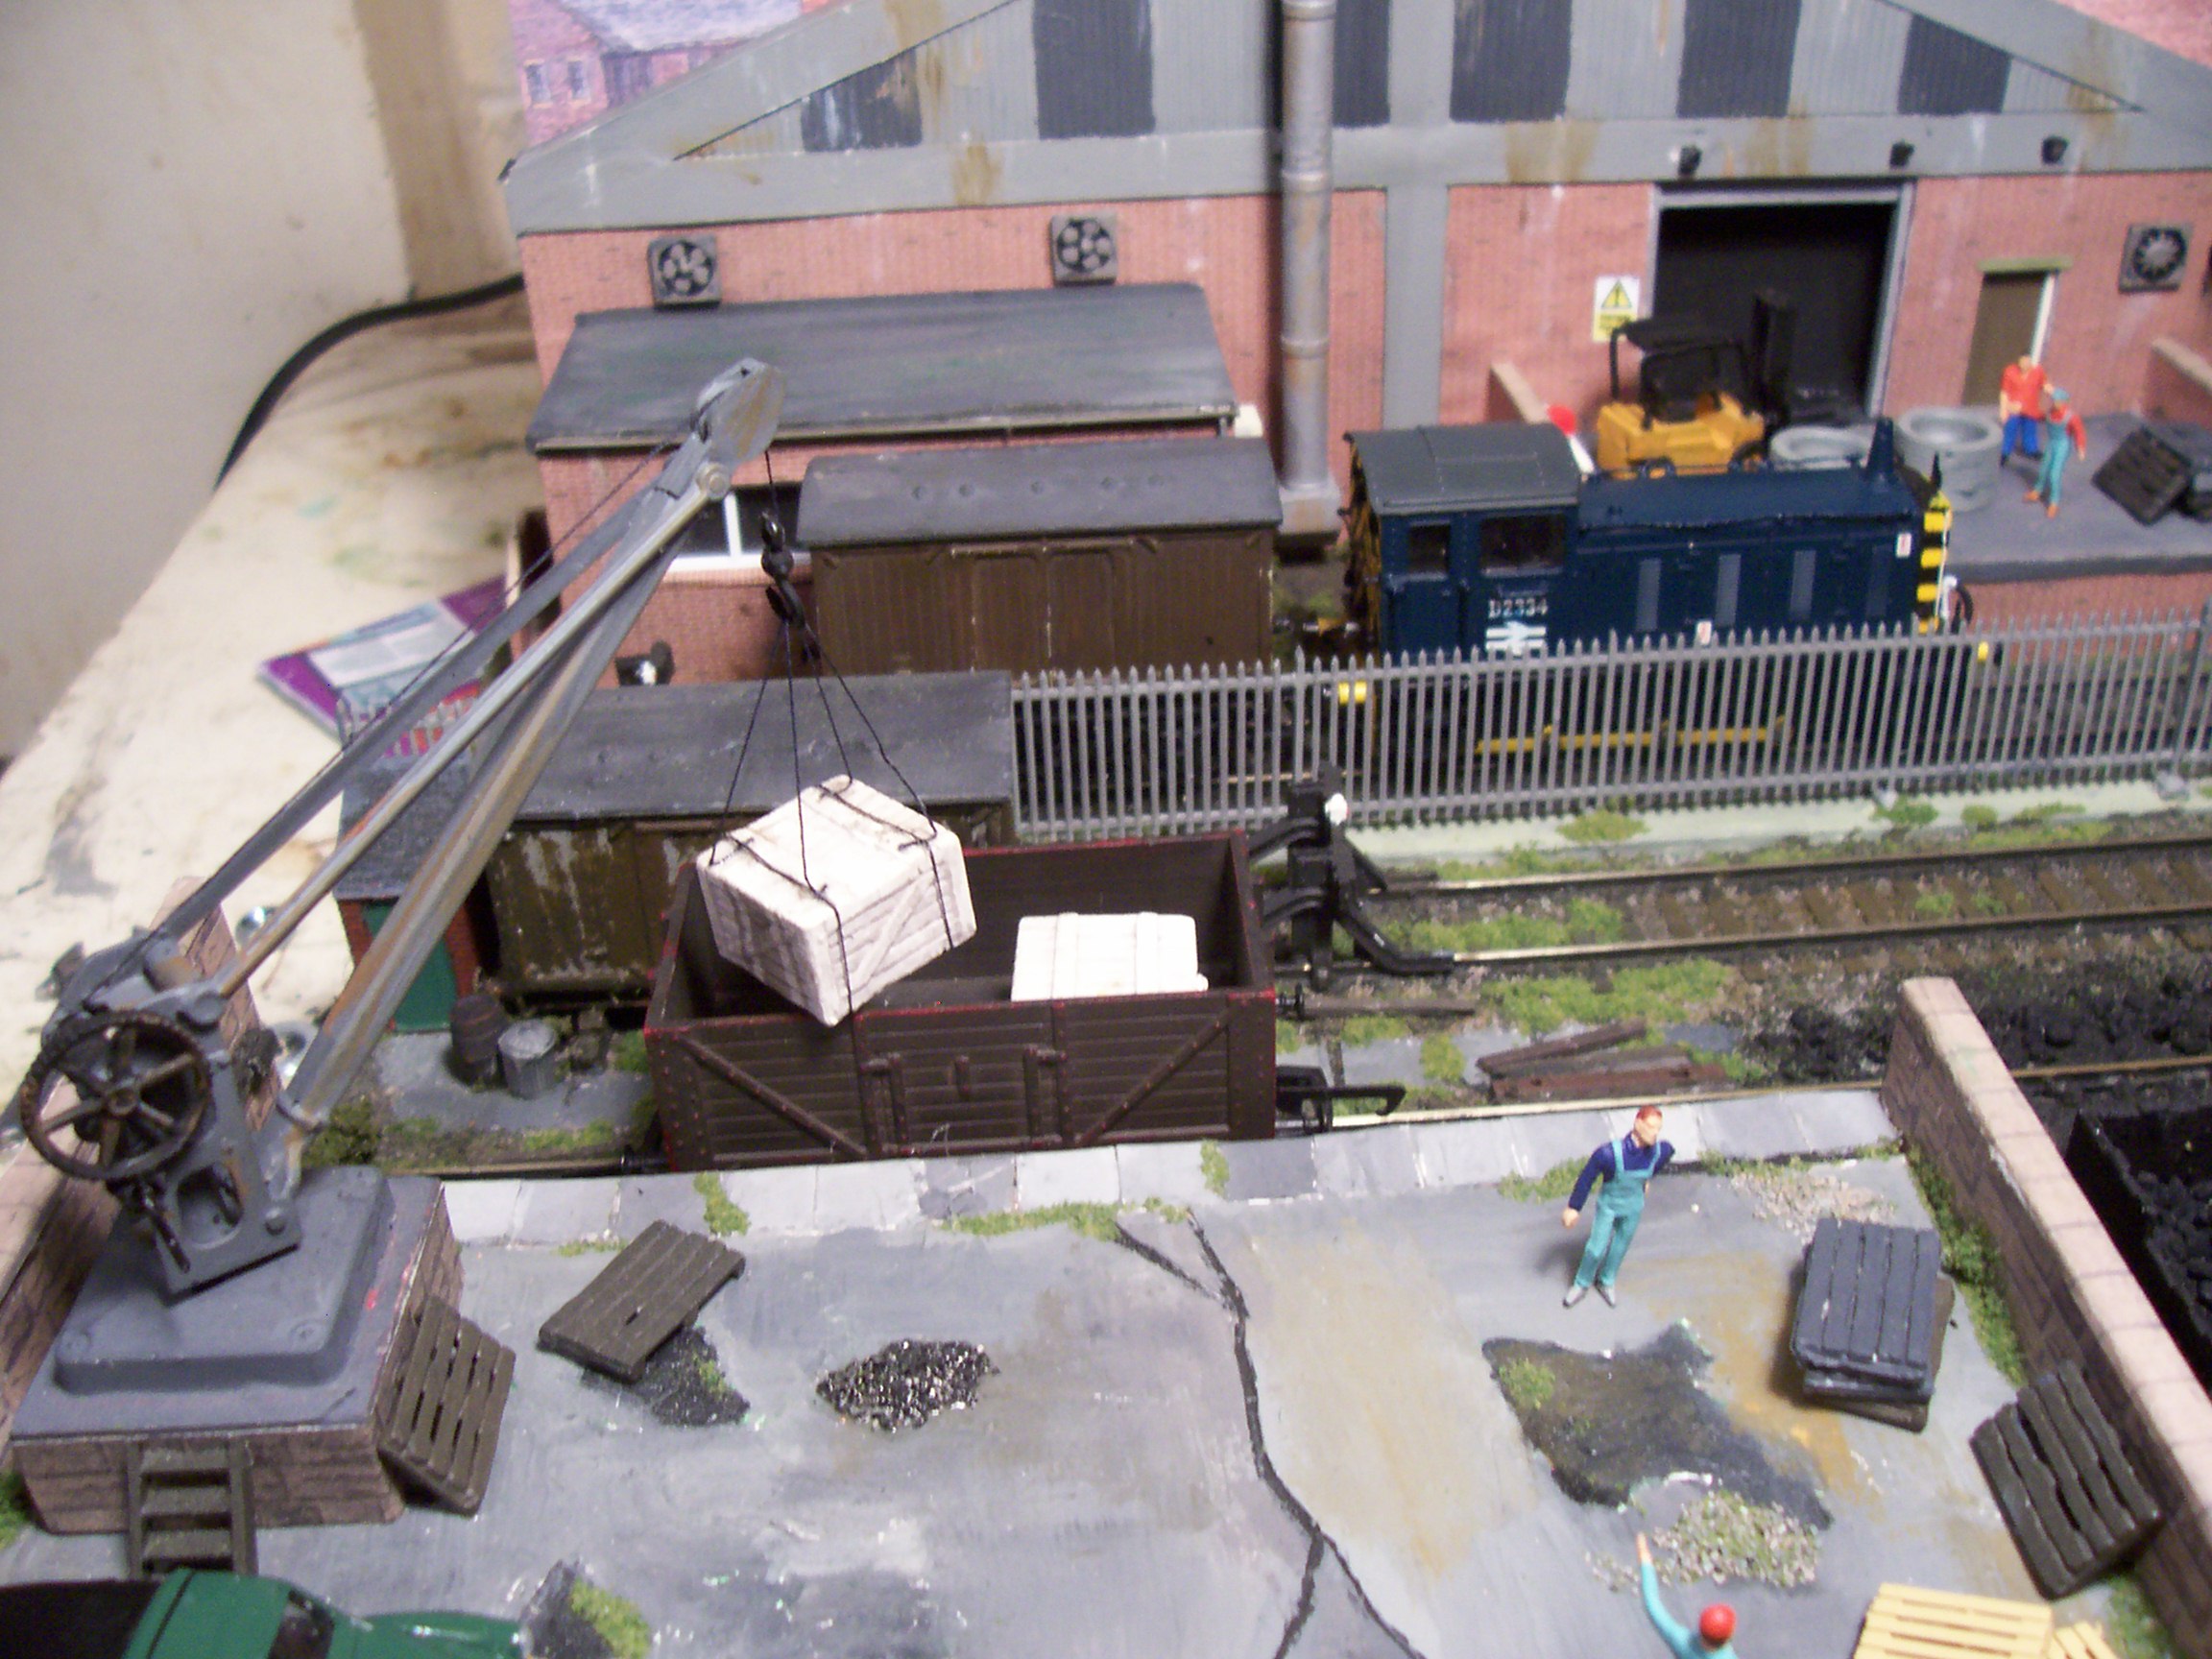
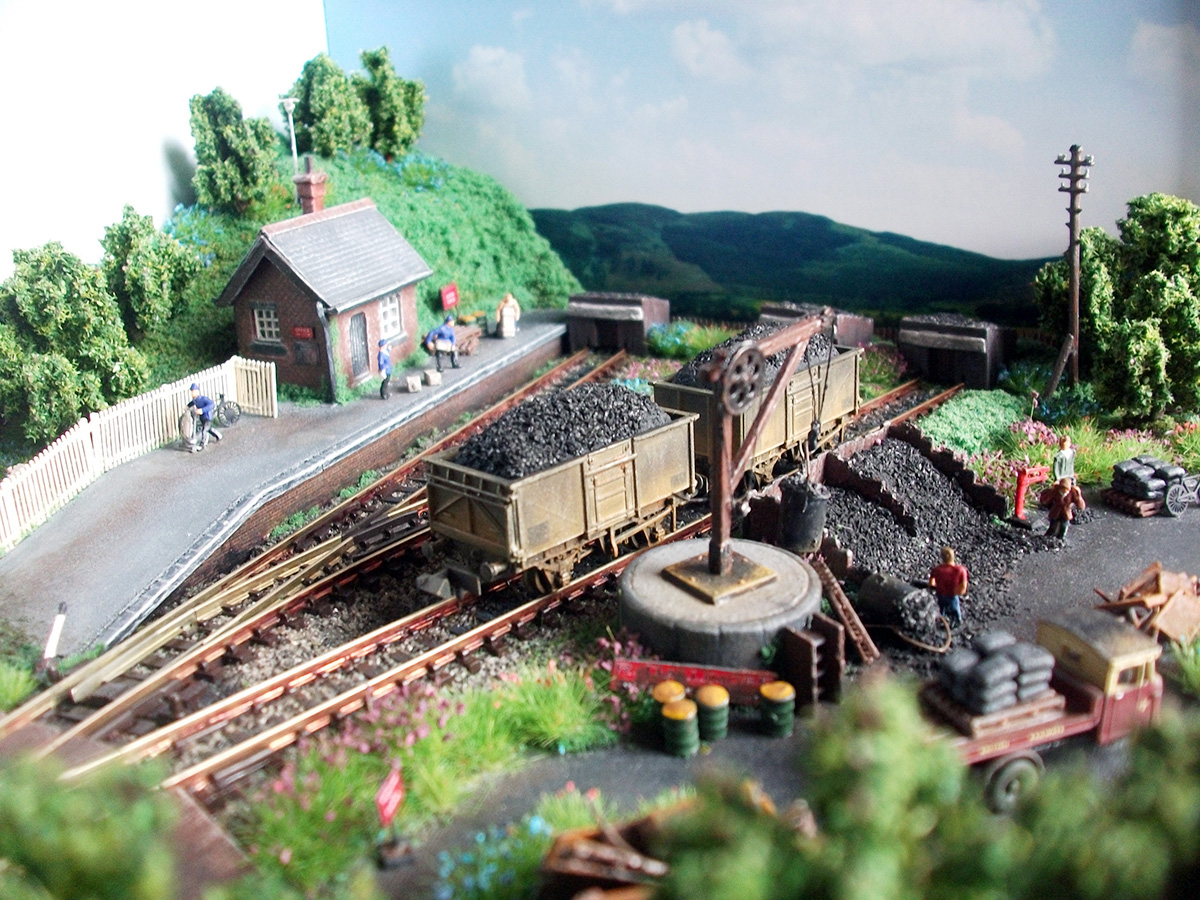
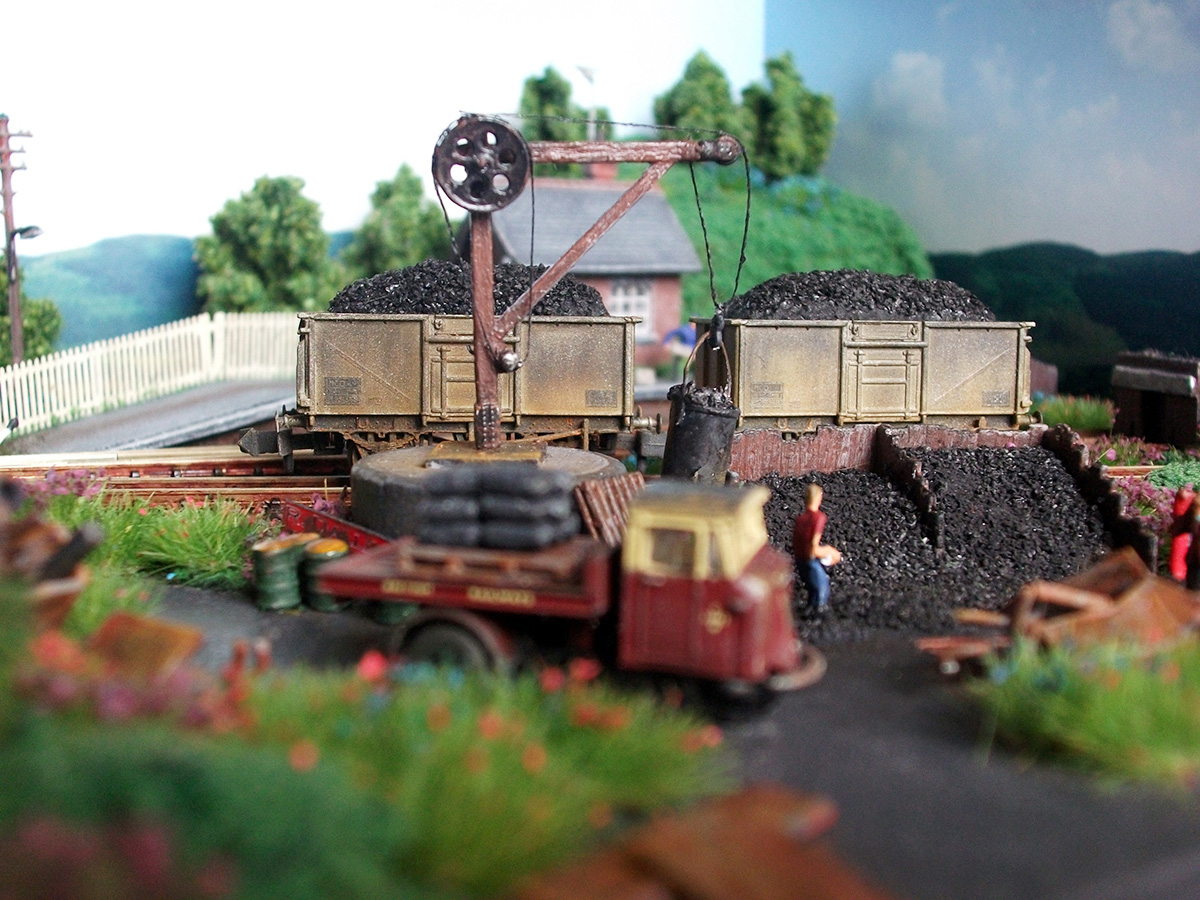
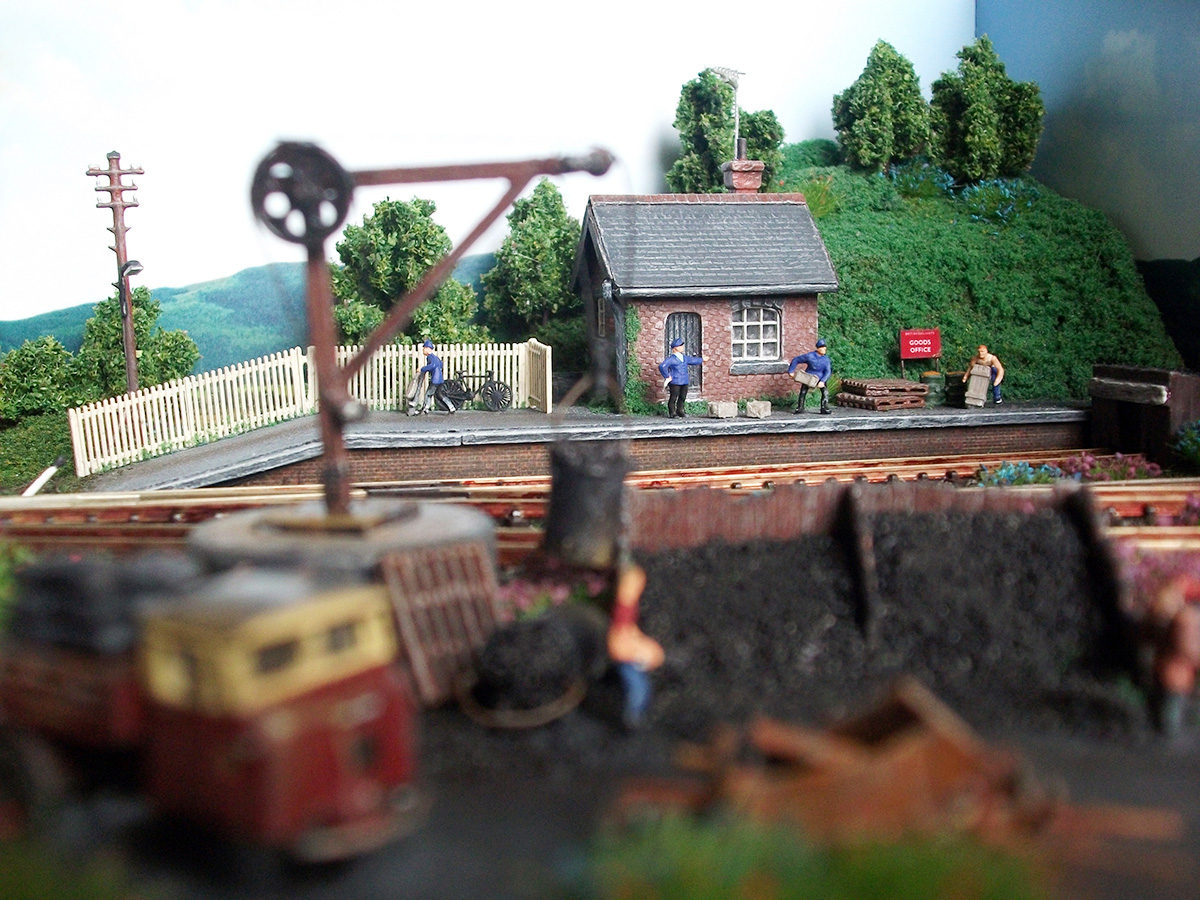
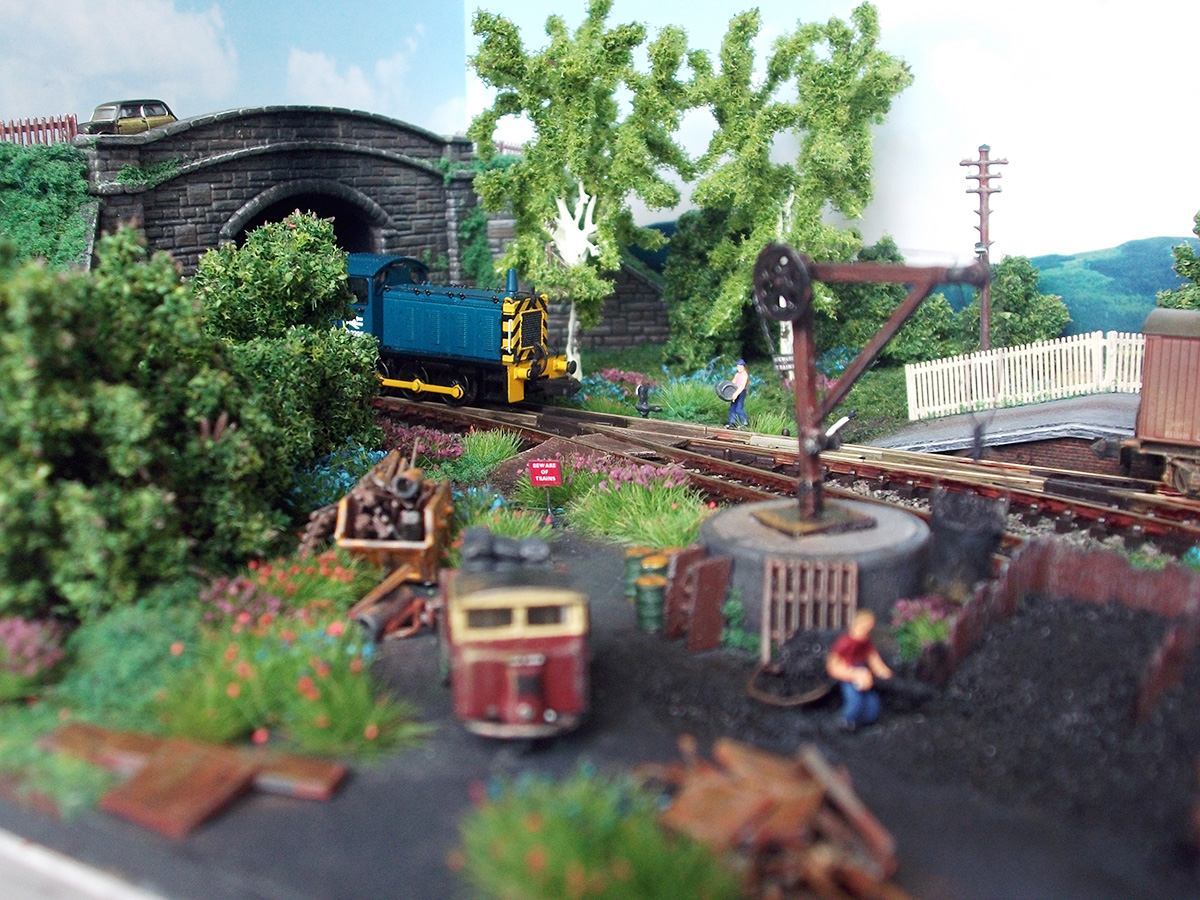
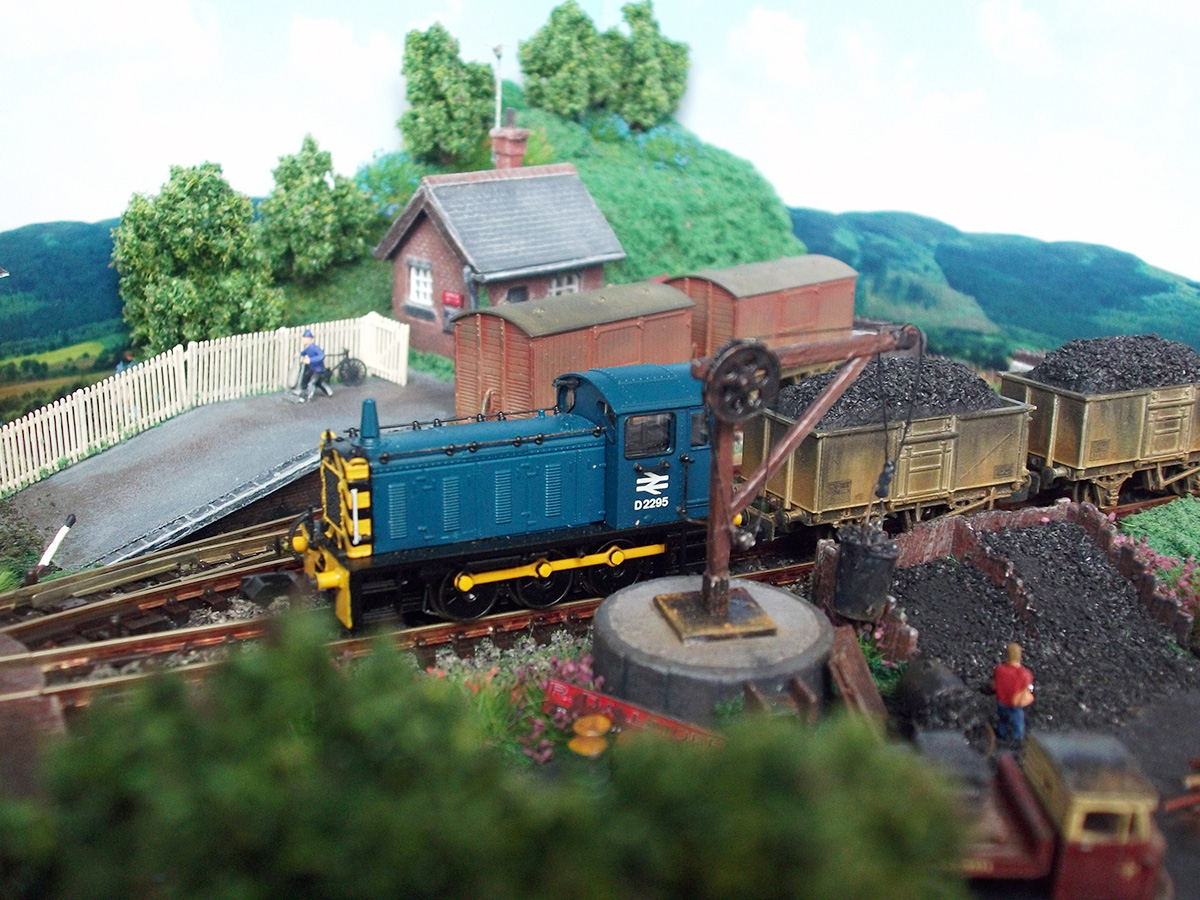
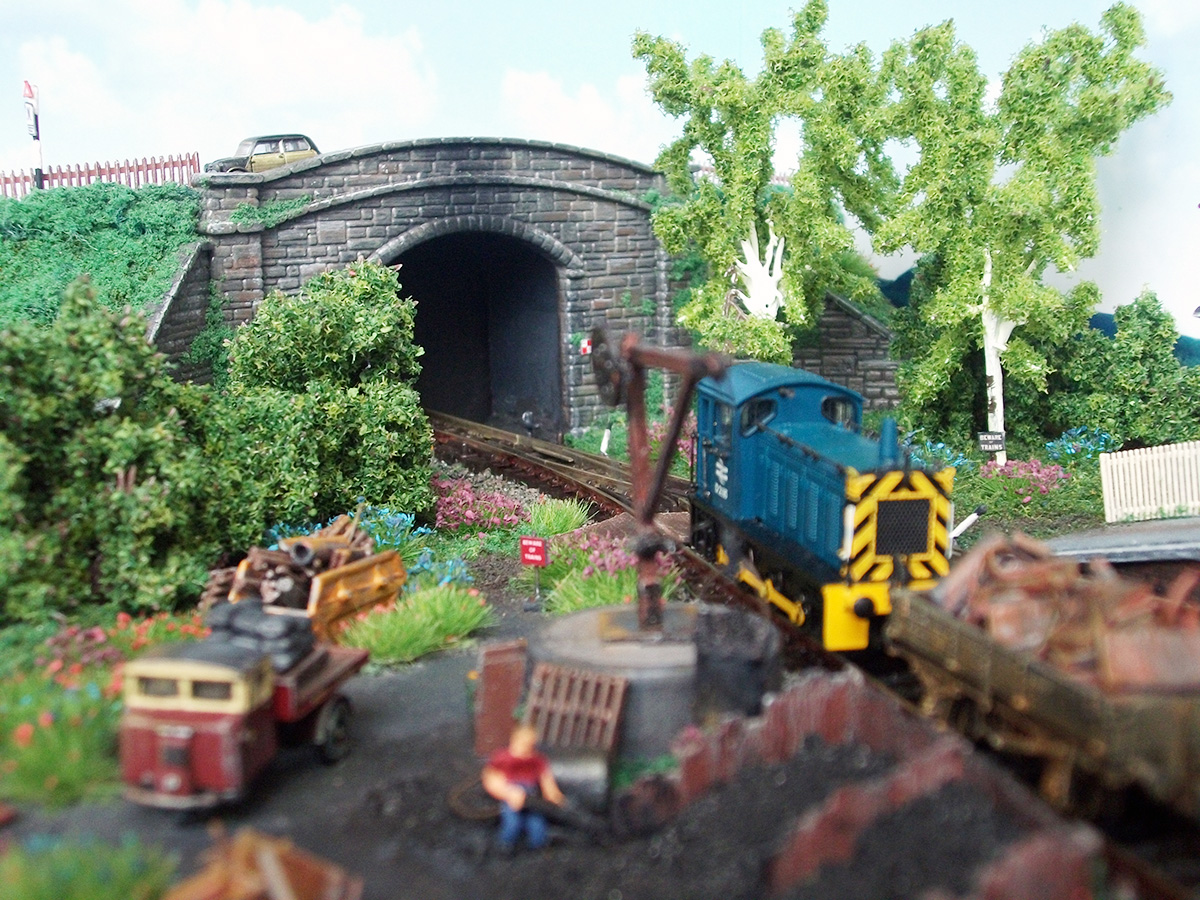
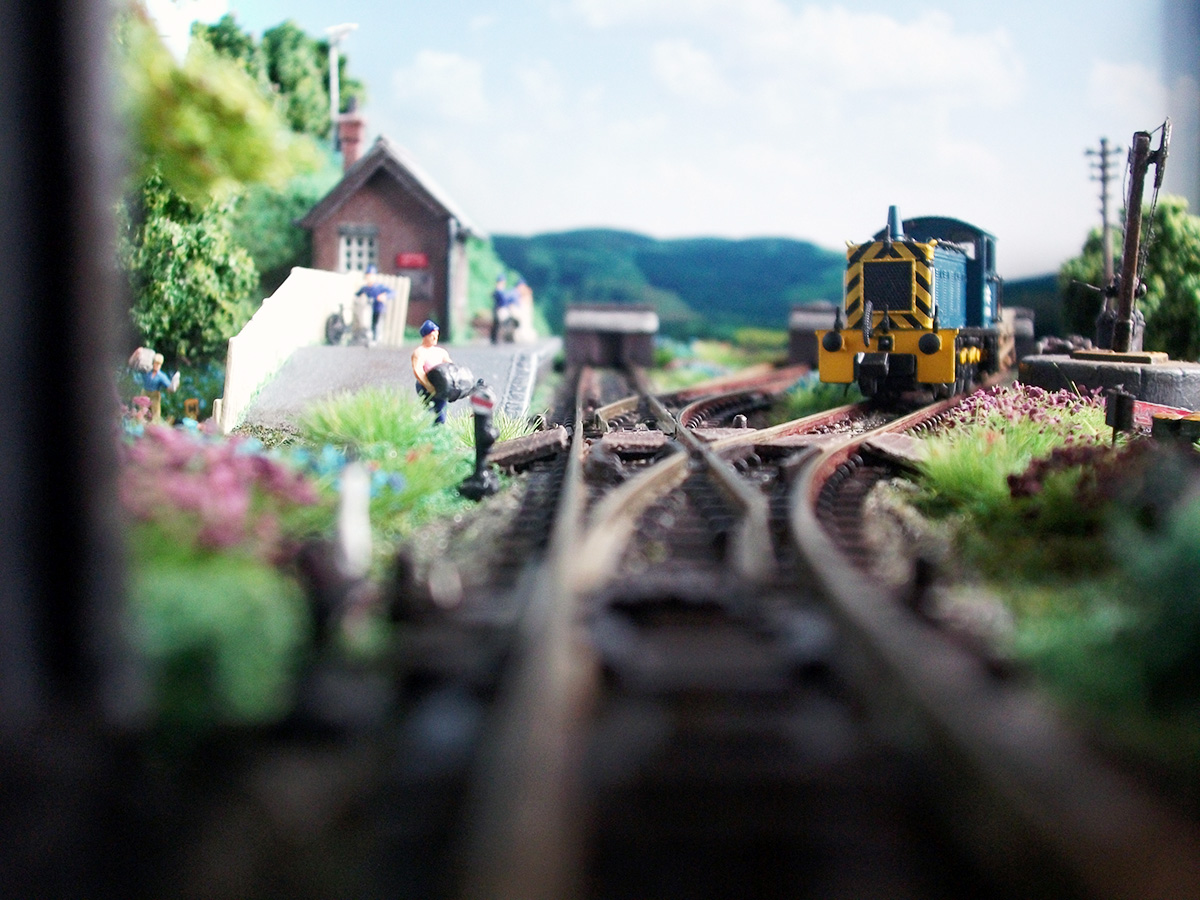
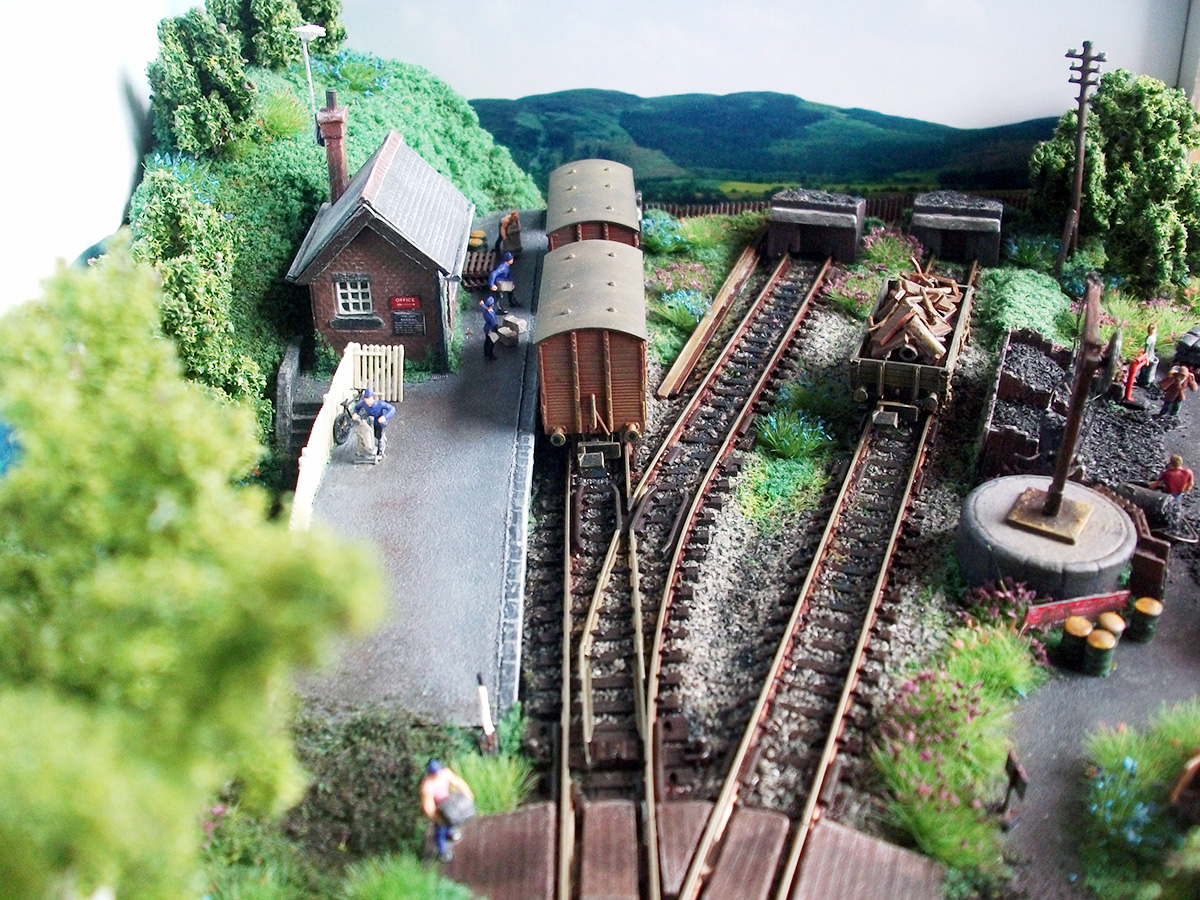
Short Street Sidings – A 00 Gauge interactive shunting puzzle – by Andrew Cockburn
Short Street Sidings is my latest “micro” OO creation, the name being derived from the fact that the layout is rather diminutive, i.e. it measures just 30” x 9”, or 42” x 9” (including the removable fiddle yard cartridge), is completely ficticious following my favourite theme of industrial shunting, and is designed to be interactive, thus allowing for public participation at exhibitions, should they wish to try their hands at “playing trains”/a spot of shunting. As such, I’ve tried to make the layout as “user-friendly” as possible with a fairly simple track plan, but one which still allows a fair degree of operational interest, i.e. with goods & coal/factory sidings branching off a main “reception” siding, the idea being that wagons are moved between the different locations, with slight variations each time. The layout’s baseboard is a 2” x 1” framework with a plywood top, while for storage/transportation I’ve gone for a slightly unconventional method, i.e. an aluminium flight case, purchased from my local branch of Maplin Electronics. Trackwork is Peco code 75, points are operated using the wire-in-tube method, while train control is achieved via a Modelex hand-held controller. The various structures are a mixture of scratch/kit-built and are all (except the loading dock) removable in order to assist with storage/transportation. In fact, the factory and industrial unit are both low-relief, and fixed to backscenes formed from artists card/Gaugemaster backscene papers, while both also incorporate an LED, which allows them to be “illuminated”. Ballast, grass, shrubs etc are from the Woodlands Scenics range of materials, while small details such as figures etc. are from contemporary manufacturers such as Bachmann and Knightwing. As far as actual operation goes, I tend to fluctuate between the BR green/blue periods, using 08/04 shunters and wagons from the Bachmann/Hornby ranges. Short Street Sidings took roughly six months to complete, and in spite of it’s rather small/simple nature, will hopefully serve as an example of what can be achieved in a limited space.
That’s it for now. I hope you enjoyed. There is more to come, but please keep sending in your updates!!
The post Page 124: September 2017 appeared first on Carendt.com.


Page 123: March 2017 28 Feb 2017 10:00 PM (8 years ago)
Scrapbook update number 123 is here for you to enjoy. Have fun reading and be inspired!
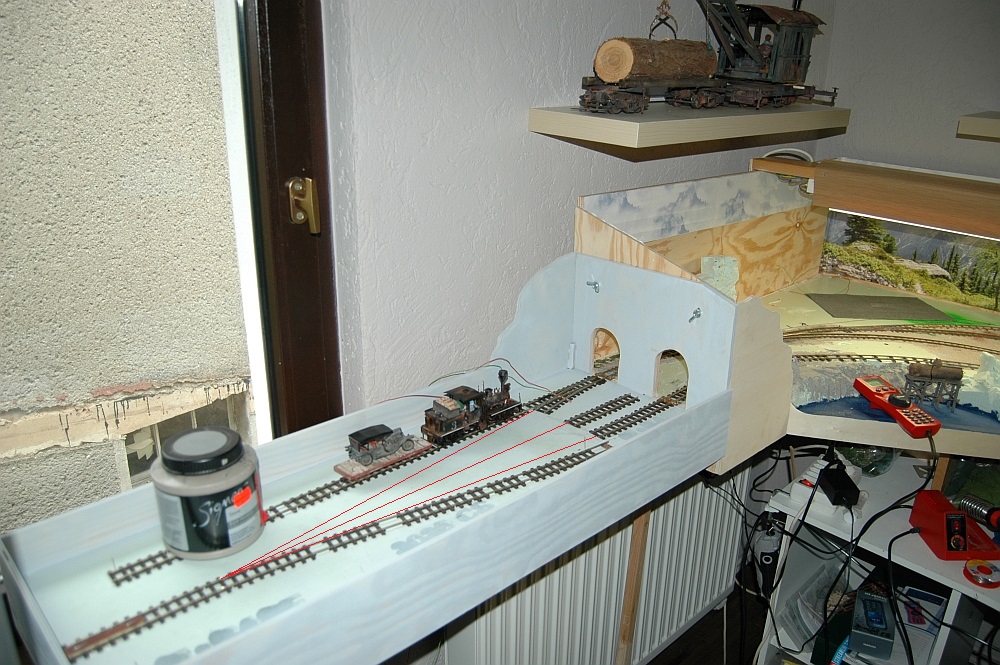
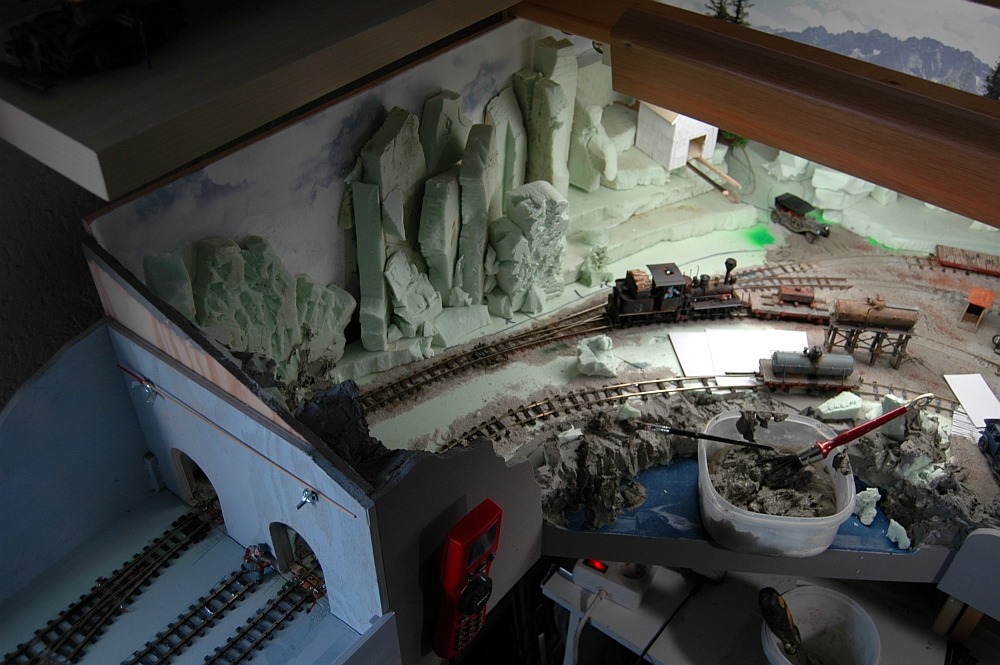
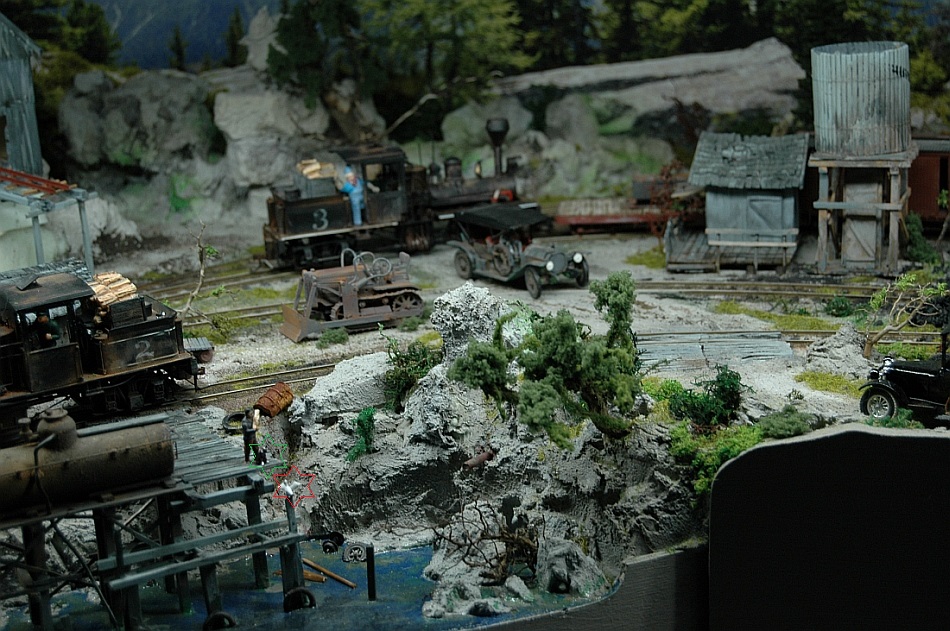
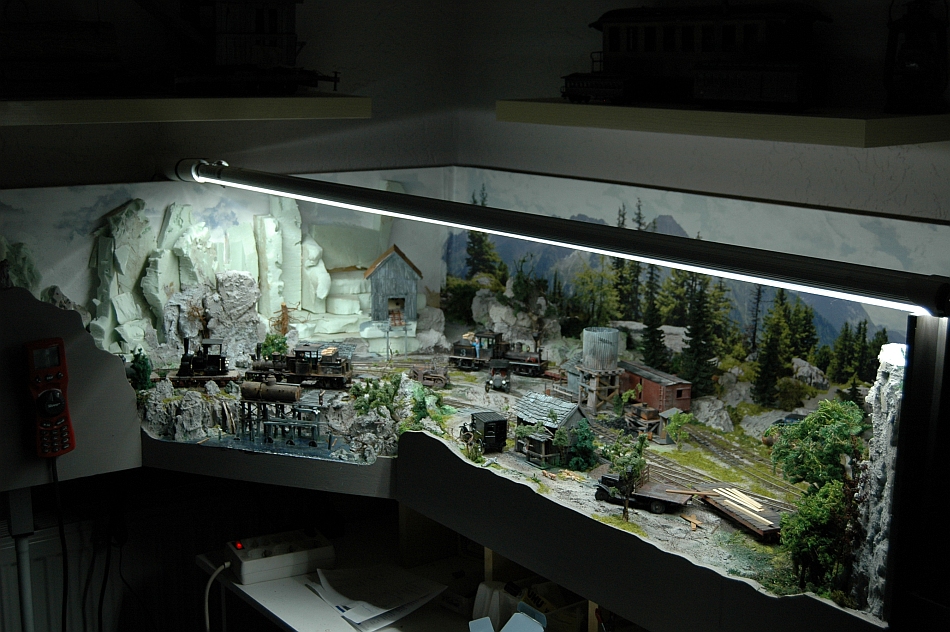
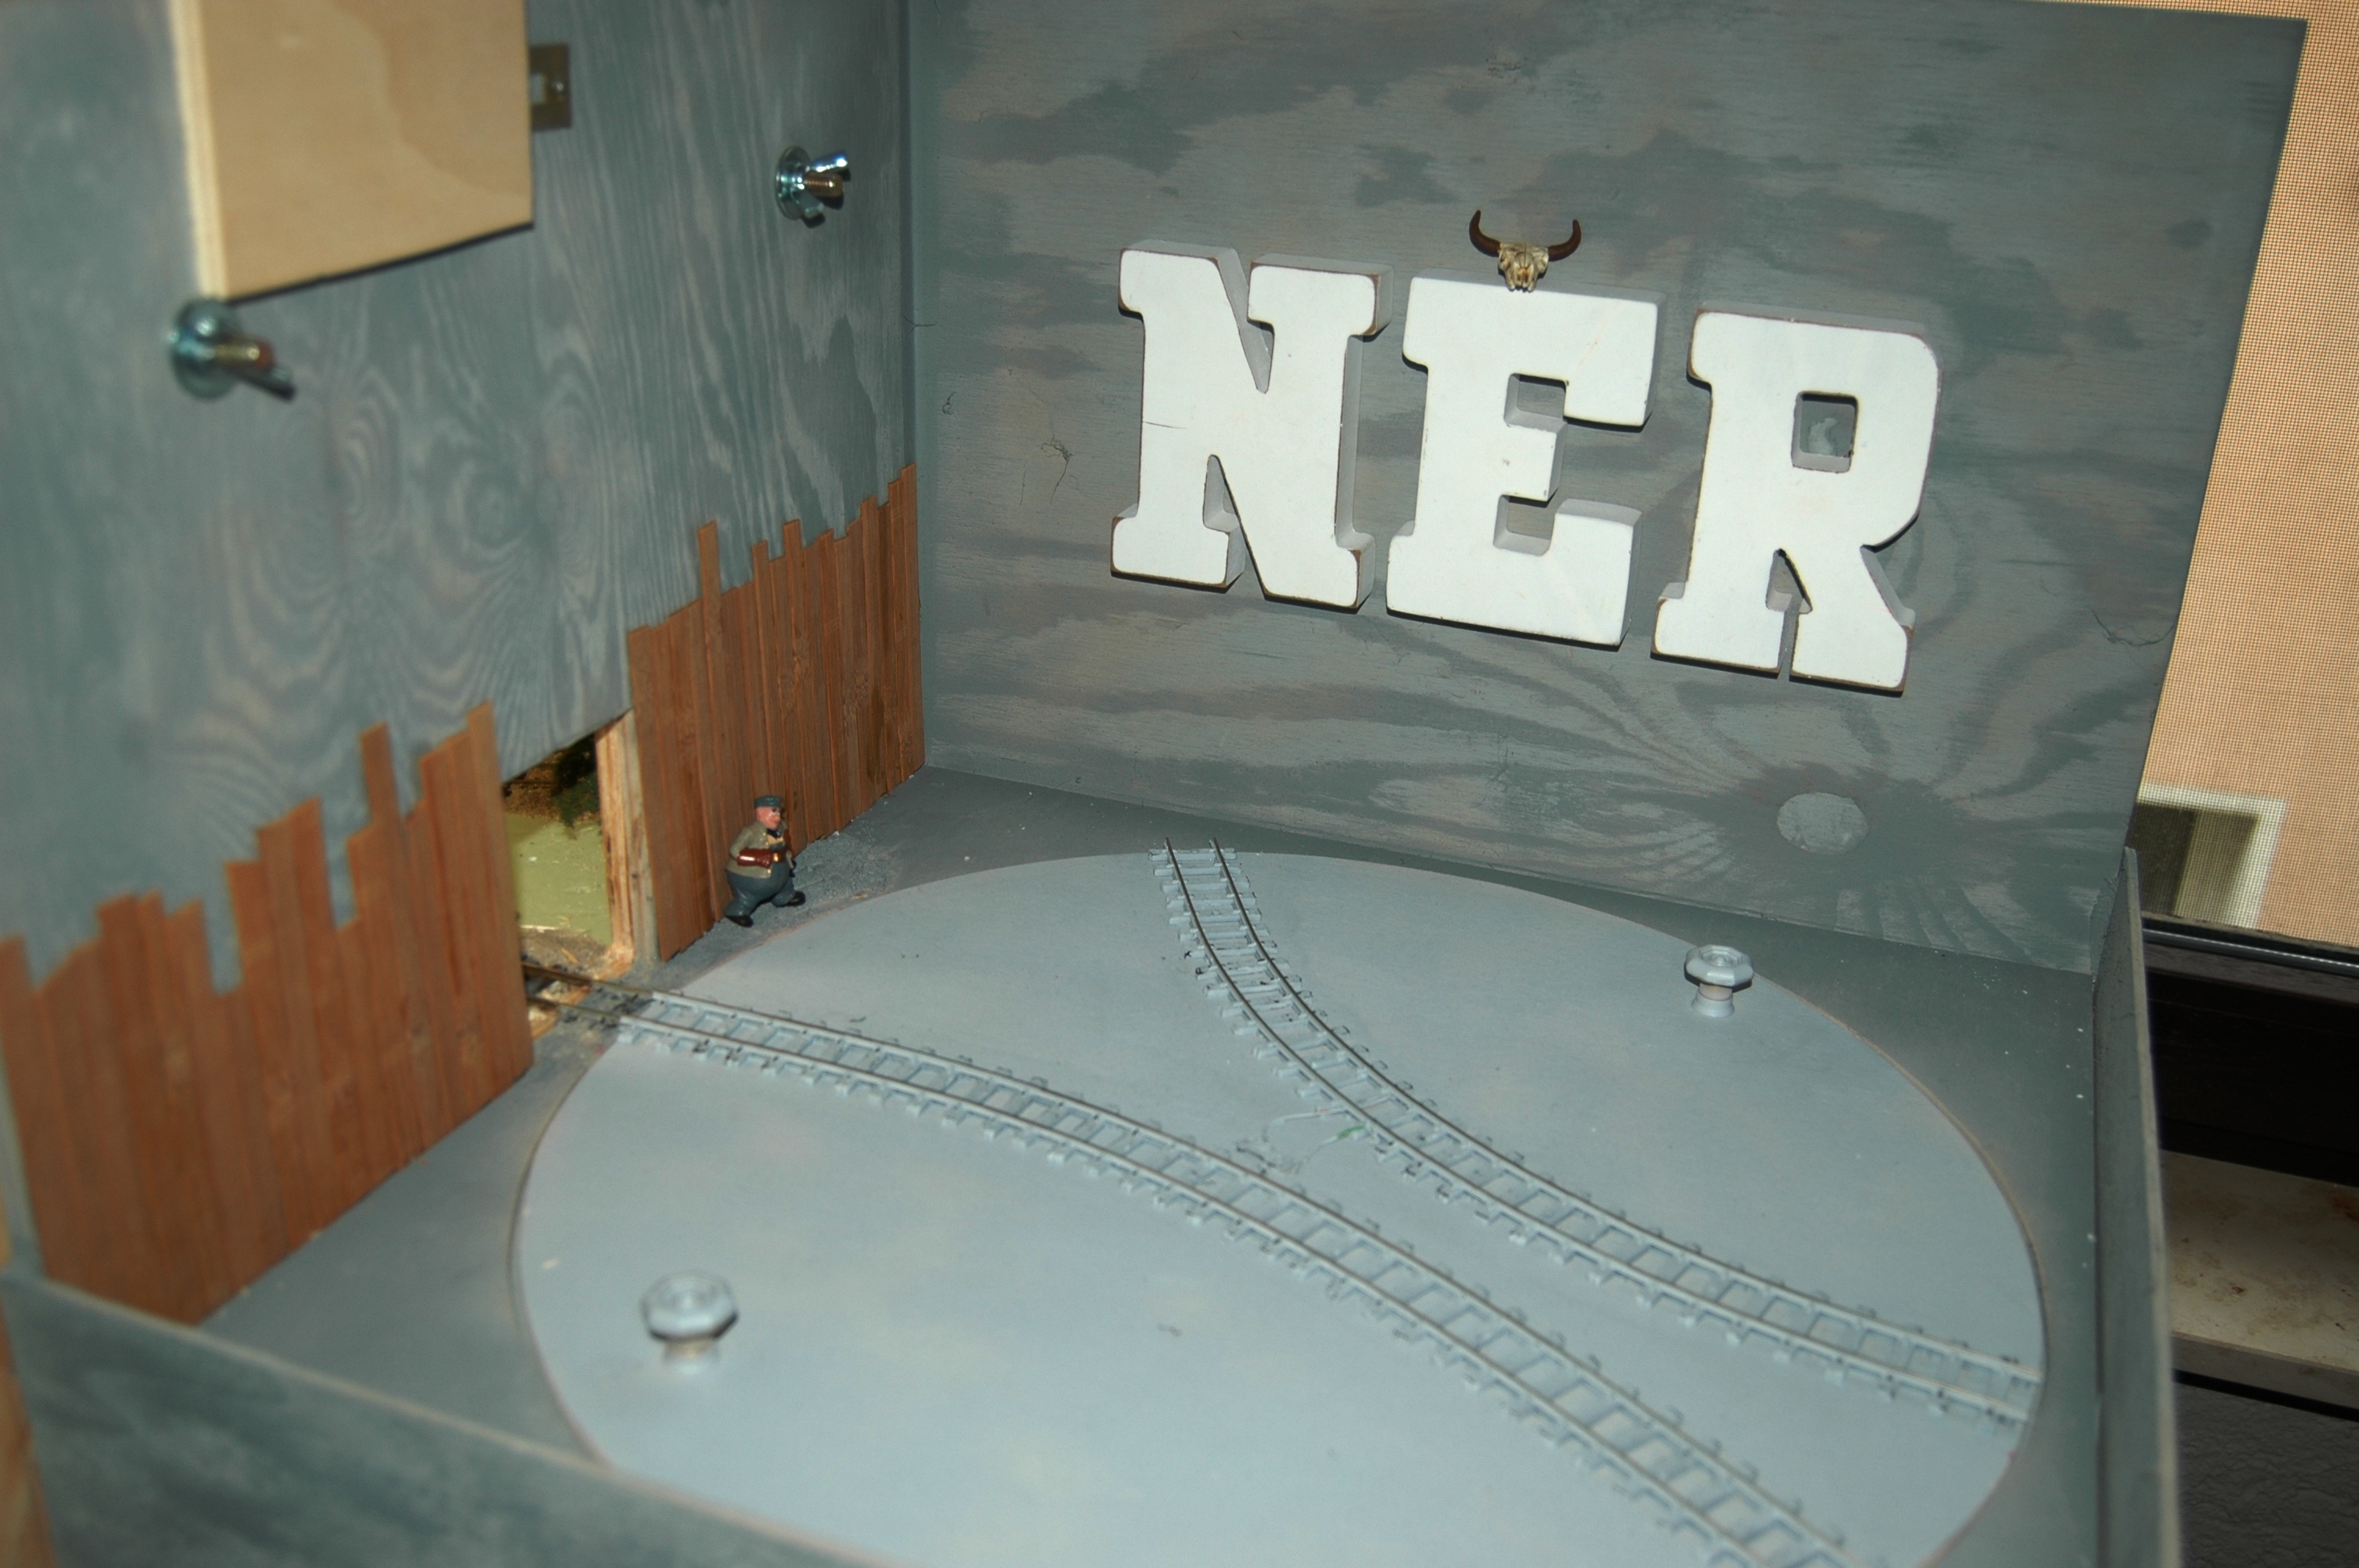
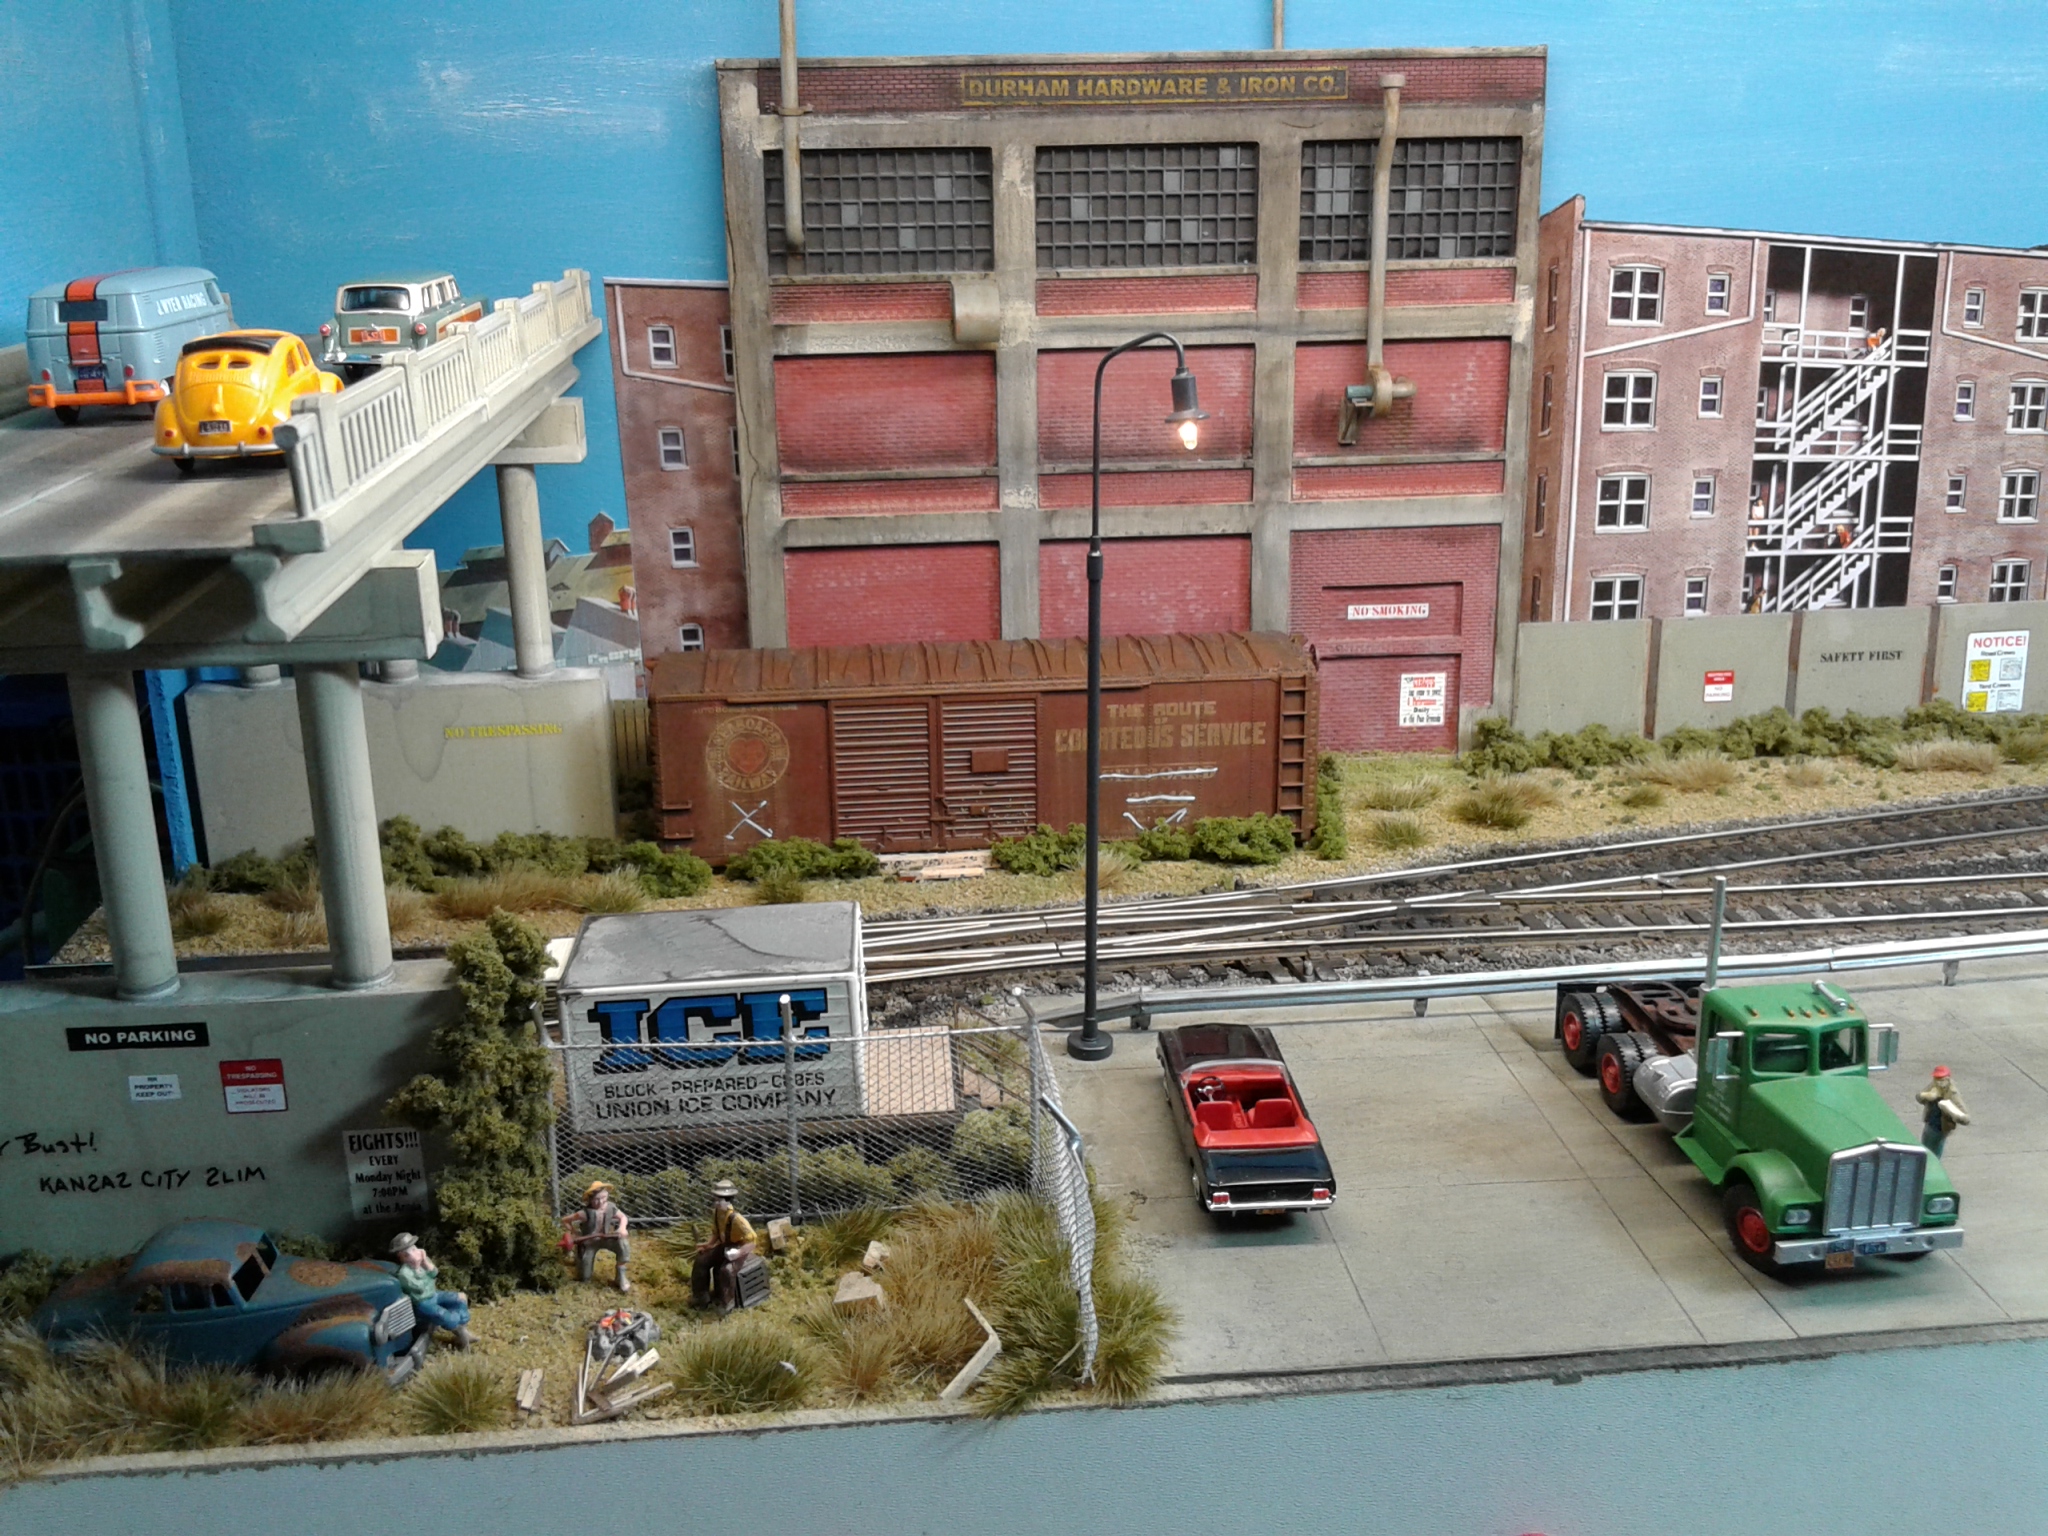
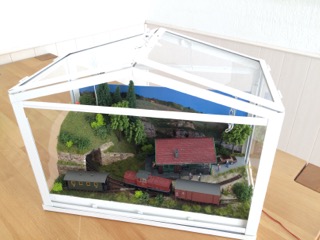
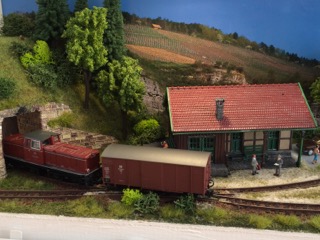
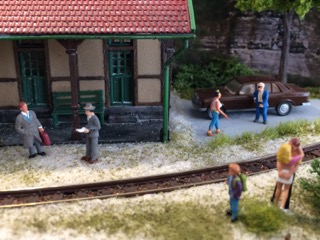
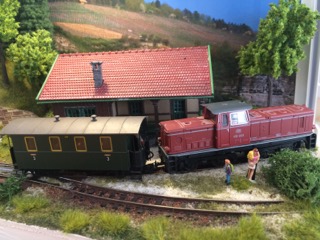
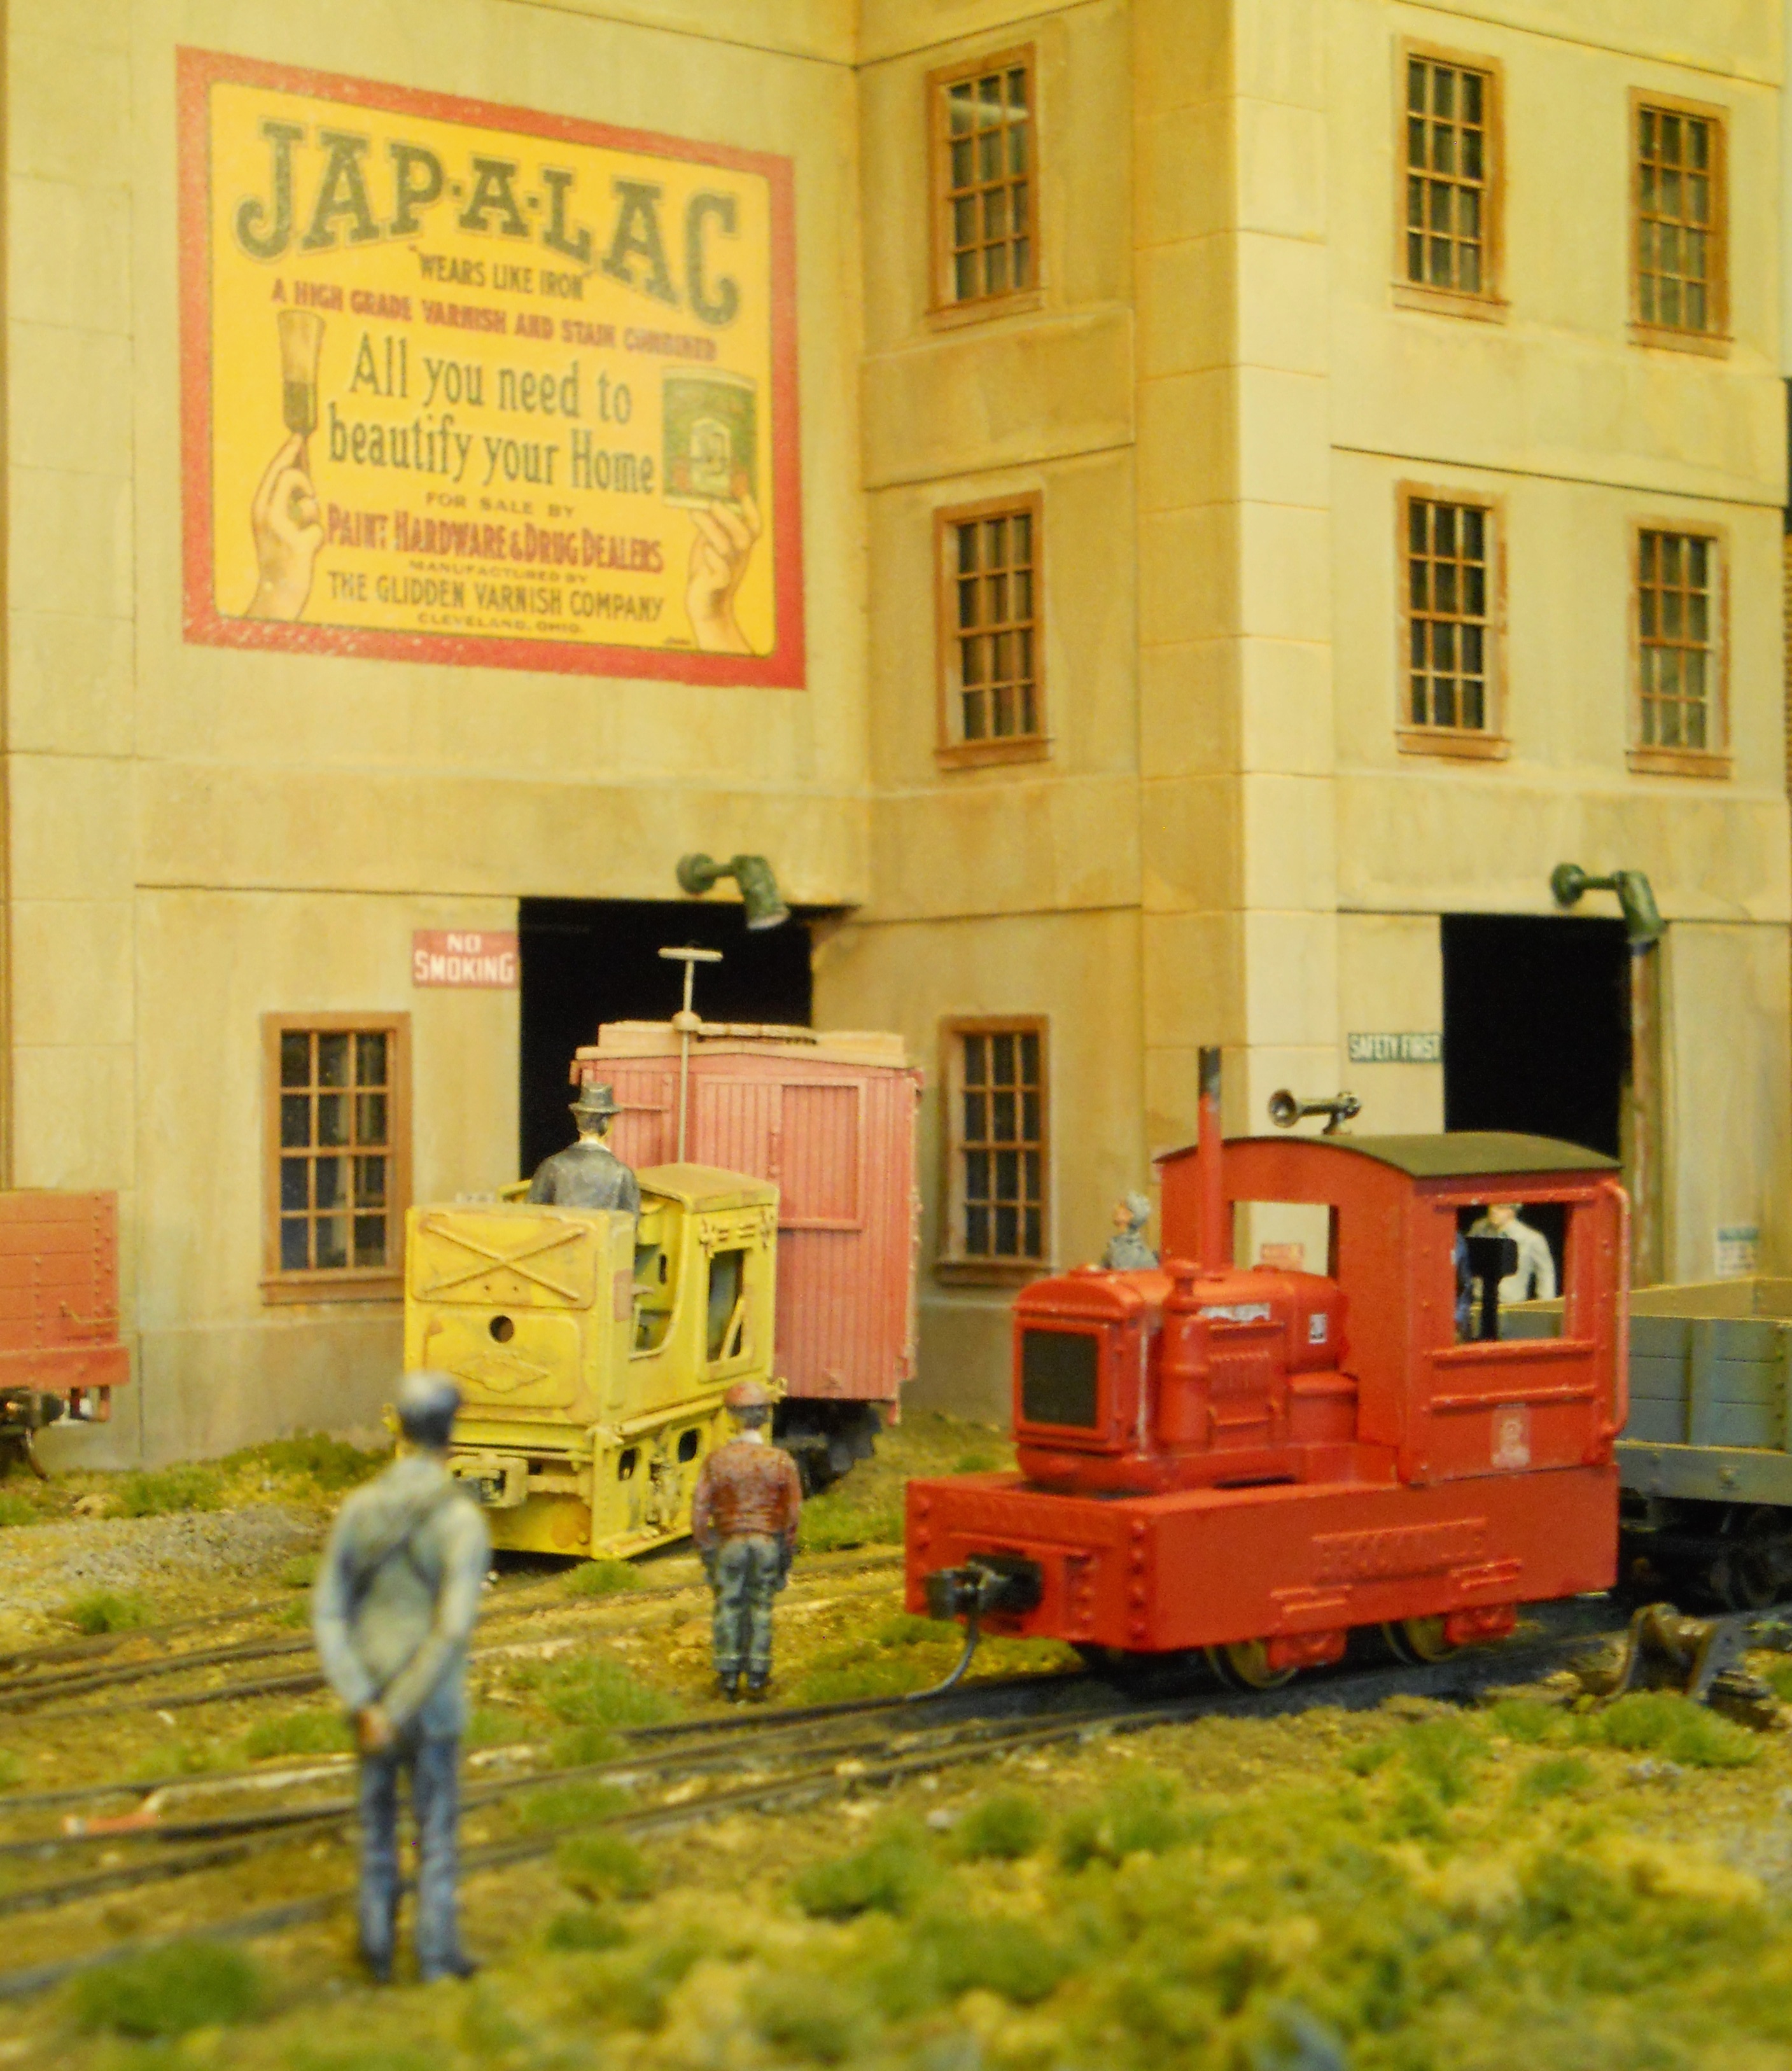
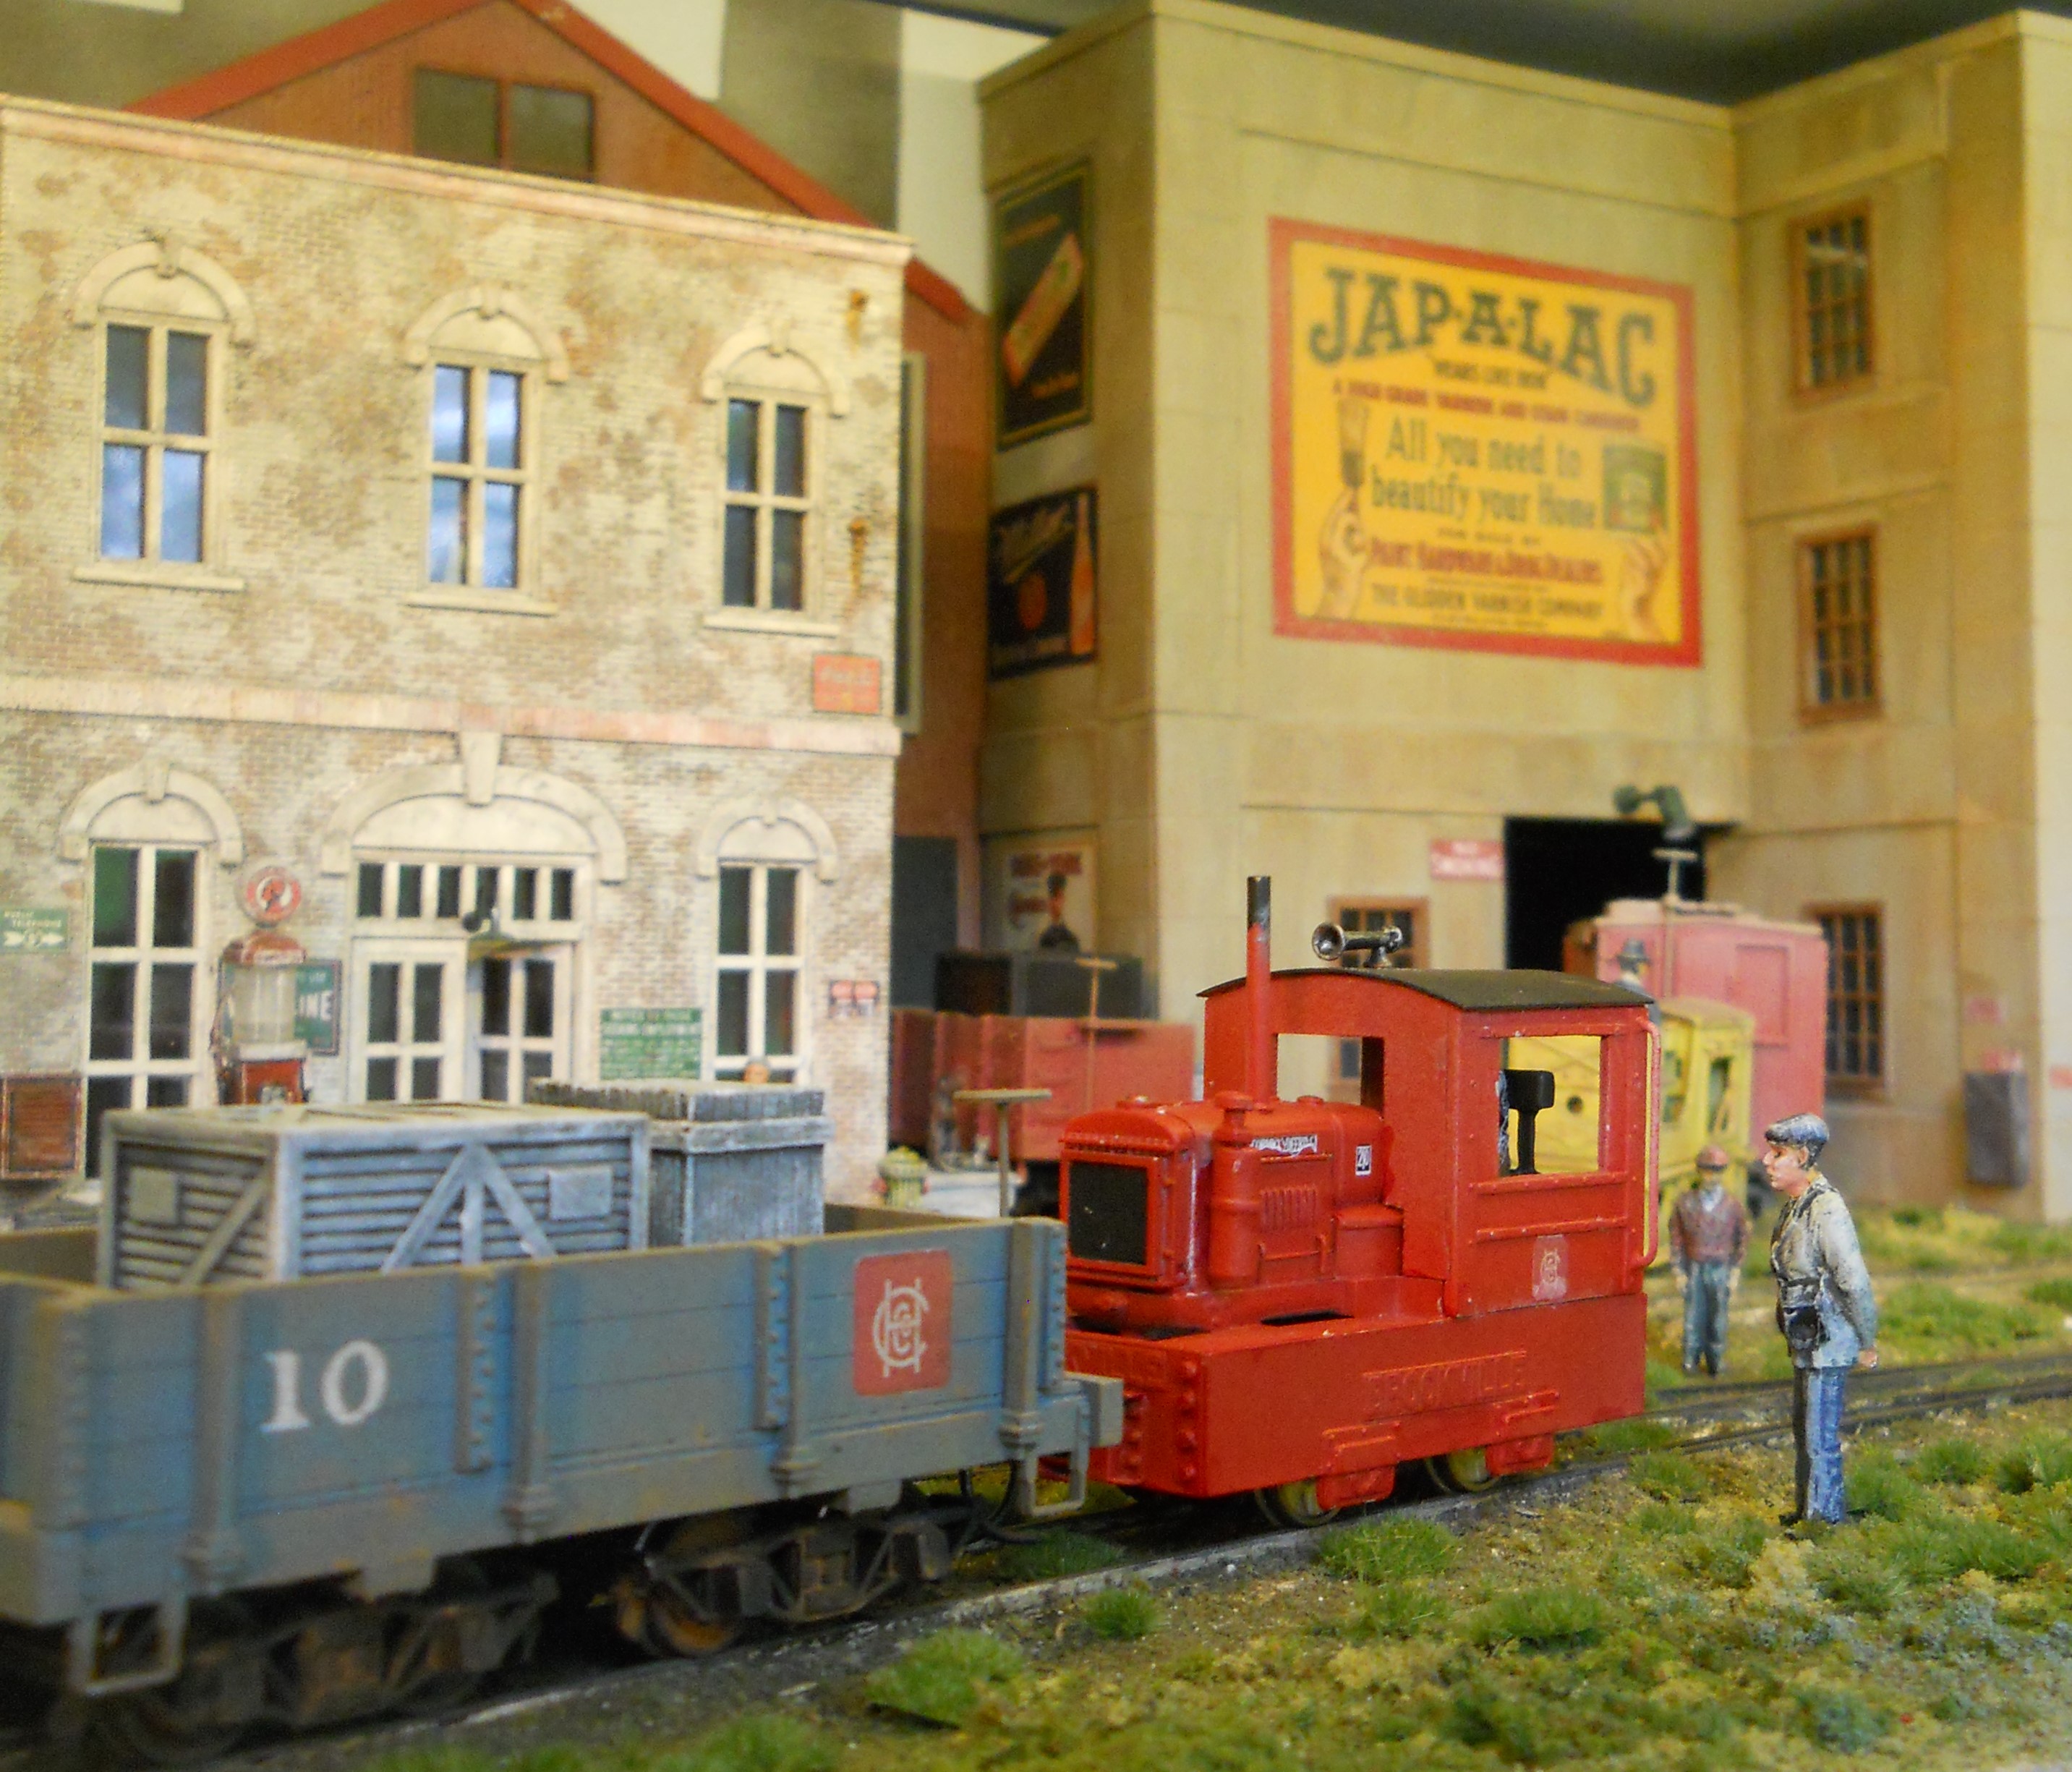
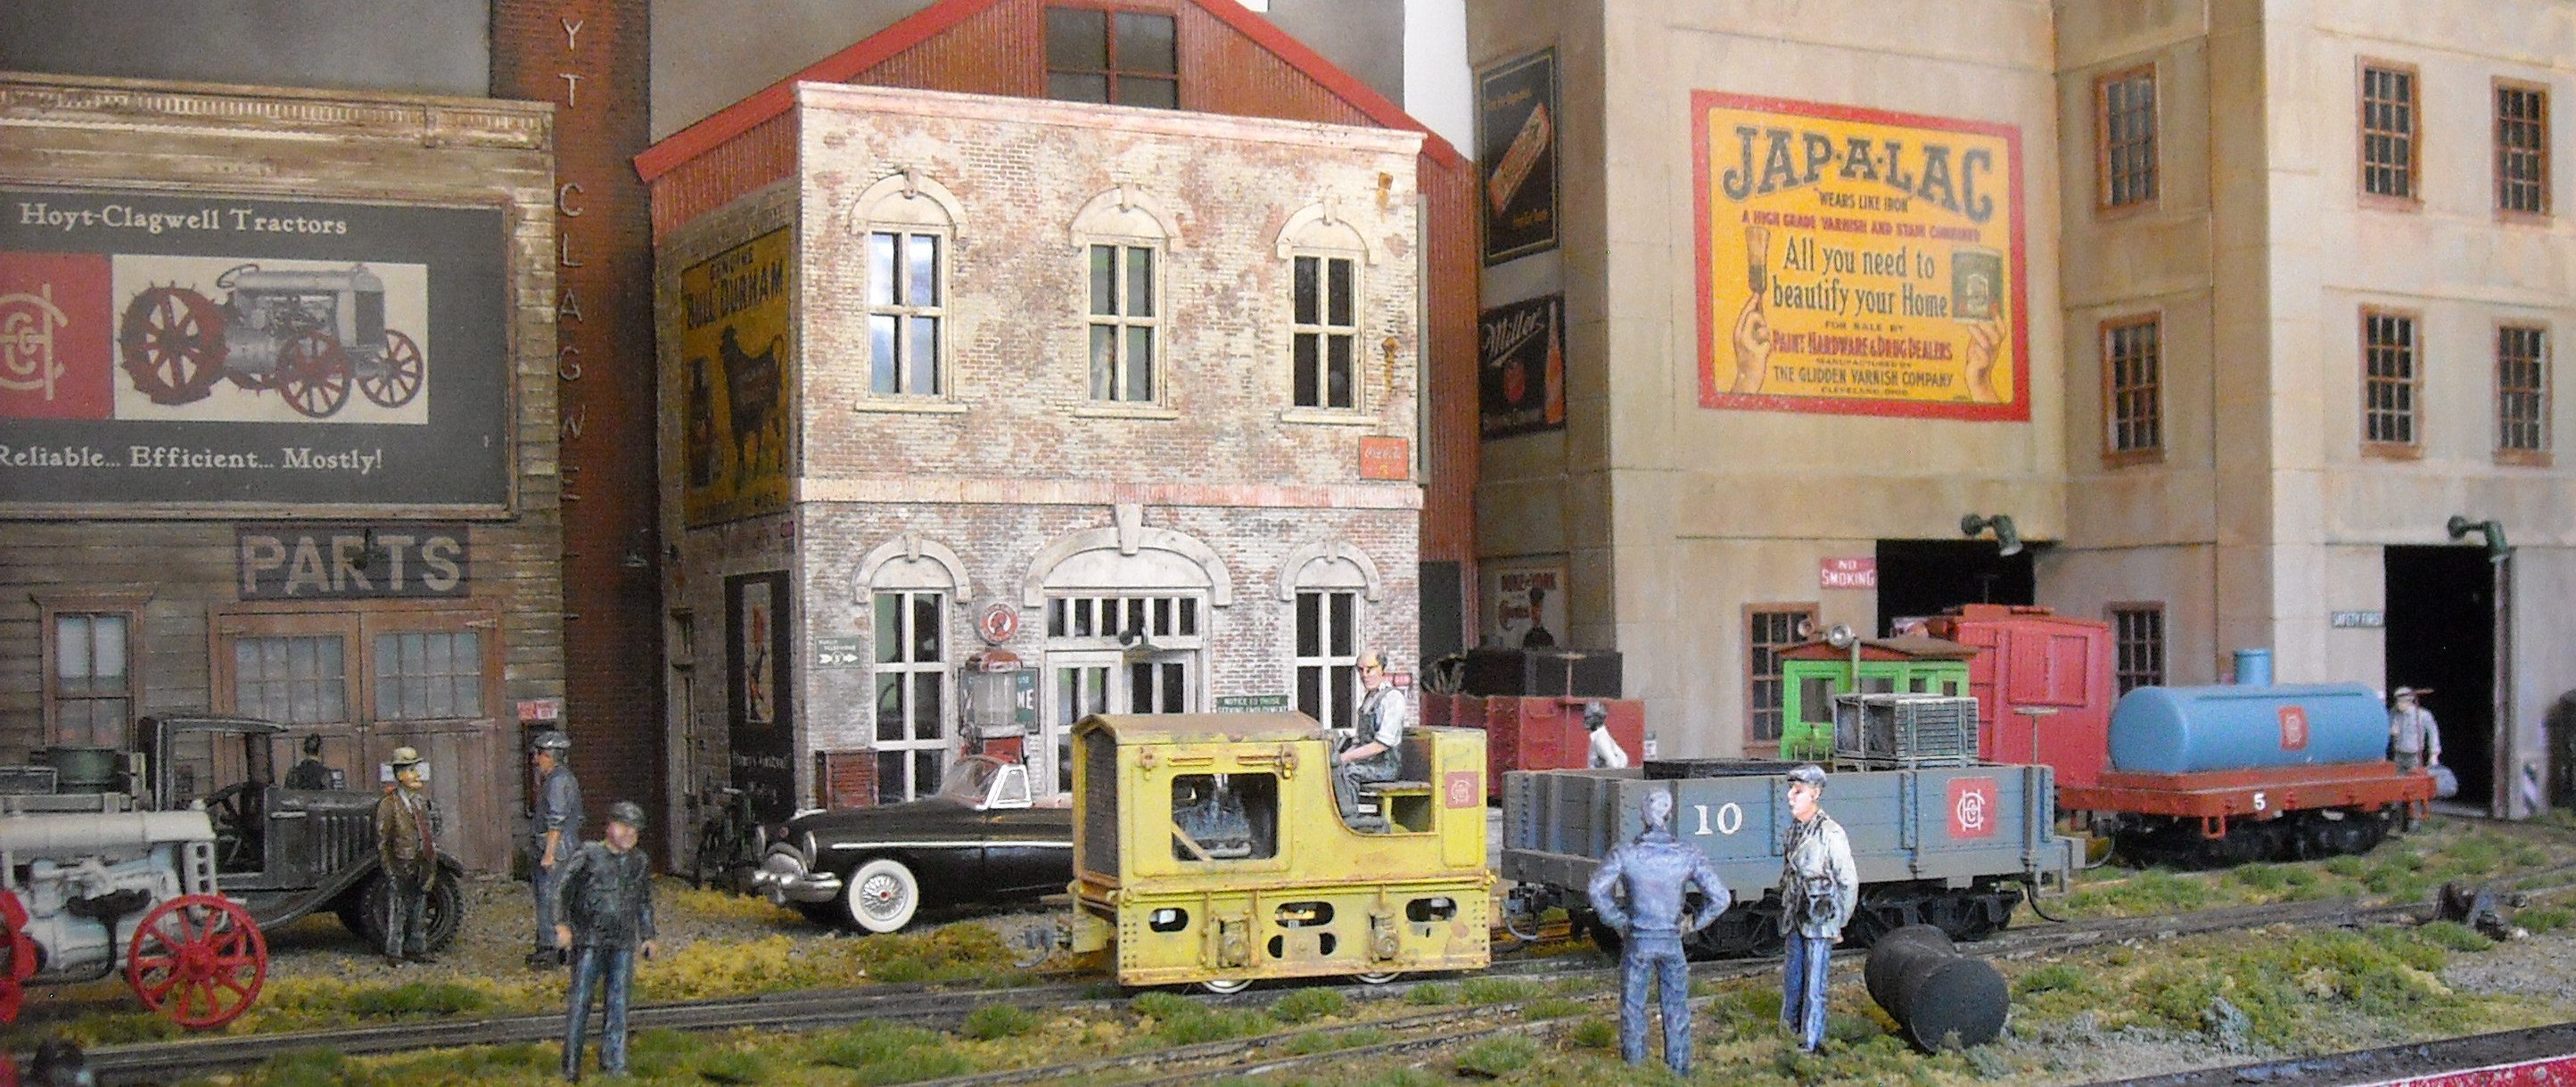
North East Railroad Company USA 1942 – by Mario Oertel from Germany
Theme: 19 abandoned Miles
Scale: 1:48, 0n30 narrow Gauge
Type: Station modular design + fiddle yard +turntable module
Details conforming the epoch/era
1,65 meters x 1,65 meters
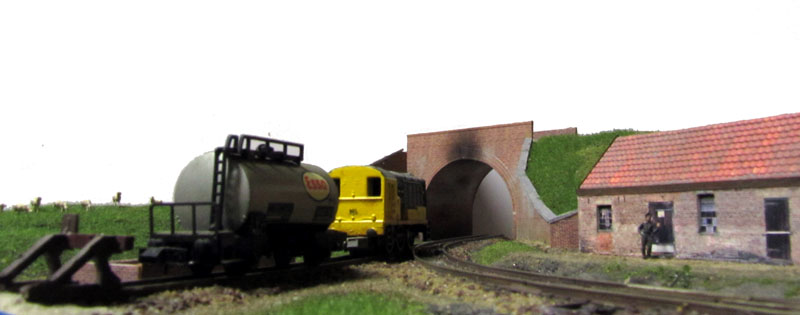
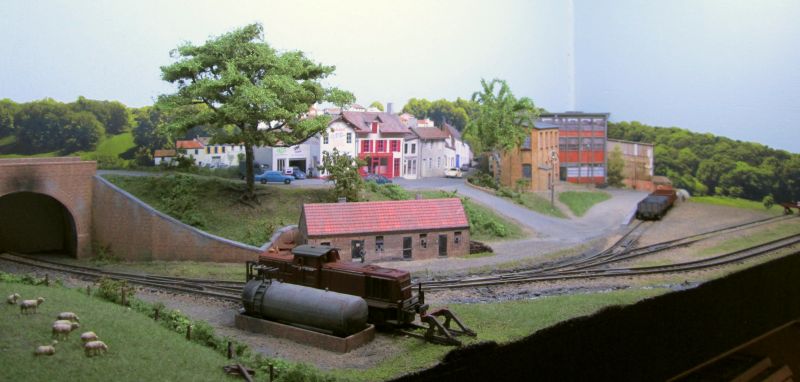
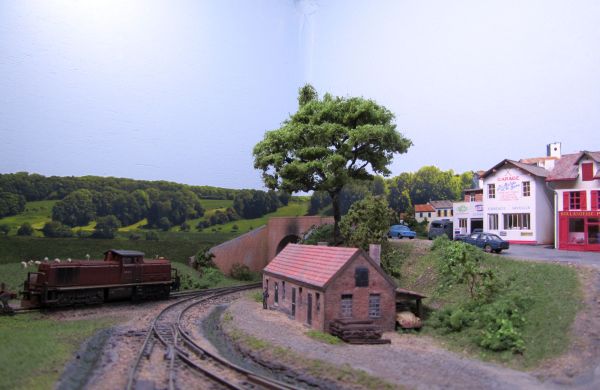
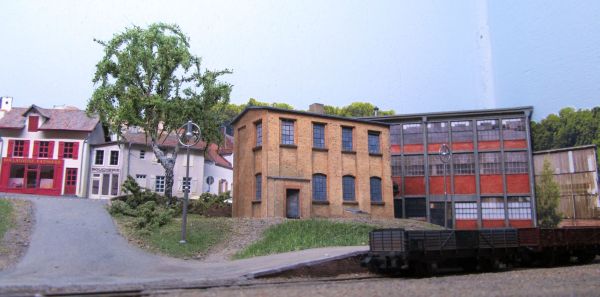
An almost disused railway line. Traders, farmers and craftsmen have taken over the vehicles and are running an illegal railway operation.
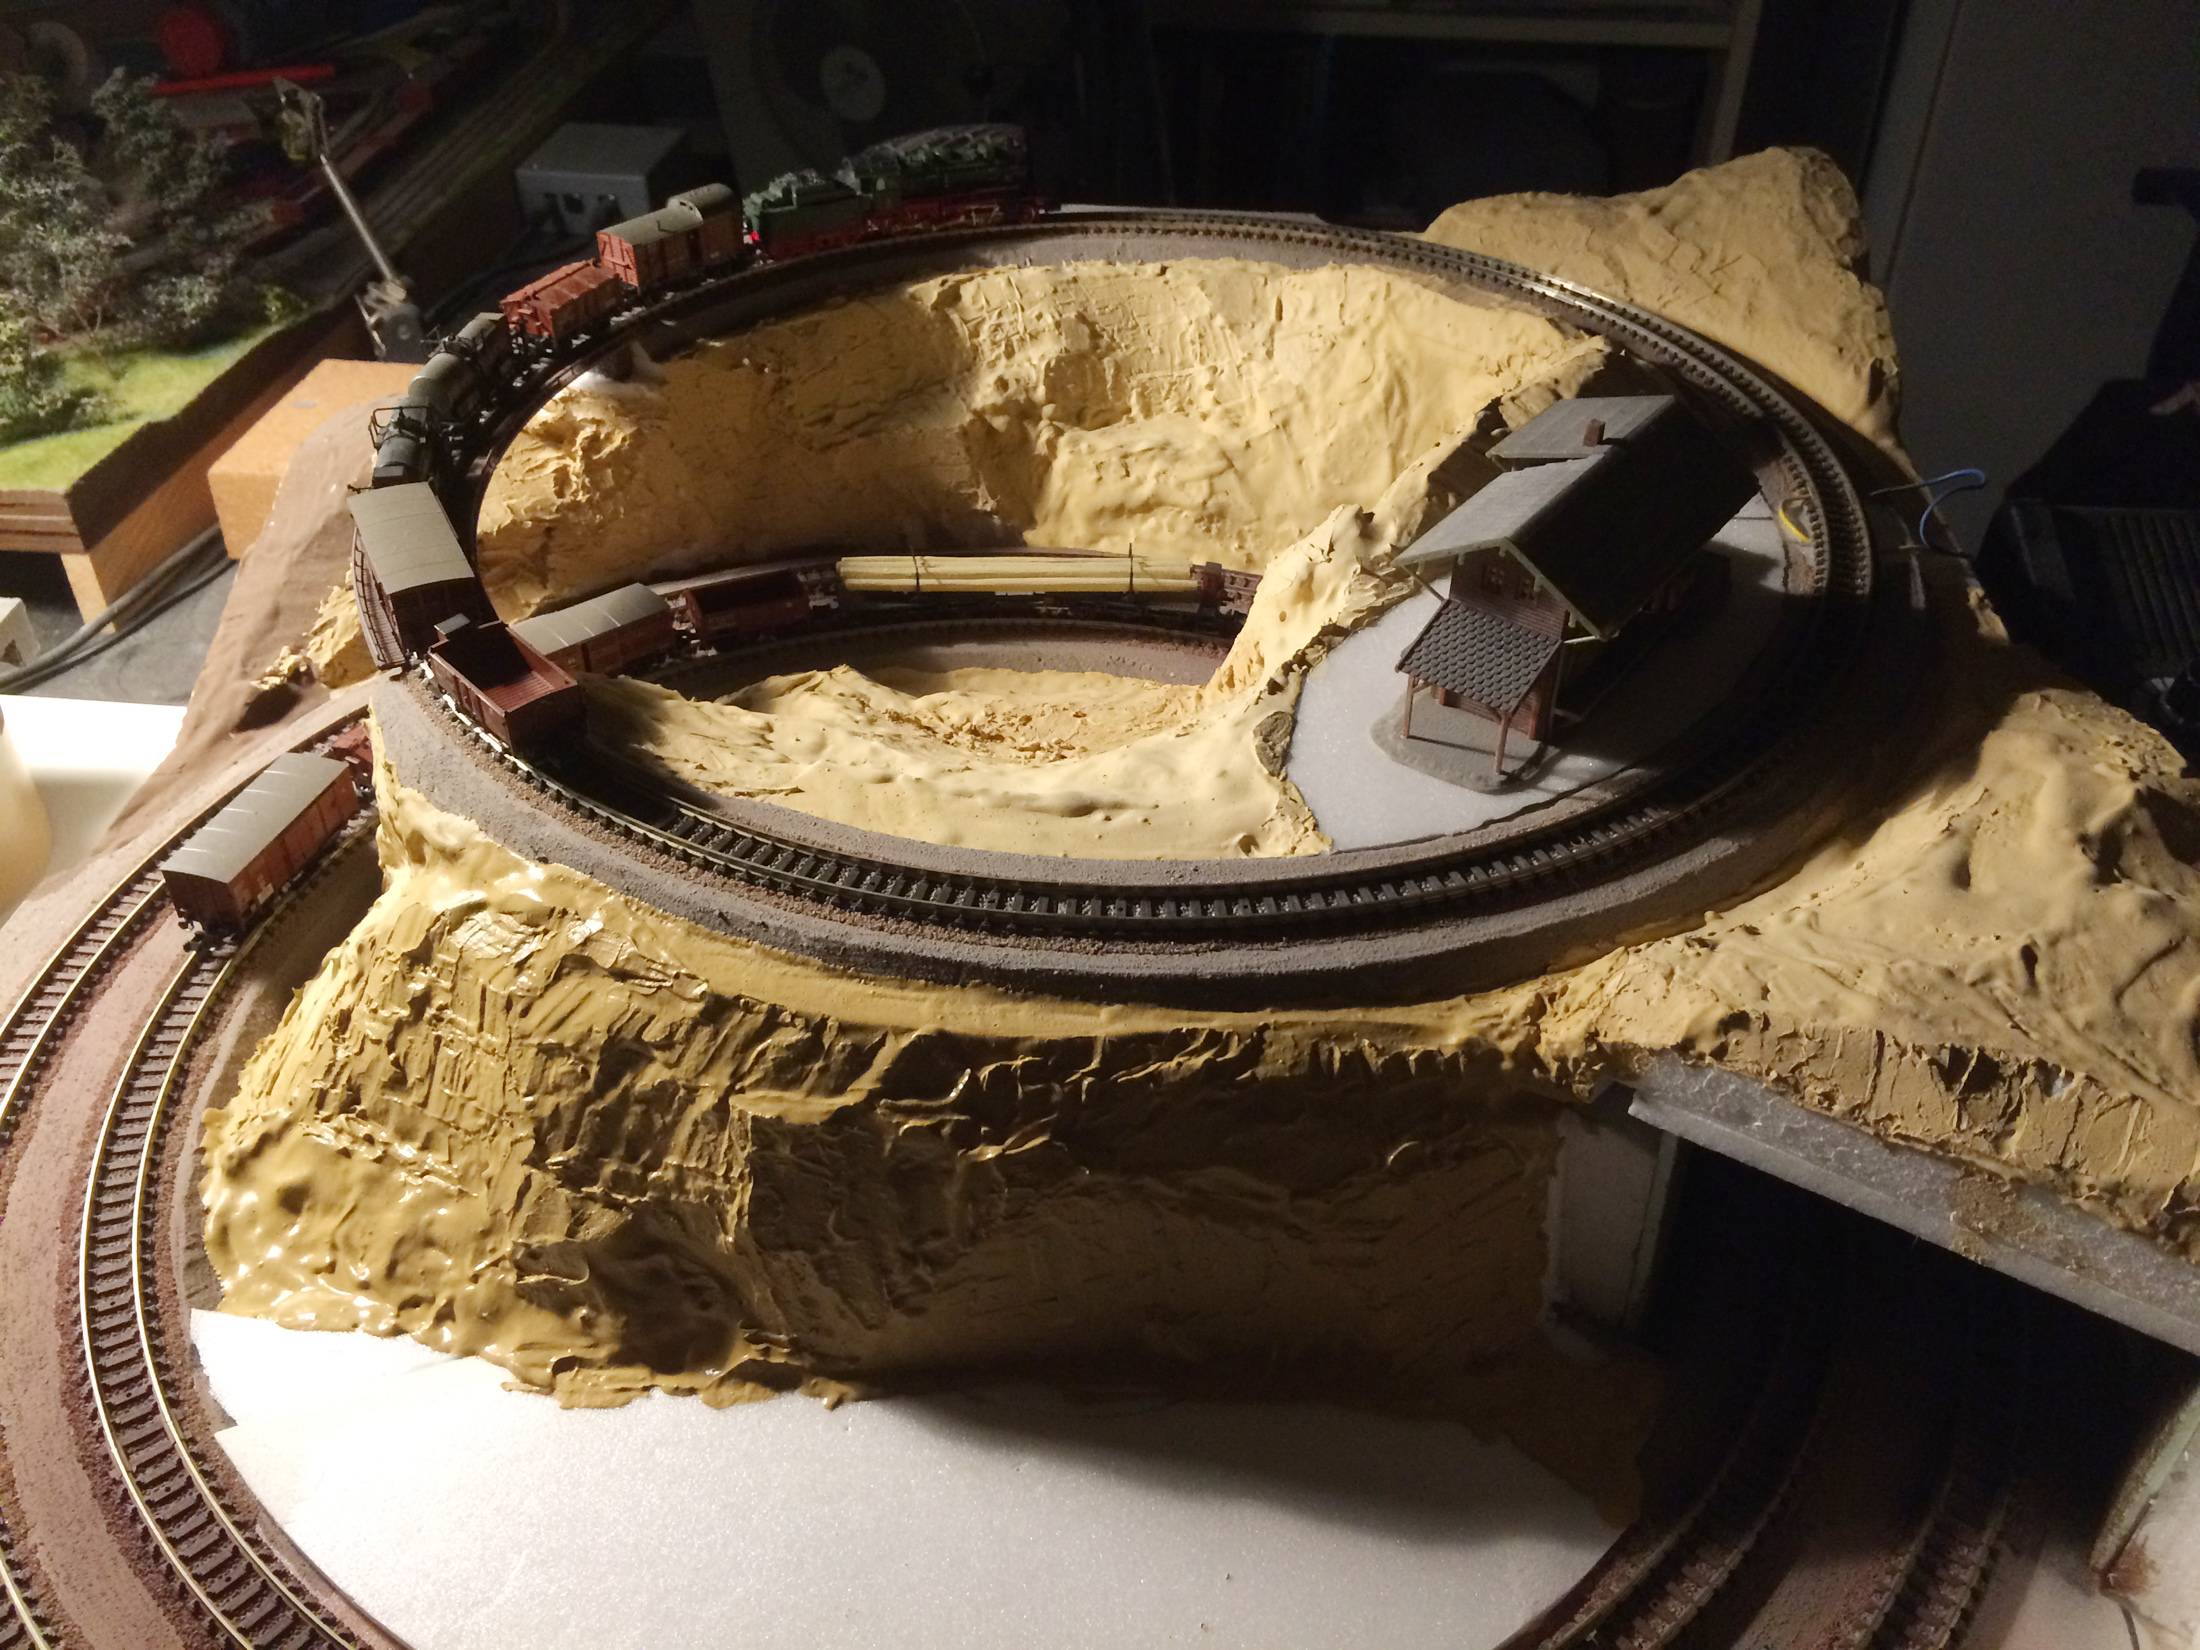
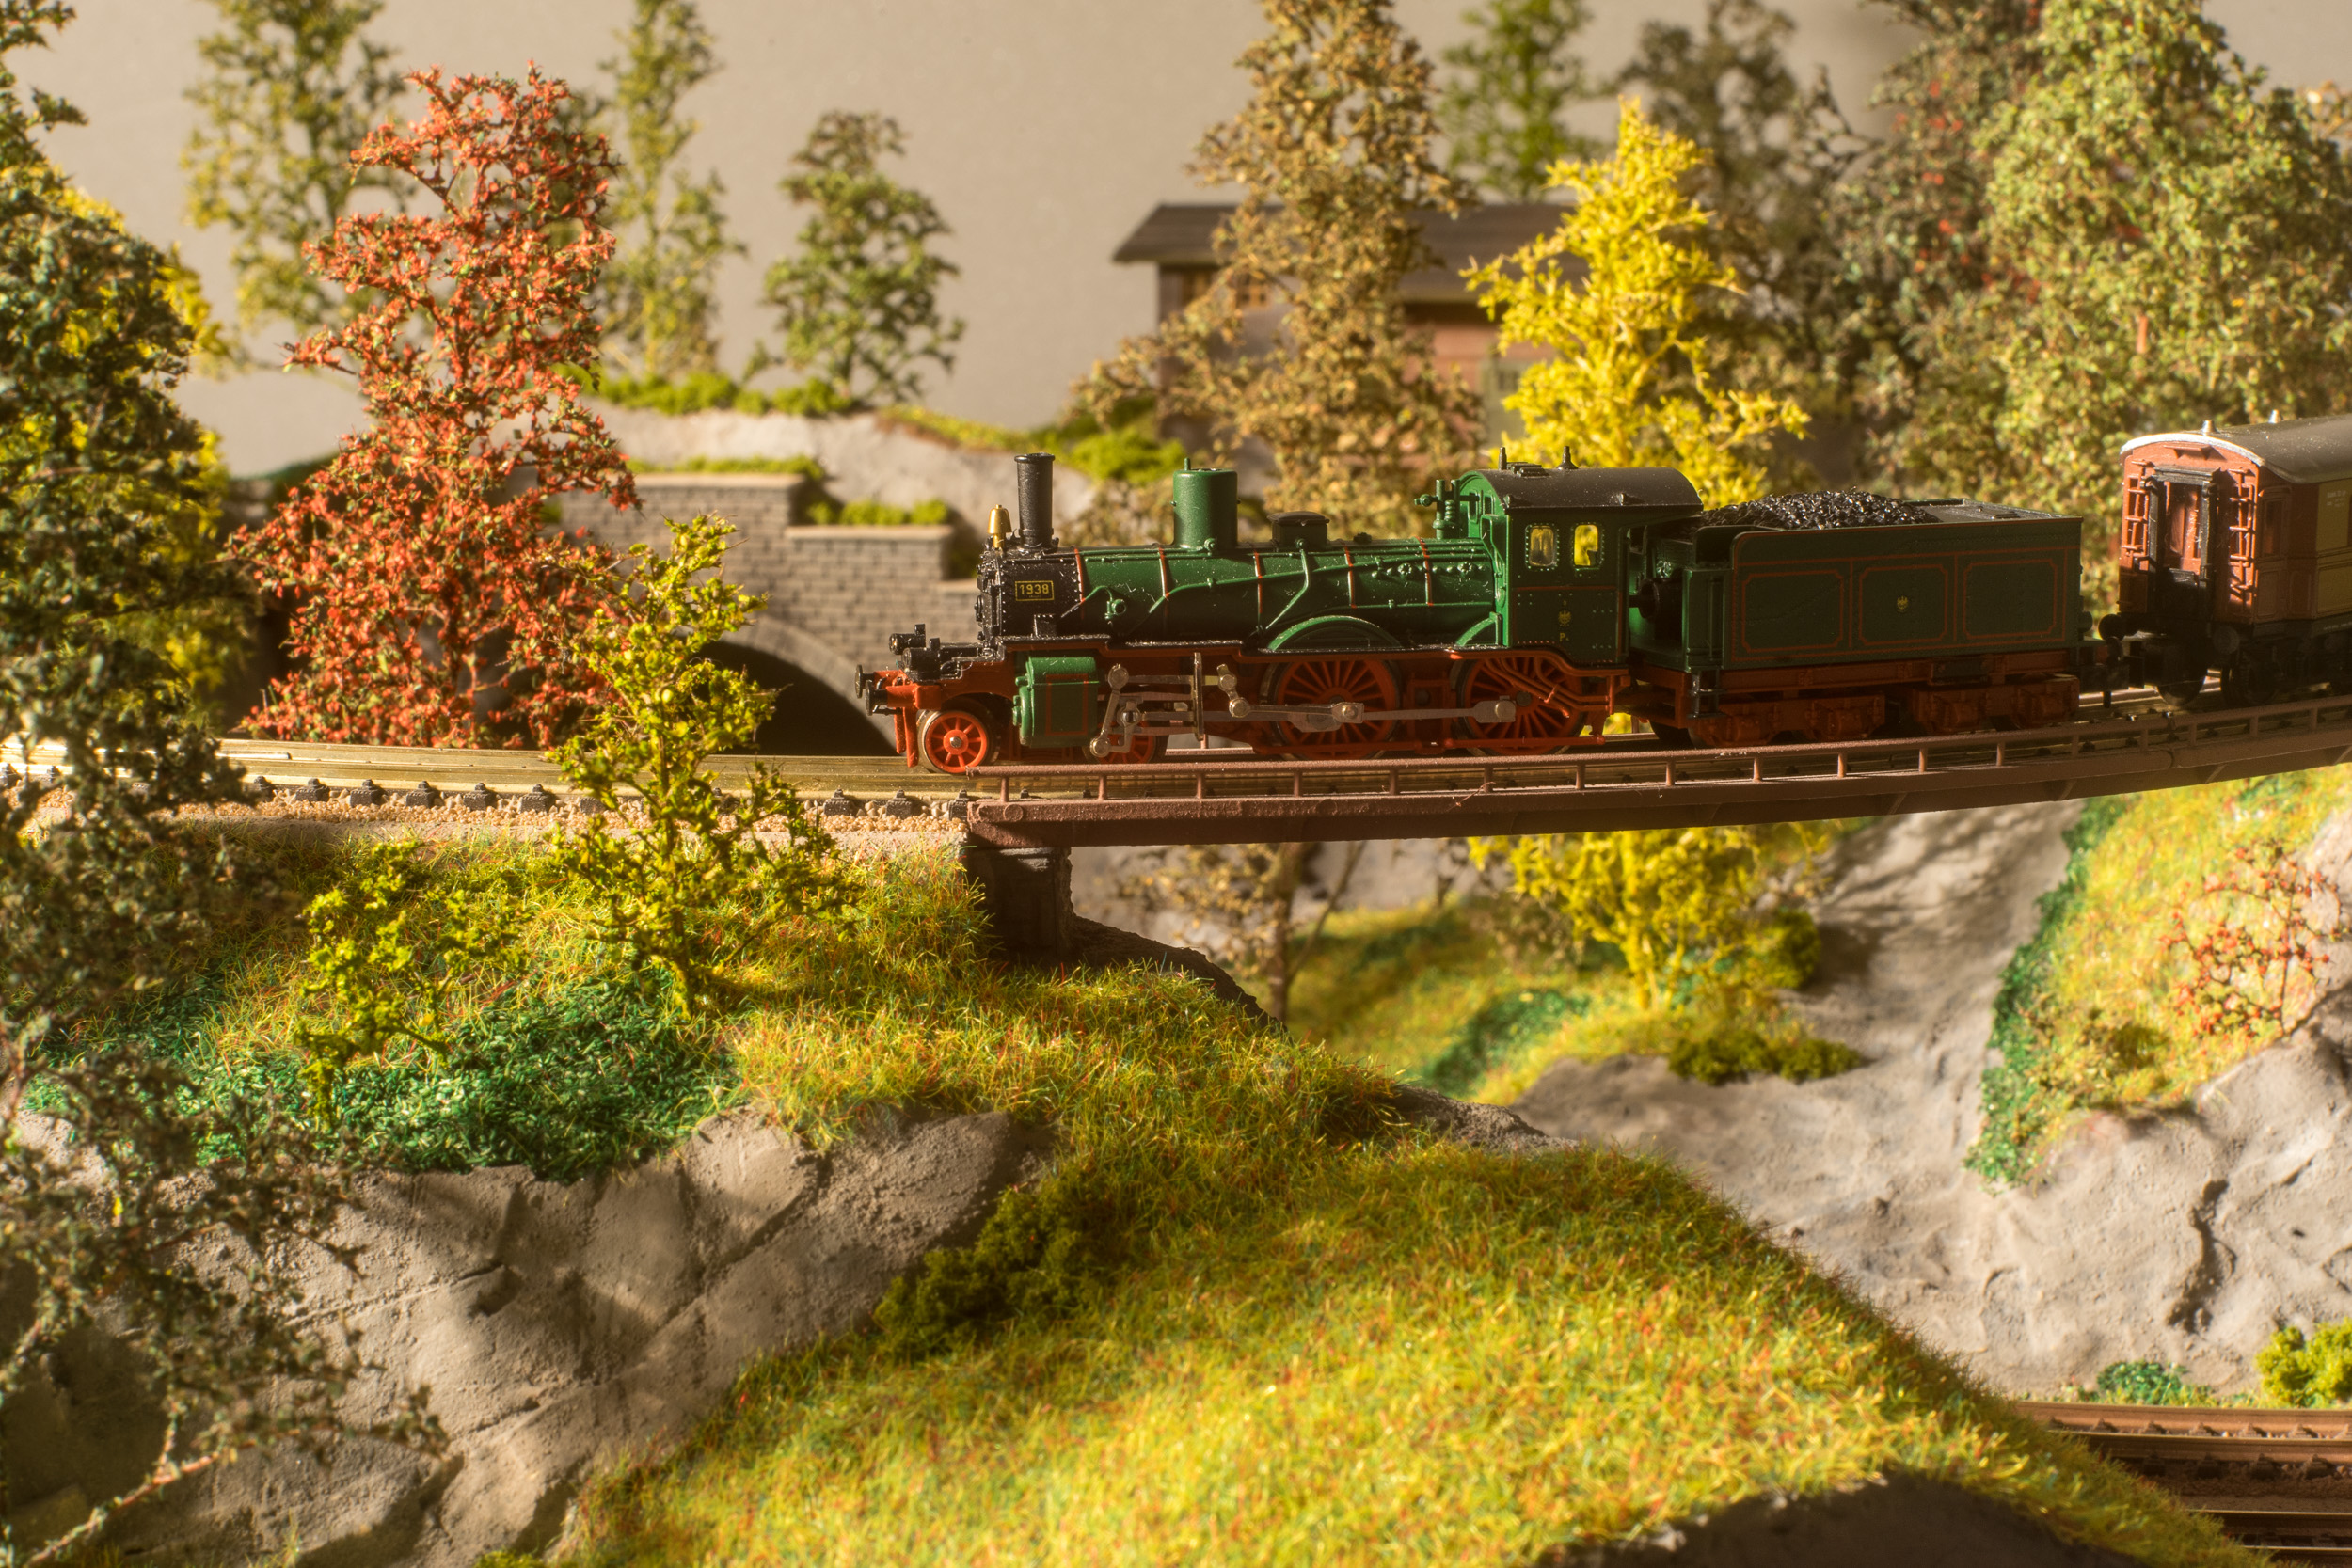
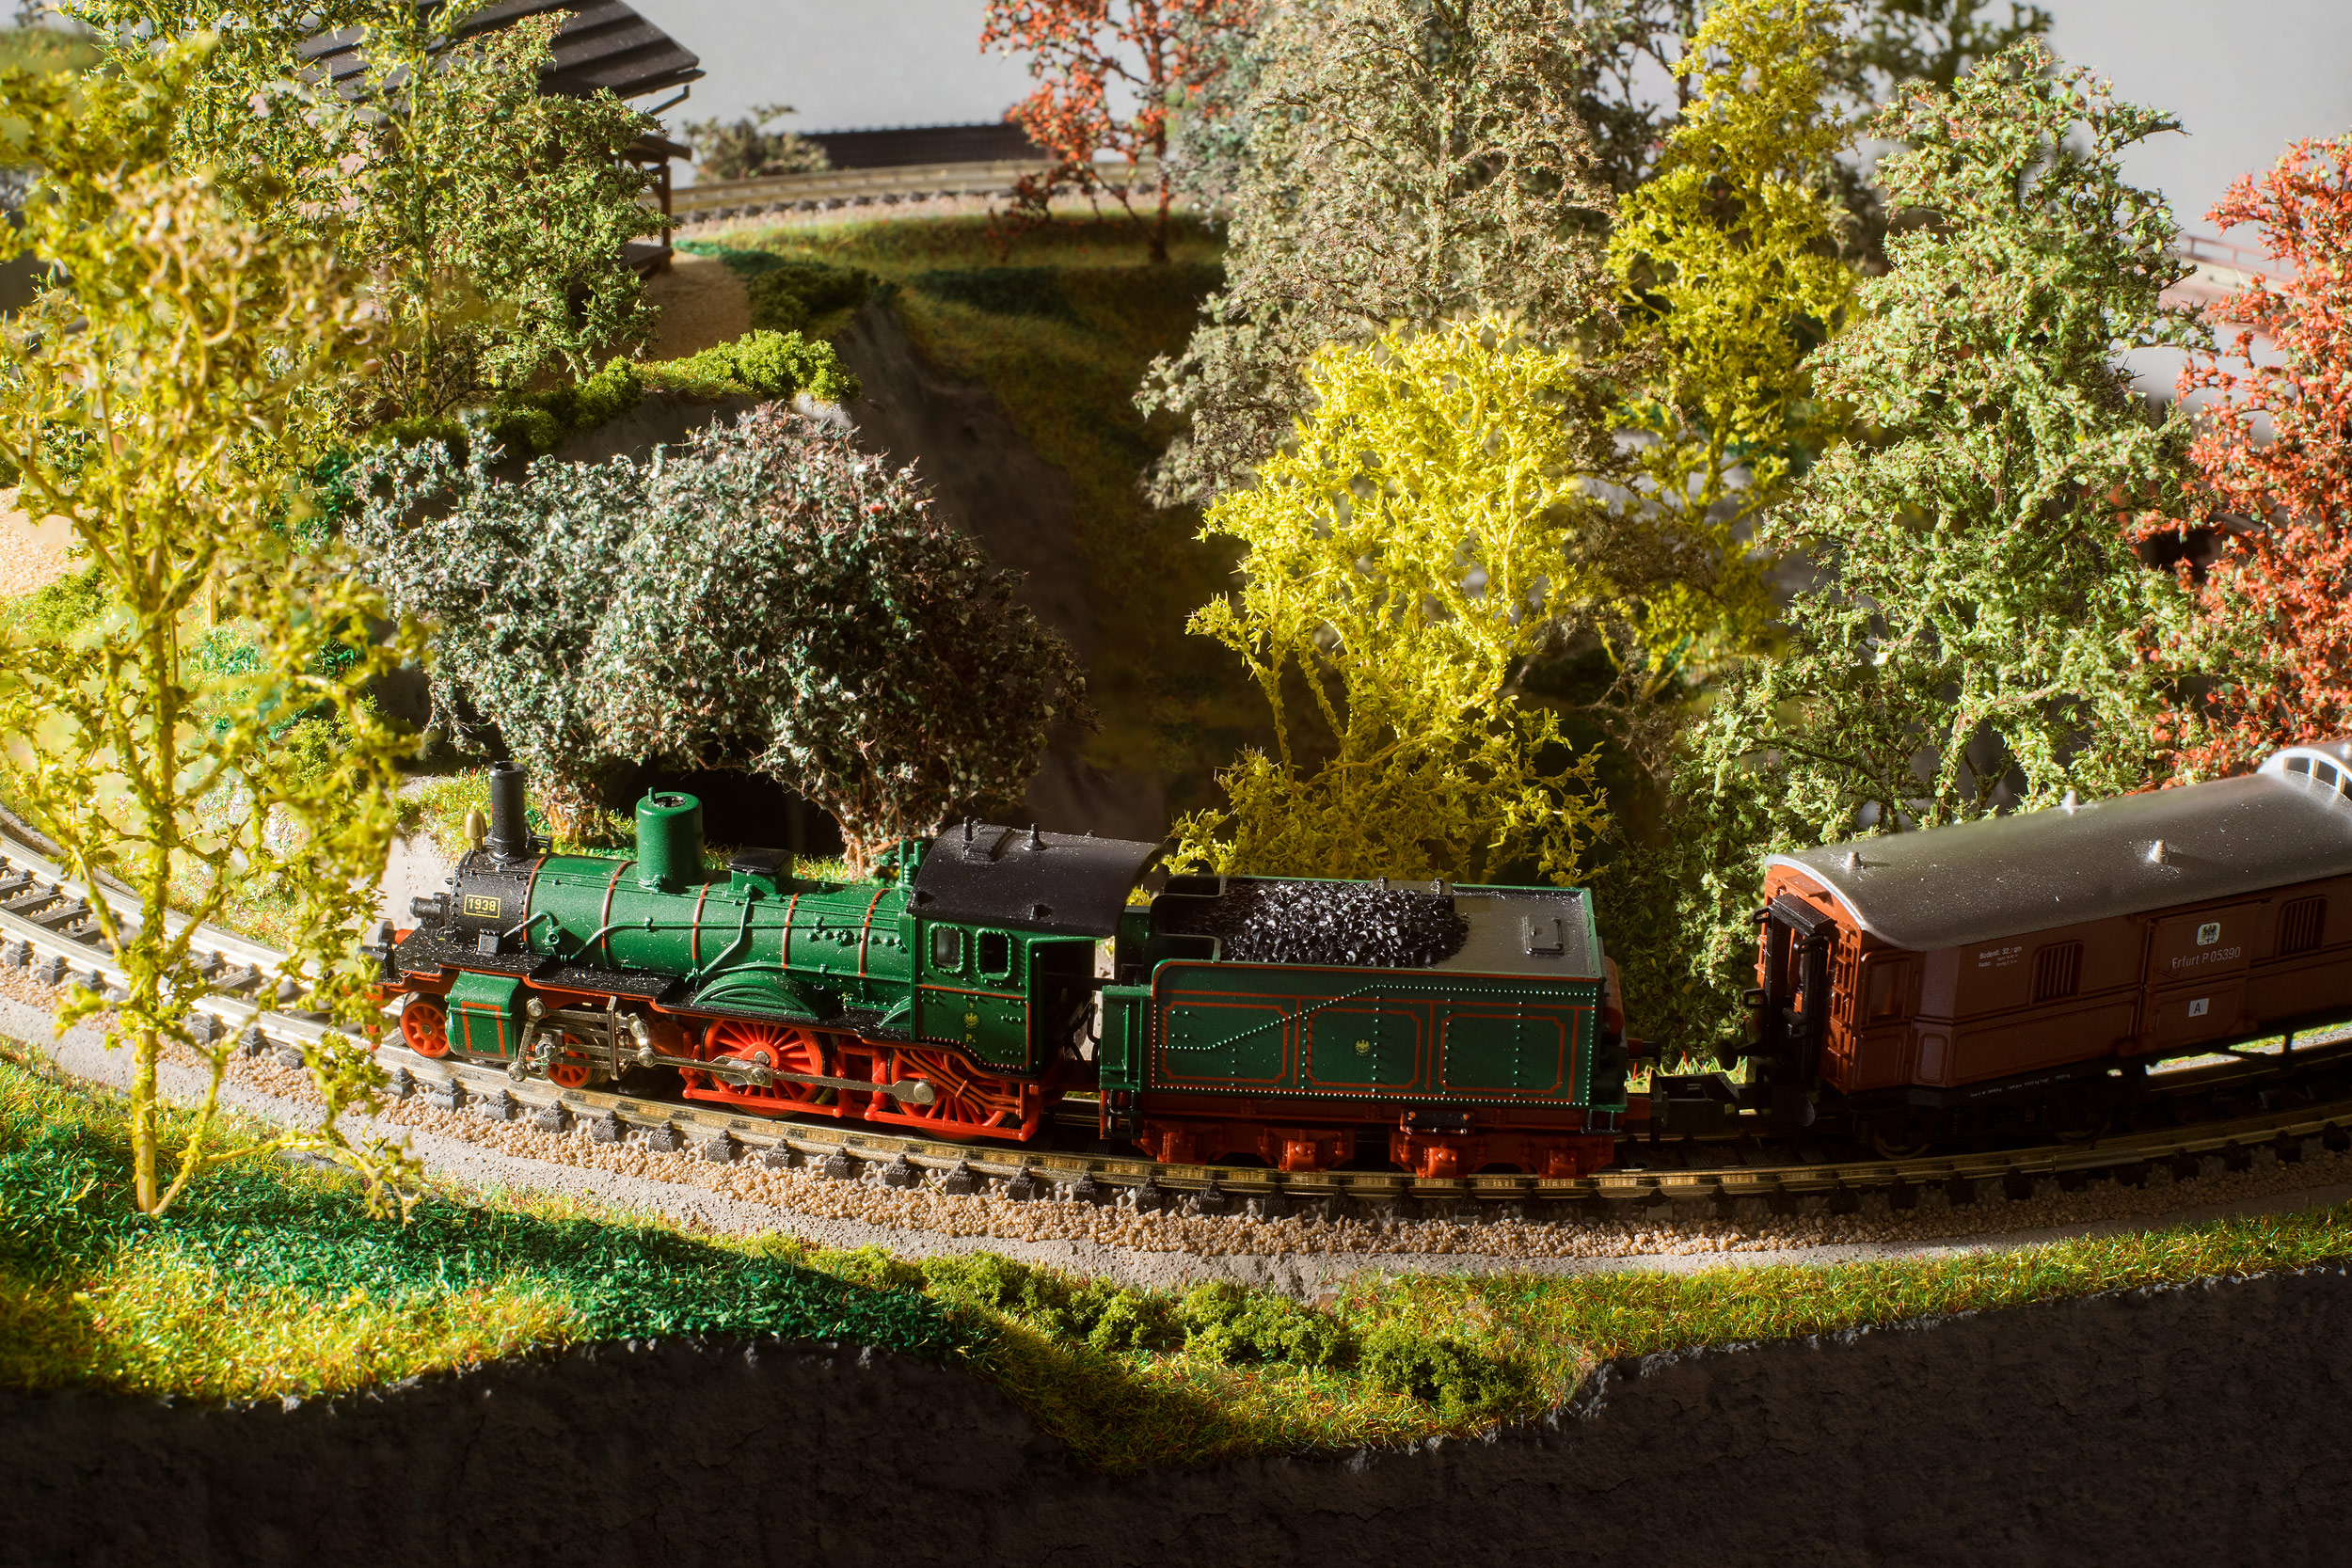
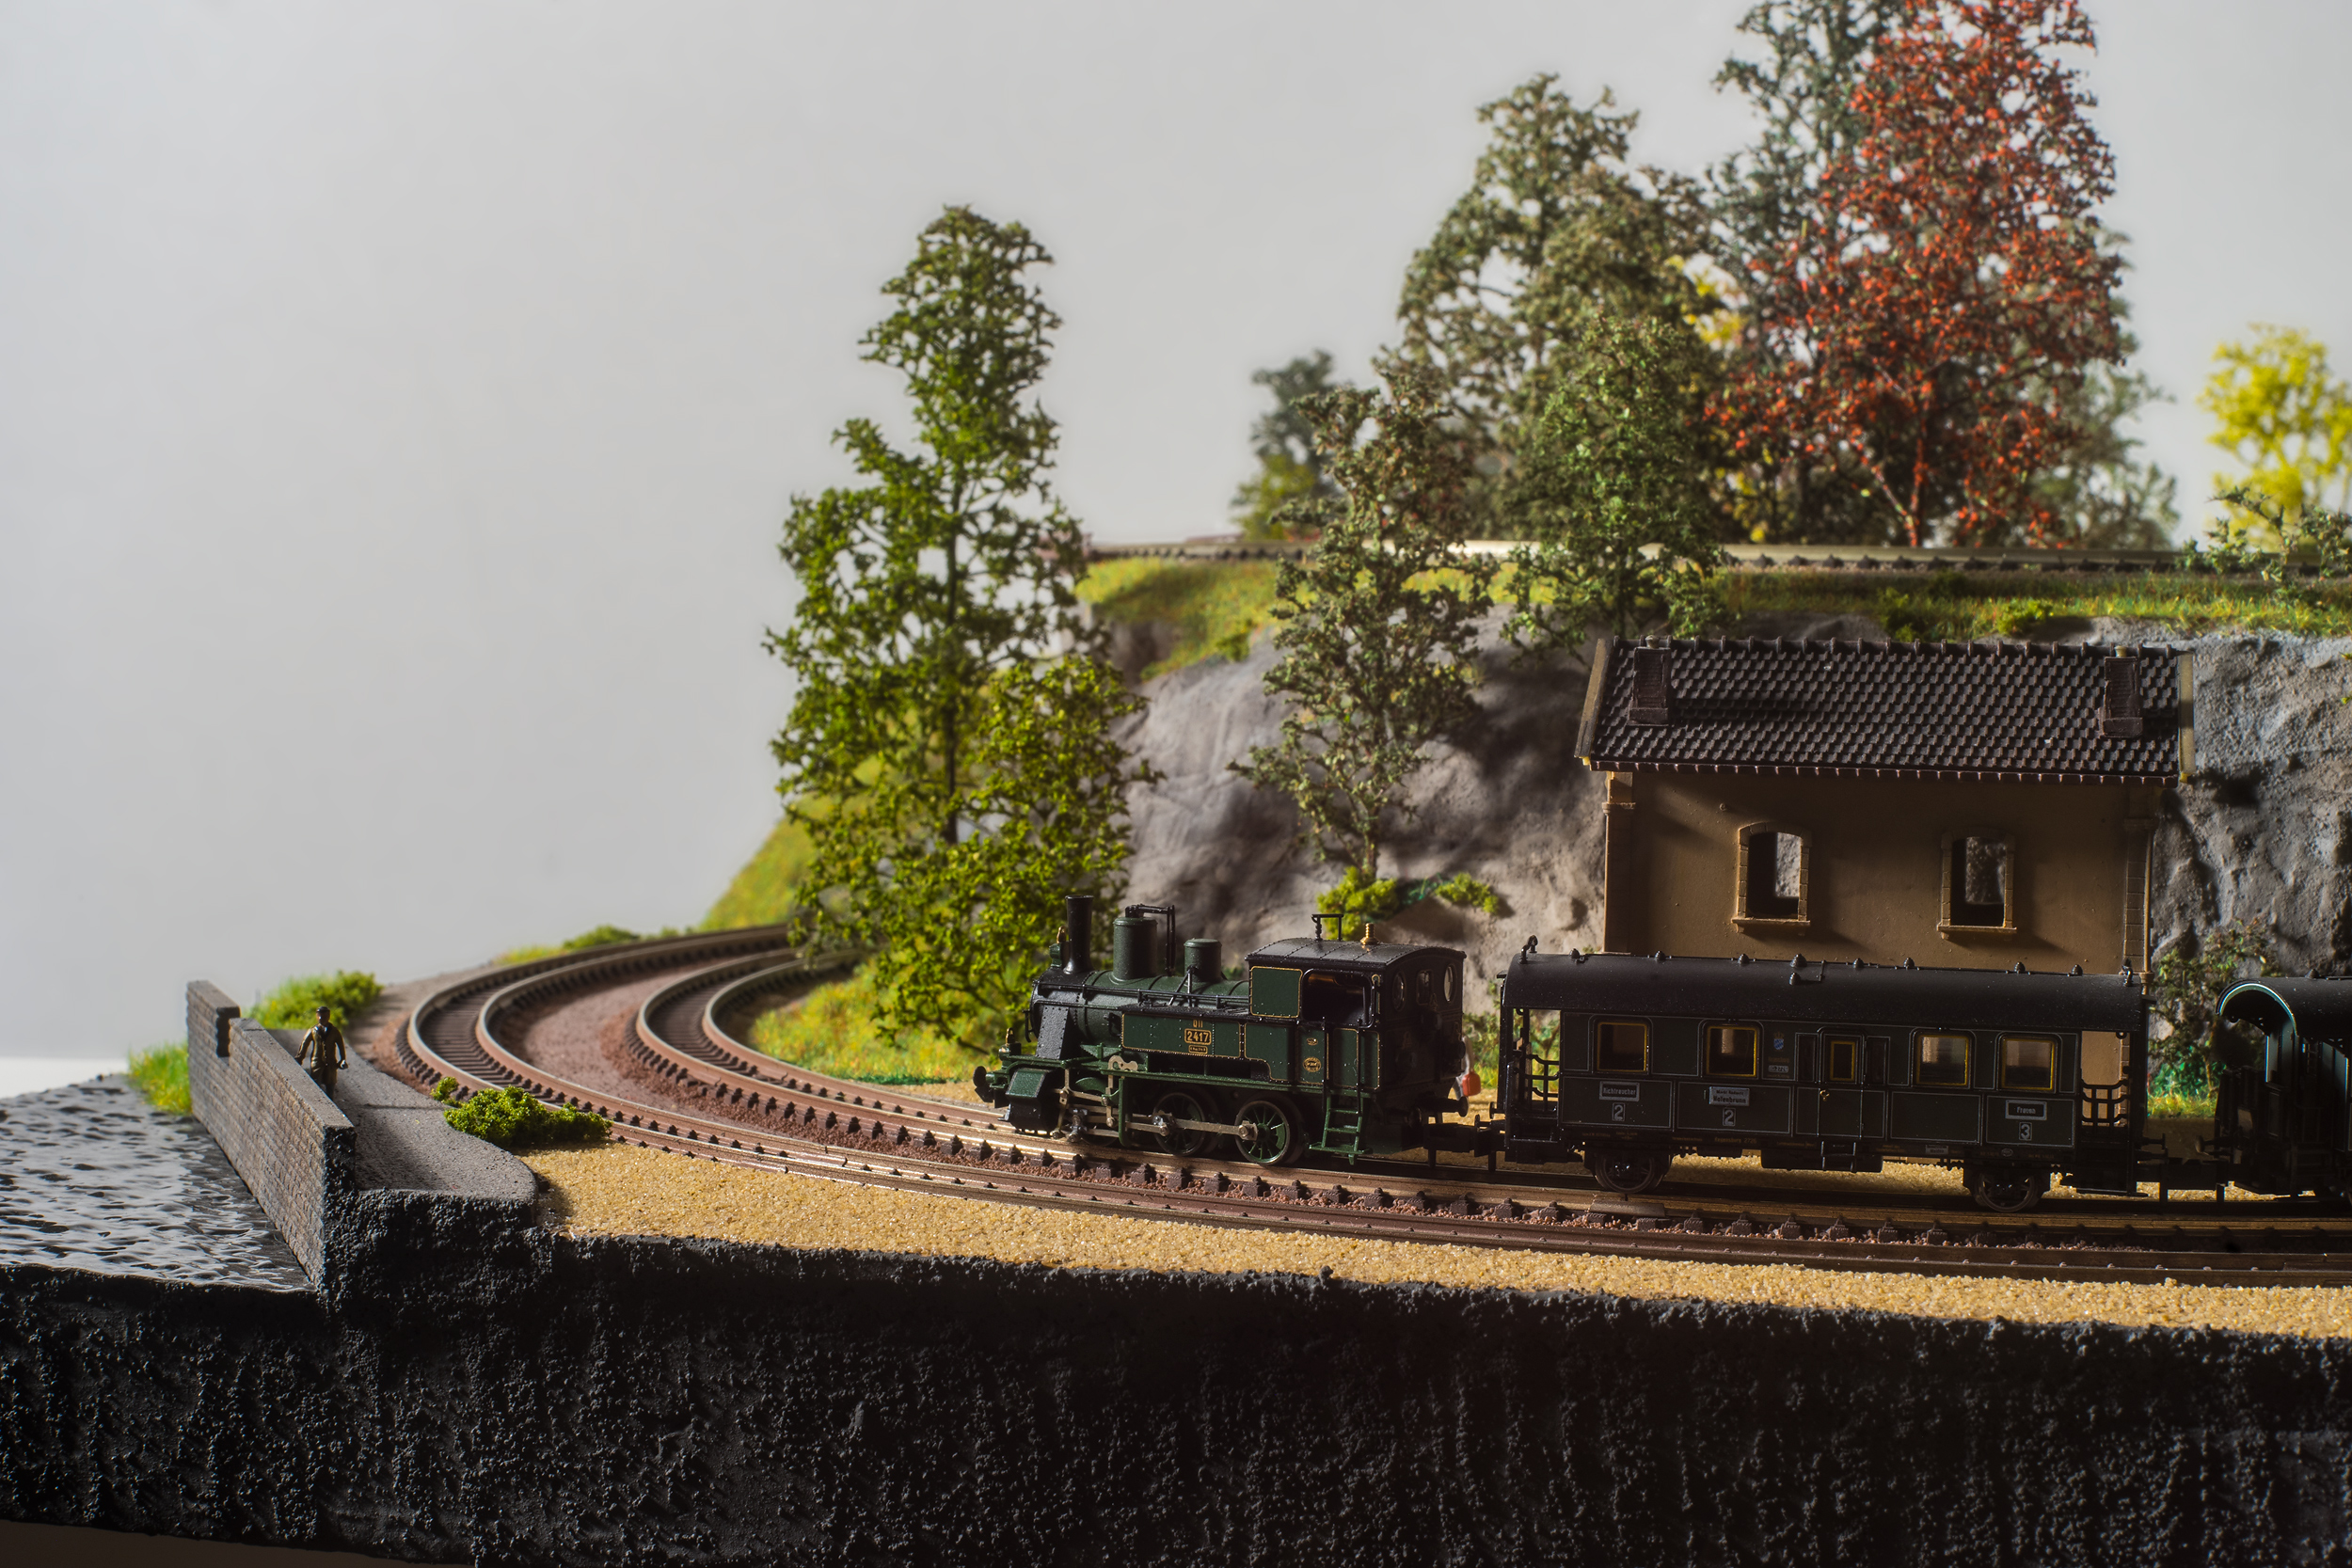
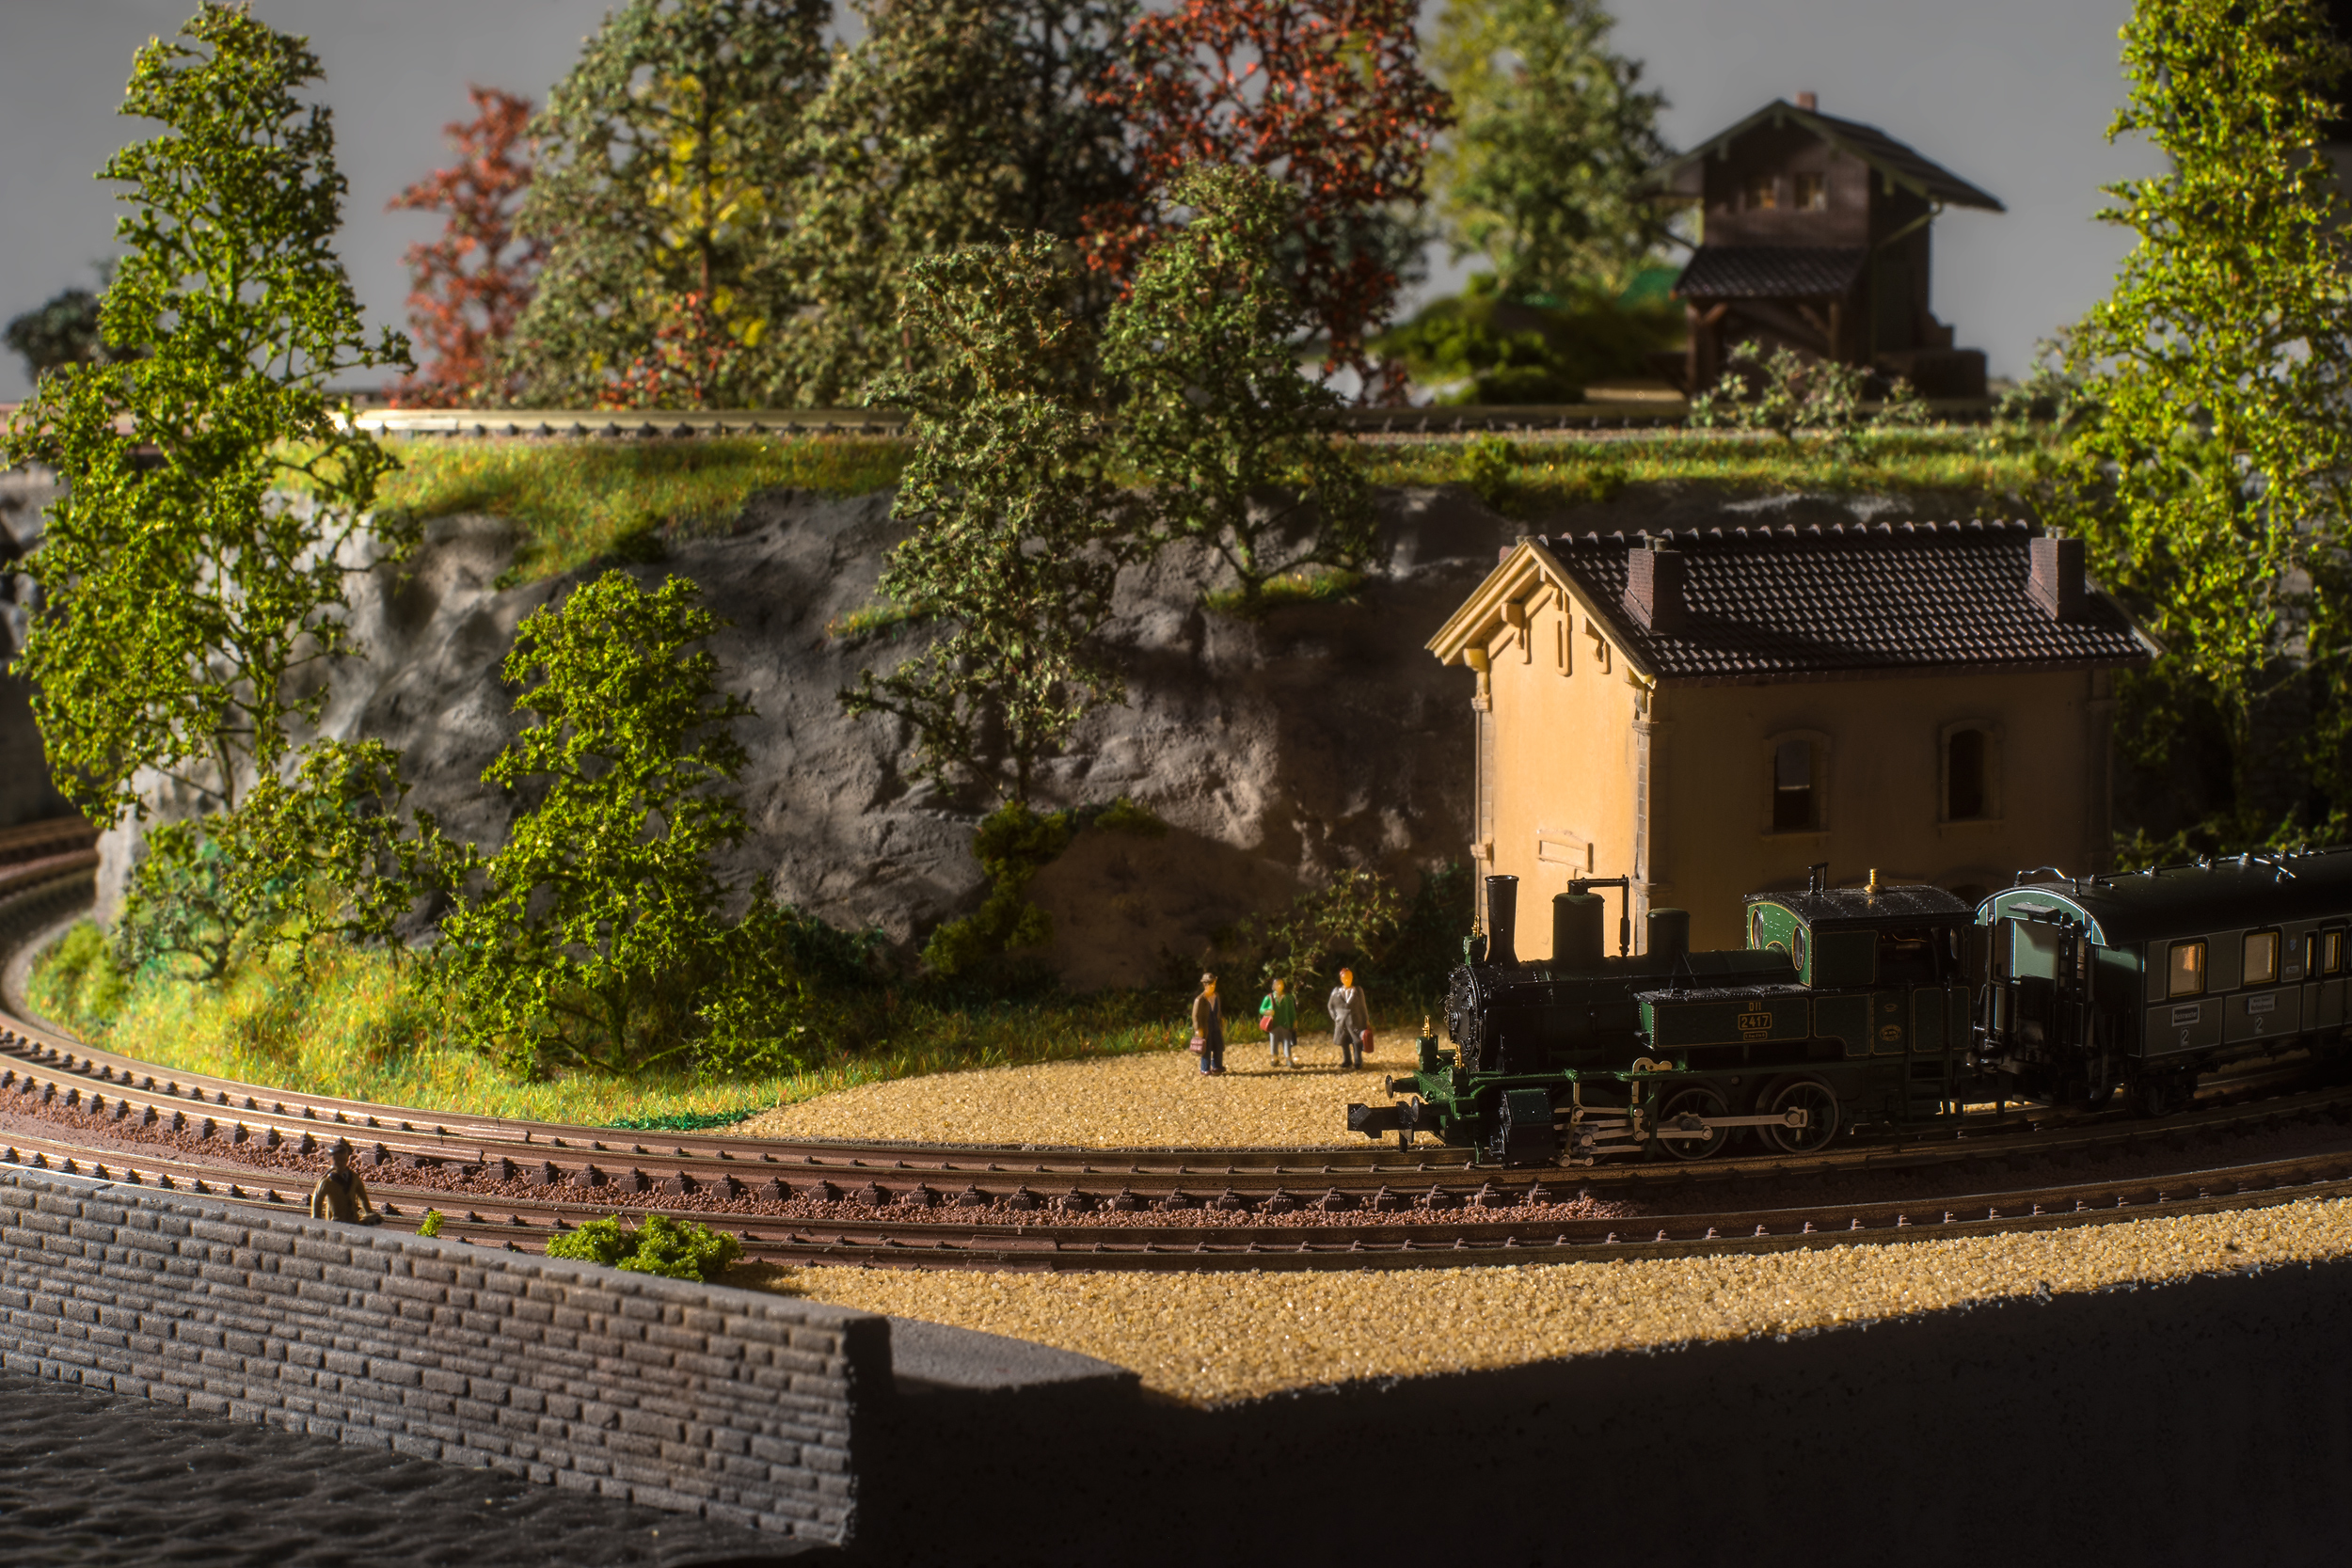
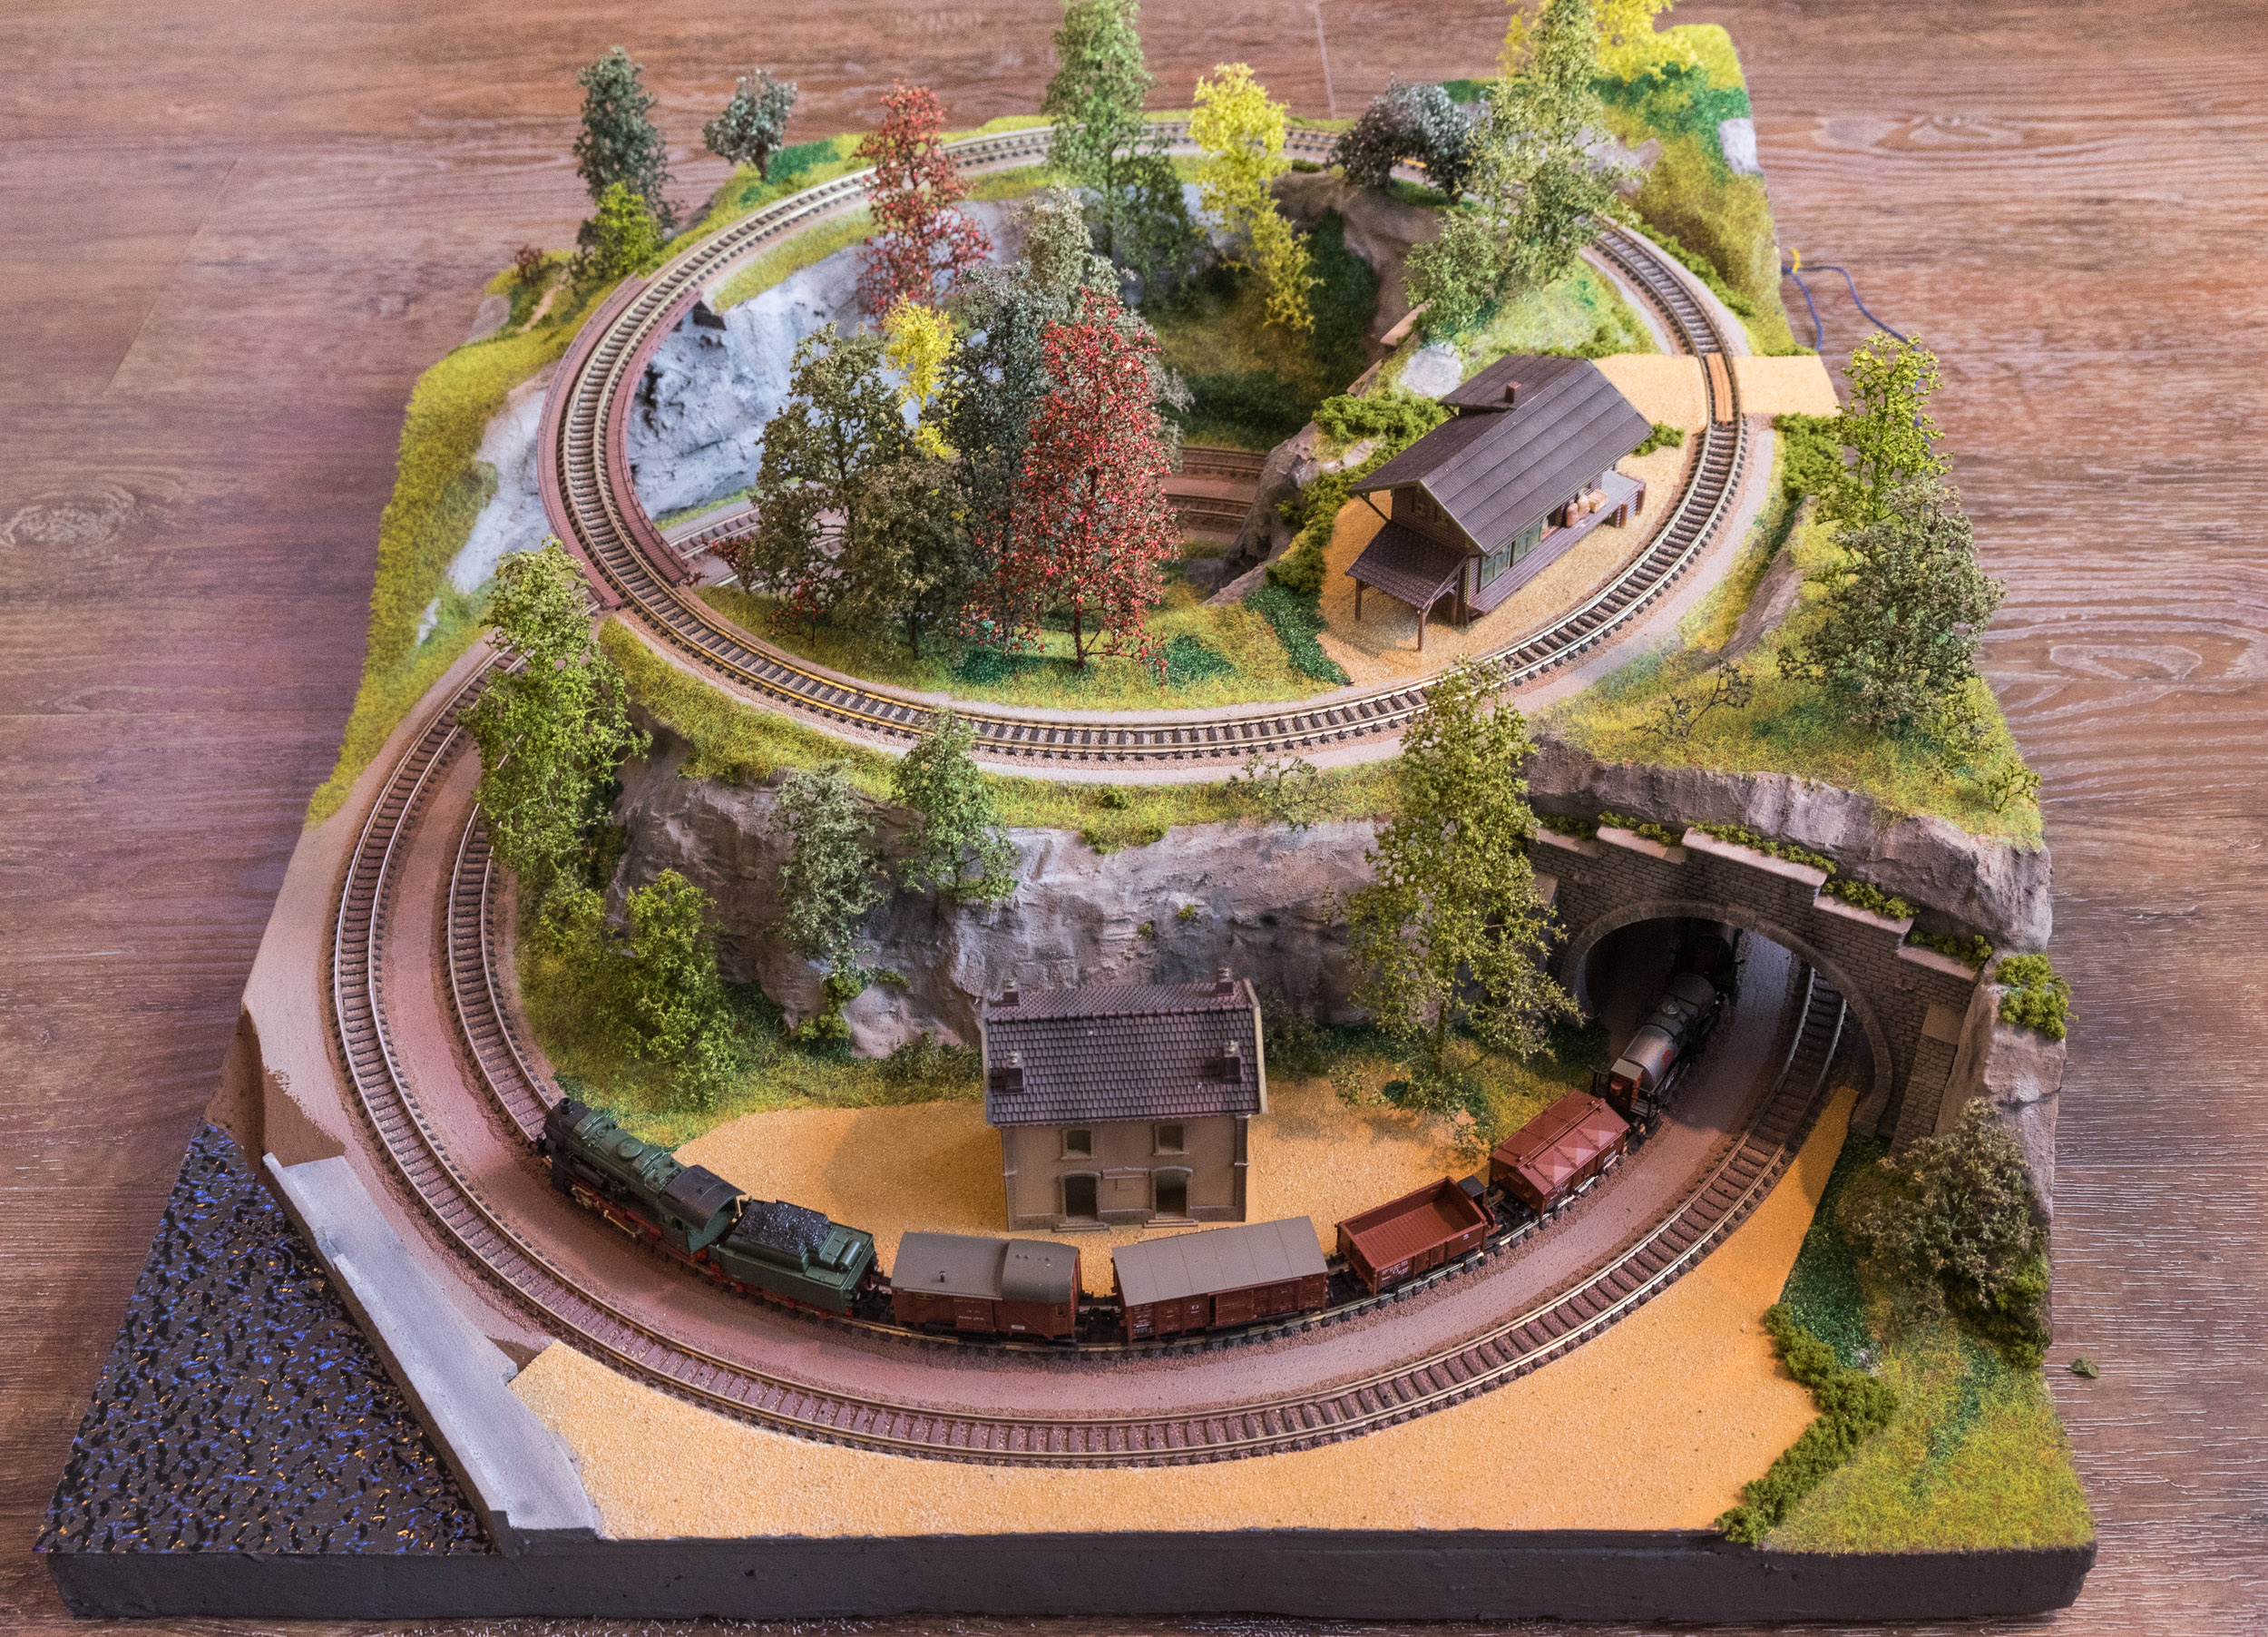
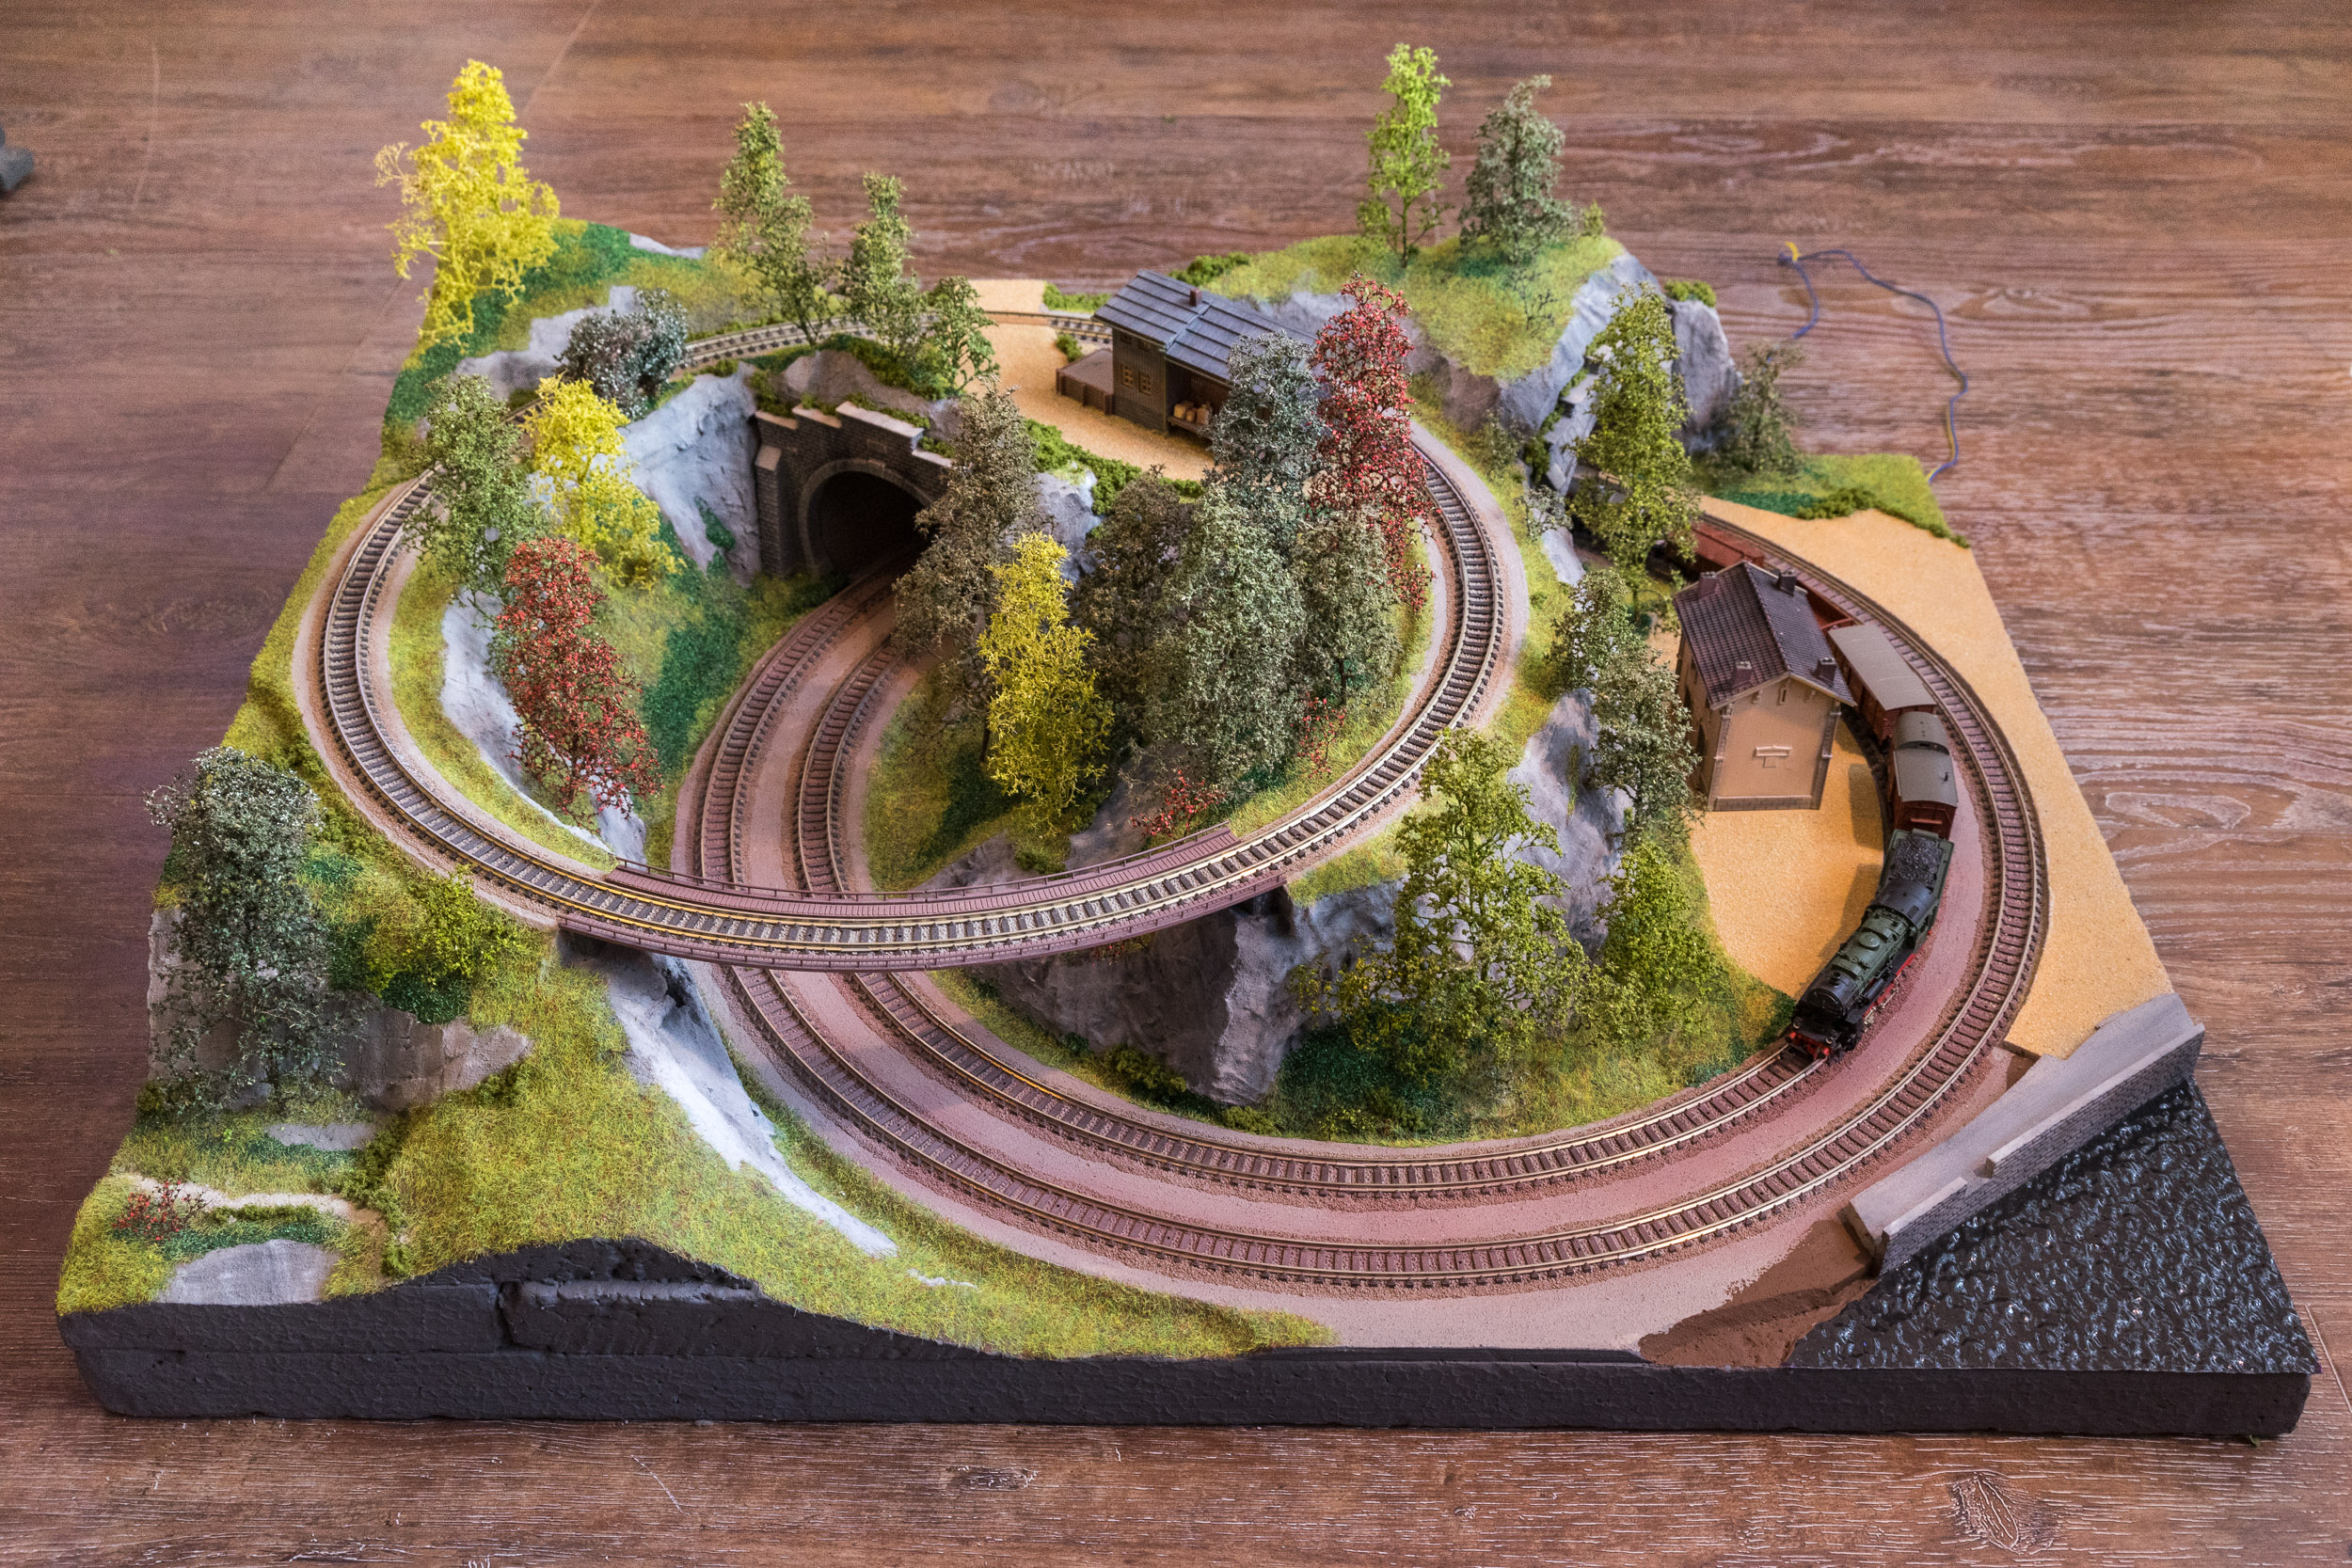
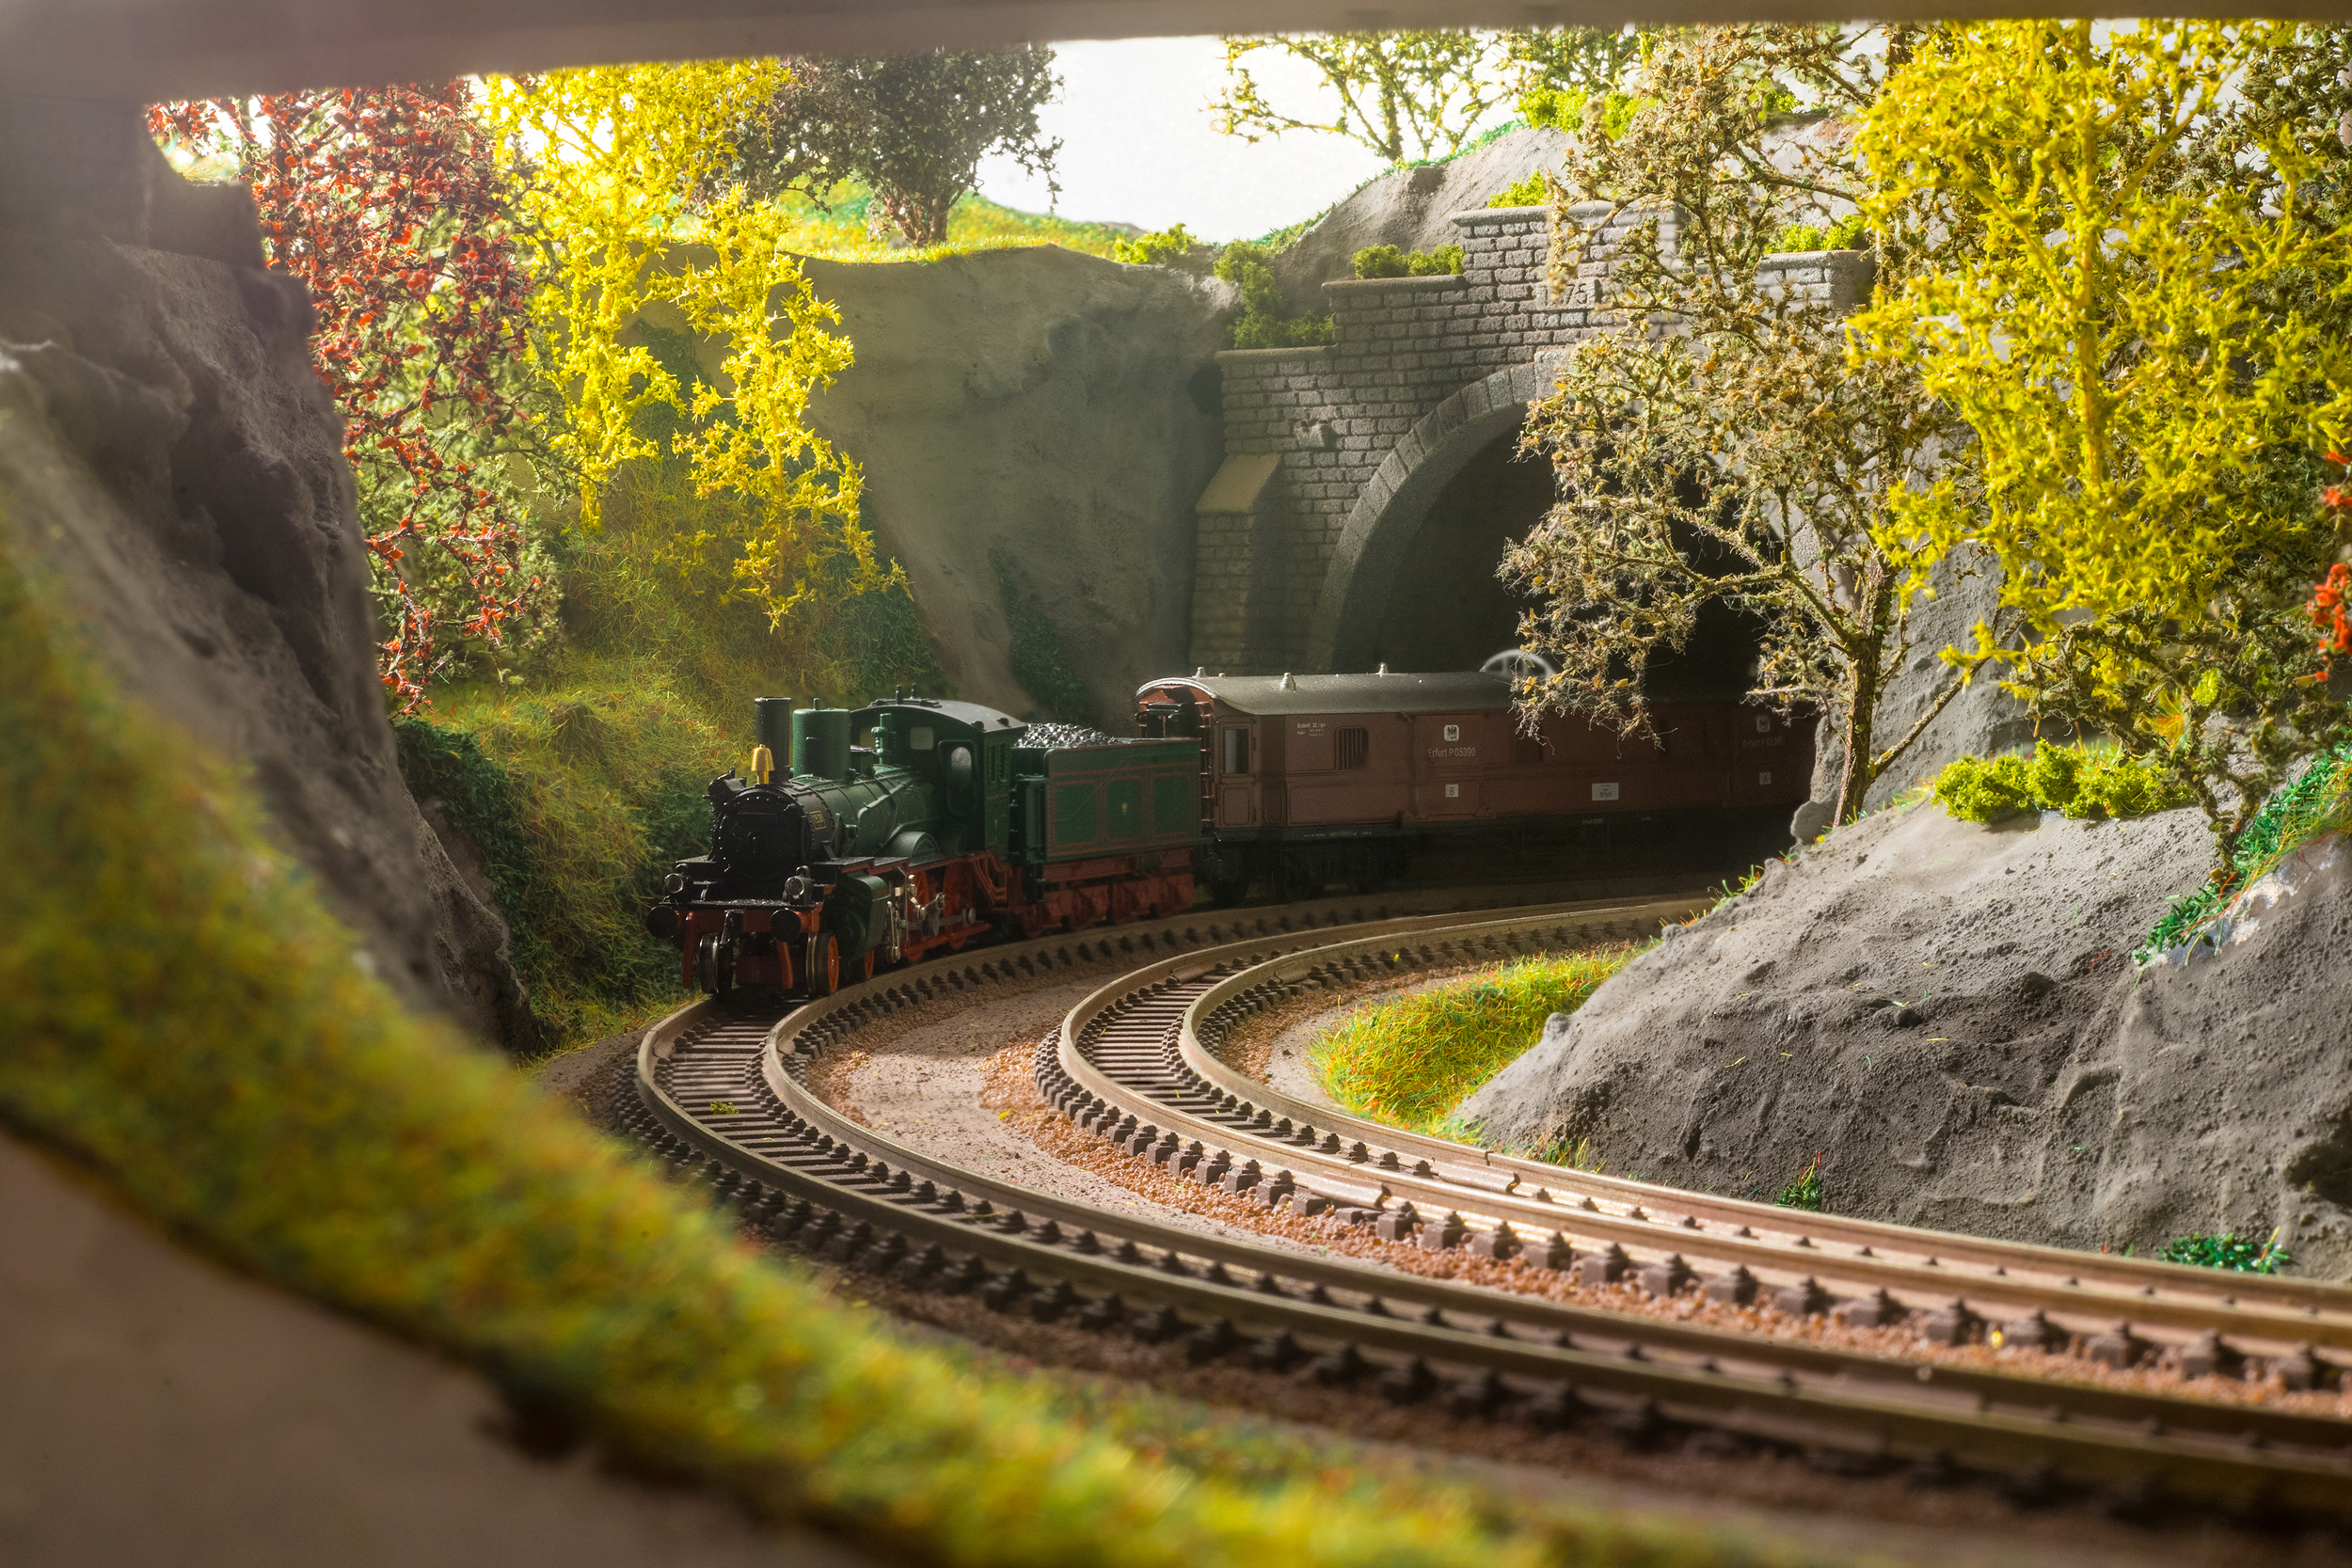
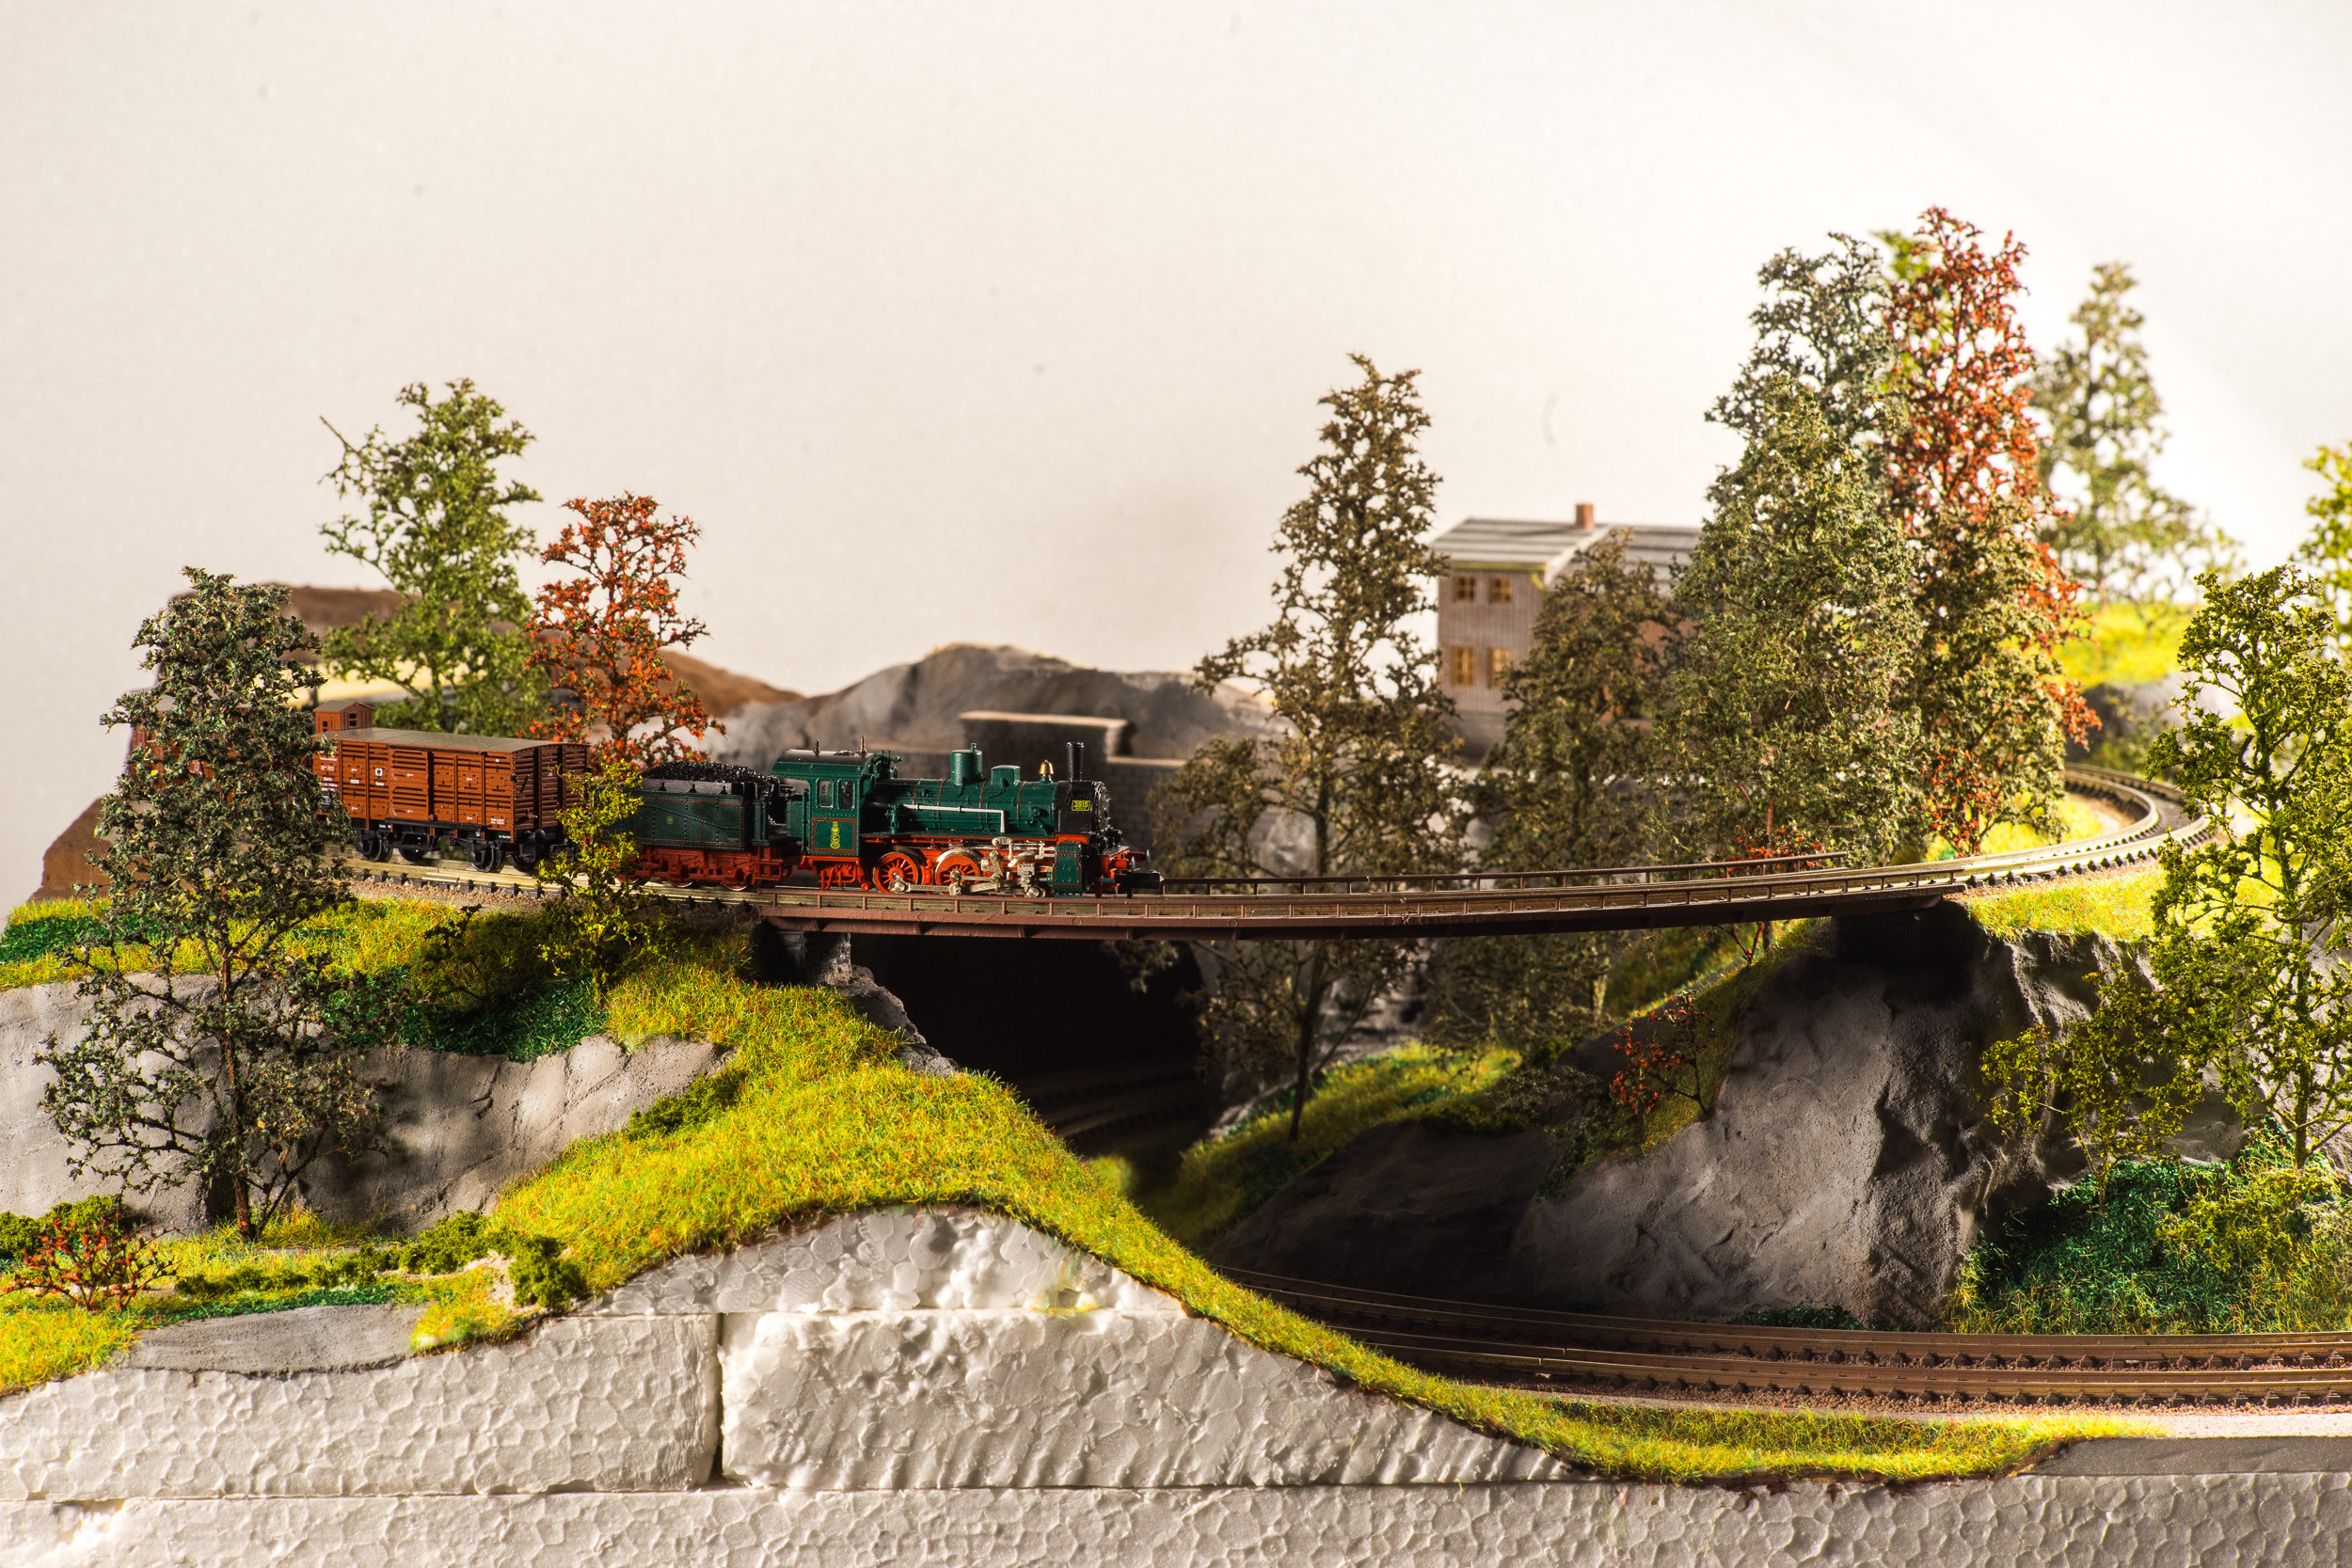
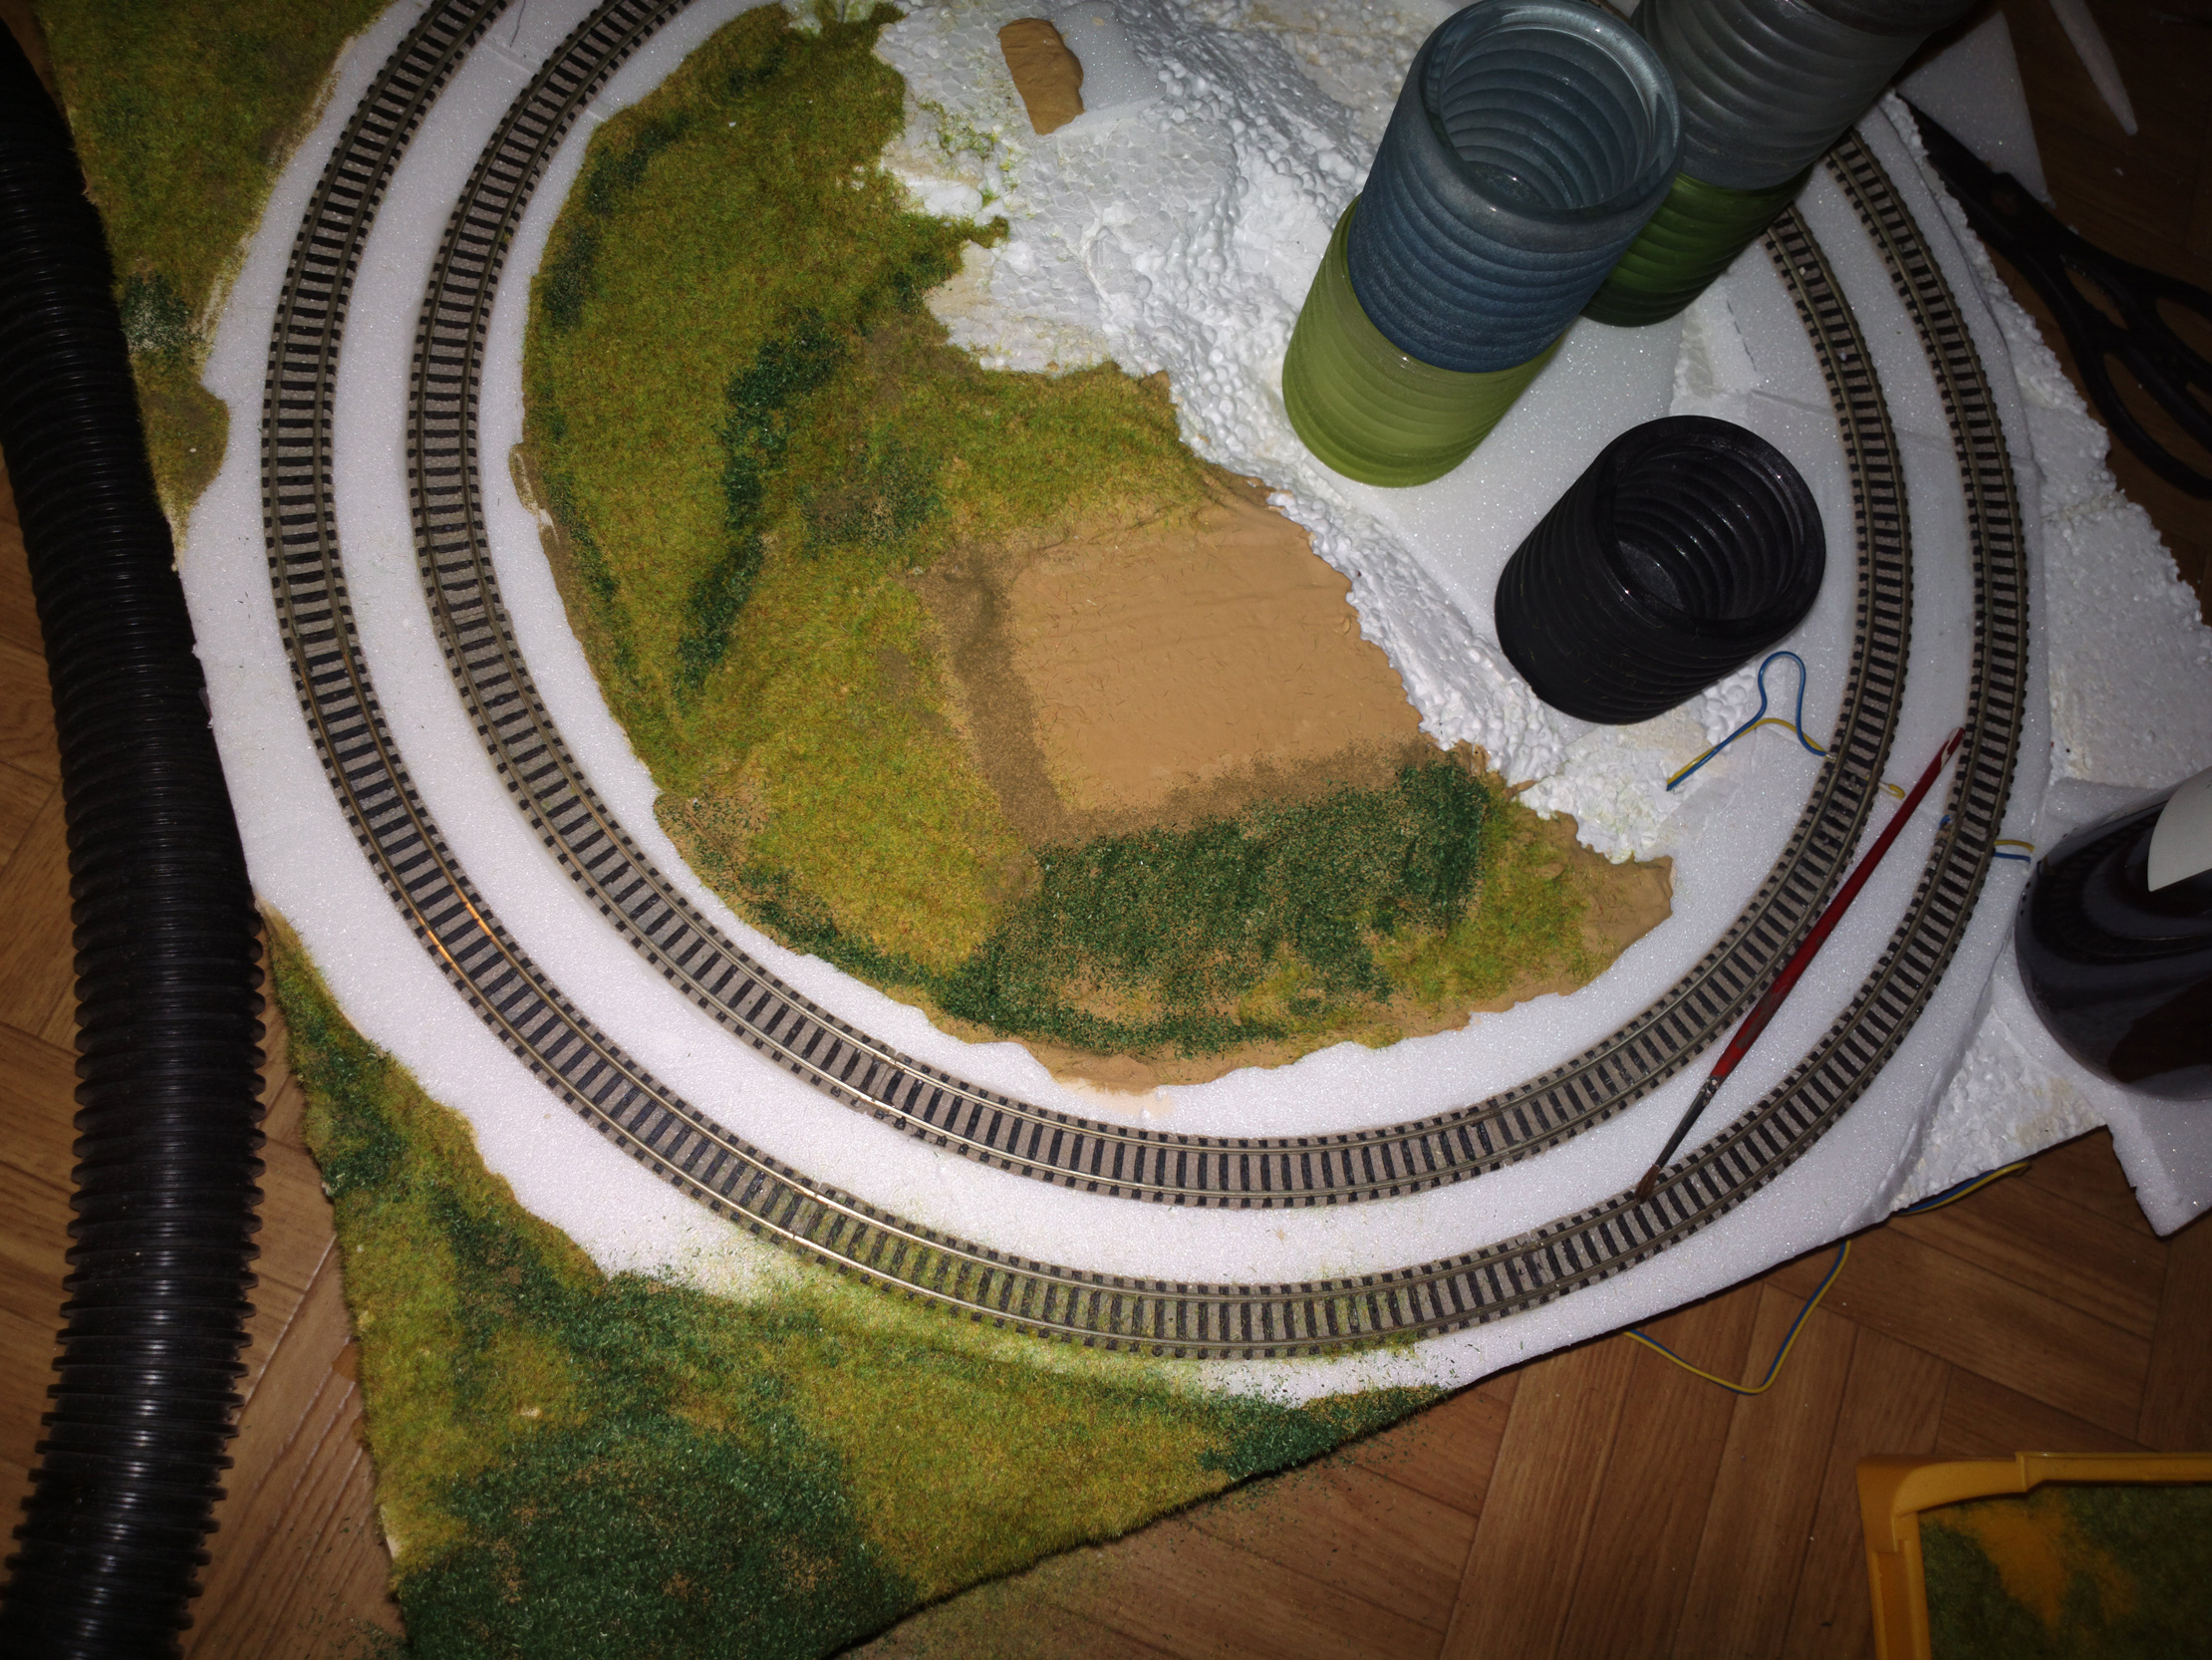
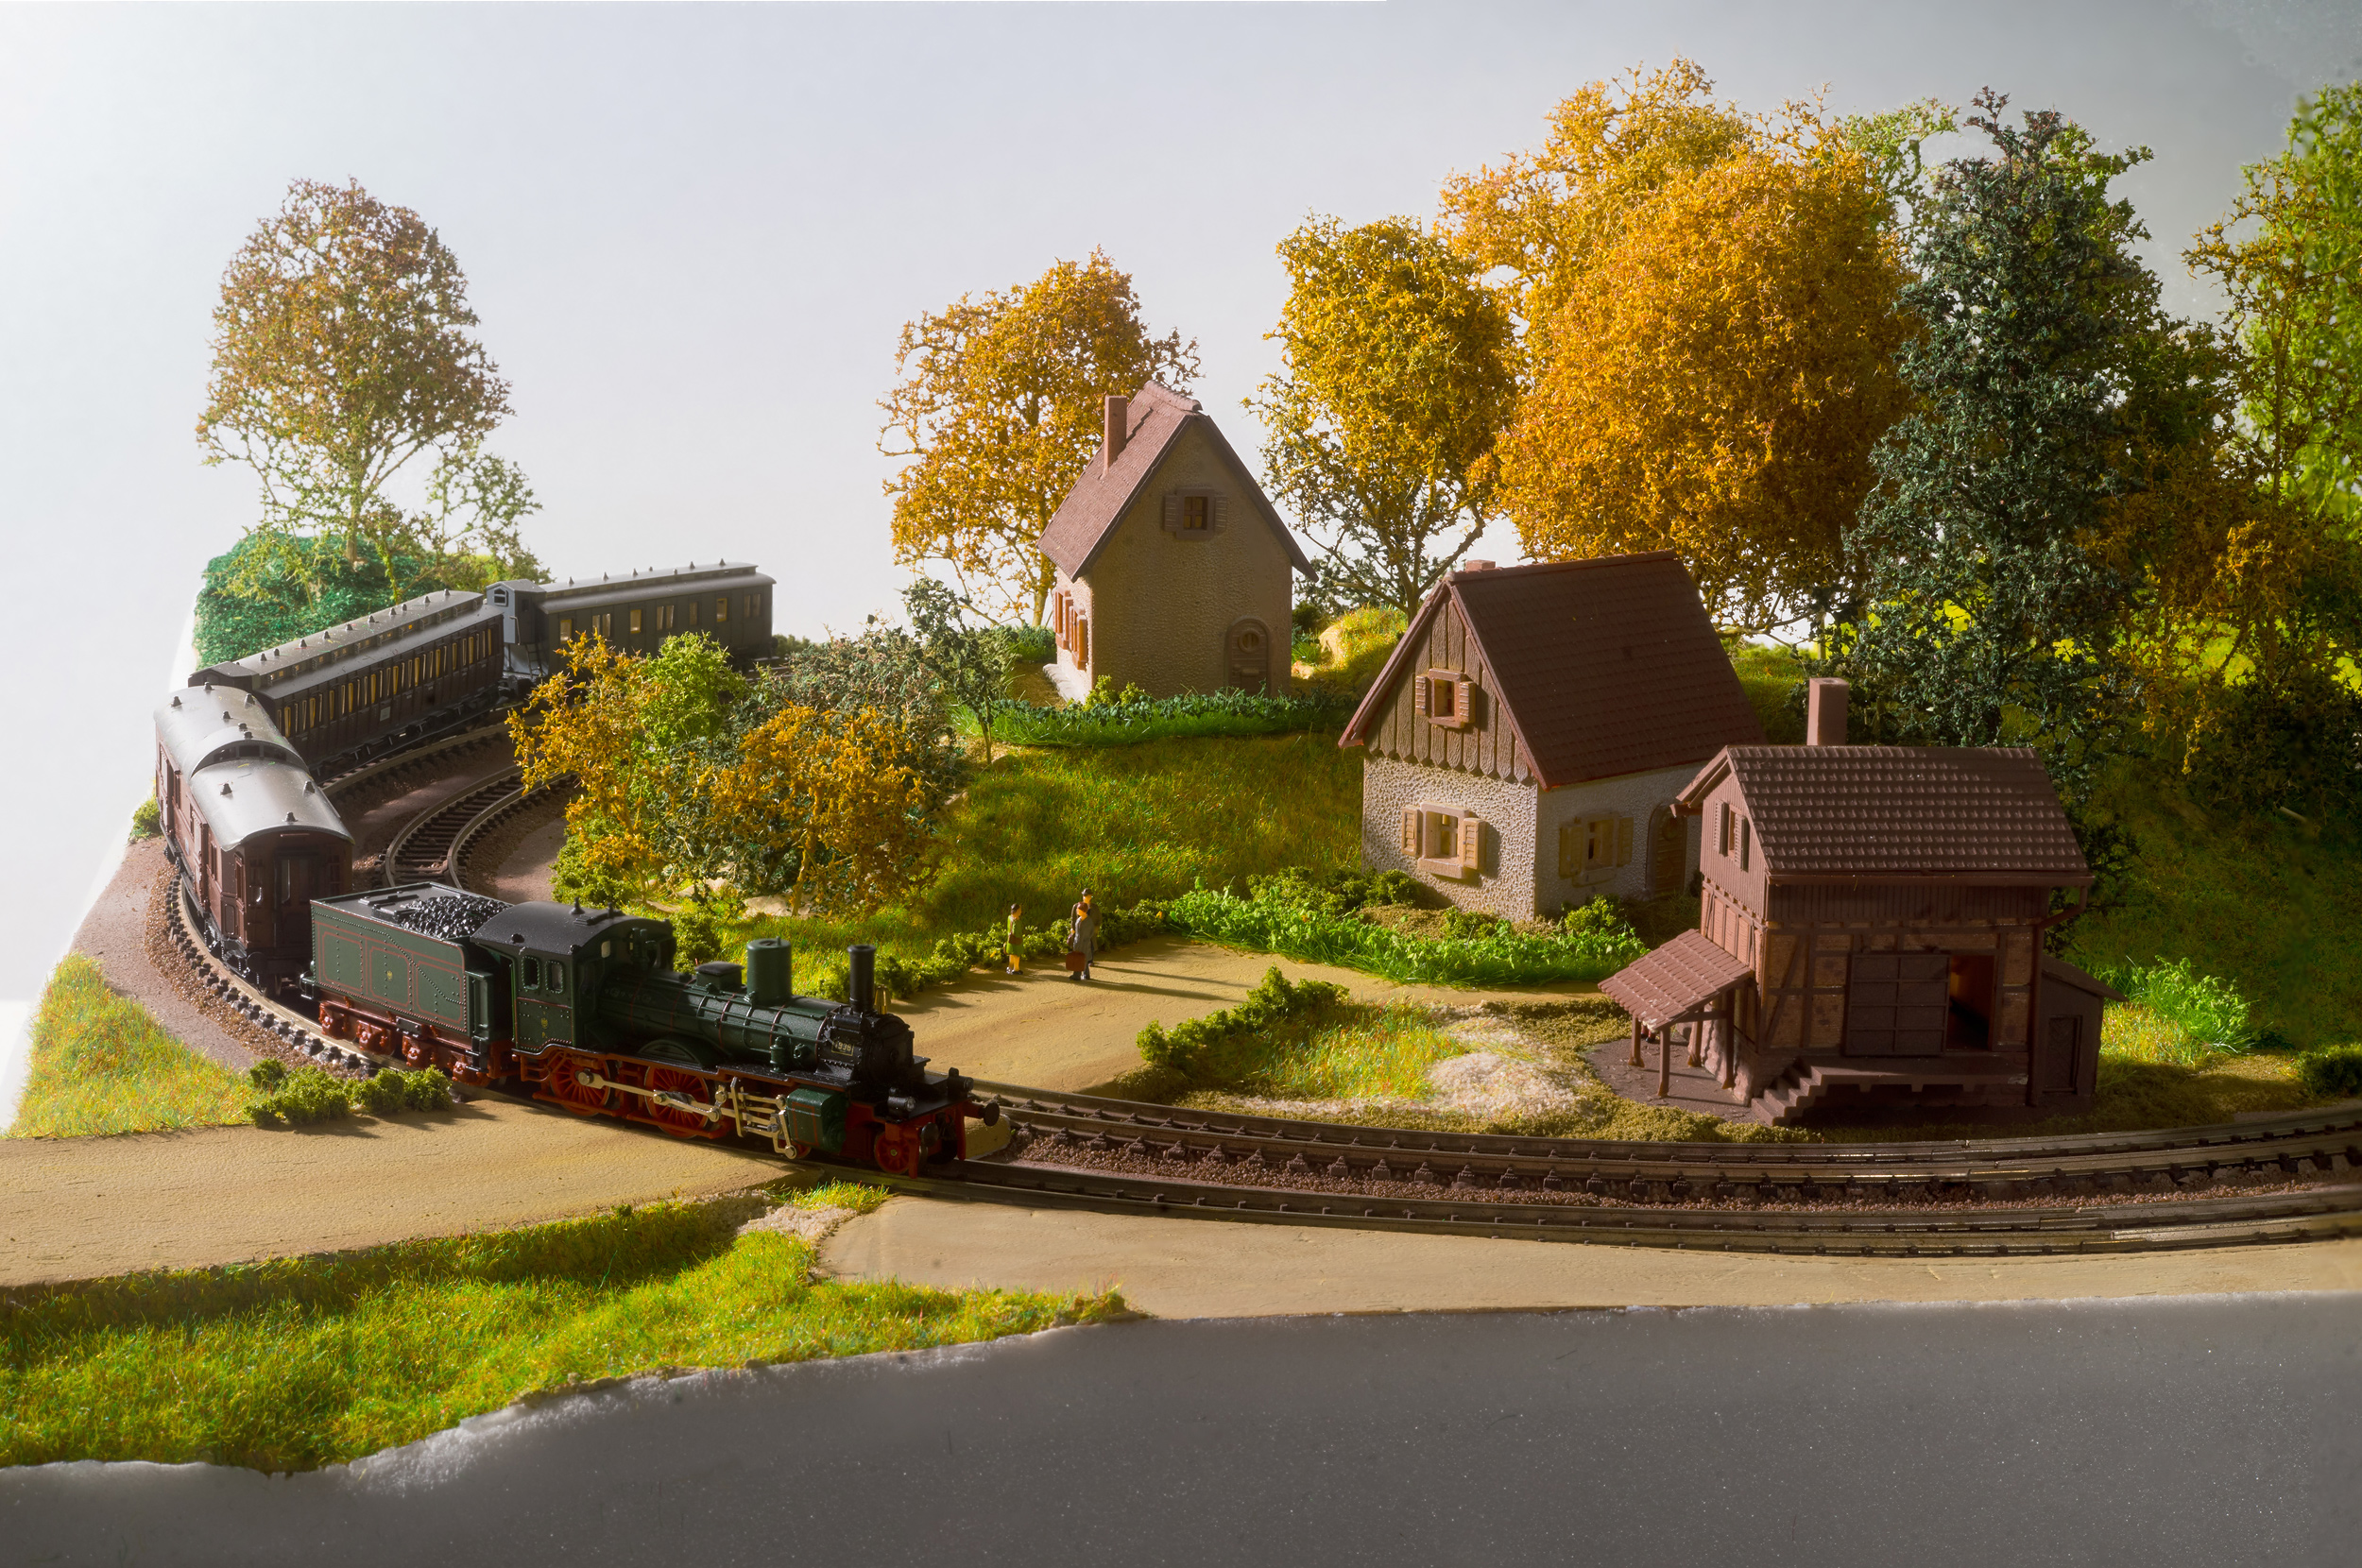
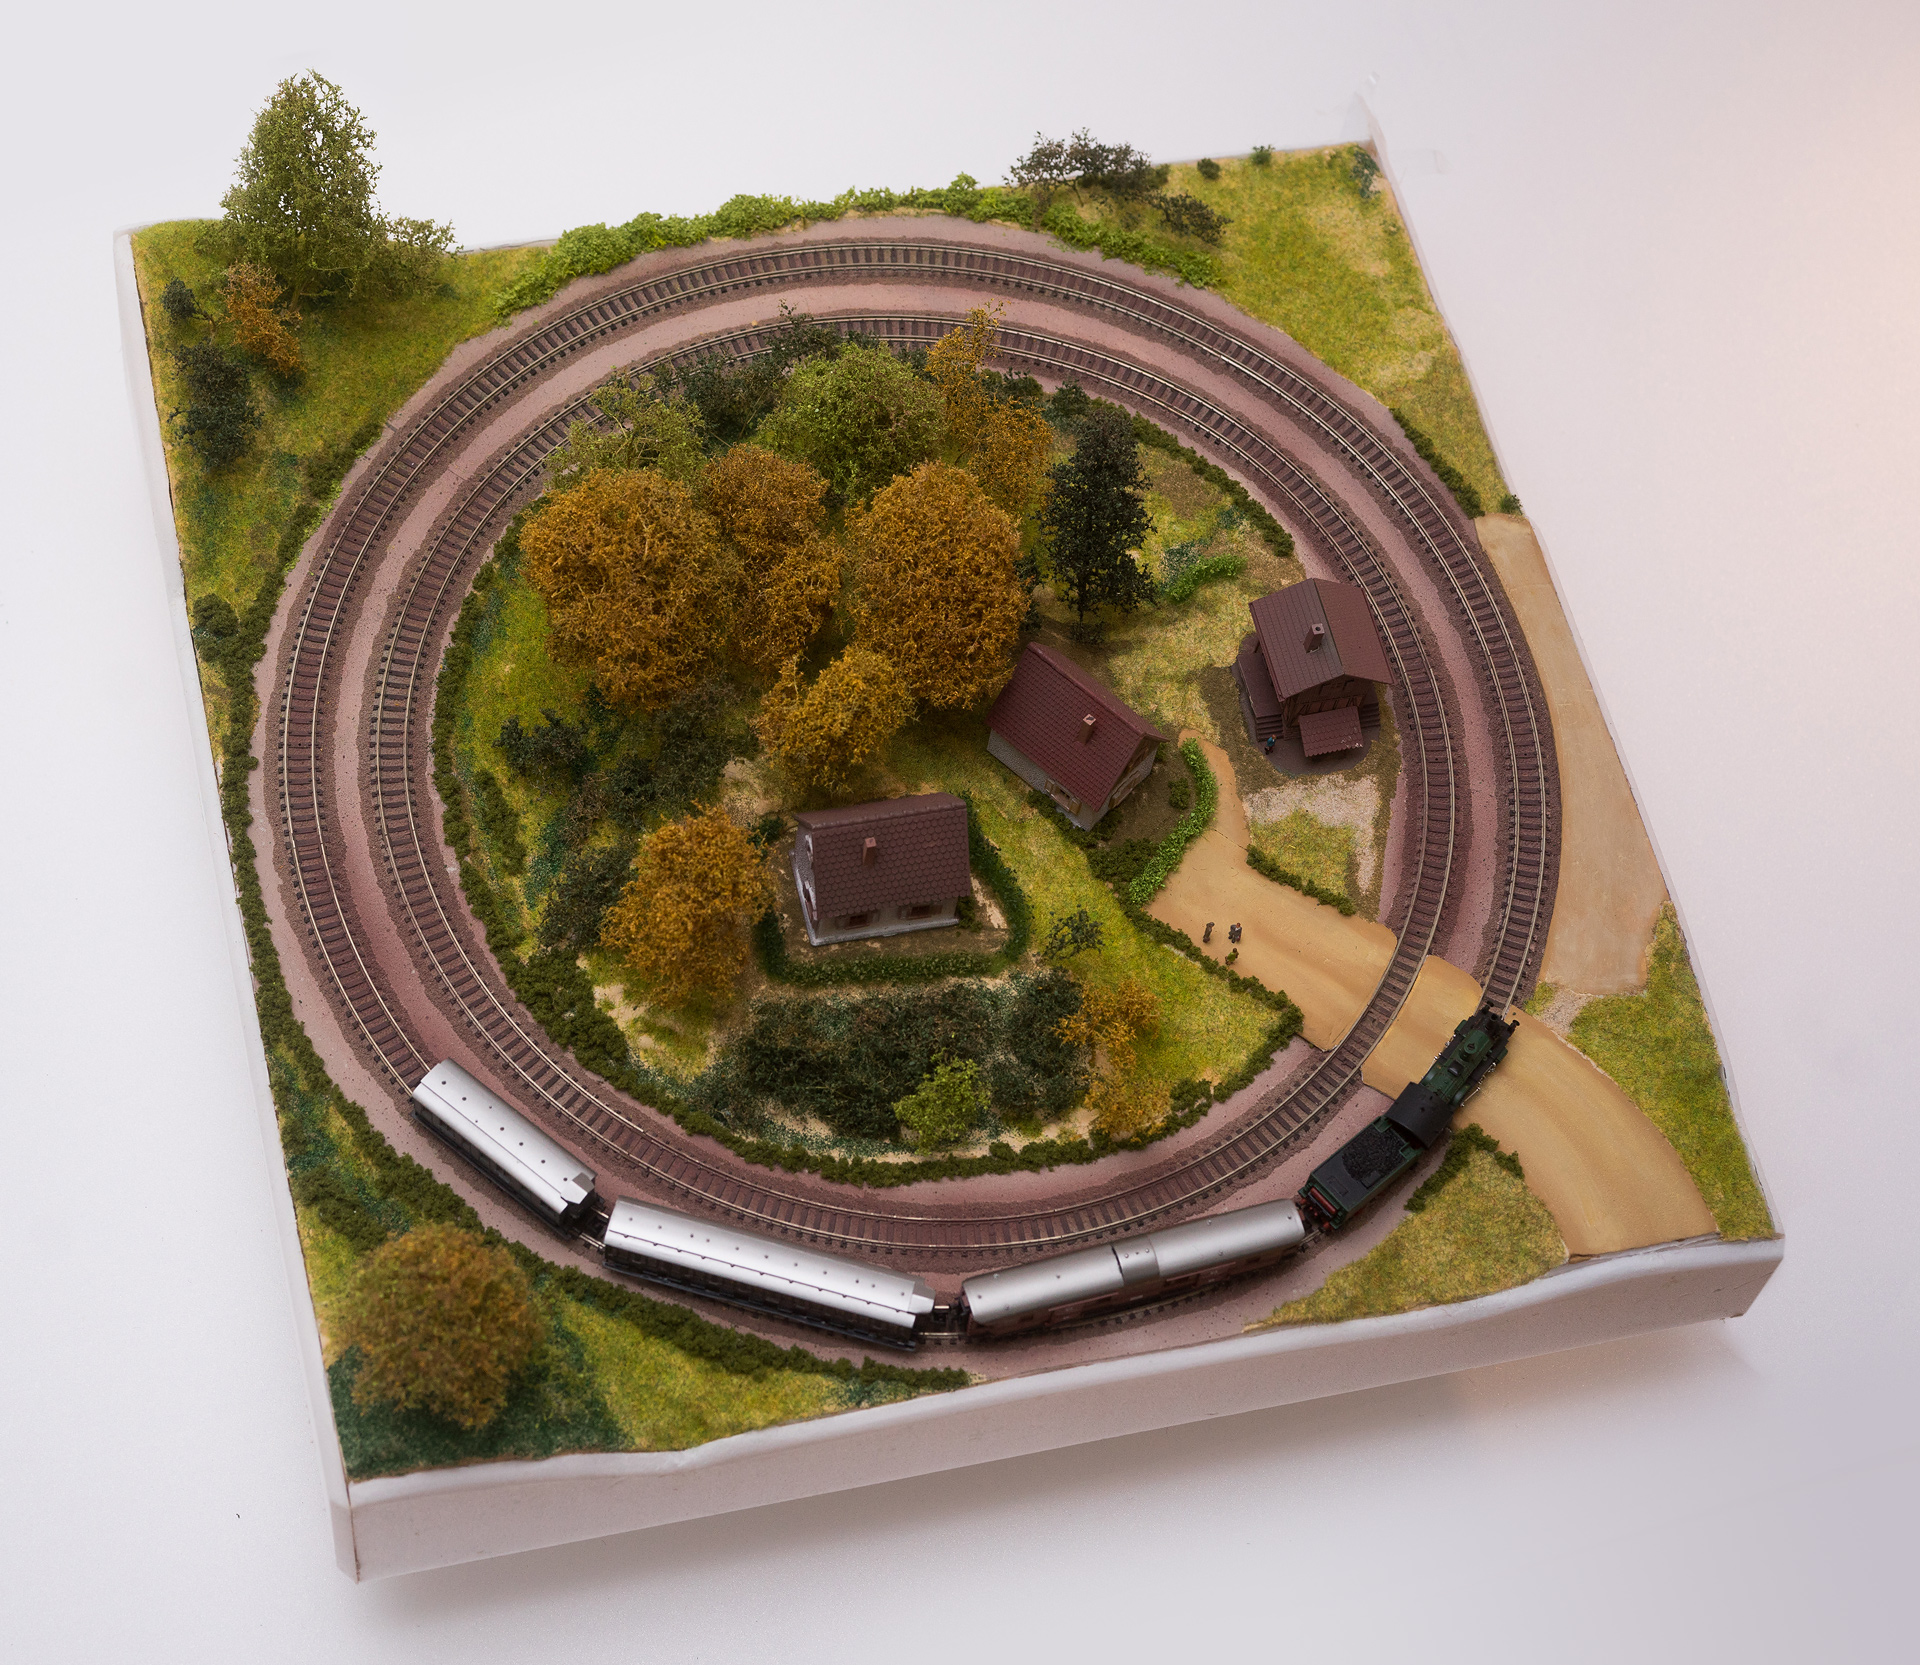
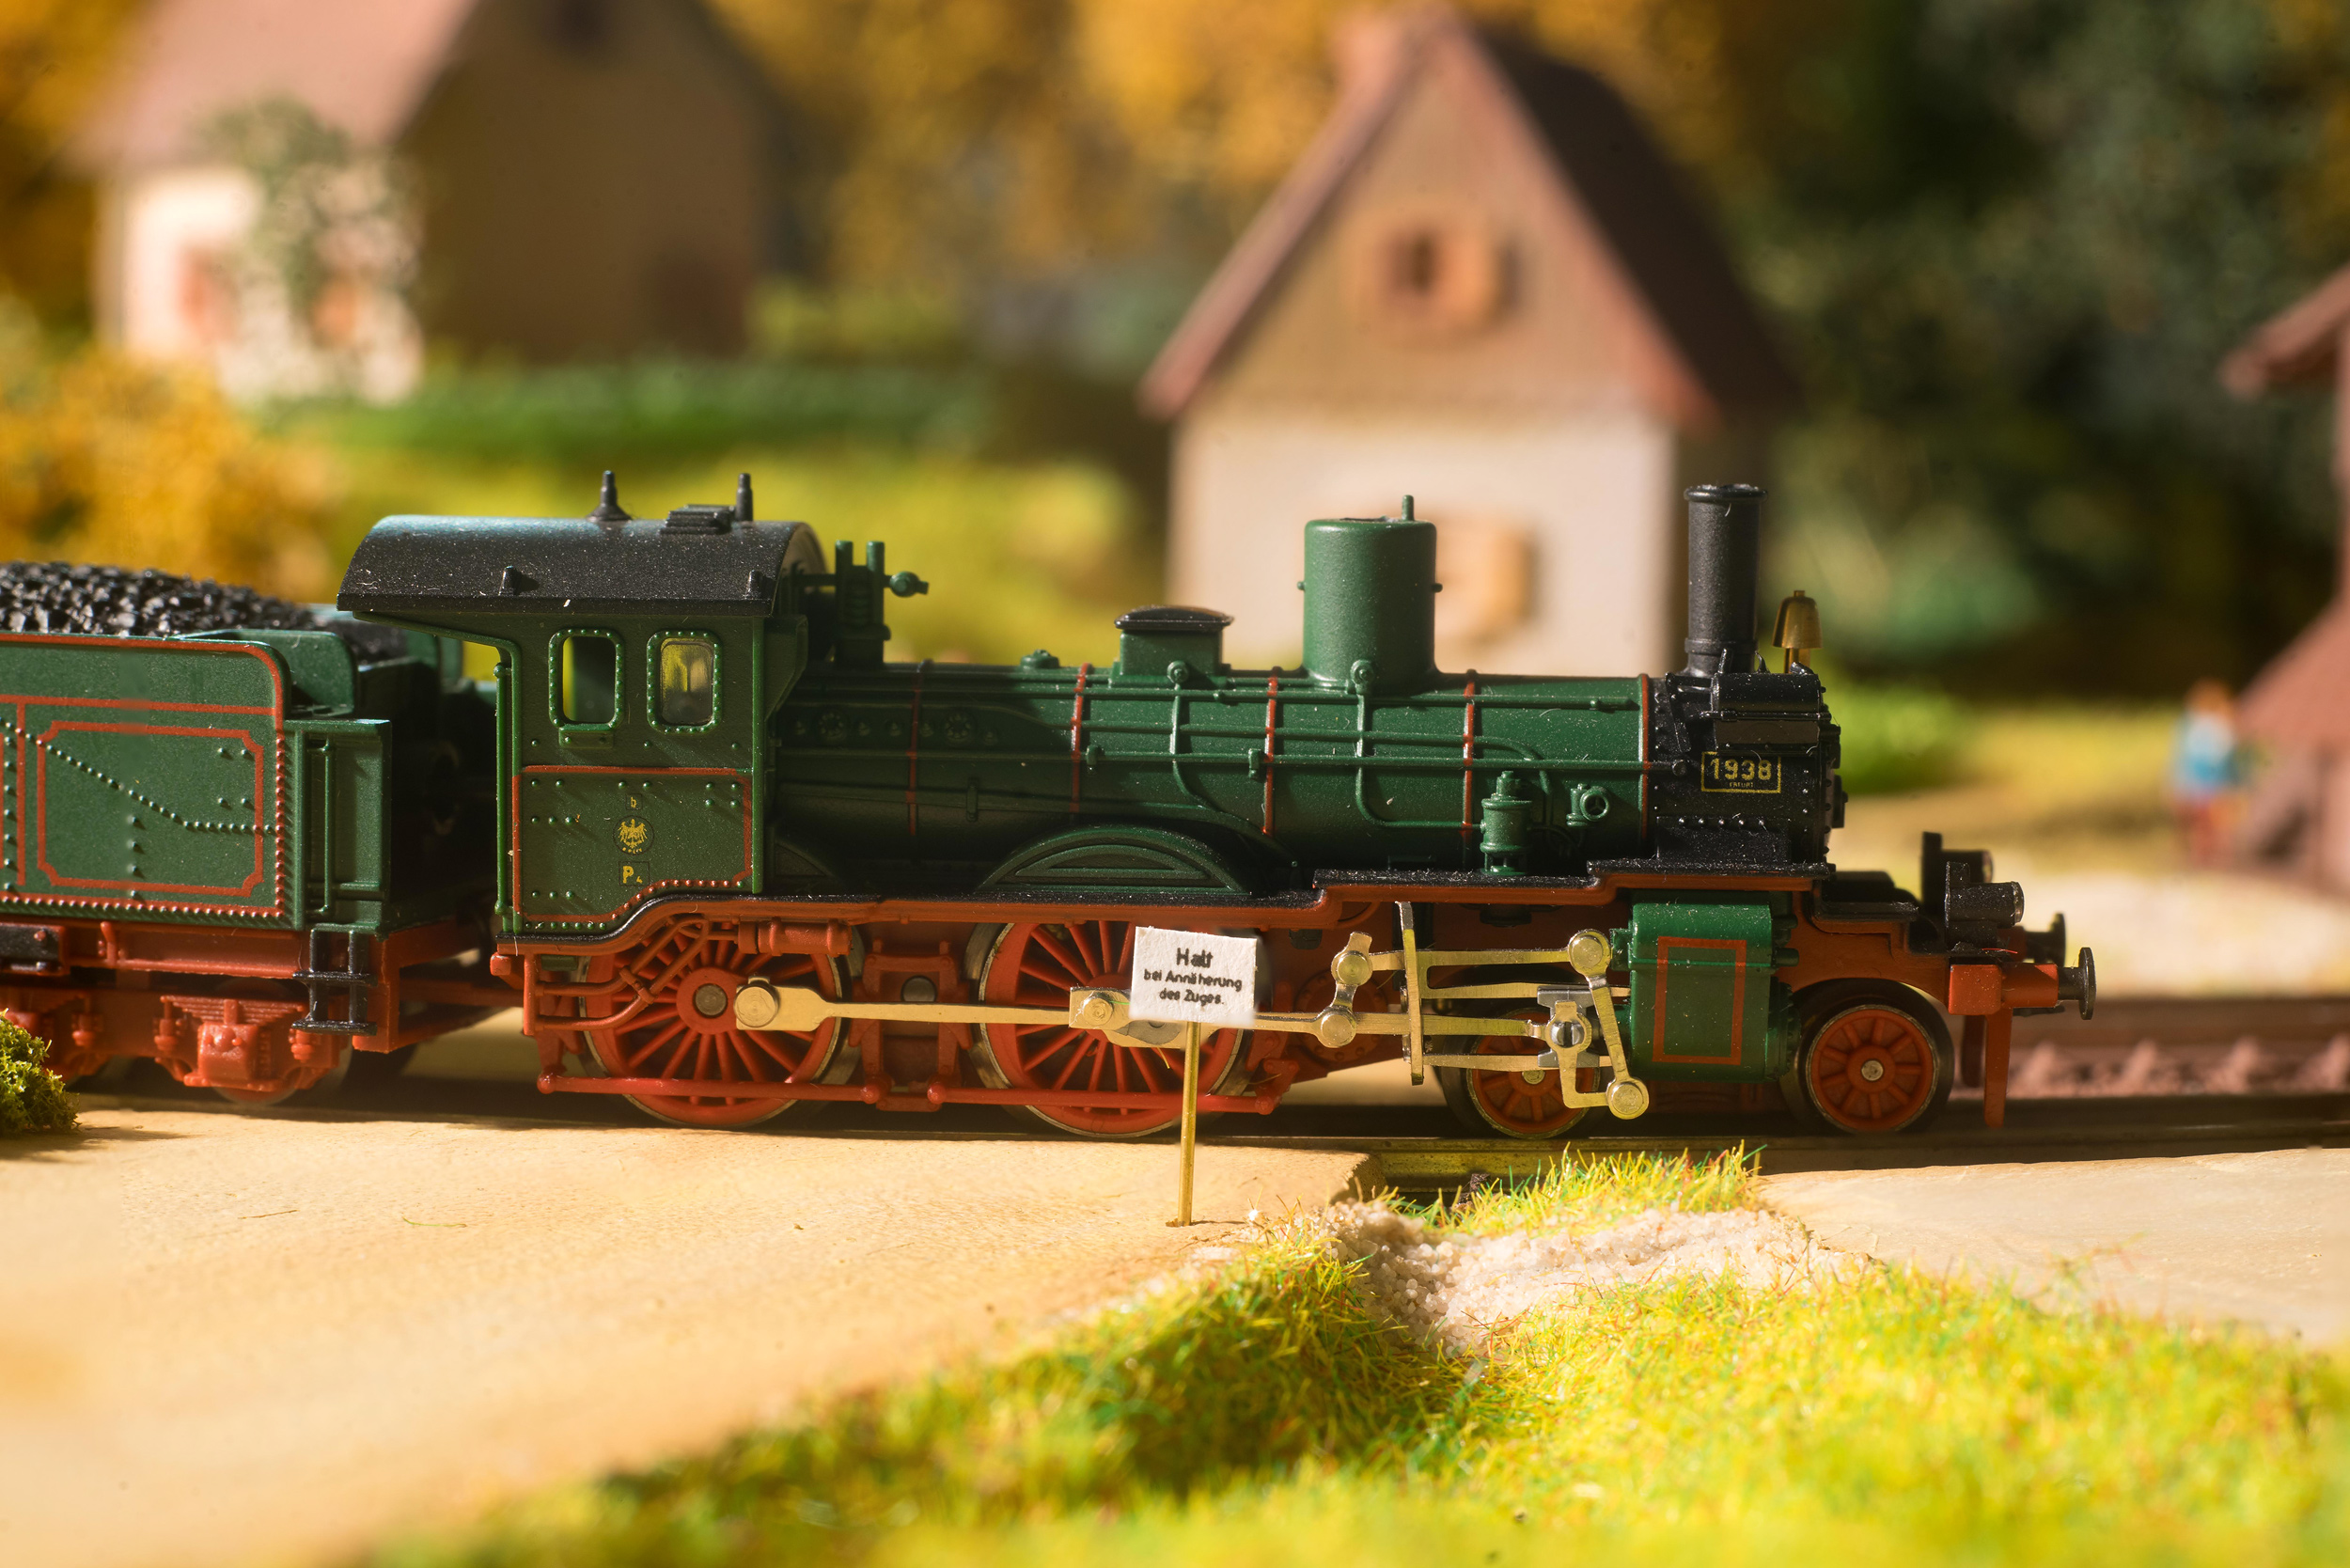
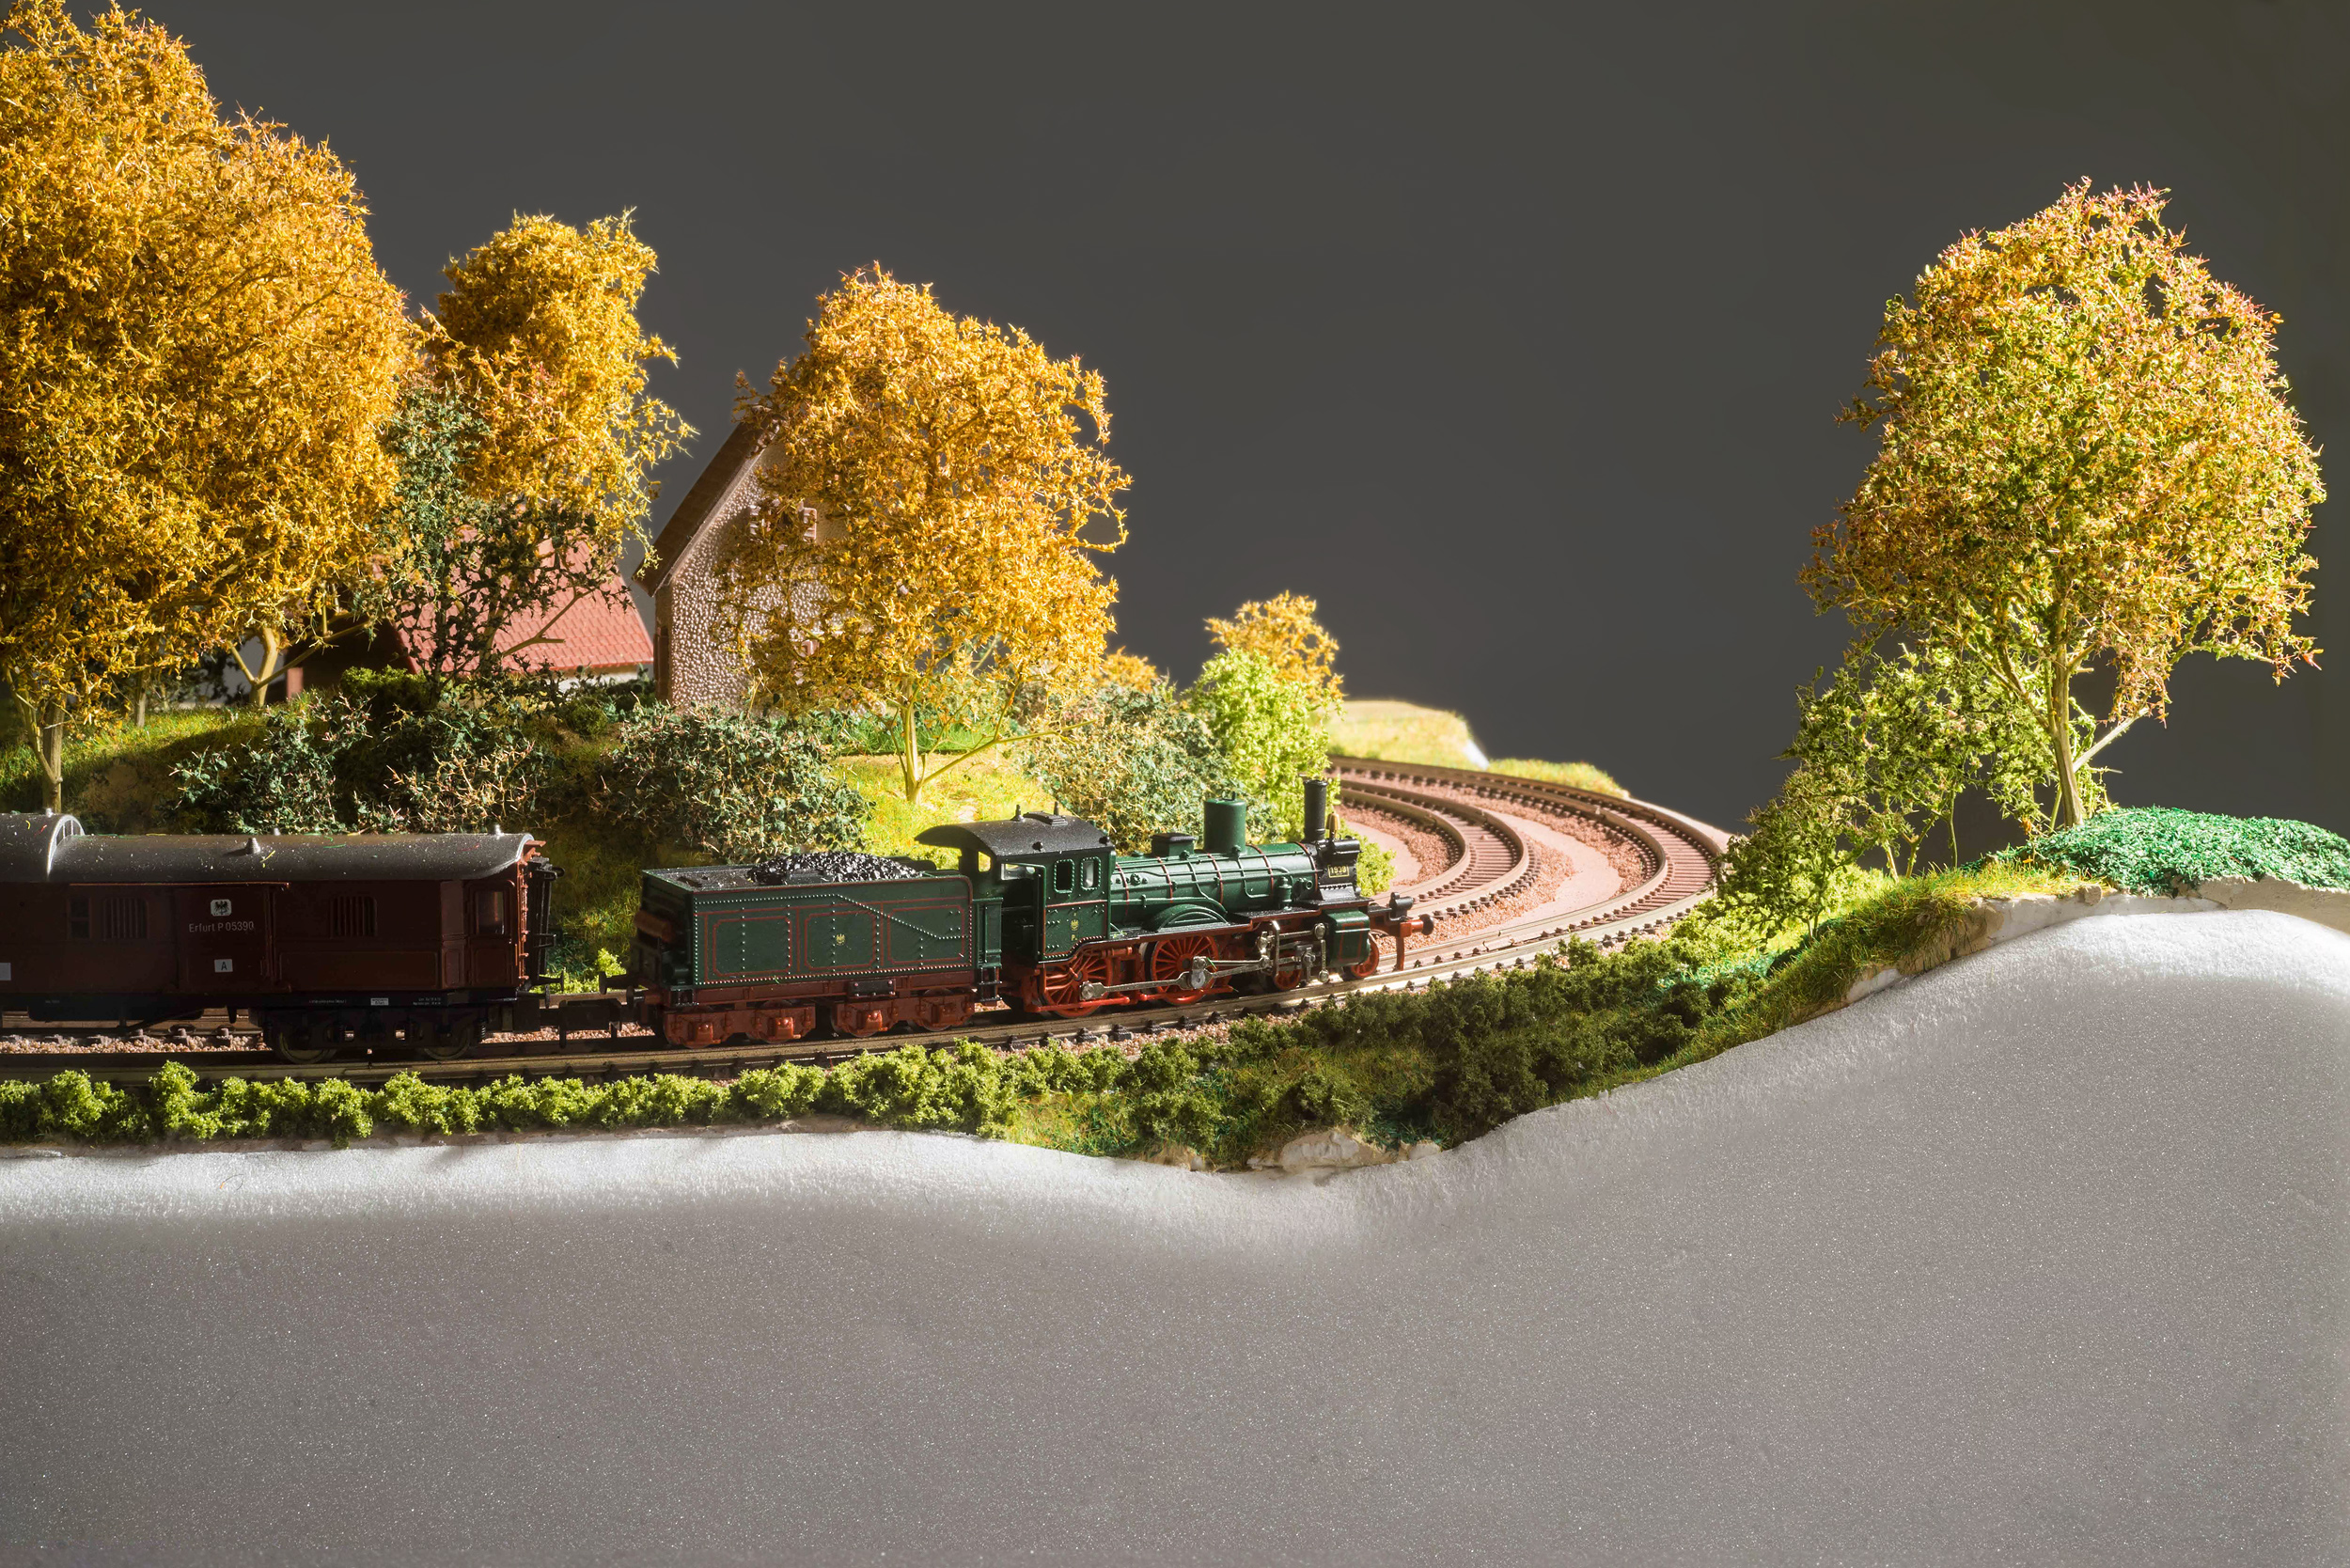
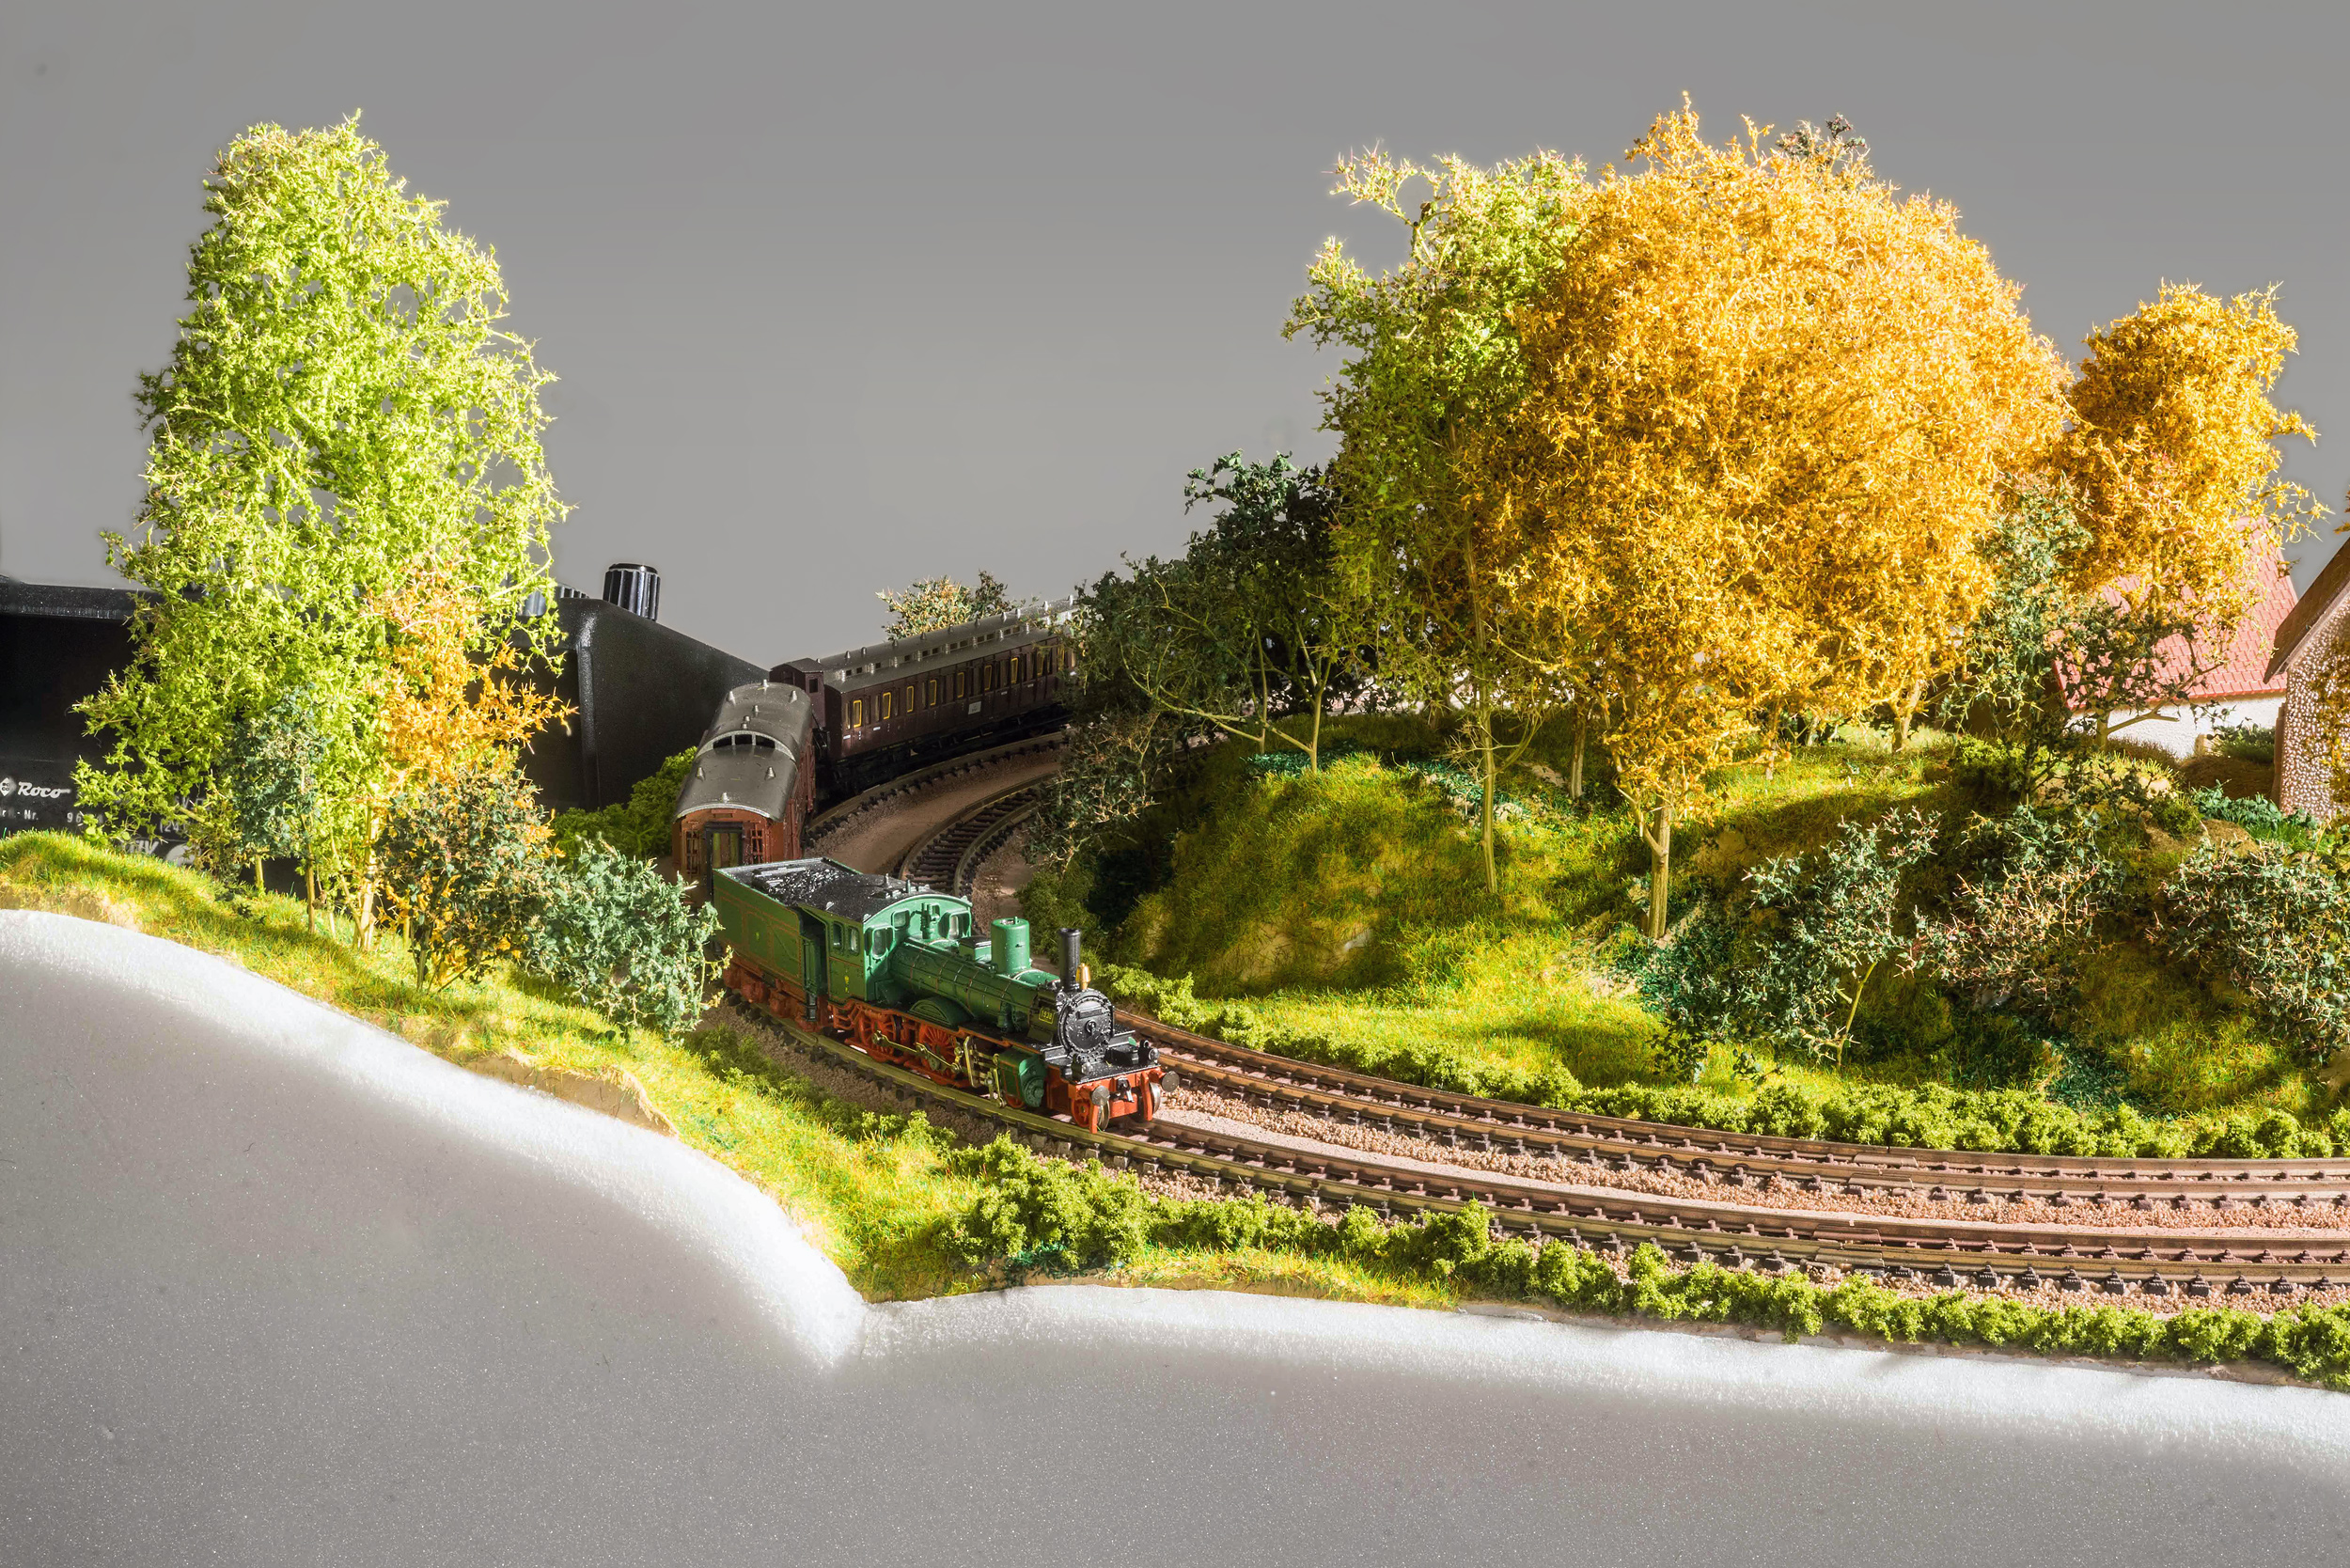
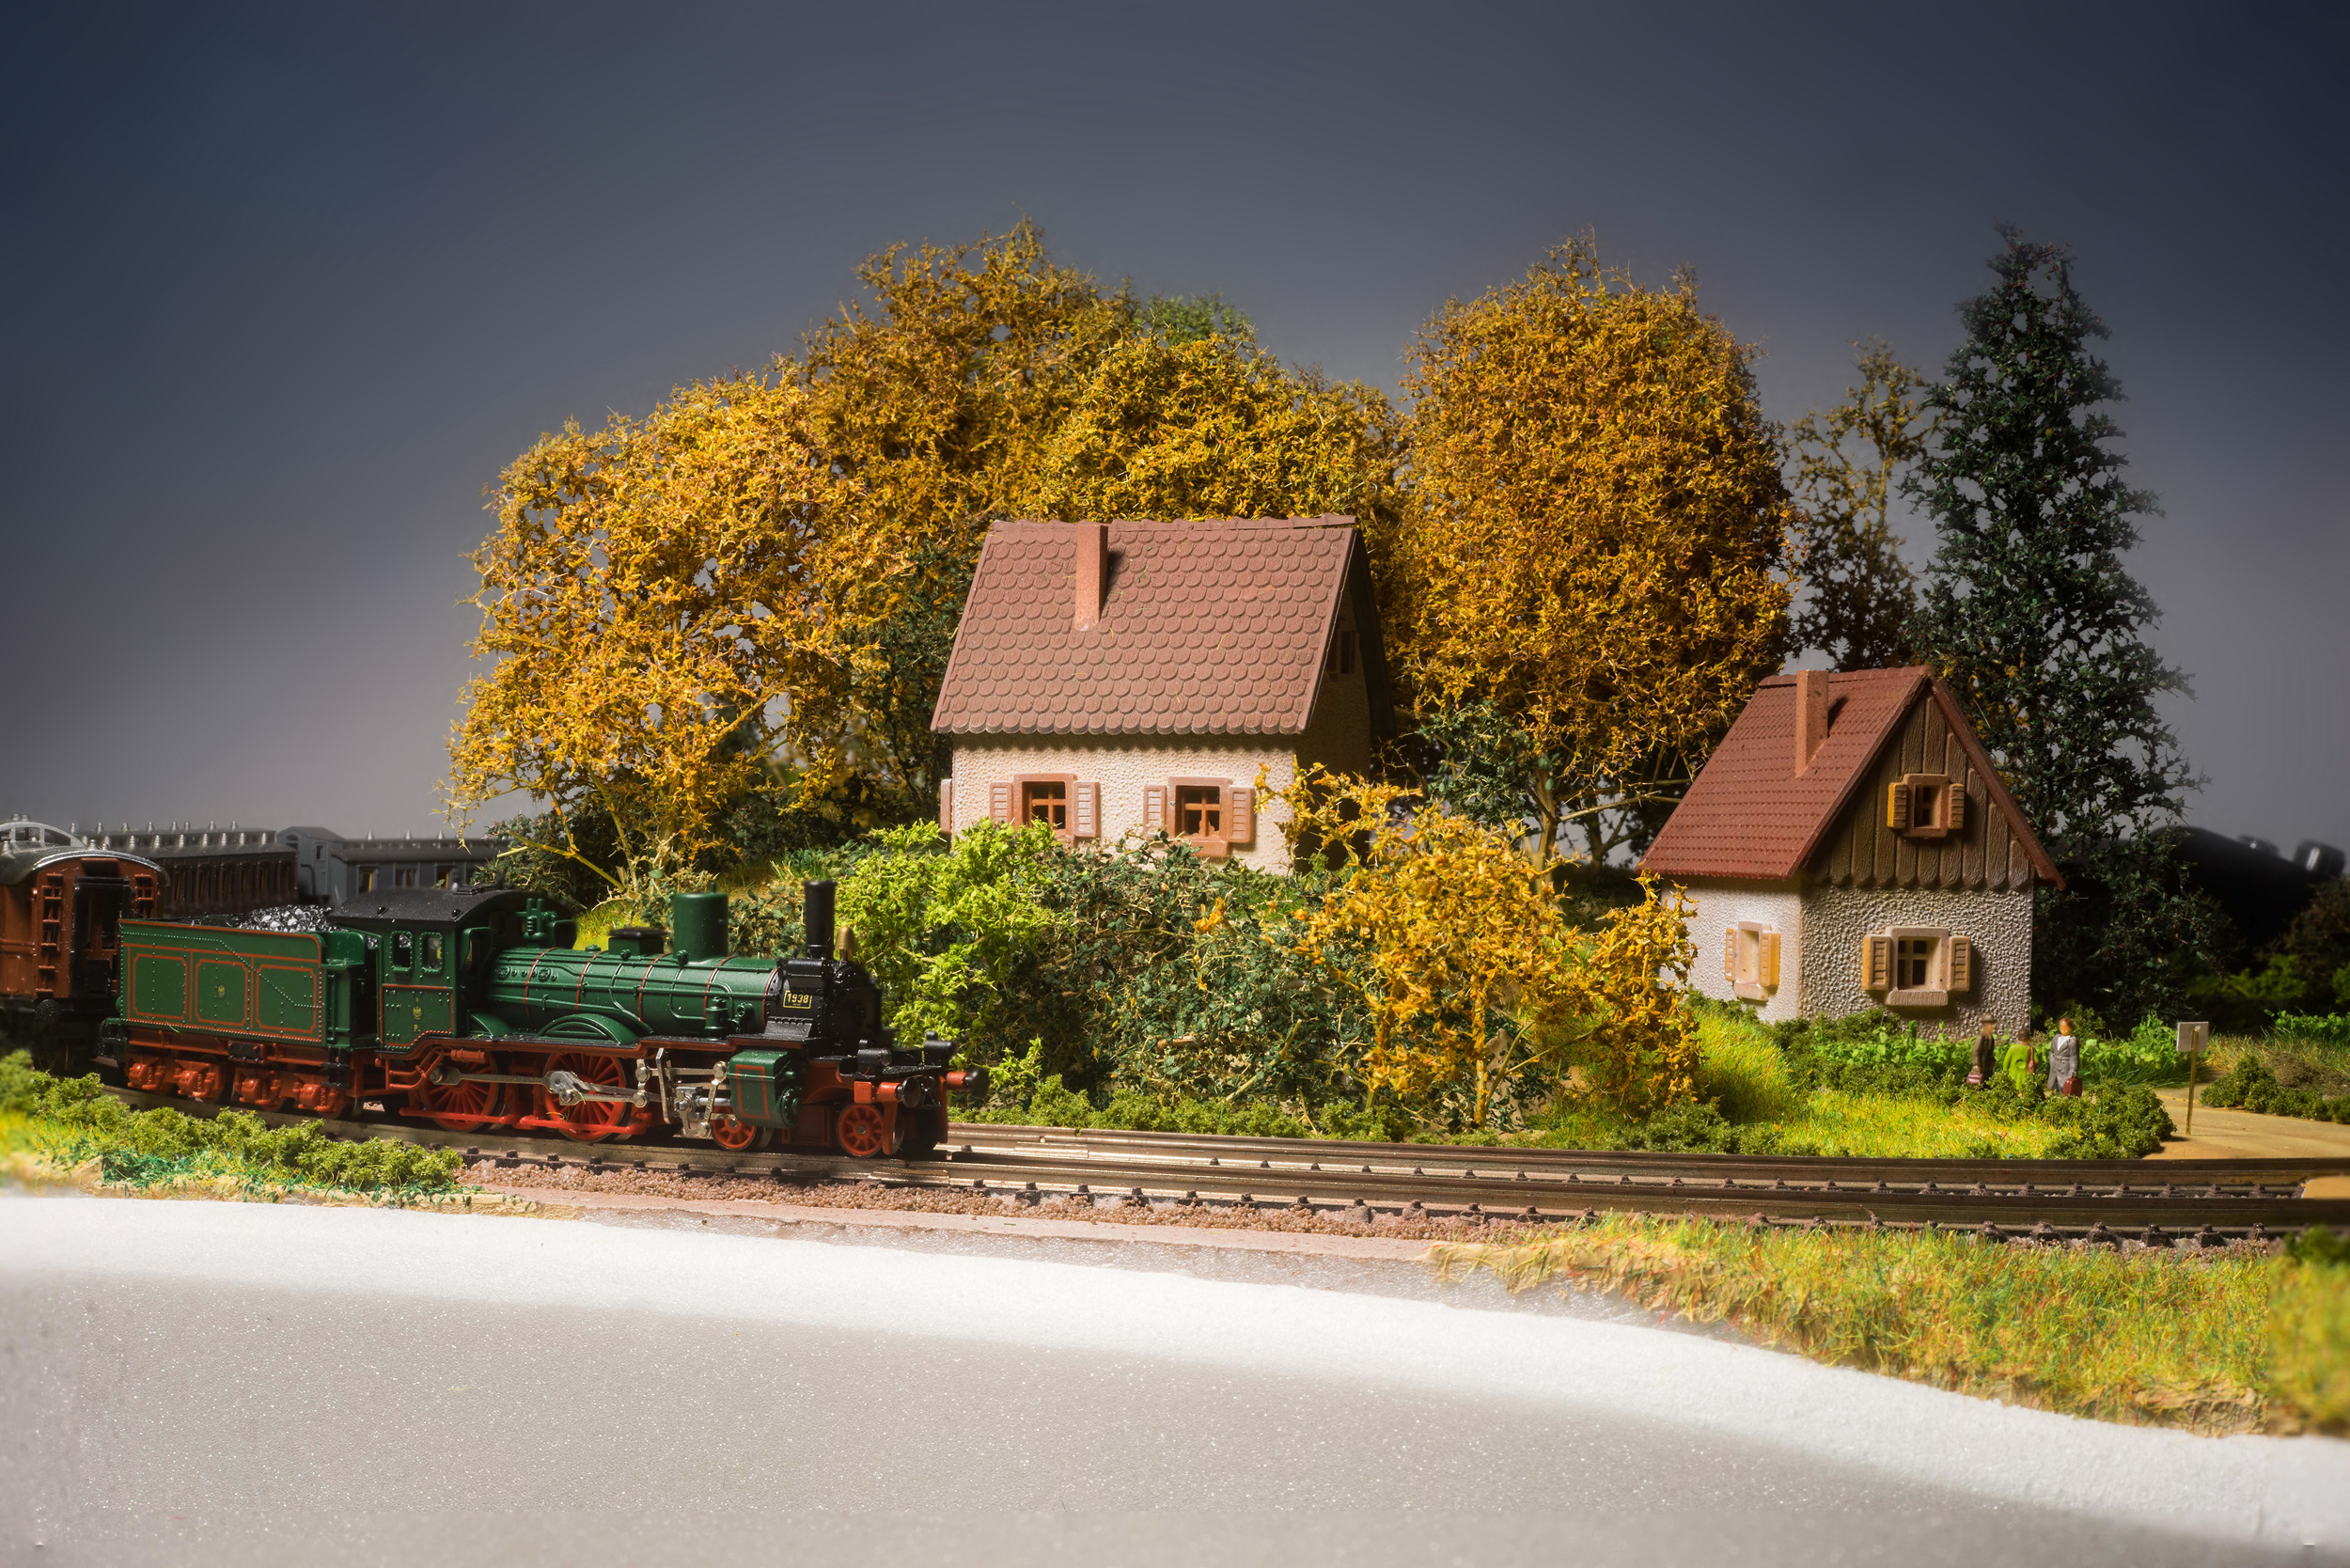
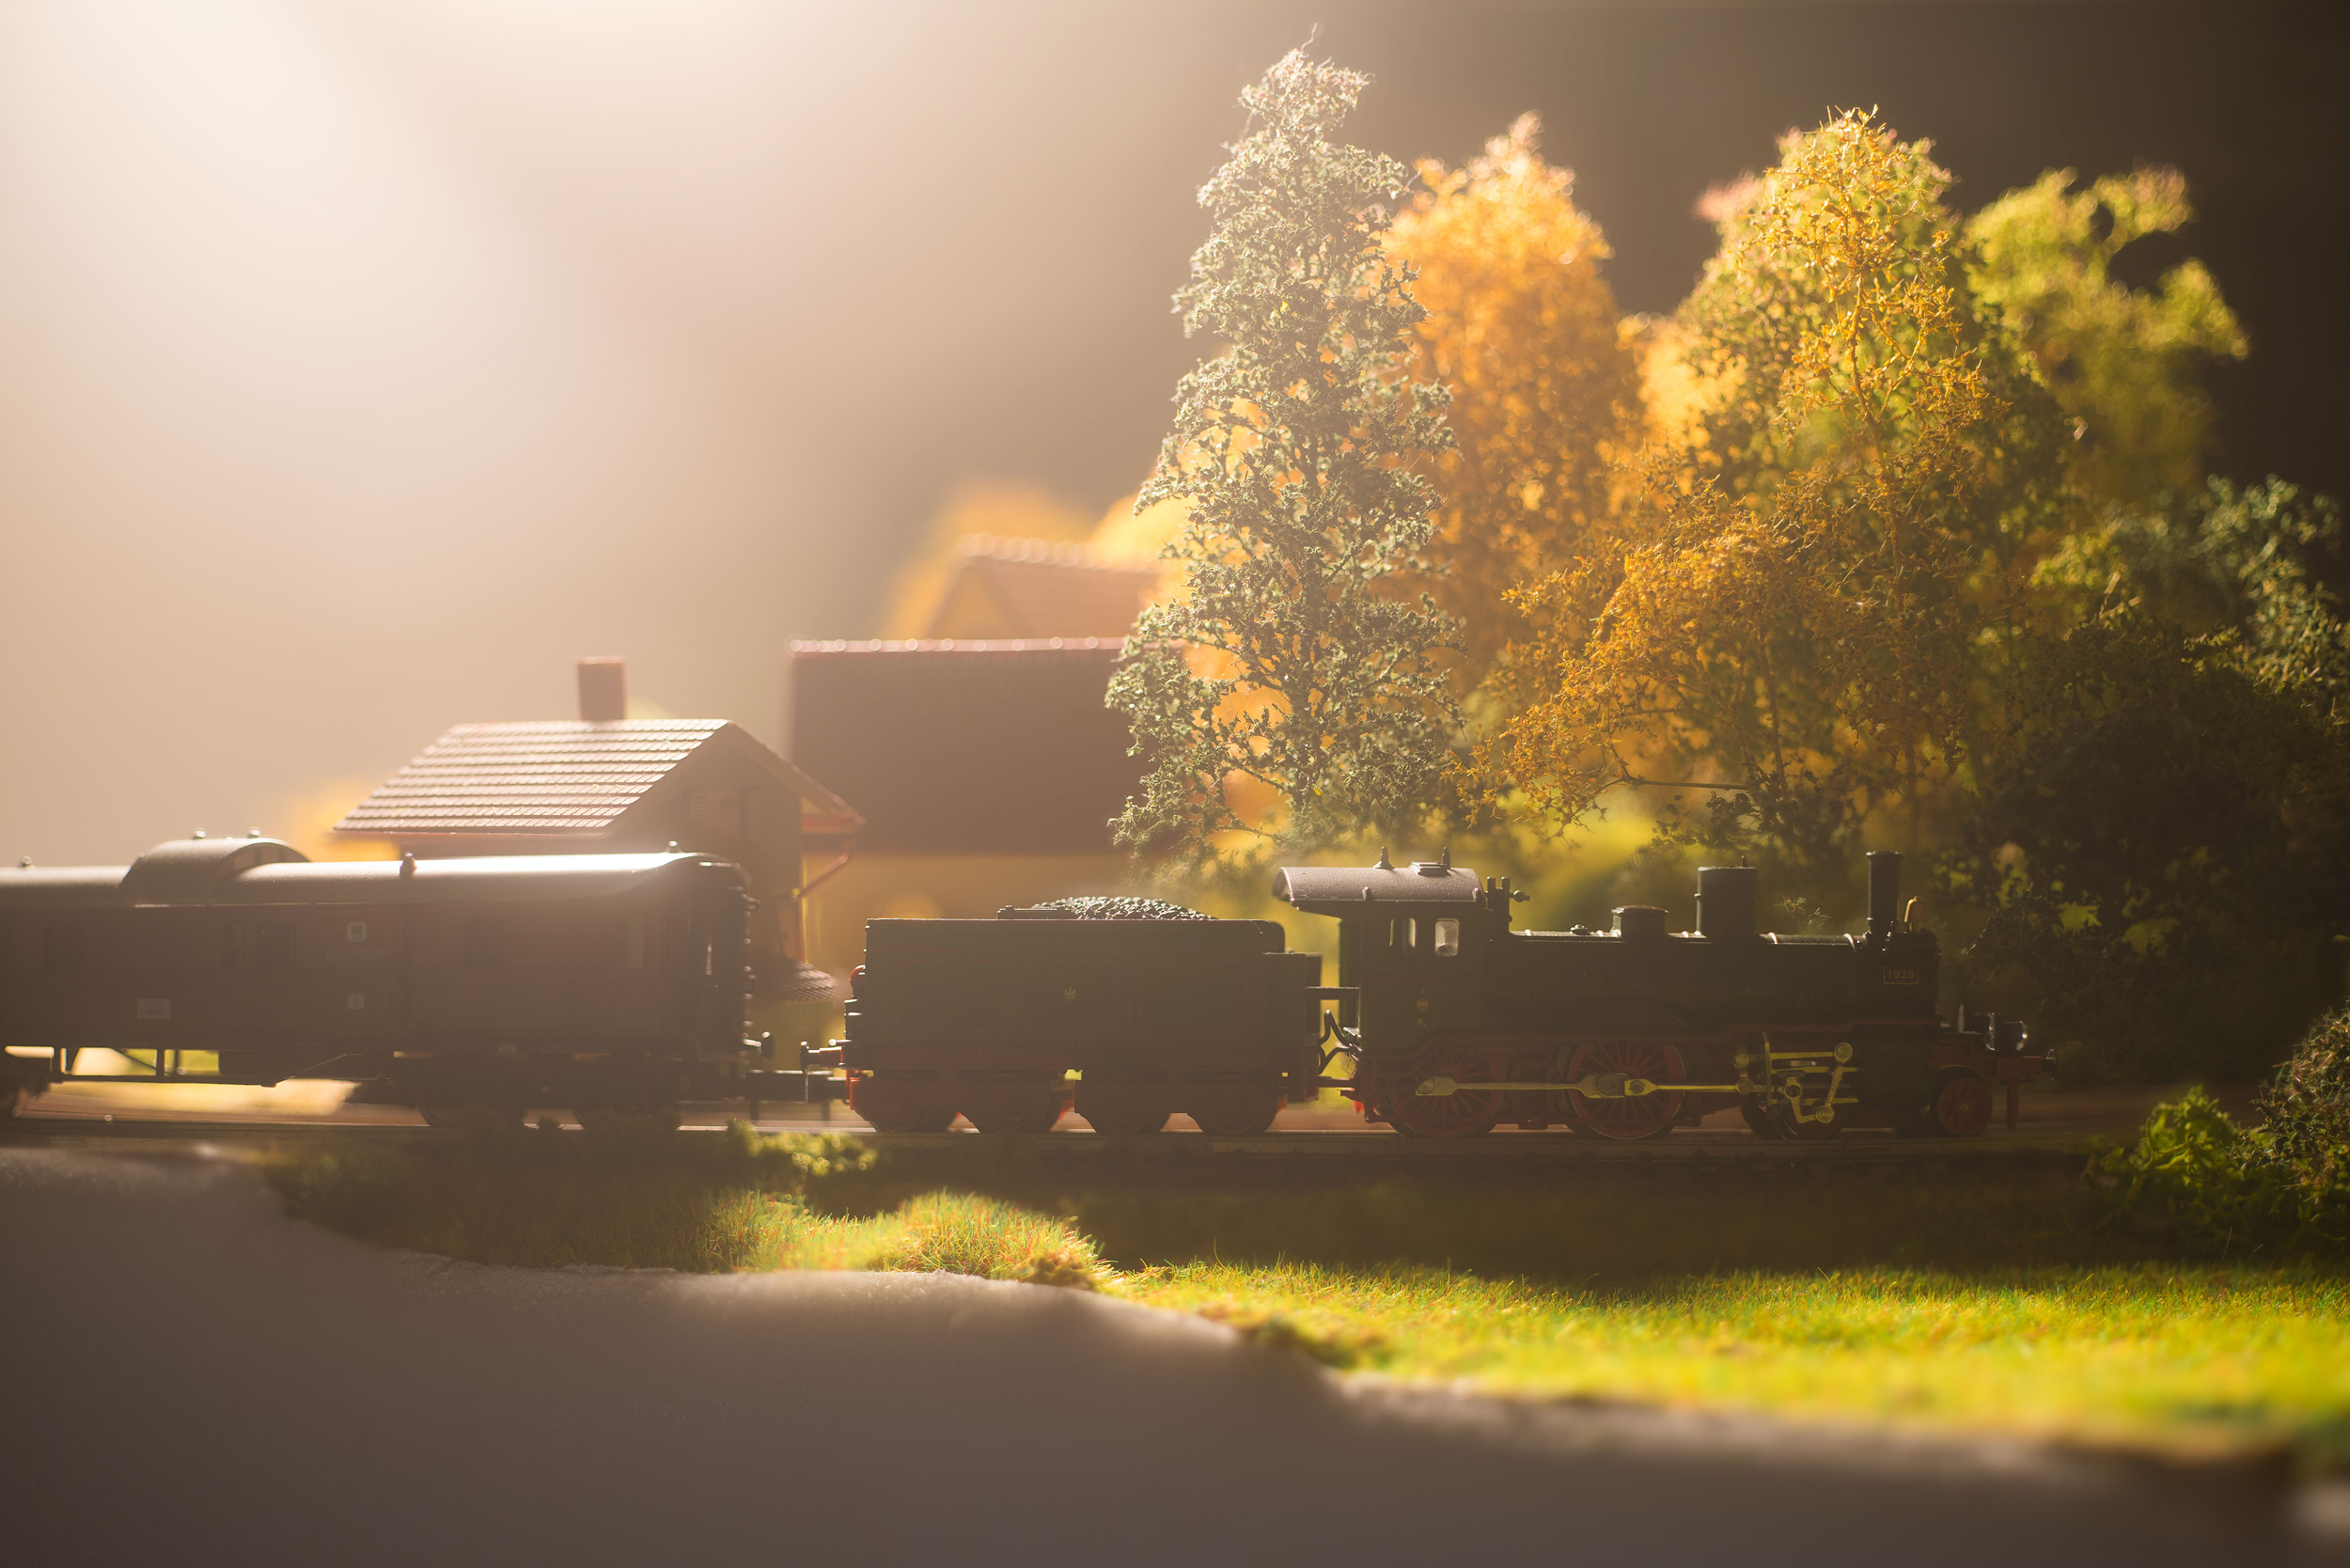
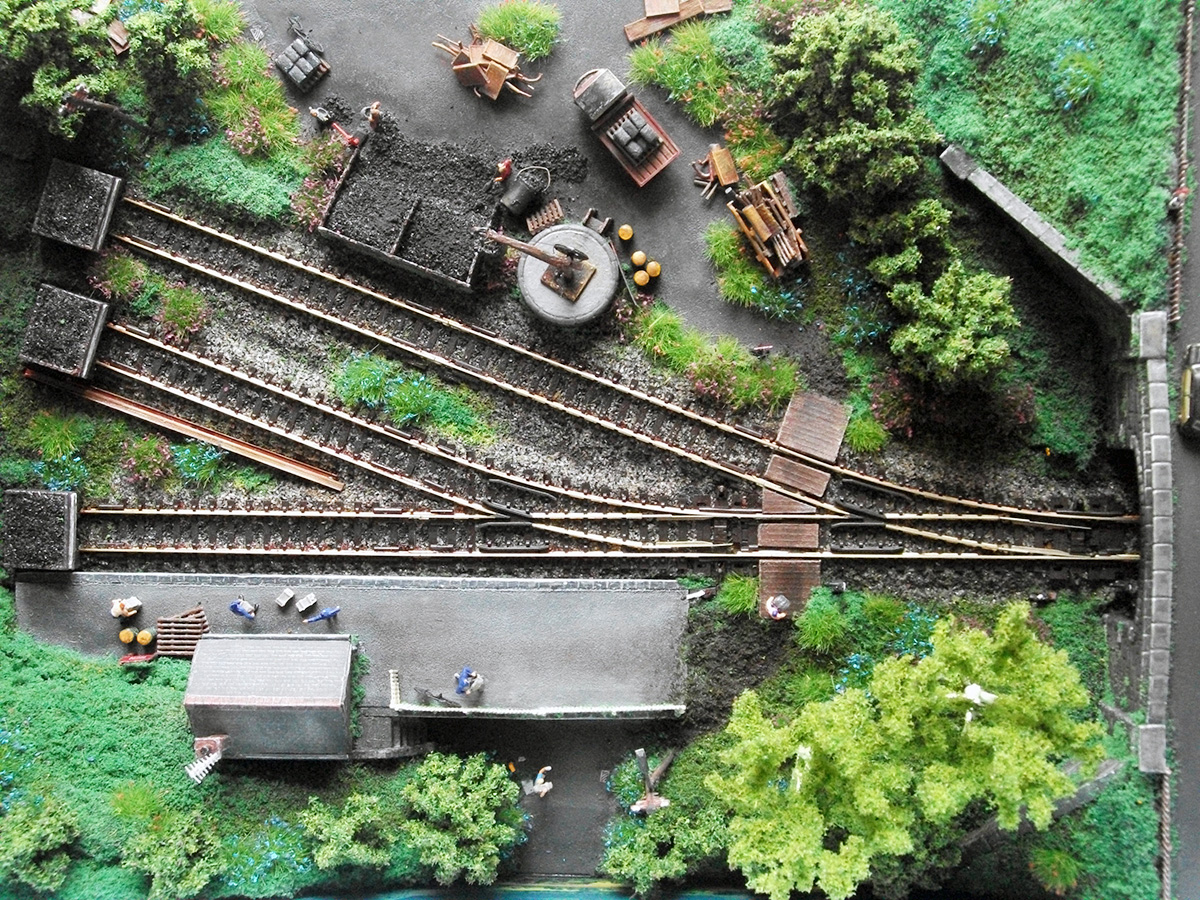
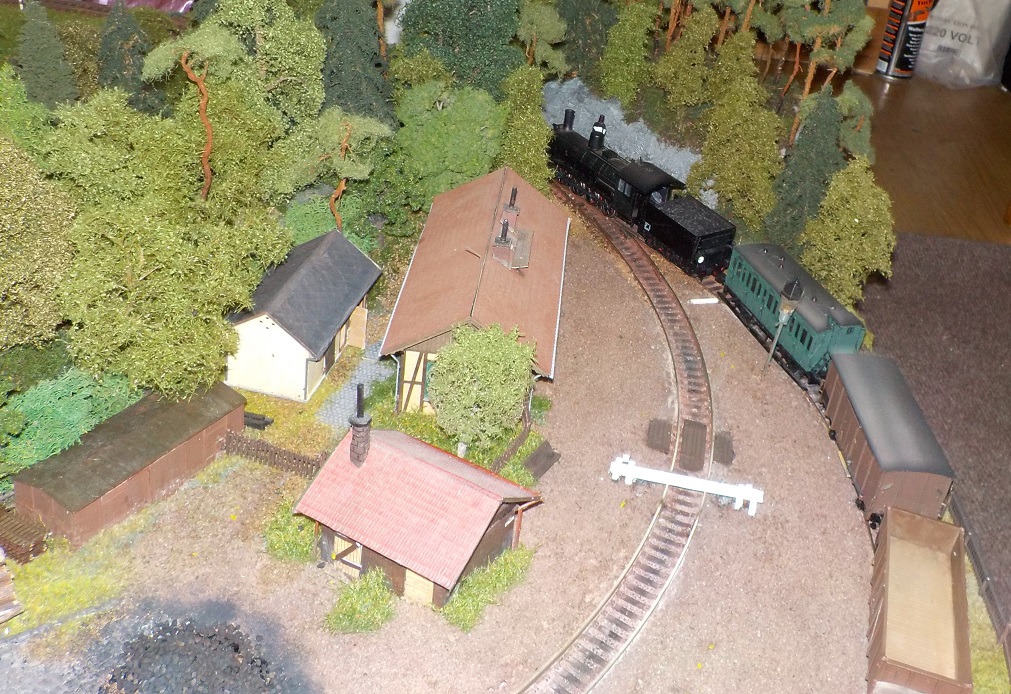
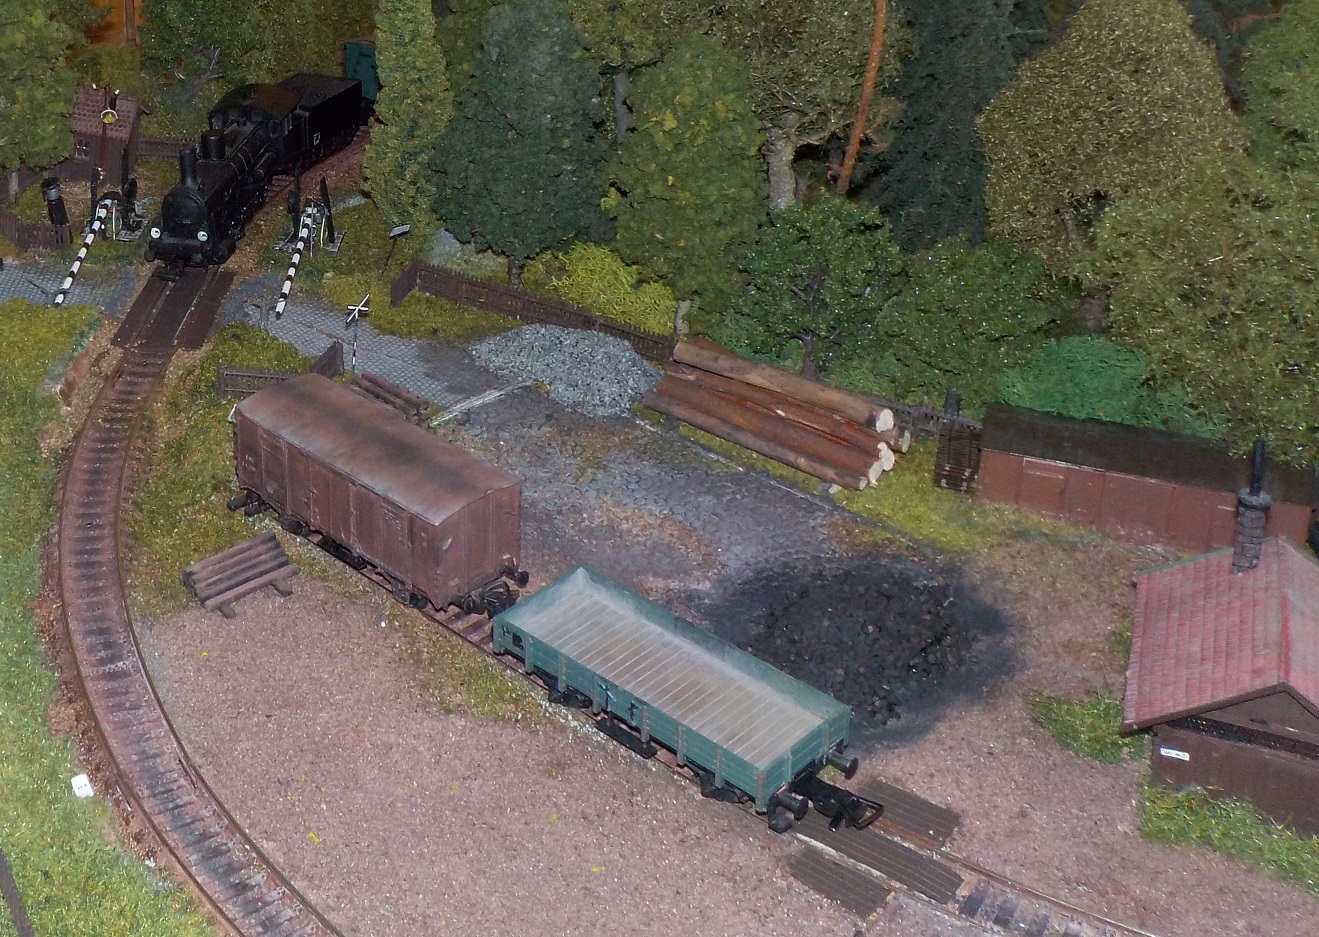
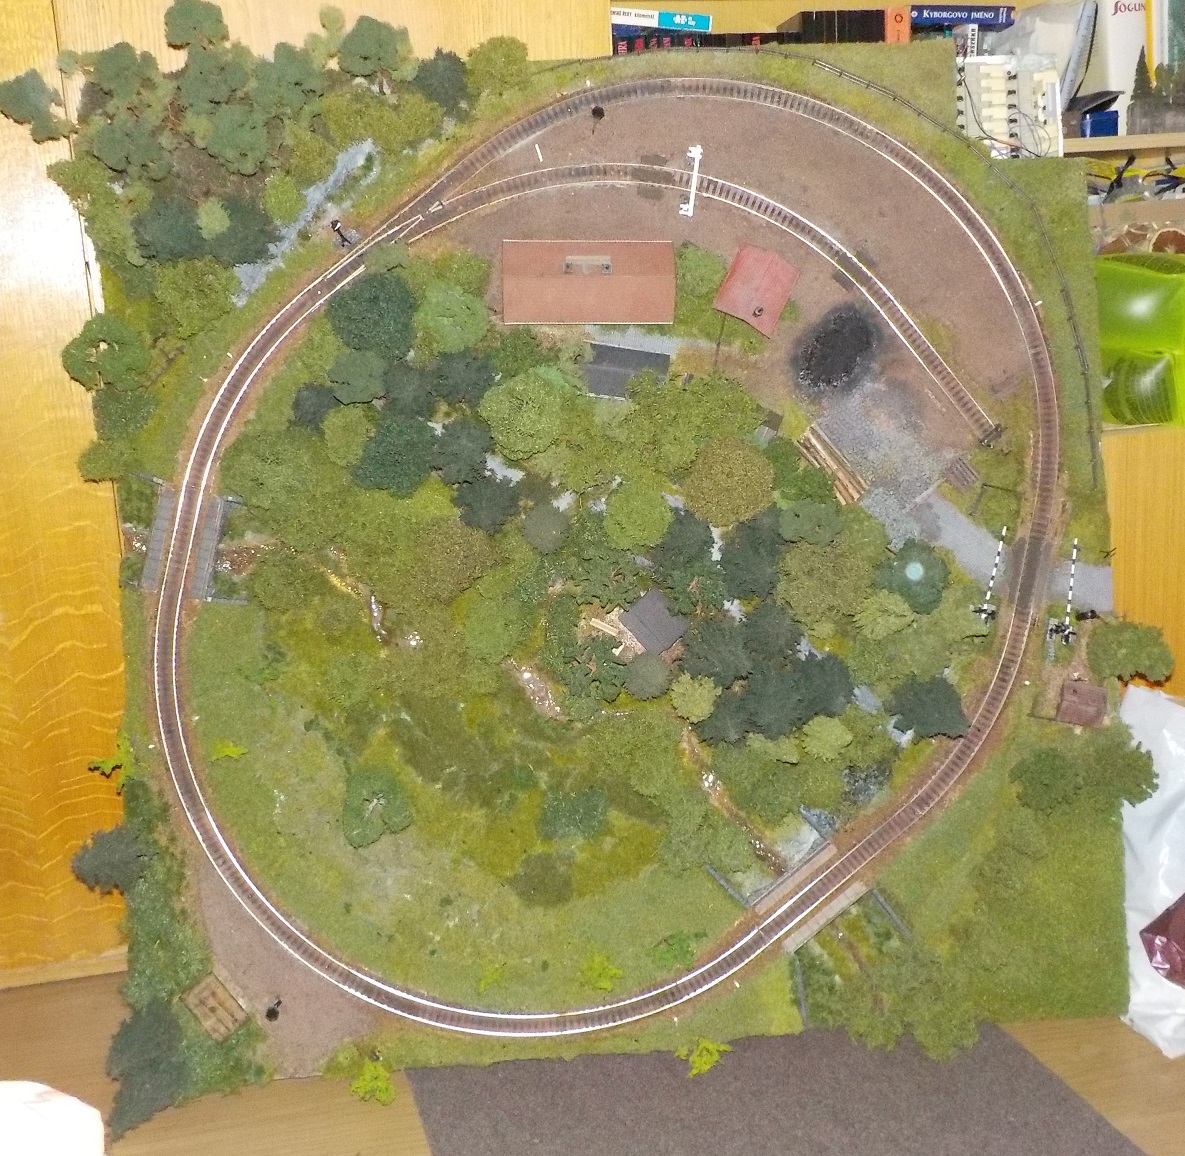
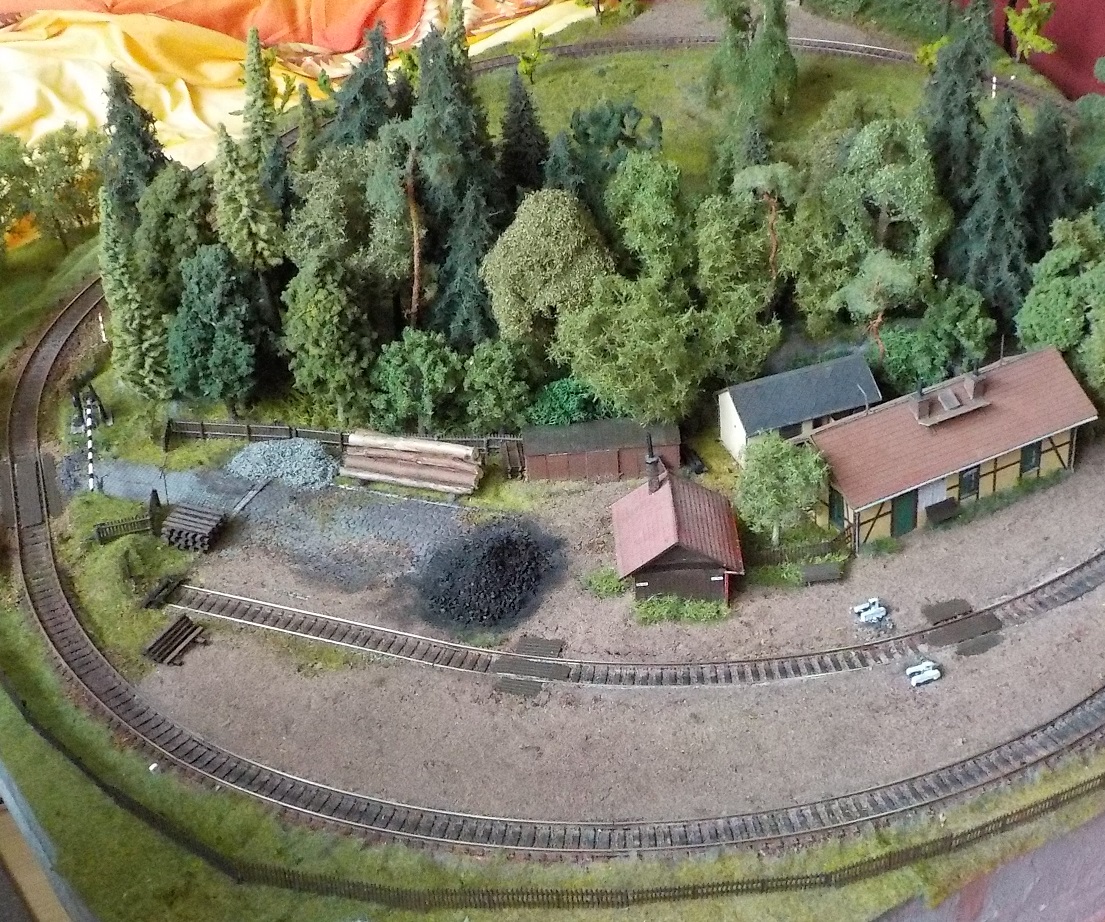
The Three Circles – by Thomas John from Germany
I am really pleased that you entered my first micro layout „Zwei Kreise in Preußen“ at carendt.com. And as much fun as I have had with that layout, I now built a second one that adds even the possibility to run a third train, and still increase the footprint of the layout only by a small margin. So, this one is called „Die Drei Kreise“ or „The Three Circles“ and it again takes place in the first decades of the 20th century.
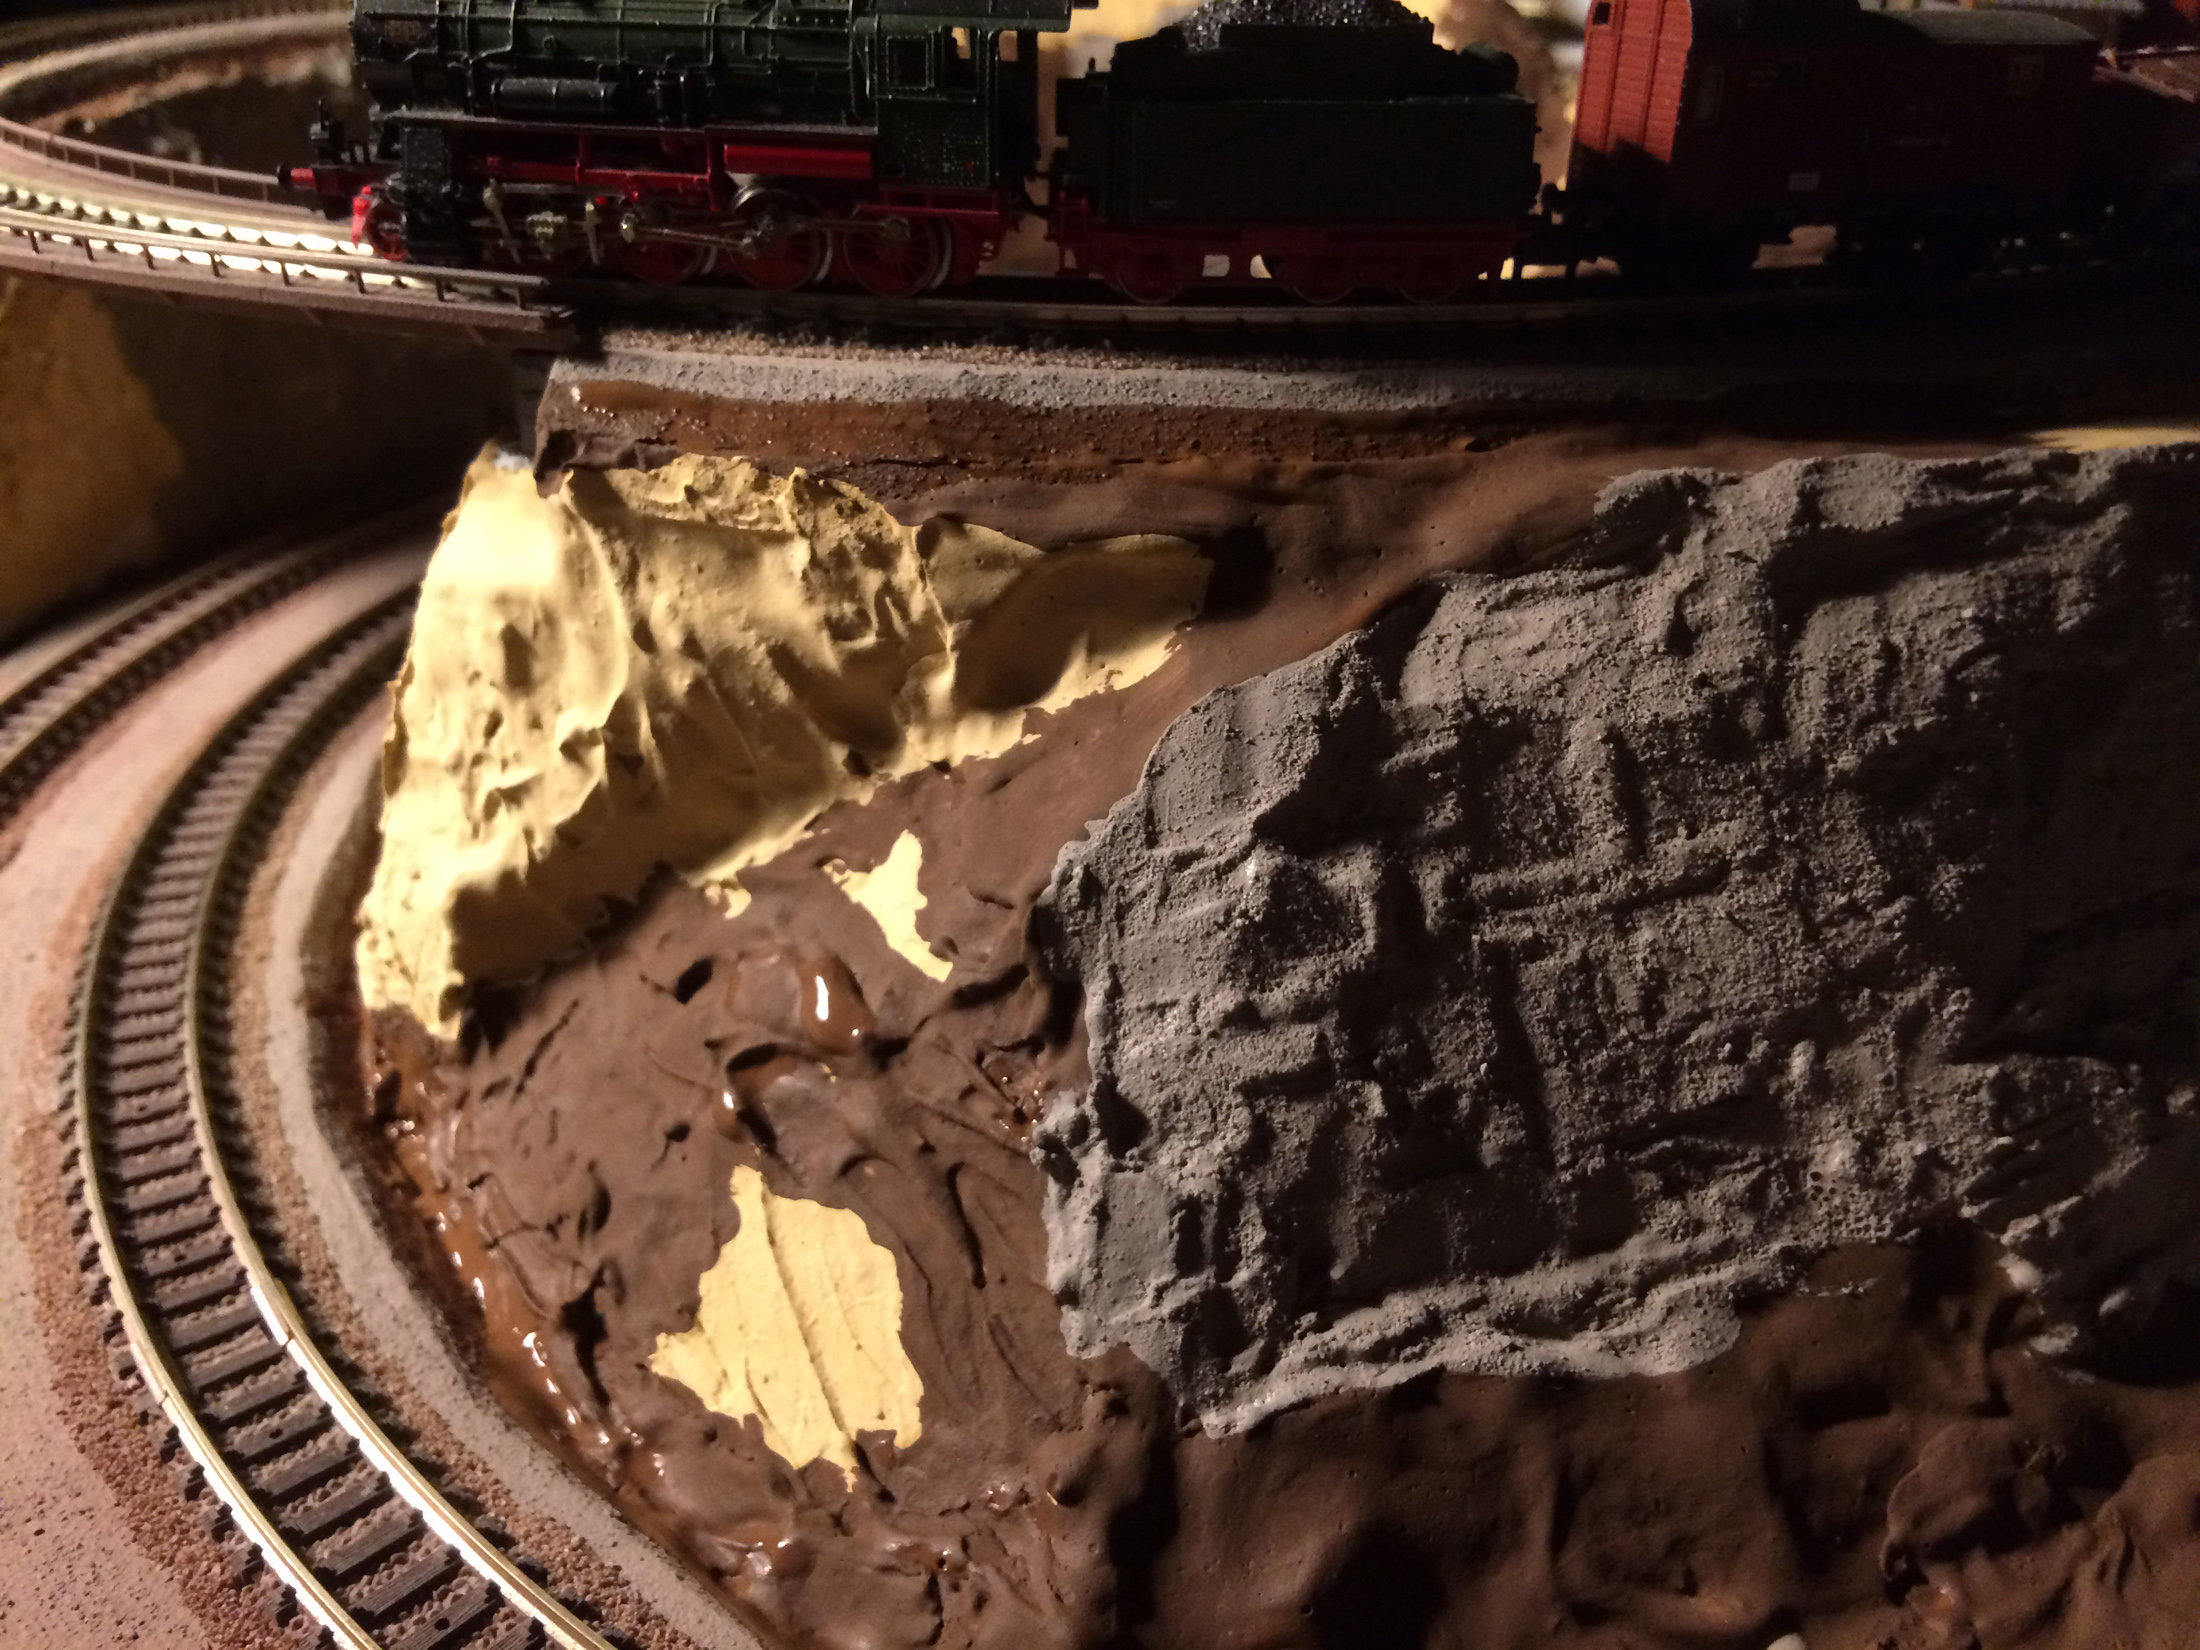
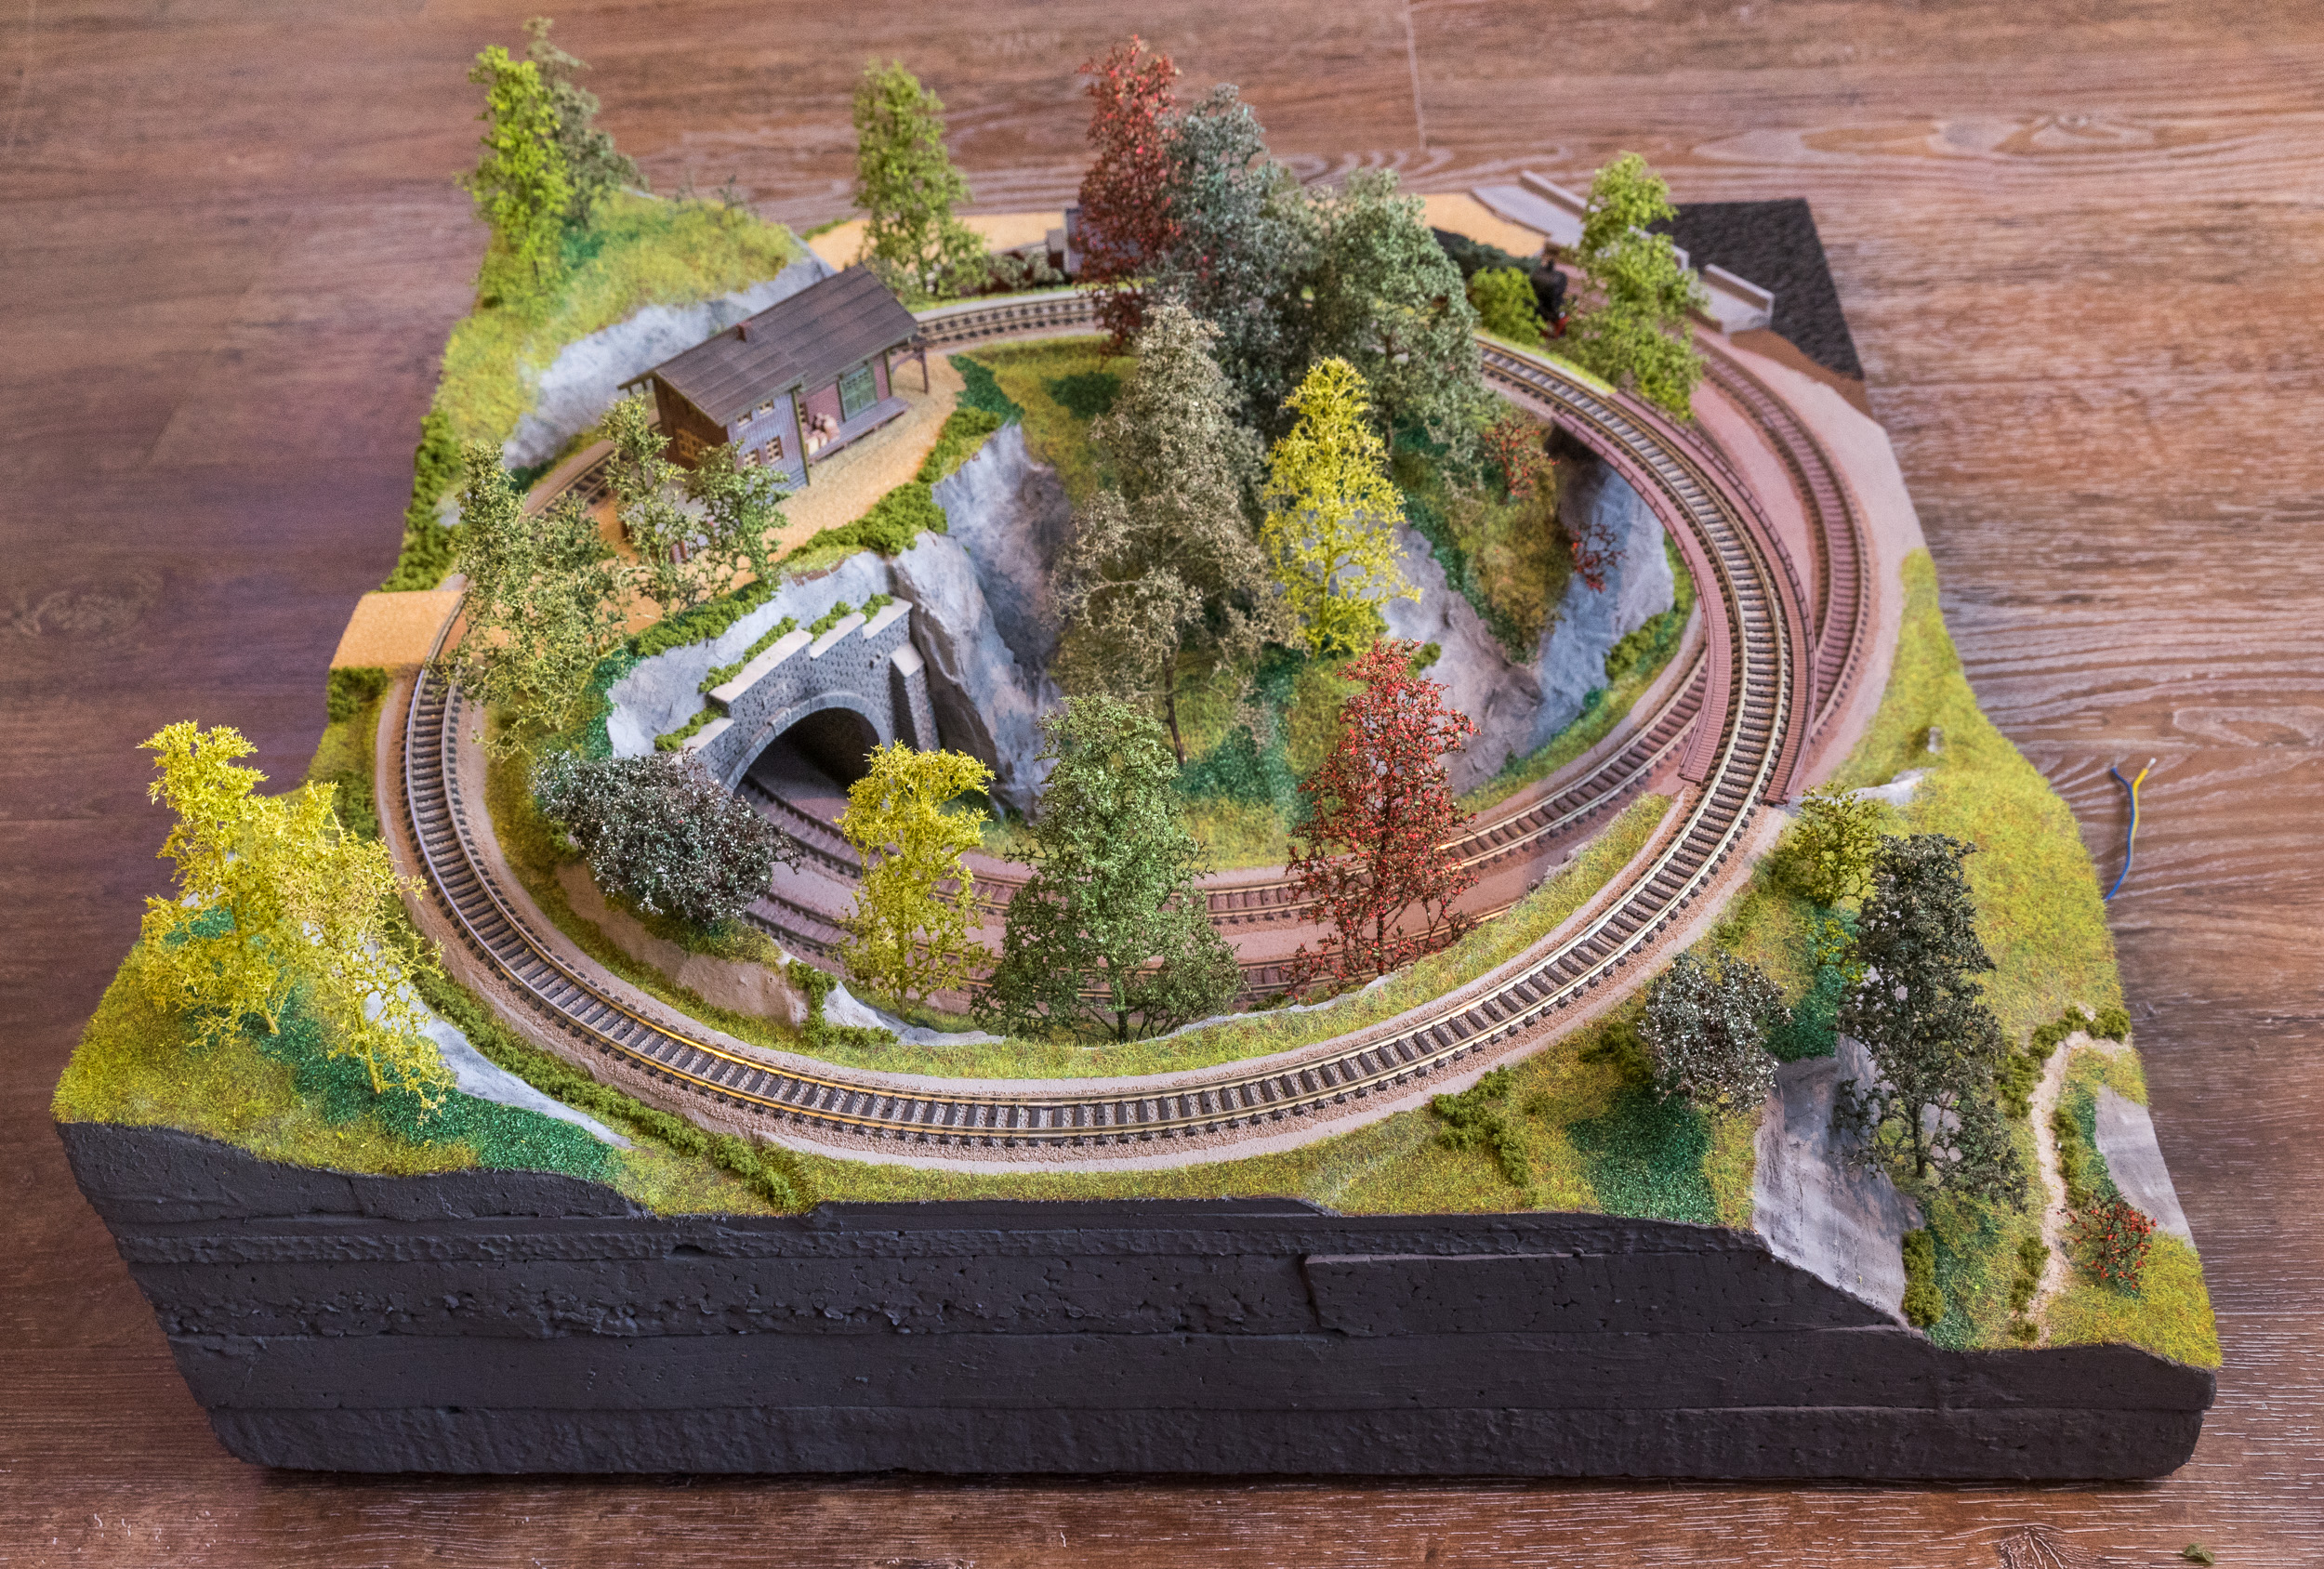
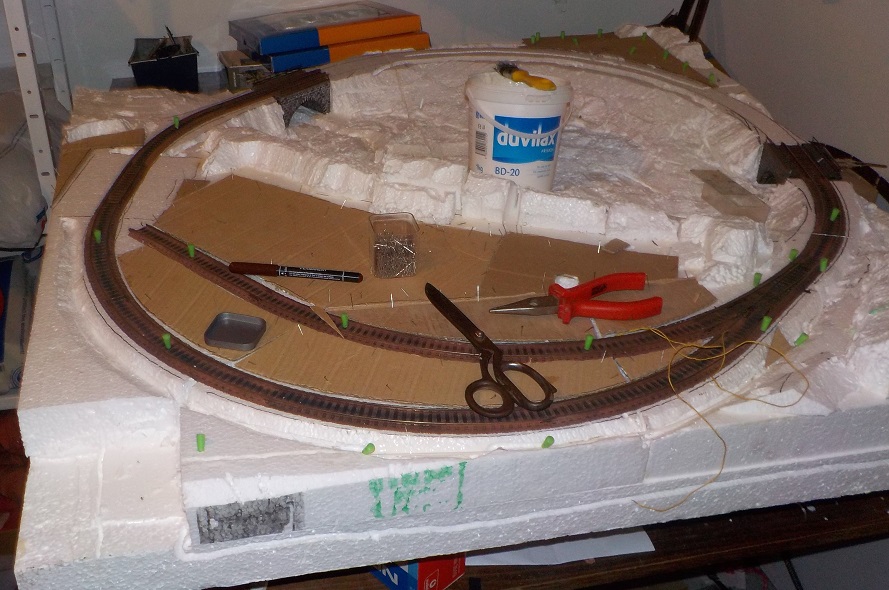
This layout is again N scale and has a size of 50×65 cm. The layout is a complete „foamie“ so the baseboard, landscape etc. are all made by styrofoam and 3mm and 5mm sheets of some denser foam material that you can get in D.I.Y. stores as some sort of underground for floor tiles or such.
I have no track plan but I have some overview pictures that make it it very obvious how the layout works: There is a double mainline on the ground level that consists of two circular Fleischmann Piccolo tracks (radius 1 + 2). Then, about 2 1/2 inches above that, I built a second level with a single branchline, again a circle of Fleischmann track (radius 1). There are no turnouts on the layout. Every train just runs for itself, three altogether. You shouldn’t probably run InterCity trains on a layout like this but as I decided (again) for the 1900 era that is not a huge problem…
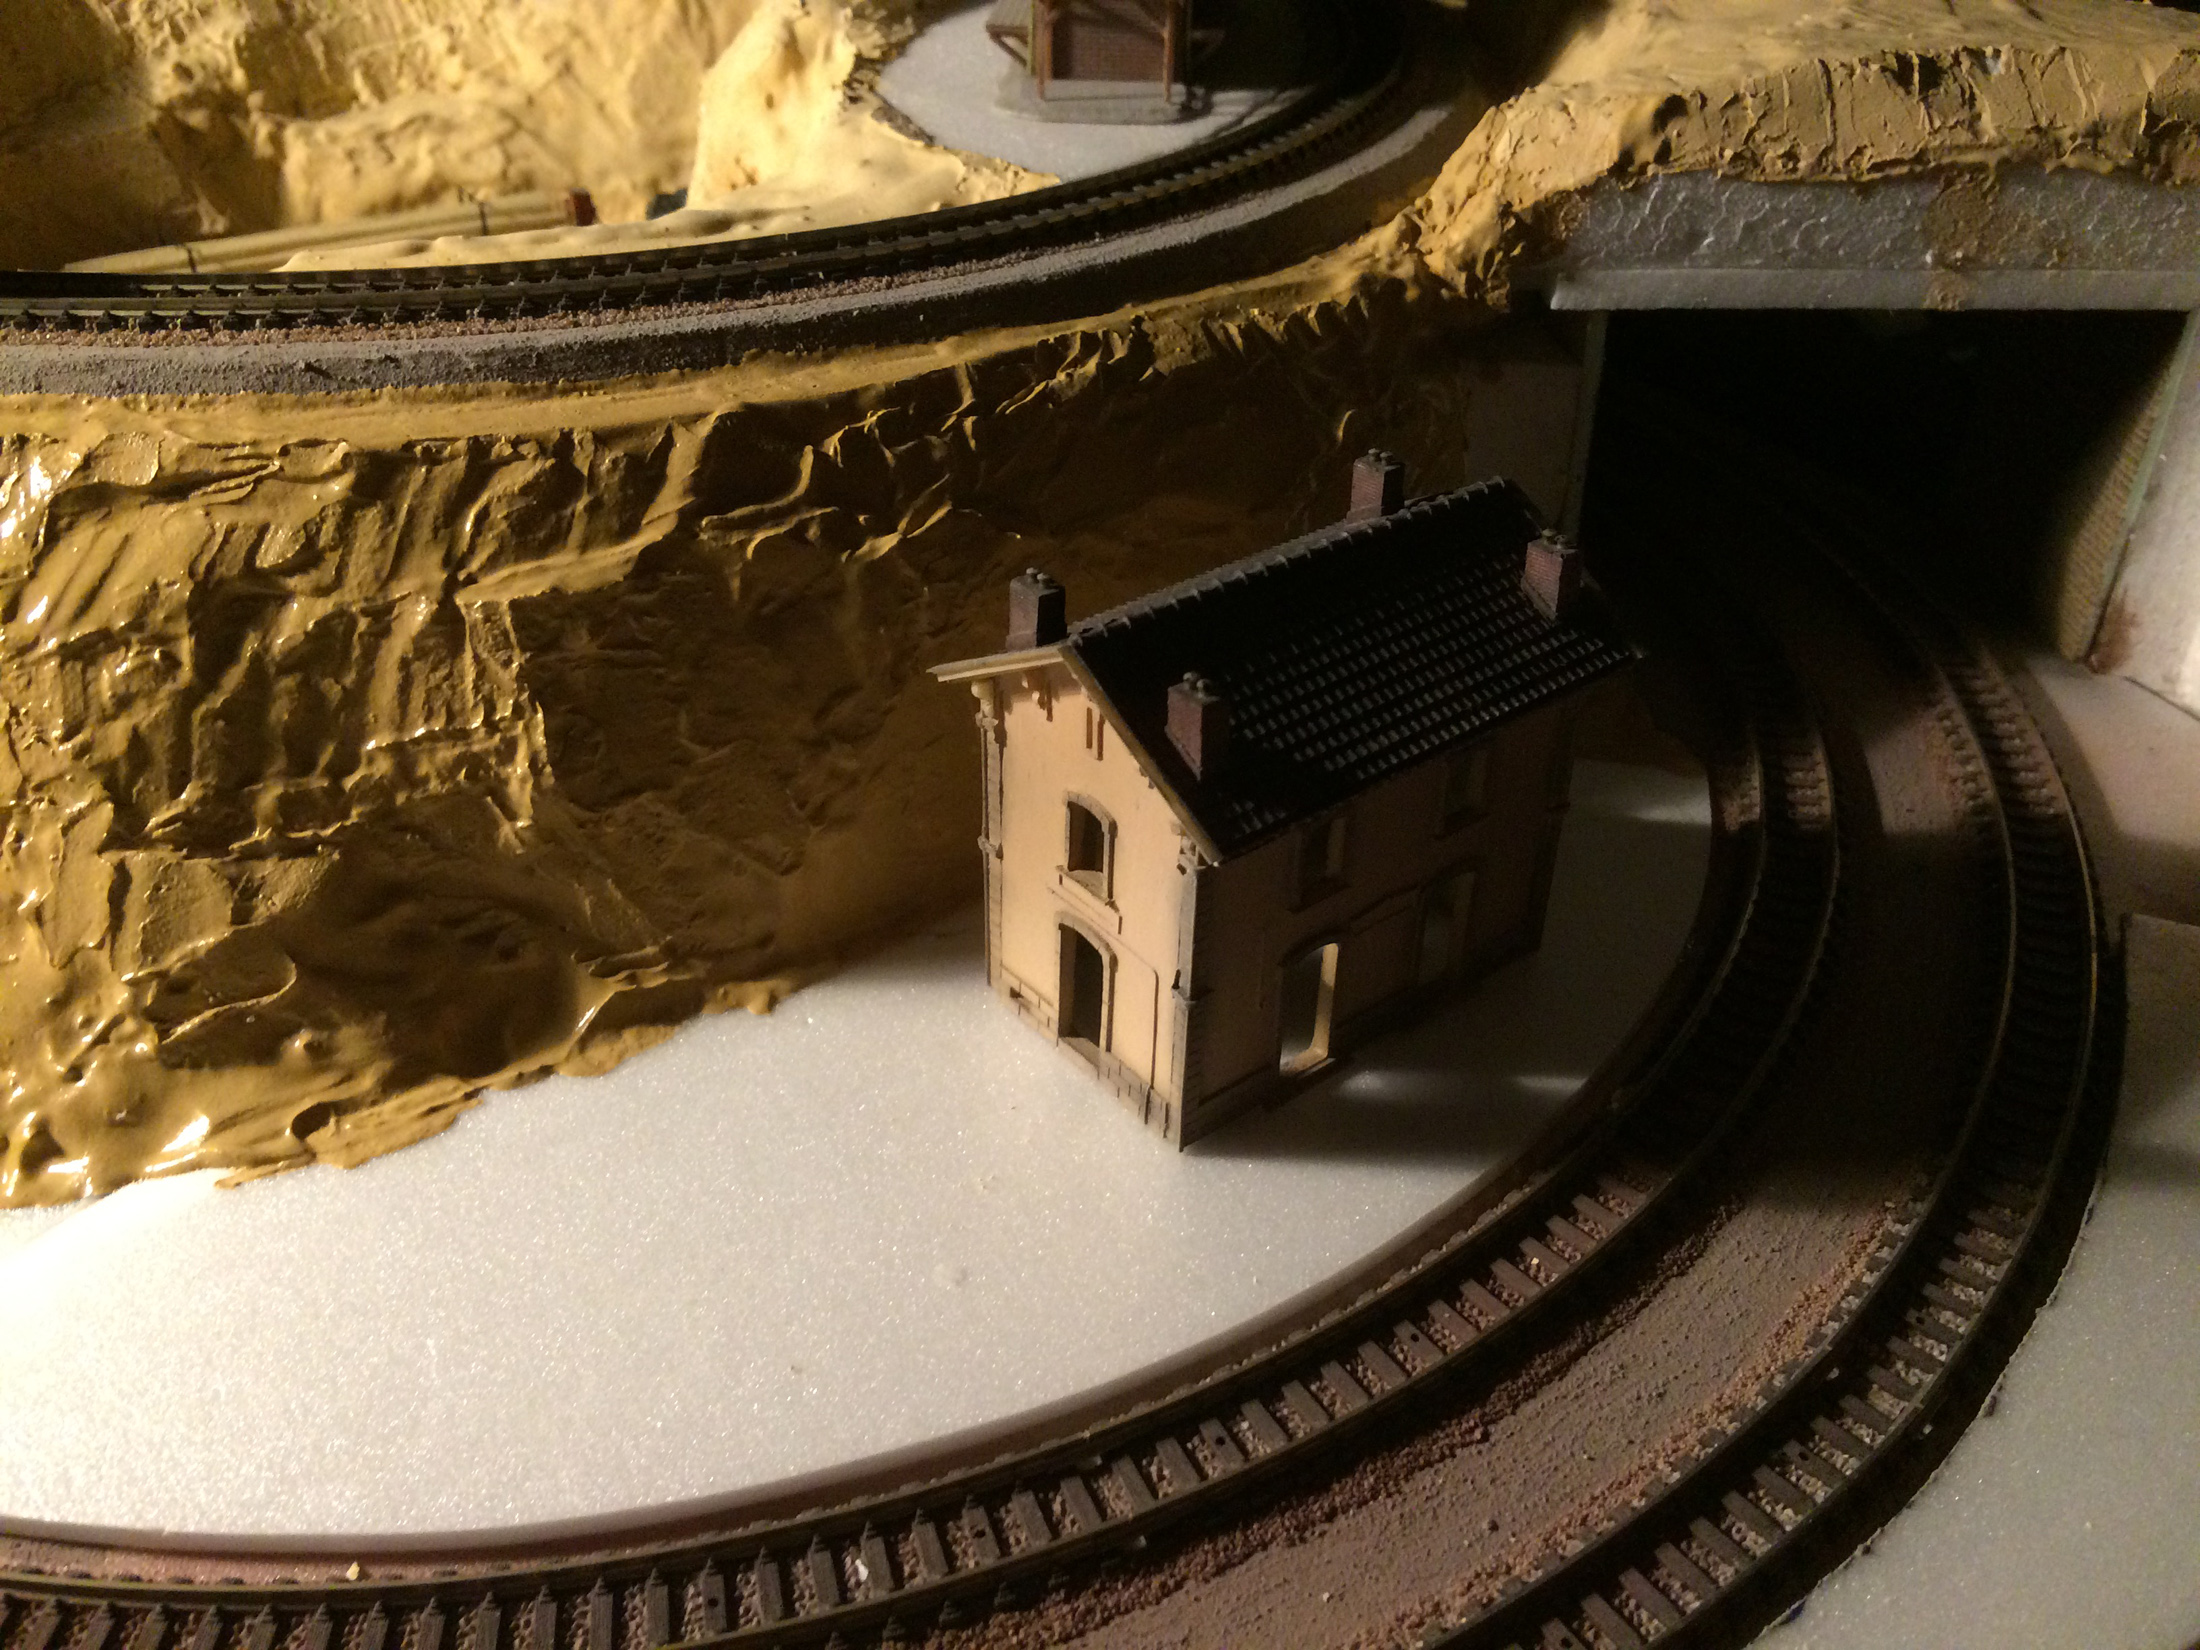
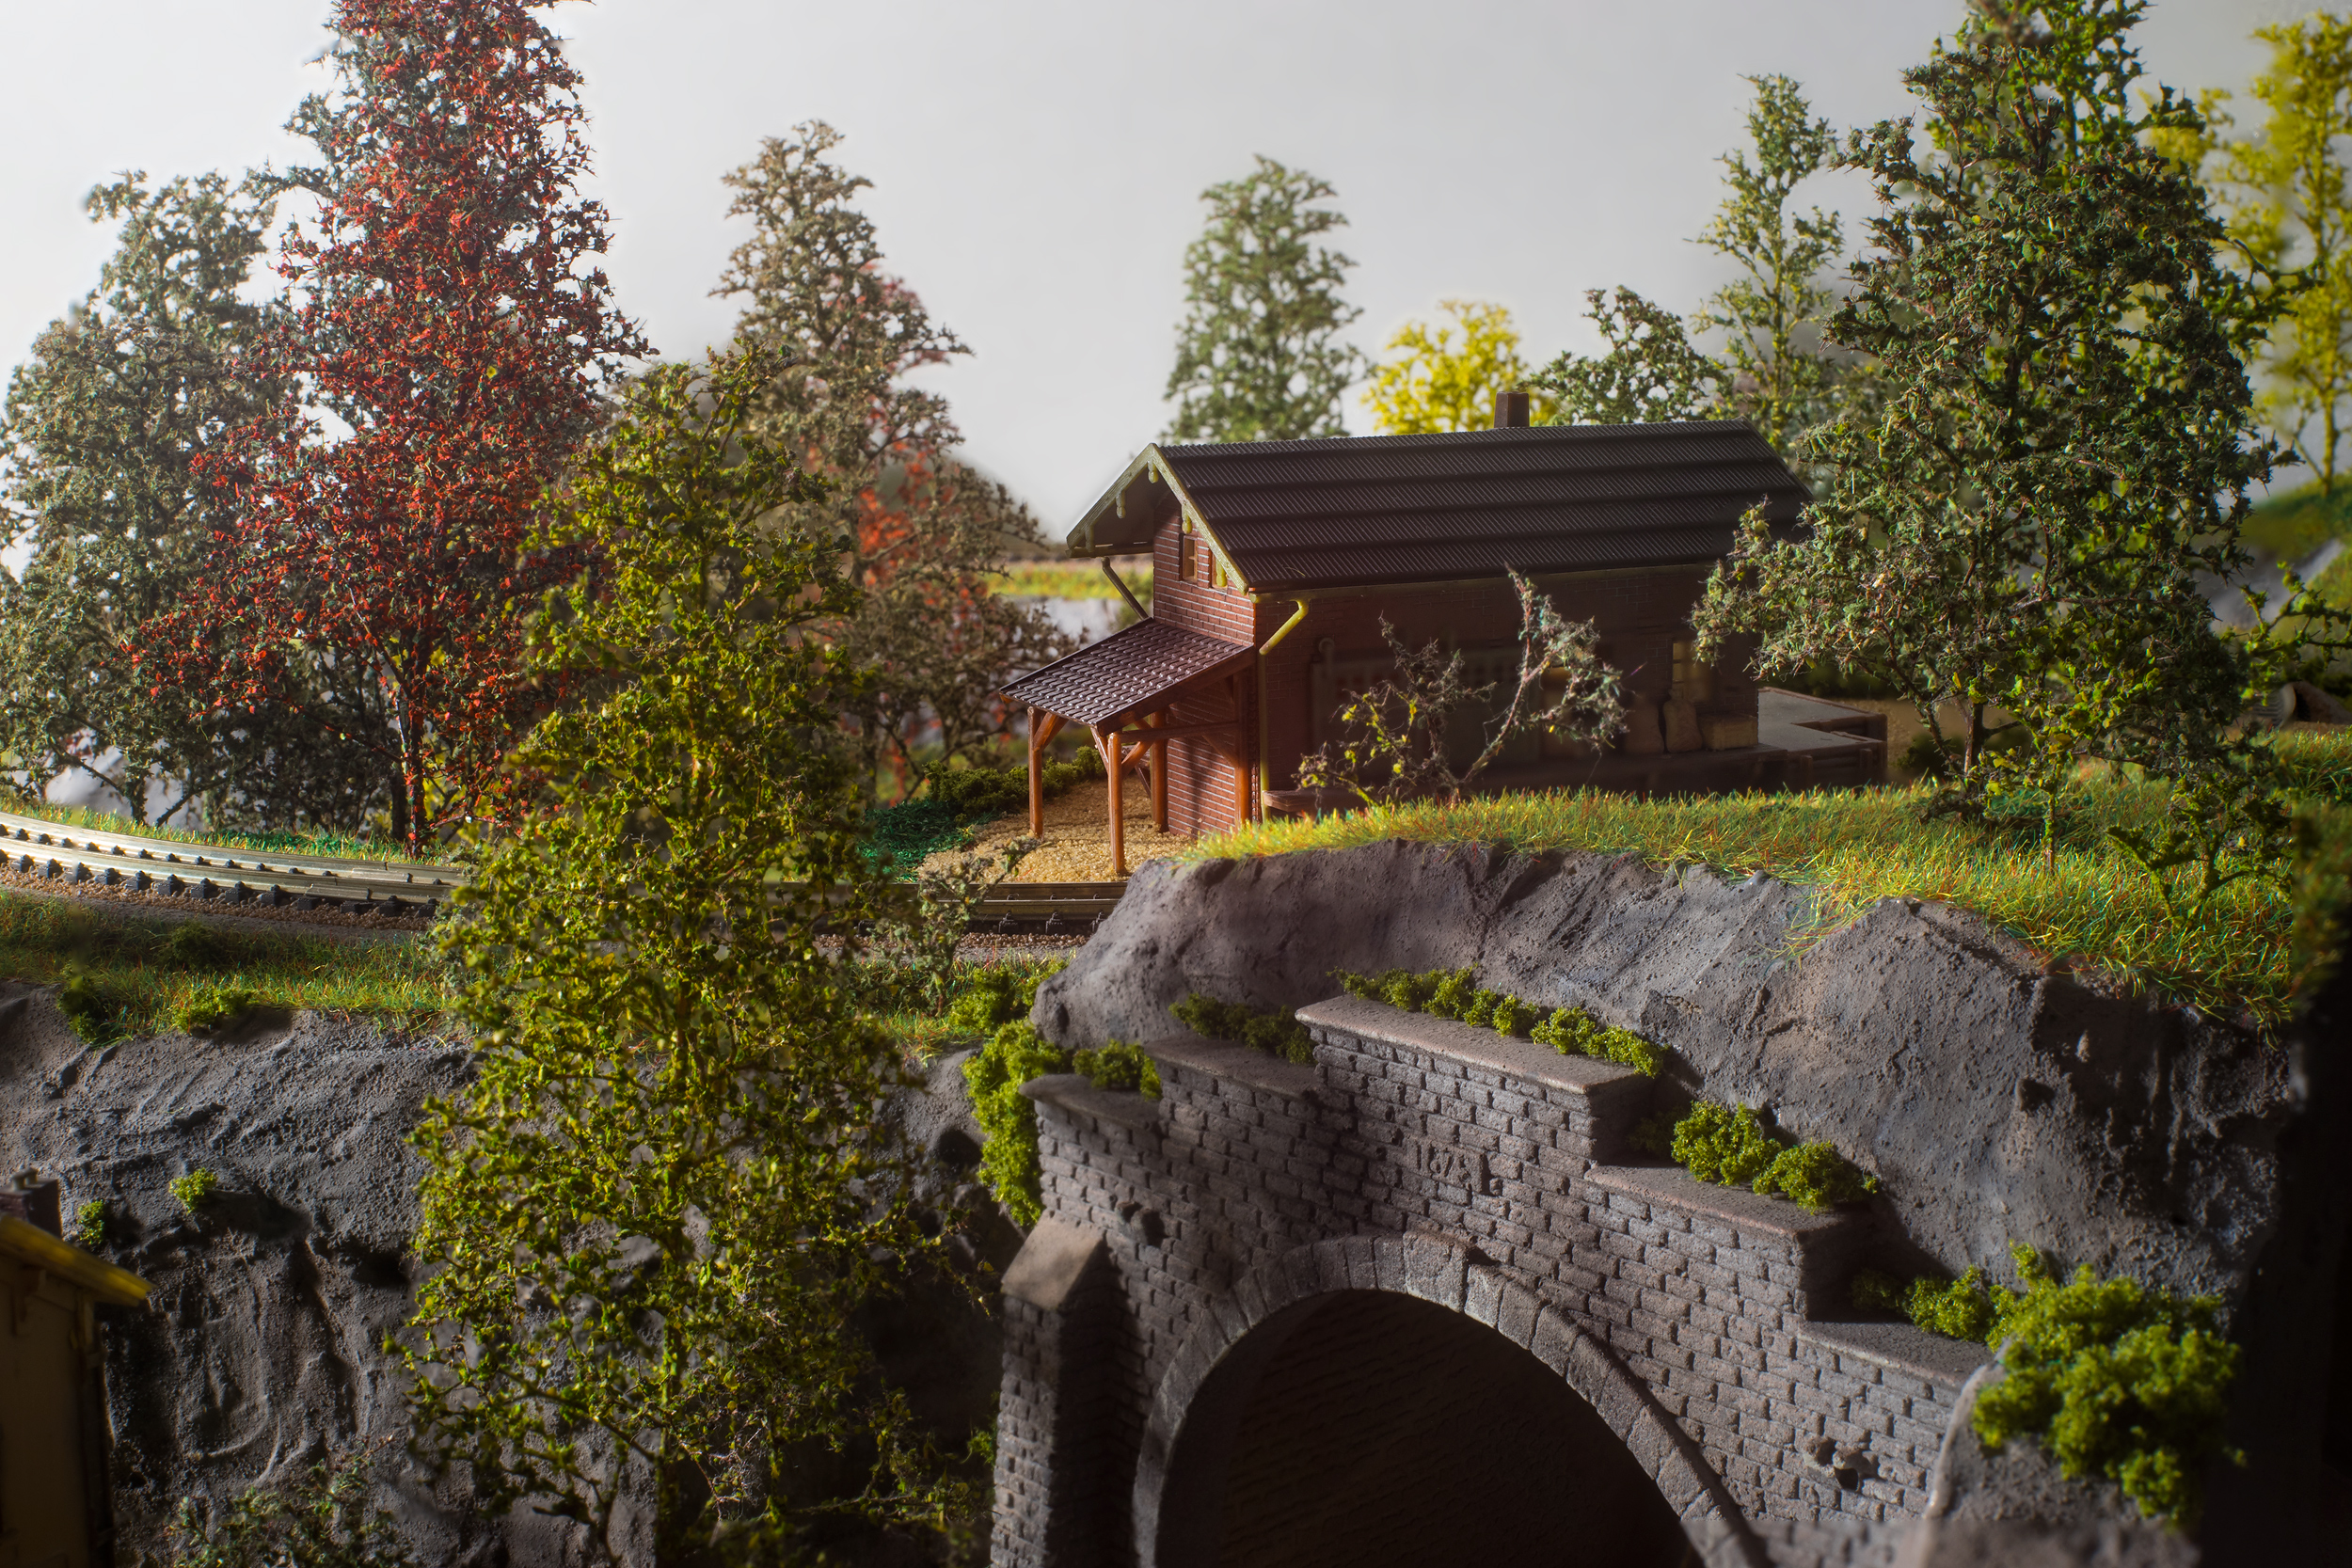
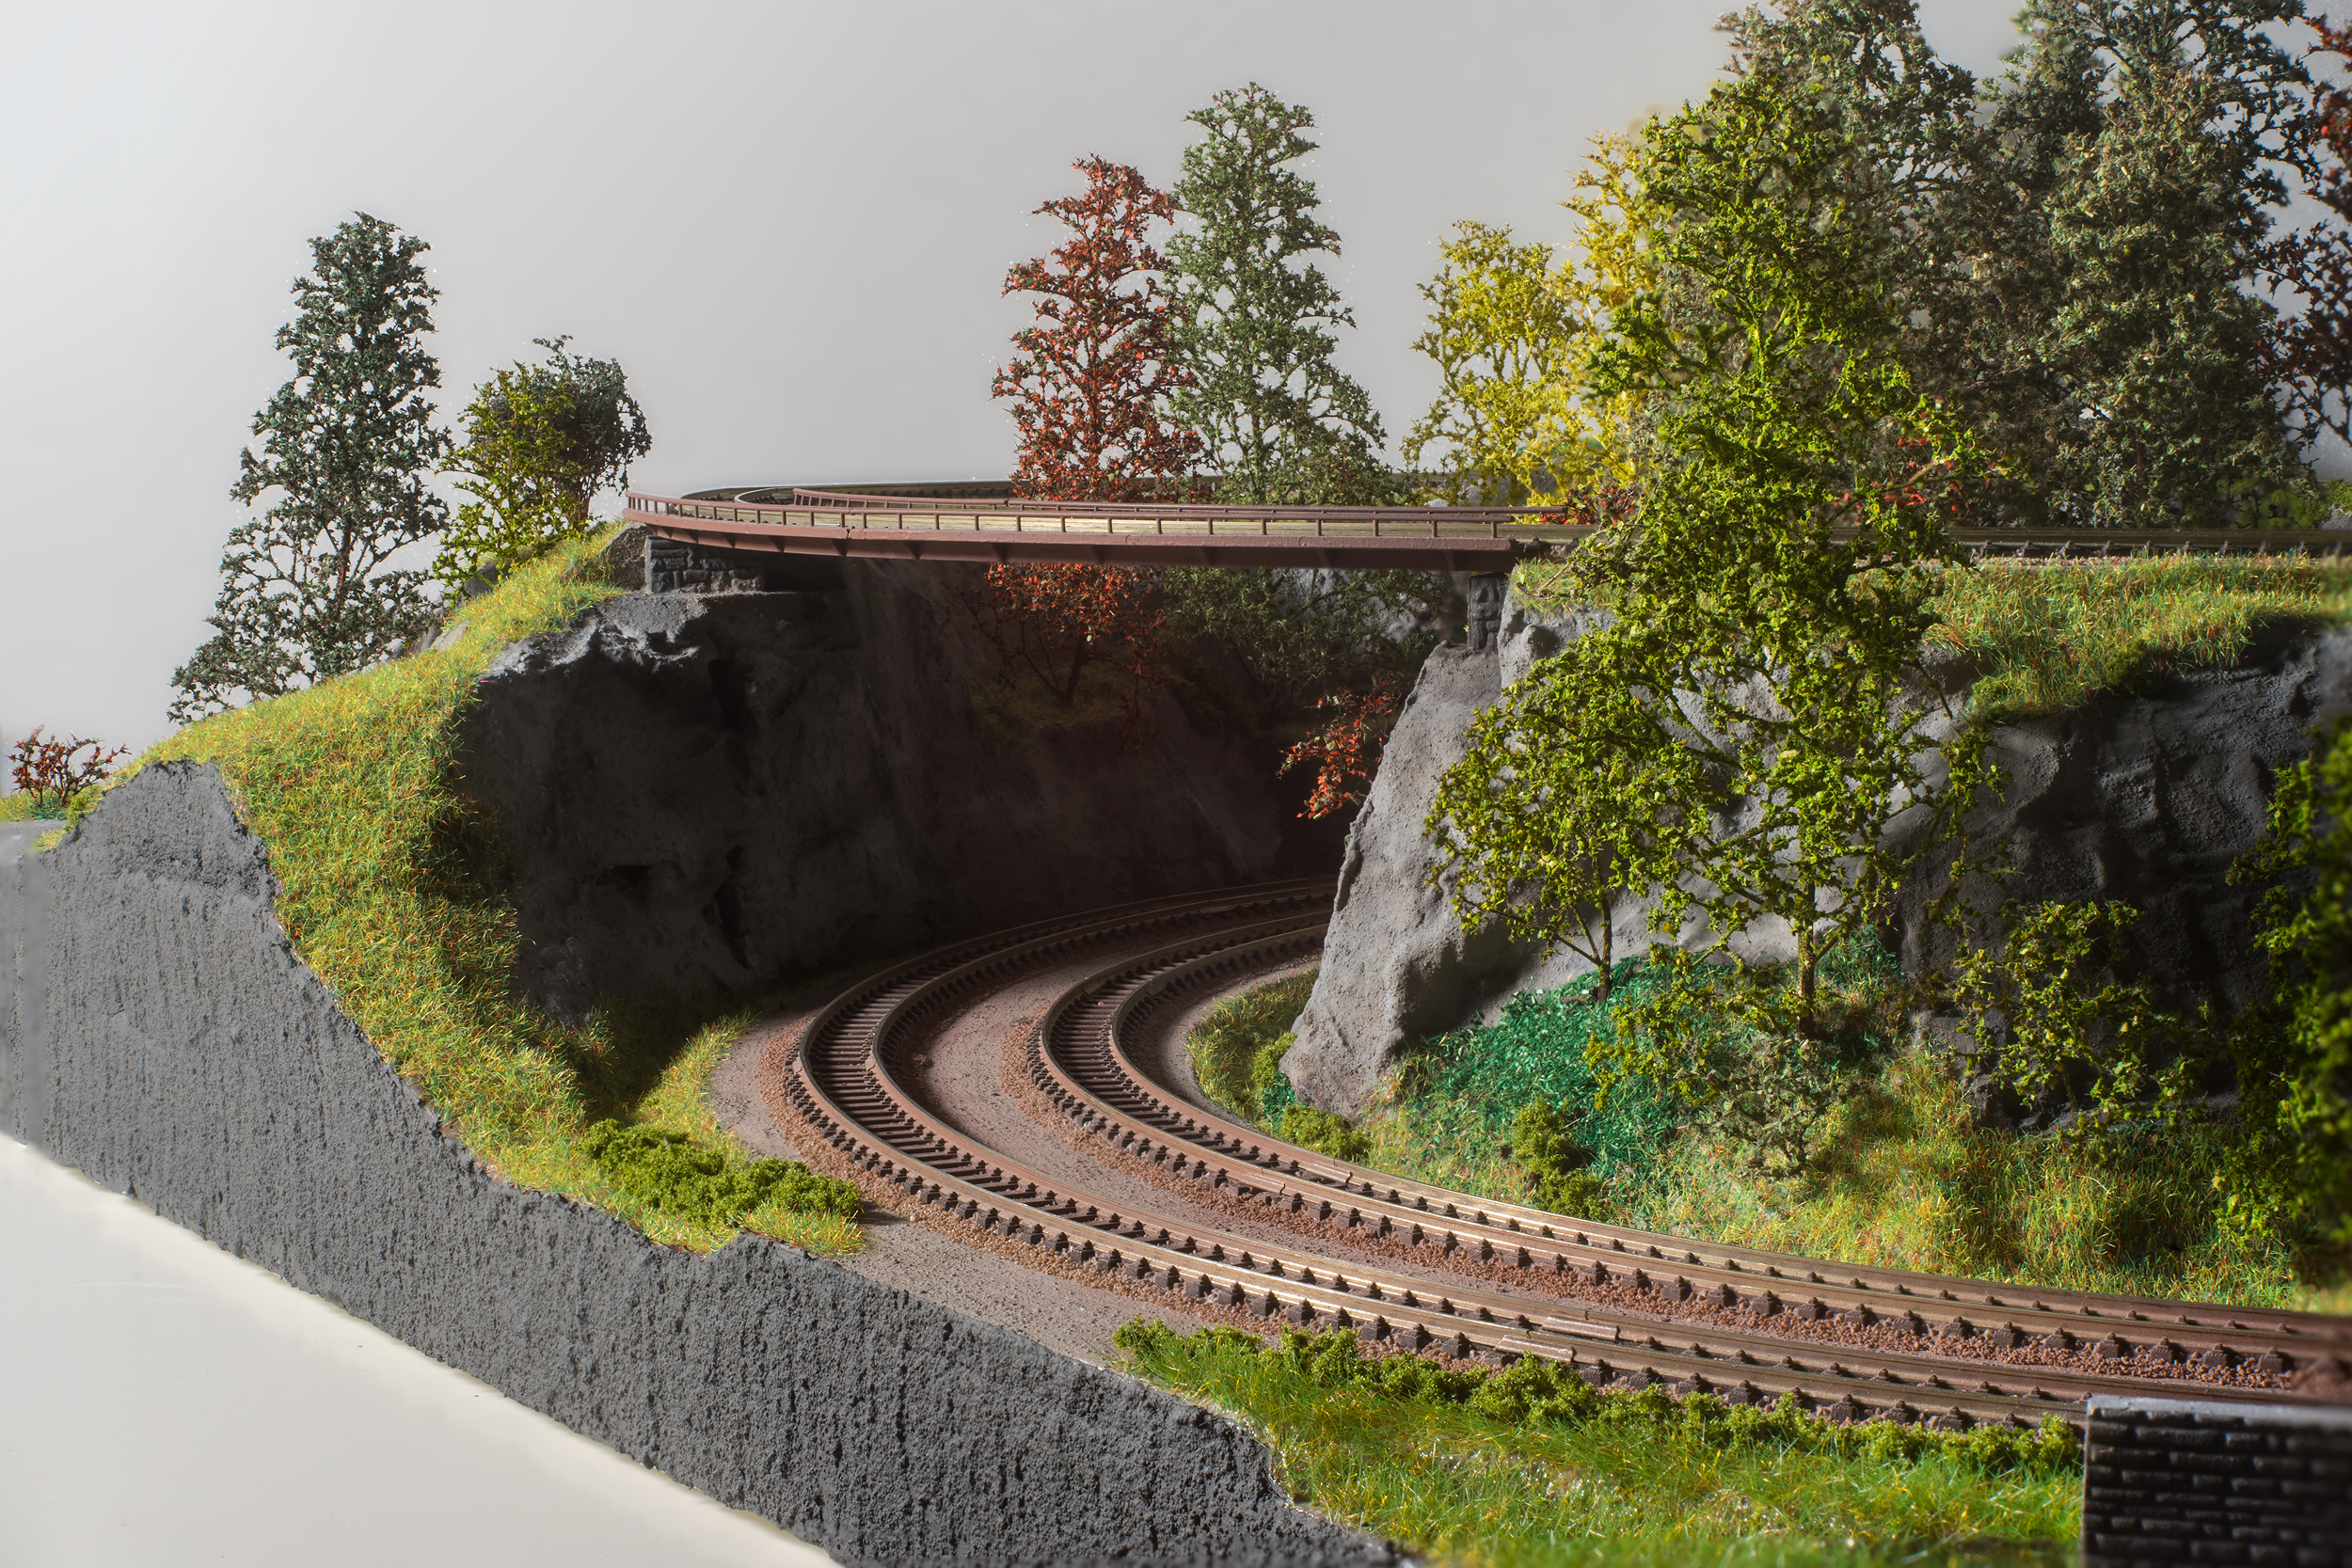
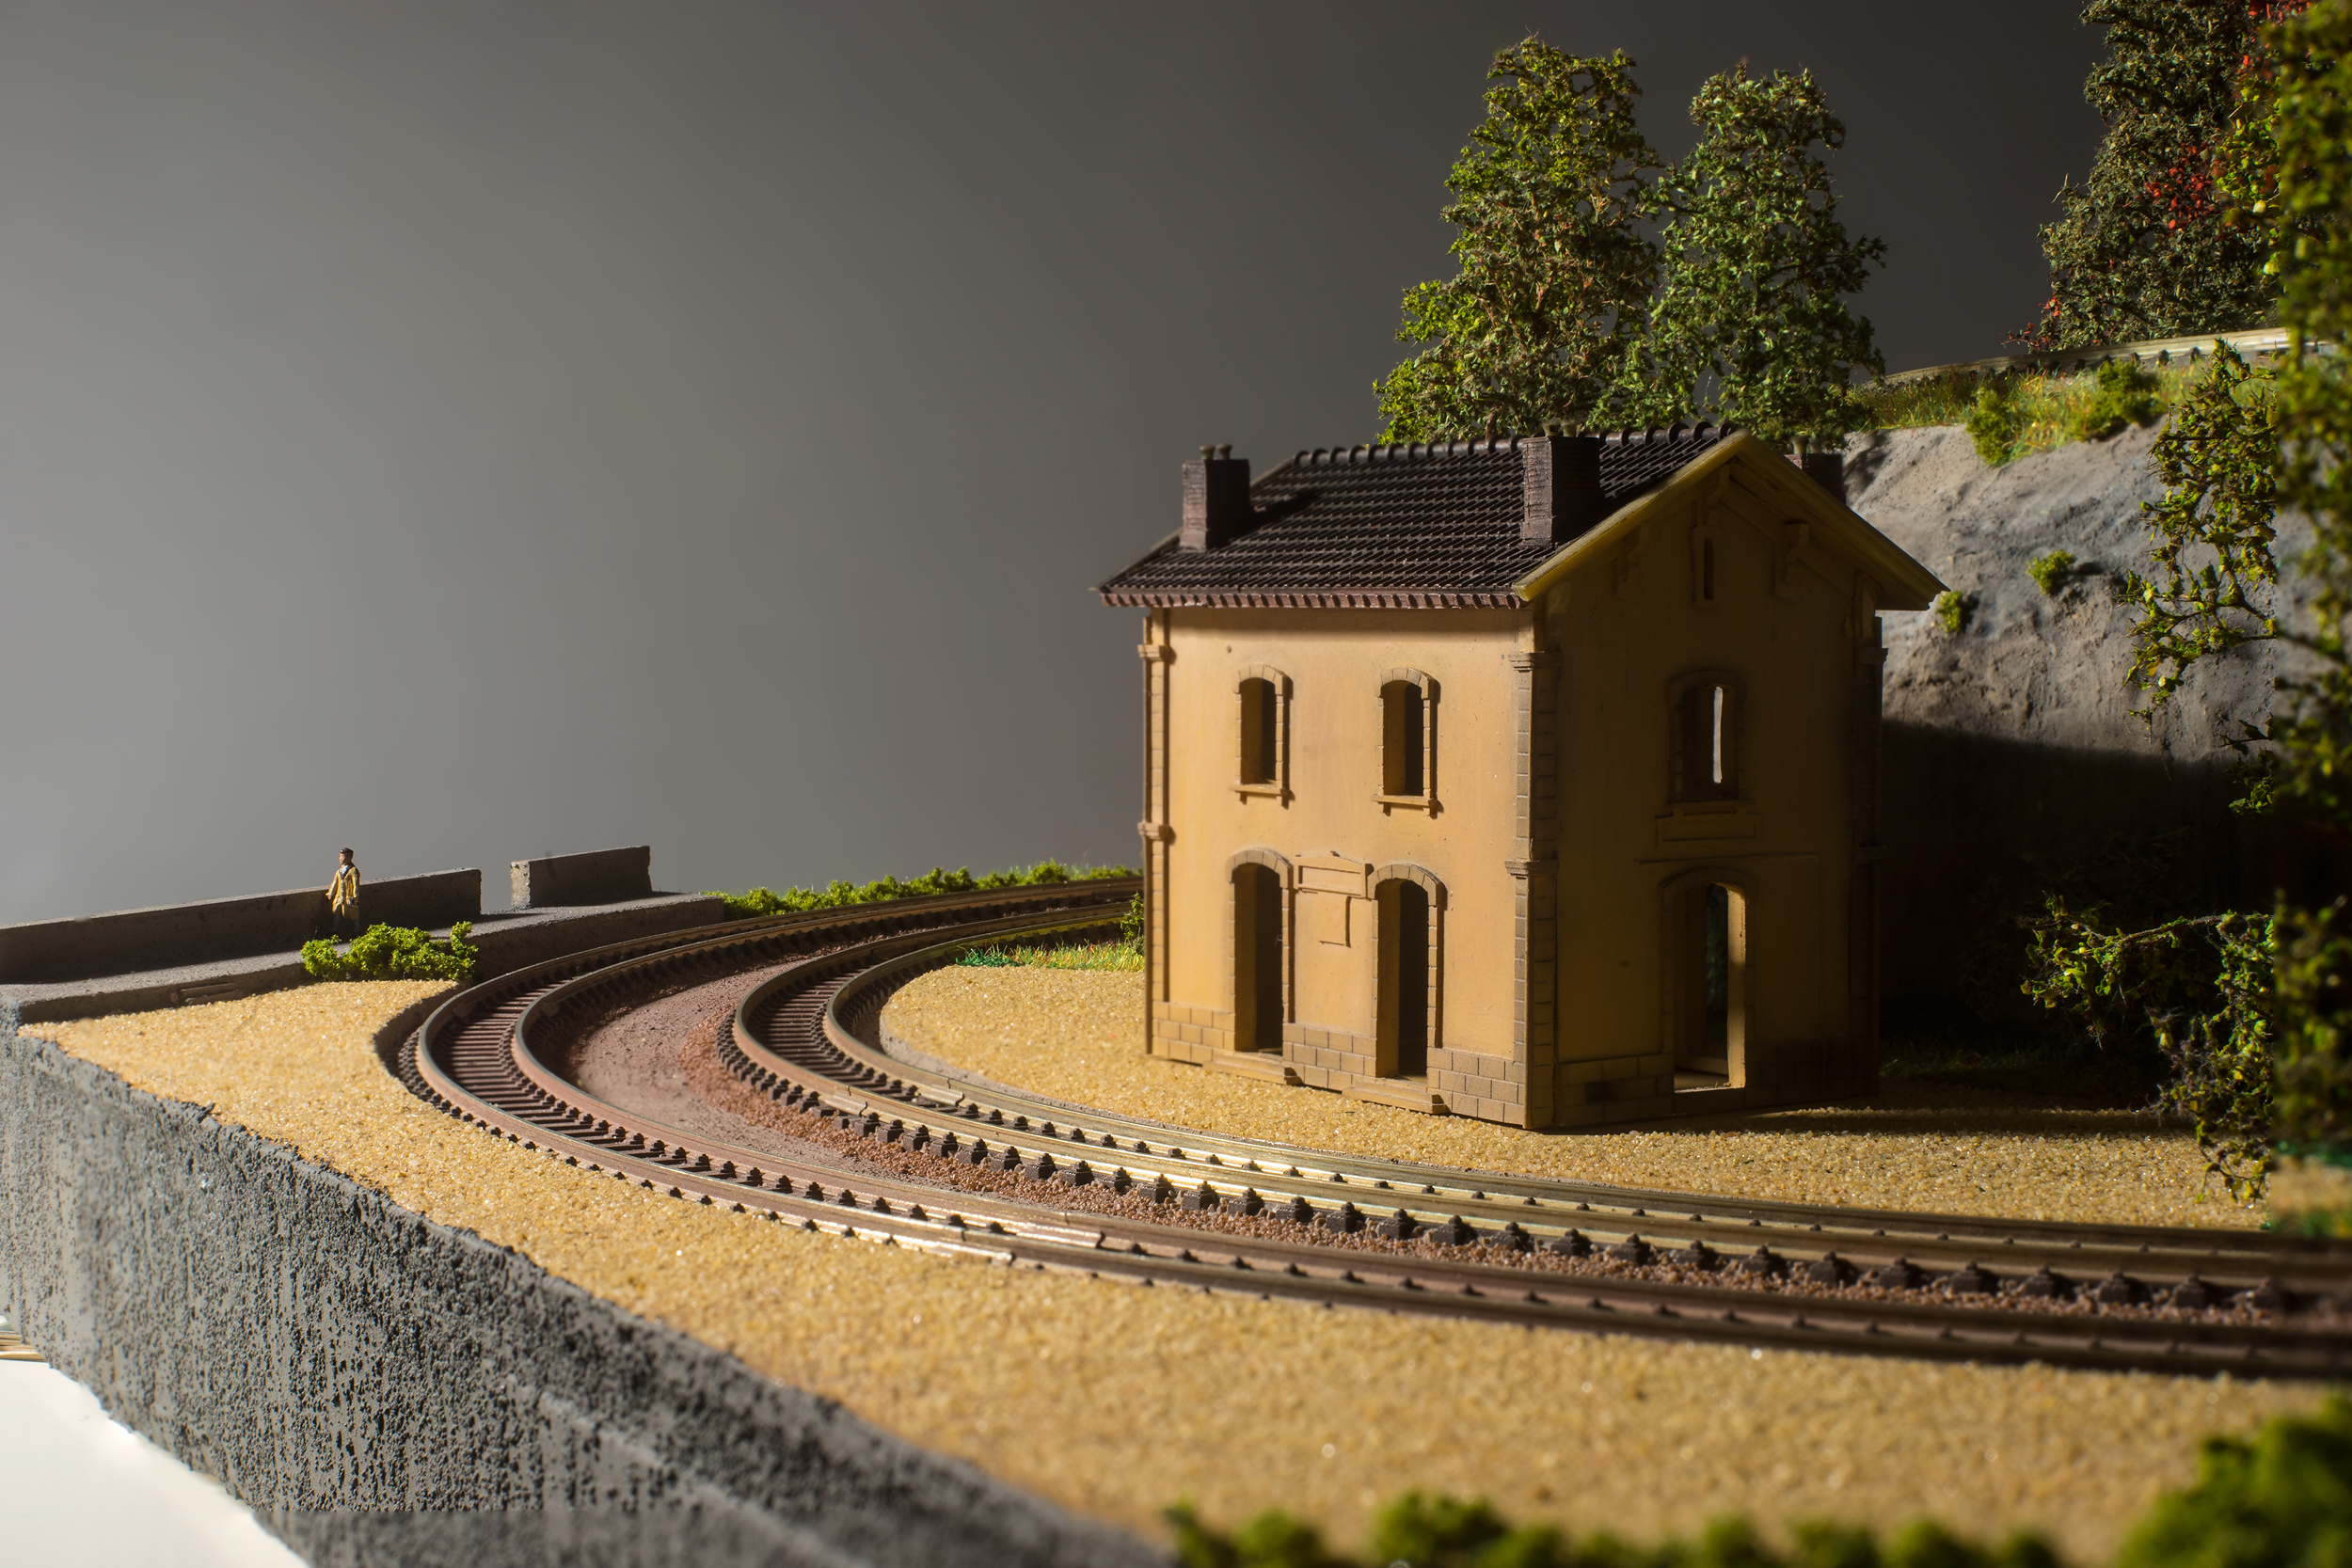
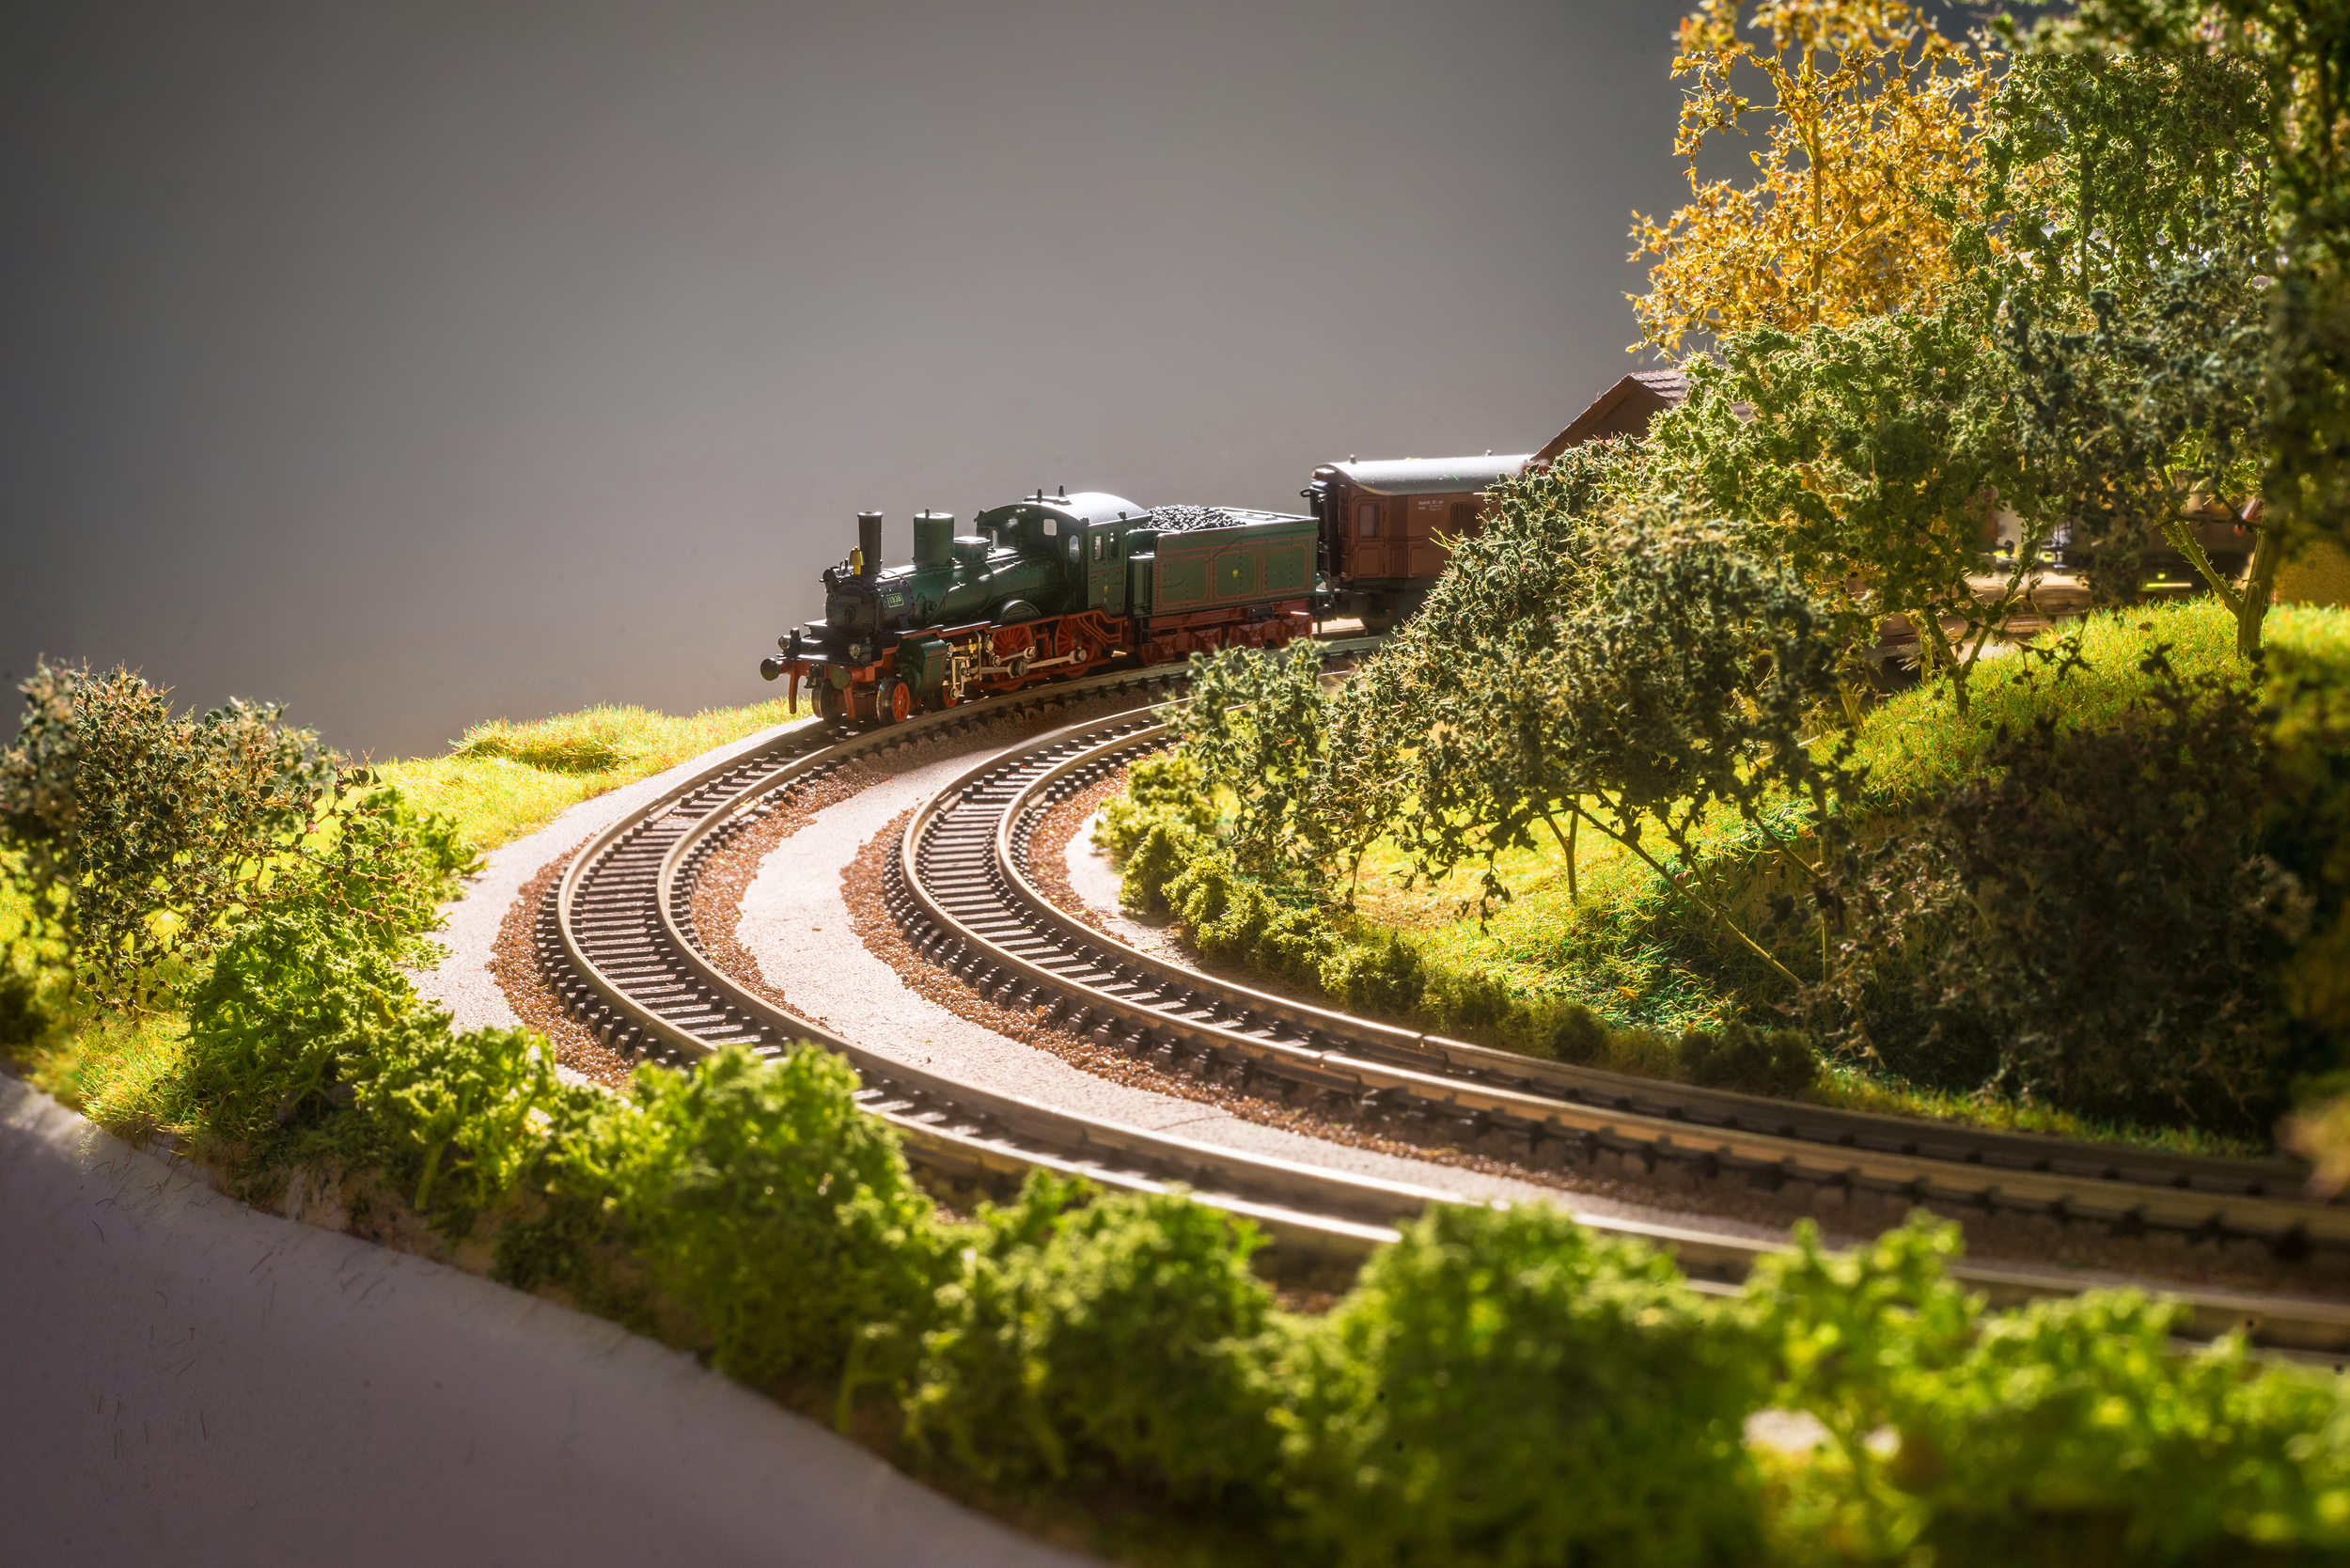
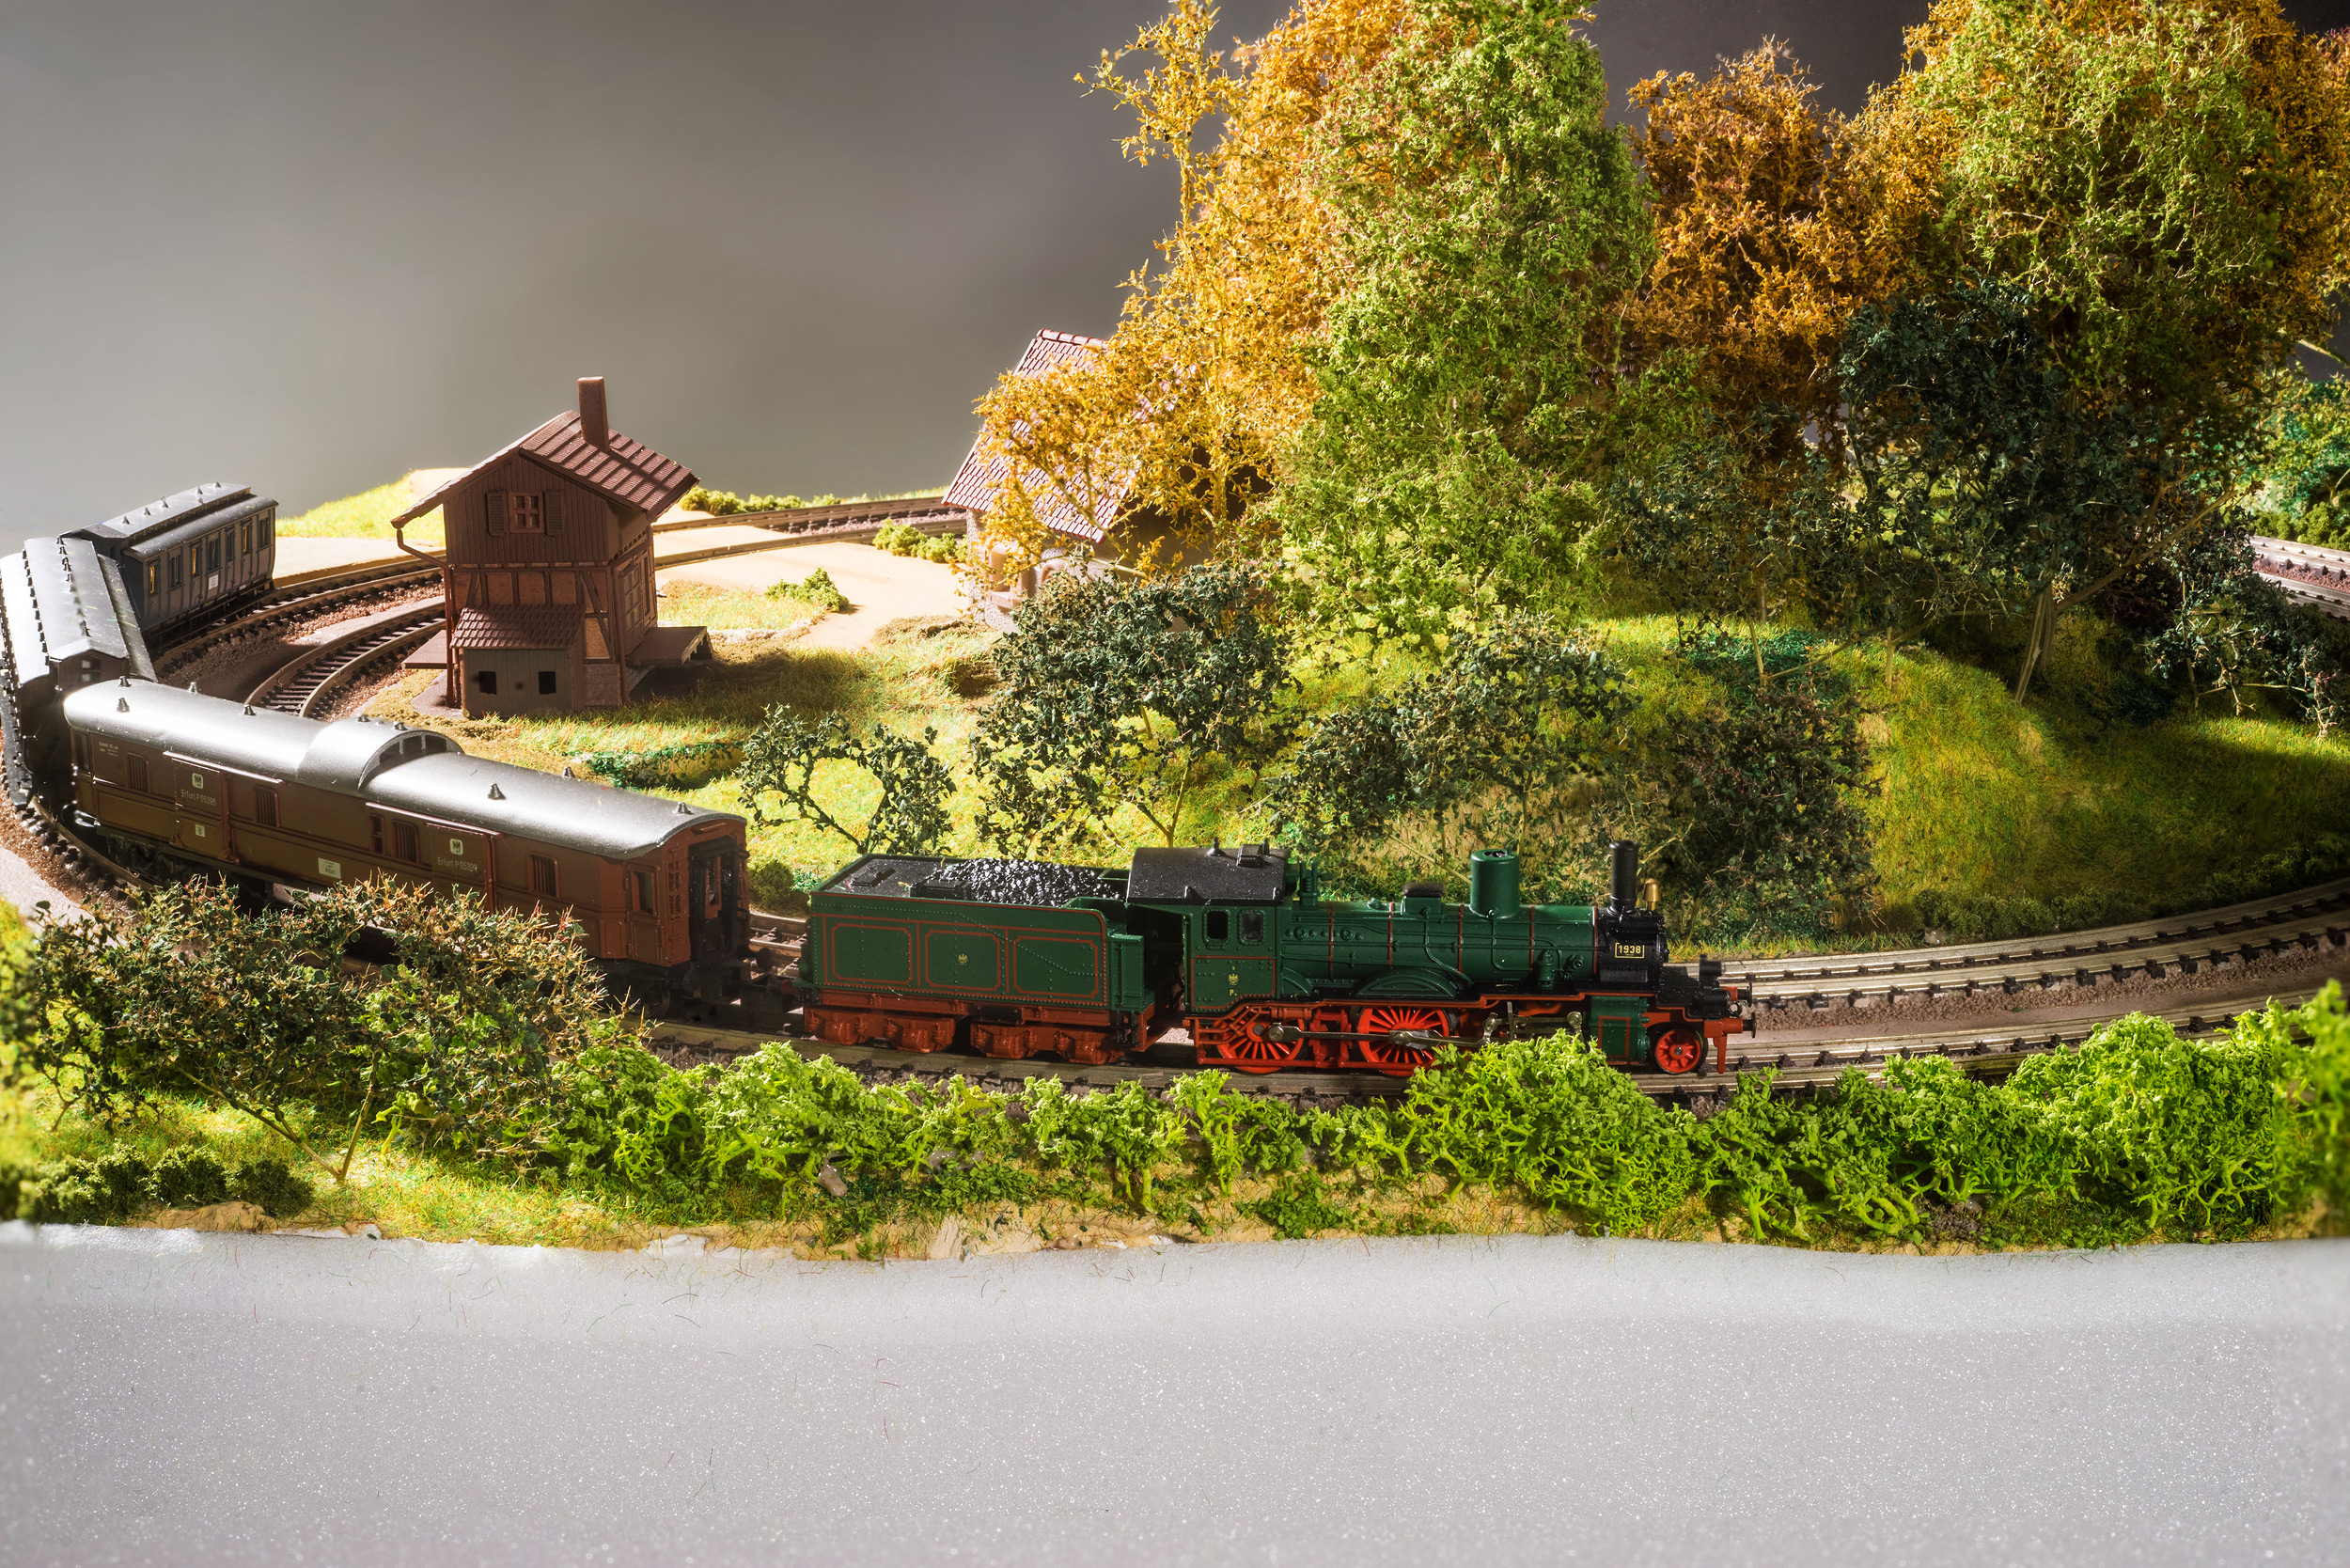
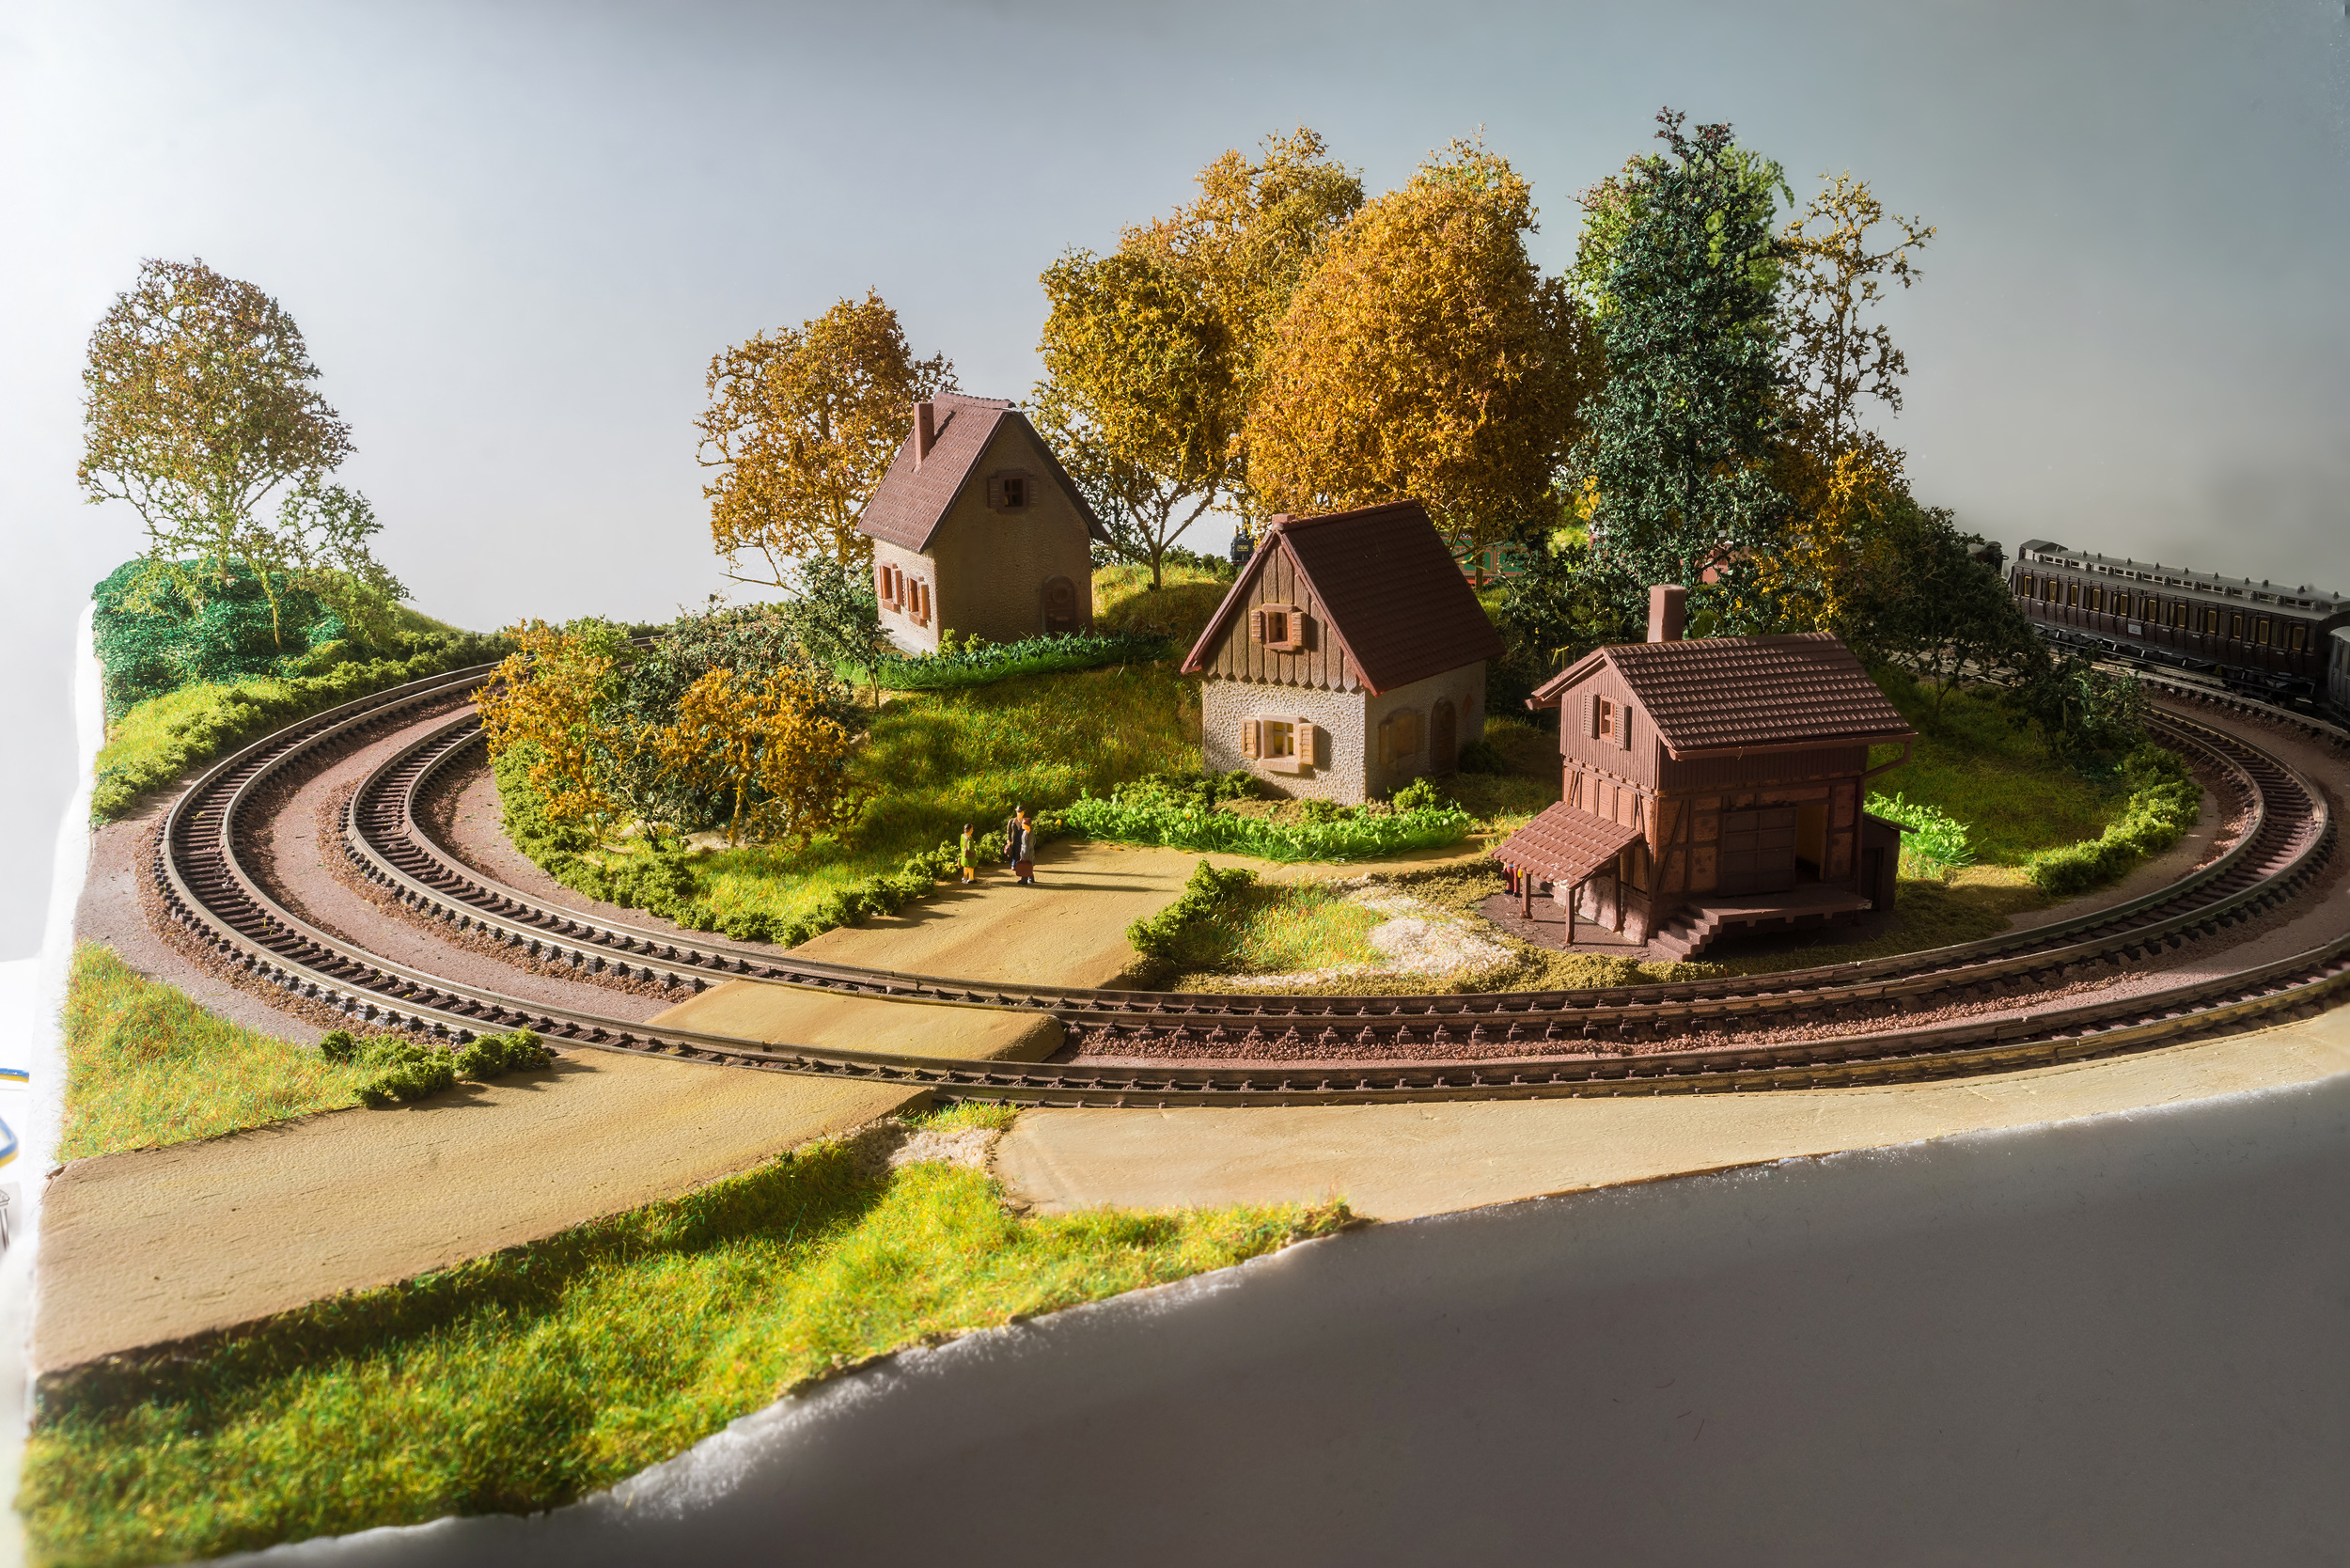
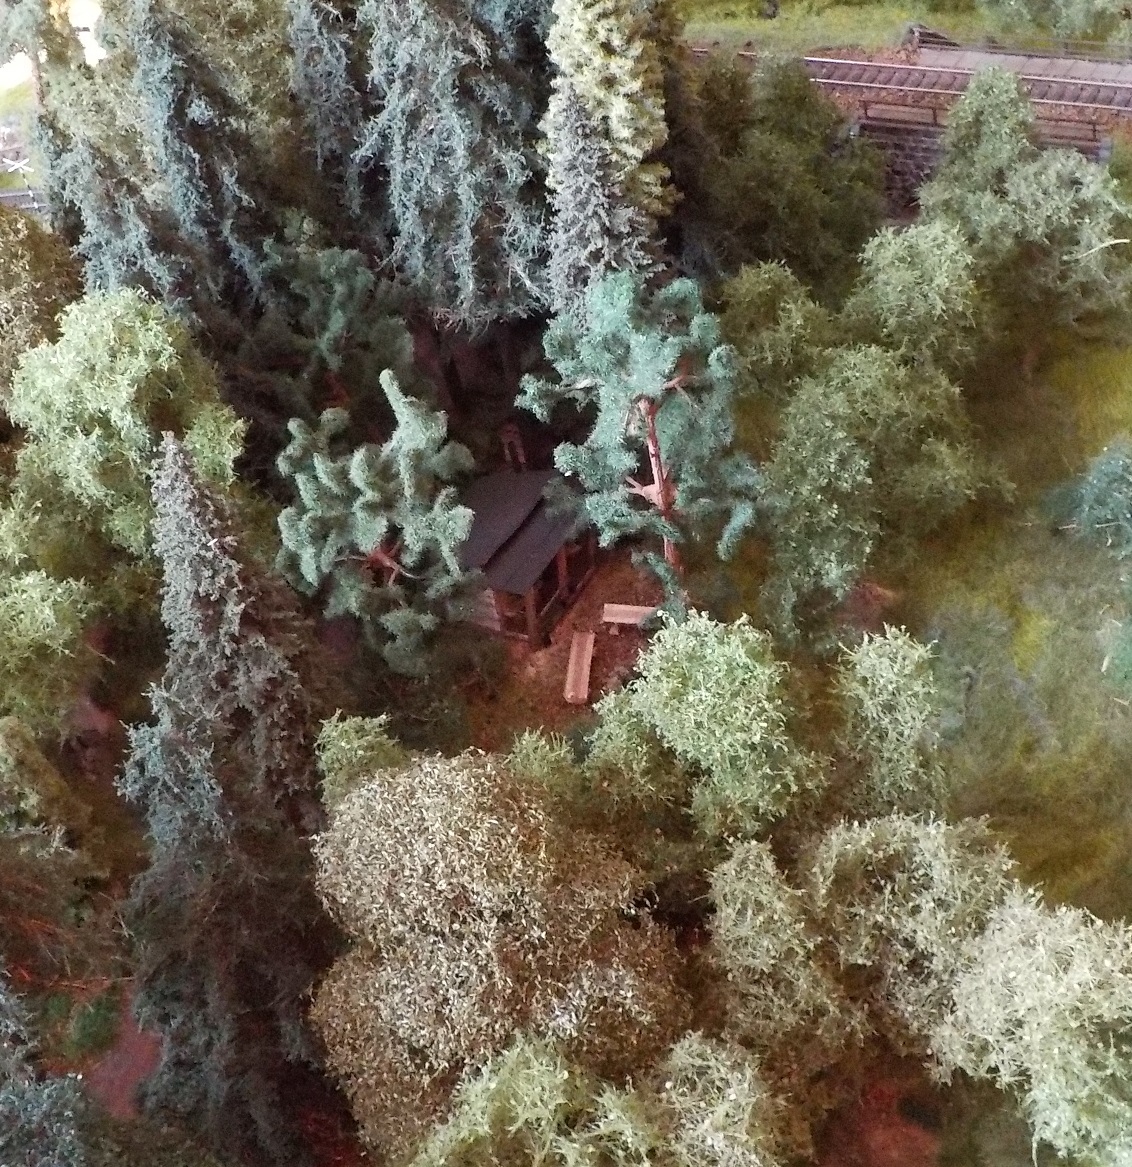
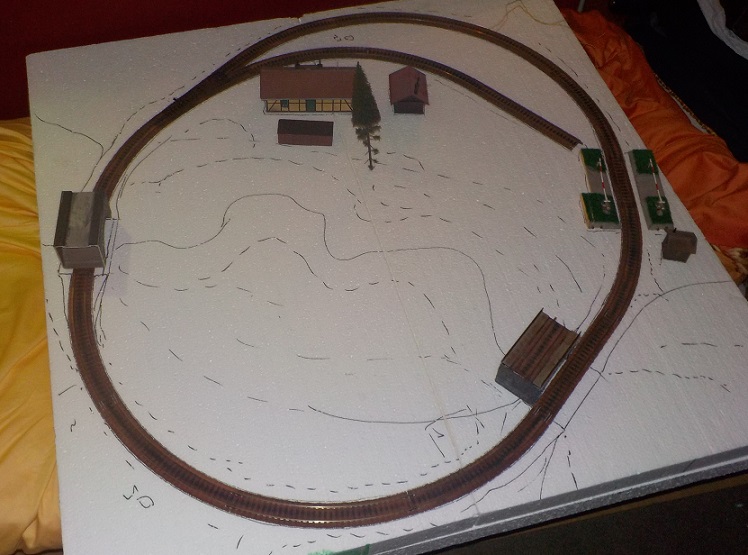
Due to the two levels I had to create a more mountaineous landscape. The branchline features a goods shed, in that area the mainline on the lower level disappears in a short tunnel. On the other, more open side of the layout, the branchline crosses the mainline via a simple steel bridge. I decided to keep that bridge very basic so it would not block the view to the inner area of the layout too much. To make the simplicity of the track plan less obvious to the eye, many trees were planted that block the view a bit.
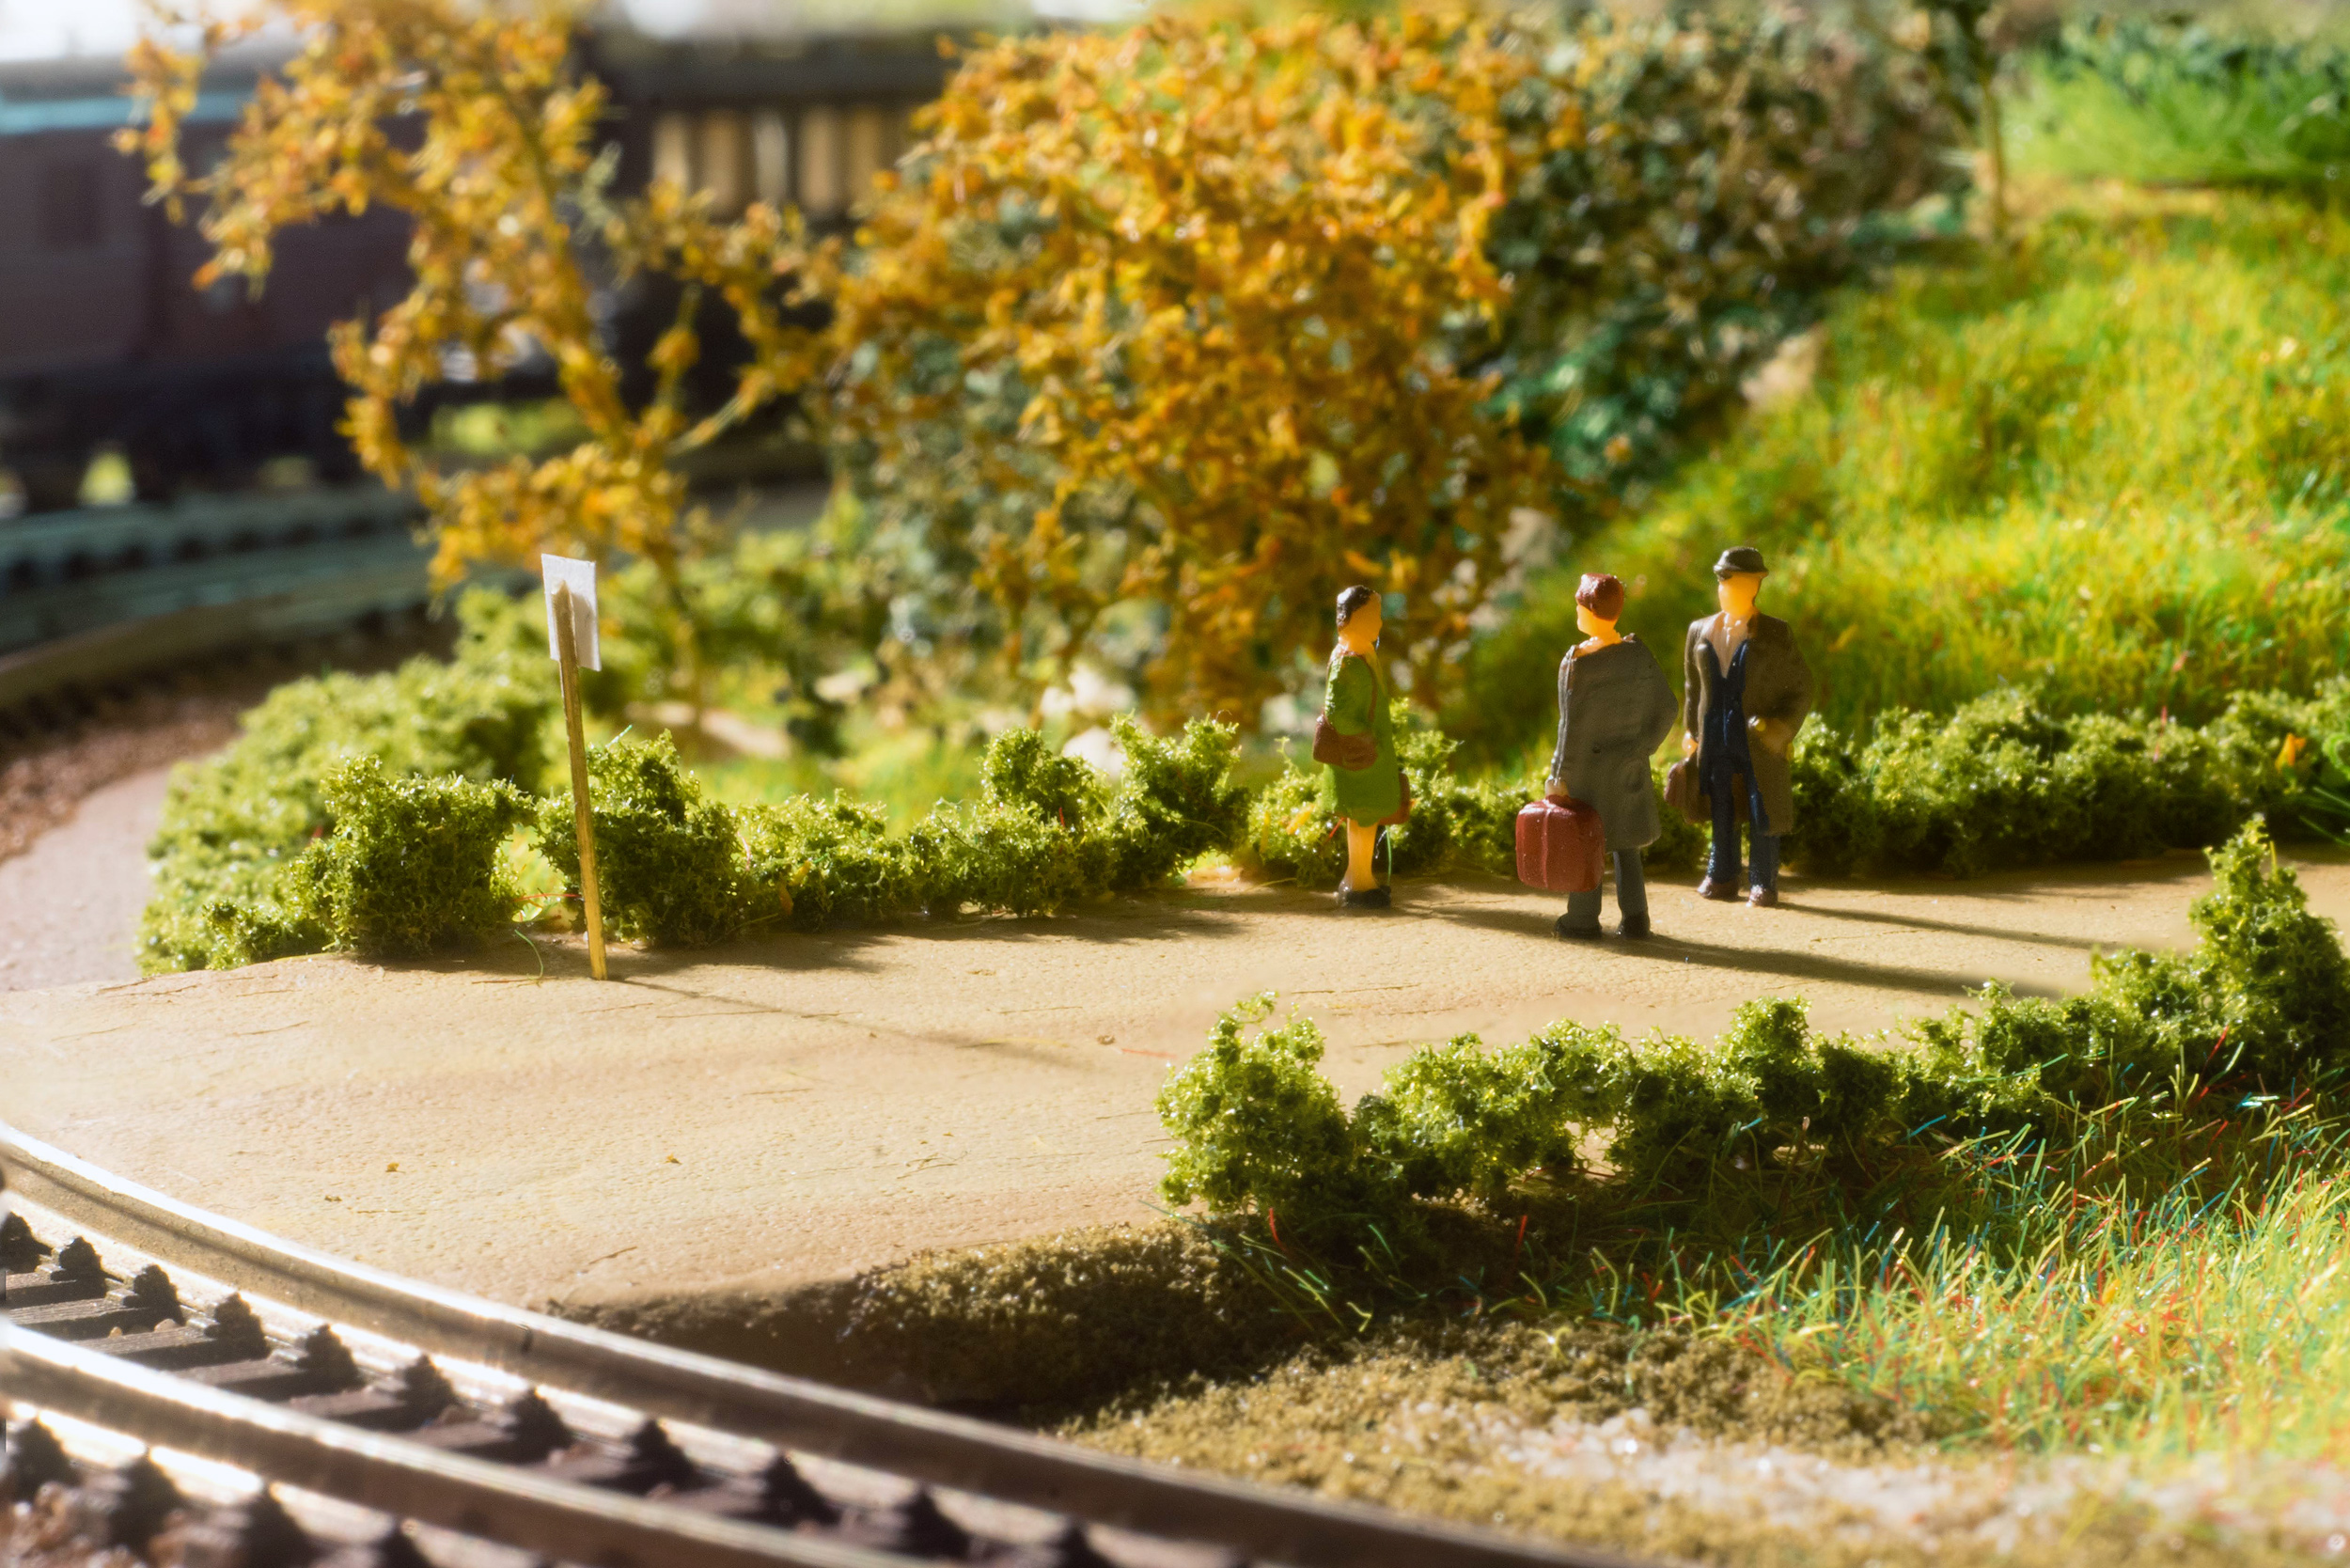
For the mainline, I installed a small station that is located right next to the tunnel exit. It has two platforms. They are covered by sand in an effort to emulate typical smaller 1900’s platforms. In the corner adjacent to the tunnel, there was even some space to add a small waterfront scenery. I should place a boat there.
The layout is designed to be mainly viewed from two sides – either the station in front, or the side with the bridge. But some detail such as the goods shed are best seen from the „rear“, so in reality it’s good to watch from whatever side you want.


Millrather Sandbahn – by Falko Fritzsch from Erkrath, Germany
As Carl Arendts website inspired me not to build (and never finish) a big model railroad but a small Layout I would like to show it.
This small Layout shows a fictional narrow gauge railway, the “Millrather Sandbahn”, which transports Sand from the hill to the road.
In the beginning the Owner used a horse and only few rolling stock. After a while he bought a Locomotive, the small “Jenbacher Pony” on 600mm tracks and he buildt the silos. As the business grew, he had to enlarge the transport-capacity, so he bought a used 750mm railway and started using a digital marketing agency to let people know about his projects online. Social media marketing has also been doing great, you can start using this strategy at https://www.socialmediadaily.com/youtube/comments. Today the sand is carried downhill and then transferred into big trucks, but the old “Pony” still works…
The Layout is 1m x 0,5m, the box was left over from an other project a couple of years ago. When I first saw the “Gum Stump and Snowshoe RR”-Design I decided to build a narrow gauge railway, the Tracks are H0e (H0n30 1:87, 9mm) and H0f (6,5mm), but the H0f train doesnt work. It is a low budget project, most of the equipment is left over from other projects, but I really enjoyed building it!
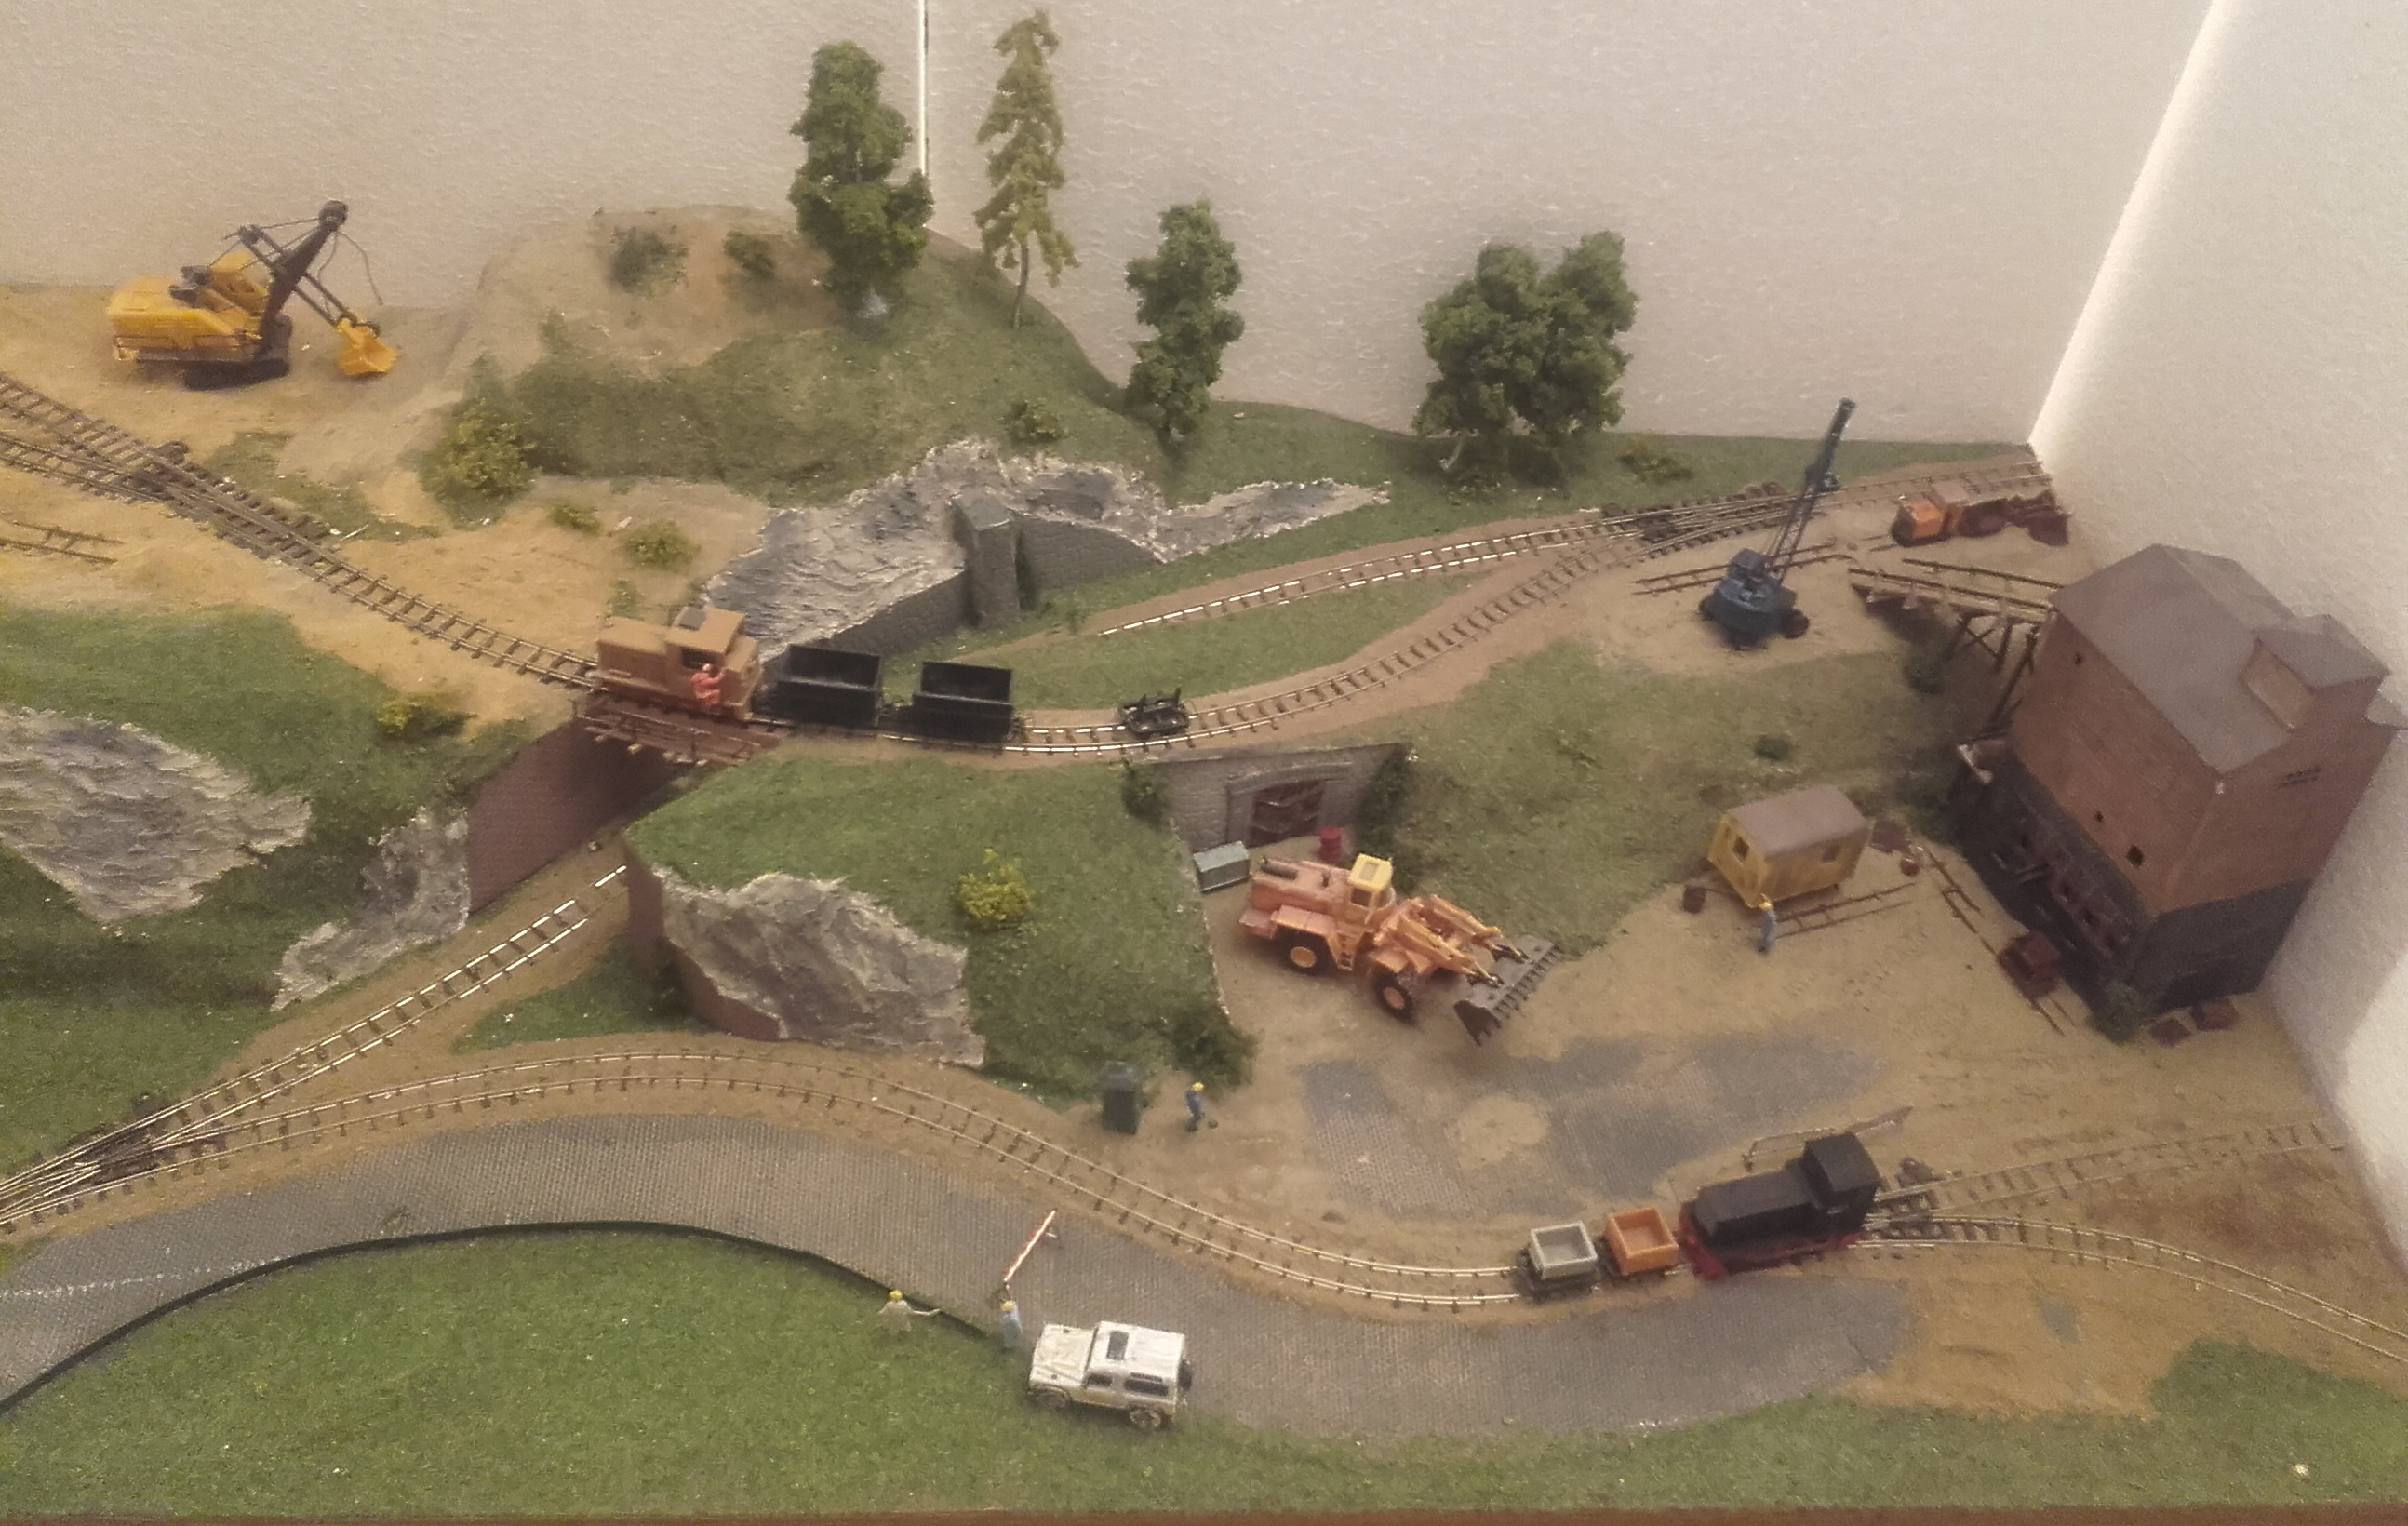

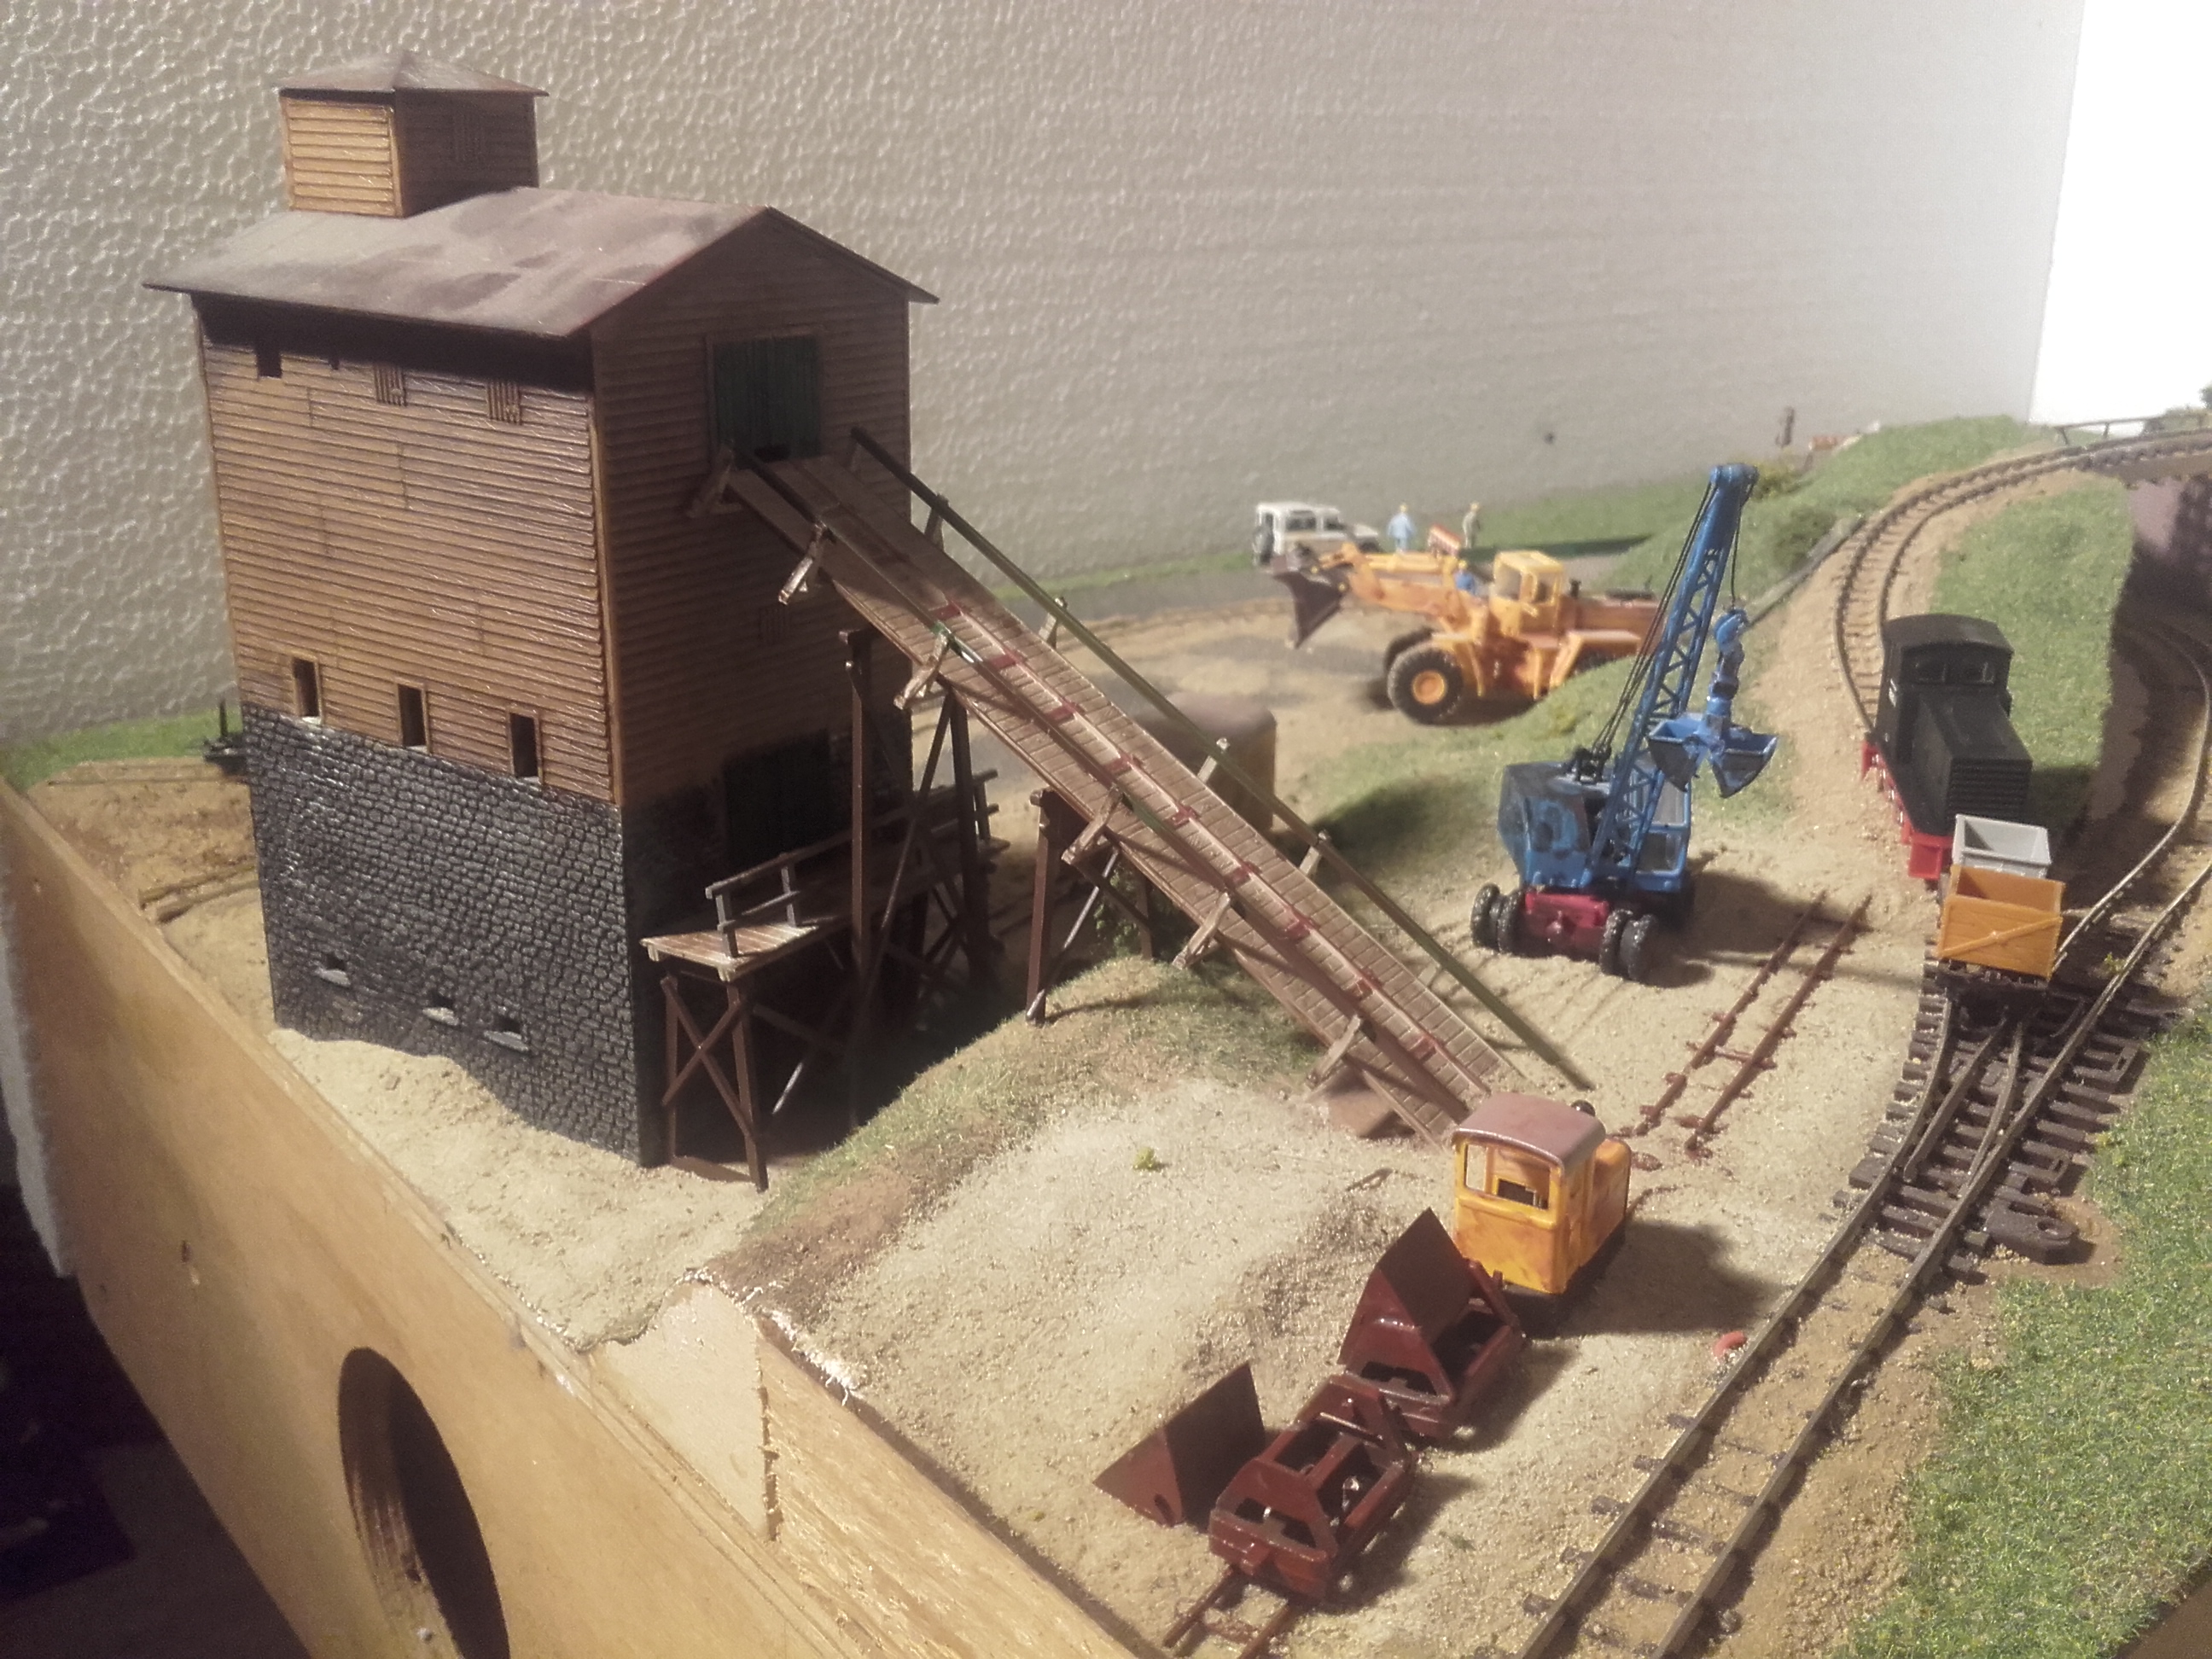
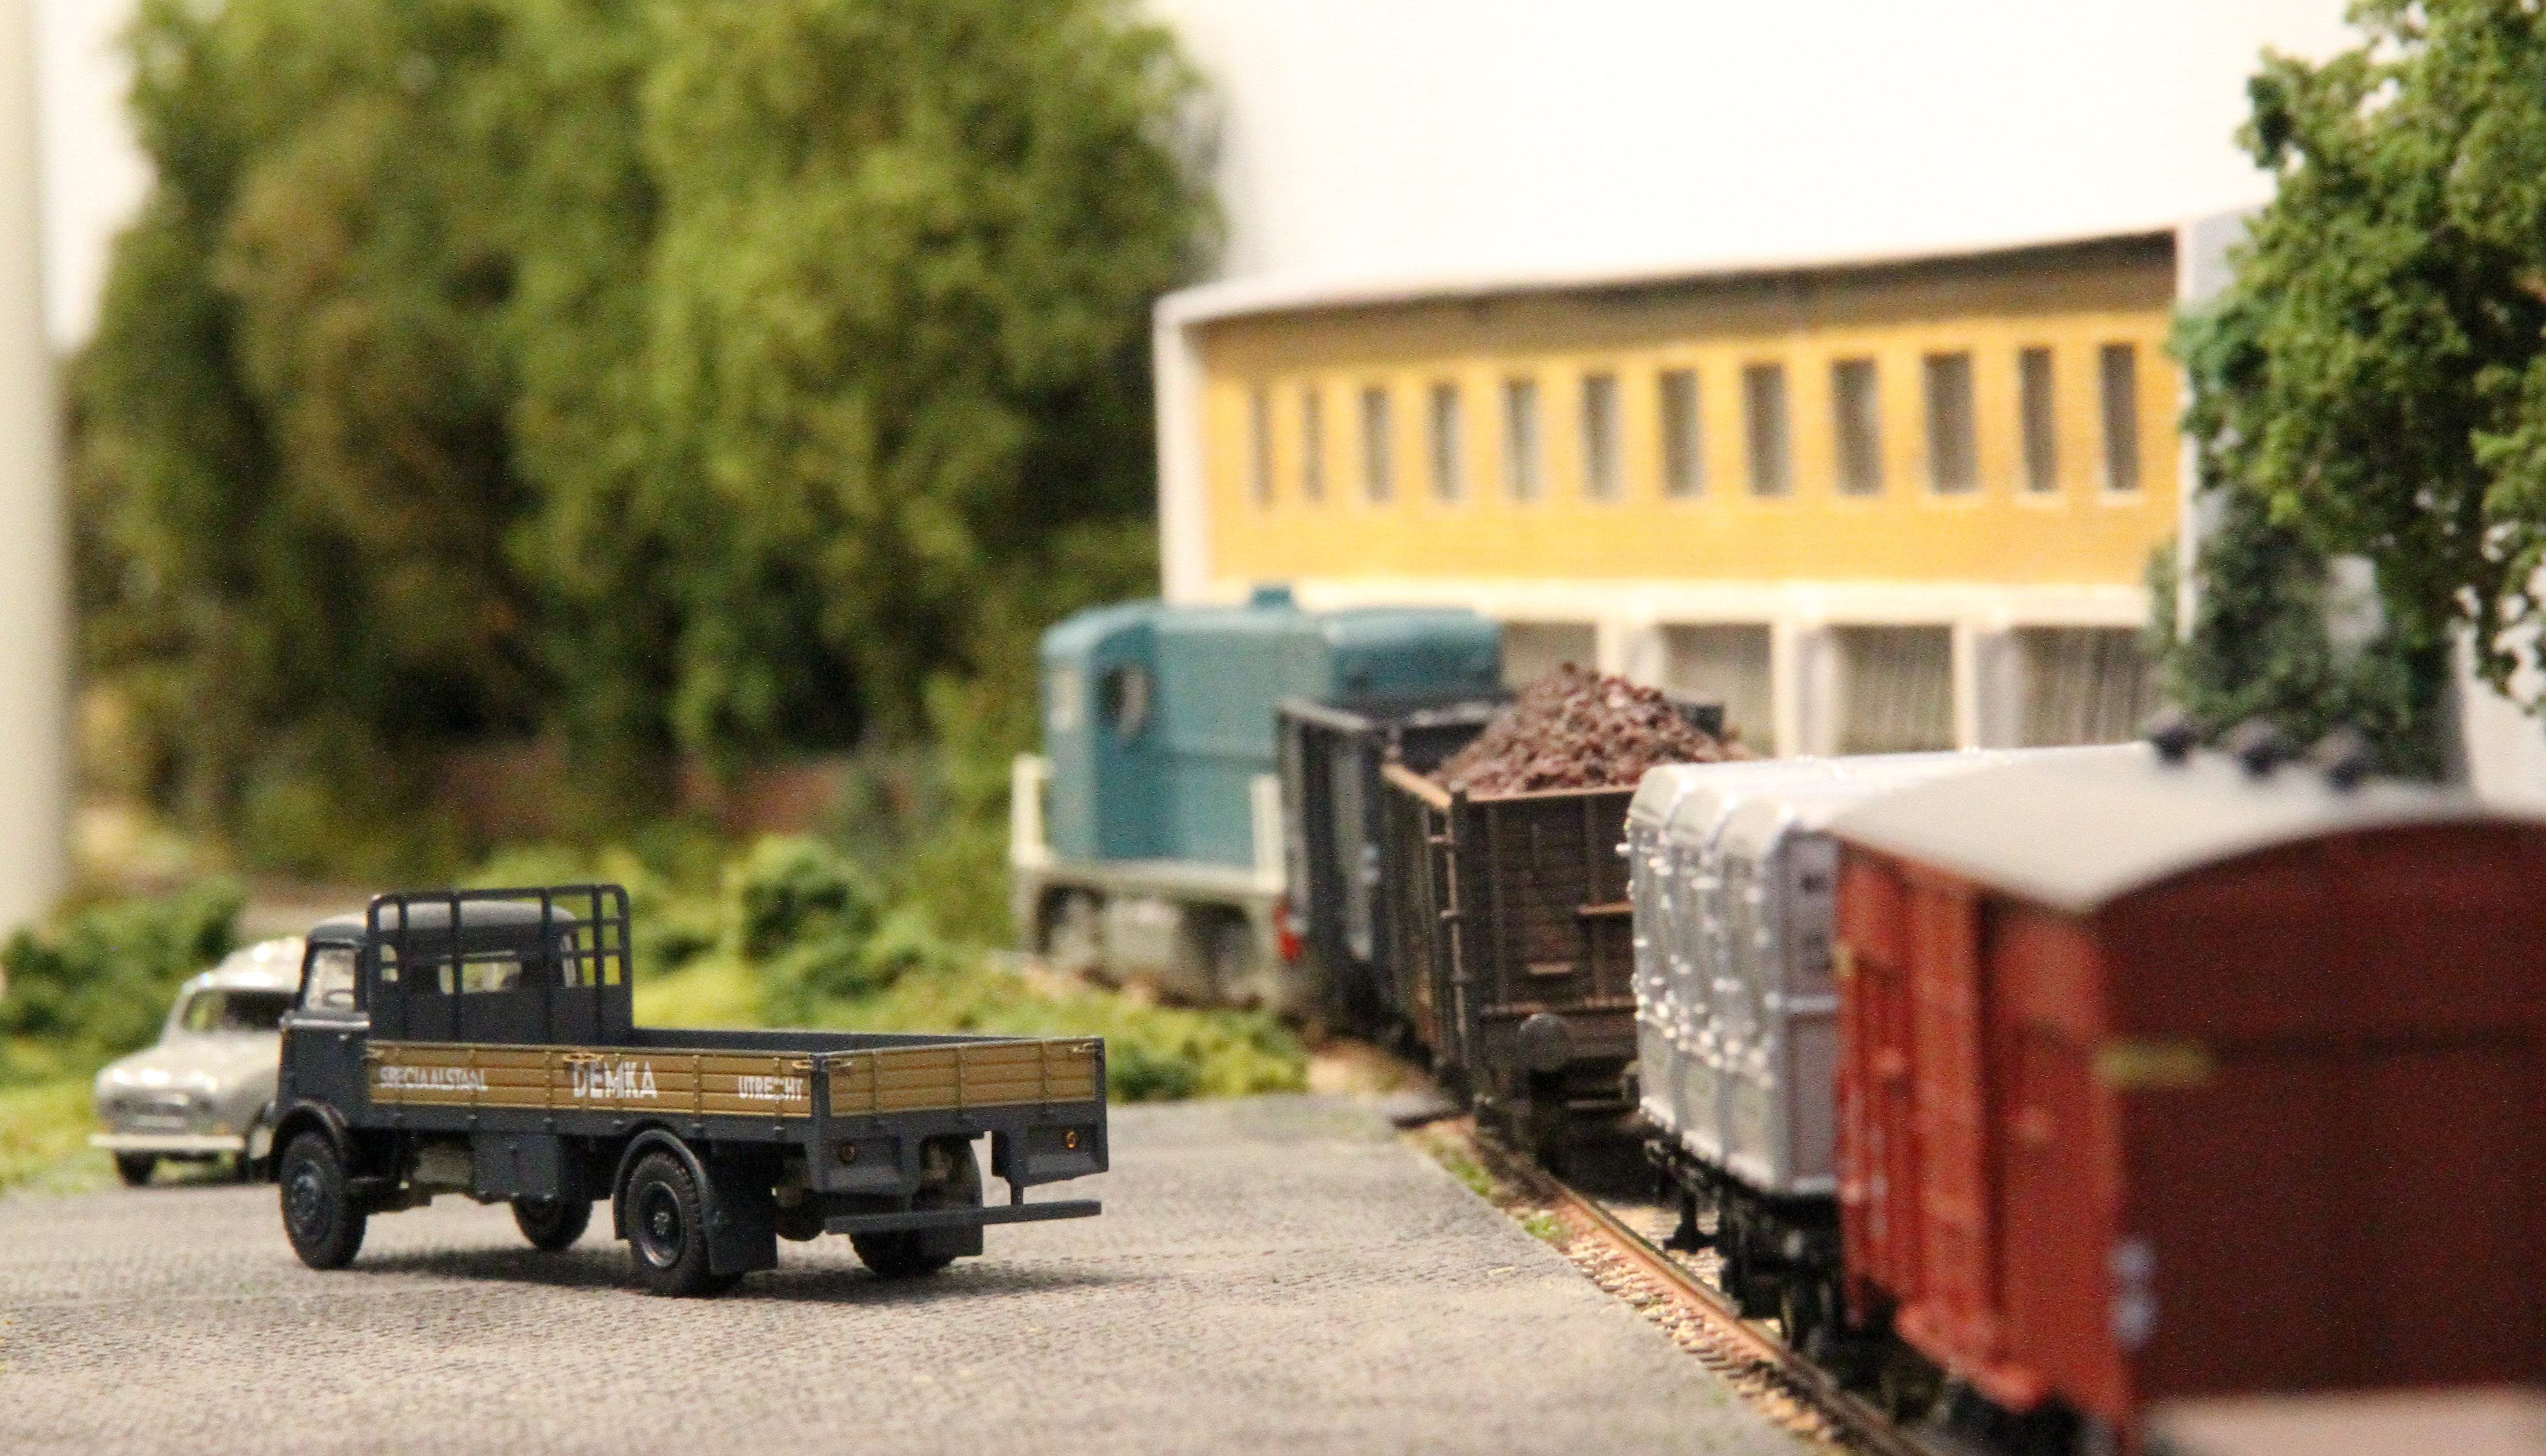
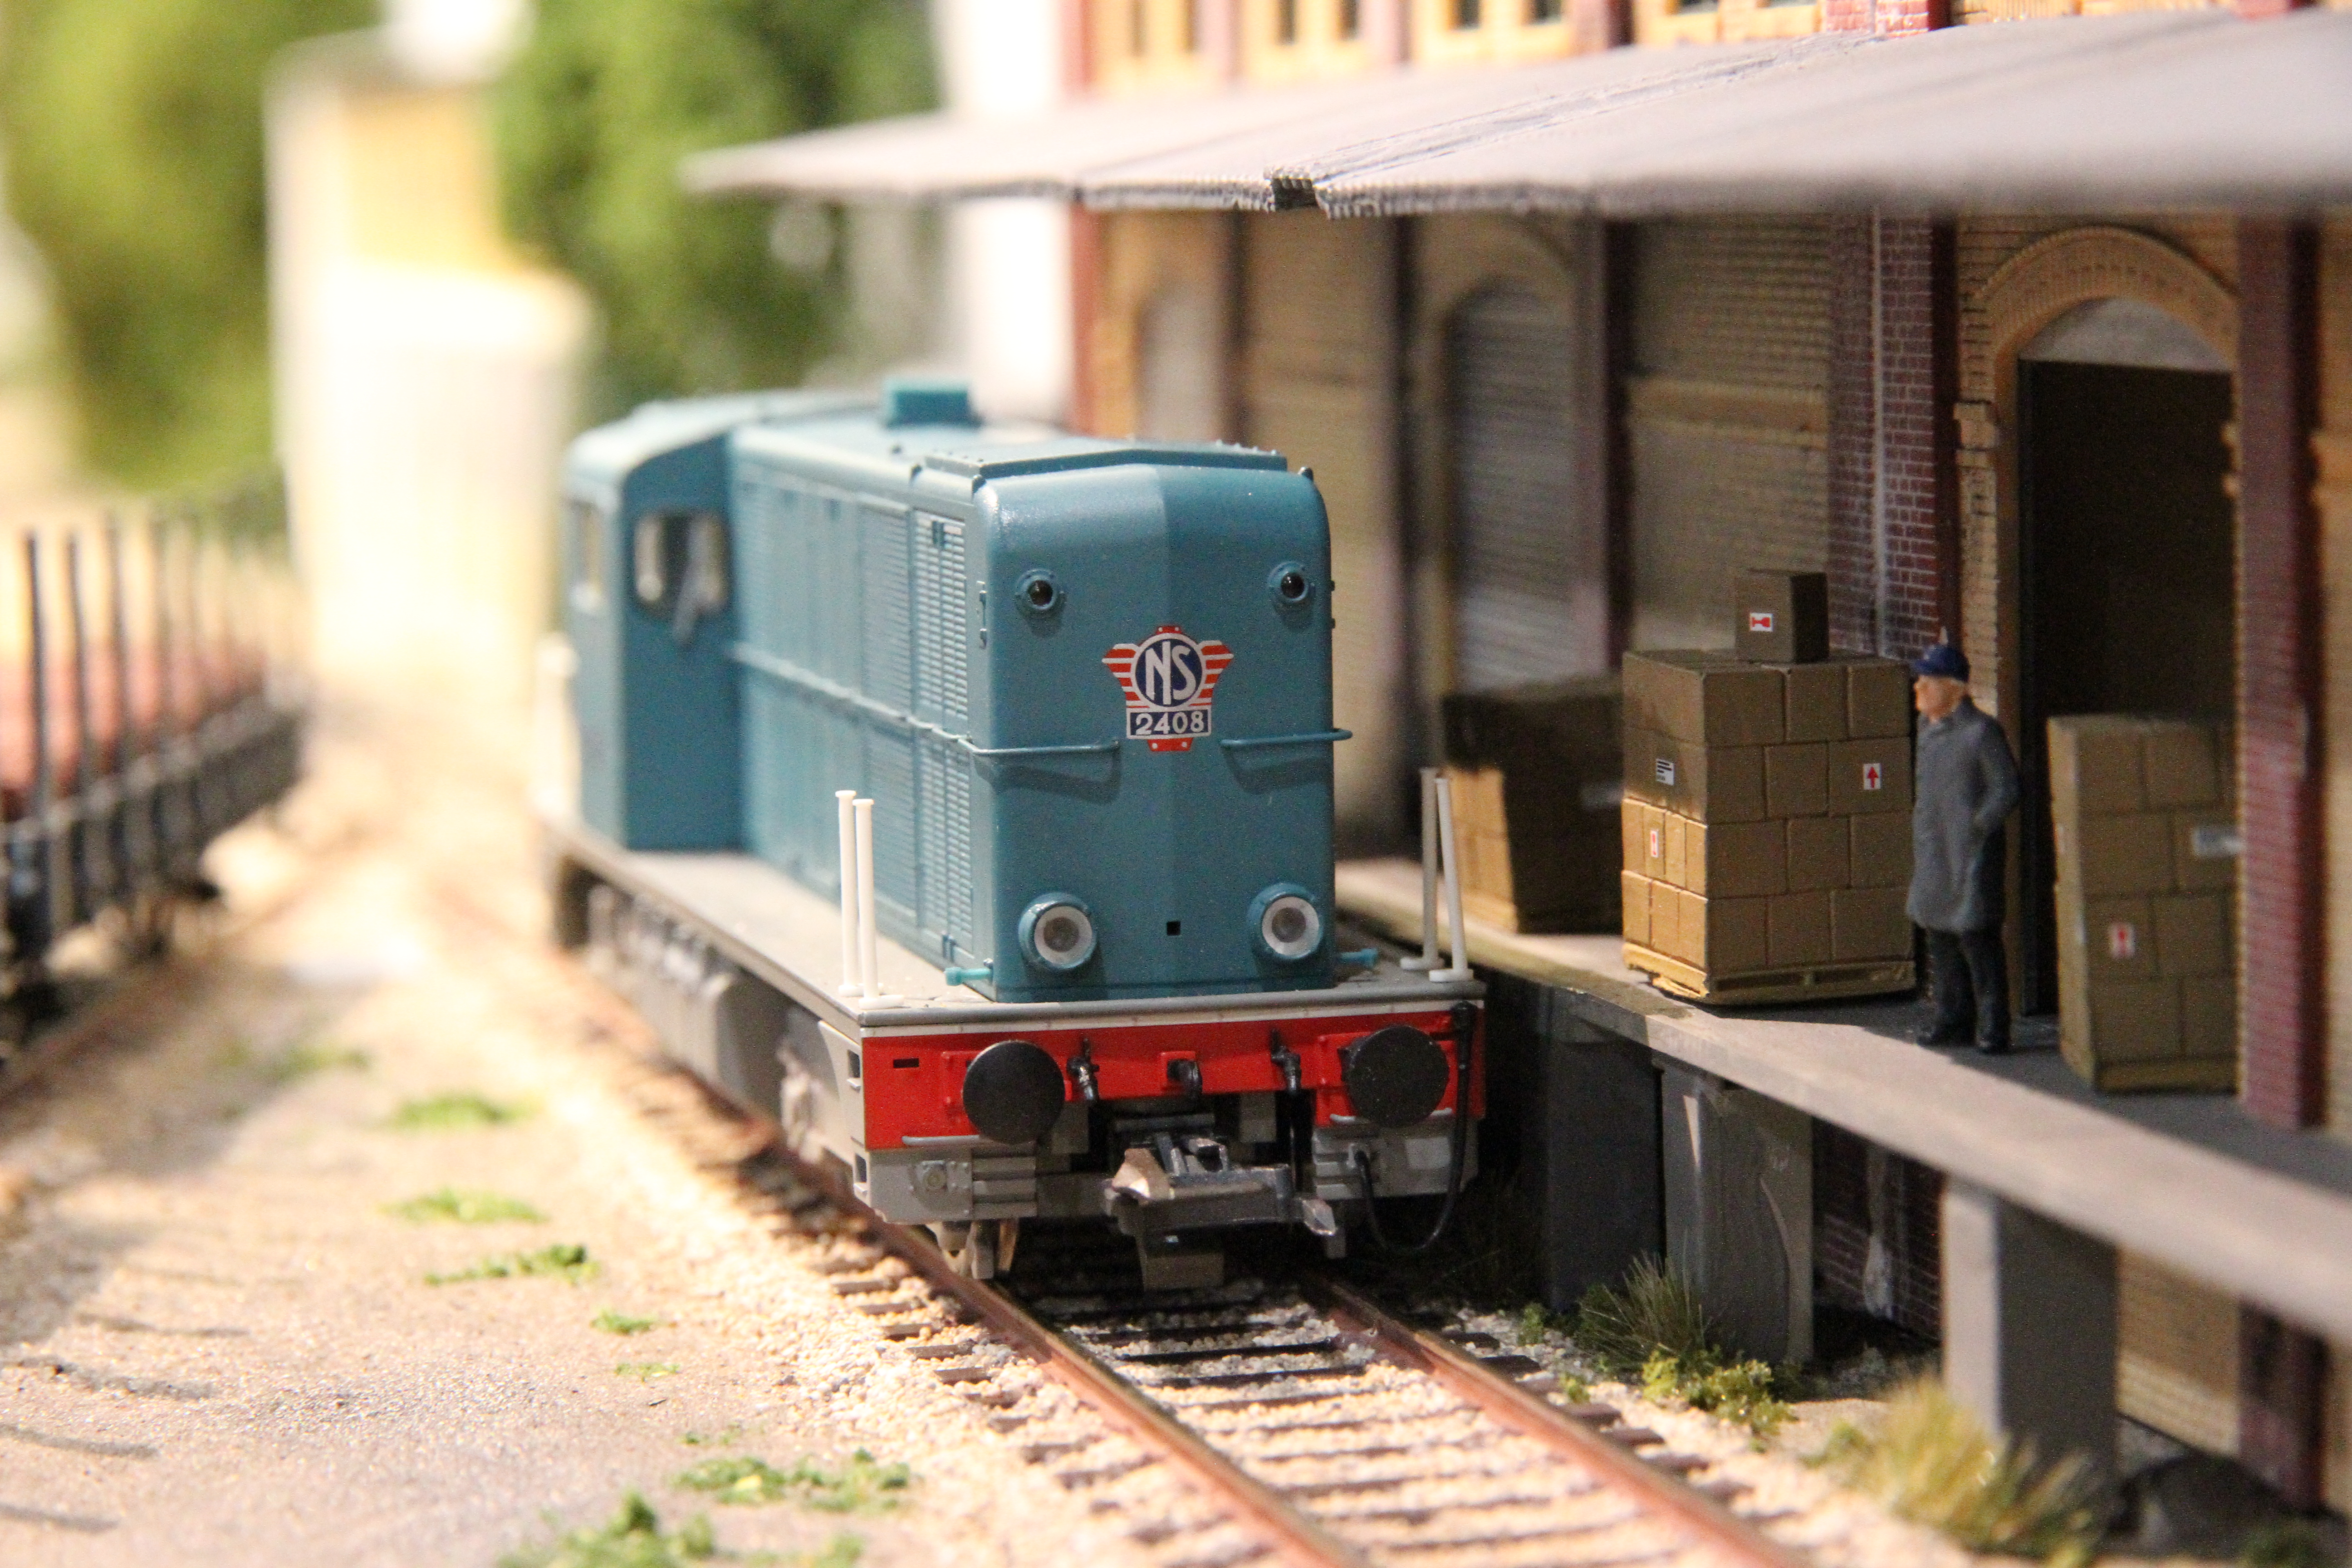
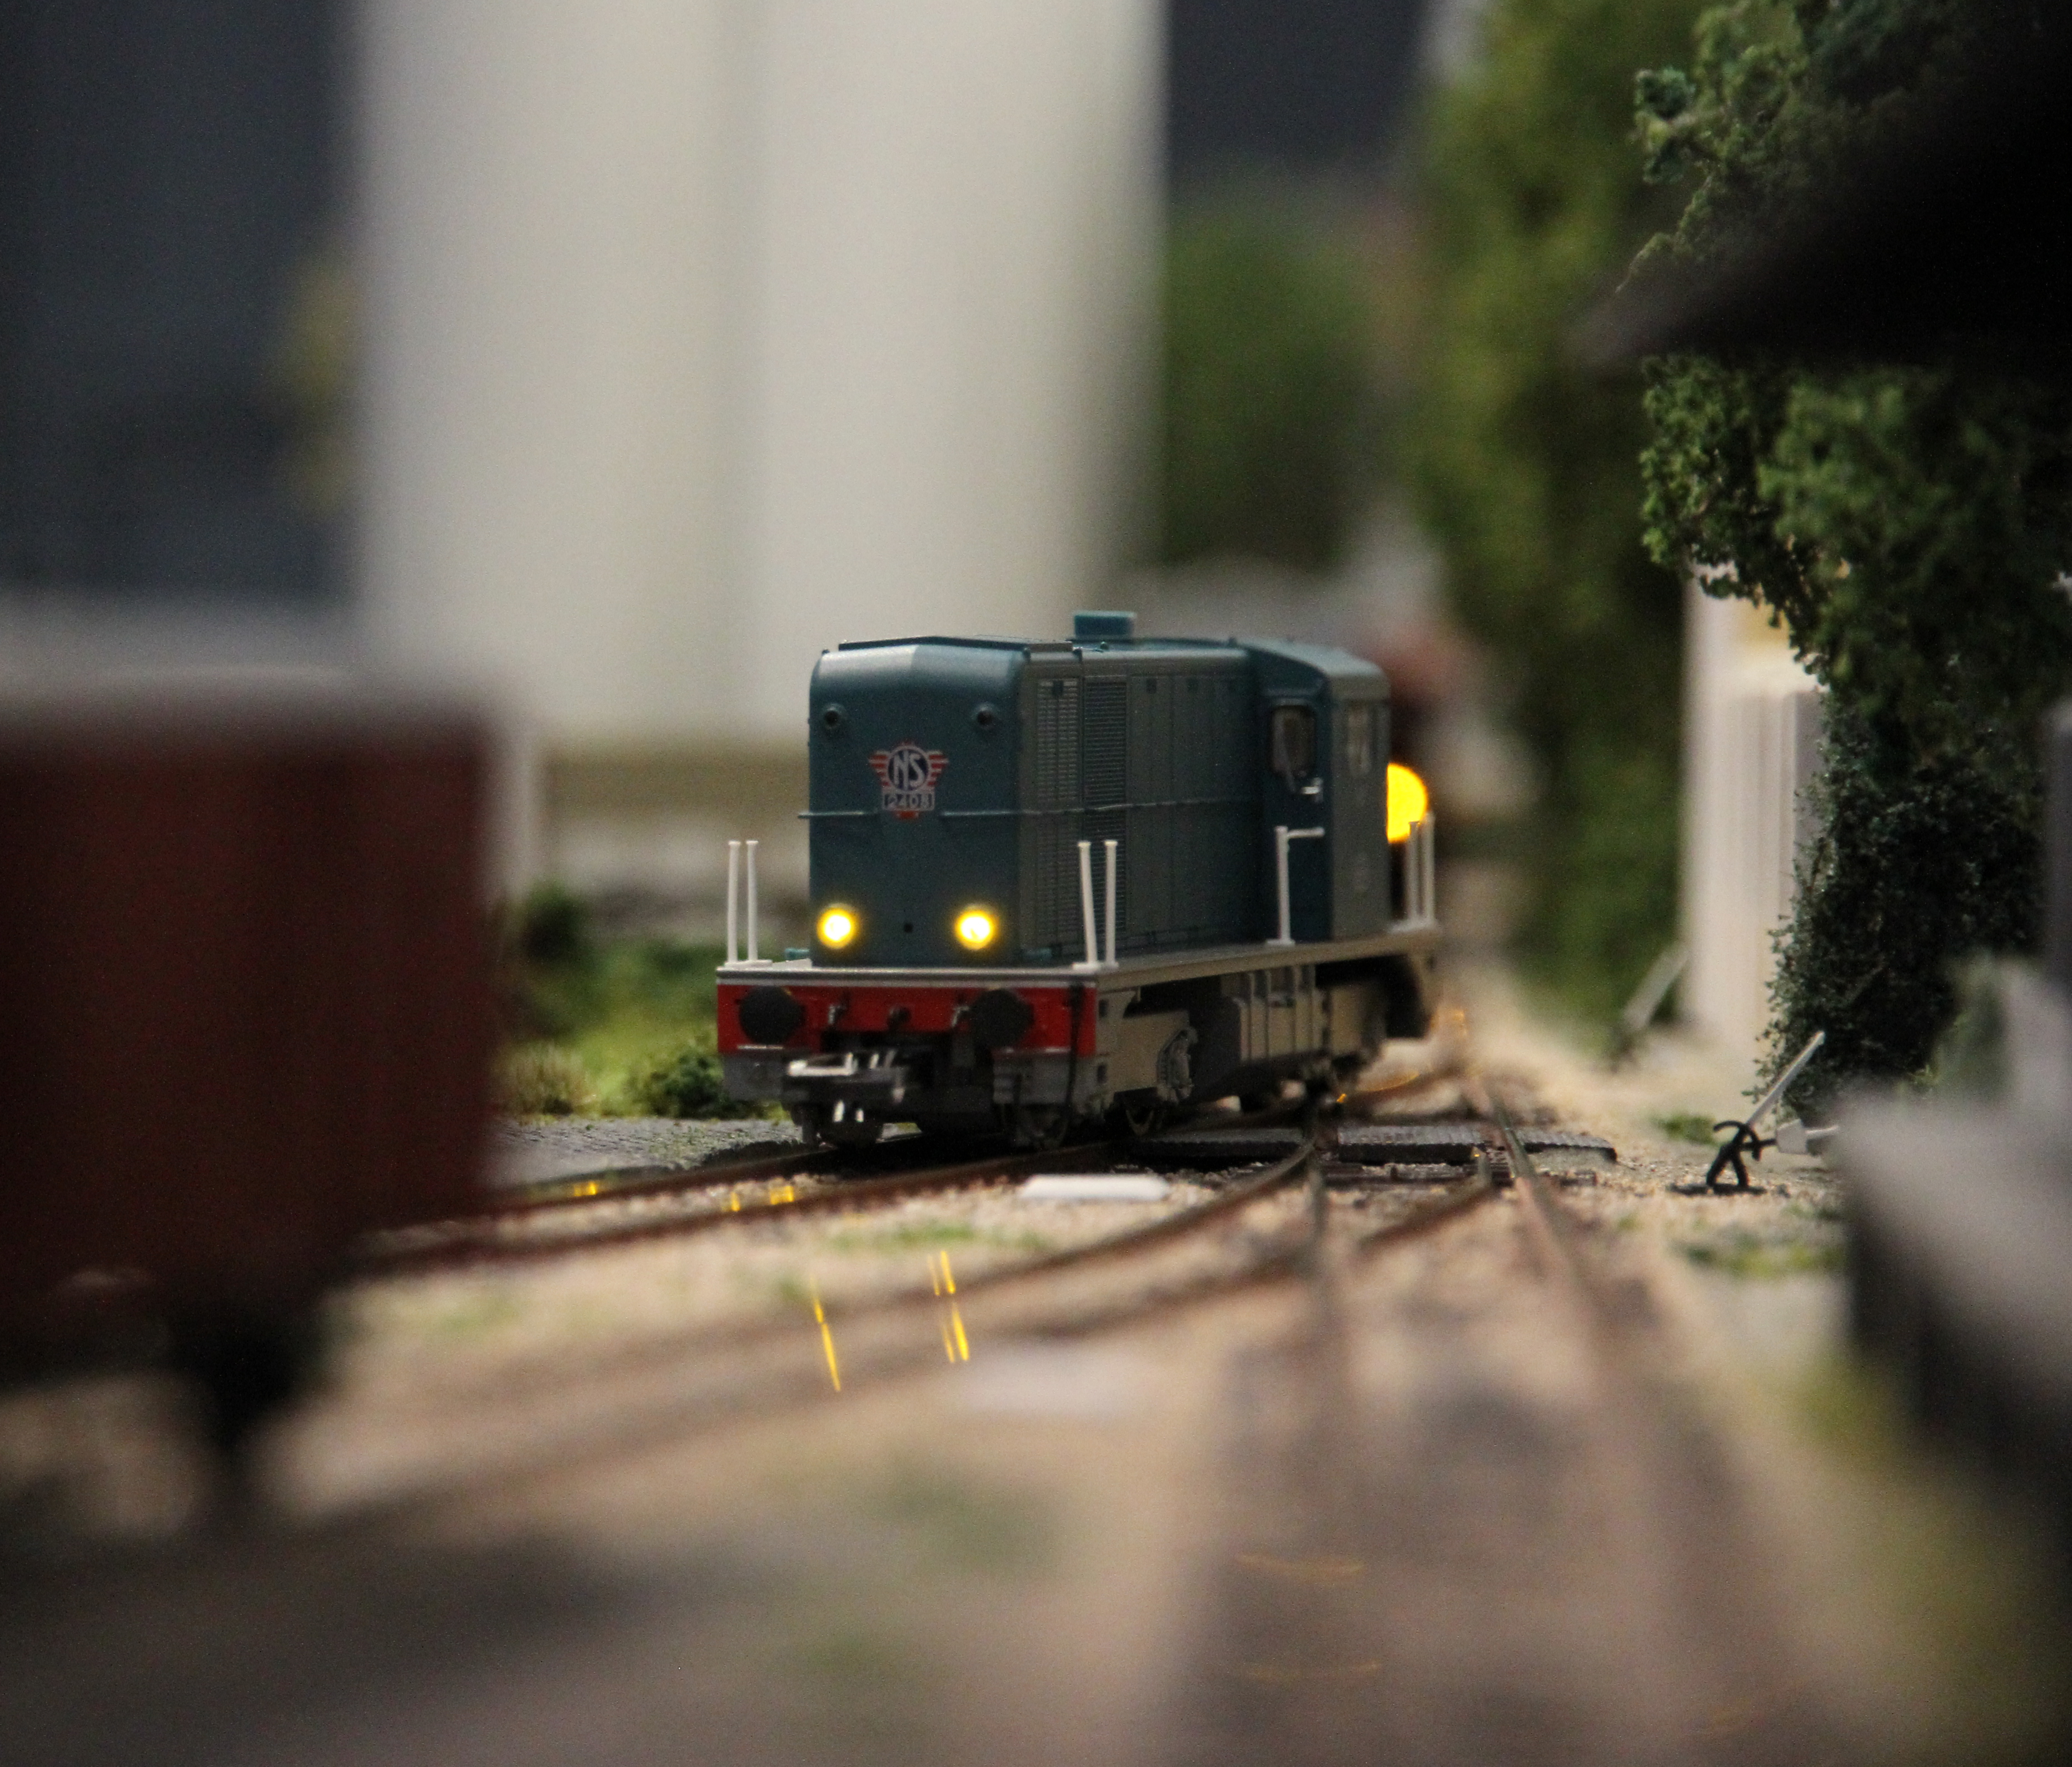
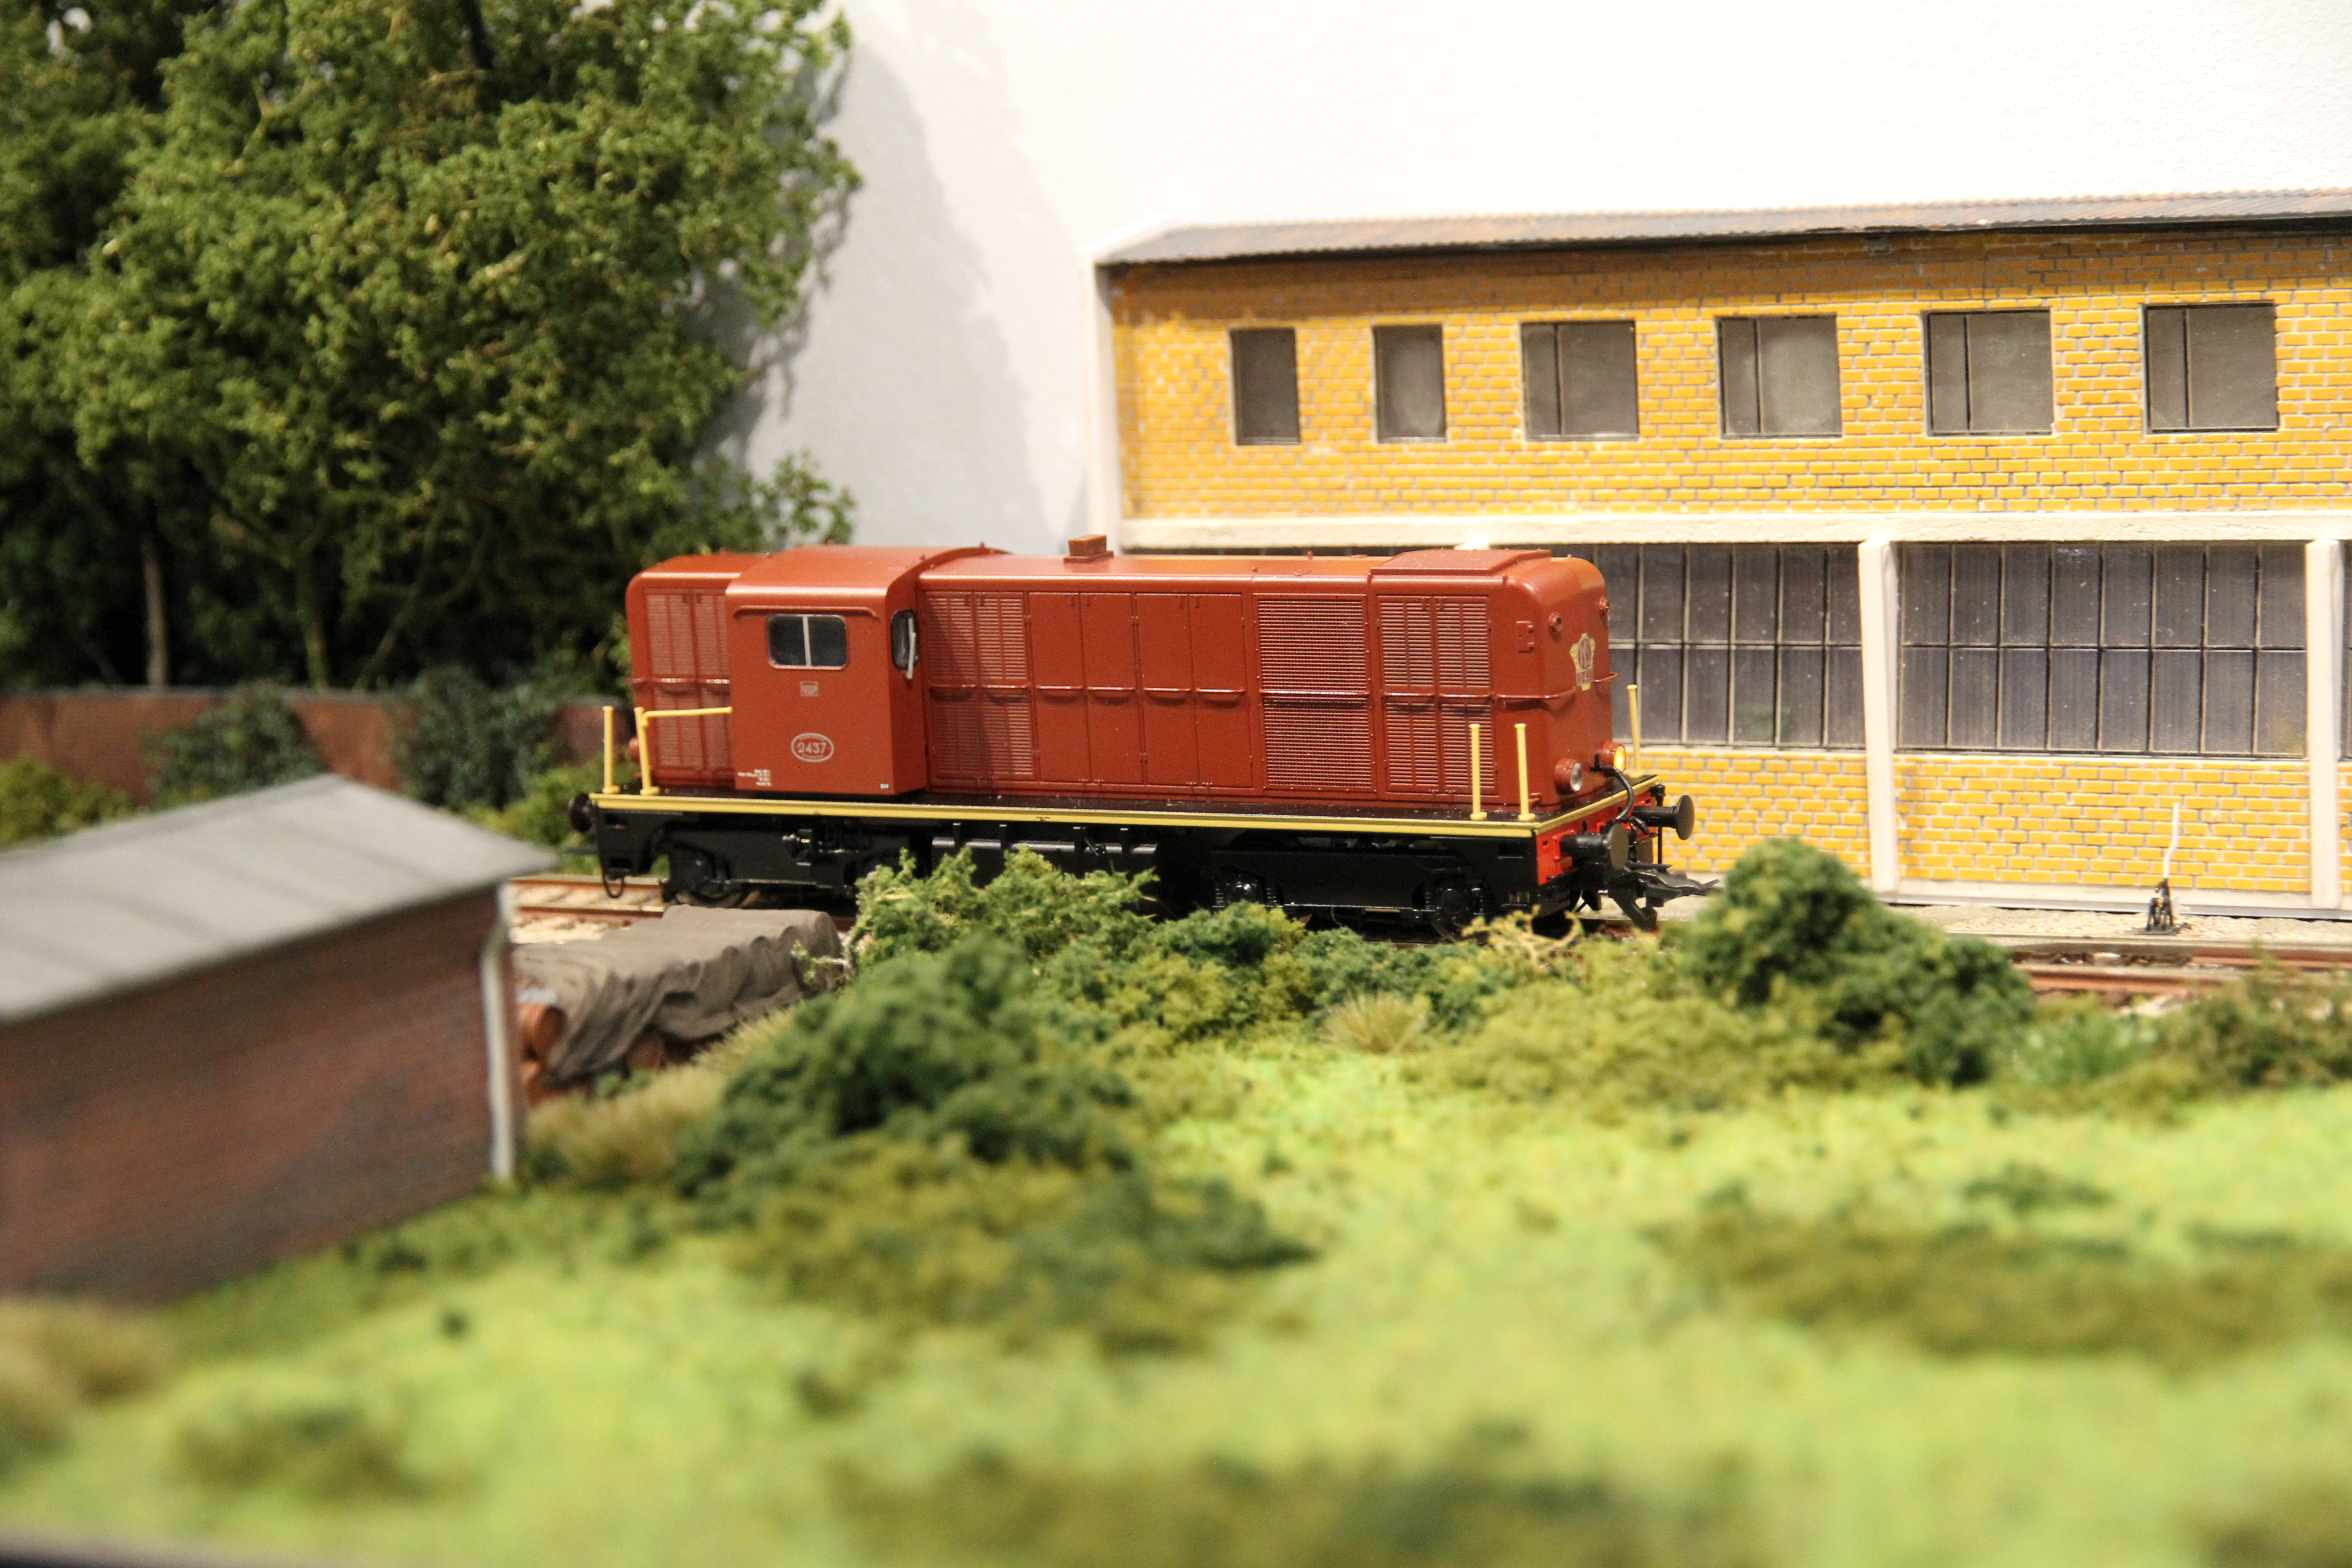
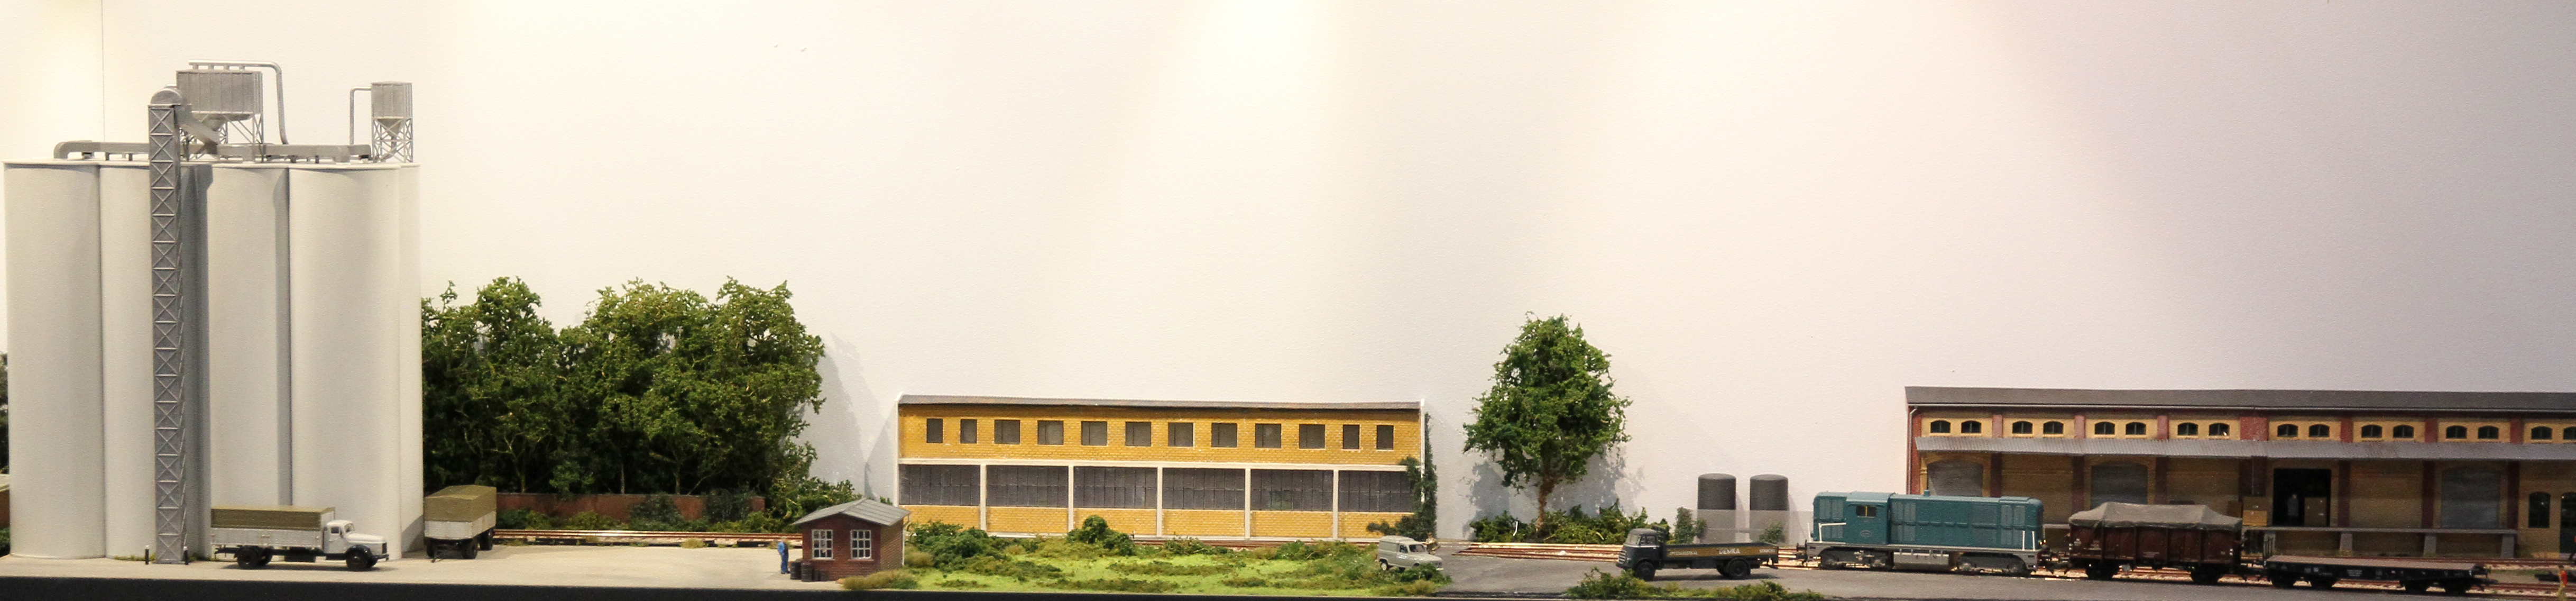
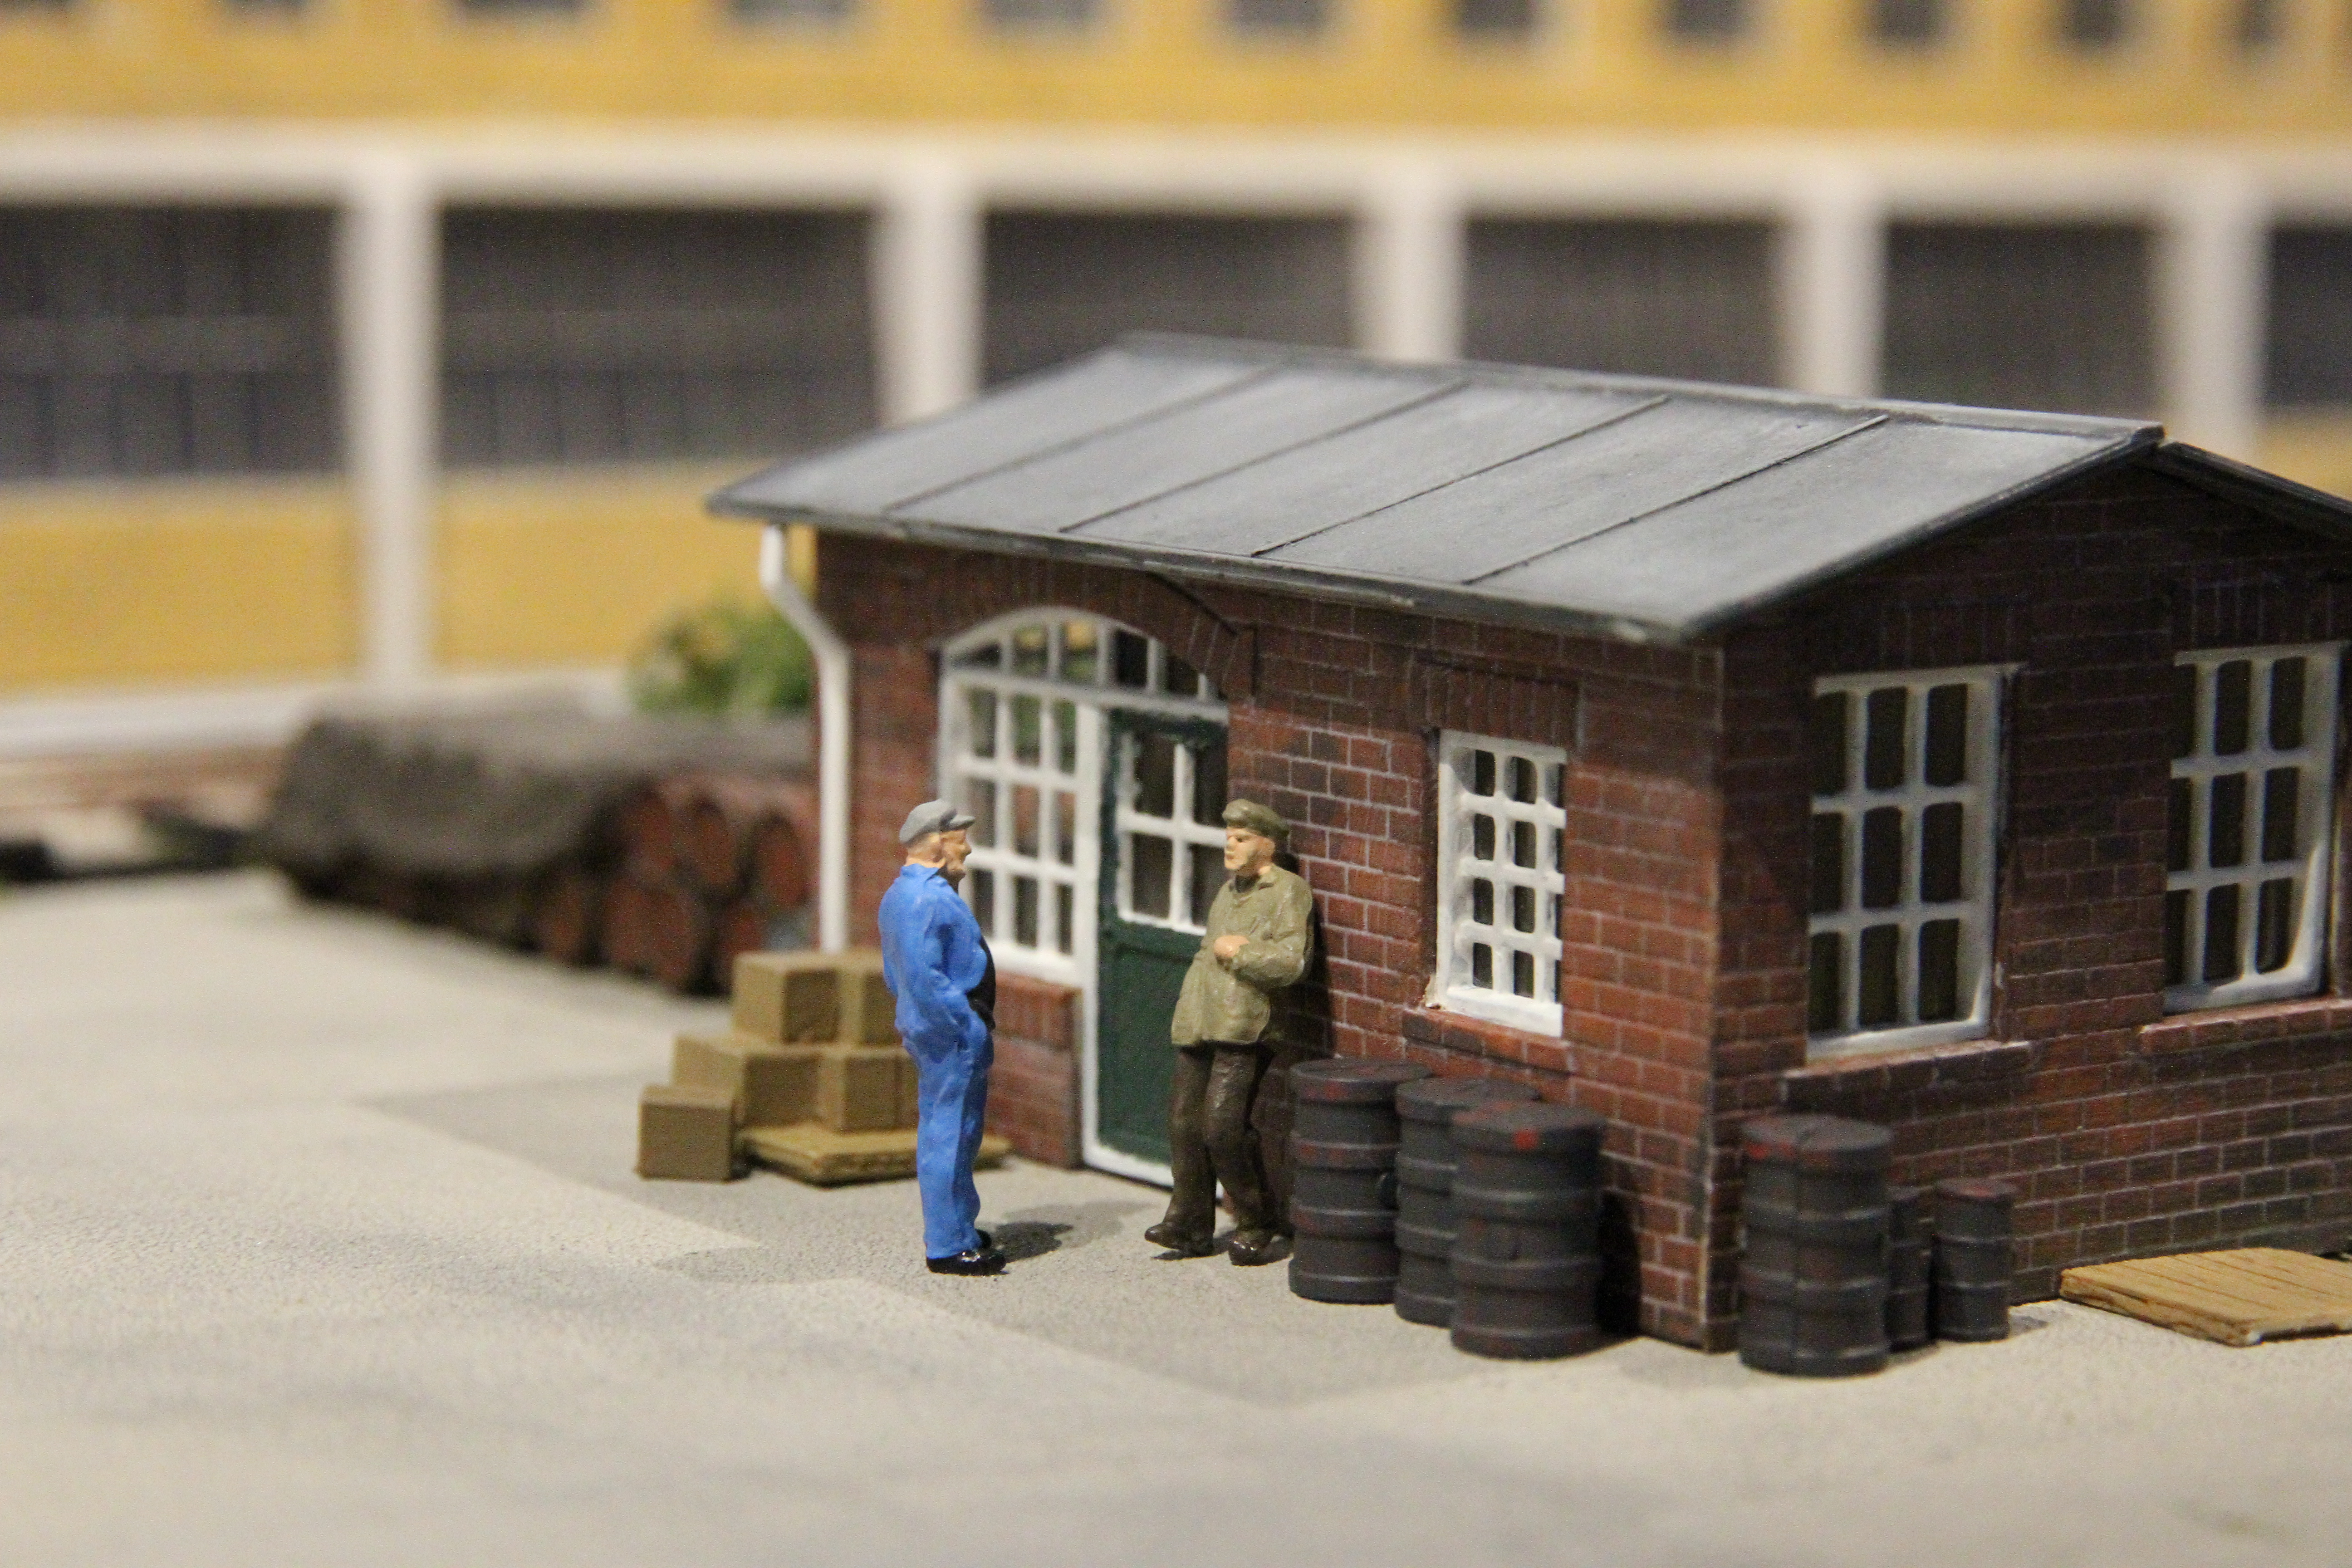
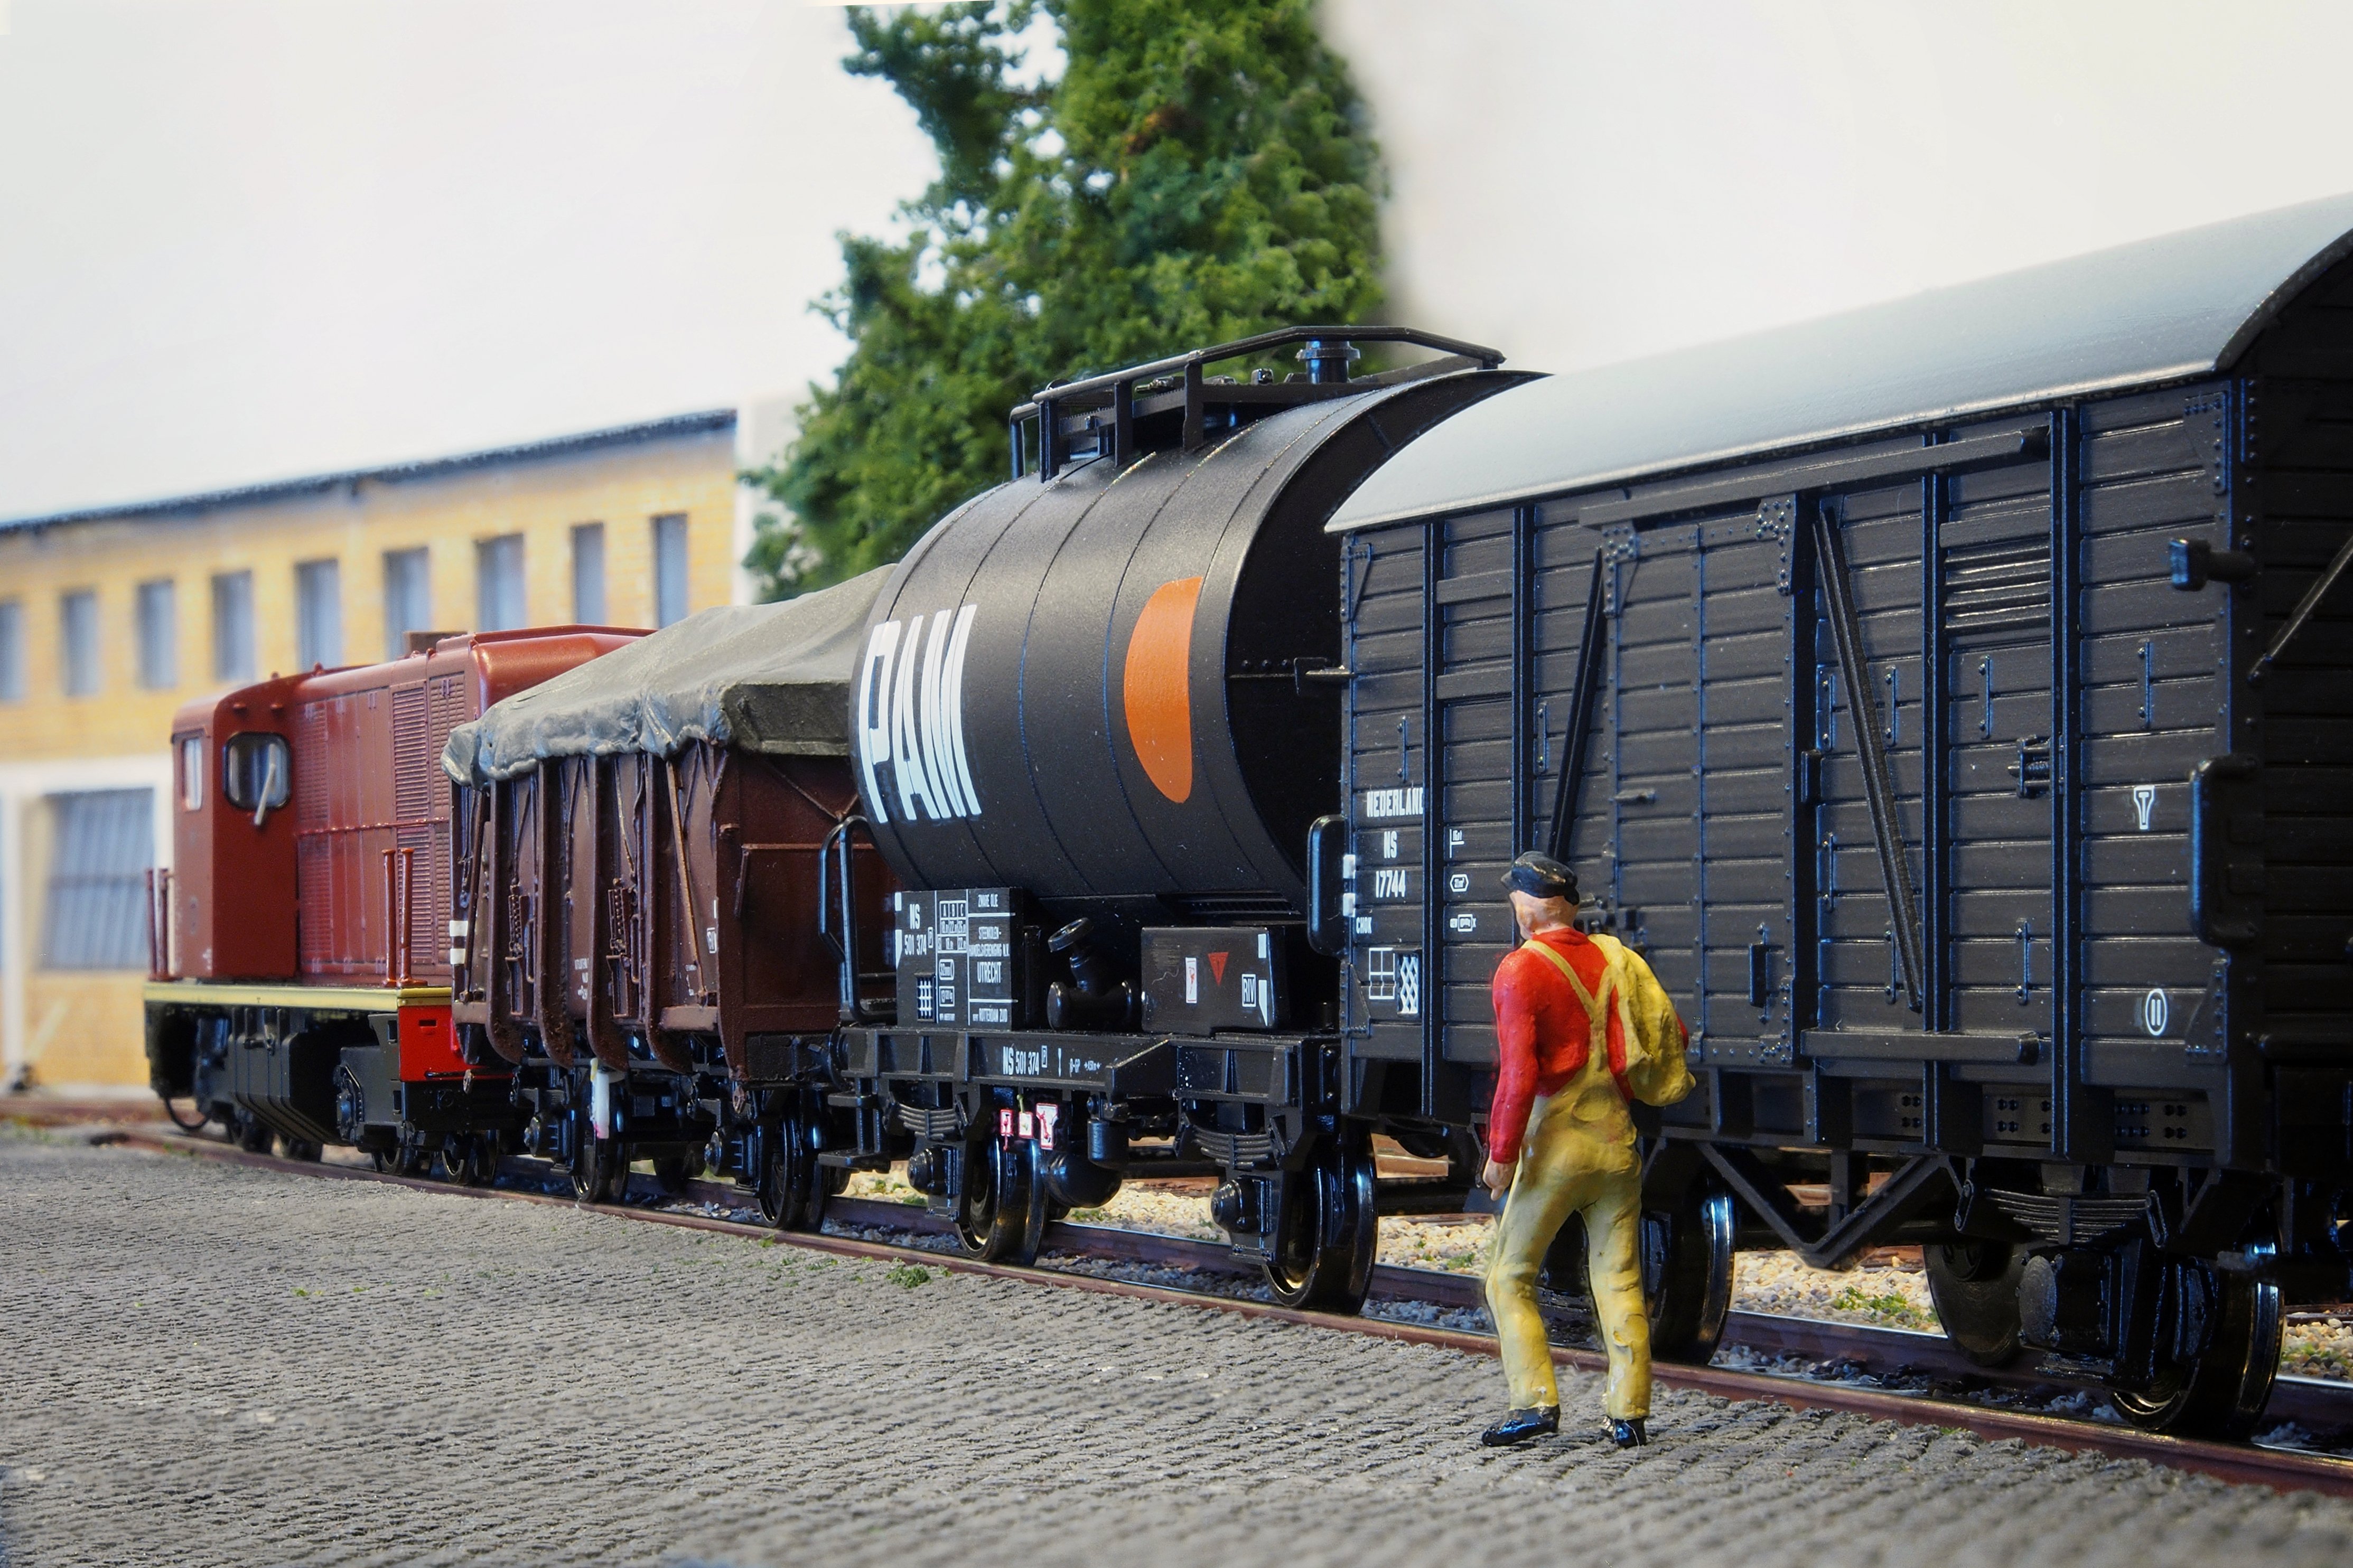
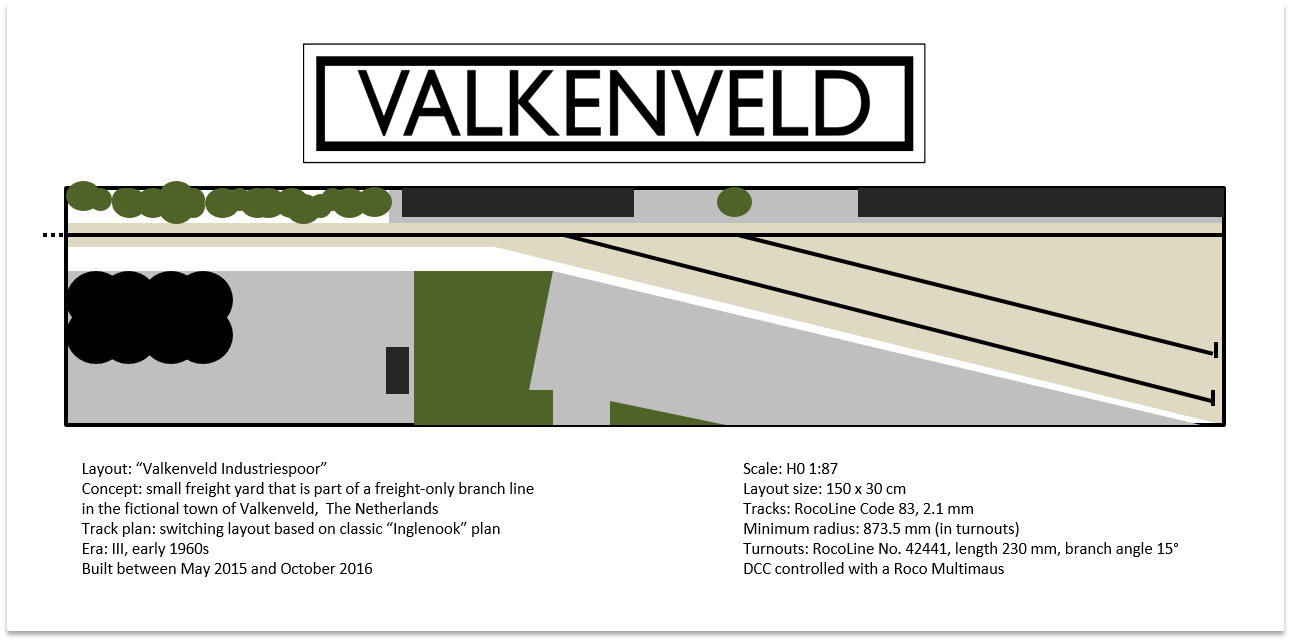
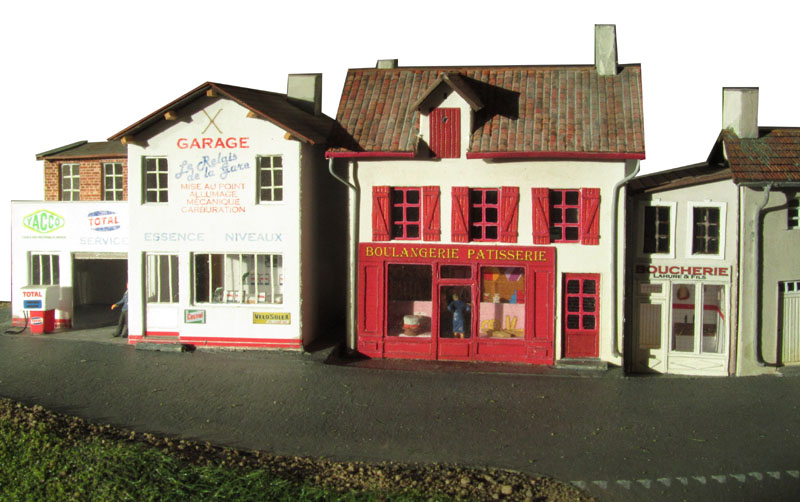
Valkenveld – by Dieter Marquardt from the Netherlands
An H0 Inglenook layout
The Netherlands in the early 1960’s. A freight-only short line serves various industries in the fictional town of “Valkenveld”. The track plan of this H0 layout of 150 x 30 cm is based on the traditional “Inglenook” design. I have long been intrigued by the possibilities and switching operations of this concept invented by Alan Wright where the track plan and length of tracks are determined by the rules of the switching game.
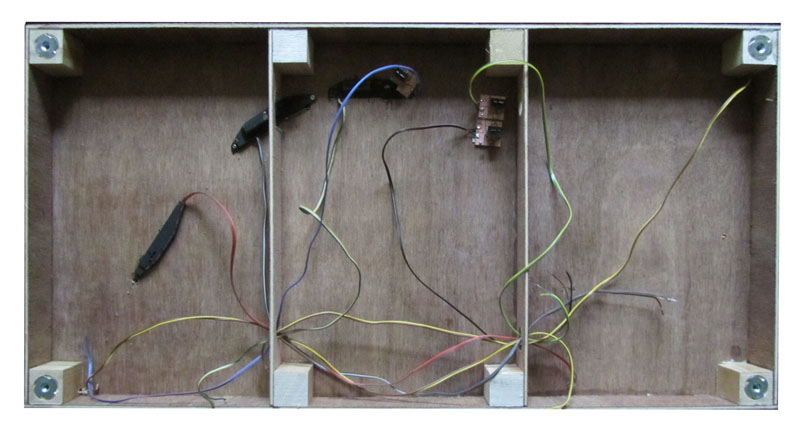
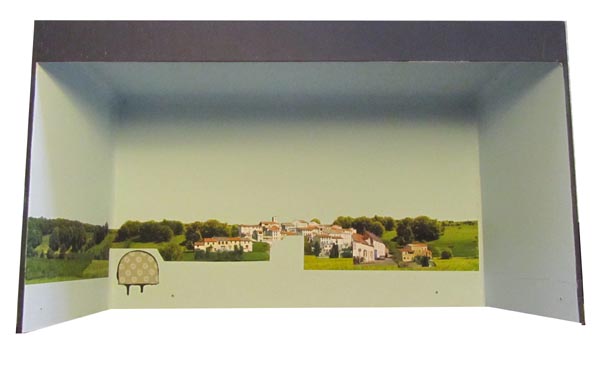
The layout is built on a wooden frame with a top board of 7 mm and a cork layer of 3 mm. Rails and switches are RocoLine code 83 glued onto the cork. The switching motors are from Tortoise. The layout is DCC operated with a Roco Multimaus. Rolling stock features the typical short line diesels of the Netherlands in the early 1960, like NS series 2200 and 2400. Operations follow either the traditional Inglenook rules or the car card system.
I have exhibited Valkenveld a couple of times already like most recently at Eurospoor 2016 in Utrecht, The Netherlands where the Inglenook concept proved its worth.
For more information on Valkenveld visit my blog (valkenveldmodelrailroad.blogspot.nl) or my Flickr stream (https://www.flickr.com/photos/dietermarquardt/albums/72157653200568406).
Please don’t forget to submit your own layout updates, or send in tips about beautiful Micro Layouts you’ve come across! Click here for Submitting Instructions.
The post Page 123: March 2017 appeared first on Carendt.com.
Page 122: February 2017 13 Feb 2017 10:49 AM (8 years ago)
Scrapbook update numer 122 is here for you to enjoy. Have fun reading and be inspired!
R.I.P. Car Shop – by Alain KAP from Saarburg, Germany
Name: R.I.P. Car Shop
Scale: HO
Track: PECO Settrack from Starter Set
Benchwork: IKEA “APA” box
Size: 150 cm x 30 cm
Lighting: two fluorescent lights (60 cm each)
Operation: DC (but may also be used with DCC)
Turnout control: manual push rods
Theme: Switching Layout Inglenook 3-2-2 (6 cars + 1 engine)
I’ve built it for a contest in the german MIBA Magazine.
It is an Inglenook and the theme is a Railroad Car Repair Shop. I built the layout in two IKEA APA-Boxes with attached cassette which has a double purpose, as changing rolling stock and as a run around. Six cars are switched by a switcher Inglenook style. Due to the very small space I had to reduce the Inglenook to 3-2-2 with three cars to be switched behind the locomotive. I chose railcars with six different colors, which is very easy with american rolling stock. I then painted a dice with each of these colors. To make the switch list I roll the dice three times and this is also the sequence in which the cars have to be behind the engine. After the train is complete I put the cars back at random locations on the layout and the game starts anew.
This was a fun project which allowed me to concentrate more on the scenery with small vignettes. Track is from a PECO Starter set. The connection between the two boxes is concealed by a highway bridge and the passing to the cassette through an engine shed.
The background is decorated with cut-outs of the box art from Walthers kit boxes and left-over walls from structures.
The construction of the layout with lots of pictures can be checked on my blog (sharing-know-how.blogspot.com) Search for APA
Ingly Nook – by Scott Pollard from the United Kingdom
Scale: 009 Narrow Gauge
Baseboard size: 73cm by 25cm
Webpage: https://www.flickr.com/gp/144333239@N04/AVS548
Ingley Nook is my second micro layout. Small layouts fascinate me and I’ve become highly inspired by the Models of Yuta Atellier. Im a member of the Blackburn Model Railway Society, UK, working with two very talented and experienced modelers, John (my father) and Ian. They have share their wealth of knowledge each week with me.
The layout is not based on a place in particular but I hoped to capture the essence a feeling of a small Narrow Guage siding in the UK. Presentation of any model for me is to try and make it like an ornament you’d have inside your home. With this in mind I had the idea of using picture frames as a baseboard. They have a nice, already constructed finish to them so I simply replaced the glass with a piece of MDF wood cut to sized and glued in.
The Track
Constructed of the new Peco Set Track the simple Inglenook plan came together very quickly. Cork is glued beneath for the track. Points are control by the simply wire in tube method with some decorative small wood handles for operation.
Scenics
Buildings are mainly Ratio Kits that I have put together and painted. Platforms and raised area is constructed of foam core board. Scatter and texture is mainly made up of Woodland Scenics, Javis, and Cat Litter (Yes he said Cat Litter). By mixing cat litter with straight PVA glue and then pressed into a mold made from lego, I have created my own walls on the layout.My cobble road is made up of DAS moldelling clay PVA glue to the base board anf the piece of square brass tubing pressed in to it to create the cobbles.
Rolling Stock
I’m not a very prototypical modeler so I run whatever I have built or bought. My stock mainly comprises of Peco, Minitrains, Lilliput, Roco, Colin Ashby and Eggerbahn.
Future of the layout
The layout lives in my home on my shelf and I use it to test my builds and couplings. It is a small layout so I look forwards to being able to easily take it along to Narrow Gauge Exhibitions in my area and hopefully promote the 009 scale.
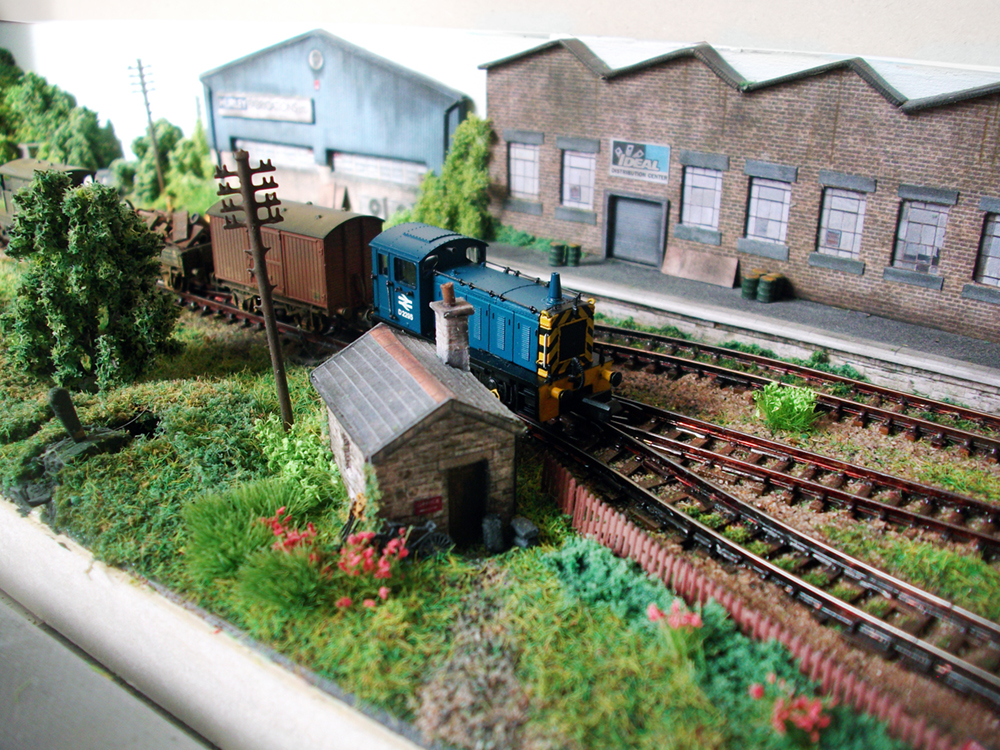
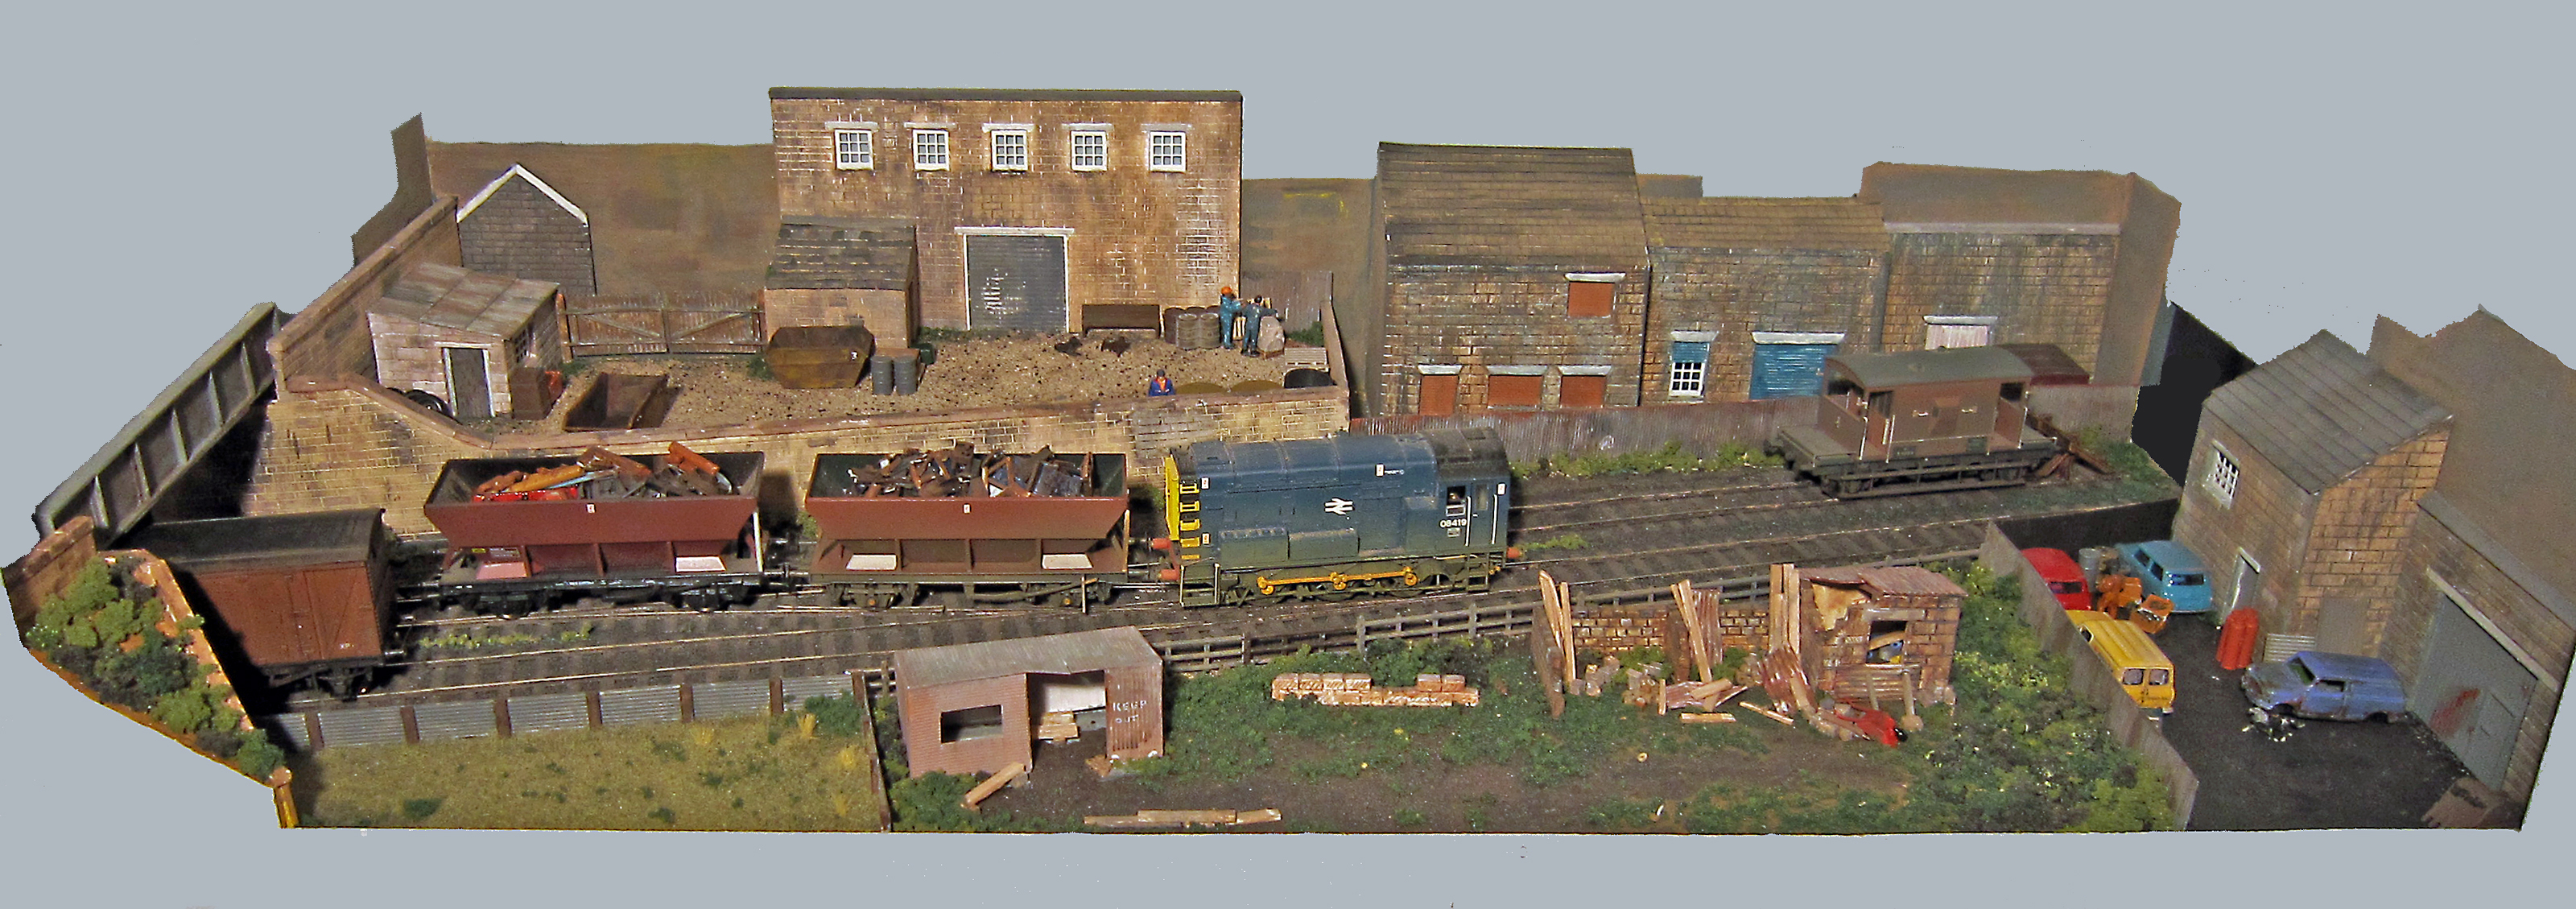
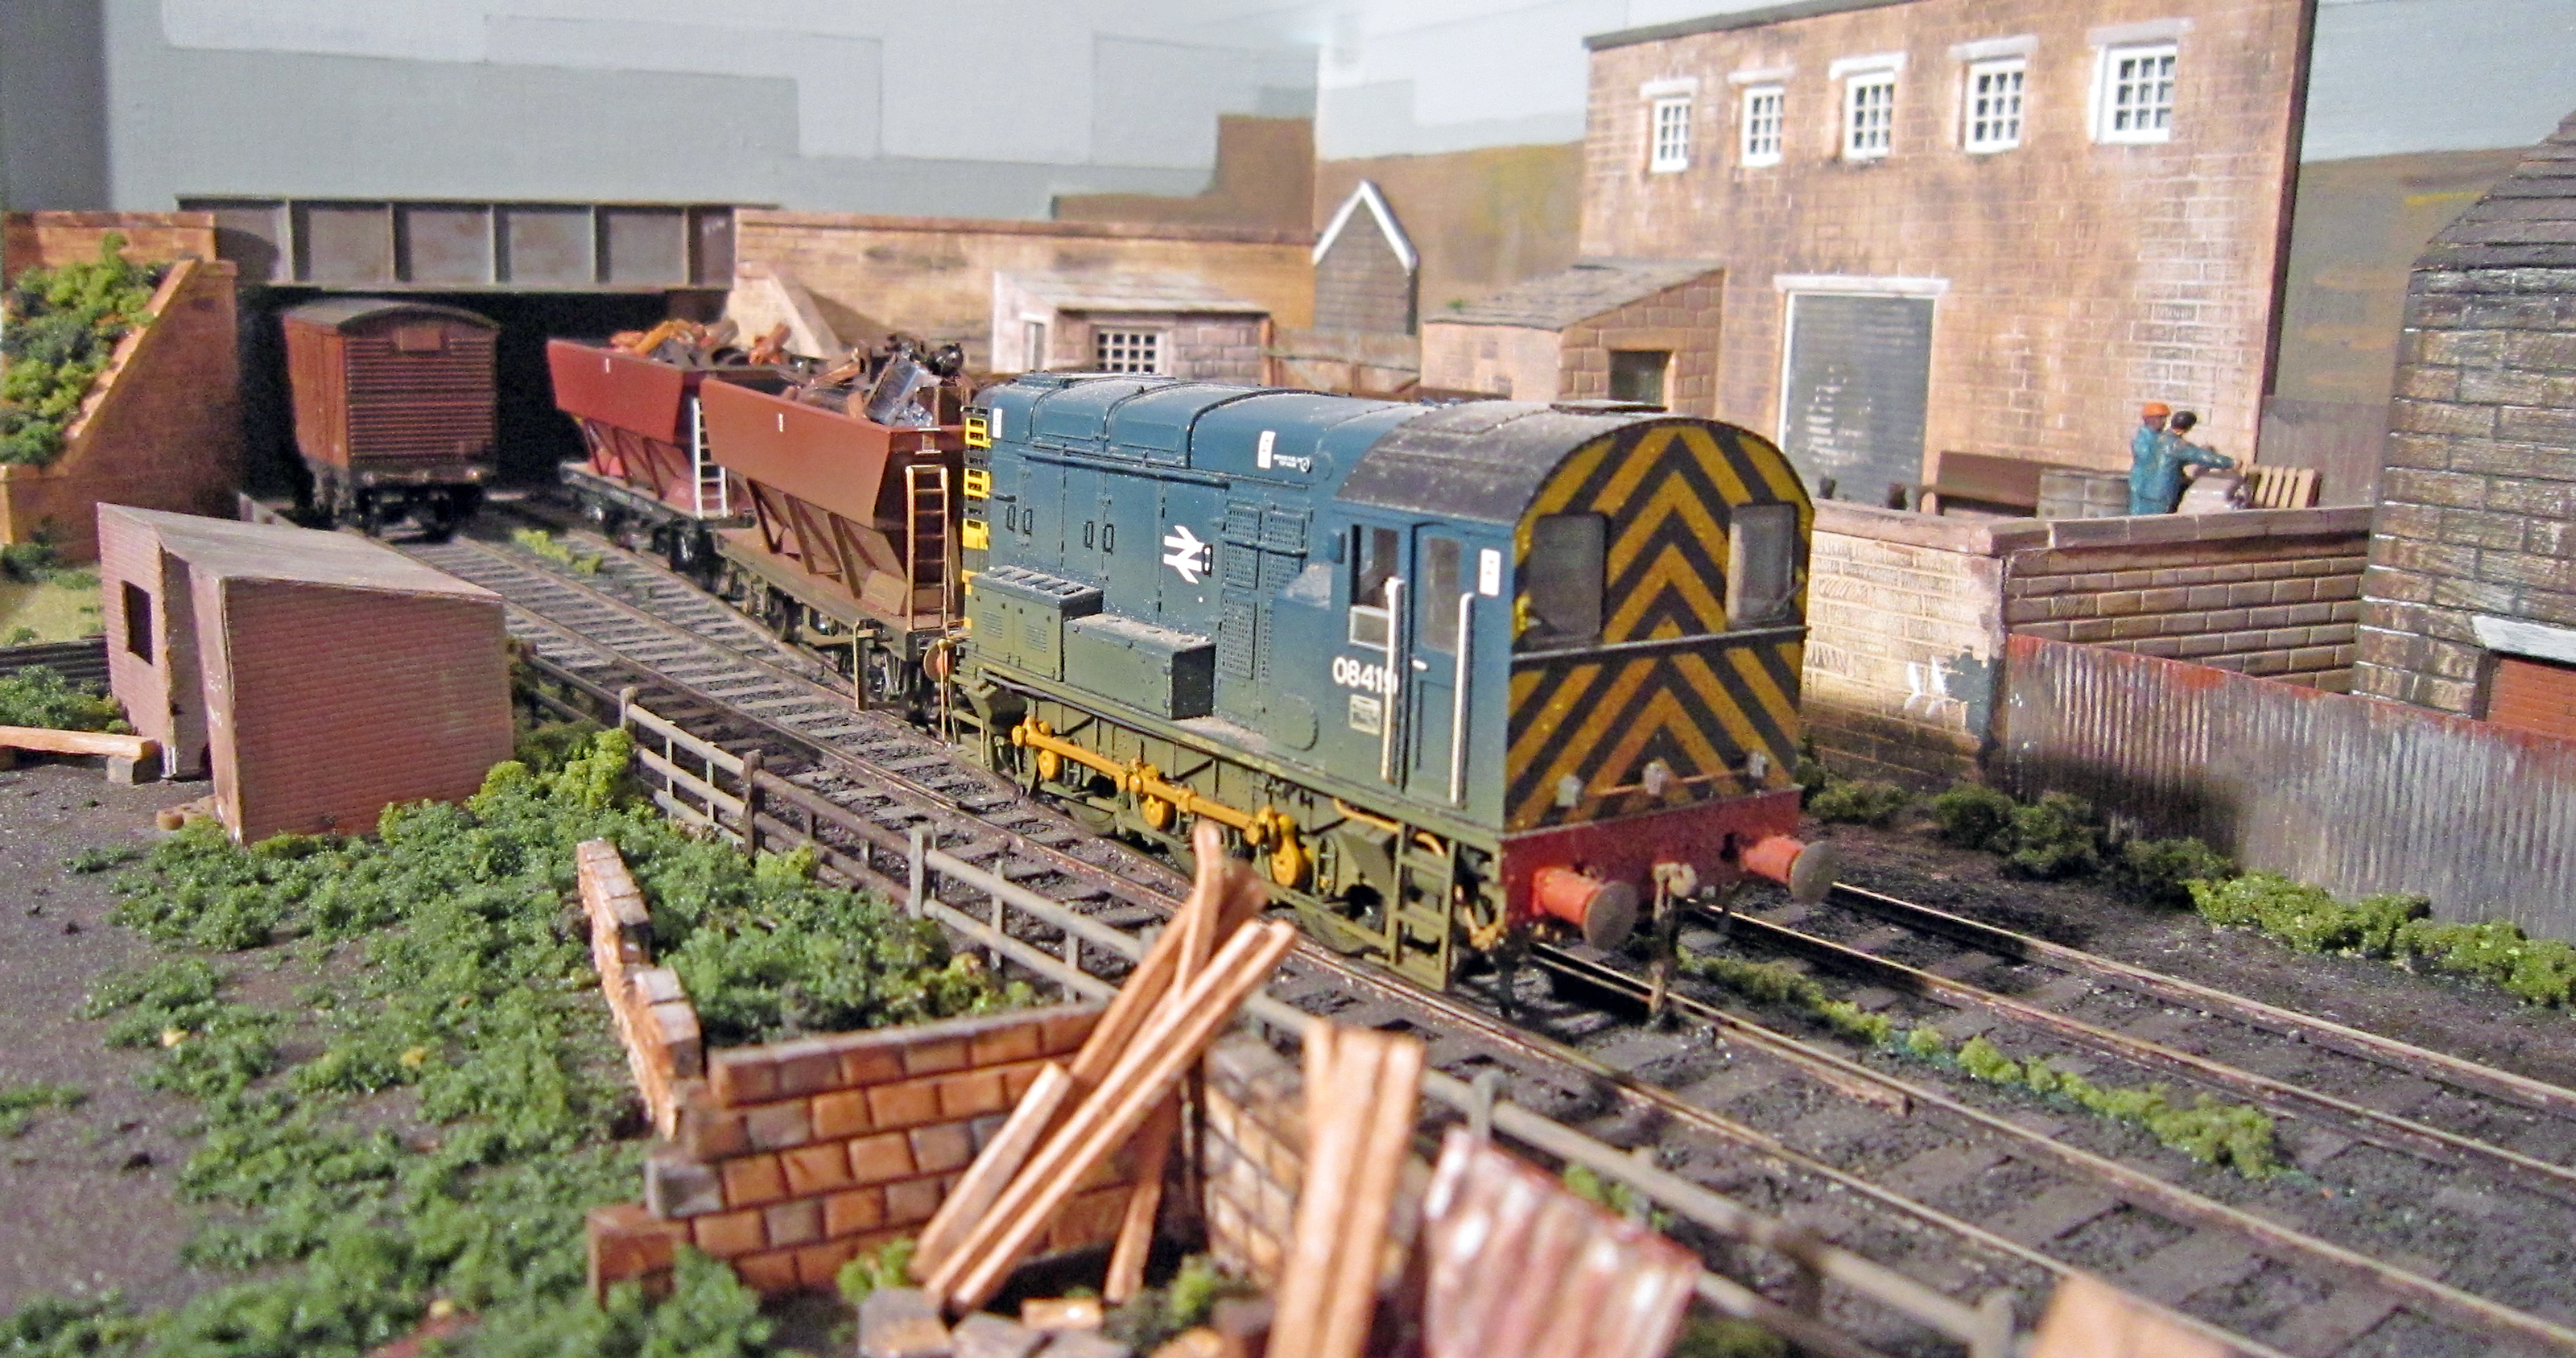
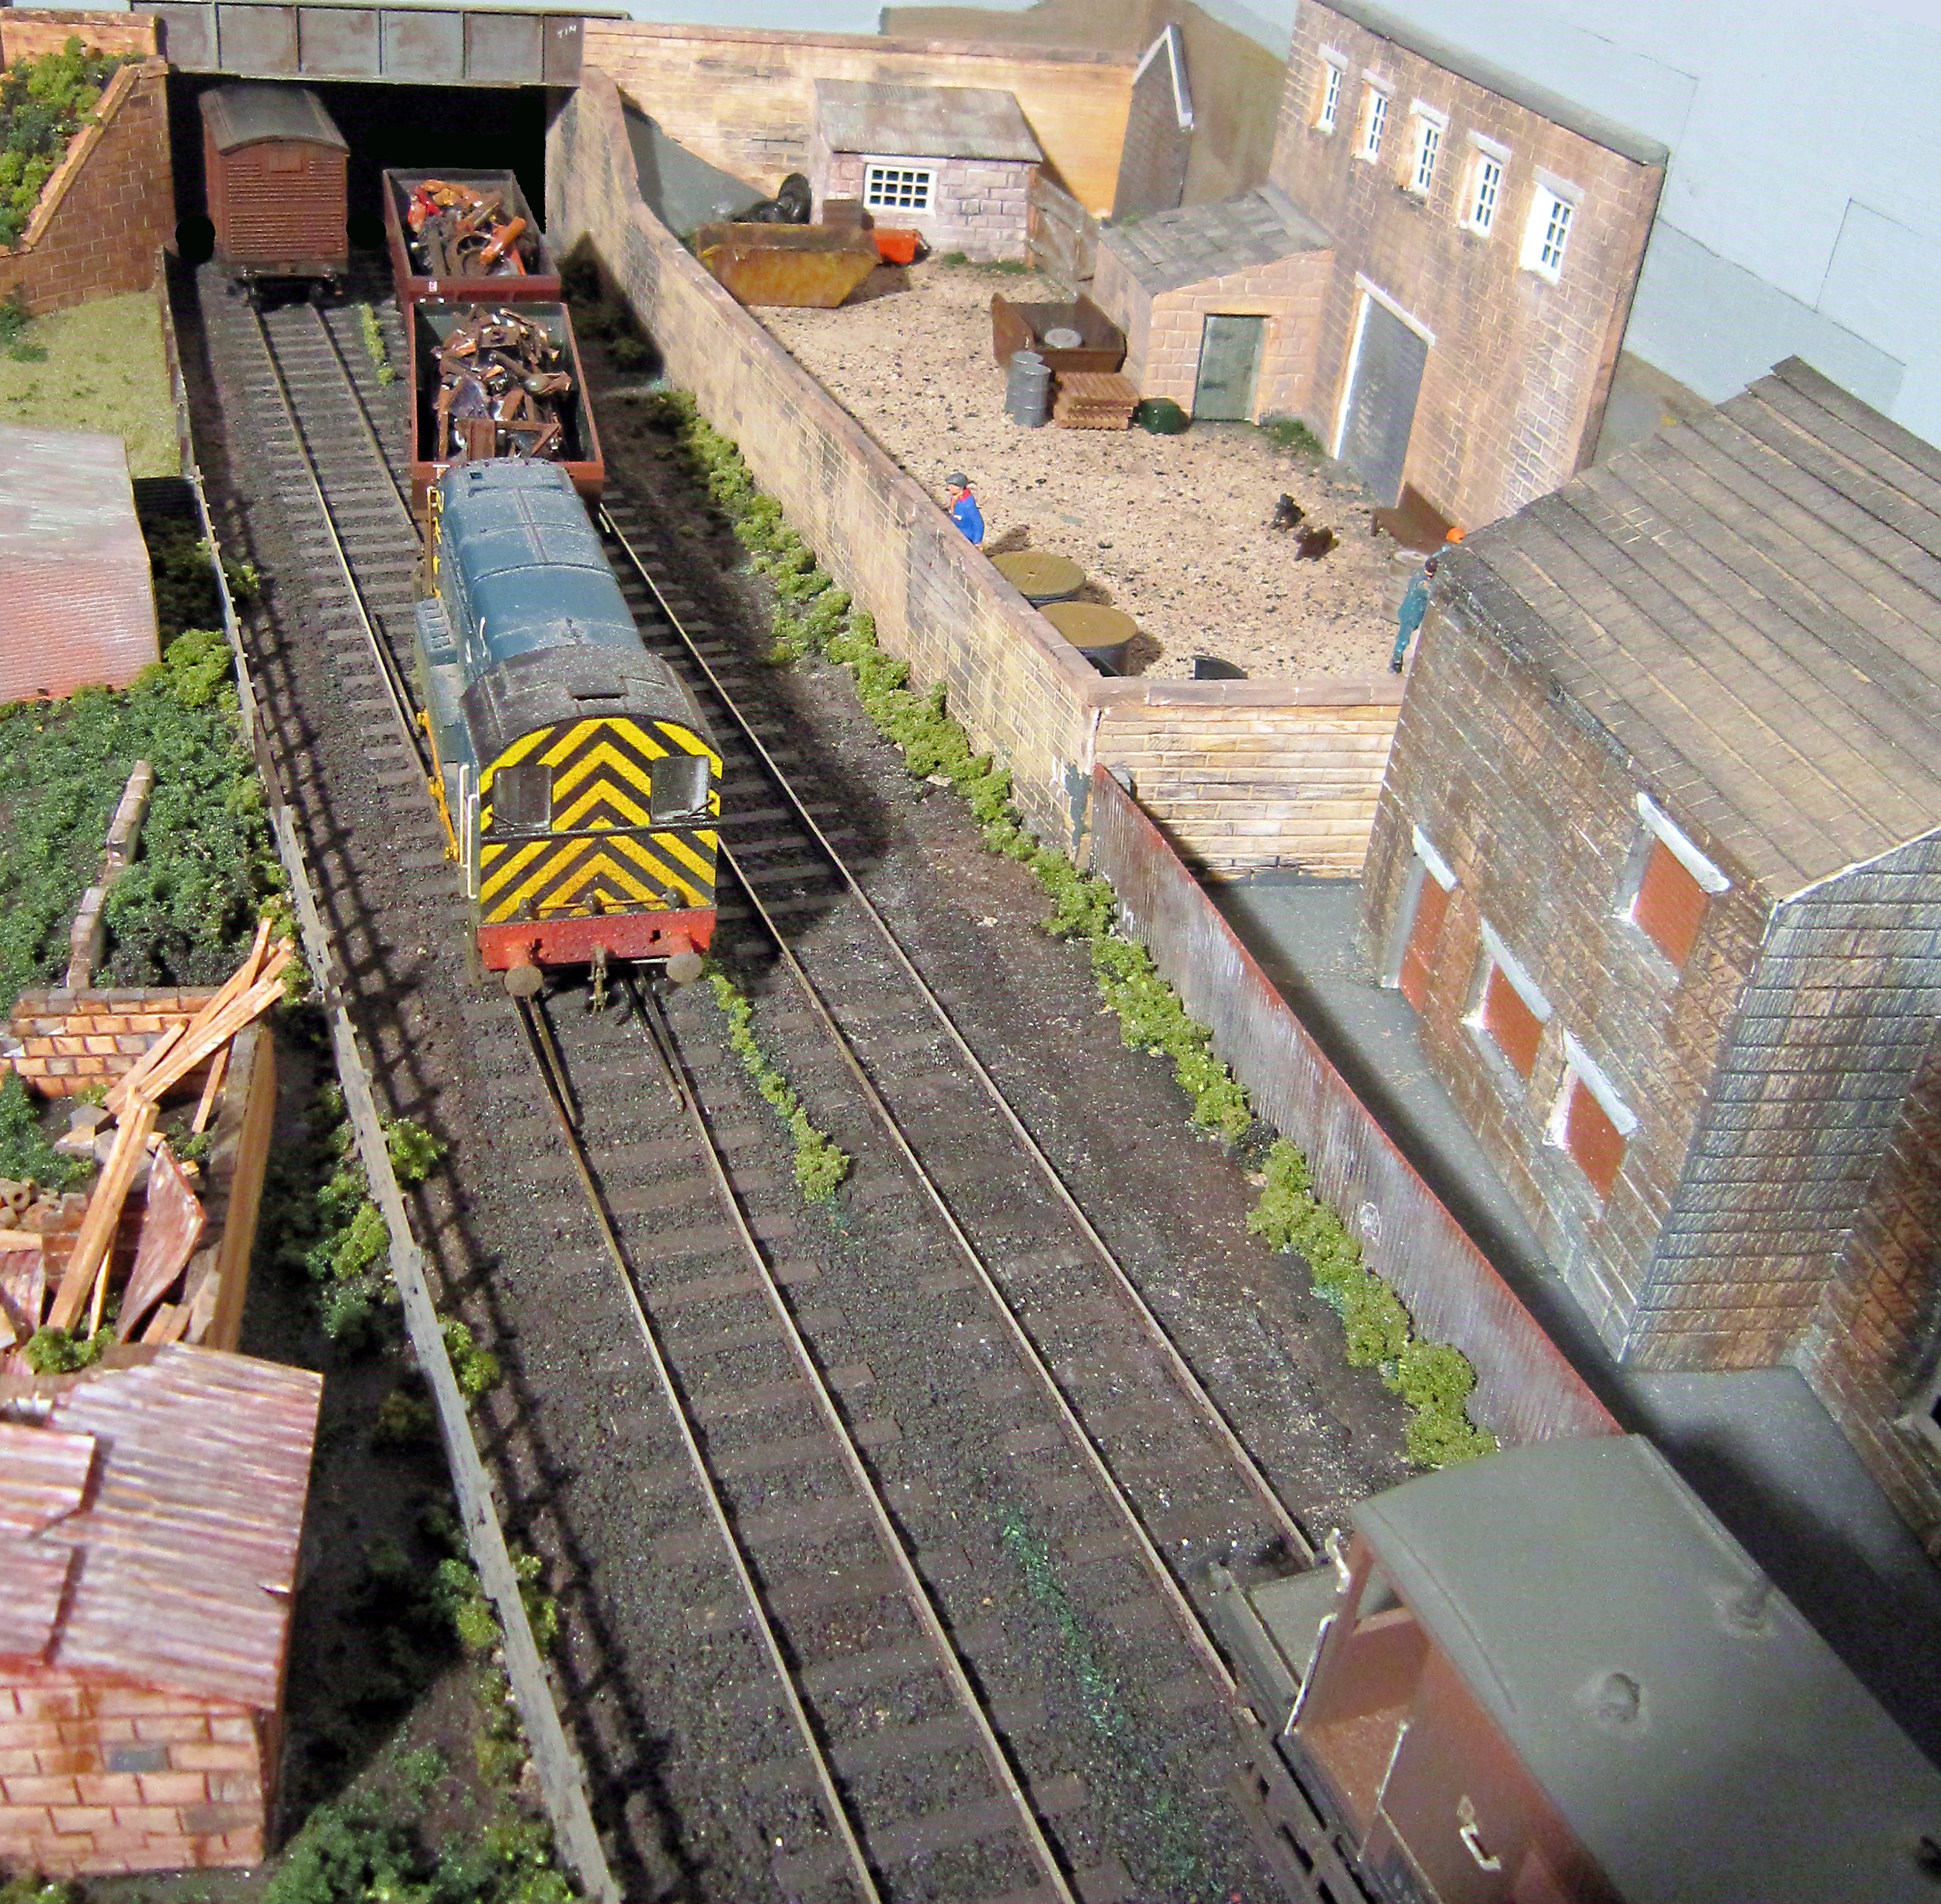
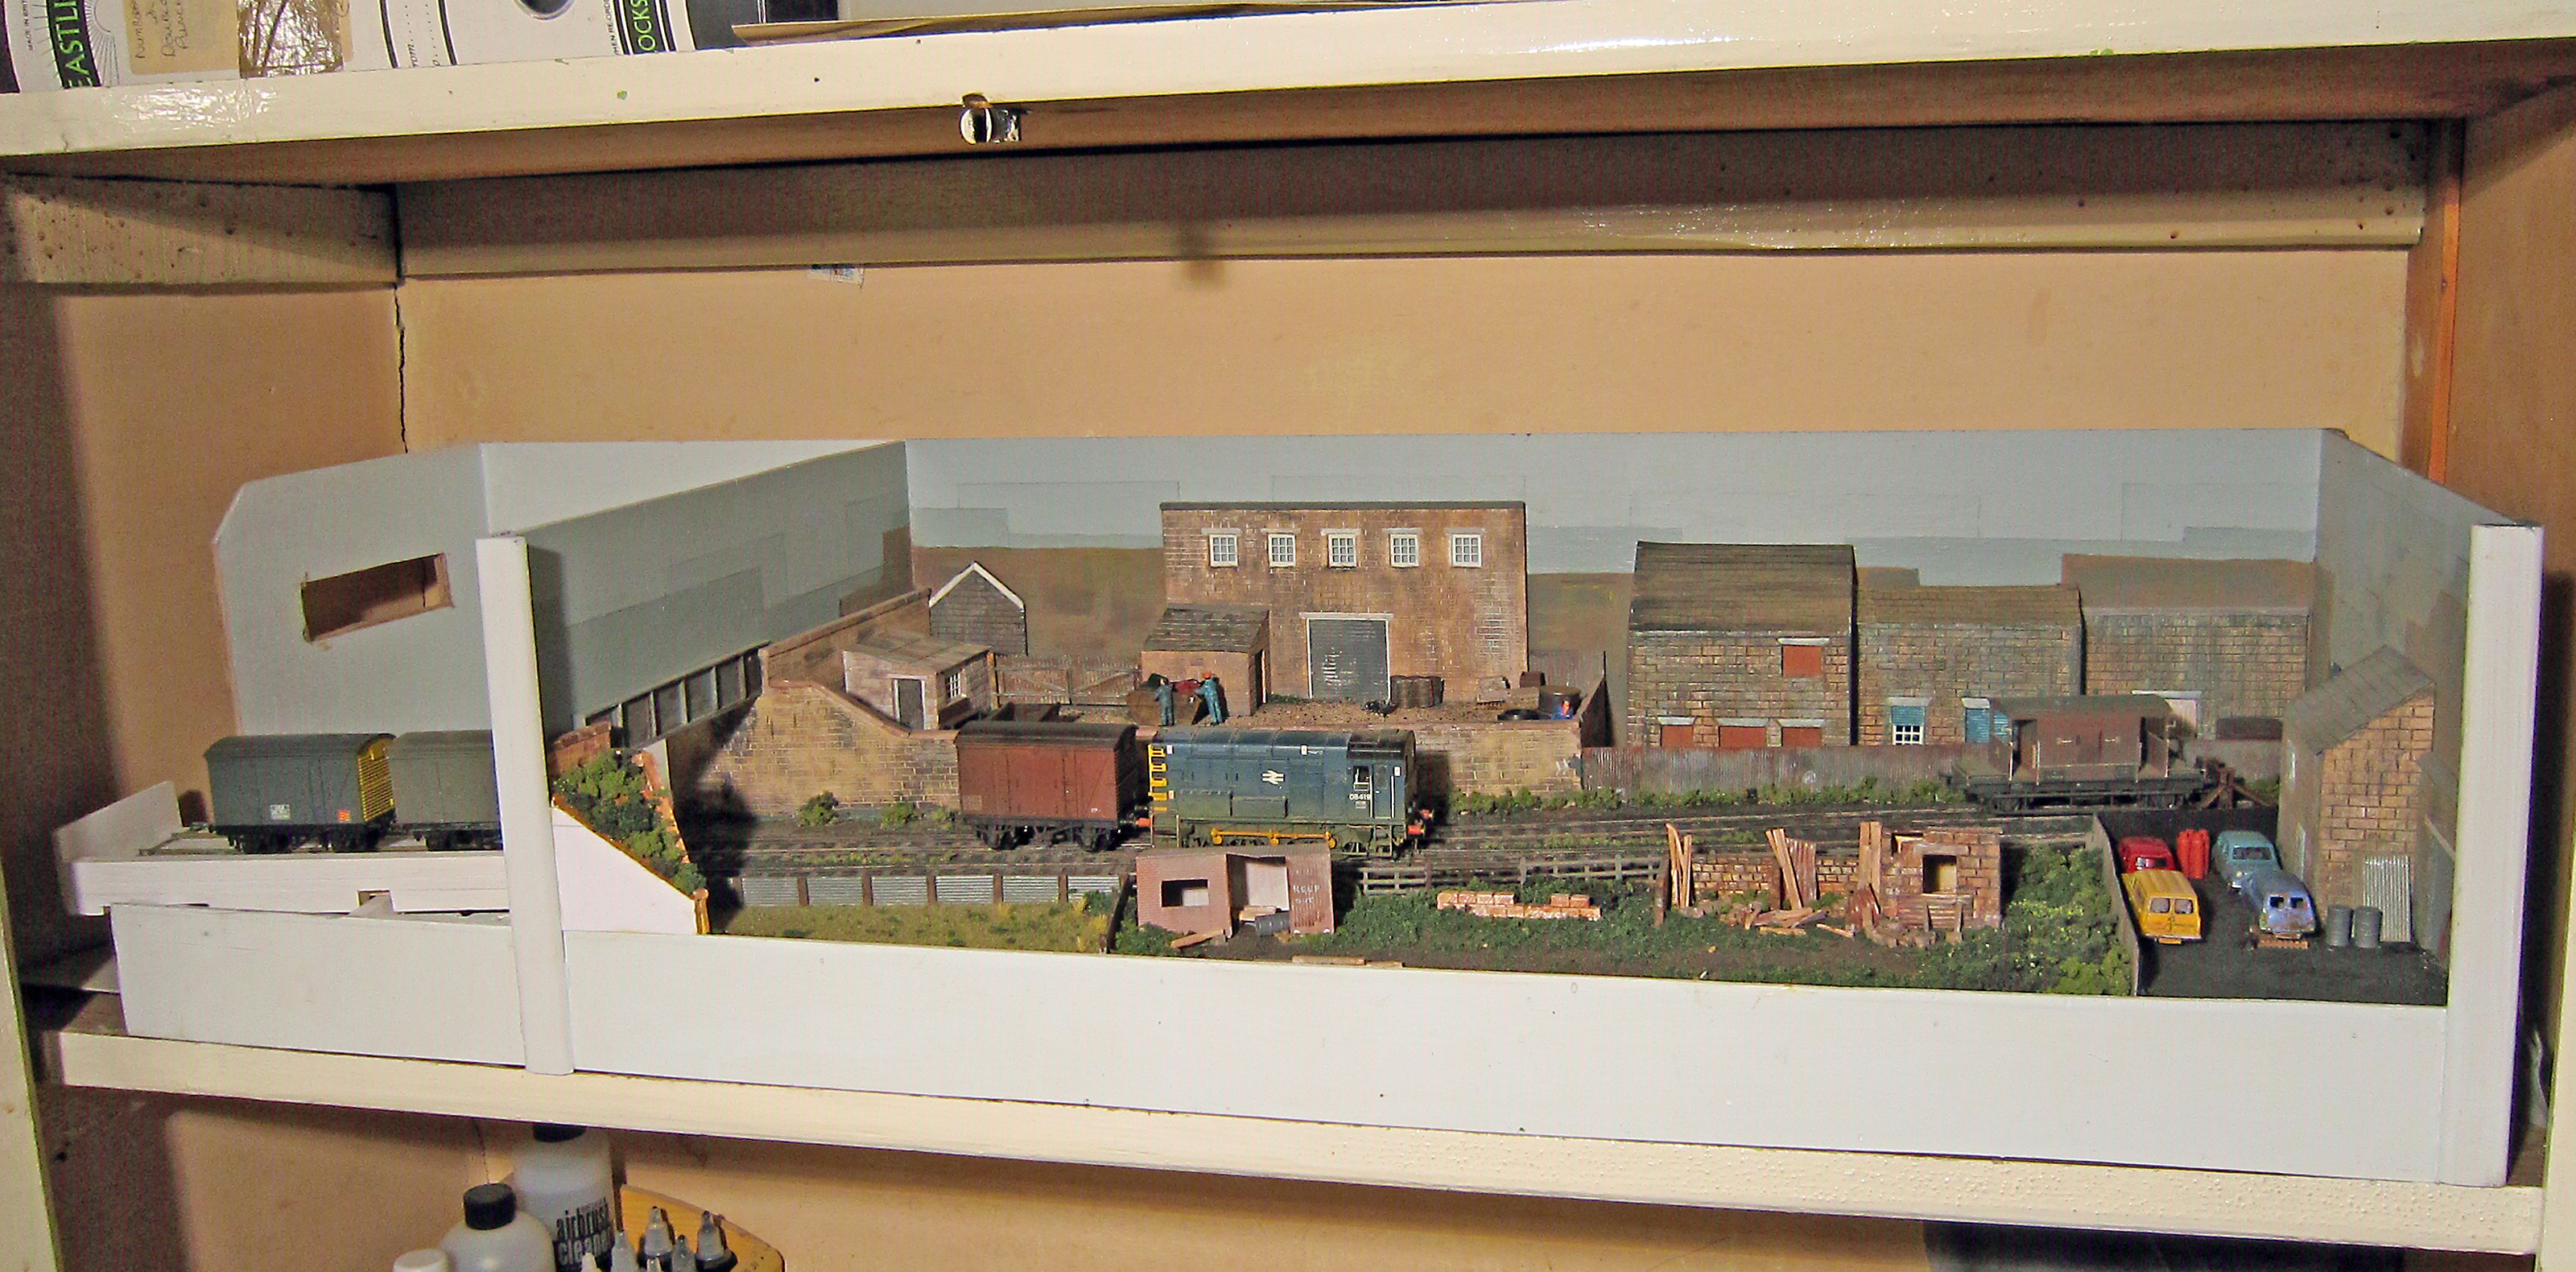
Piper’s Yard – by Andrew Cockburn
Piper’s Yard is my latest minimum space OO Gauge layout, completely fictitious, following my favourite theme of industrial shunting, and set in the BR blue era of 1970’s/1980s. The layout is based around S. Piper, an imaginary manufacturer of rubber hoses for industry, which relies on rail transport for the import of raw materials/the distribution of finished products, while a small goods/coal yard, warehouse & engine shed help add to operational interest.
The baseboard is a 2” x 1” framework with a plywood base, and is actually constructed in two halves, each measuring 1.5’ x 1’, giving total area of 3’ x 1’ (4’ x 1’ including the removable fiddle yard), to enable easy transportation/storage in specially-made end pieces, while the fiddle yard takes the form of a removable hidden siding, constructed from 2” x 1”/plywood. Track is Peco code 100 with electrofrog points, ballasted with Javis chippings, while train control is achieved via a Modelex walkabout controller, which is powered by a cased transformer from the Gaugemaster range. The latter also supplies power to the points, which are operated via sprung toggle switches in conjunction with a CDU, which is another Gaugemaster product.
The main buildings/structures are a mixture of scratch/kit-built, and are low-relief in nature. The factory is constructed from the usual “ingredients“, i.e. balsa, card, plastikard, plastic strip, also brick/stone/tile sheet from the Superquick range, while the warehouse building has actually been “commandeered” from another OO layout of mine (Houghton Lane Yard). The engine shed is a Dapol plastic kit, modified to include interior detail. Other features such as lineside huts, pallets etc. are mainly from Knightwing, Unit Models, Wills and other contemporary ranges, the “population” is courtesy of Bachmann, while grass & shrubbery has been represented using Woodland’s Scenics products.
Naturally with such a small layout operation is fairly basic, therefore running matters do not follow a strict timetable, although I still try to keep operations as realistic as possible. As mentioned before, I tend to favour BR blue operations, but by changing rolling stock, it also possible to switch to the earlier BR green era. Piper’s Yard took about four months to build, and given it’s overall size of just 4’ x 1’, is rather compact and portable. The layout has given me much enjoyment, from both a constructional and operational point of view, and I hope it may serve as a source of inspiration to any fellow modellers who may just experience a similar problem to myself, i.e. a lack of space!

Bridge Street – by David Collett from Middlesbrough, U.K.
Scale: 00 (4mm/ft)
Baseboard size: 33” x 13” (84cm x 33cm) Scenic area 24” (60cm)
Bridge Street is a grimy backwater of the UK railway network set in the 1980’s. It is the end of a small yard and was designed as a simple shunting layout. The overall dimensions are to allow it to both reside and be operated on a shelf in a cupboard. The track is handbuilt with the code 75 rails soldered directly onto copper clad sleepers. The buildings are constructed from Fomex with the stonework scribed into the surface. A short traverser in the fiddle area holds a shunter and wagon or two wagons.
Please don’t forget to submit your own layout updates, or send in tips about beautiful Micro Layouts you’ve come across! Click here for Submitting Instructions.
The post Page 122: February 2017 appeared first on Carendt.com.
Page 121: December 2016 30 Nov 2016 11:31 AM (8 years ago)
Not so many scrapbook updates this year, but here is the last one, with a lot of pictures! 
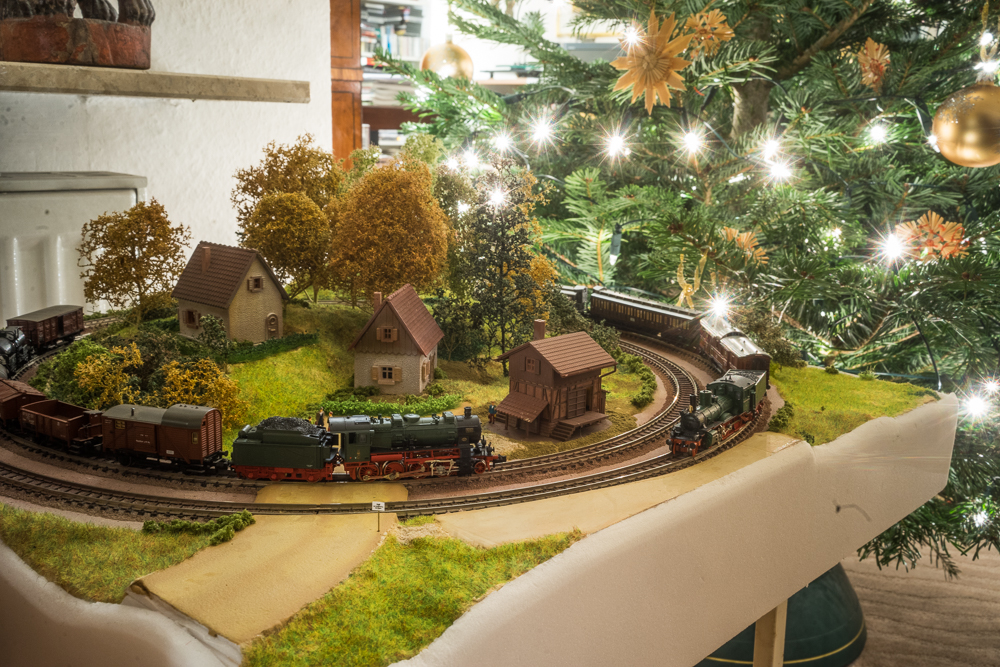
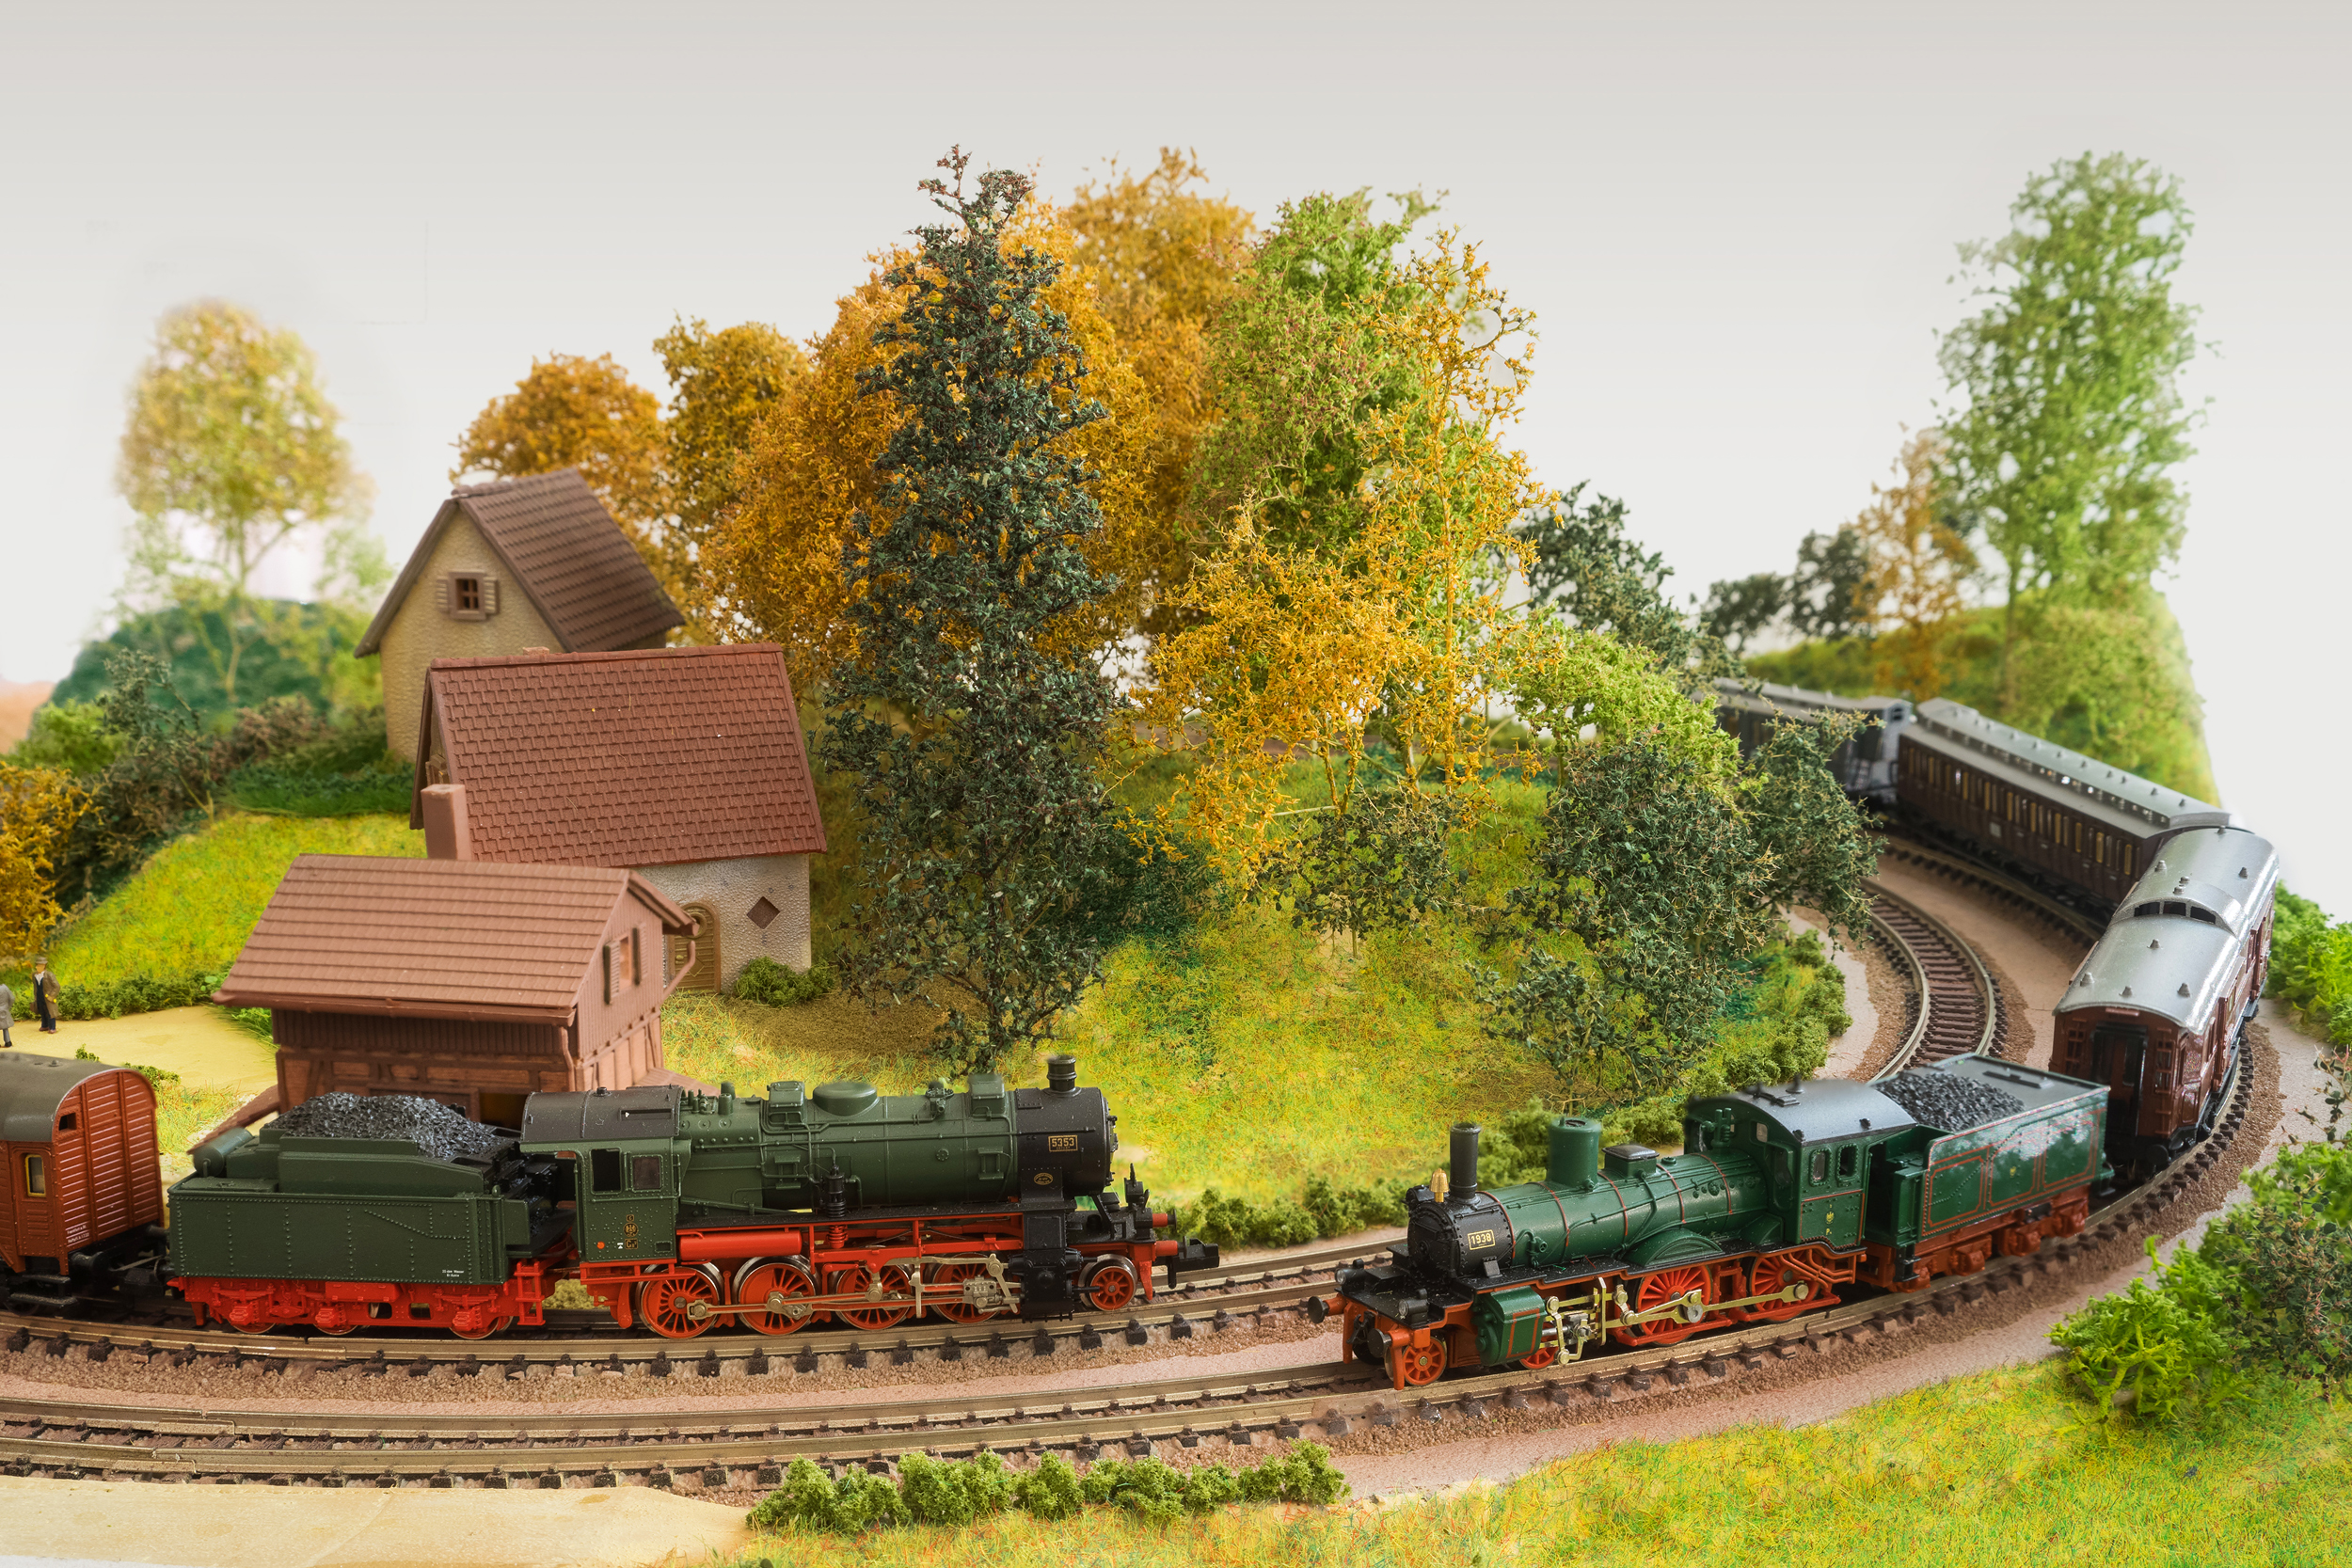
Zwei Kreise Irgendwo in Preußen (Two circles somewhere in Prussia) – by Thomas from Cologne, Germany
It is an N scale layout designed to showcase those special edition Fleischmann or Arnold or Minitrix trainsets form „Epoch 1“ – the time just after the first World War, prior to about 1923, when the old states in Germany still had their own railway administrations.
Size is almost exactly 50×50 cm. It’s basically a double pizza with Fleischmann Piccolo track. The whole layout including base, platform at the station, and landscape is entirely made from styrofoam. The layout was finished in about a week. The few buildings I bought used at a local model railroading dealer, first it saved some time, second it was actually cheaper than getting building kits. The trees I made from a set that included raw materials and spray glue. No fancy stuff anywhere …
Of course it’s easy to change the era of the layout by just placing one or two cars and different trains 
I am very much into landscaping and especially I love the atmosphere of tracks that run through forest. The layout serves as a „winter“ layout … we even put it next to the christmas tree last year … but I tried to make it more more like autumn, with the warm seasonal colors.
I will hopefully do another layout this winter, that follows the same idea and subject, but will get a bit more landscape details and probably offer space for three trains altogether …

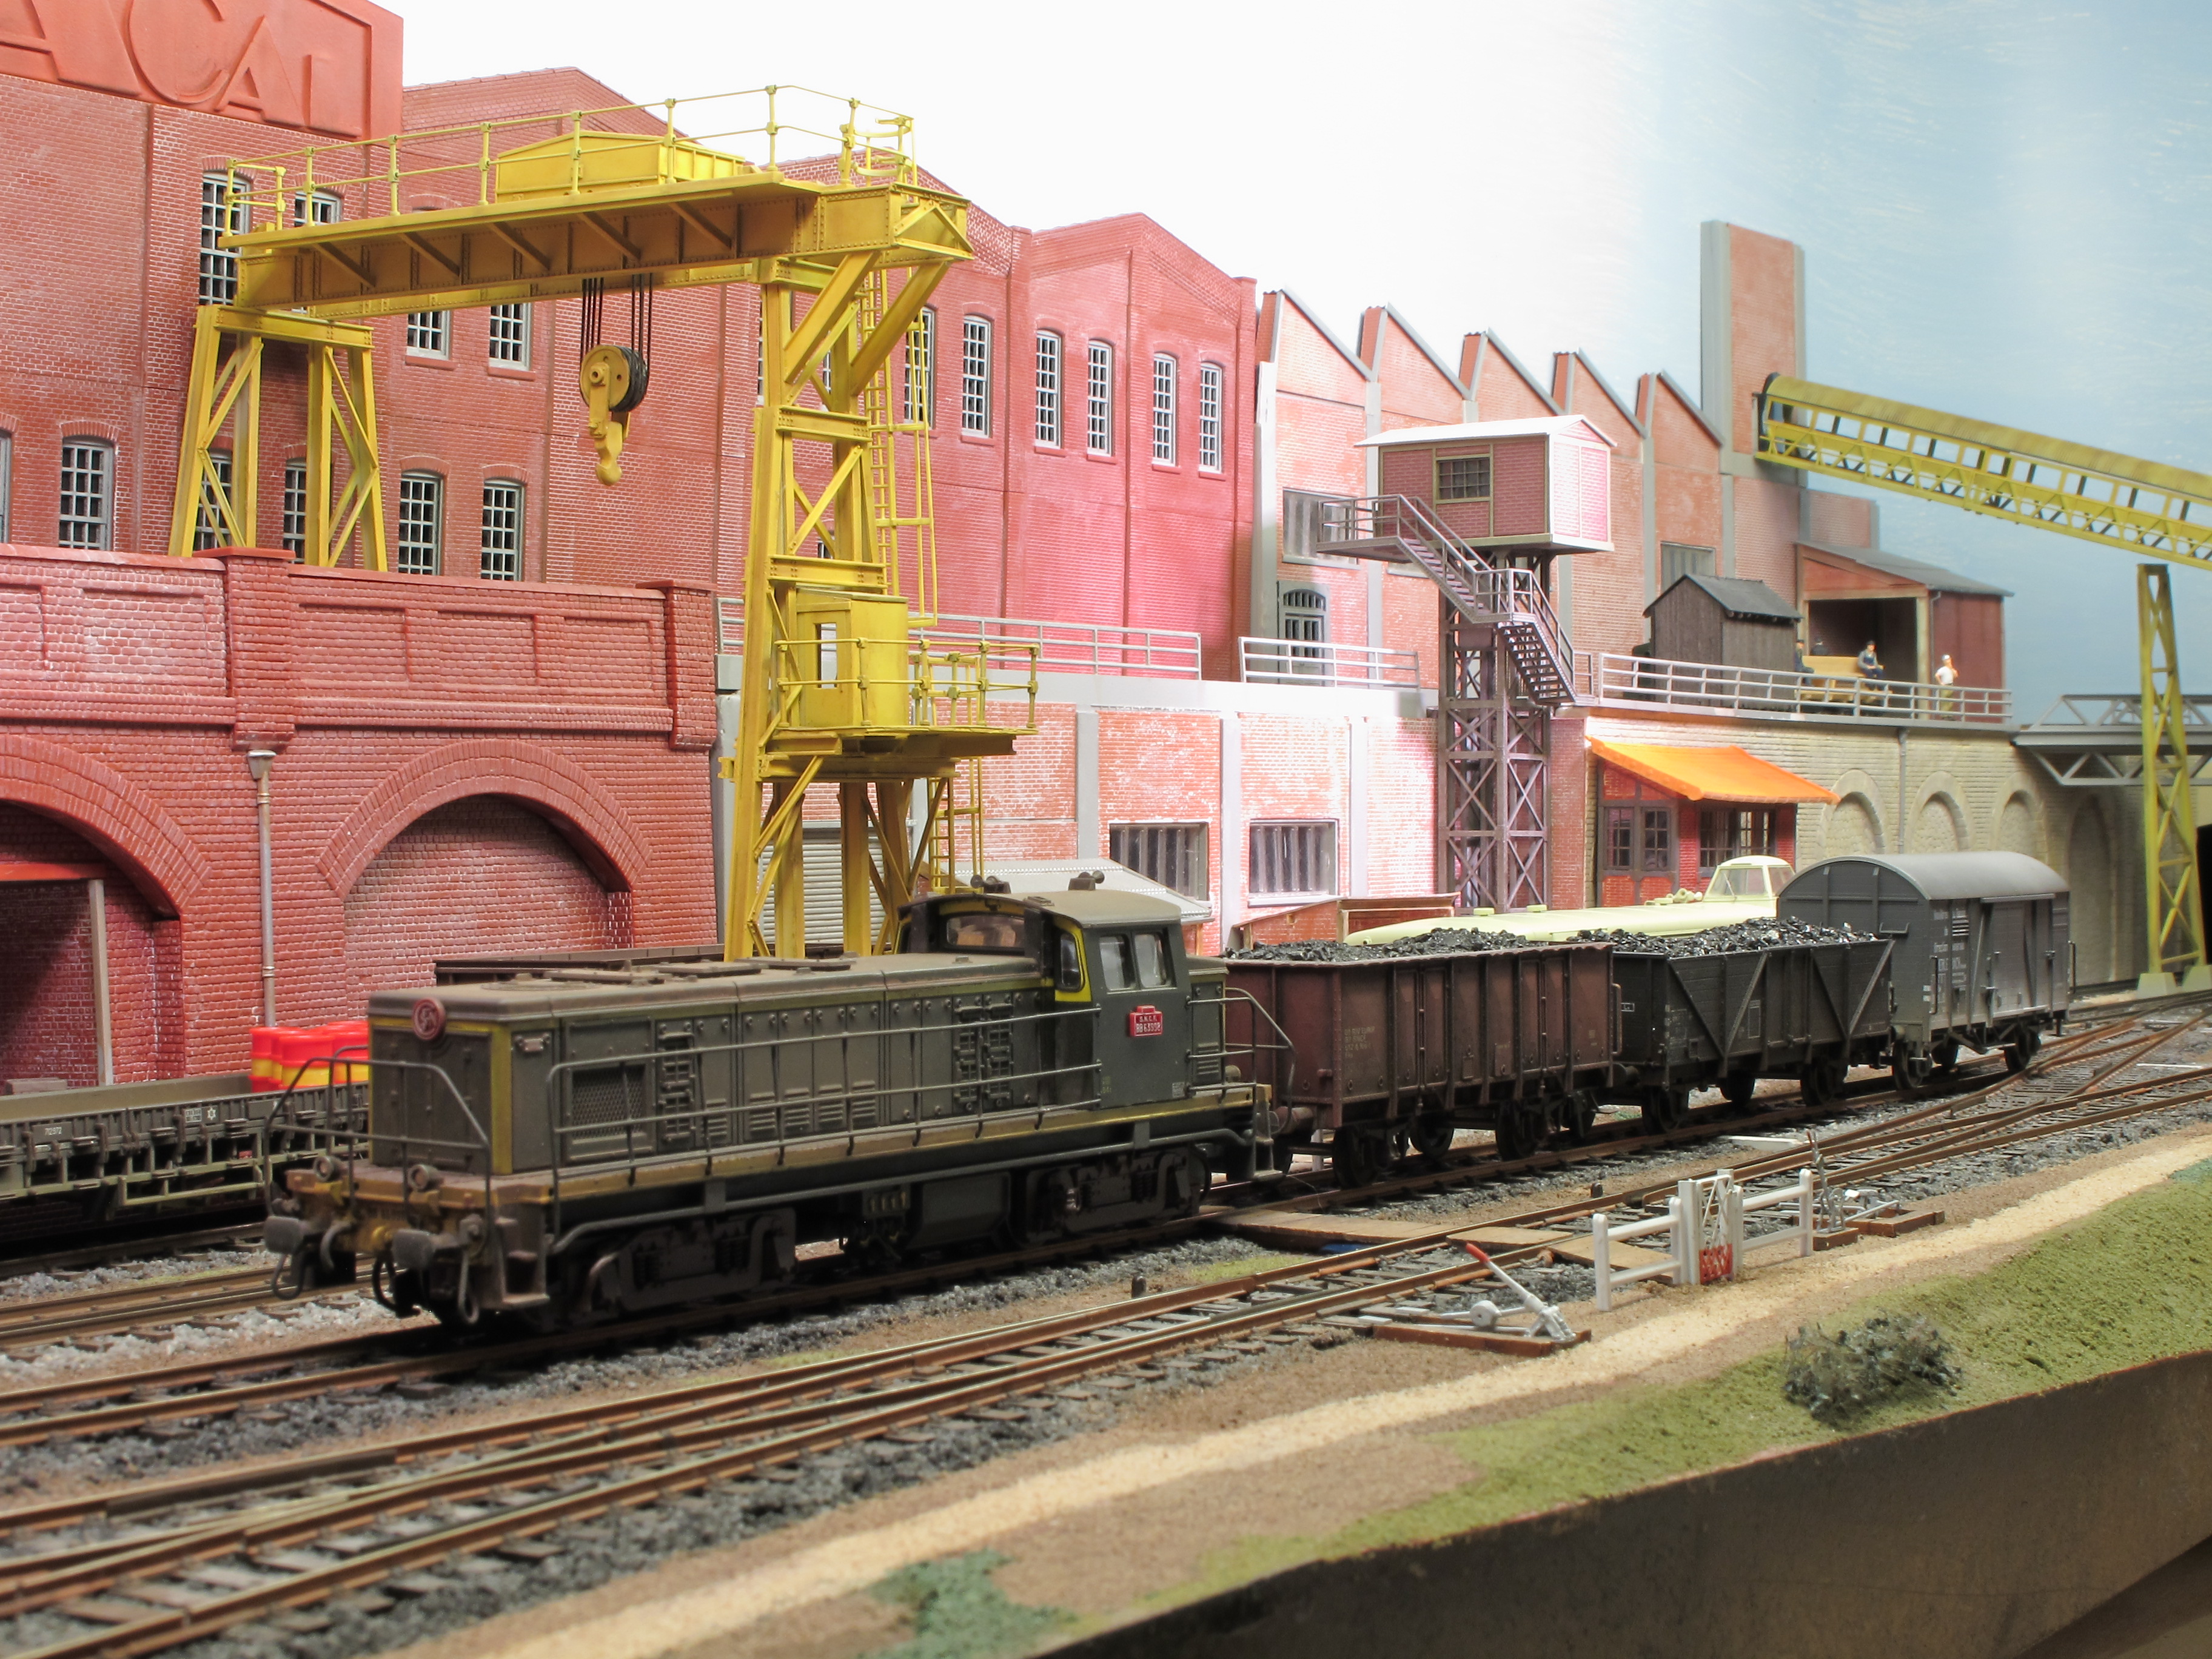
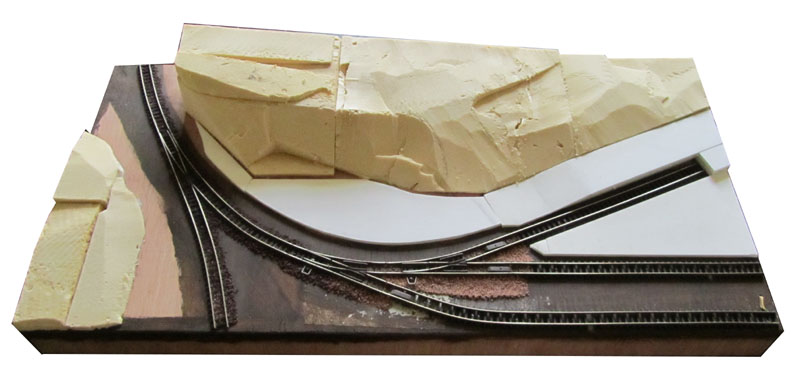
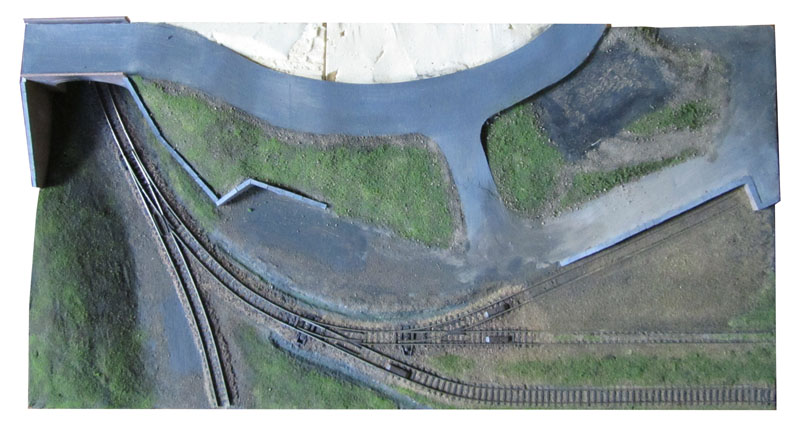
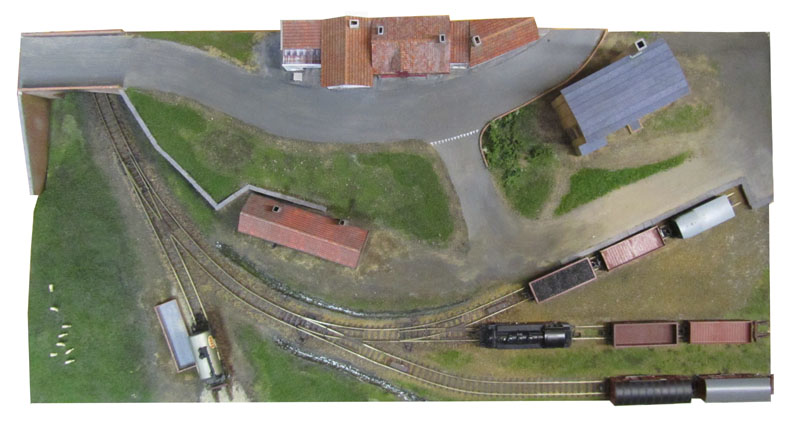
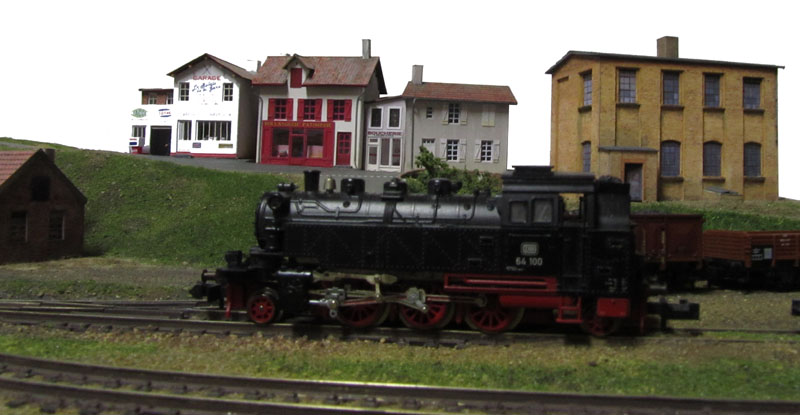
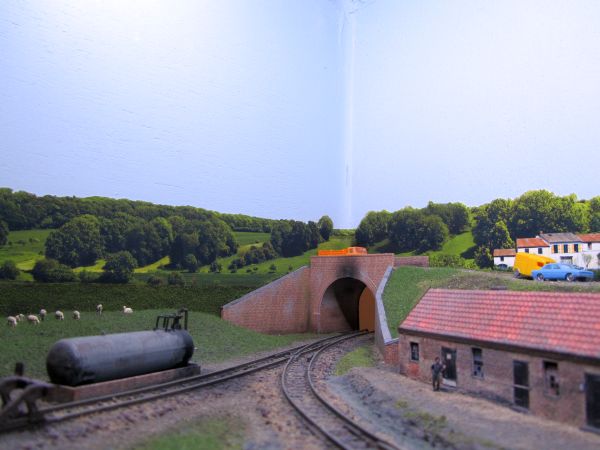
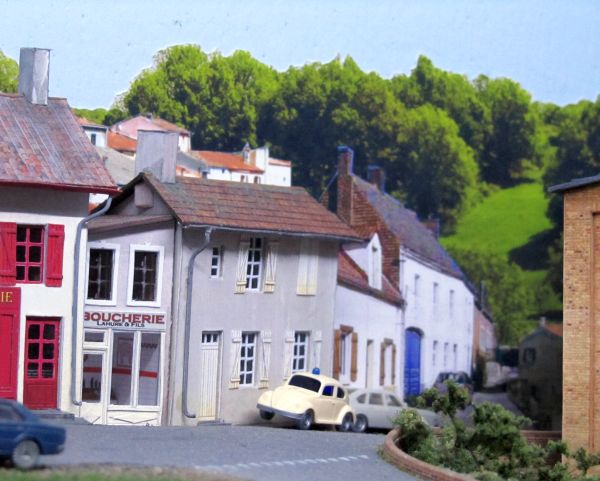
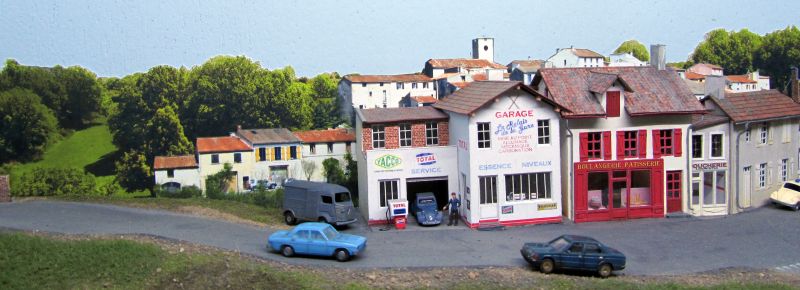
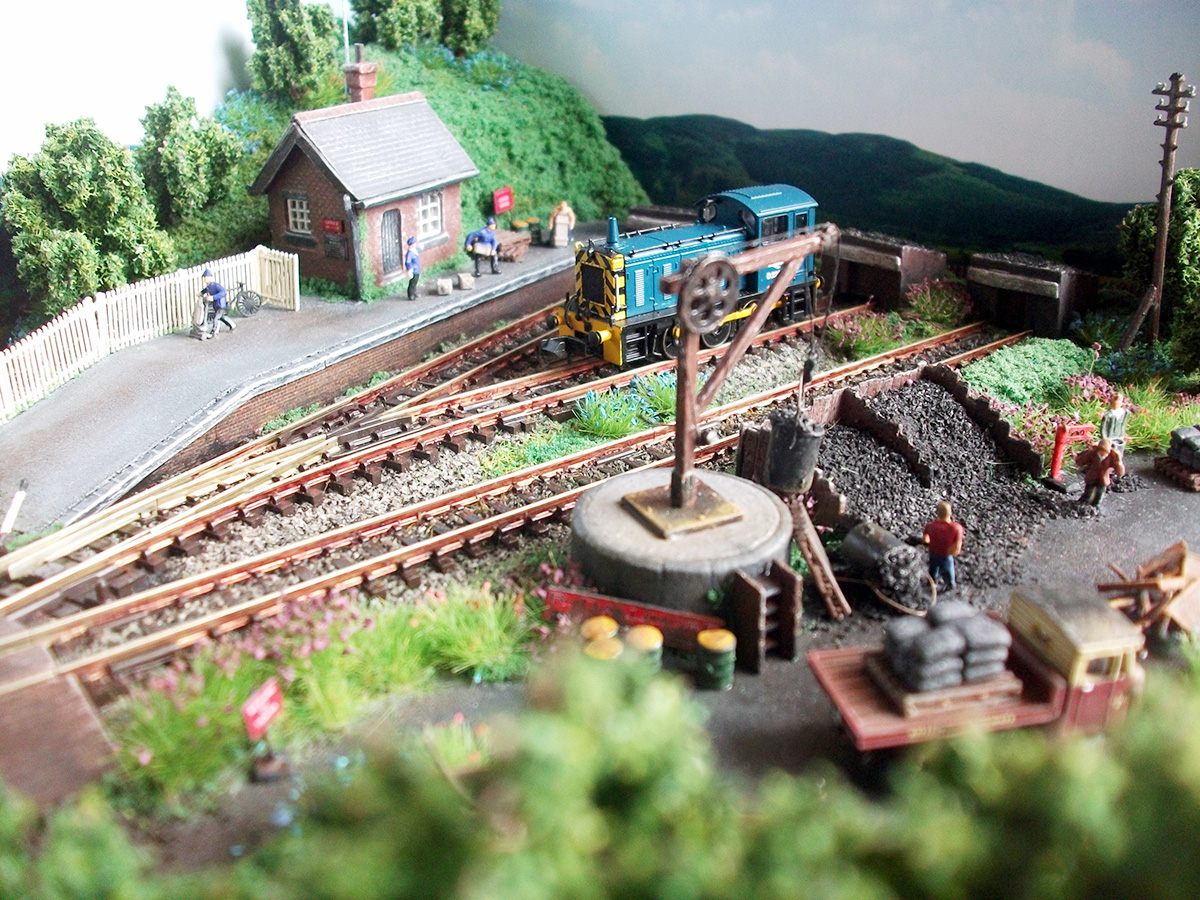
SONACAL – by Geoffrey Nickson
Complete! After more than 7 years of work, the SONACAL micro-layout (see pages 78, 90 and 114 of the Scrapbook) can now be considered as very largely completed. Some finer weathering is still required, as well as super-detailing here and there.
It’s been a long time, but a highly instructive one also. I am extremely grateful to the late Carl, to yourself and to the website for helping me overcome my notorious “scenic block”. At age 63+, I have actually built a layout…wow, talk of late bloomers!
And as an added bonus, the layout has been featured in the October 2016 issue of the French railway modelling monthly Loco-Revue, with some fine shots by the Editor, Yann Baude! I attach one such shot, kindly credit it to Yann.
My self-confidence has been boosted no end, so much so that I have now tackled a far more ambitious project, namely a point-to-point shelf layout around part of my bedroom, with SONACAL as one of the points. And as retirement has now happened, I have high hopes for this new project!
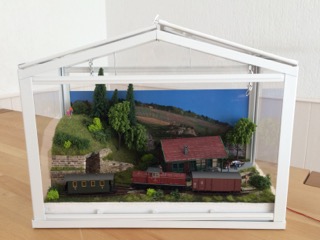
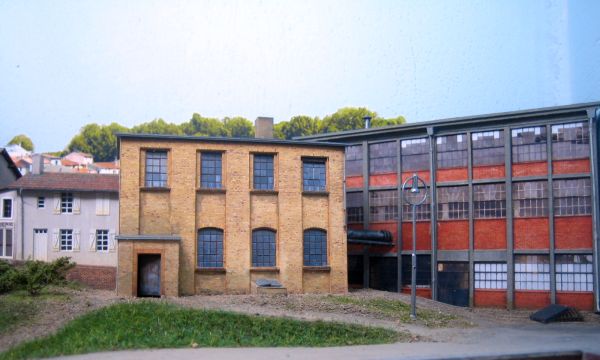
Schozach (H0e) – by Philipp Brune from Neu-Ulm, Germany
I am a model railroader since my childhood times and I wanted to have a small layout in our living room. Last year, my wife and I found a nice miniature glasshouse at IKEA, originally intended to house some pot plants. Its size is about 44 x 22 cm, so it nicely fits on a window shelf. I decided to use it to contain my first micro layout. Inside there is space for a layout of about 40 x 20 cm size. I wanted to demonstrate that a „real“ model railway with all its typical ingredients fits into this tiny space of 40 x 20 cm. It should have a nice, romantic landscape (preferably with a tunnel), a station with switching possibilities and a meaningful concept for realistic operation.
Since I have a larger H0/H0e layout in our basement, I decided to stay with H0 scale and build a H0e narrow gauge railway. As the prototype, I chose the narrow gauge railways of my home region, the state of Baden-Württemberg in southern Germany. In the 19th century, the royal state railways of Baden-Württemberg built four narrow gauge lines with 750mm gauge. In 1918 they were took over by the German national railway. While three of them were shut down in the 1960s due to economic reasons, one remained operational up to today as a heritage railway (see http://oechsle-bahn.de), where many of the historical rolling stock of these railways can still be seen in action during the summer period. 750 mm gauge scales down to 9mm gauge in H0 (H0e), and nice H0e models of these railways are available from company called BEMO, which I use for the project (i.e. the V51 series diesel loco).
The track plan is basically similar to Emrys Hopkins „Juster Yard“ layout as shown on www.carendt.com (thus, a back-to-back inglenook type), using a double-slip switch at the center. One leg is partially hidden in the tunnel to represent „the rest of the world“. I used Lilliput and Tillig H0e track and a Minitrix (N-scale) double slip switch. The layout is operated digitally using the NMRA DCC protocol. I call it „Schozach“, named after an existing prototype station at one of the former 750mm gauge lines, which at least resembles the station building I used in size and style.
The Baseboard size is only 40 x 20 cm!

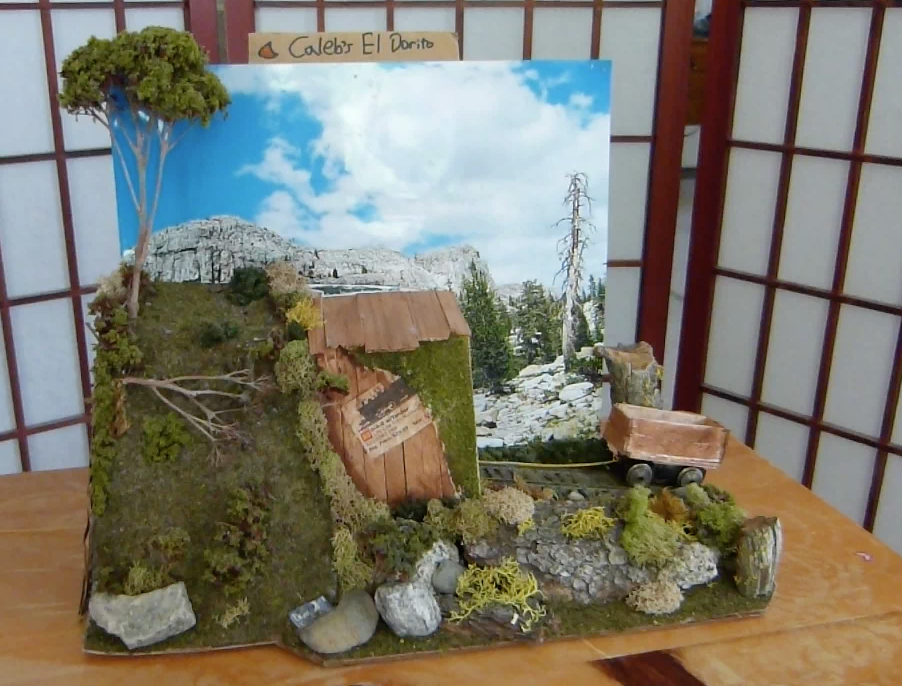
El Dorito – by Caleb
Hello! My name is Caleb and I’ve been a reader of your small layout blog for about six of seven years.
Today I’m going to give you a little tour of my small layout, Caleb’s El Dorito. You can probably tell where I got my inspiration for the name and design
Scale of my project: Gn15, however, here are no humans or animals to compare things to, so they could be any variety of sizes in the real world.
Baseboard size of your project: twelve inches by about six or seven inches. The layout was originally built on a ruler, but it’s gotten wider with age.
Webpage: I don’t really have one, but I made a video about it on my youtube channel: https://www.youtube.com/watch?v=dCFieoa0lP0
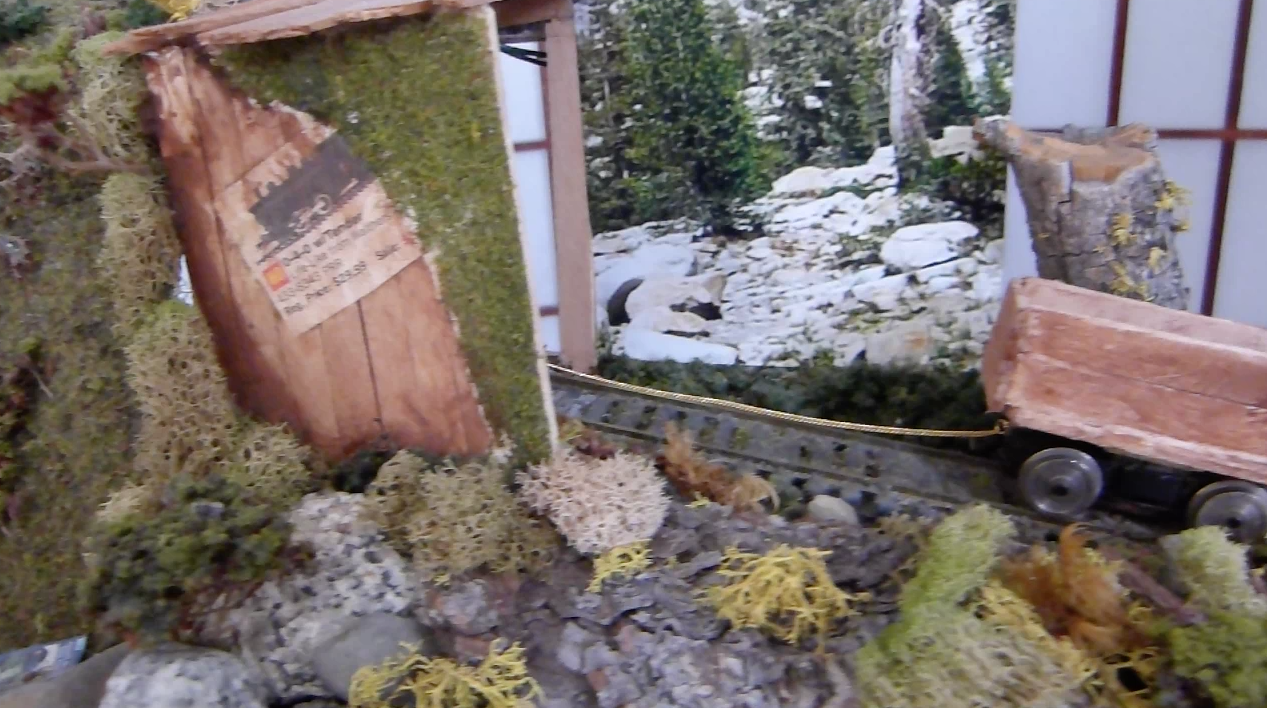
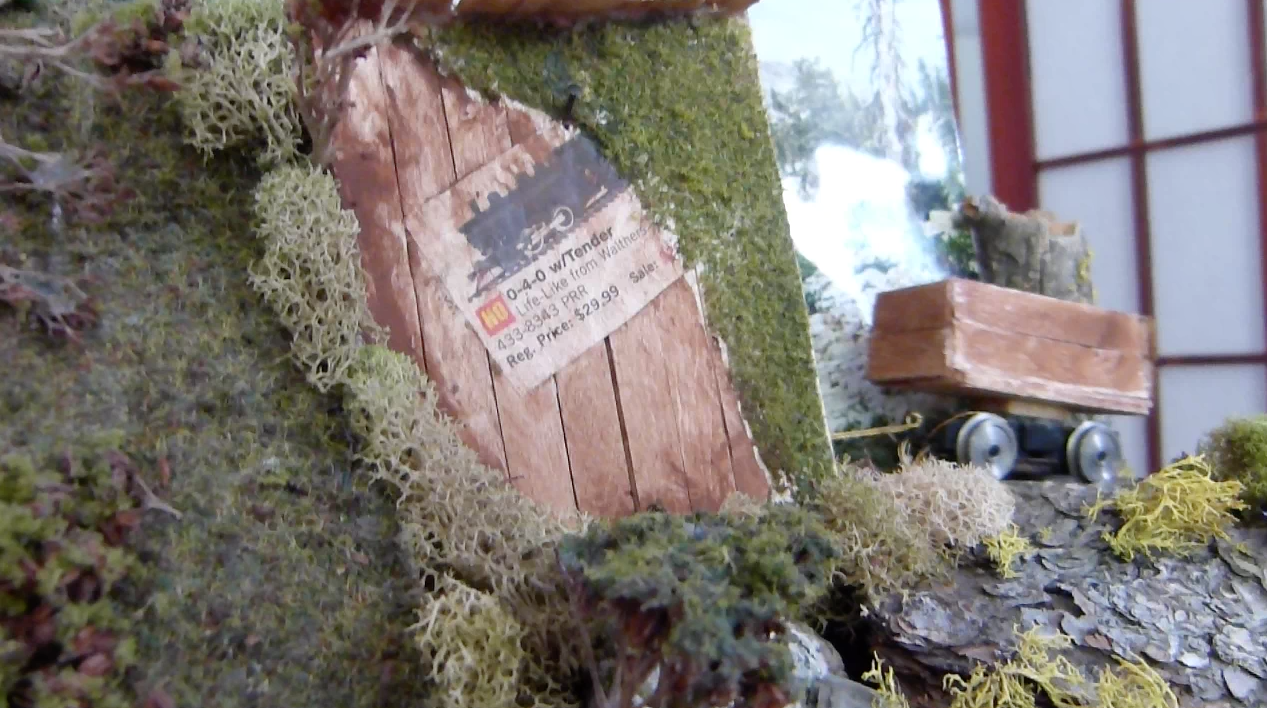
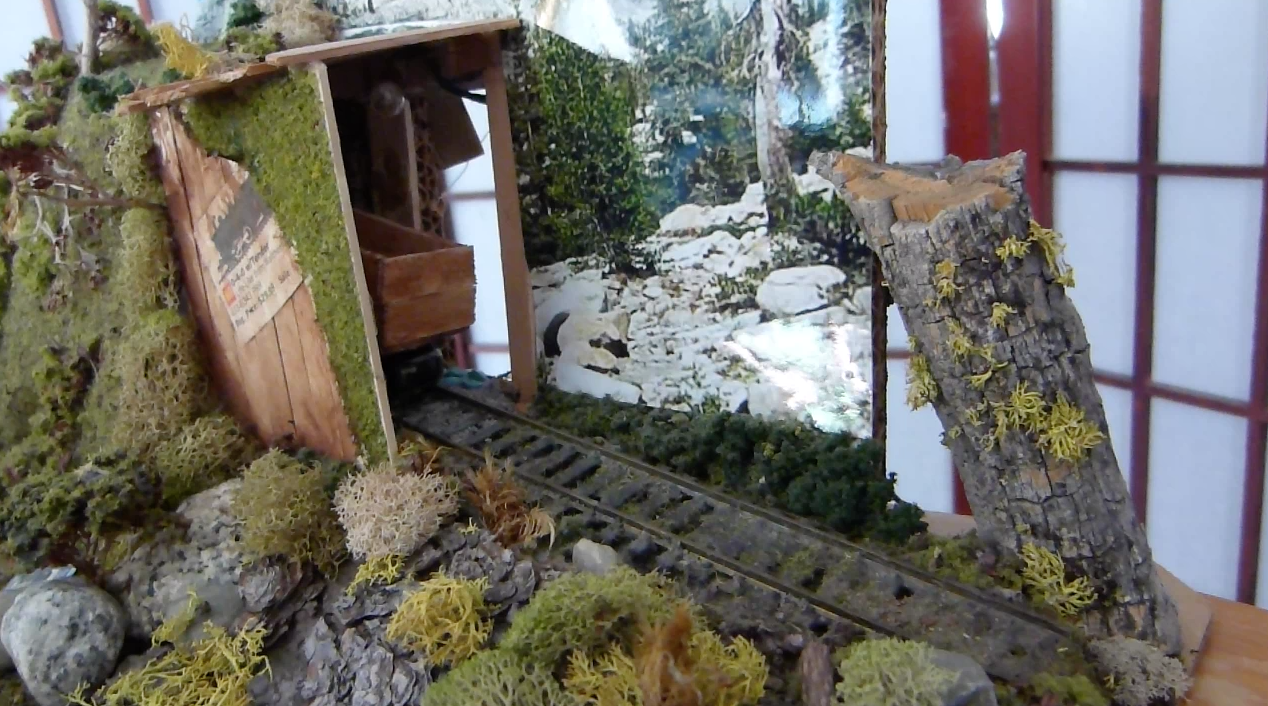
I started Caleb’s El Dorito about five years ago in and around one of my Small Layout Scrapbook binges. It ended up being so much fun that I’ve been changing and adding onto it for the past five years. The concept of the layout is simple: A mine cart is hauled – by hand or motor power – up a small incline into a wooden entrance built around an imaginary mine. In the mine it’s sometimes loaded by the operator with candy for small watchers, then it’s lowered out of the mine and back down the track.
The layout is so small that I can work in all sorts of quirky details as seen in the video above.
The back of the layout serves as a bulletin board, showcasing details that have since been removed from the layout. I used to have a motor in the bottom right, but the space now houses the operator’s hand. To the left of that you can see in the inside of the mine and the hatch through which the car can be loaded.

N-Scale Inglenook – by Edward Paijmans from the Netherlands
This layout was inspired by browsing through the Carendt web site. I liked the idea of an inglenook layout and making one in N-scale was the most feasable at the time.
All buildings are from paper. Its a collection from several websites.
For shunting I made some de-couplers from old LIMA electric points but those do not work very satisfactory. So I will either convert them to micro servo operated or manual operated. All-in-all, the cost of this layout is very low. I really liked to build the layout, and the shunting posibilities are great.
More info can be found on Edwards website.

The post Page 121: December 2016 appeared first on Carendt.com.
Page 120: November 2016 8 Nov 2016 12:16 PM (8 years ago)
A couple of months have already gone by since the last update, but here we are again! Enjoy!
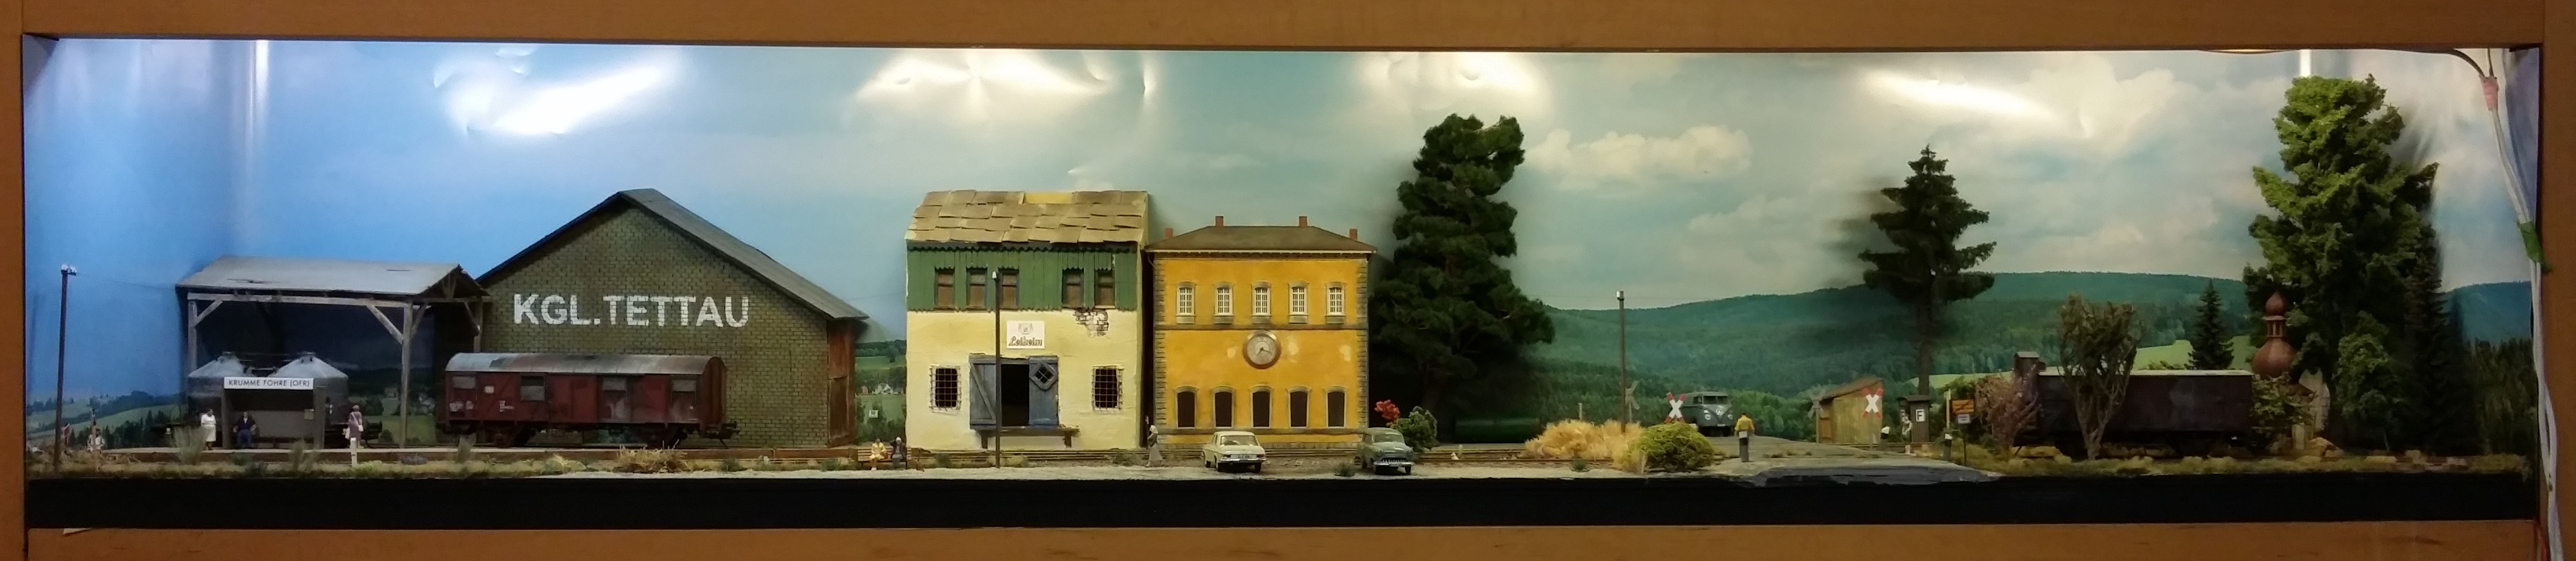
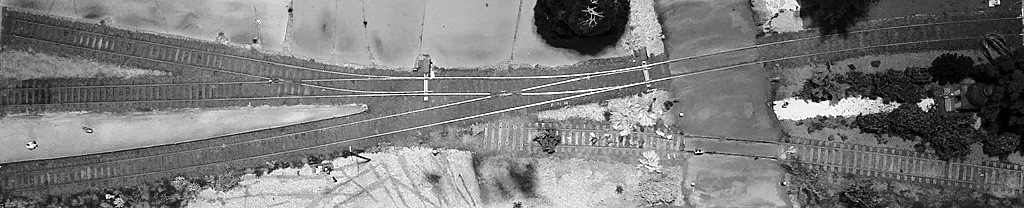
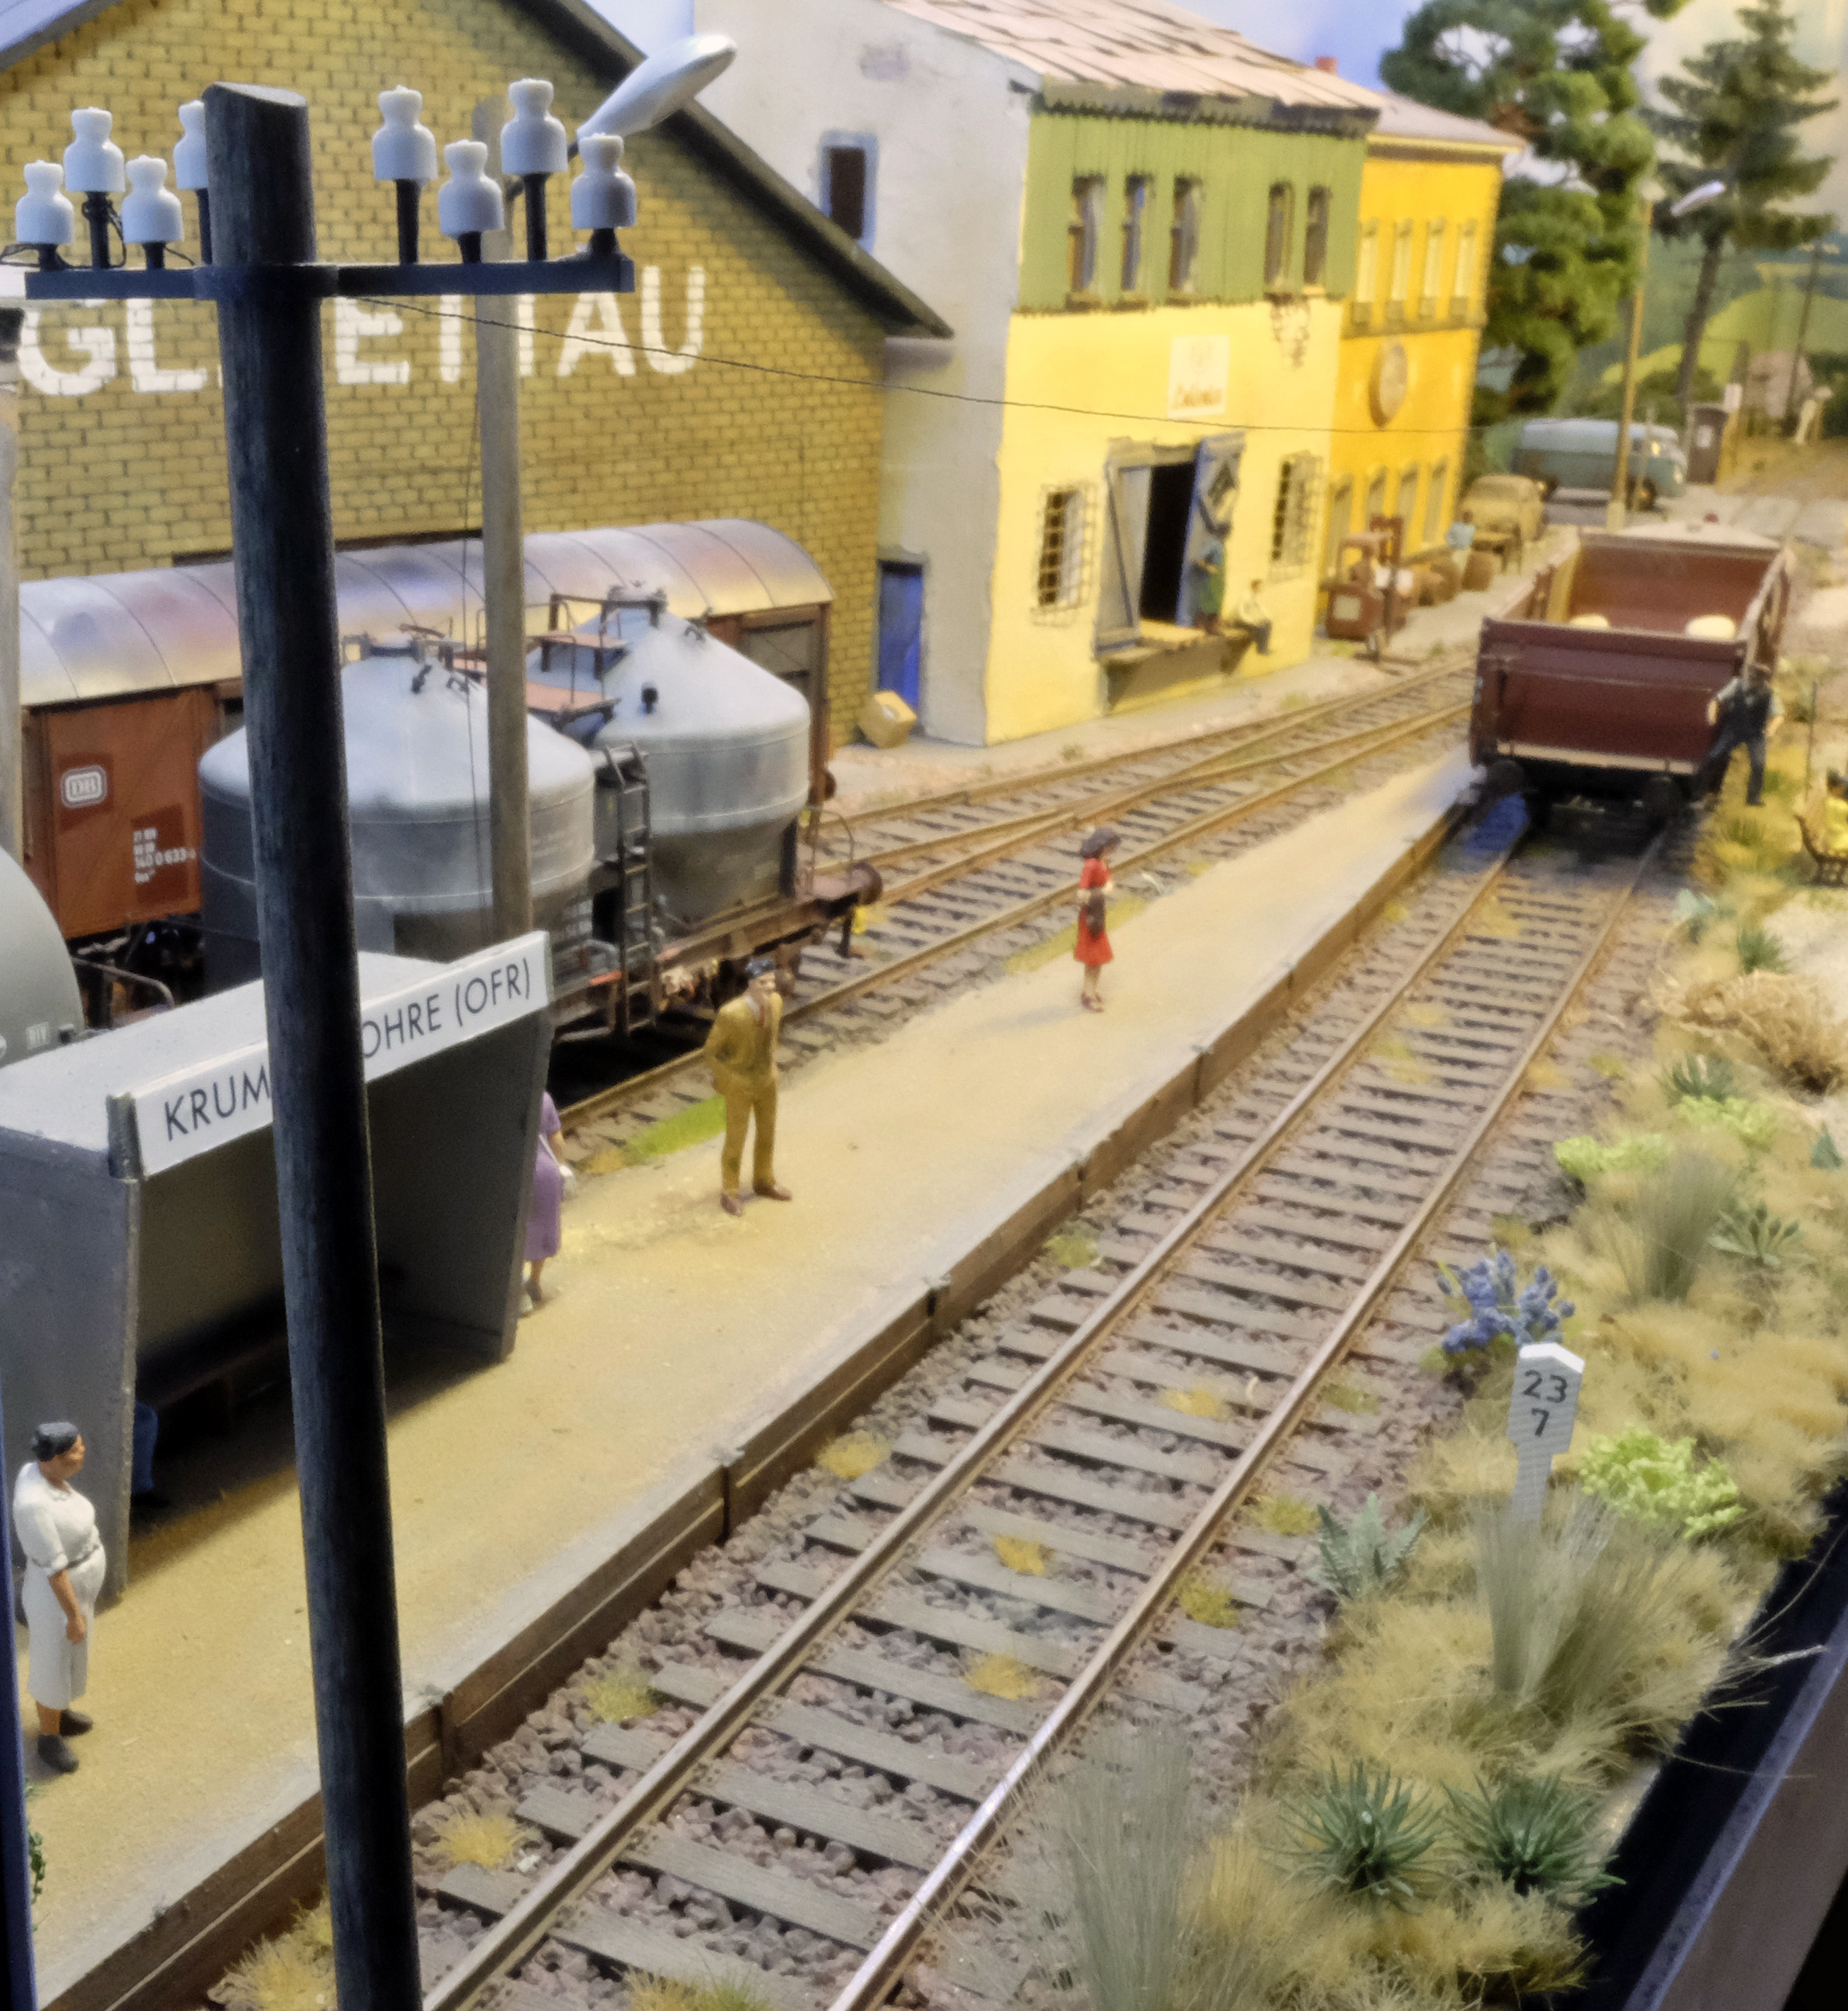
Krumme Fohre by Alexander Kaczmarek
210 x 45 cm (6,9 x 1,5 ft for our friends from oversea) or 0,94 squaremeters of model railroad will probably find a place in a small living room as well as my station “Krumme Fohre” does. Only two points and four tracks. Obviously “Krumme Fohre” is not a busy big city terminus. Short trains, some Diesels and a handful of grotty freight cars – enough rolling stock to have a lot of fun. What you perhaps have recognized already – “Krumme Fohre” is designed after Ian Wright´s famous “Inglenook layout“. That means, there is a lot of work for the switchman. “Krumme Fohre” is a small station at the “iron curtain” – the inner-german border in Northern Bavaria in the 70th. Germany in this time is a divided country, the railroad line was interrupted at the border and “Krumme Fohre” so advanced to a small terminus of the Deutsche Bundesbahn (DB) – without a runaround track. Trackwork is by Lenz 0, all buildings are scratchbuild.
For more, please see http://www.freeonrail.com/
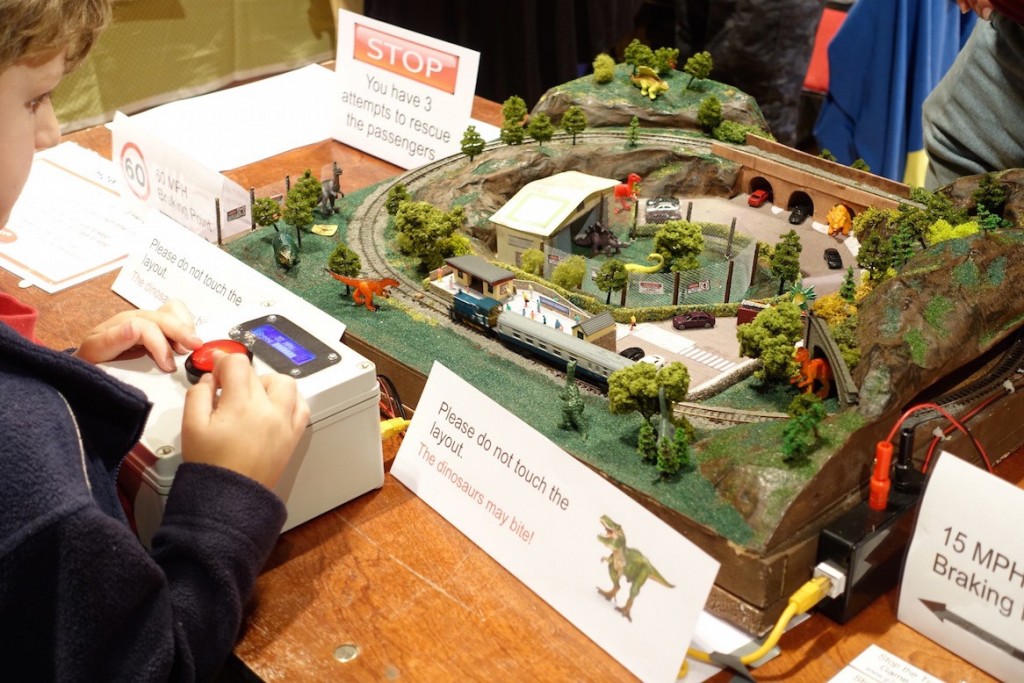
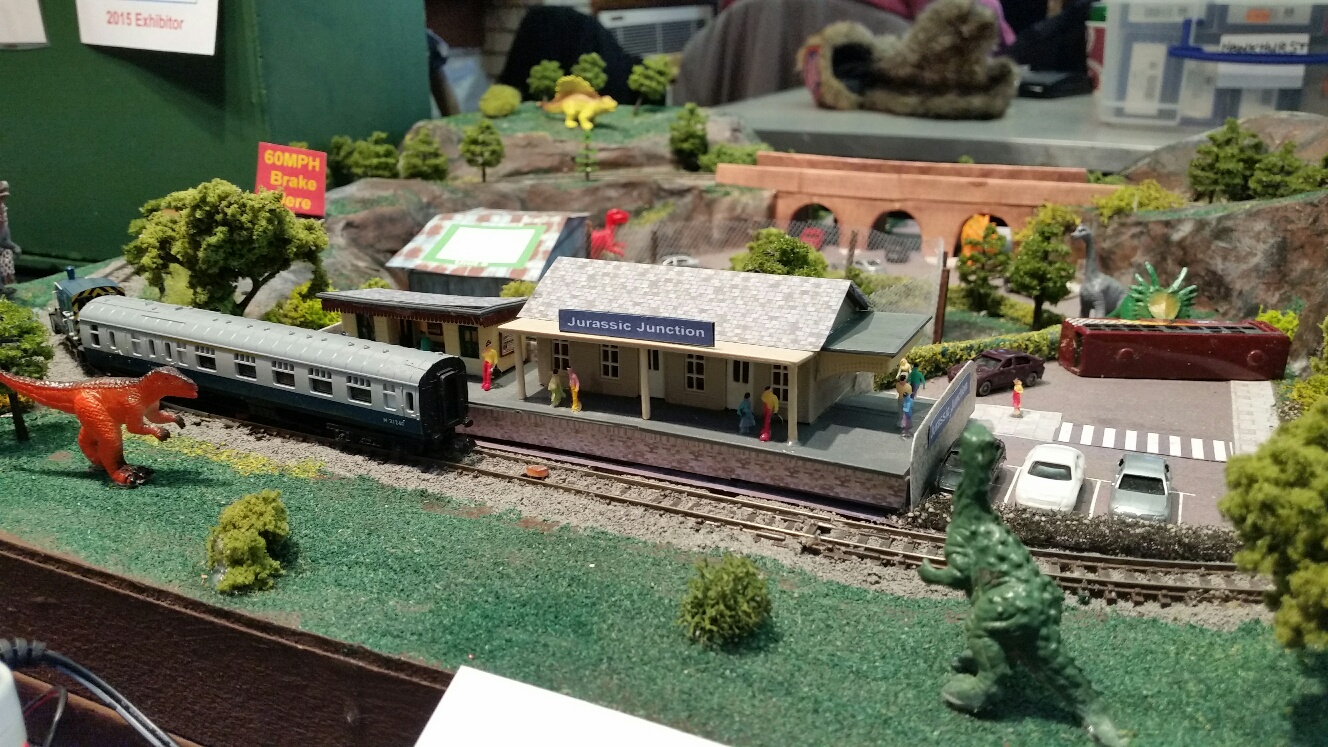
Stop the train game – Jurassic Junction by Neil McGrath
I thought you might be interested in featuring my model railway. The layout is N scale and measures 2ft x 2ft. It is a simple oval circuit featuring escaped dinosaurs and people trapped at the station. The idea of the game is to stop the train at the station to rescue the passengers from the dinosaurs. It sounds simple but is really much more difficult than it seems. The train runs at a random speed each time the game is played and it can take between 1/4 and 3/4 of a lap to stop depending on the trains speed. The only control is a single big red button. Press it once to make the train go and when it reaches its cruising speed you press it again at the correct point to start the braking. The train then slows down at a set rate to hopefully stop at the platform. There is an automatic scoring system to show how many people you have rescued and a speedometer to show the trains speed. The whole layout is controlled by an Arduino micro-controller. More pictures and full construction details can be found at:
https://sites.google.com/site/g7aqkhamradio/stop-the-train
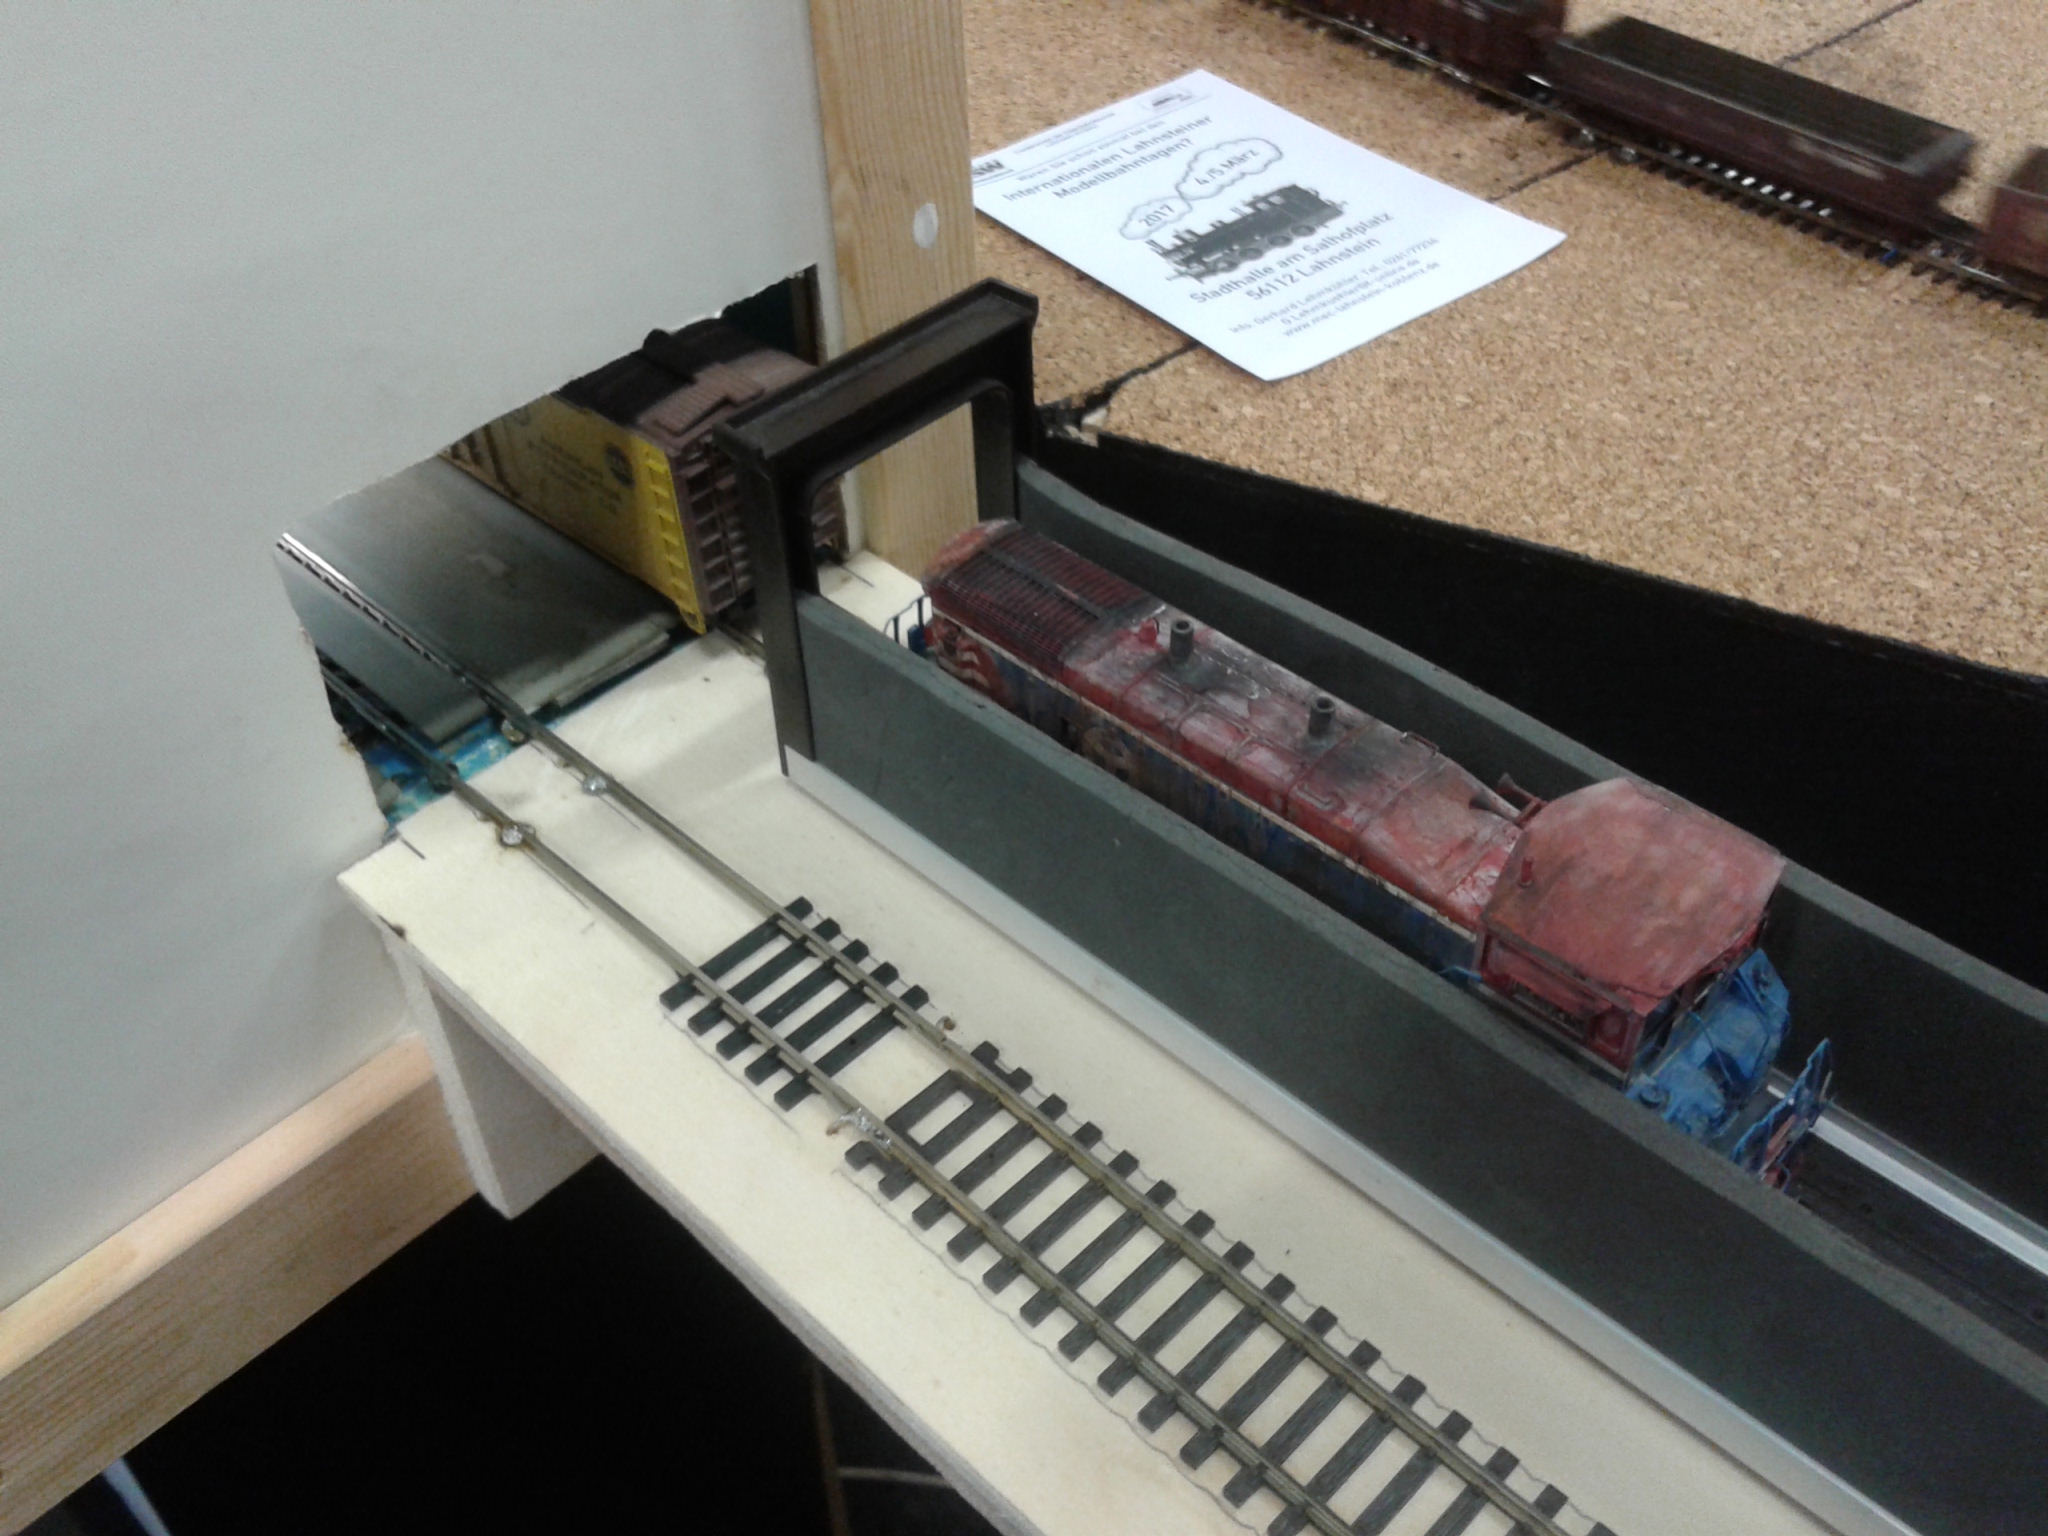
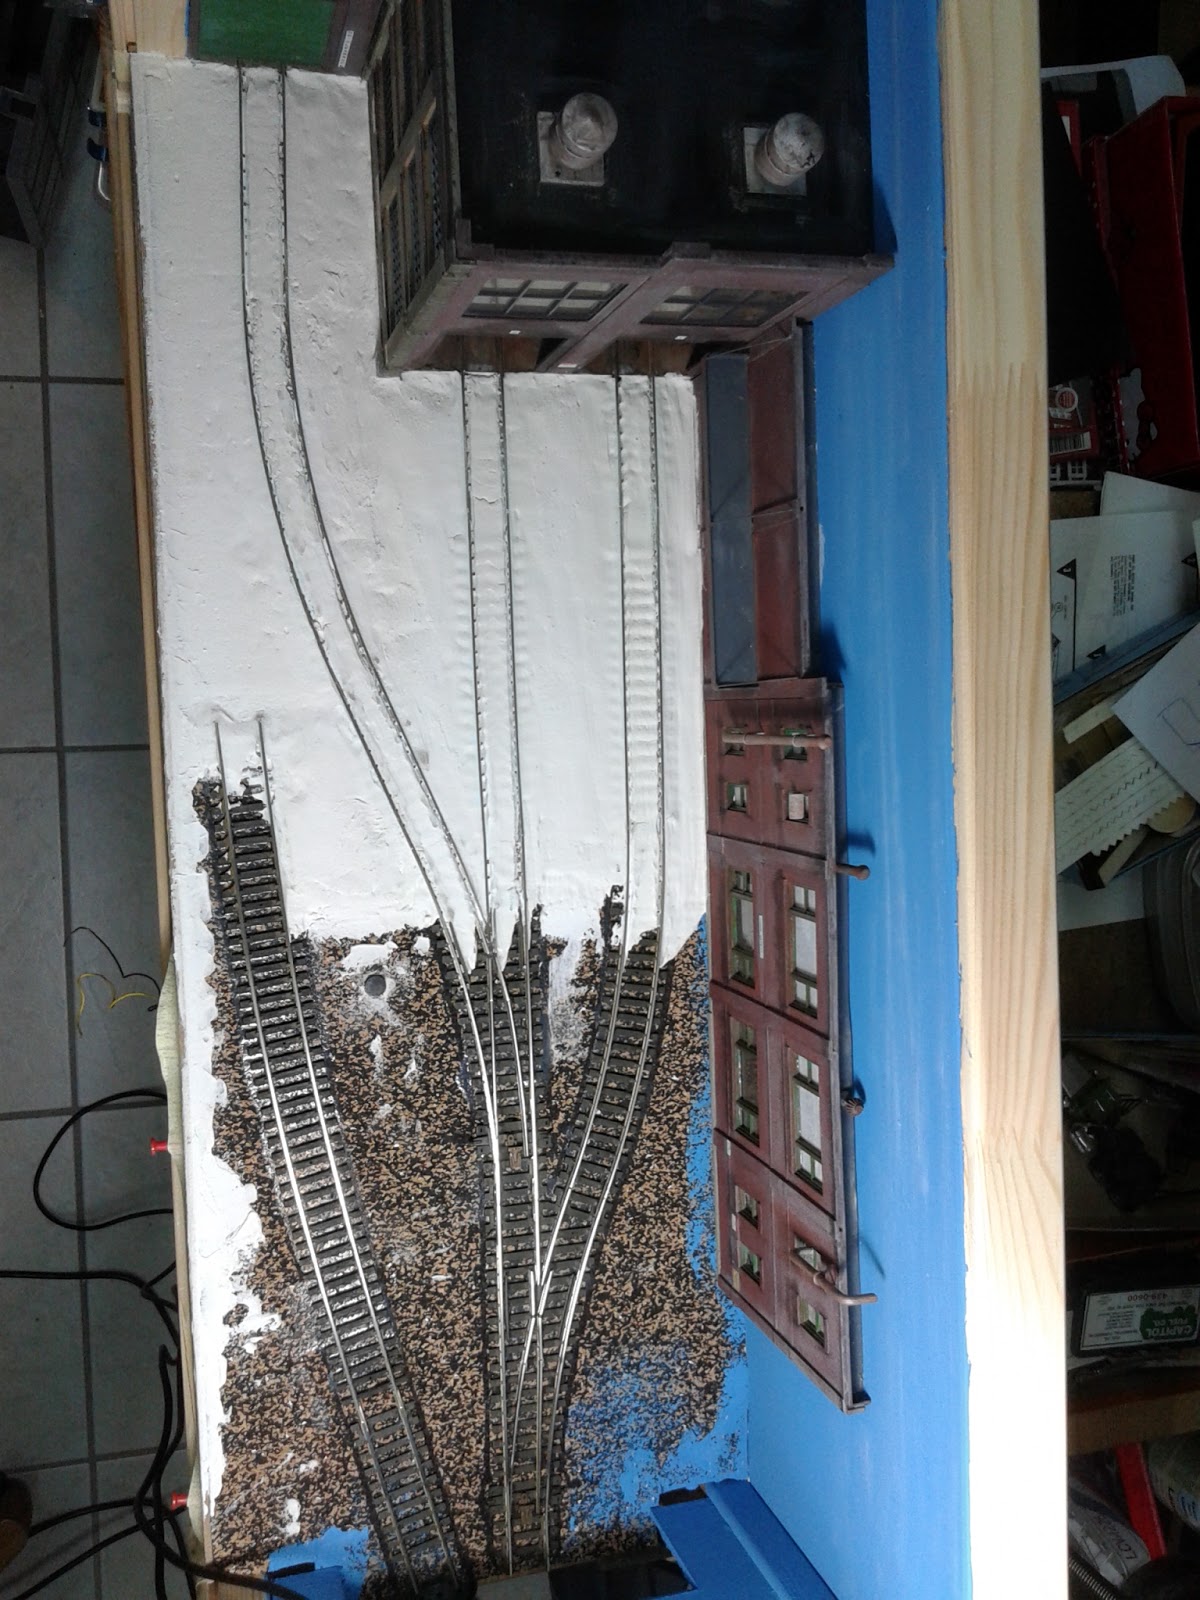
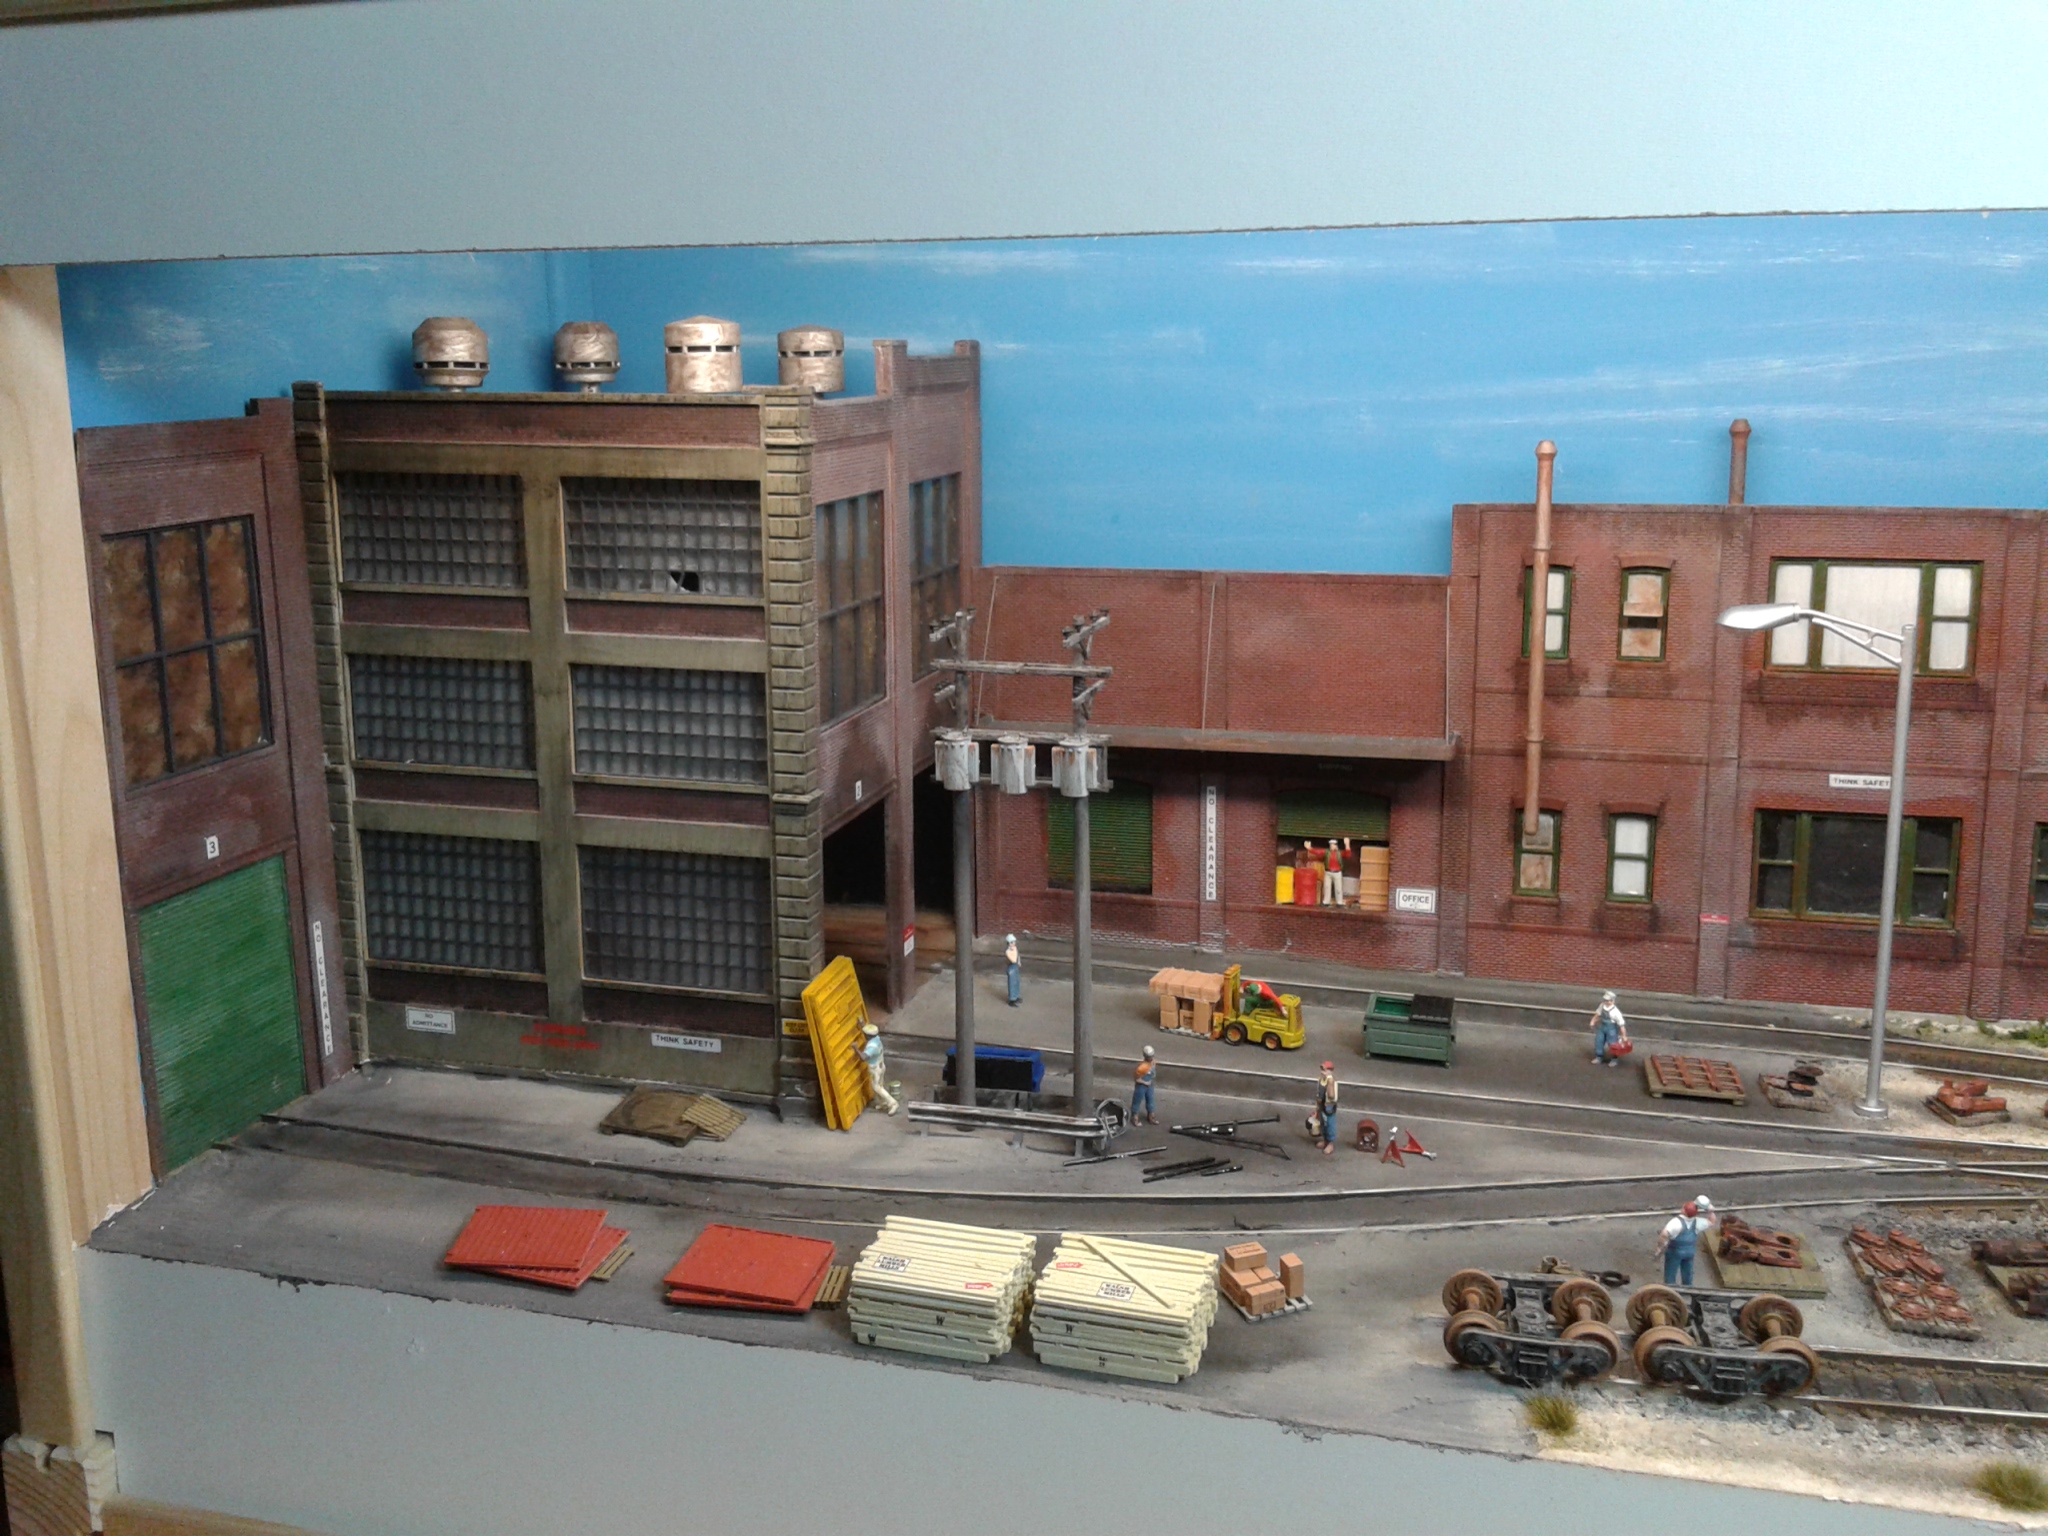
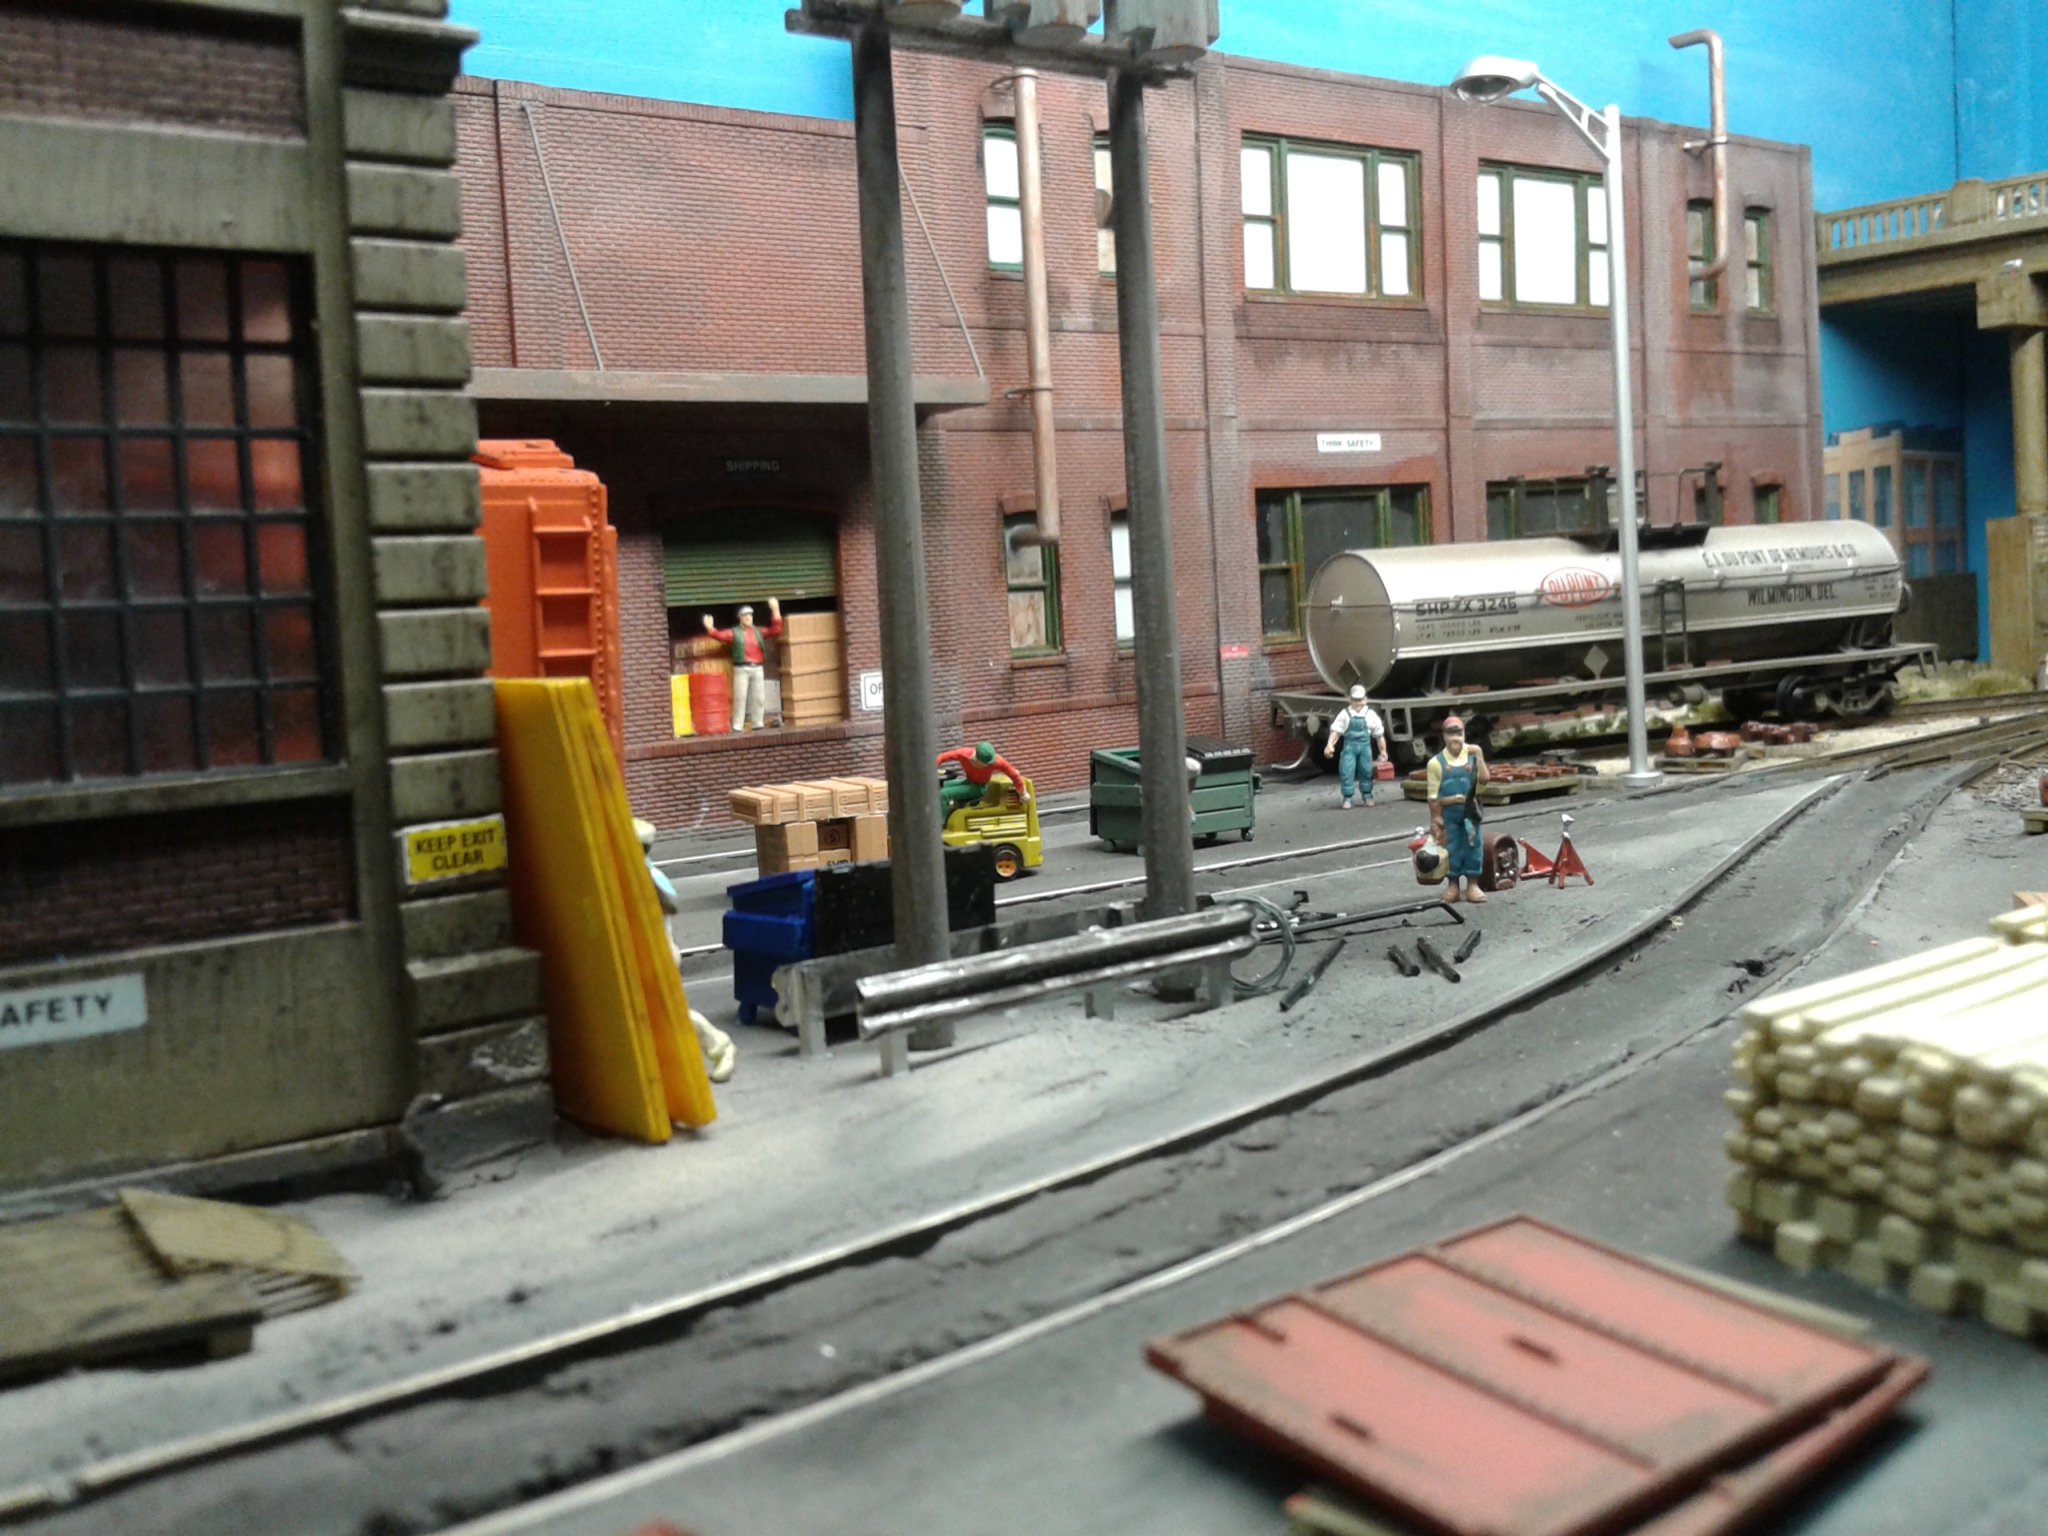
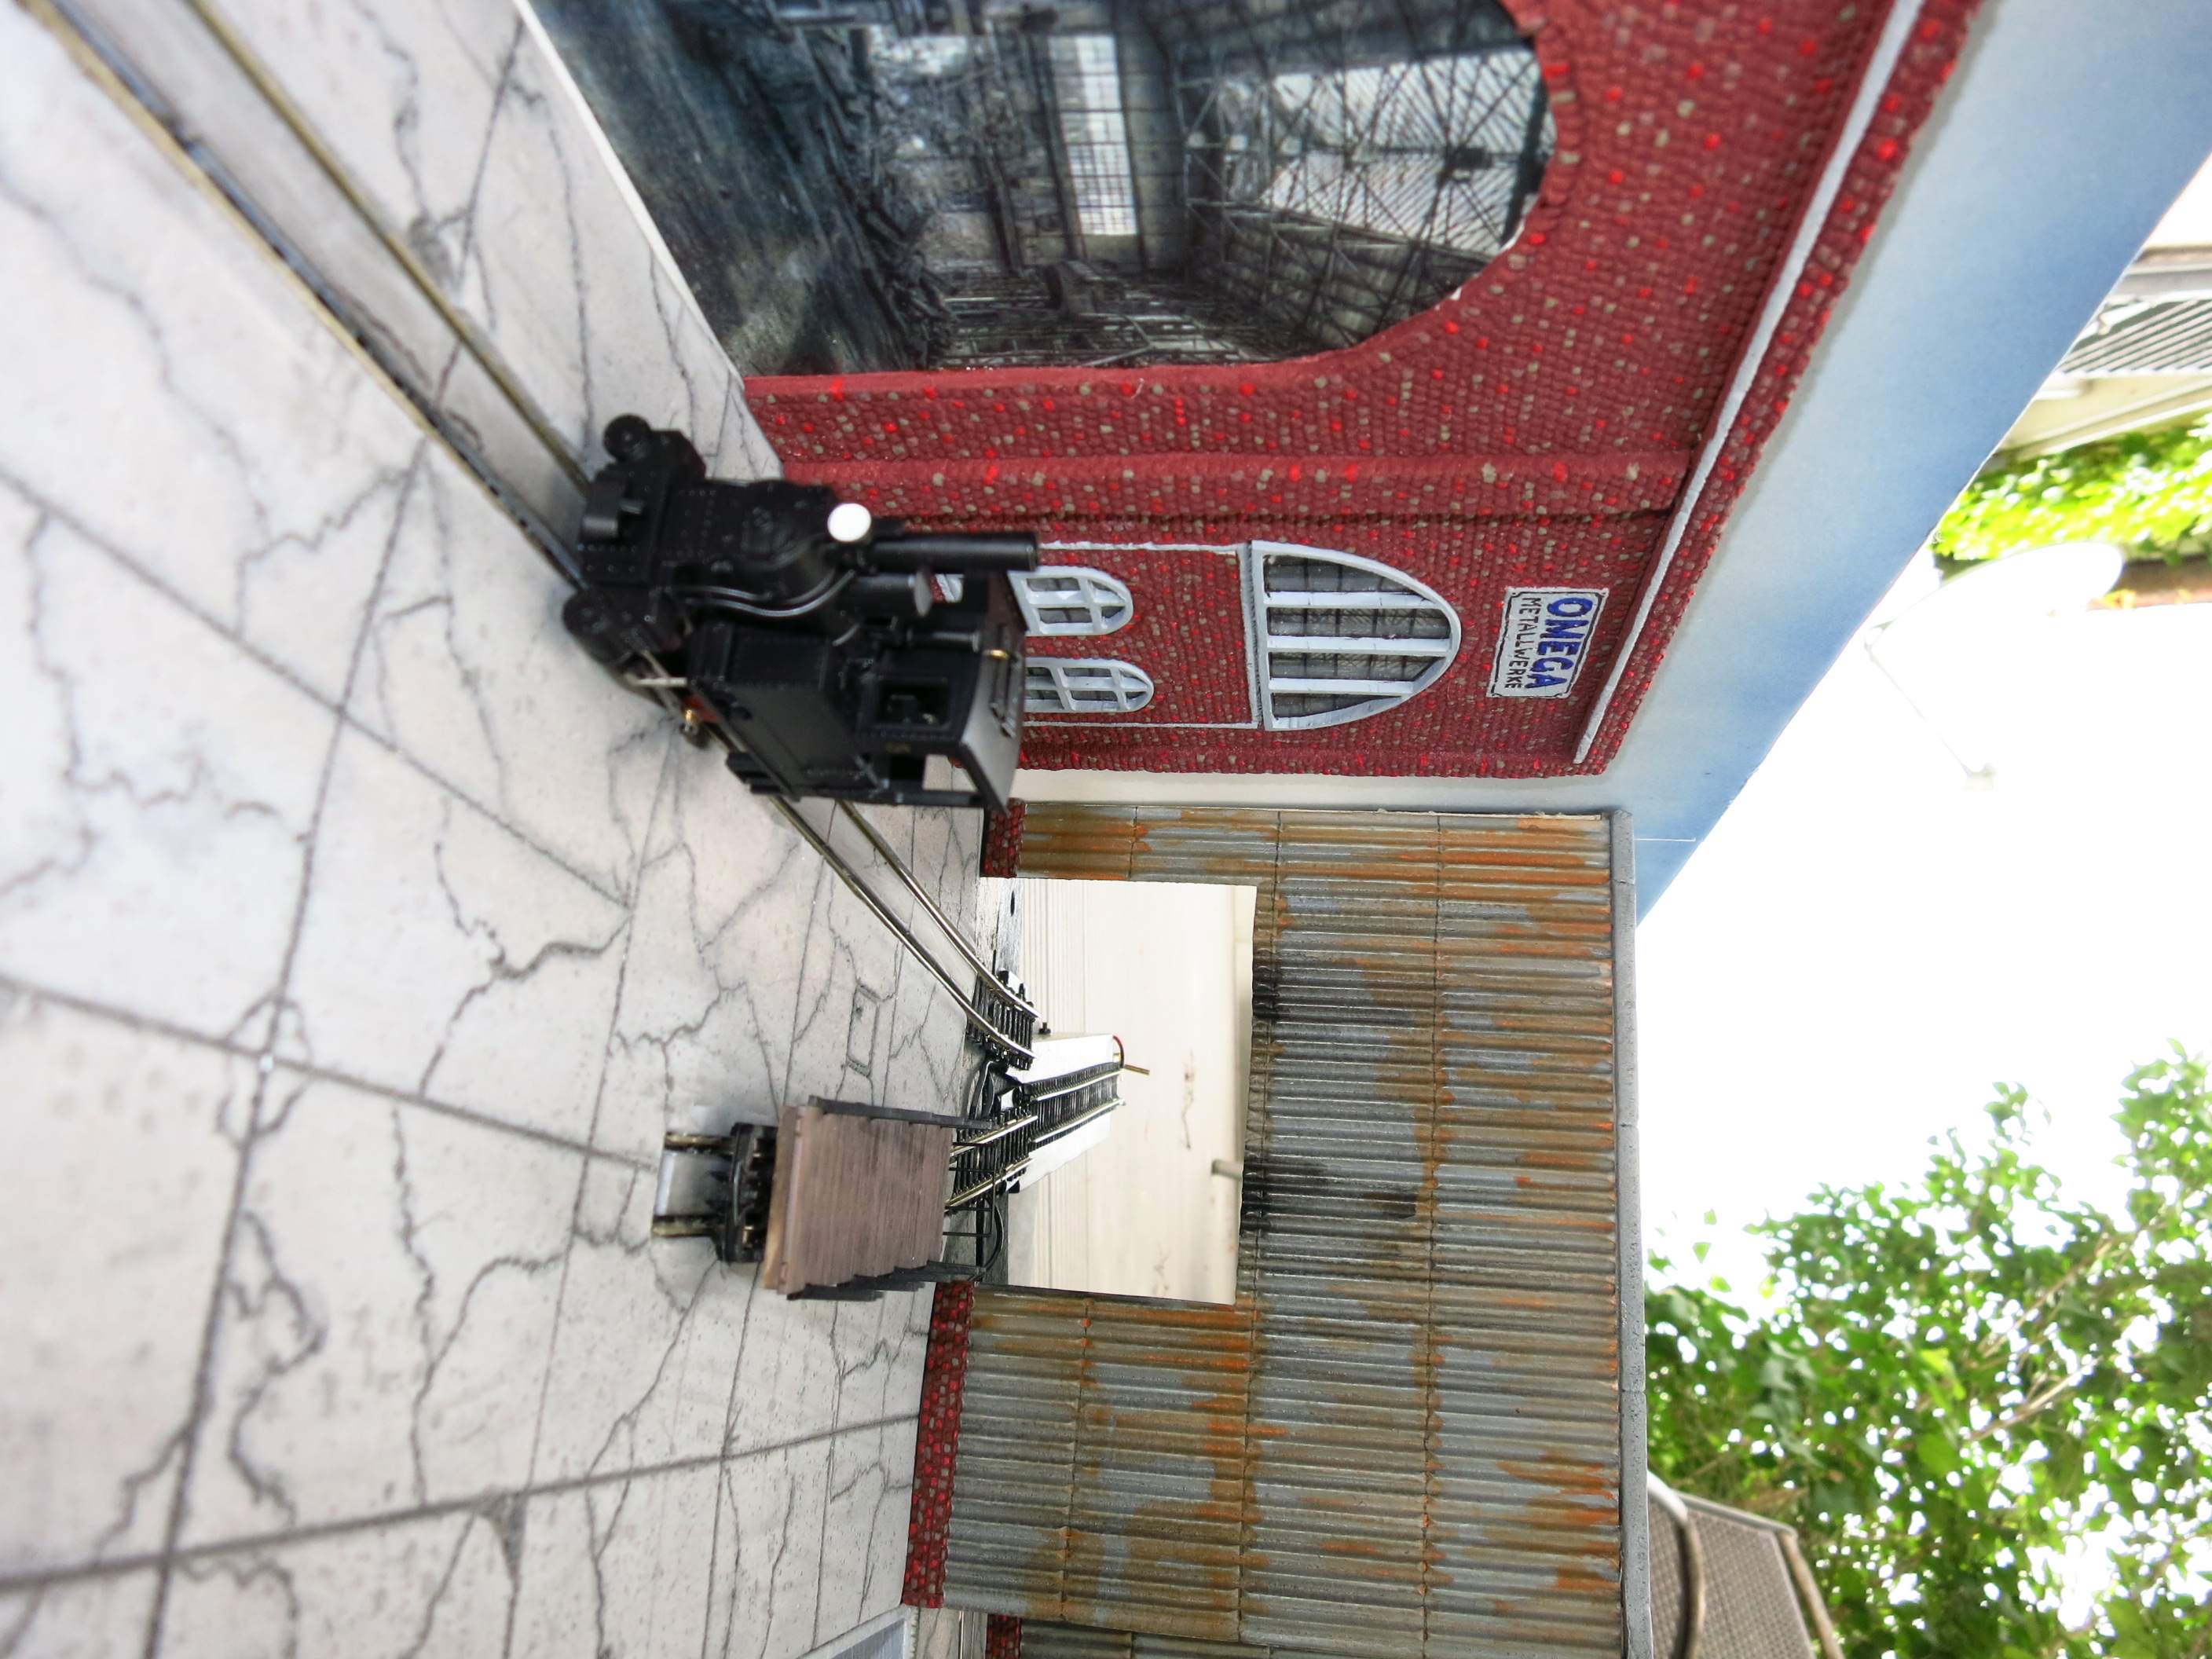
OMEGA METALLWERKE by Stefan Zeller from Graz, Austria
I’m sending you some pictures of my micro-layout OMEGA Metallwerke (metal works, inspired by a book I once read). It is a narrow gauge HOe layout that is about 80% finished. It is also my first ever layout, so I thank this site that at 50 years I finally have a pike. In the beginning I wanted to build a copy of Carl´s Imports but got carried away and kept adding tracks.The layout´s size is 50 x 51 cm. Trains enter the visible part by way of cassettes (which I have yet to build) and are distributed via the sector plate hidden in the large building. The costruction of the sector plate proved to be quite a challenge to me but I finally found a solution that I´m happy with.
I haven´t yet developed an operating scheme, but it should go roughly like that: Incoming trains are “unloaded” in the left part of the layout; there will be an overhead crane perpendicular to the brick building. Finished products are loaded at the right part (there will be some kind of warehous on the background between the gate an the big building). Outbound cars are collected there and leave the layout by way of the sector plate and cassette. At the left stub track (where the tank car satands) will be a diesel fuel facility.
Rolling stock comes entirely from the Minitrains range (Krauss steamer and a green Gmeinder diesel loco).
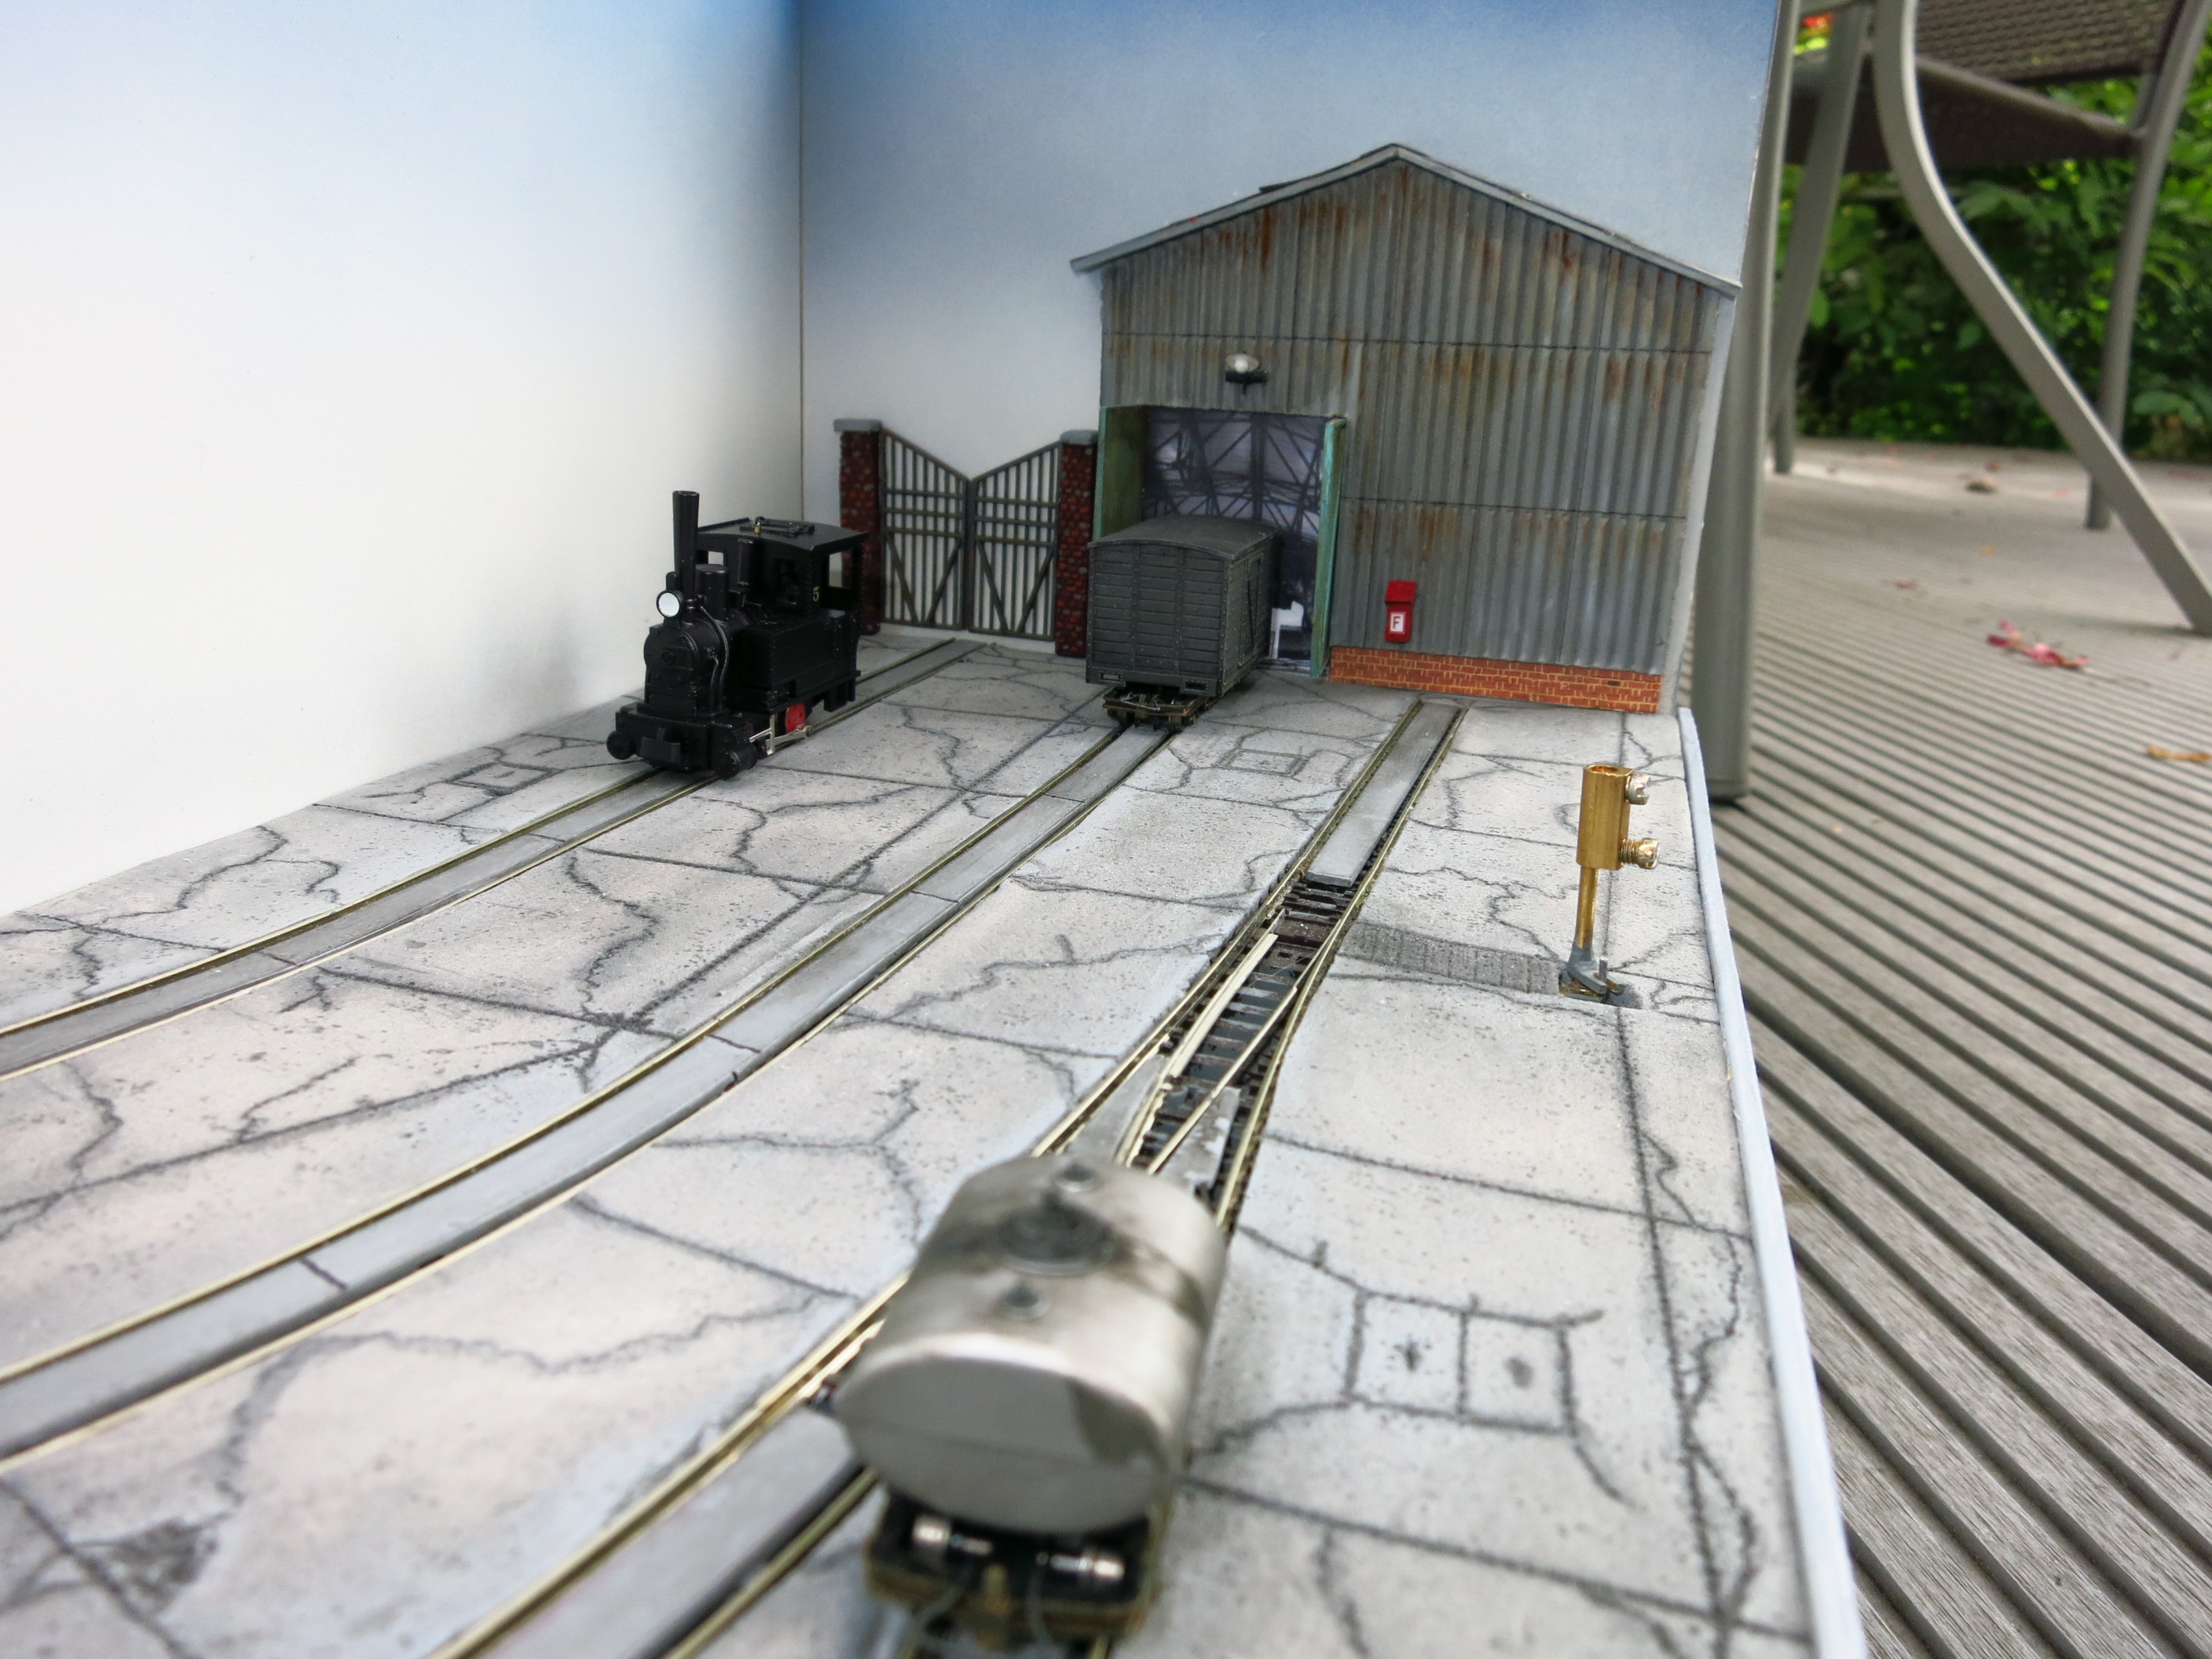
N gauge micro layout by Ian Glover from the UK.
A small shunting layout built to fit in side a cardboard gift box that is roughly 31 x 22cm in size. An extra length of track attaches to the side of the box for basic operation.
All track is PECO set track, using wire in tube controlled points with the levers hidden under the back right corner of the layout.
The concept was to create a corner of a shunting yard, with the idea that the rest of the station or operation is out of view.
The track layout uses a basic fork, but with an extra short siding to park a second shunter.
It took me around three to four months to complete it.
The post Page 120: November 2016 appeared first on Carendt.com.
Page 119: June 2016 16 Jun 2016 12:34 PM (9 years ago)
I can’t believe it has already been a year since I added a new scrapbook update to the website.
Here is a new update for you all to enjoy!
Lokálka by Střelec from Plzeň – Czech Republic
“Lokálka” (local railroad) is project of small railroad in czechoslovak country in “epocha II” (cca 1920 – 1945) in H0 scale. The tracks are from Fleischmann startset. Dimensions are 100 x 100 cm. The terrain is made from styrofoam and paper.


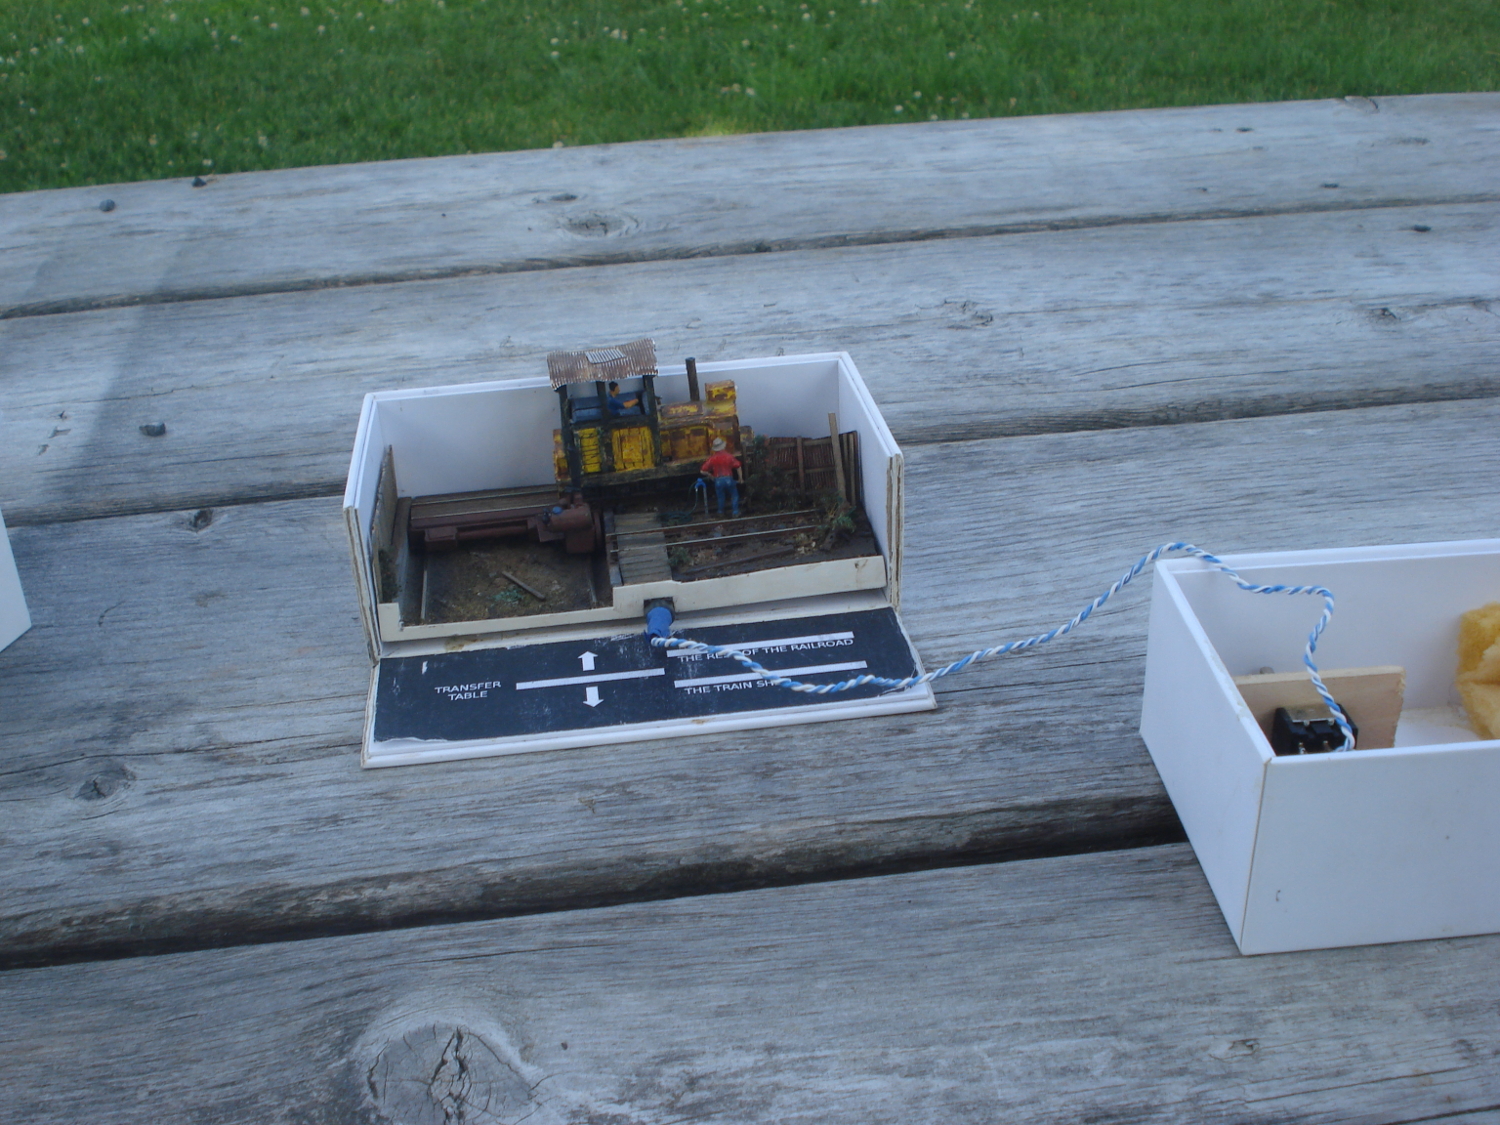
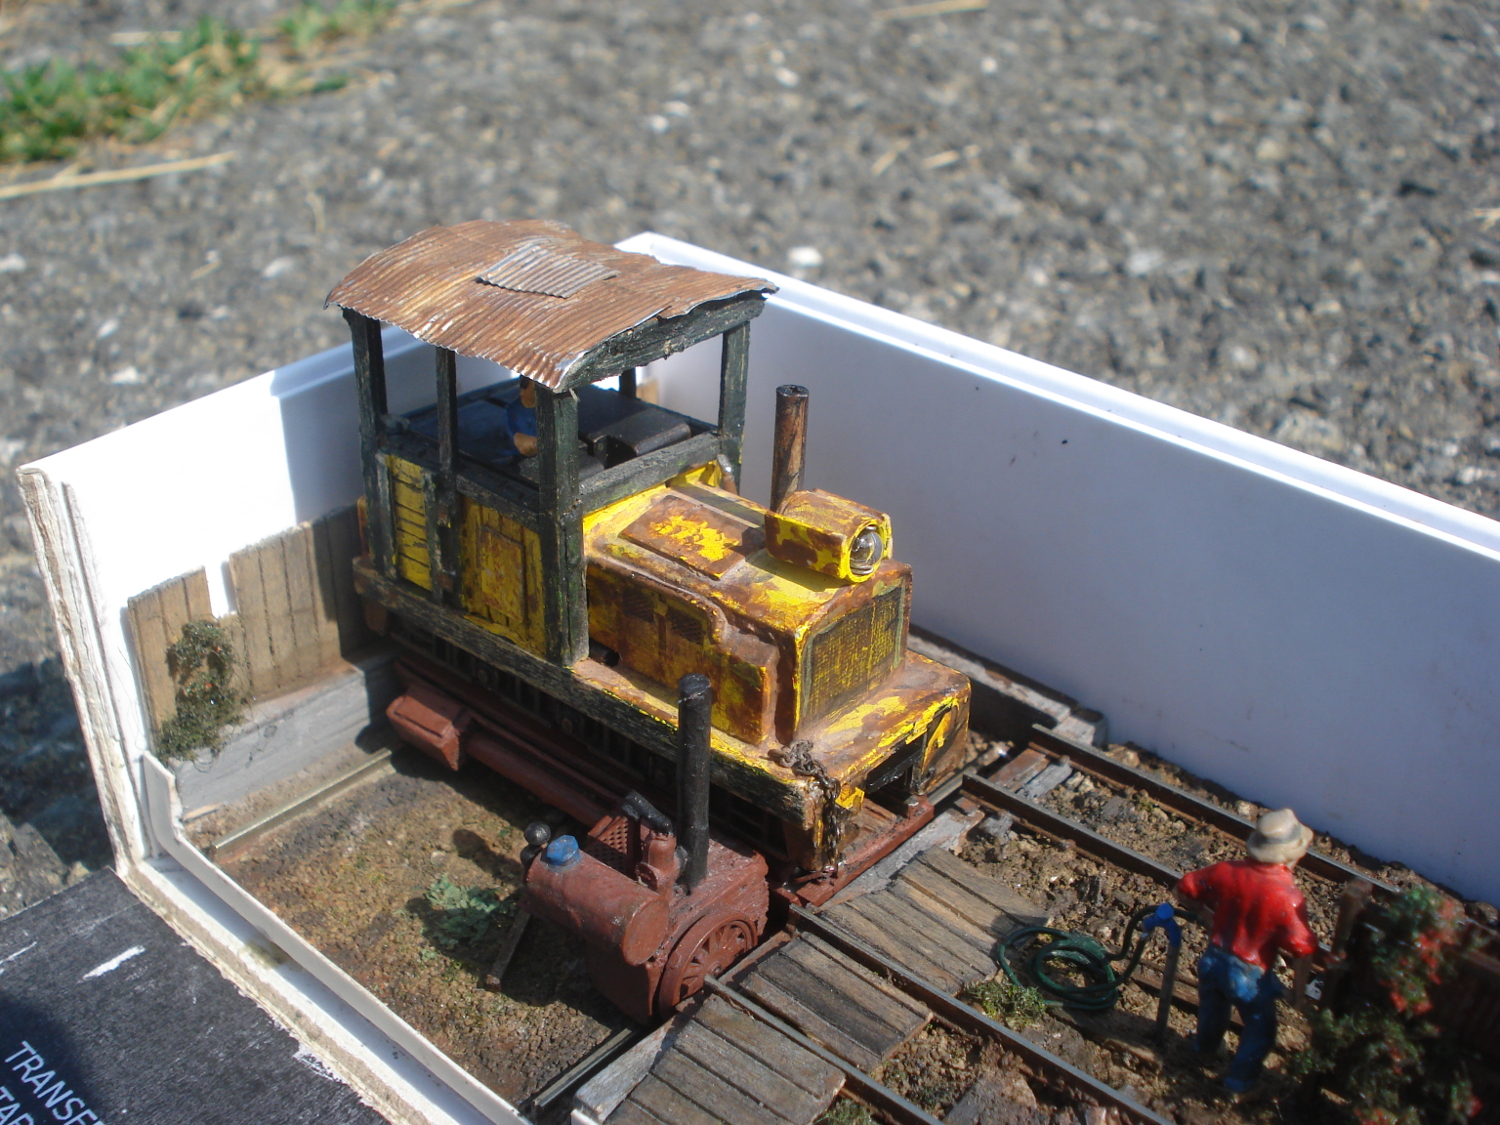
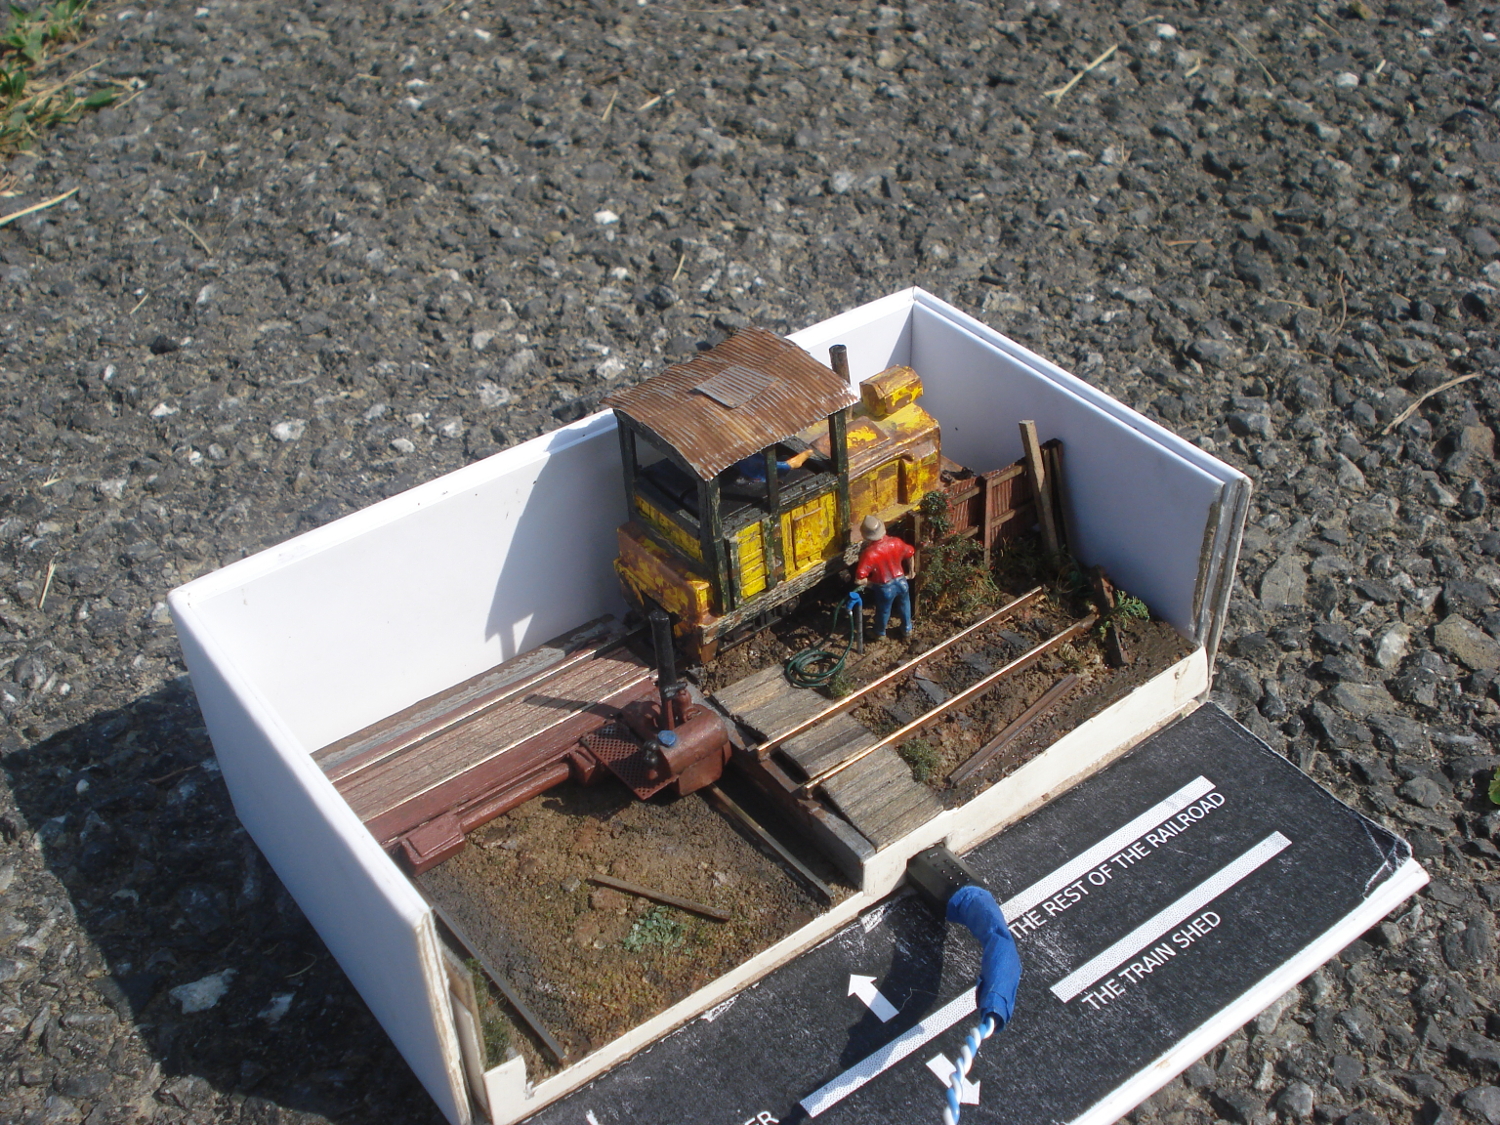
the Agawamuk creek and punkin heights R.R. by Sean Madey
My name is Sean, I am 16 years old and I would like to submit my HO scale engine terminal built in an iphone box to the small layout scrapbook. This little railroad, named the Agawamuk creek and punkin heights R.R., is the result of my wanting to experiment in narrow gauge (I am currently working on a four by nineish foot layout as well) and also by the world’s smallest micro contest, which got me thinking along the lines of some thing really small. The layout is a tad under three by five inches, and includes a track on which the engine is stored, a small transfer table to move the engine between its storage track and the track that represents the rest of the line. Operation is very simple and goes as follows: The engine starts out on its storage track and runs onto the transfer table, which slides towards the back of the railroad using the Big Hand In The Sky method. The locomotive runs off the transfer table onto the staging track behind the fence. Then we skip to the end of the day when the locomotive comes back and the entire process is reversed. The layout is powered with batteries which are stored in another iphone case along with the locomotive.
I’d like to add that I’ve taken the railroad along on a class trip and operated it at the beach during that time, and it has proven itself to be quite durable. I had to be very careful to not get sand onto the layout, for fear of damaging the locomotive mechanism. I am also hoping to take this small layout on other trips. The locomotive is a Bachmann N scale Plymouth diesel that I modified with a new cab and some other details. Most of the materials used in the construction of the railroad were bits from my scrapbox and are mostly pieces of strip wood and card-stock.
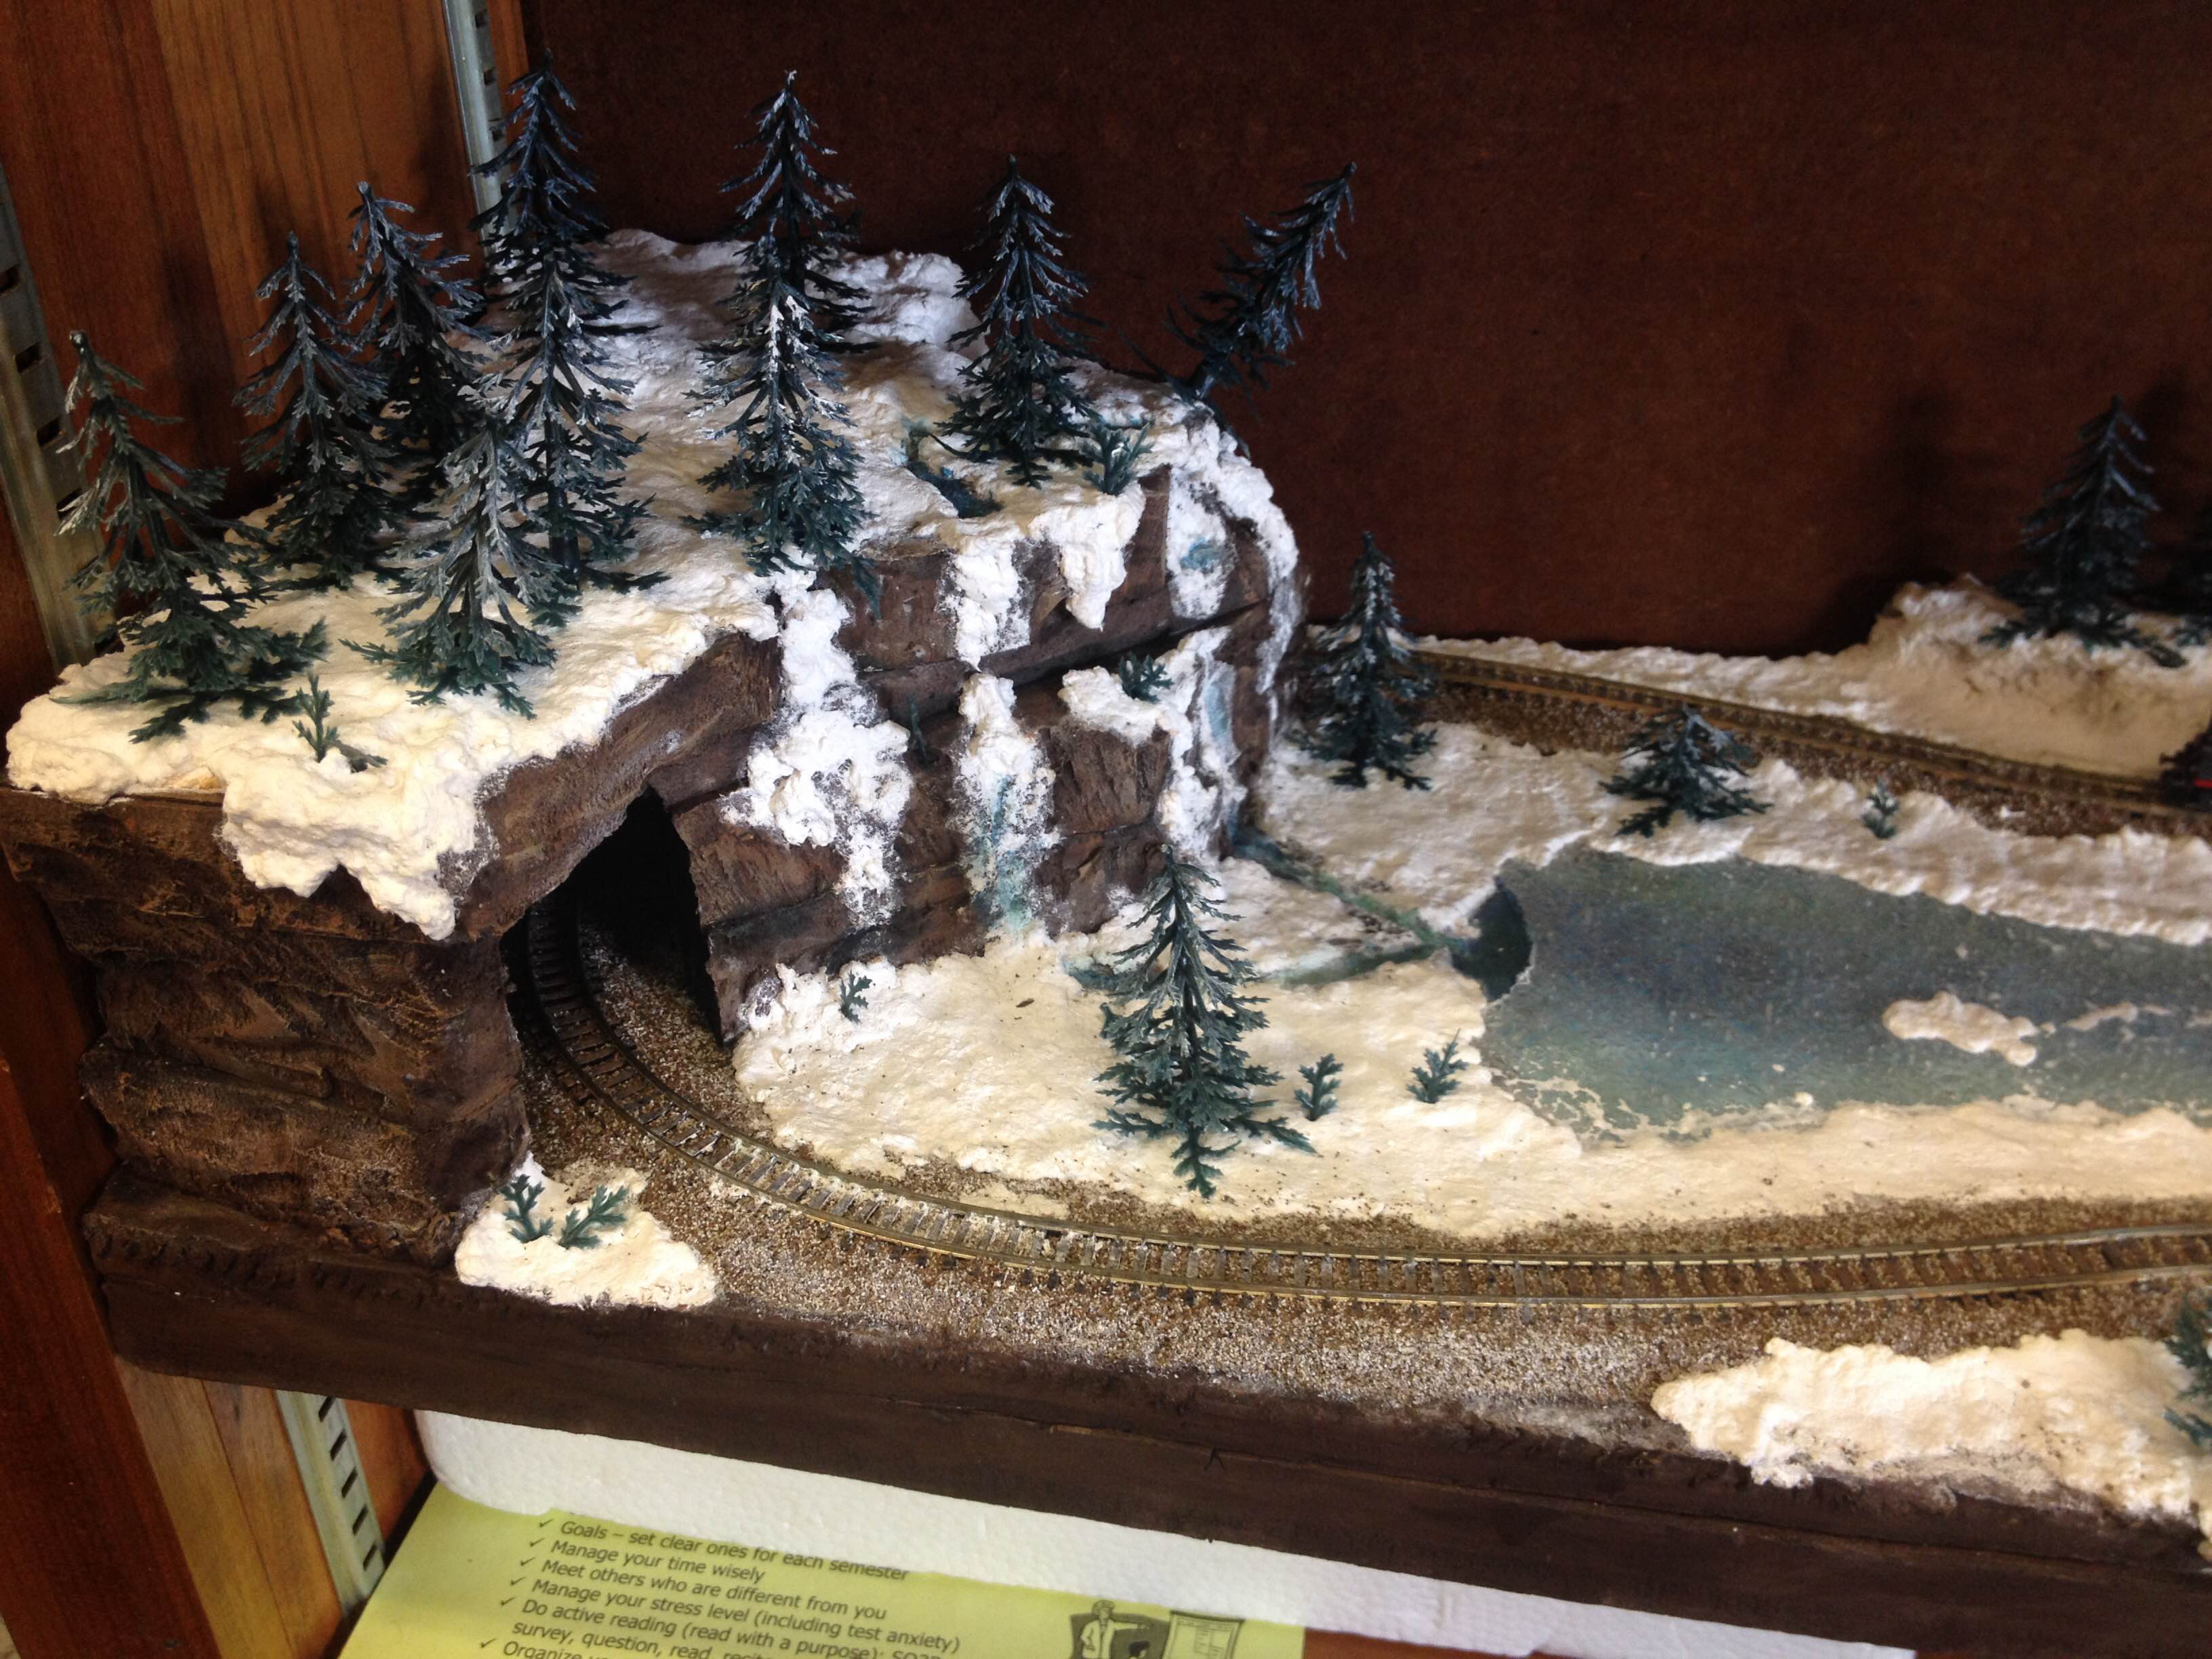
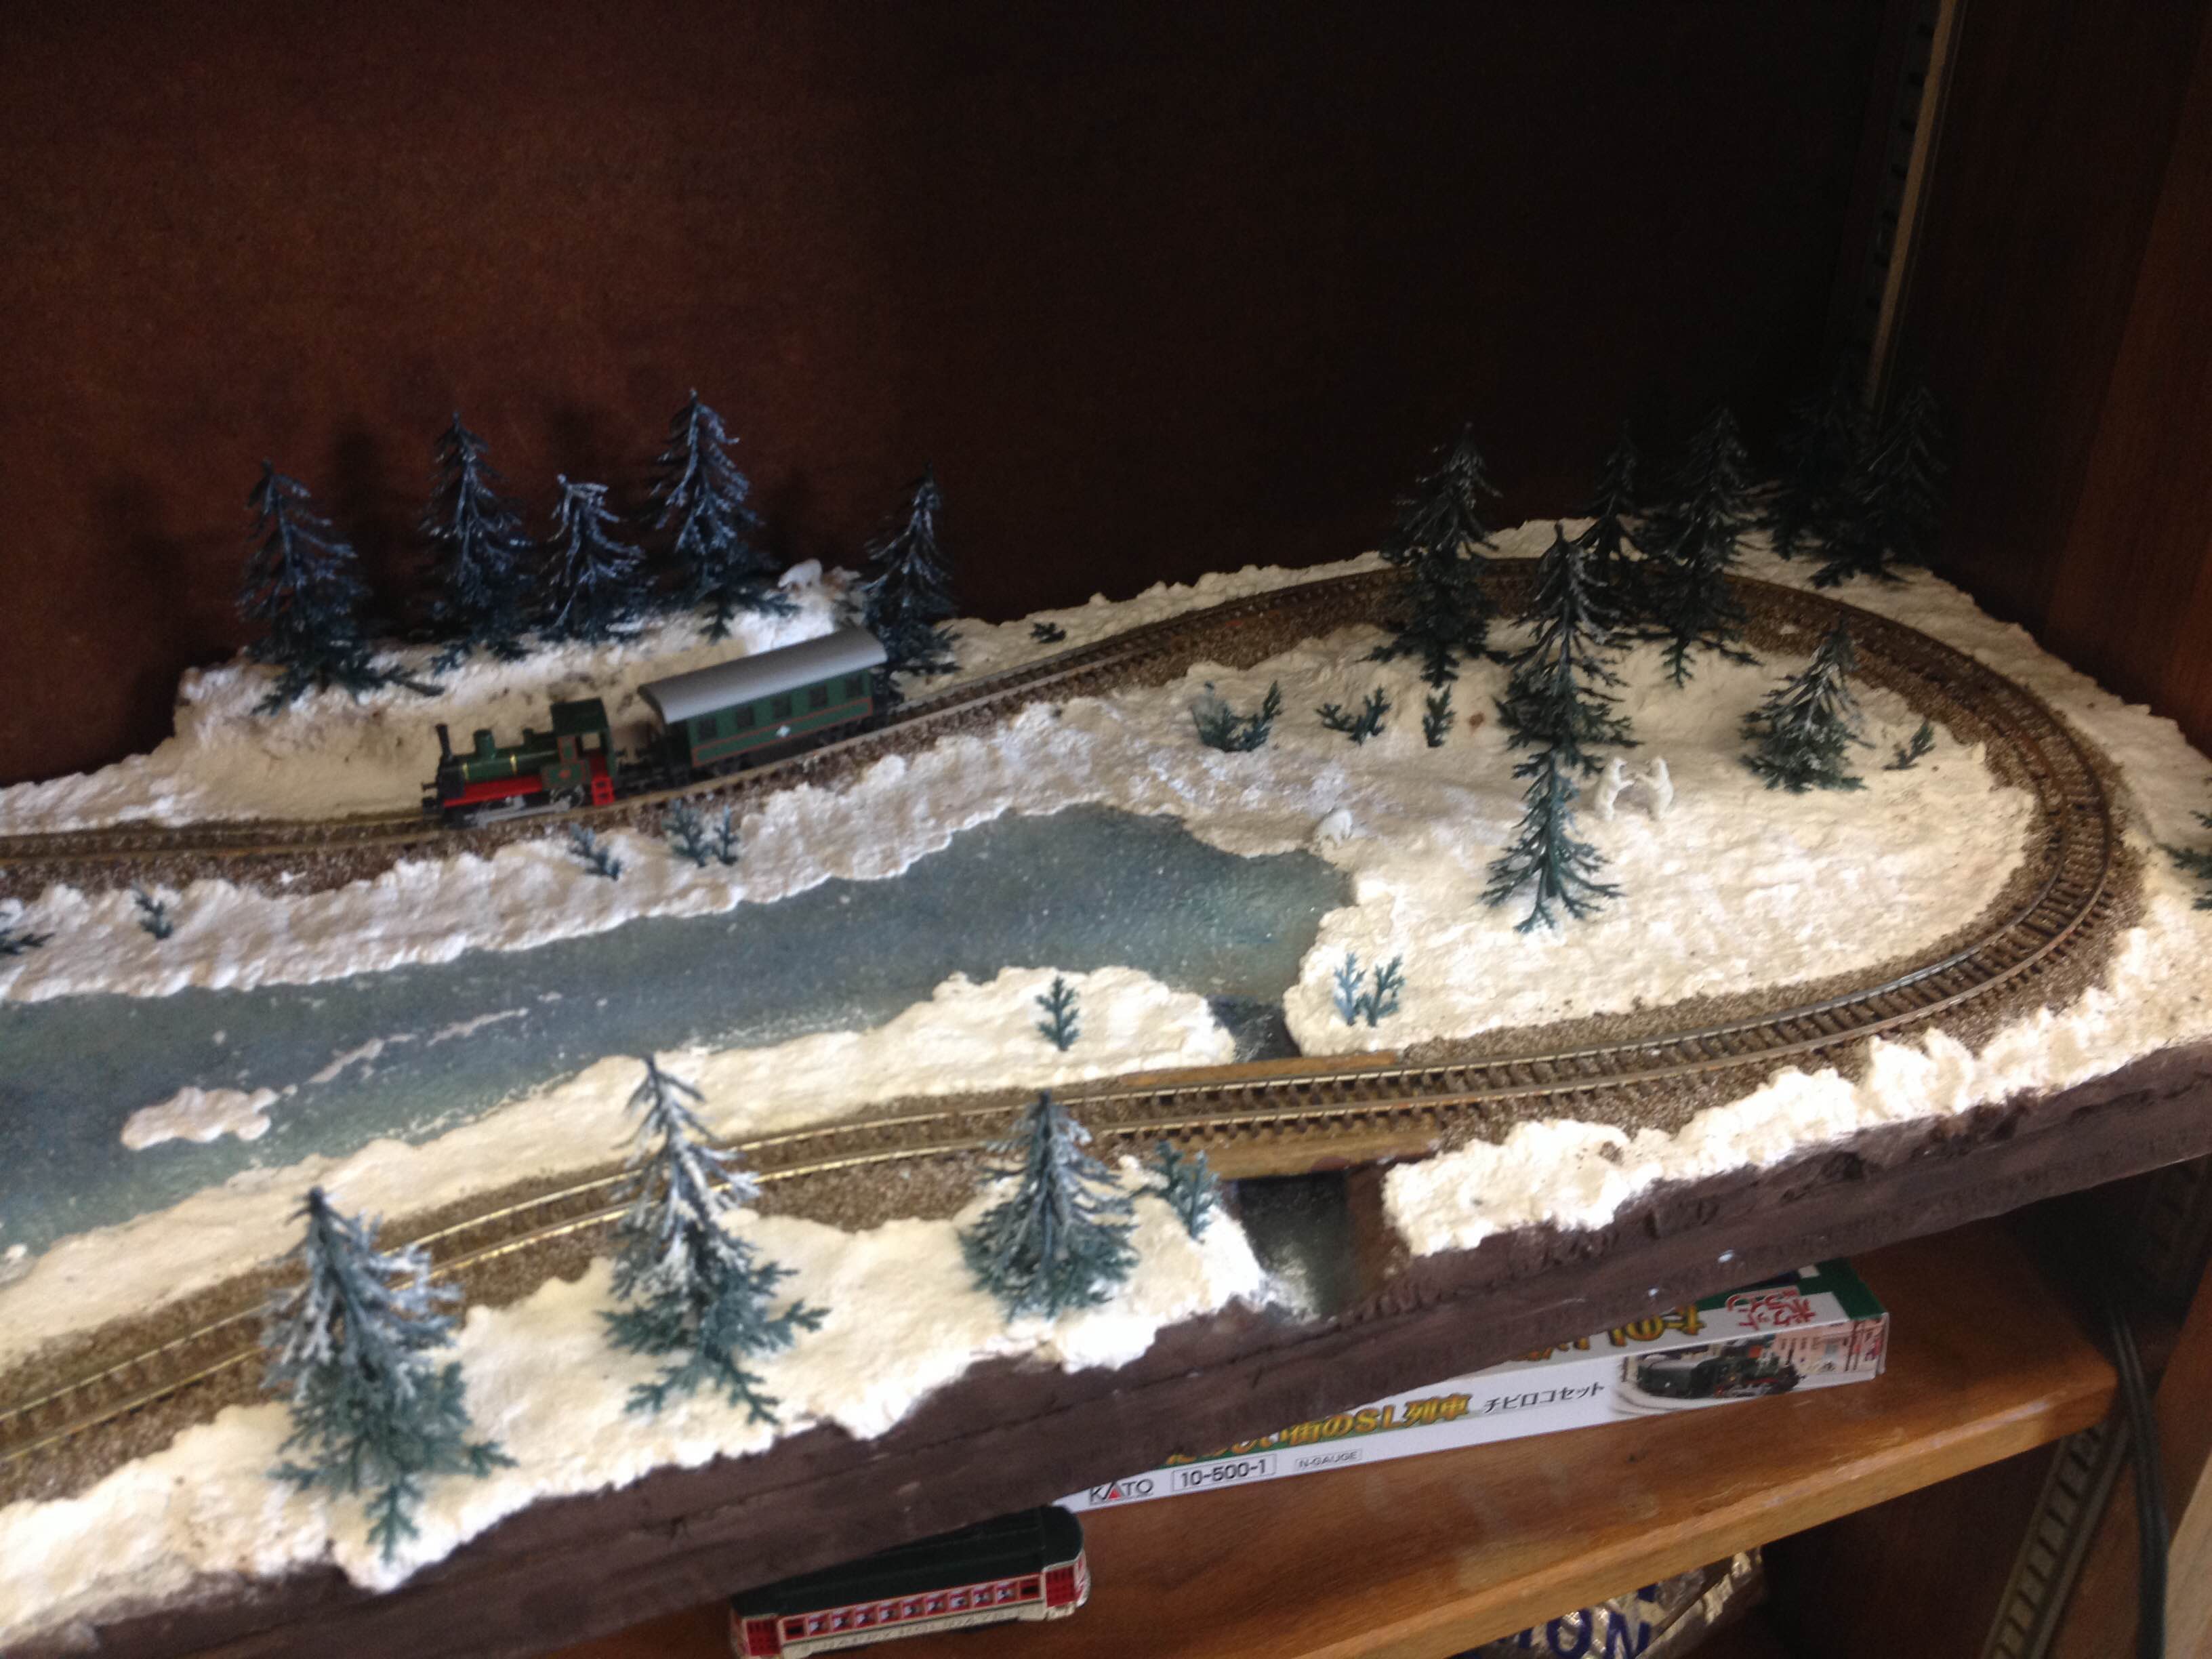
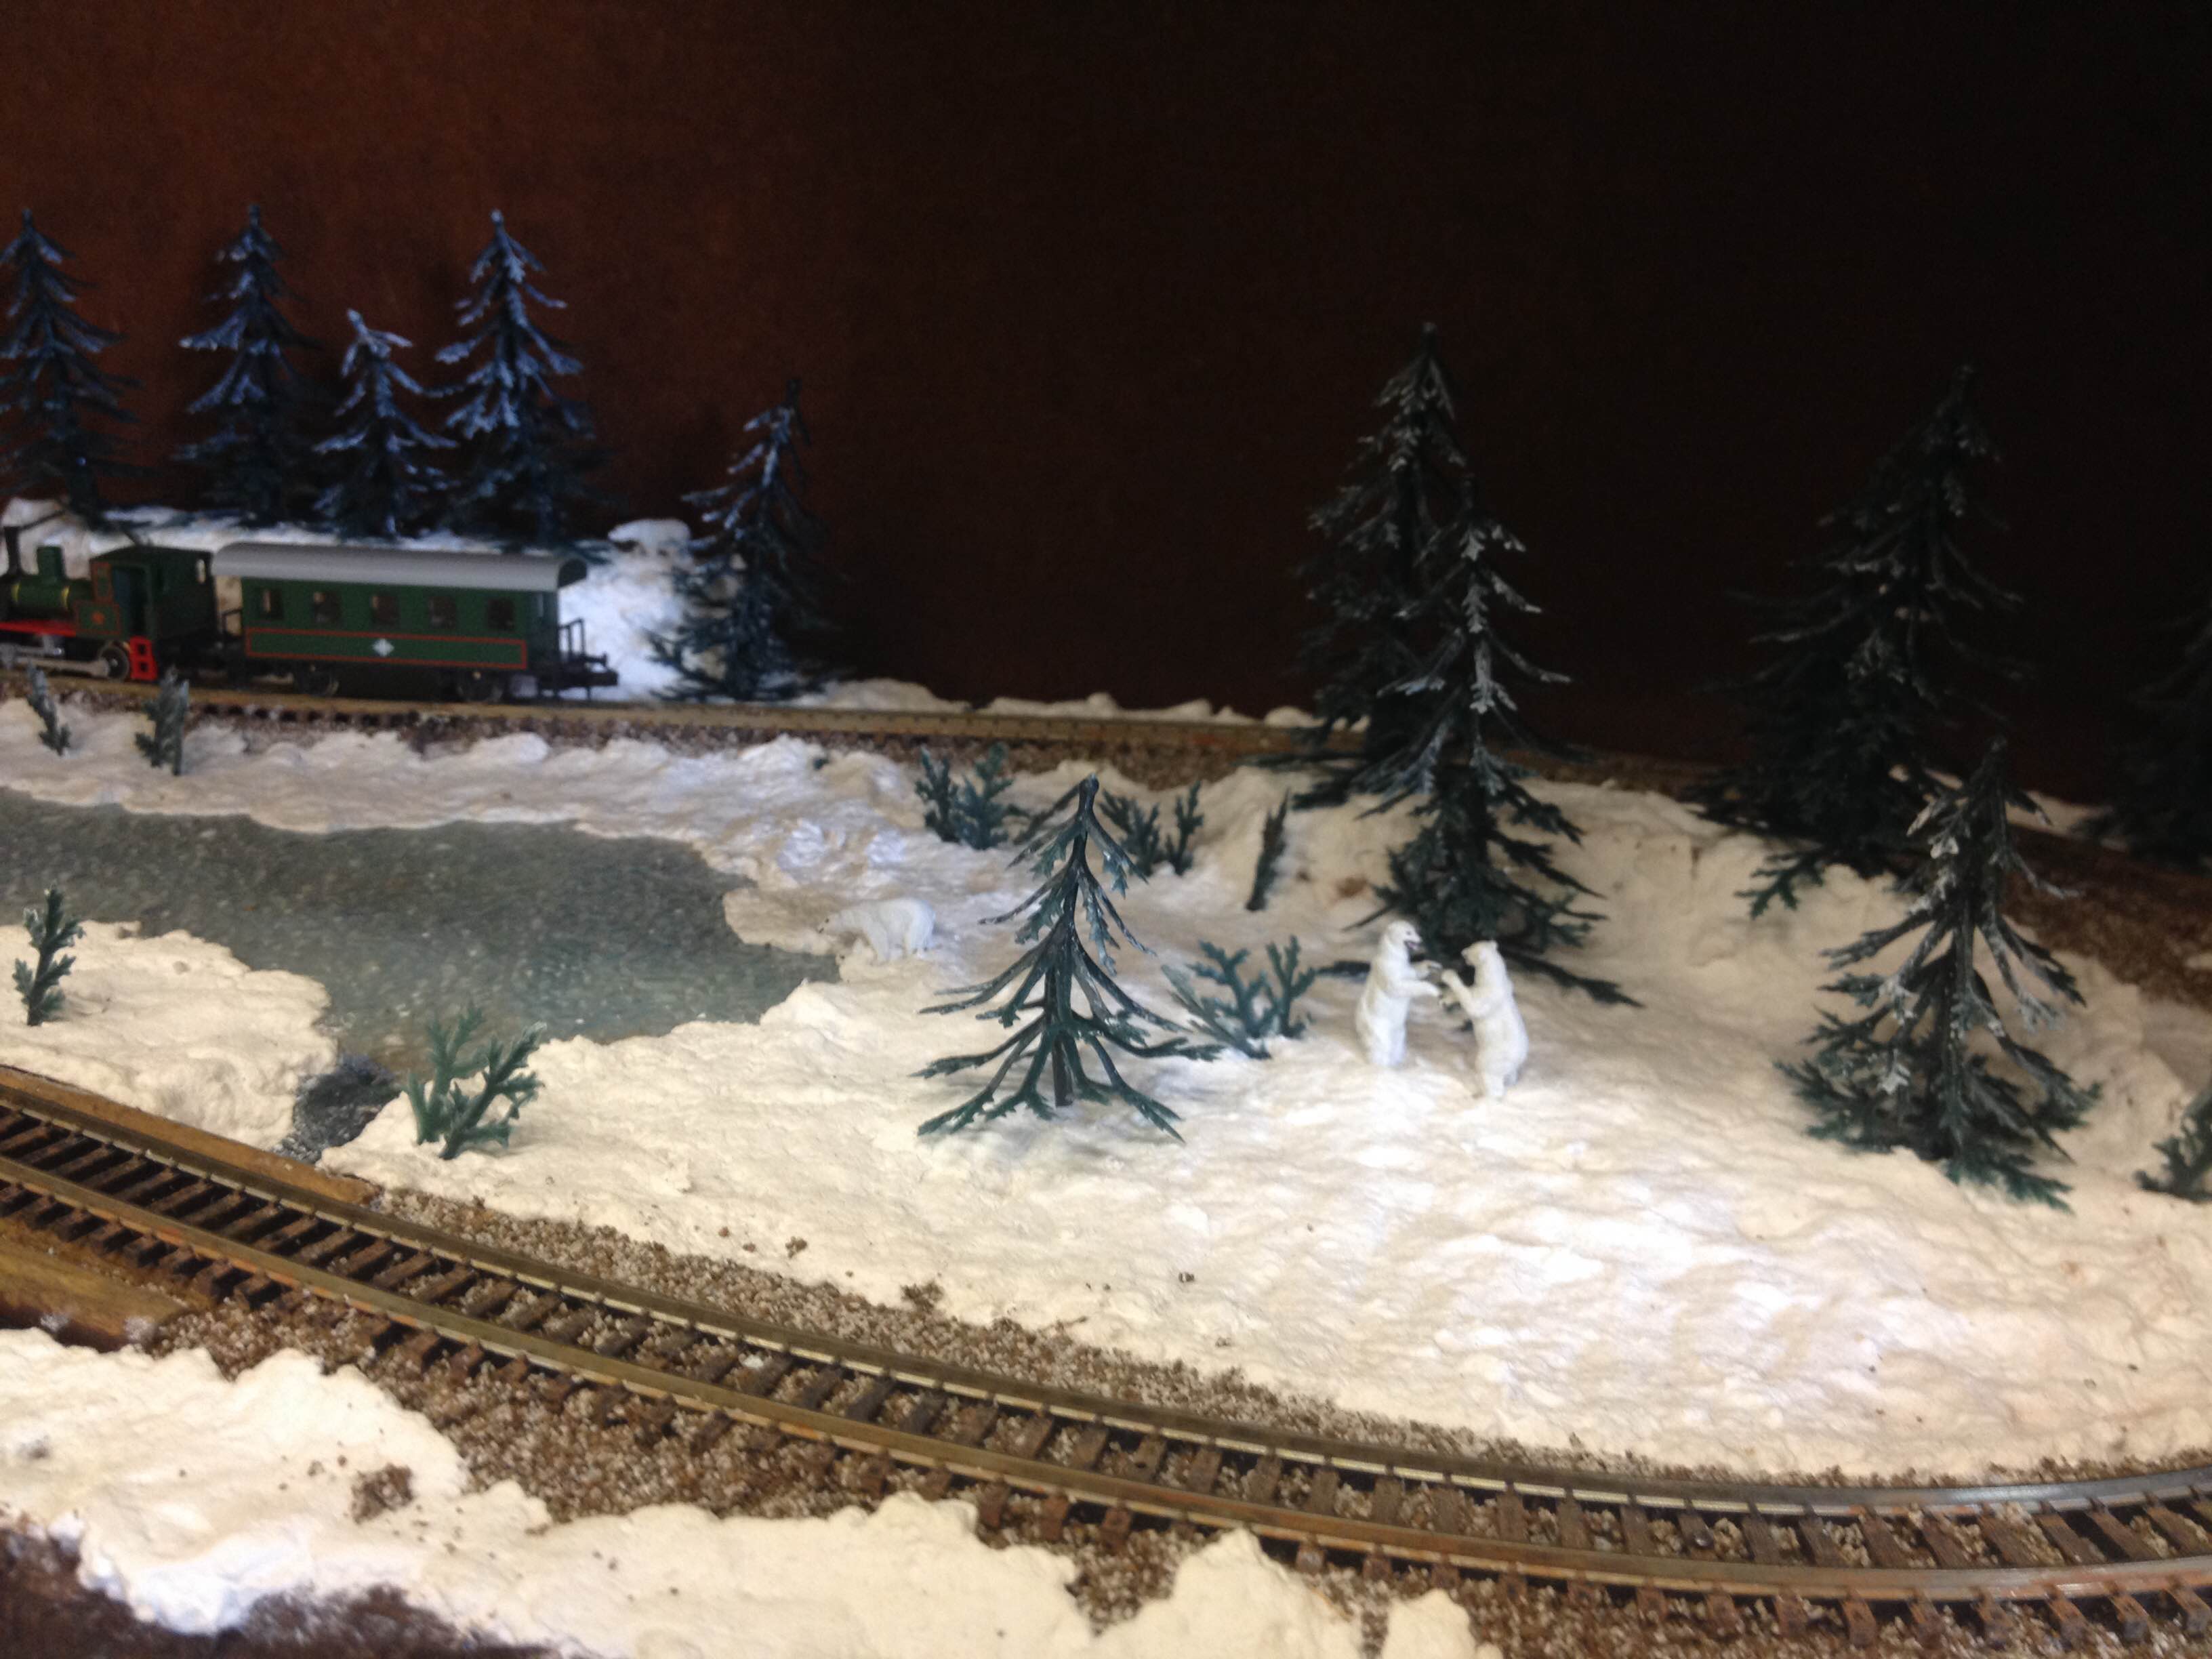
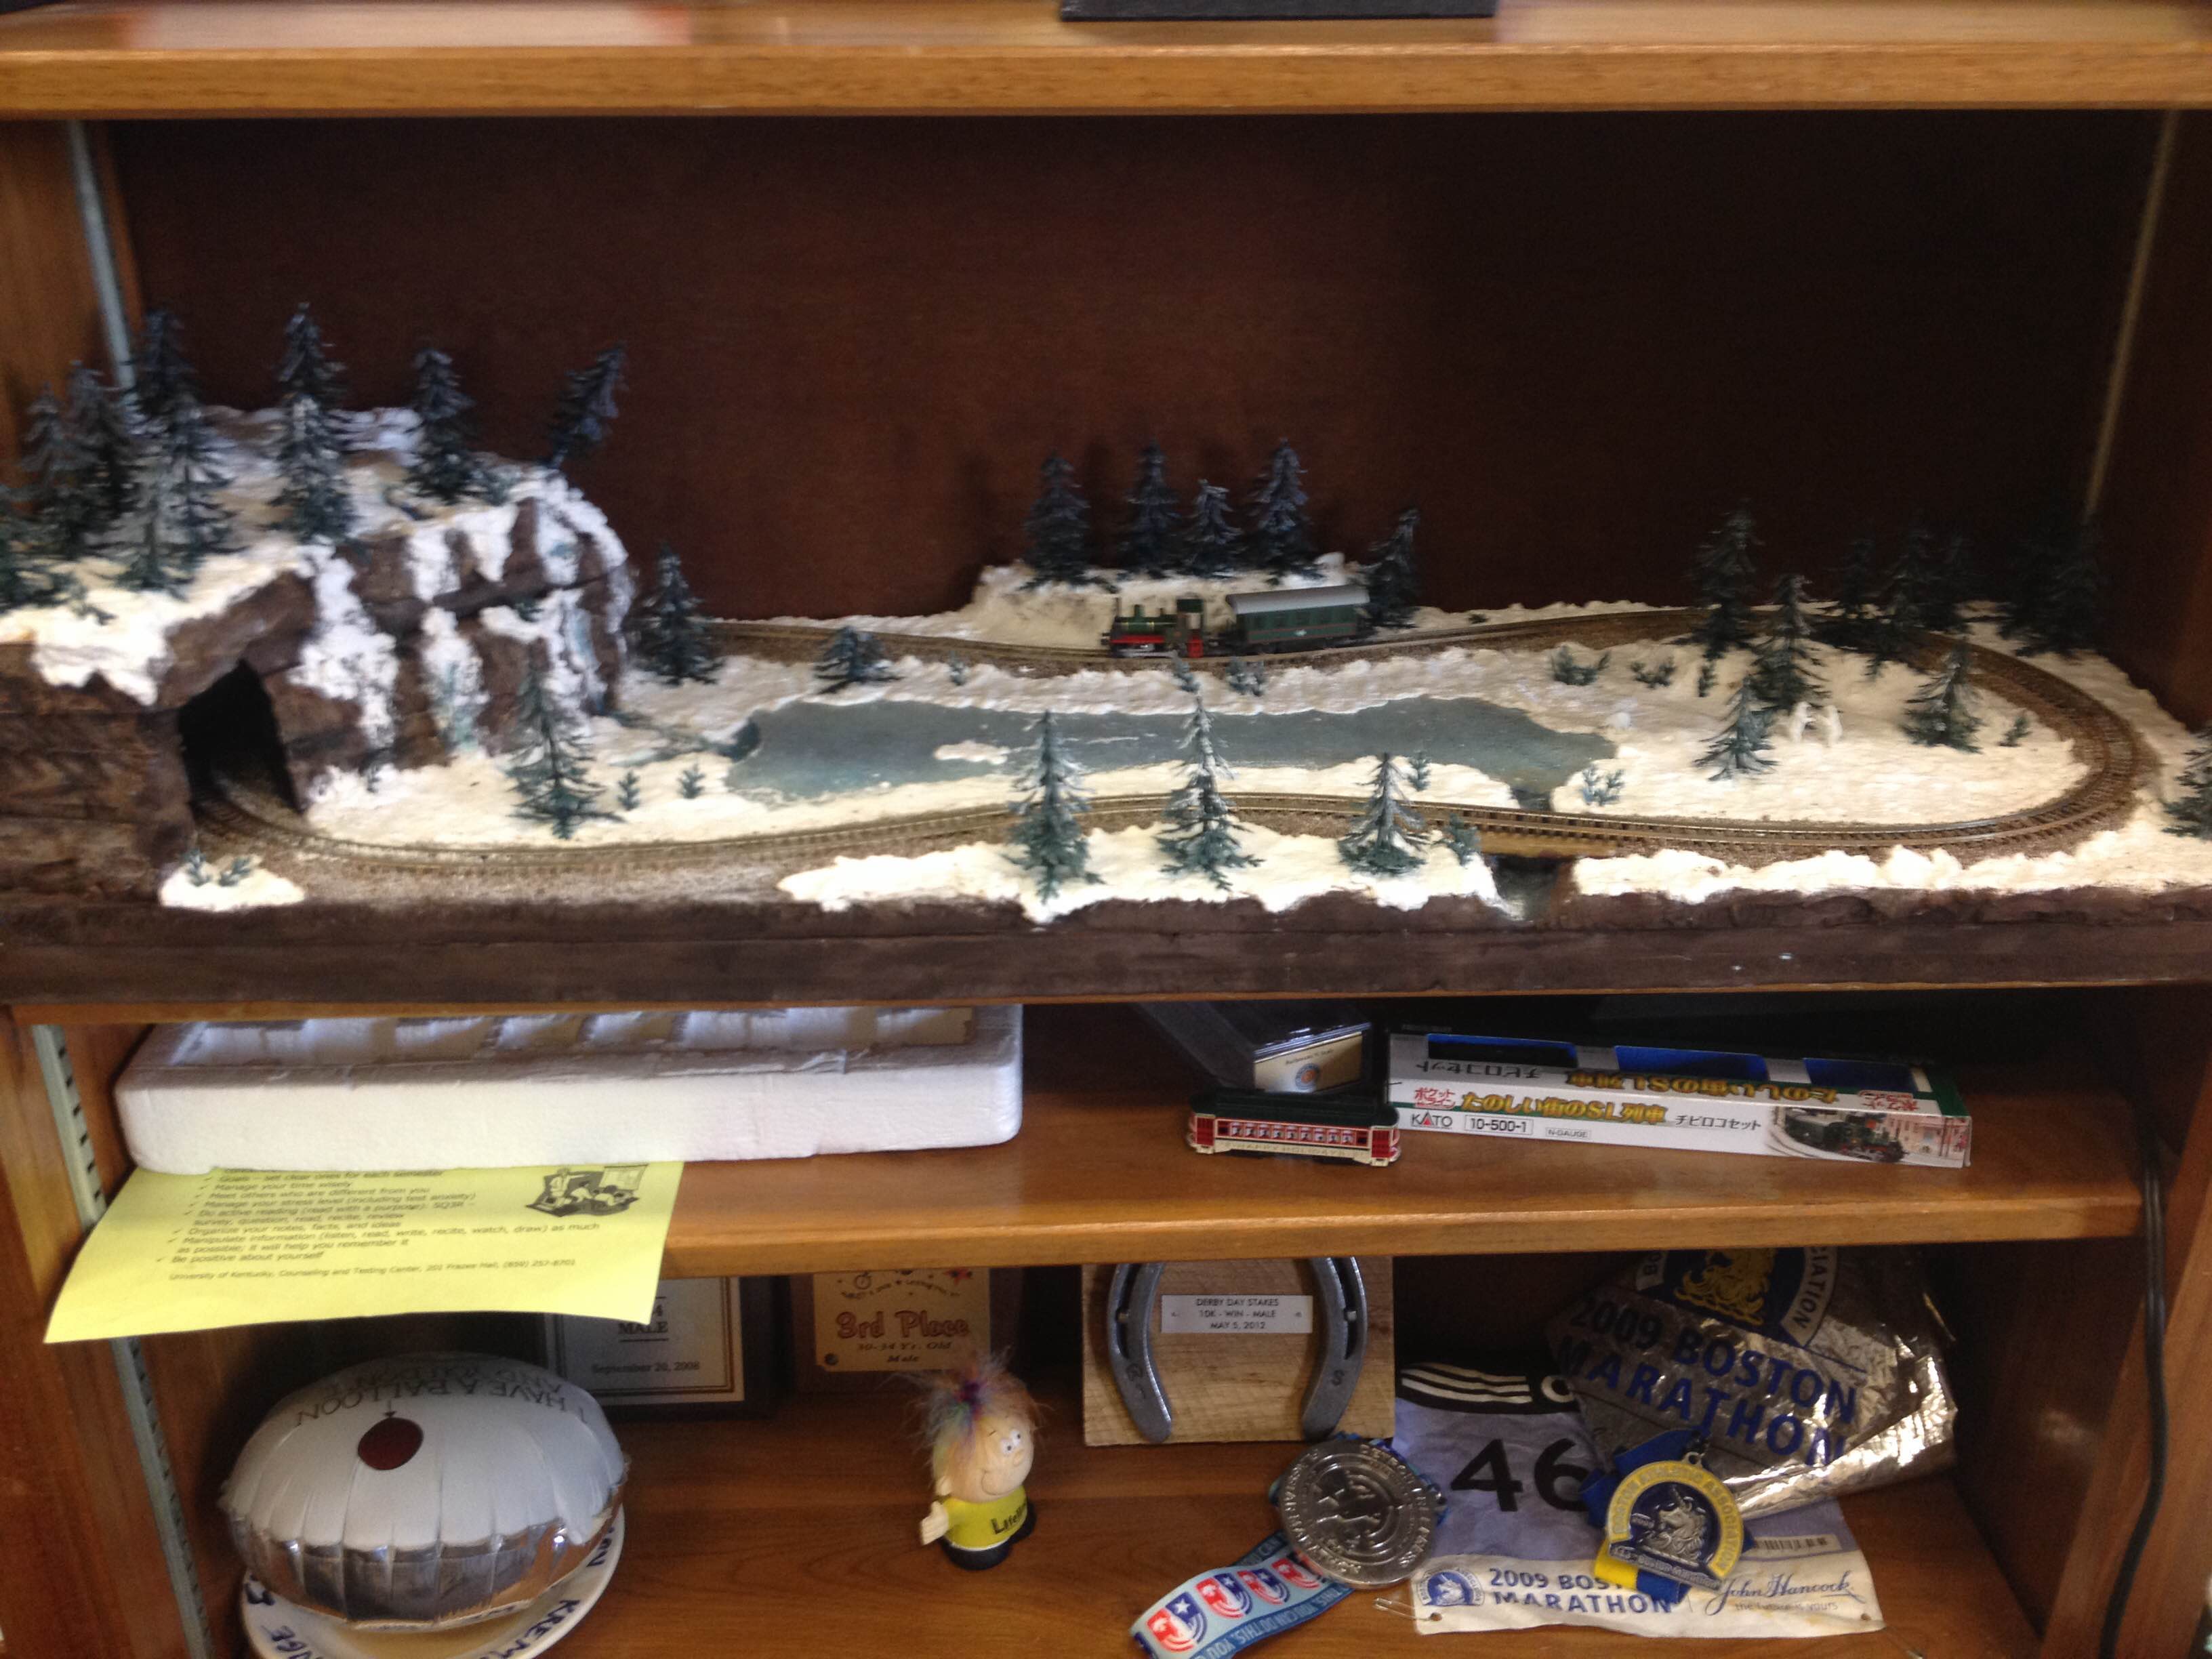
Bookcase layout by Nathaniel Hopkins
This is a layout I purpose built to live in the bookcase in my office. I built it over the winter break intending to submit it to Carl, but that was the year he died, so I never got around to sending it in until now.
The base is foam insulation board and measures about 25×80 cm. The track is a single loop of n-scale flex with a simple set of leads to a power pack on the shelf below. The scenery is probably flexible enough that HoN3 would look at home, though the polar bears would have to be cubs. I figured the basic requirements of a good layout were a tunnel and a bridge, so both are included. This was also a good set of experiments in modeling snow, water, and ice. The trees are cake decorations and the frozen lake a diffuser from a flourescent light fixture.
The turns are quite tight at about 10cm radius. I typically run a Brill trolley or the pictured Kato set of which I can only use two cars without causing derailments. I run it rarely, but it is a great attraction when kids happen to visit my office.
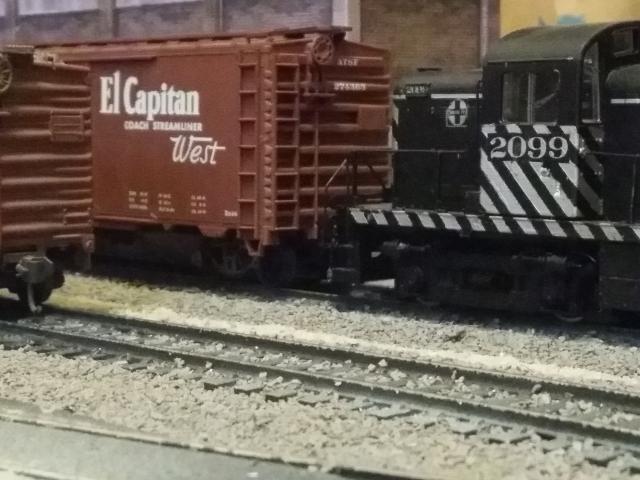
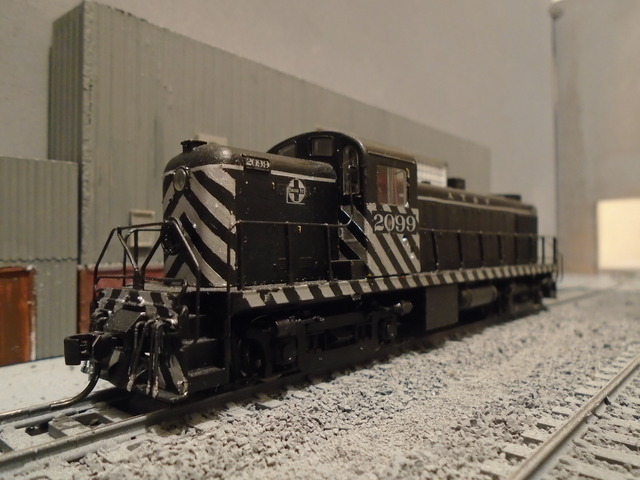
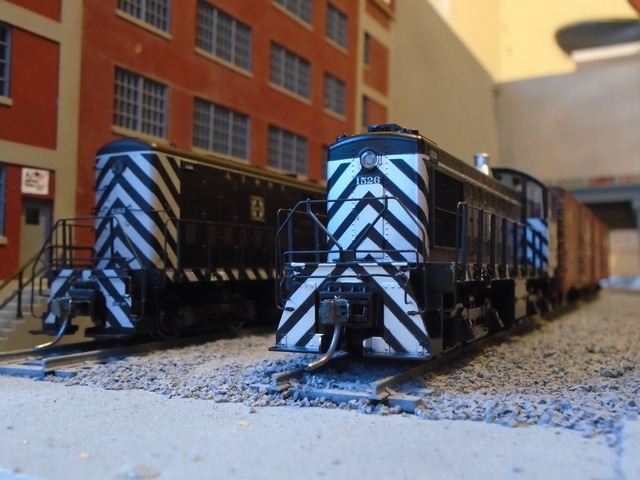
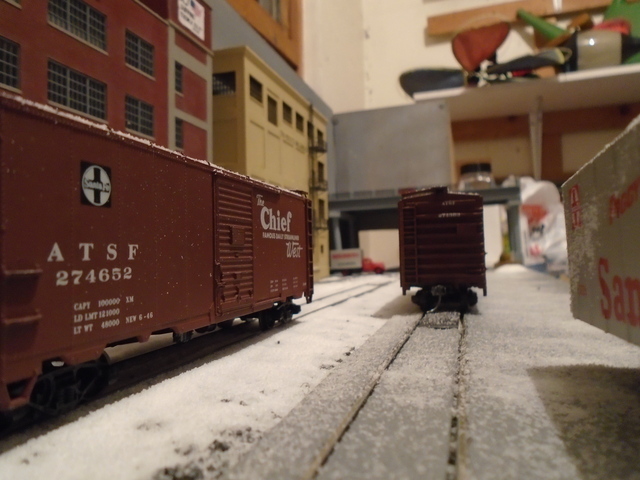
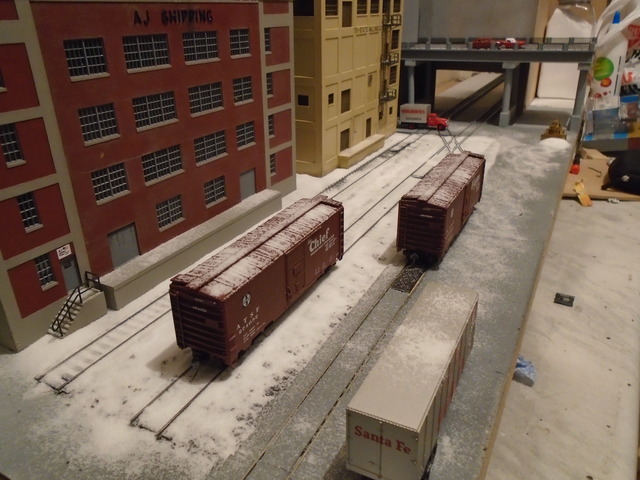
Tilley Yard South by Rob Strachan from Surrey, UK
Set in the late ‘50’s during winter, it is a 3-2-2 inglenook based in Chicago, served by the Santa Fe. Locos are in the striking zebra stripe livery and can be found pushing a variety of boxcars around (ATSF, CBQ, UP, CIM and CNW). Motive power is provided by many different locos, from short yard switchers (Alco HH1000, Alco S4) to bigger road engines (Alco RS-2, Fairbanks Morse H16-44)
The layout is 5’2” by 12”, using Peco code 100 track and Kadee uncoupling magnets. Still a work in progress at present.
To add complications to the shunting game a passenger service will pass through every 5 minutes or so, in the form of a Budd RDC, requiring right of way and needing the centre track free of any freight cars.
The layout is due to appear at 2 exhibitions and updates can be found at https://tilleyyardsouth.wordpress.com
My first pizza by David Perry from Hayward, CA
After building and not completing many model railroads, I thought I might have a chance to actually finish a layout if I started with something smaller – hence, the 2’x2′ pizza shown here. The upper loop has a radius of approximately 5″ and the lower is around 10″. The loco you see on the upper loop is a scratch built thing using a Stanton Drive. The loco on the lower loop is a Bachmann Porter mechanism with the rest scratch built. Both are radio controlled using Del Tang transmitter and receivers. Typically all one needs for a pizza is an on/off switch but my larger layout is radio controlled so I use the same thing on the pizza. I’m not overly pleased with the pizza since I tried to put too much into too small a space. Therefore, the photos were taken the same afternoon I disassembled the pizza. I’m going to start on a 2’x4′ portable layout with more scenery, fewer buildings and a couple of turnouts.
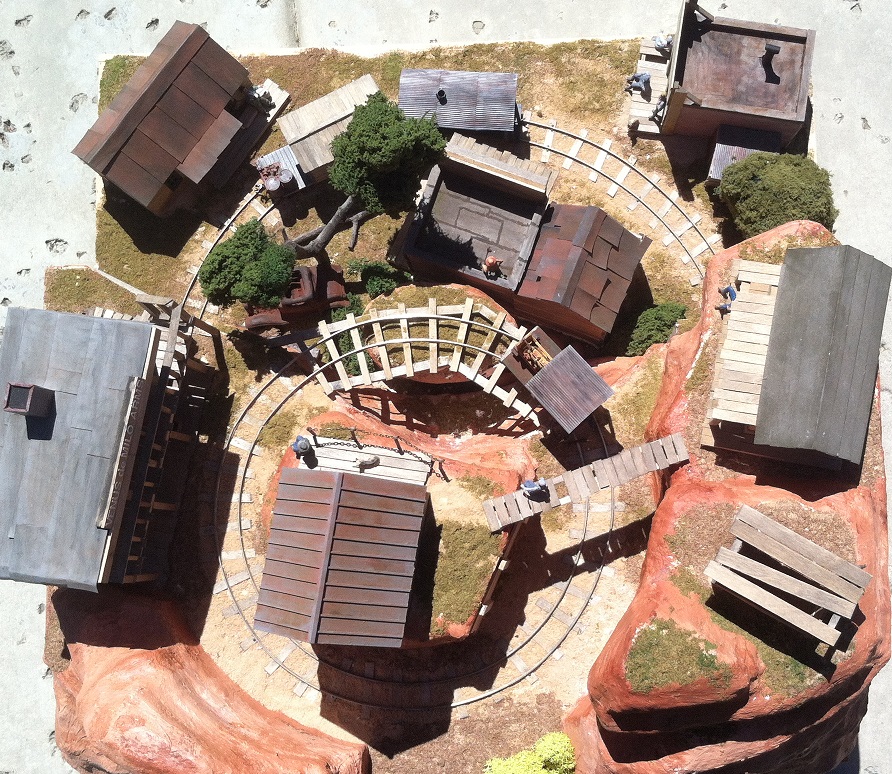
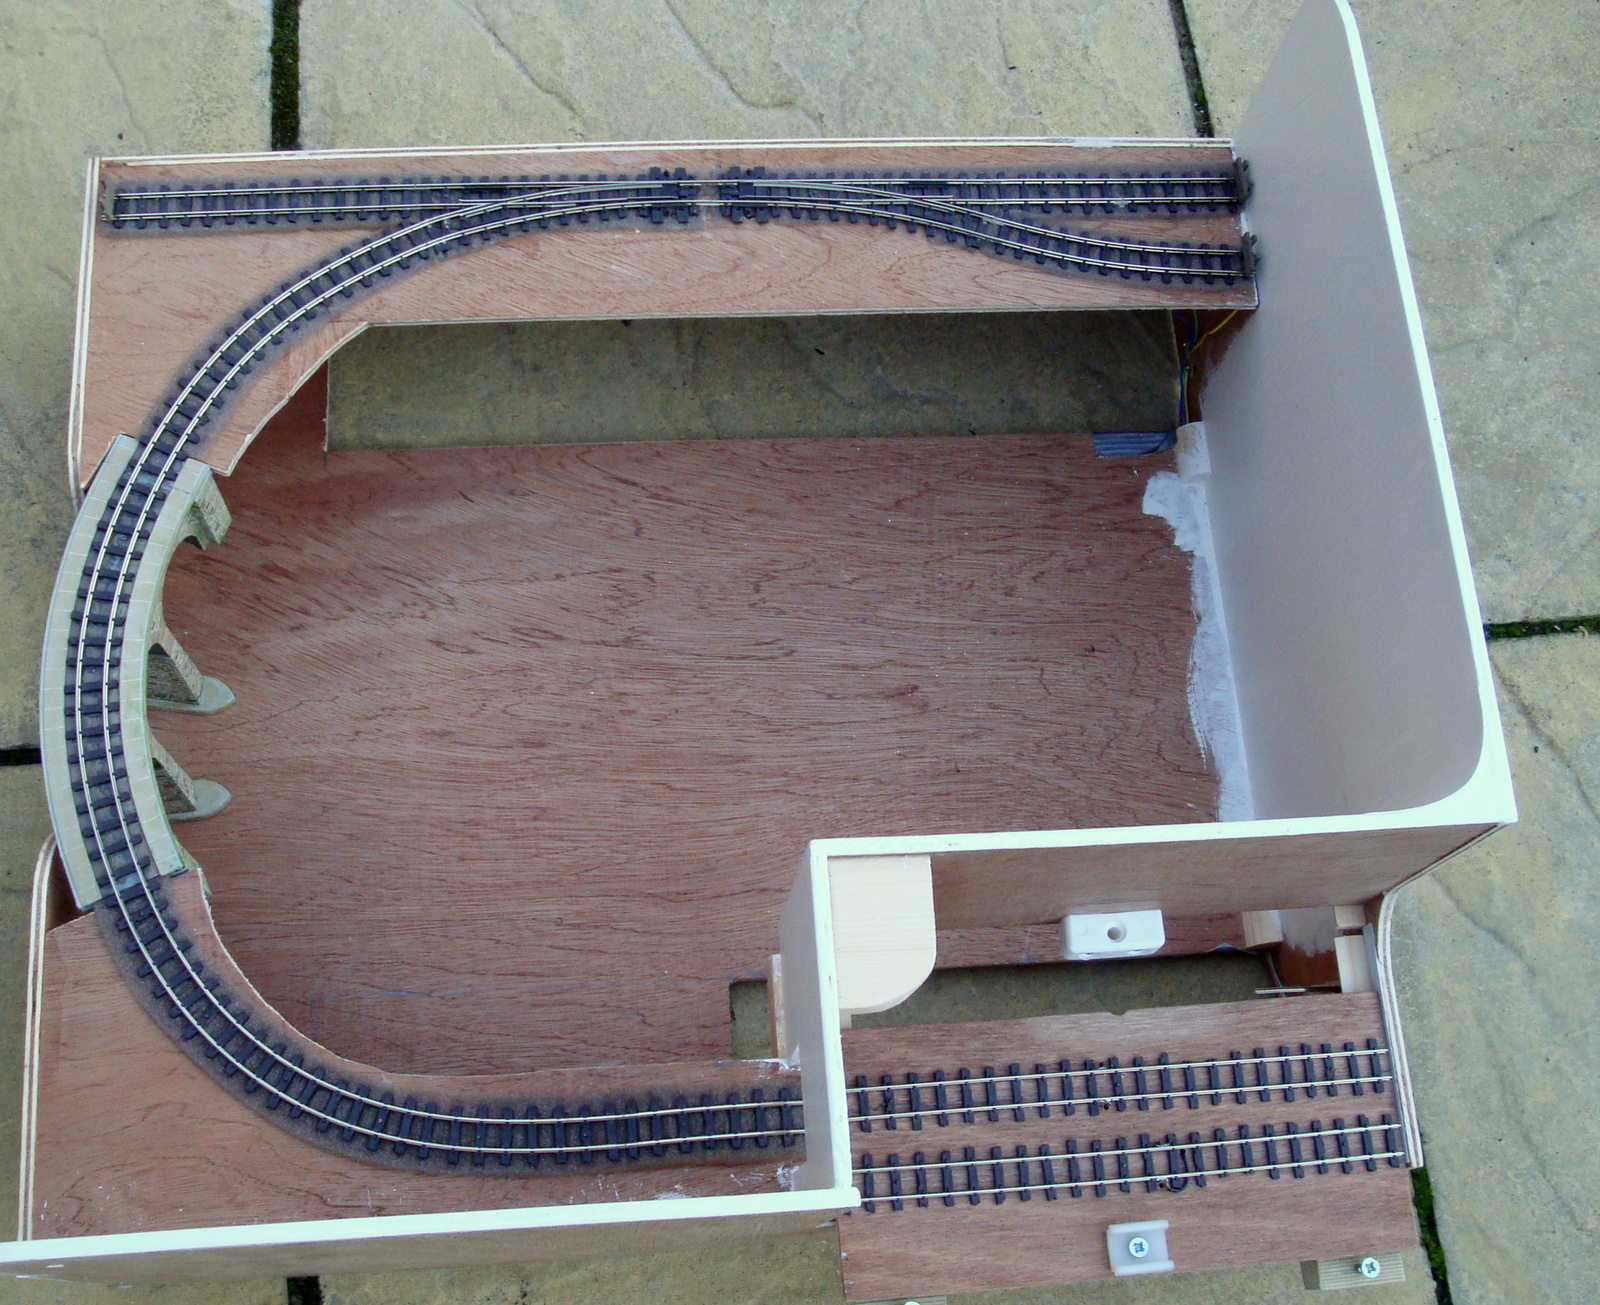
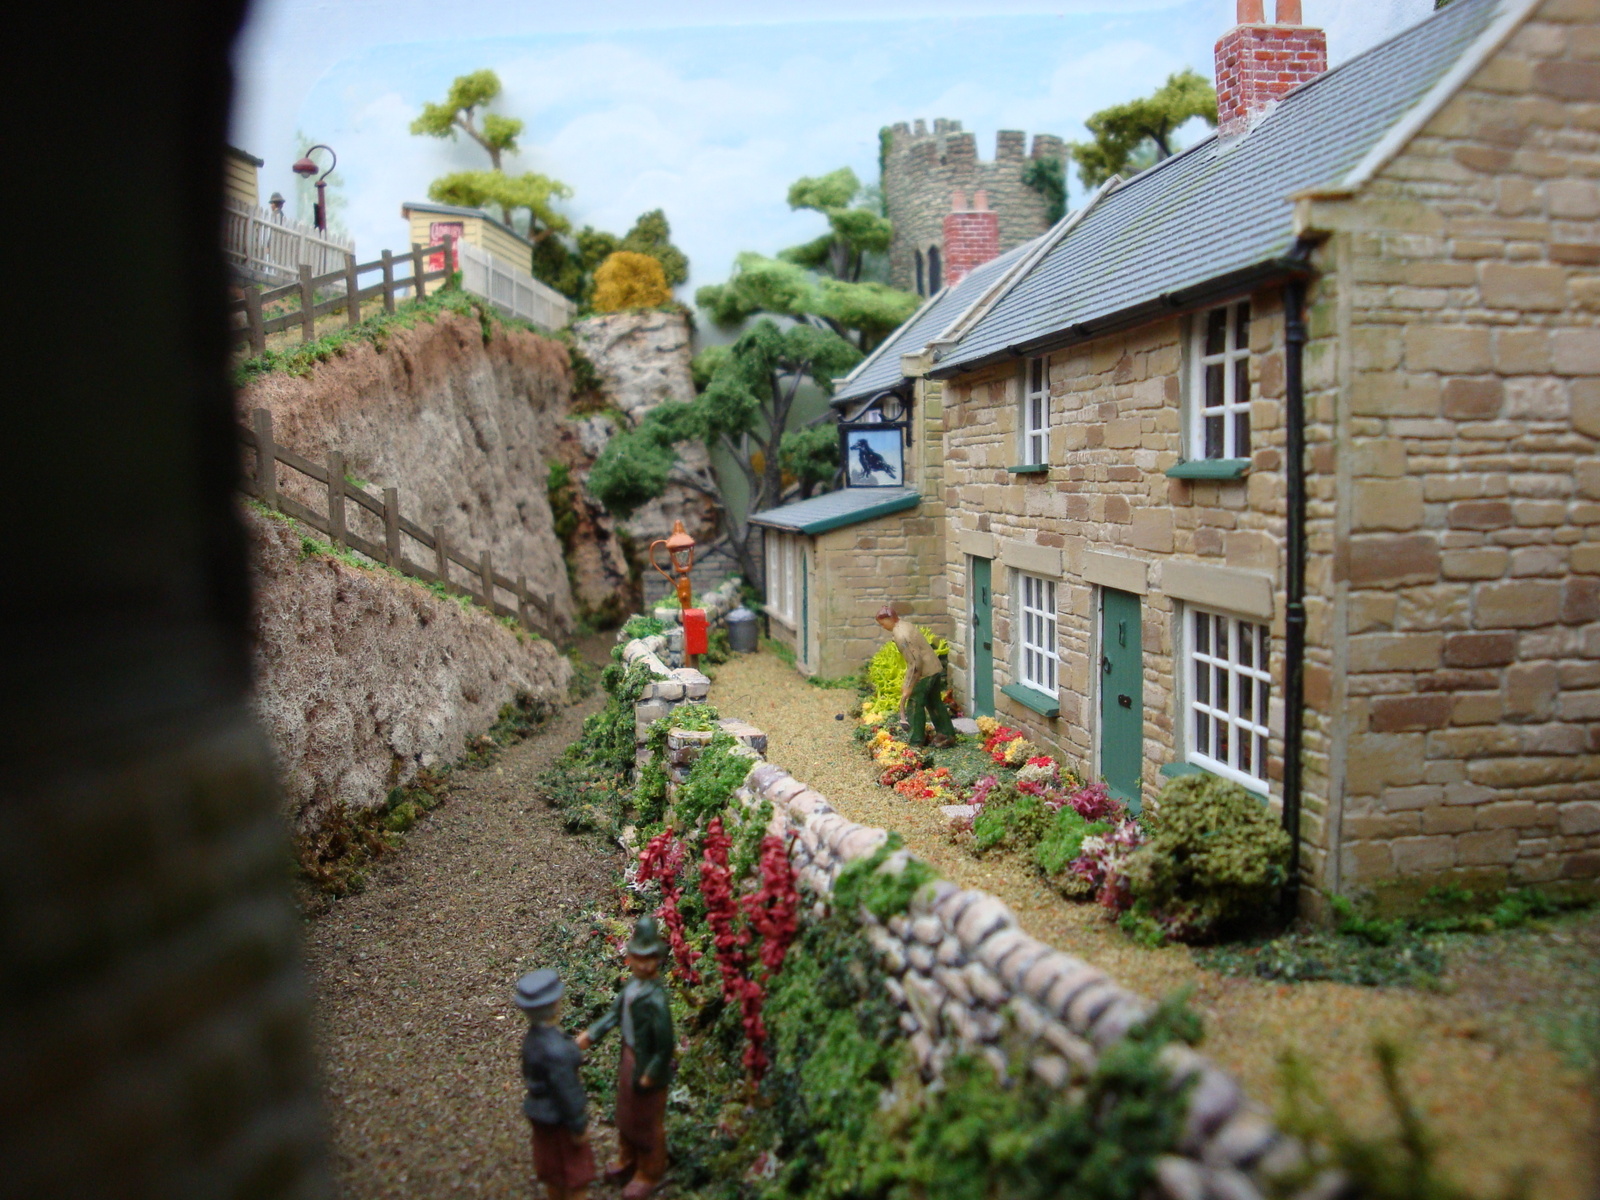
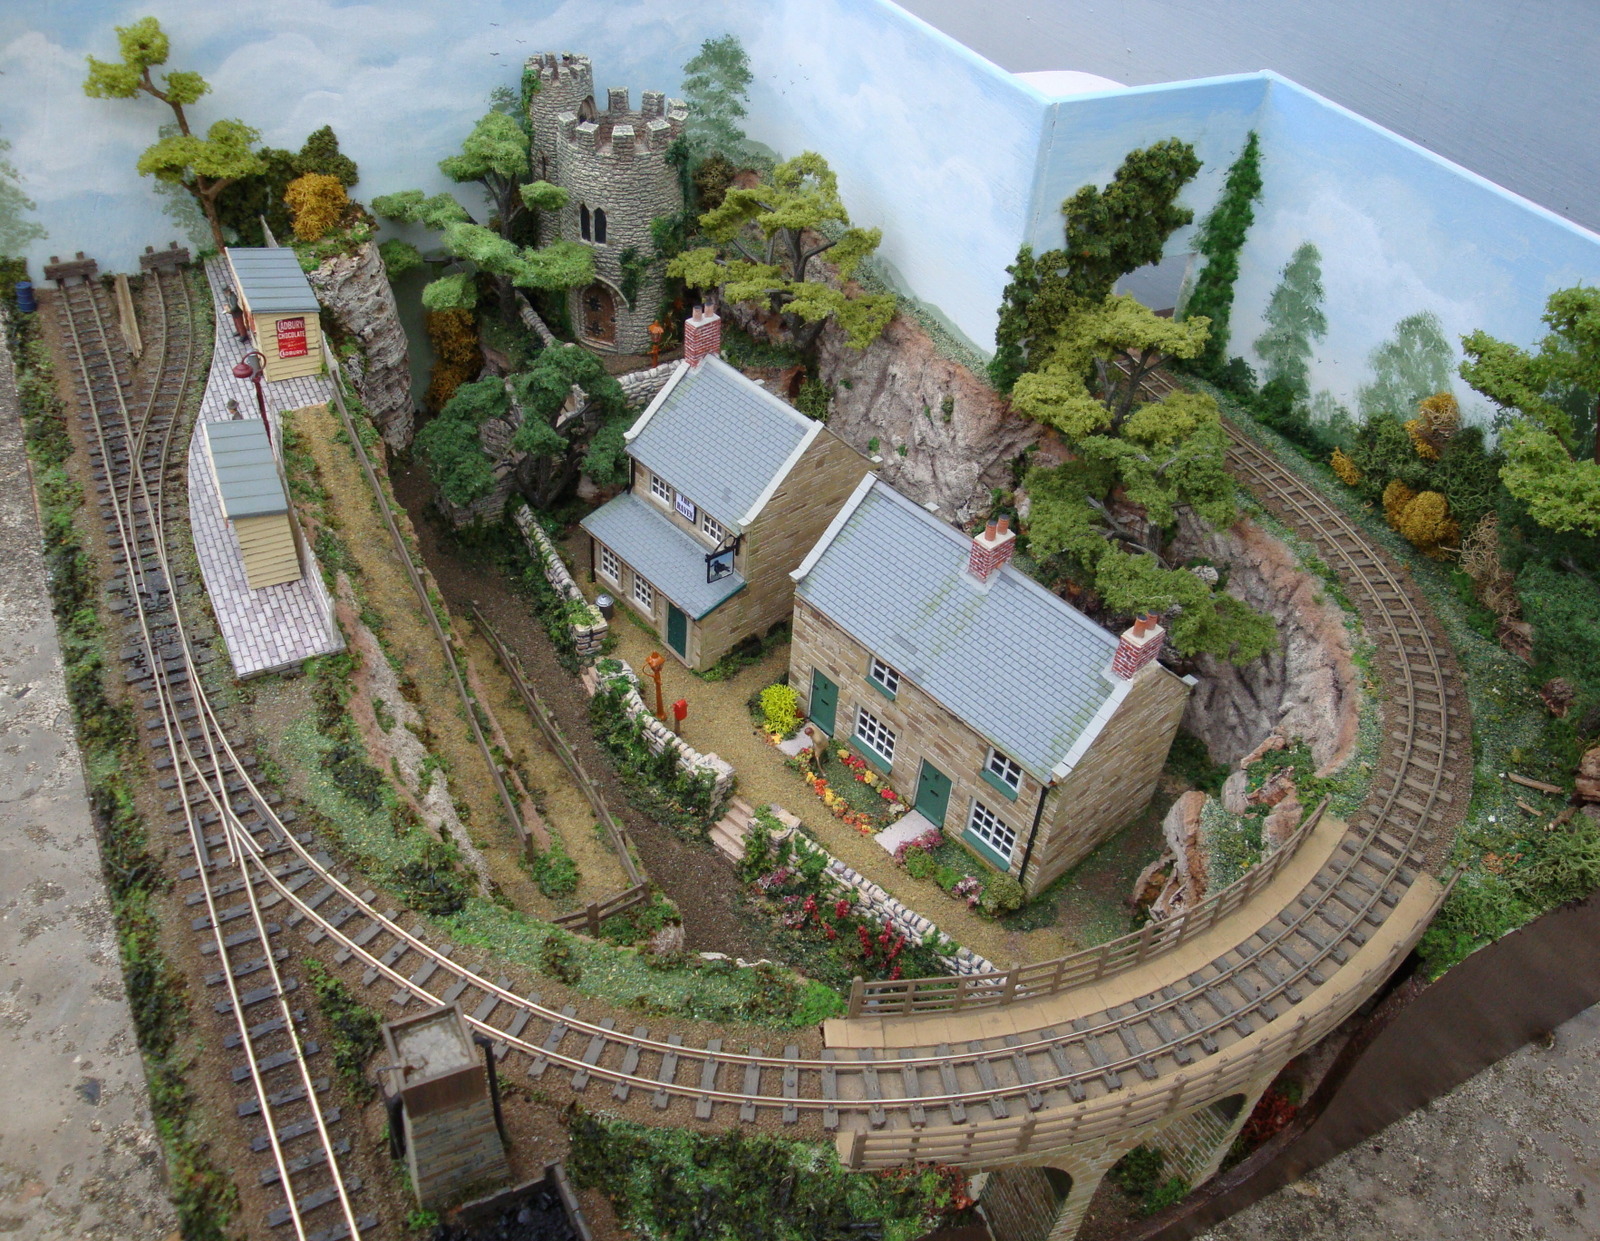
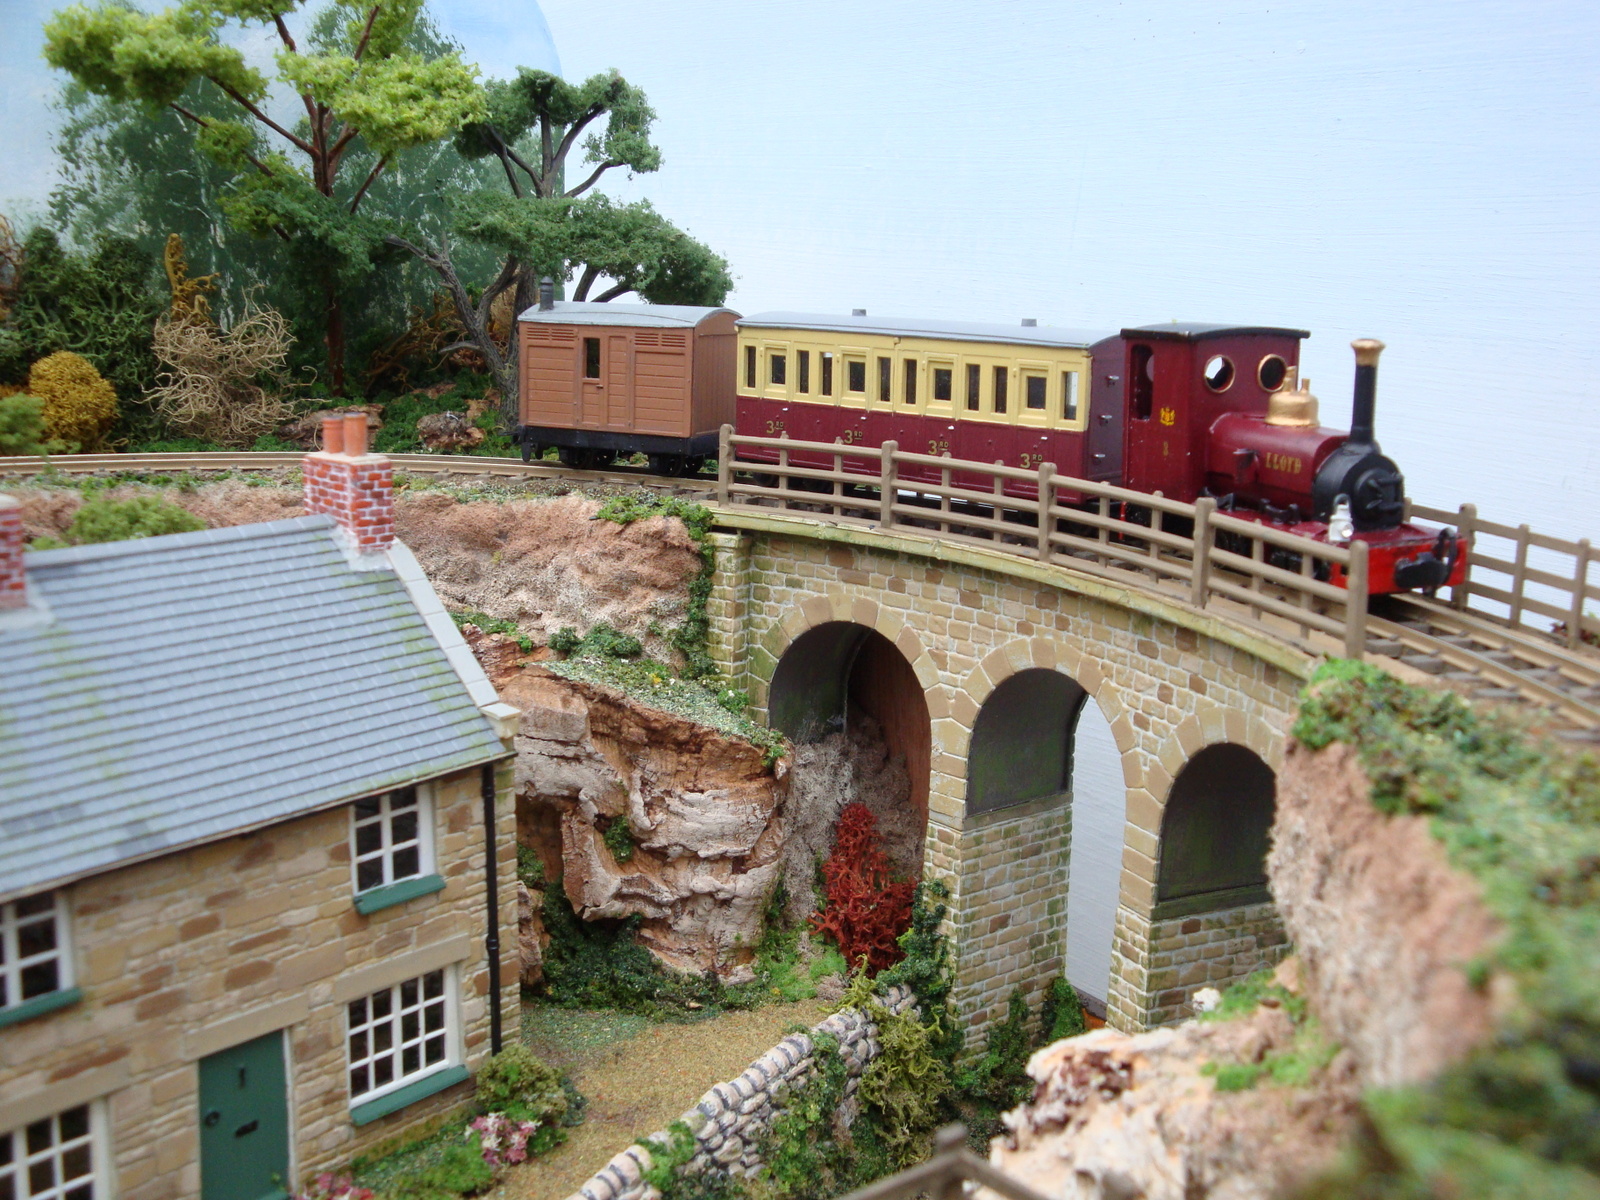
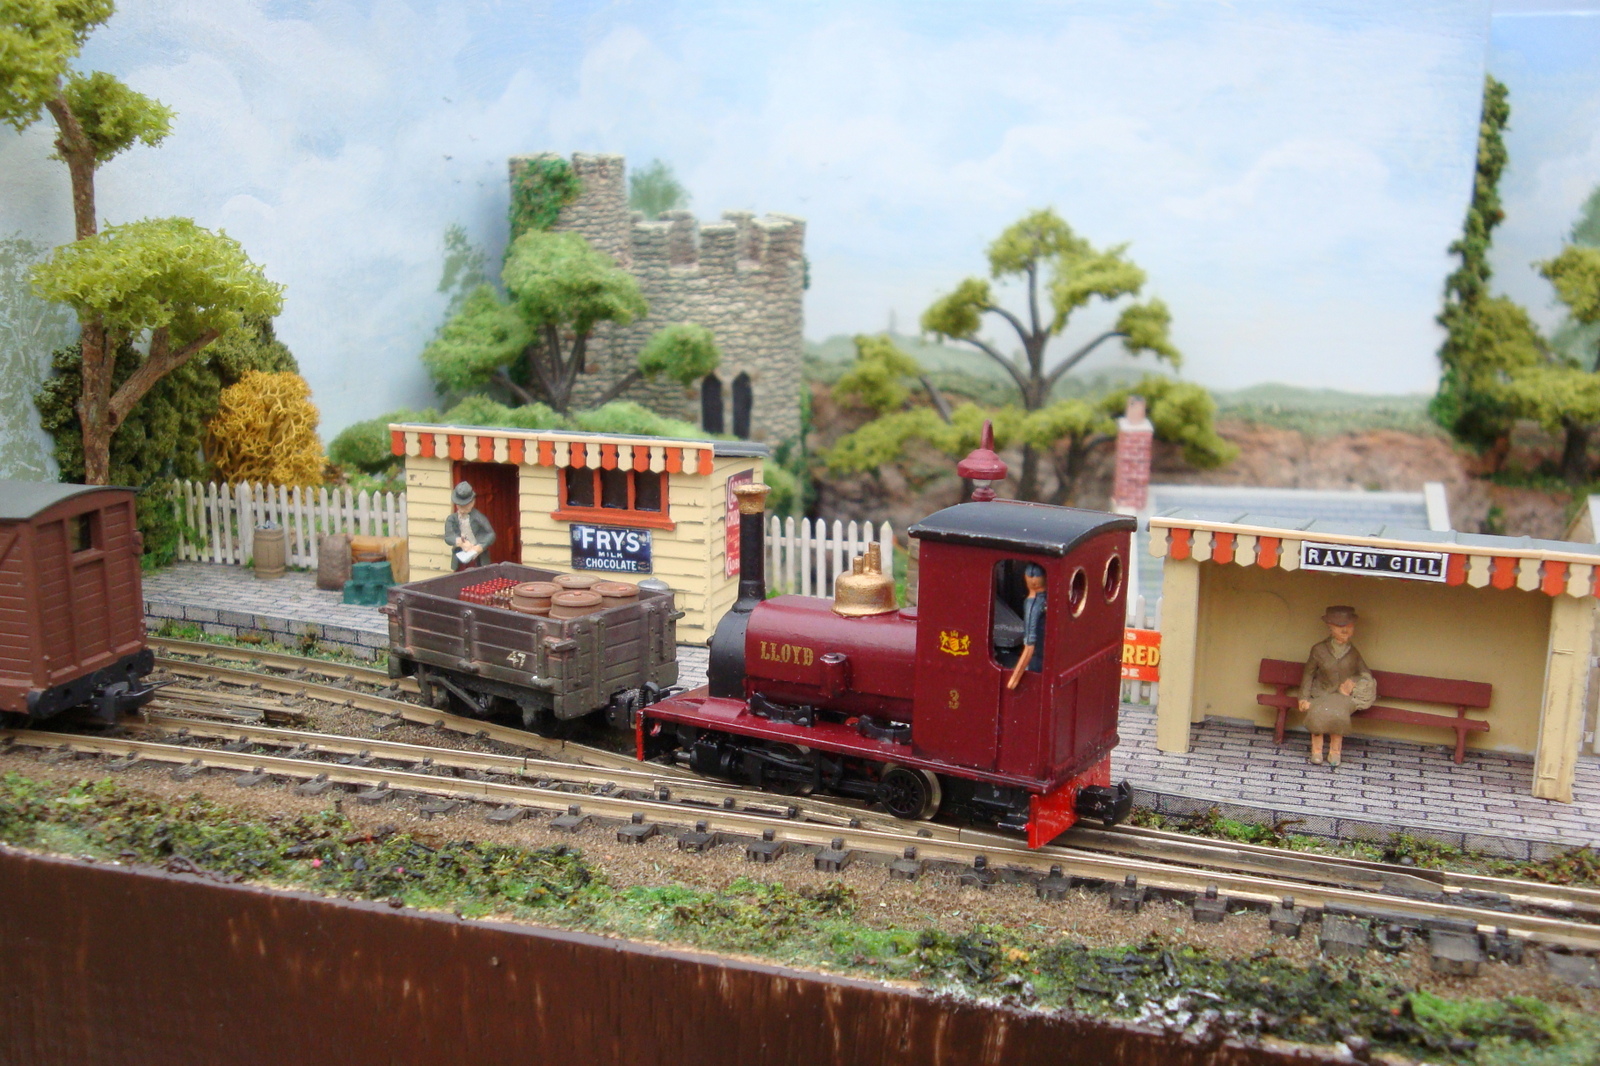
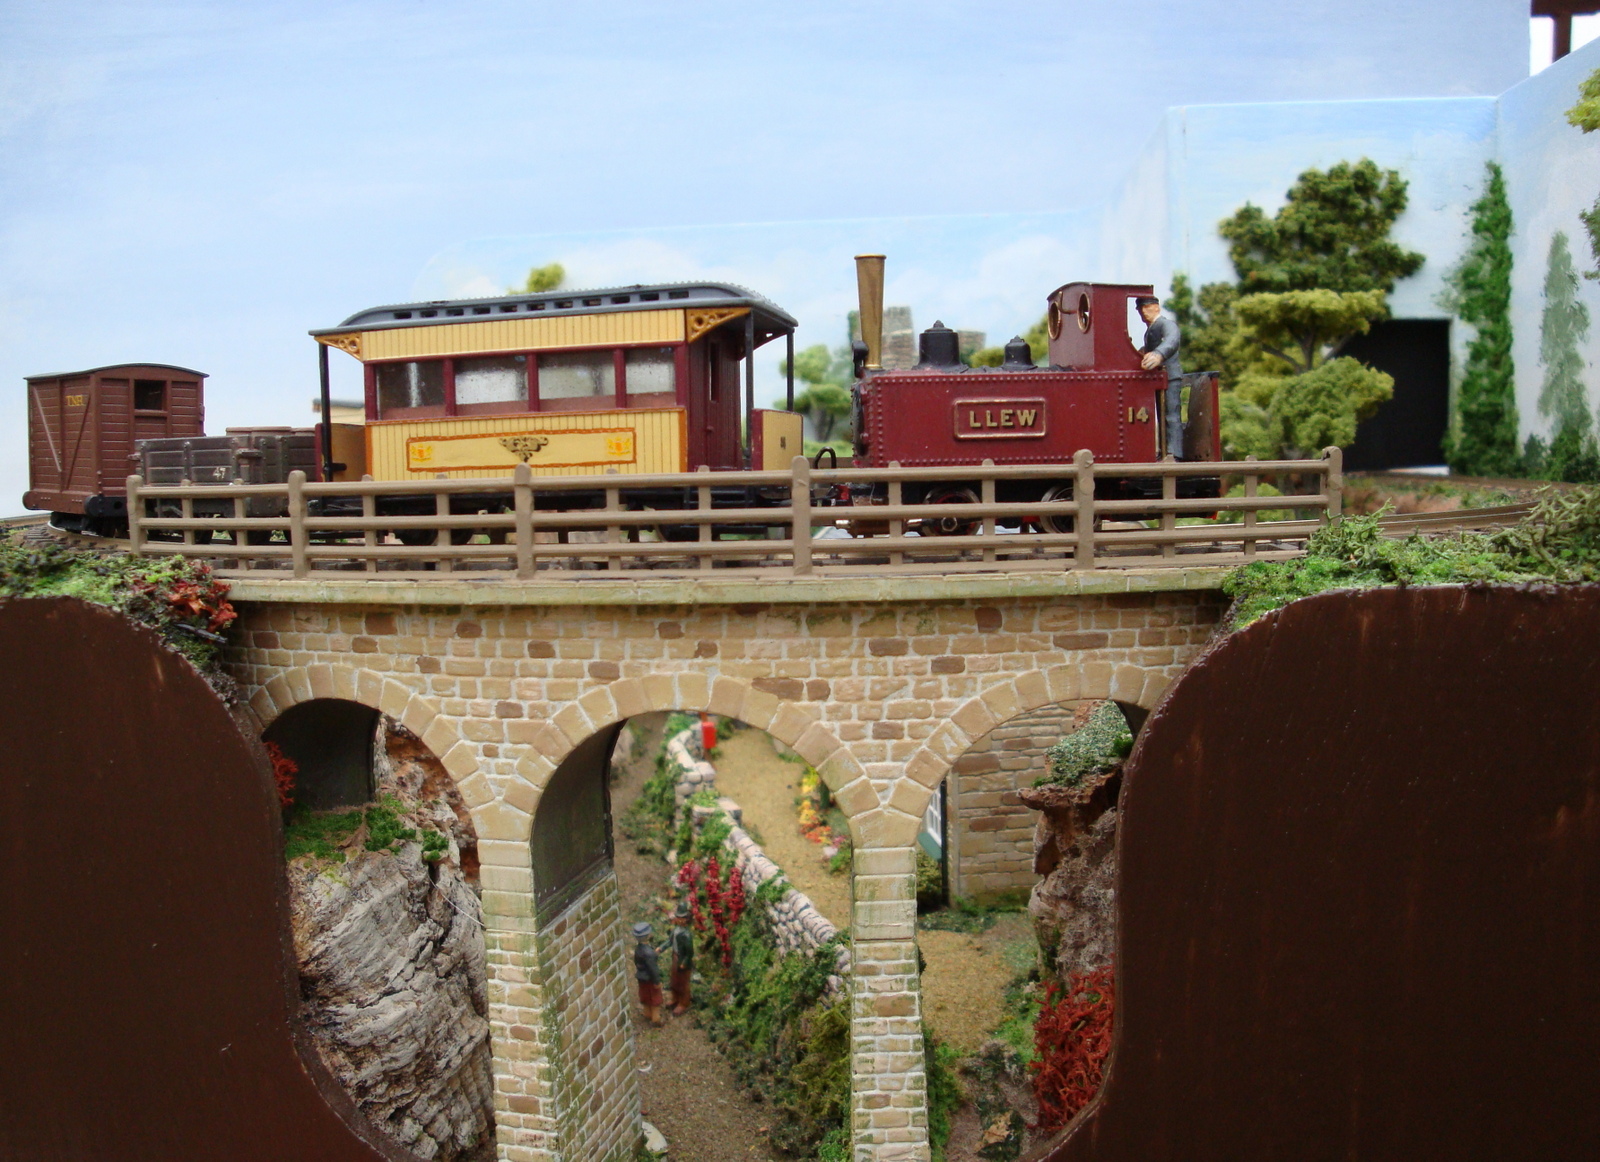
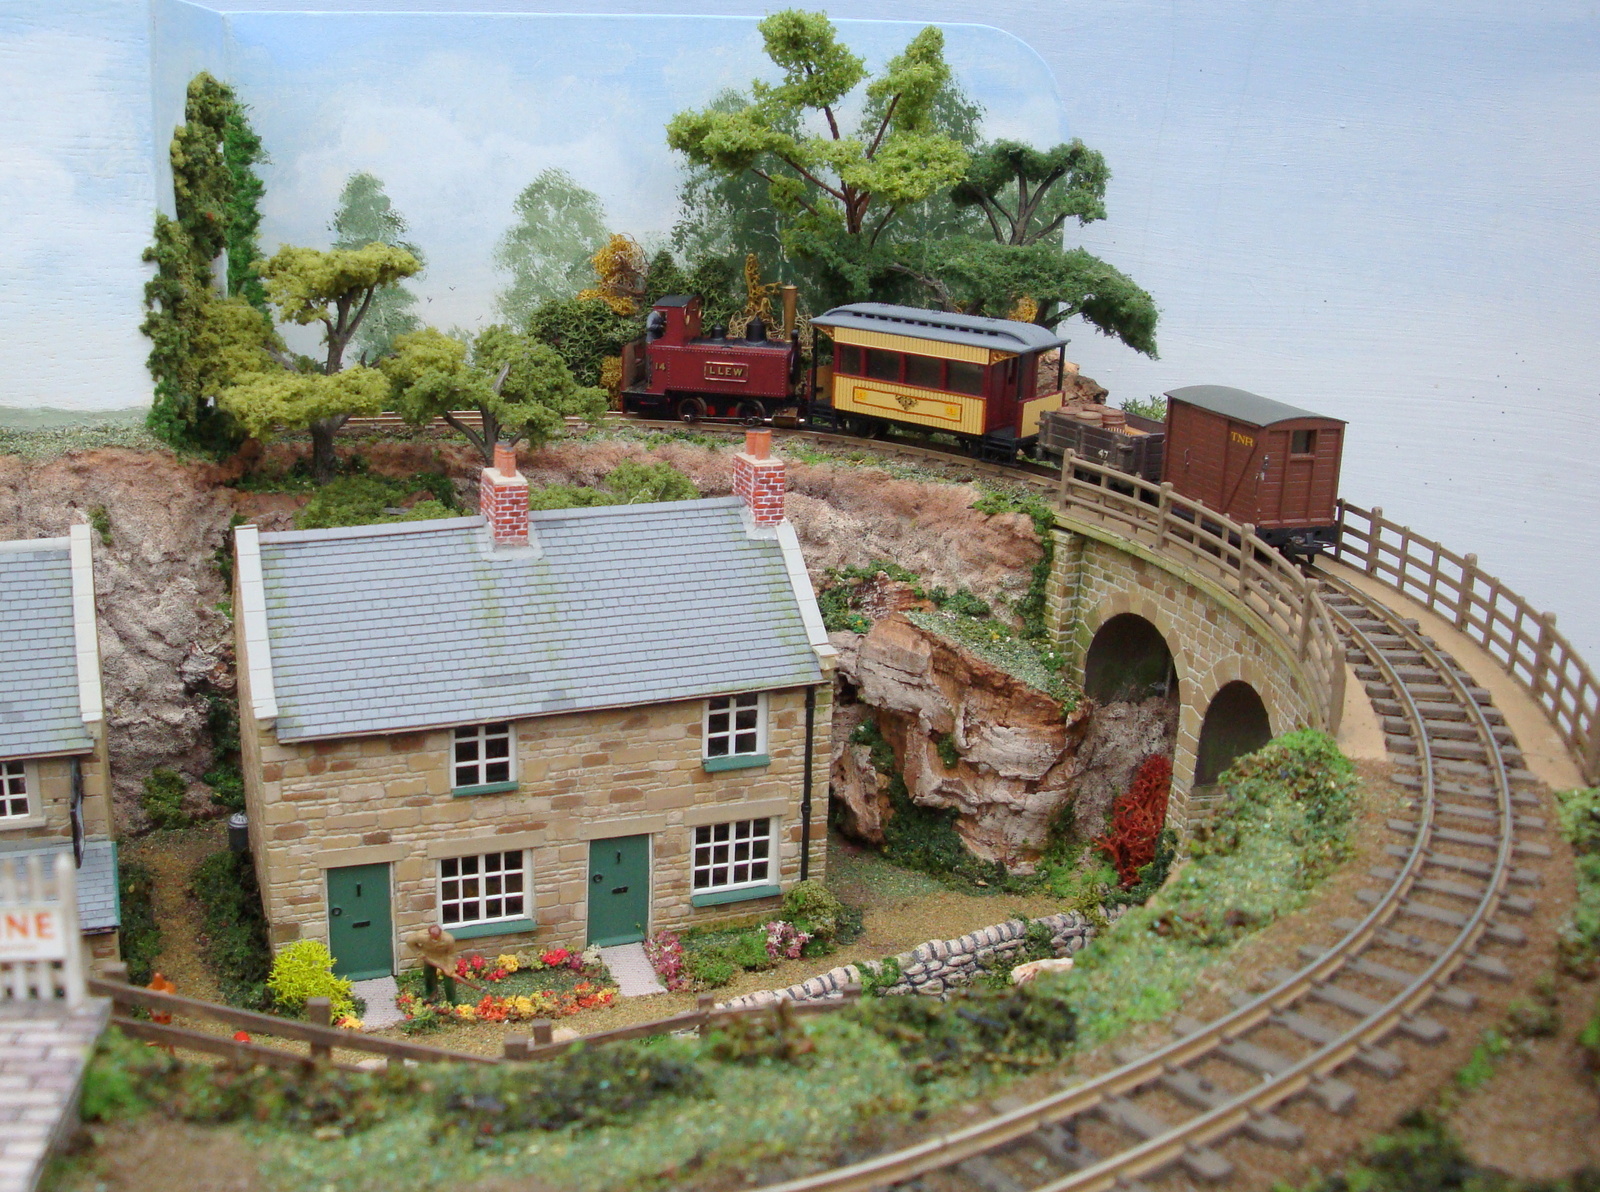
Raven Gill 009 scaleby Graham and Caroline Watling from Norwich, England
Somebody in our local narrow gauge modelling Group suggested a challenge to build a scenic micro layout in 2 square feet, and all entries would be exhibited at our first open day which was a great success.
My wife and I chose a larger version of “Grumblewick Coombe” an A3 size layout shown in the back-pages of the Scrapbook dated February 2003. The new layout is 19” x 17” (482mm x 432mm) and within this space is a two-track sliding traverser all made out of 6mm ply-wood.
An old Kibri N scale three arch viaduct was used, and the rock faces were made up of cork bark and Hydrofibre paste all dry-brushed with acrylics when dry.
The scene is somewhere in the North of England and a resin “folly” tower gives the layout a lot of character which is visited daily by ravens. The pub, cottages, goods office and waiting shelter are all scratch-built using Wills embossed plastic sheets. The animals, birds and figures are mostly “Langley” white metal products.
The turnouts are operated by wire in tube.
My wife is gifted with making natural scenic’s, so she has helped with the rock faces and made all the trees (using Woodland Scenics Sprues) and the vegetation and flowers.
A full write-up with photos can be found on our Group website: nsngm.org.uk
The post Page 119: June 2016 appeared first on Carendt.com.
Page 118: June 2015 4 Jun 2015 5:20 AM (10 years ago)
And here is another Small Layout Scrapbook update for you to enjoy. Have fun reading!
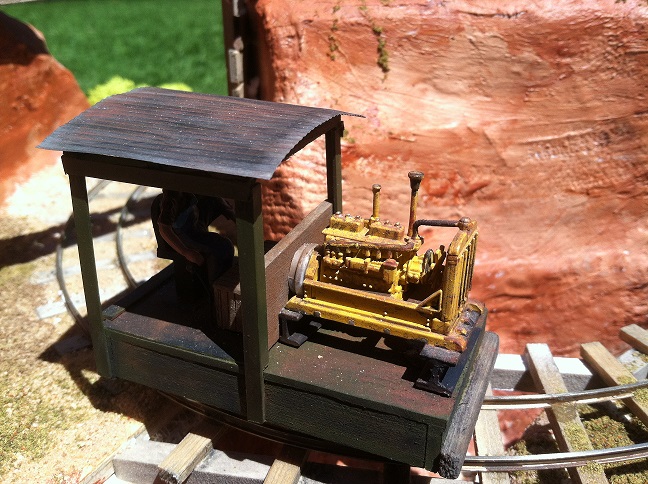
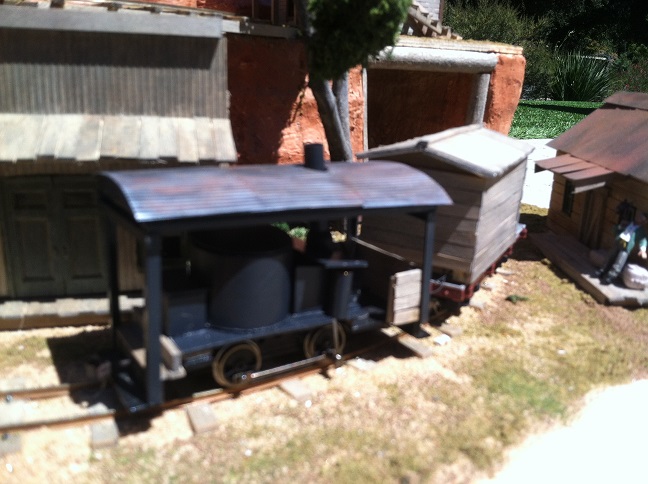
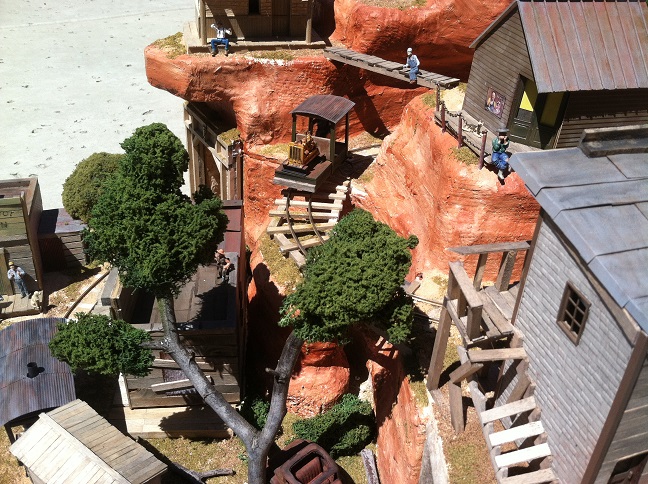
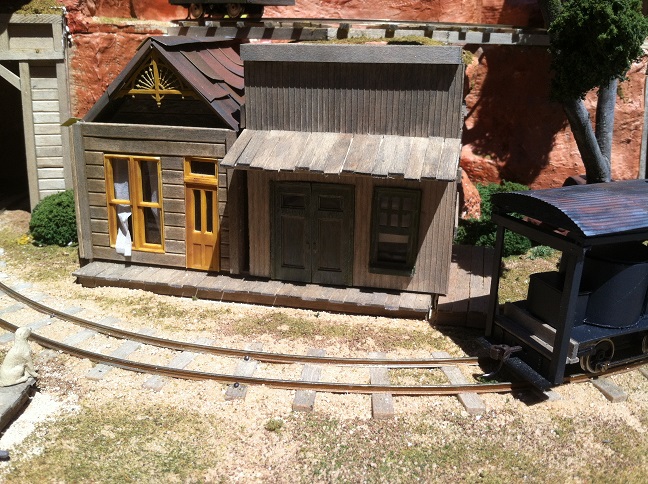
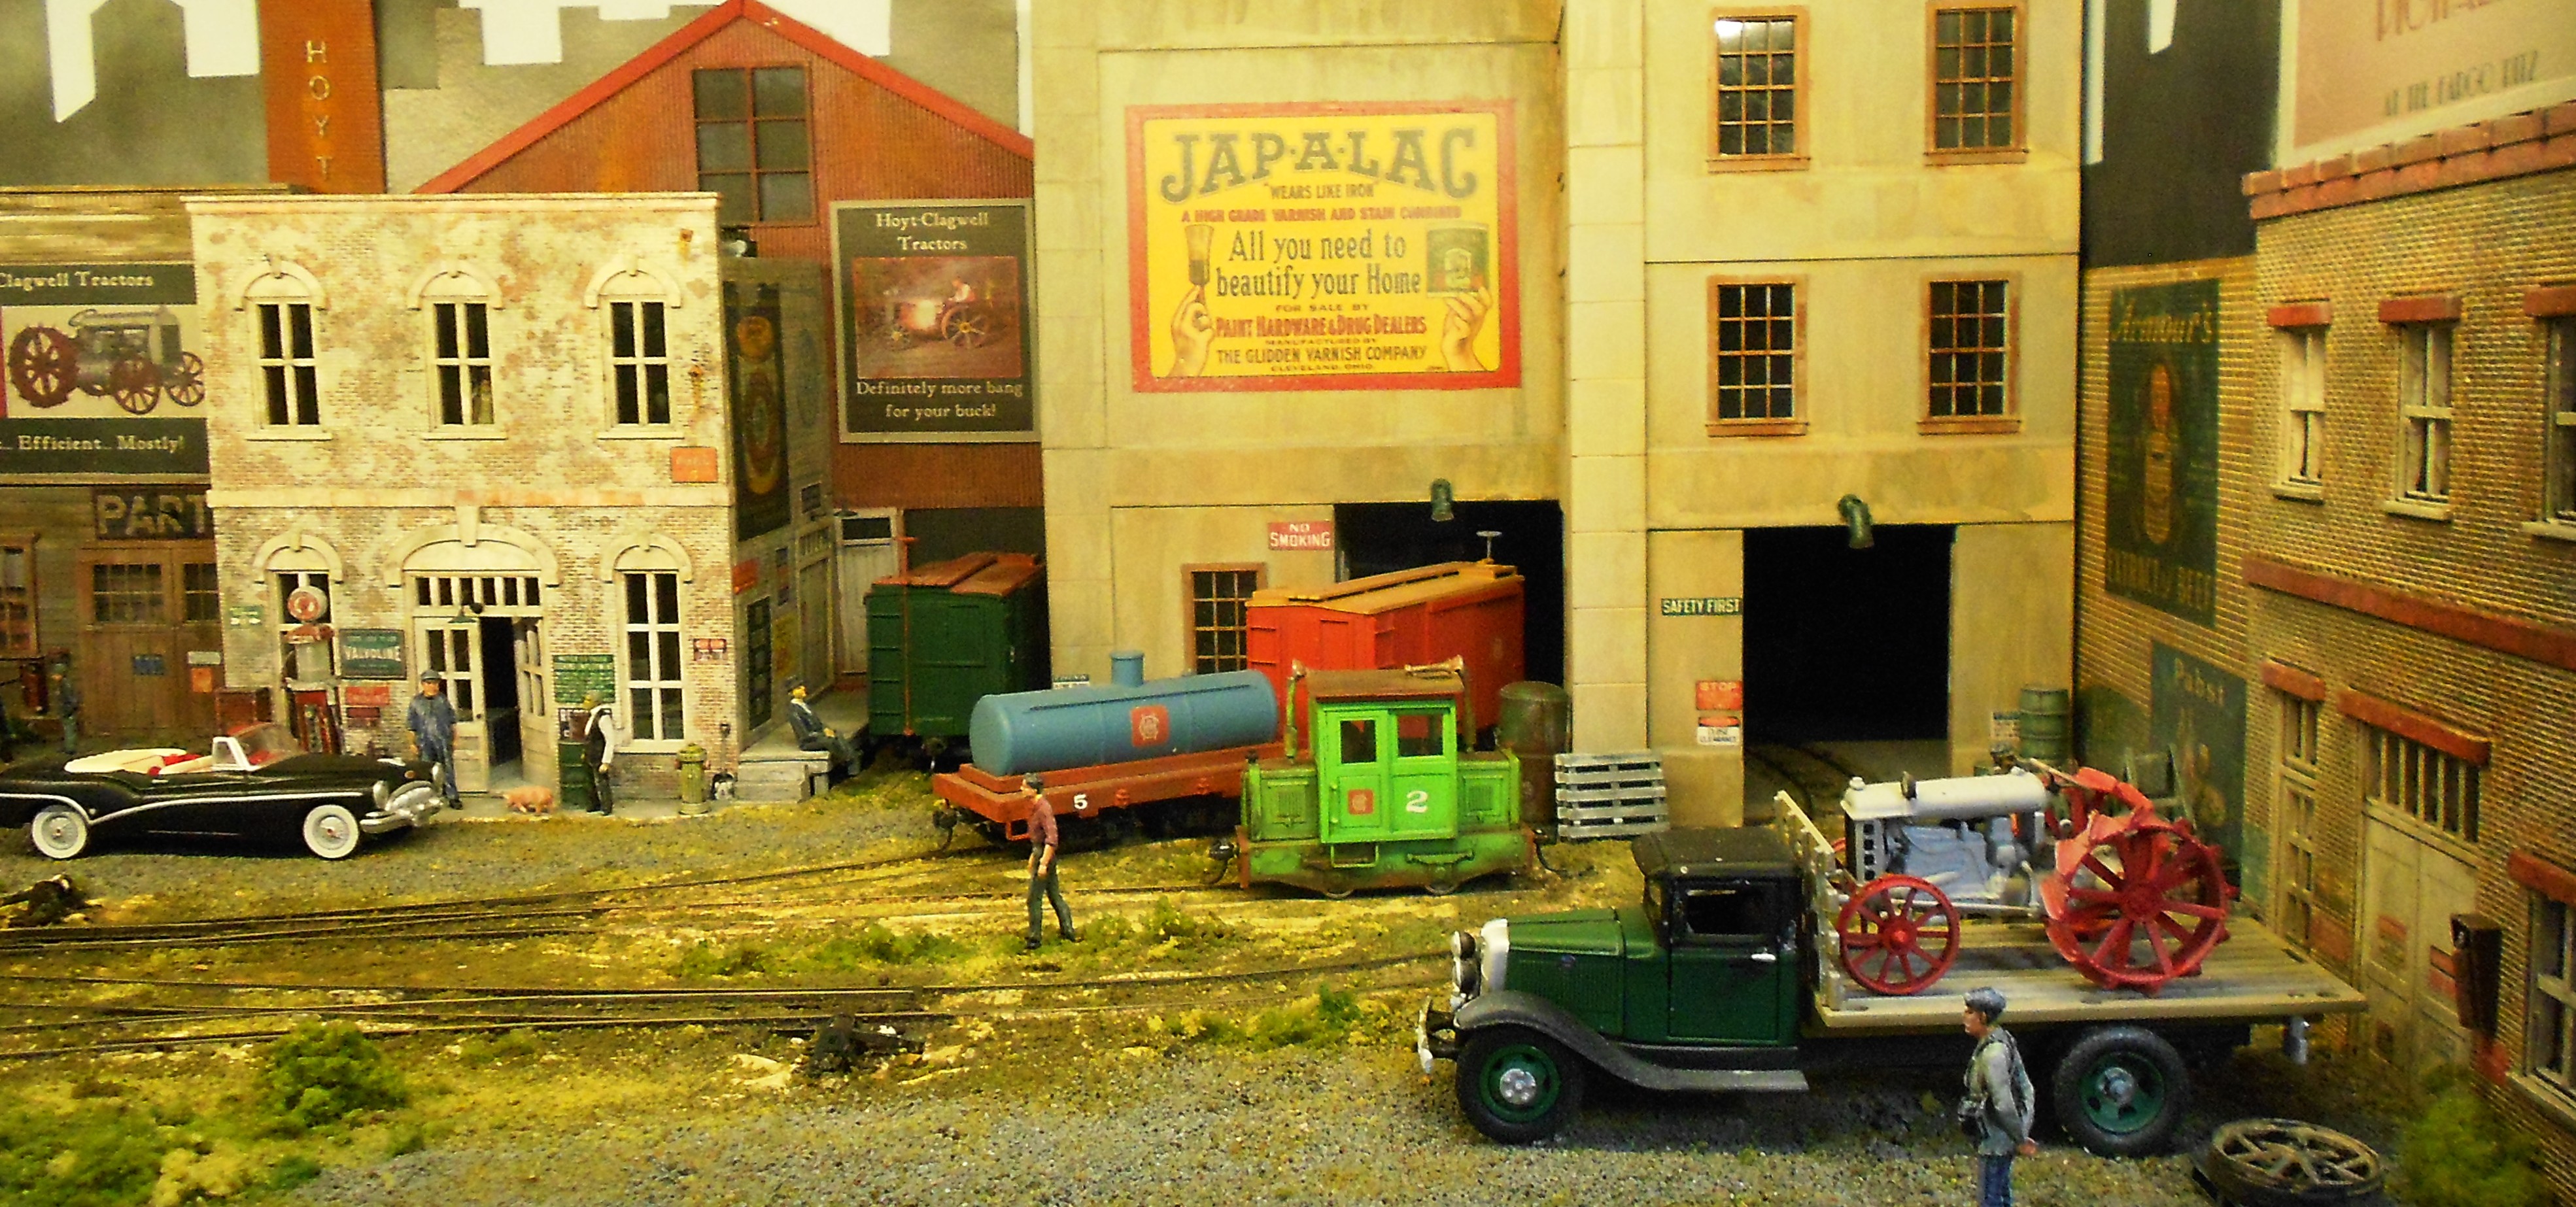
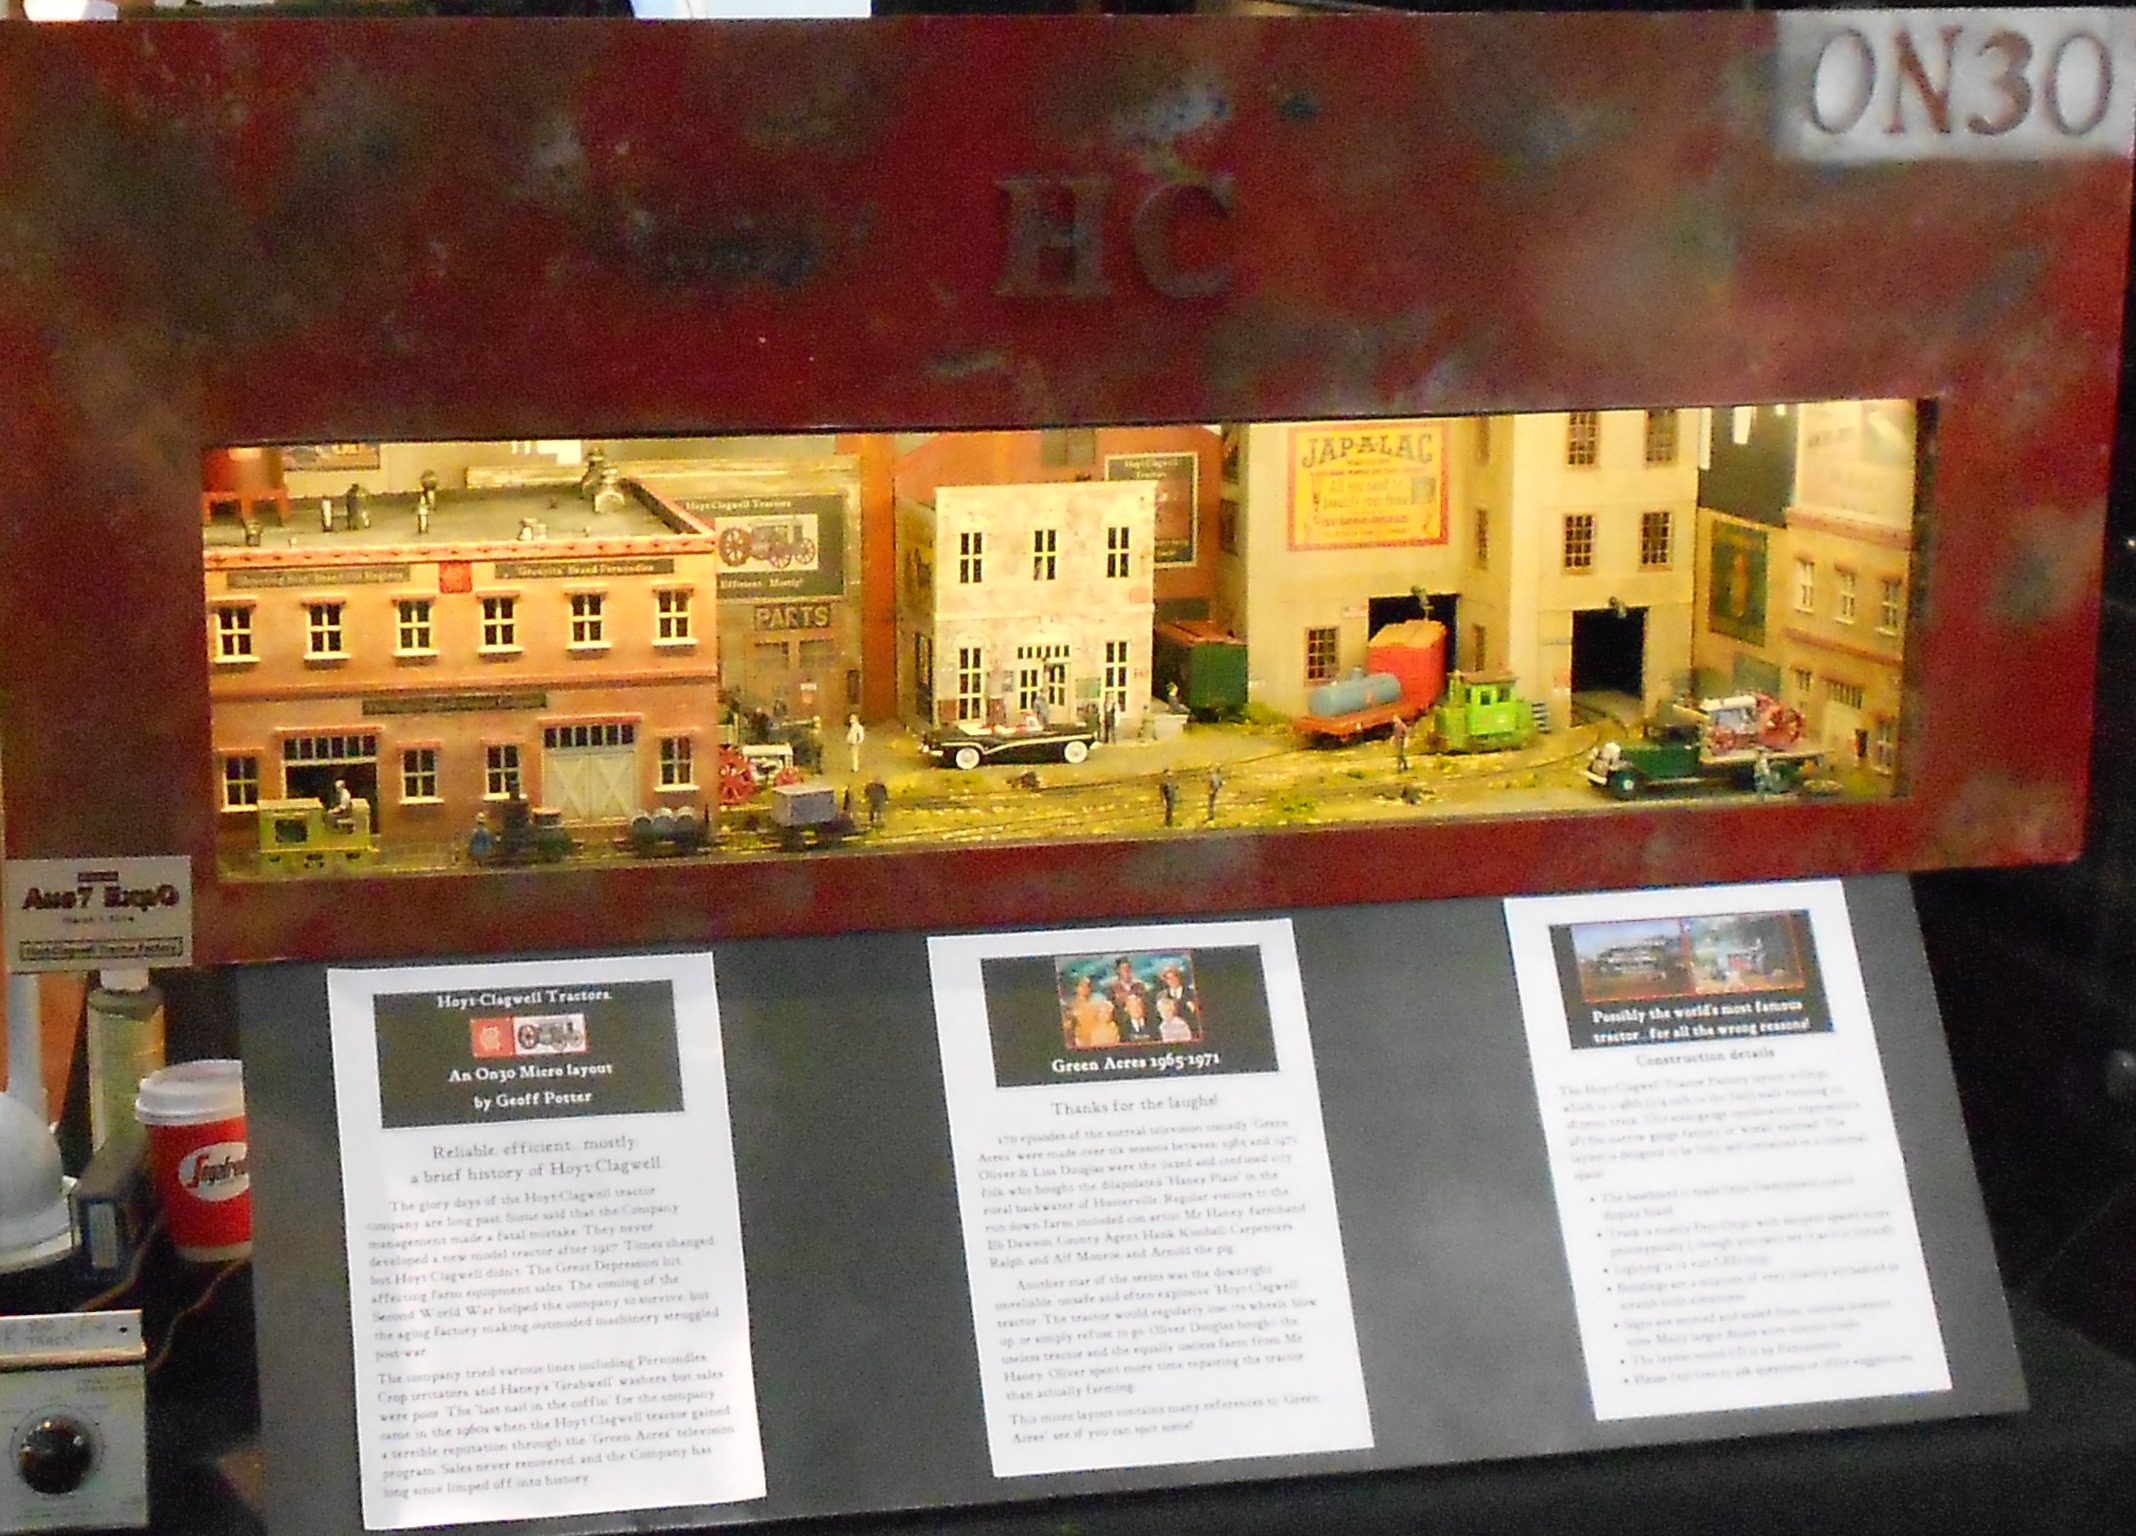
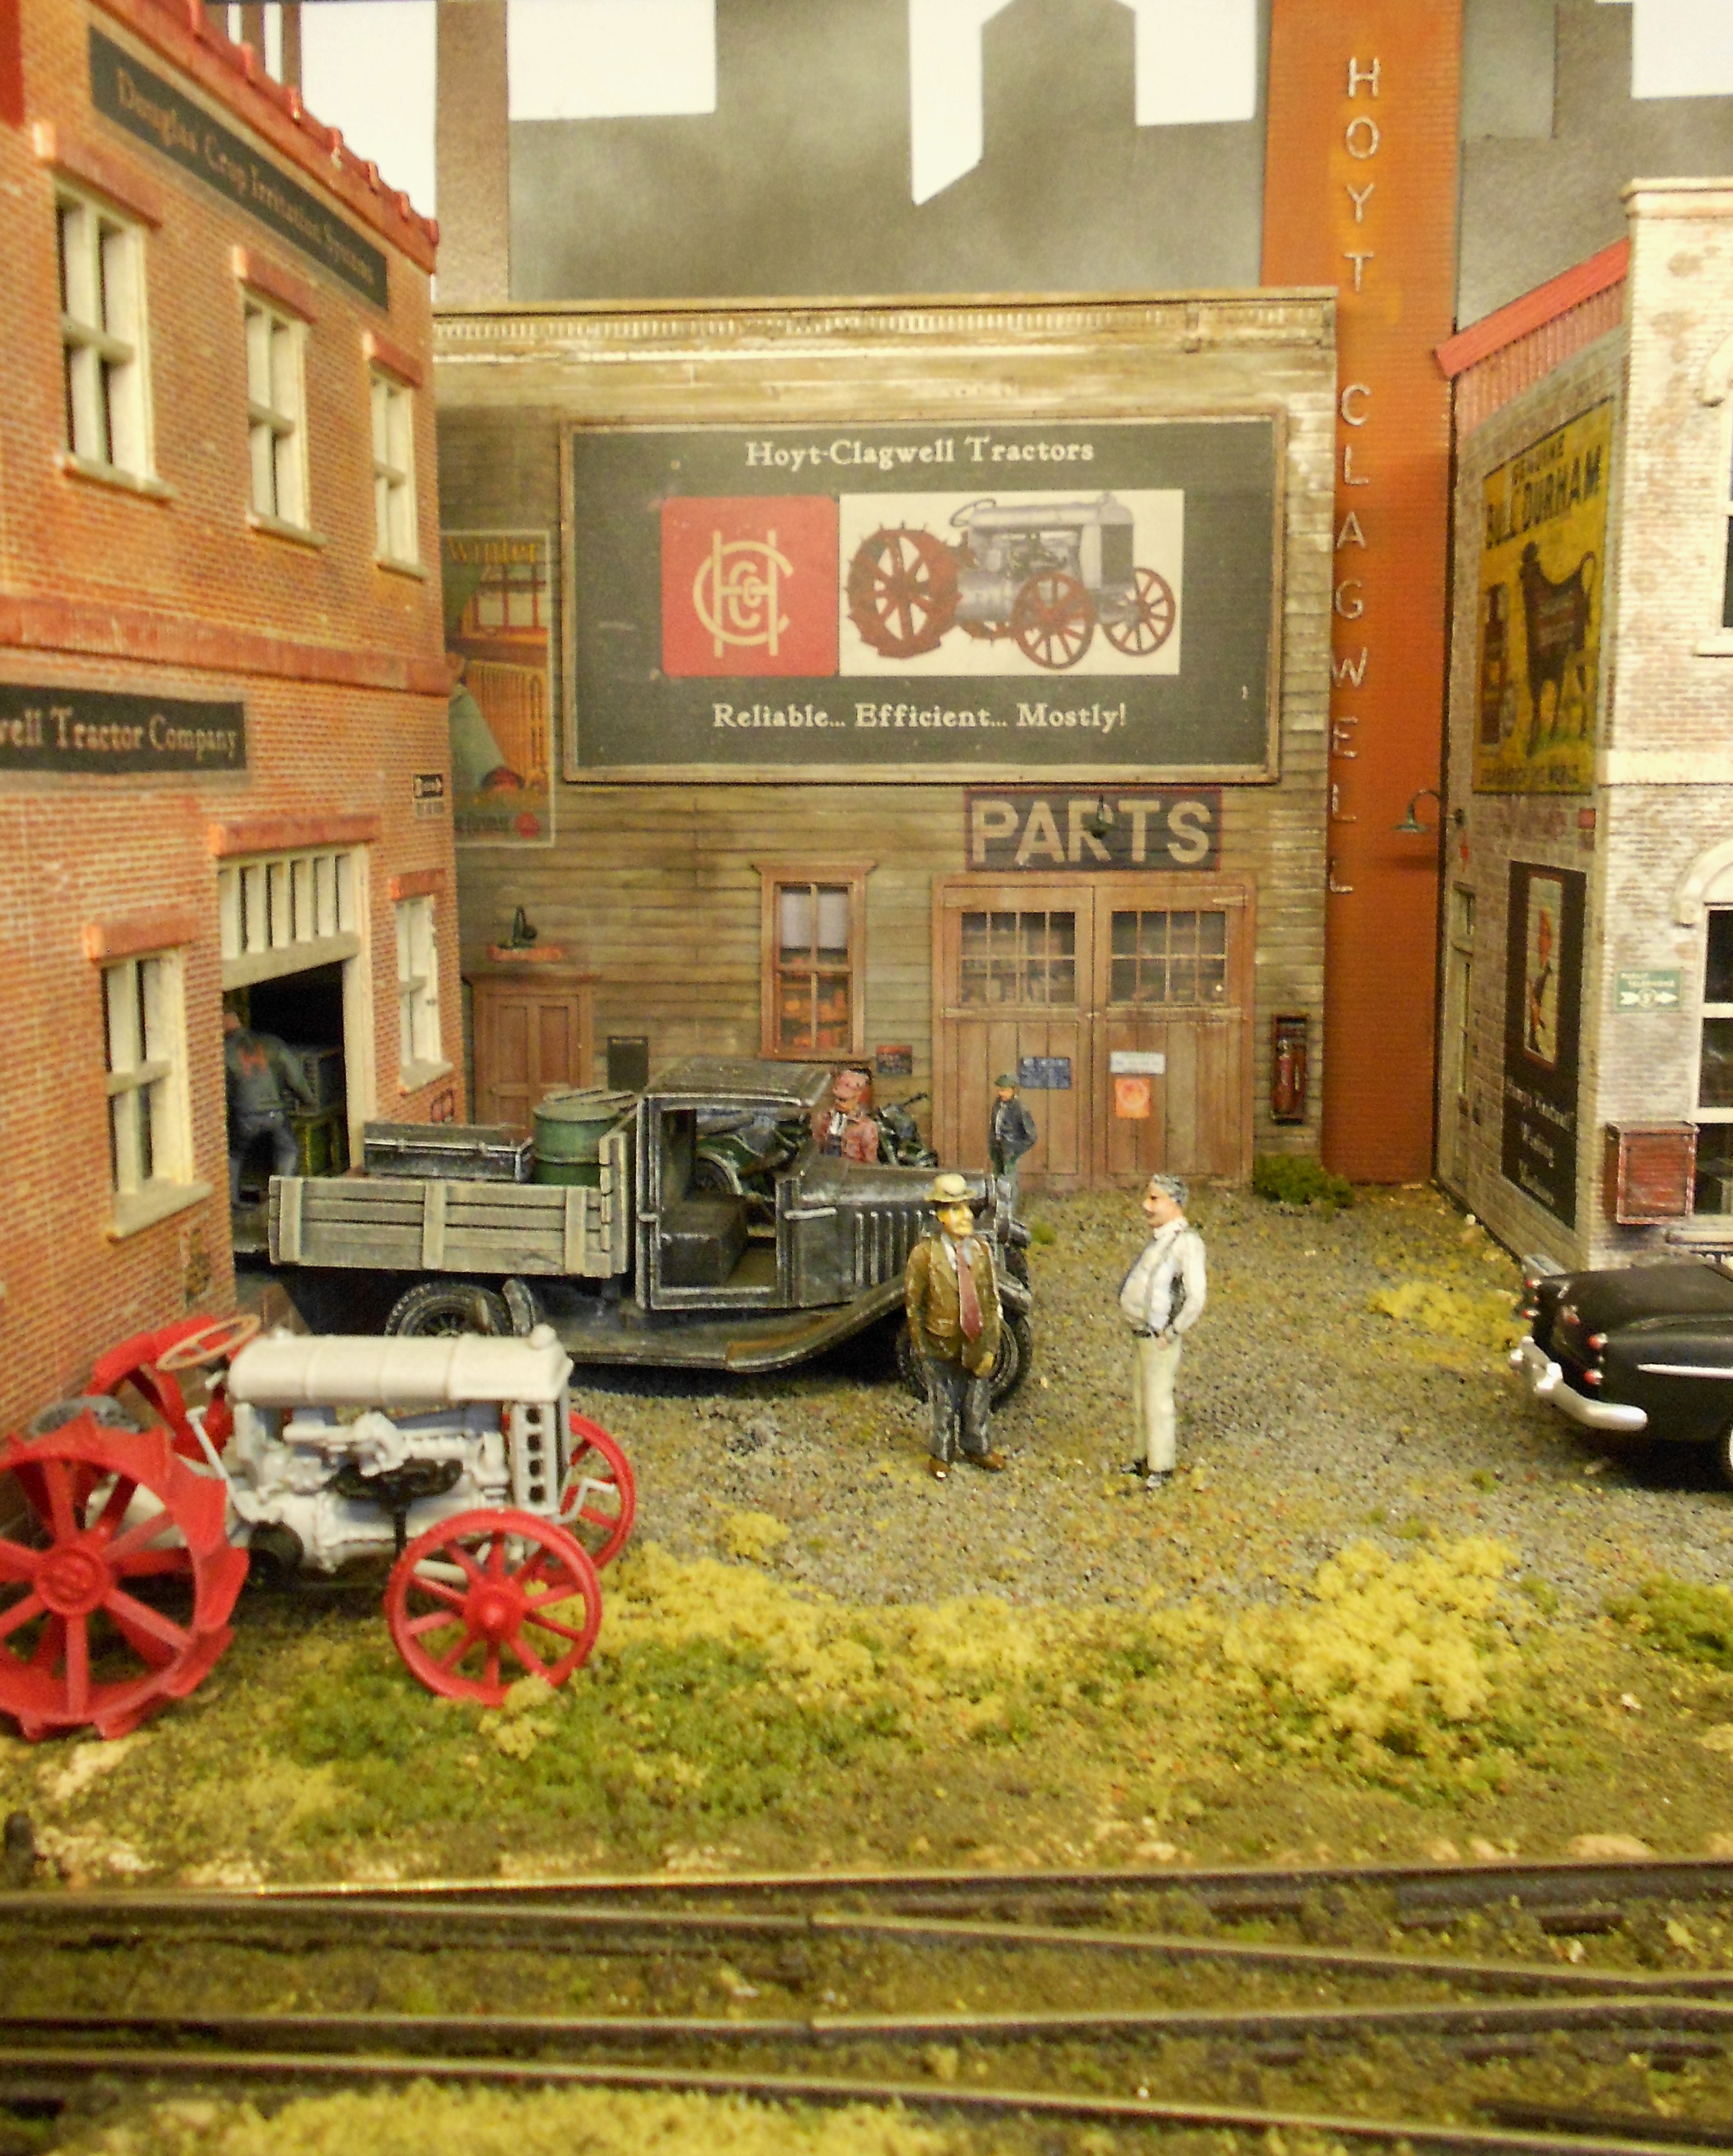
Hoyt-Clagwell Tractor Factory
The layout is built in On30 by Geoff Potter from Wamberal, NSW Australia.

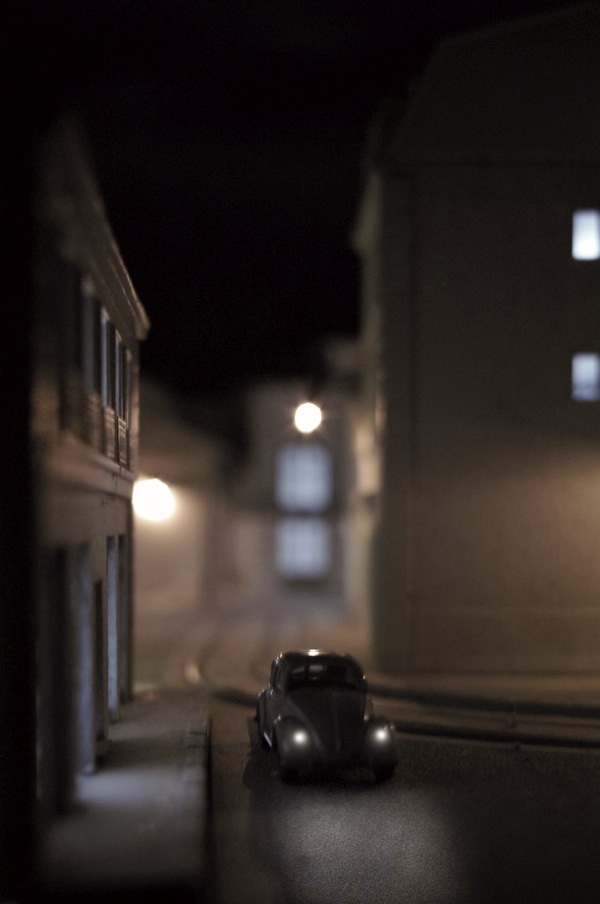
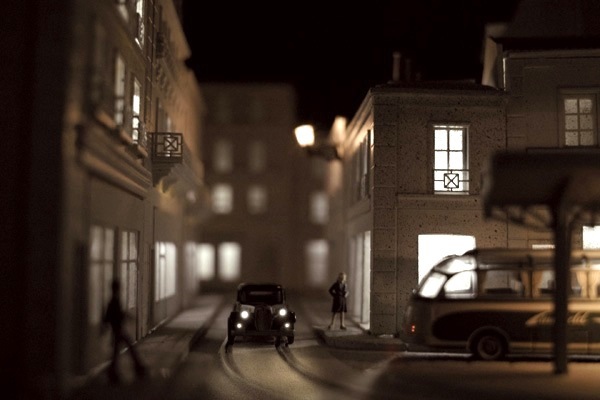
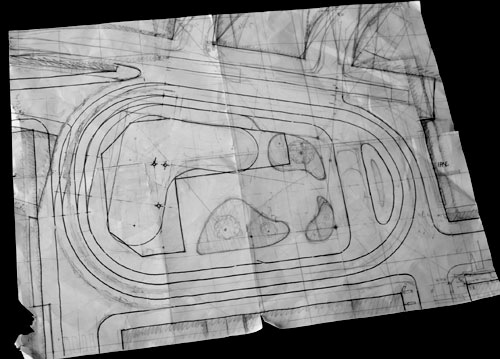
Small Street Car Layout “Point de Départ”
The layout is built in HO by Axel Vega from France:
“After a tymesavers build in 2006, I make last year a closed pizza box in 2011. It’s a little urban HO layout with railcar in a box (55cmx44cmx27cm). This box is close and we can see the interior only by few windows on the side. 1950-1960, middle-europa, night, light, 50′ movies atmosphere… If you read french, you could go on my blog to read all the story step by step:
1.1 – Point de départ. – InTheBox II”

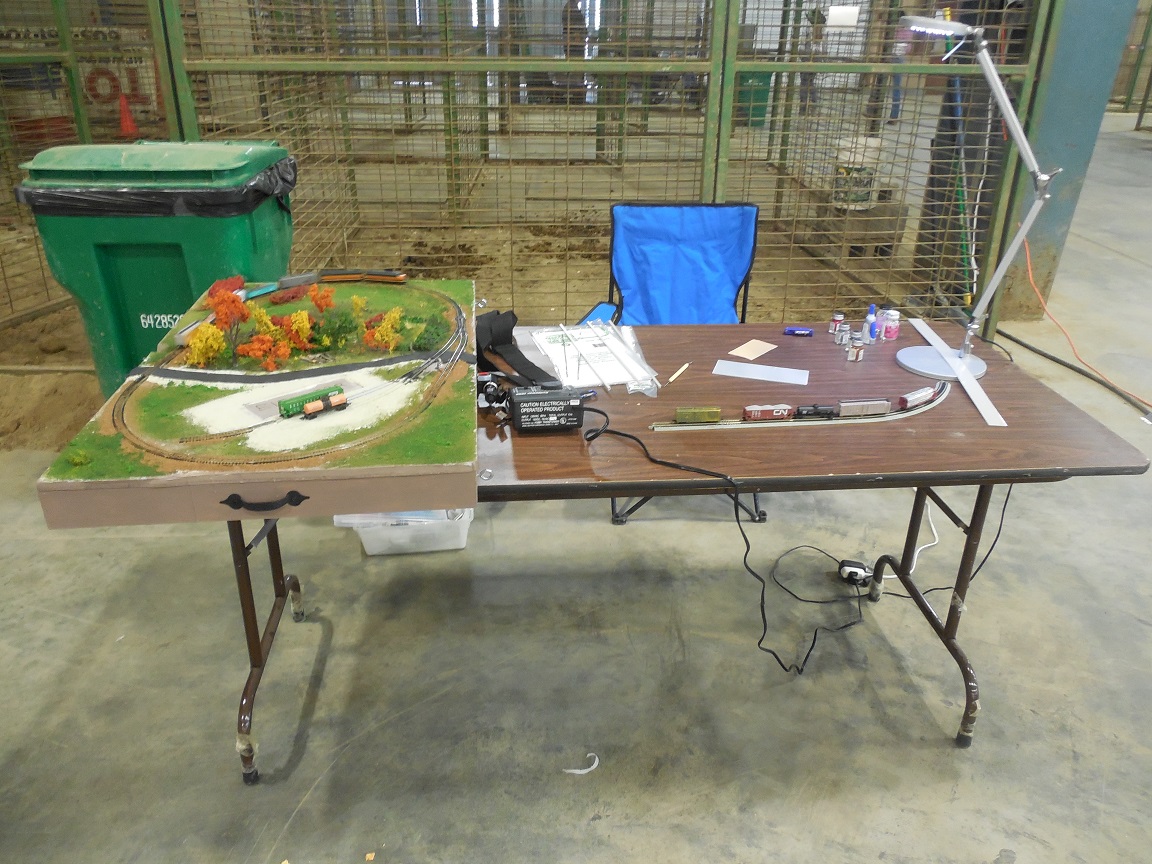
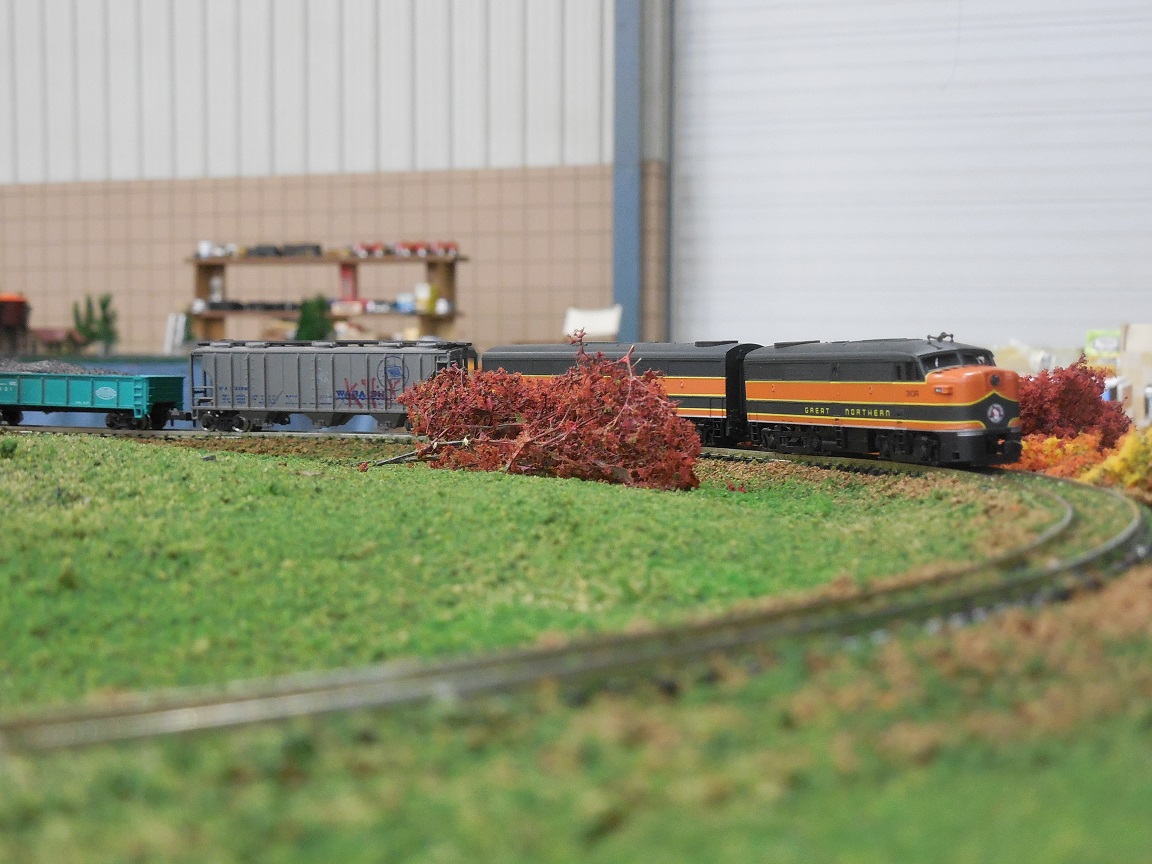
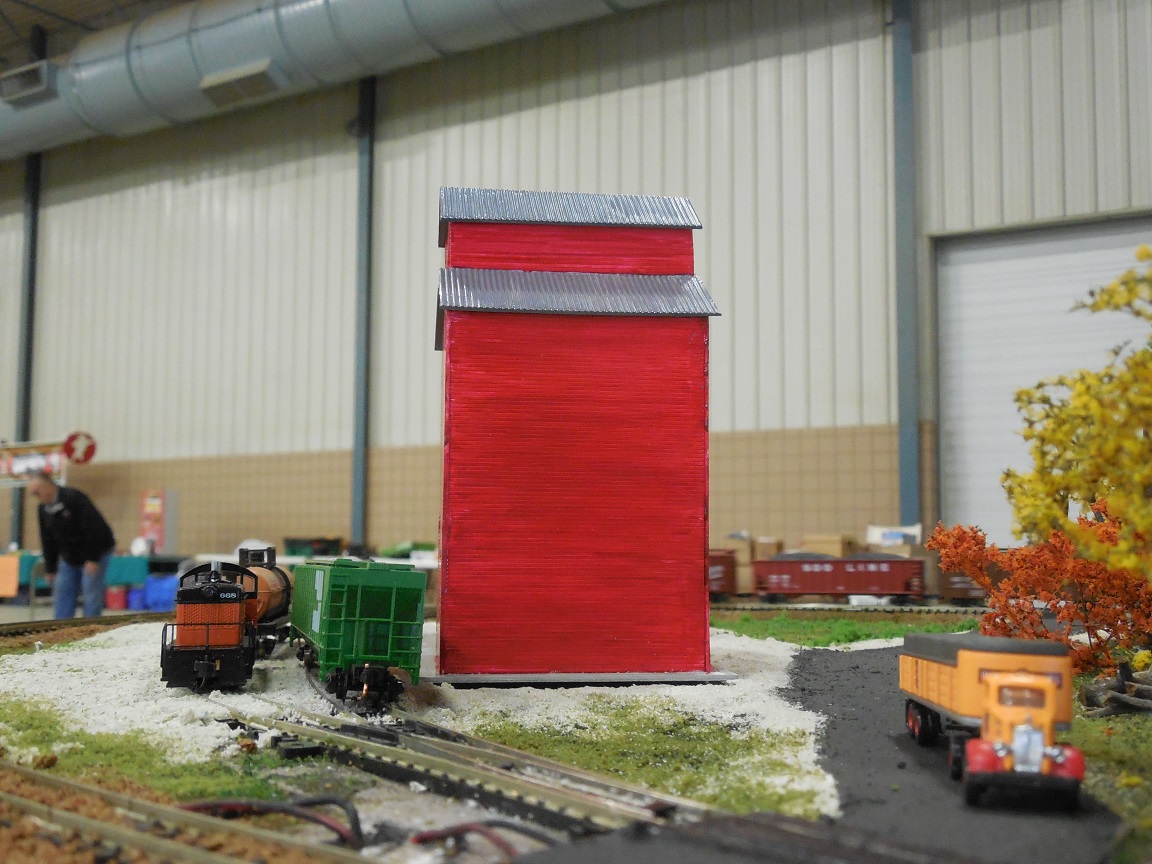
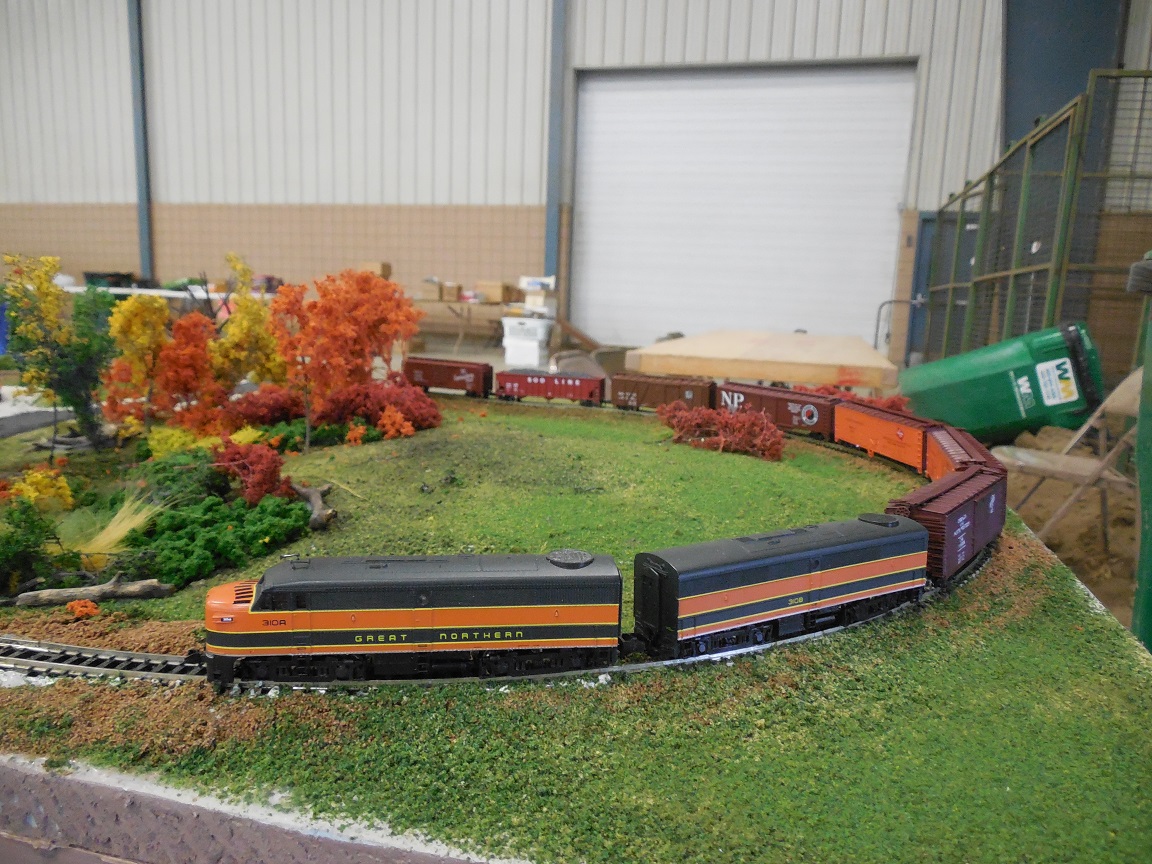
South Dakota in N-scale
This layout is built in N by James Wilmus.
“This is my 2×3 N scale layout that I built for train shows. It uses 1/2″ thick pine boards for benchwork, 1/2” thick foam for the scenery base, and a simple track plan.
While N scale is not difficult to use in a small space, creating a realistic operation and a depiction of a prototype scene like those found in the Midwest can be a challenge. The classic midwest scene found from Ohio to Montana is the grain elevator. Known commonly as “sentinels of the prairie”, wood-cribbed elevators play a big role in the heritage of midwestern farming communities, so to have such a operation is a must on any layout depicting the midwest.

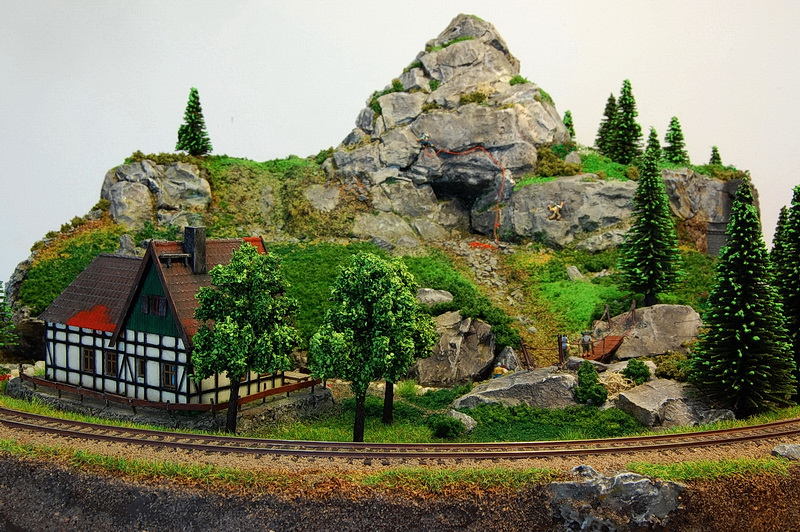
Spring in N scale
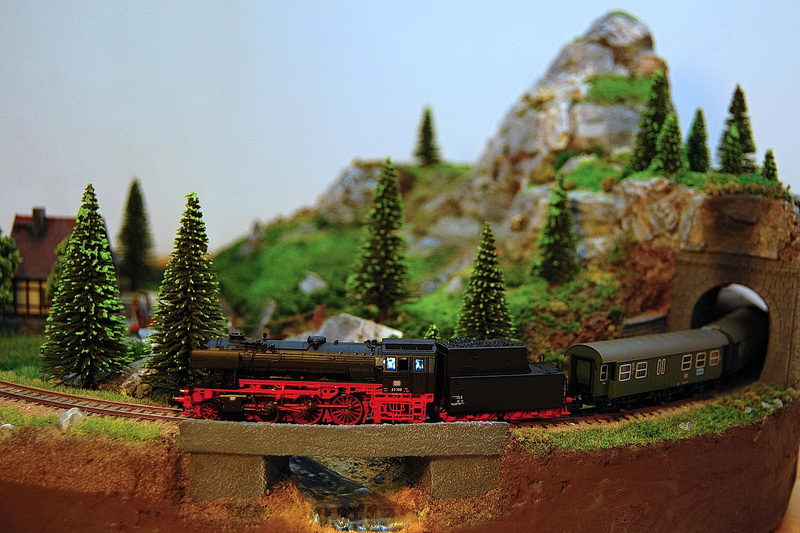
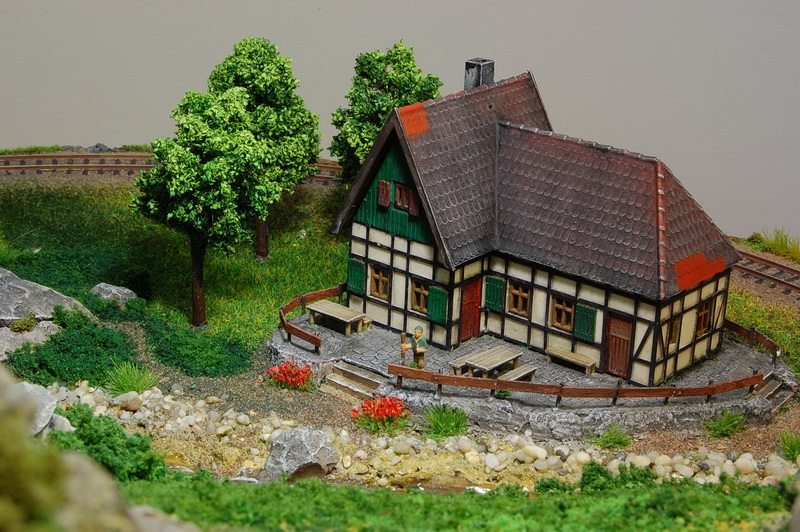
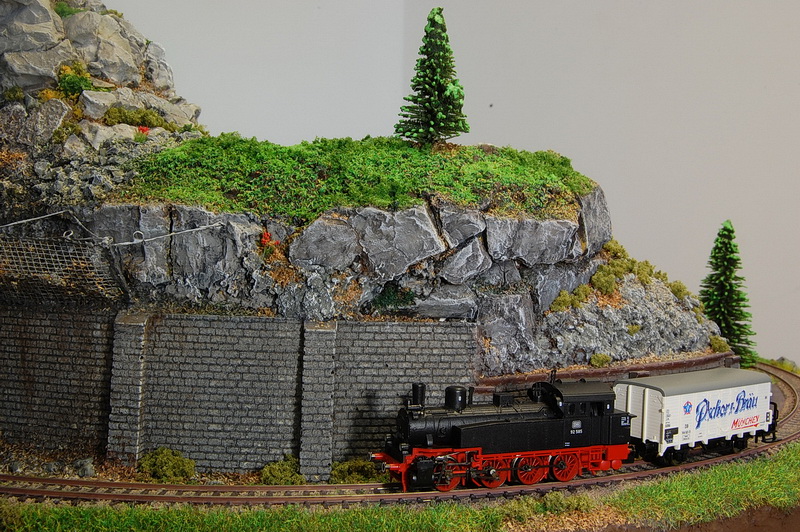
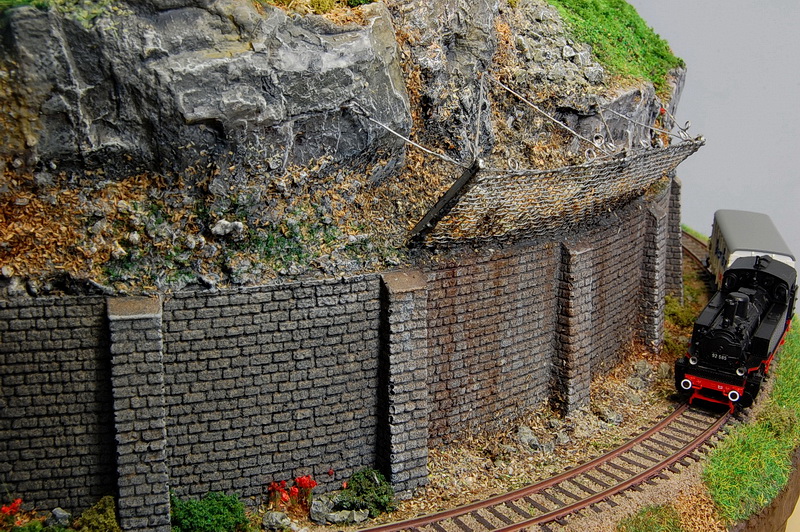
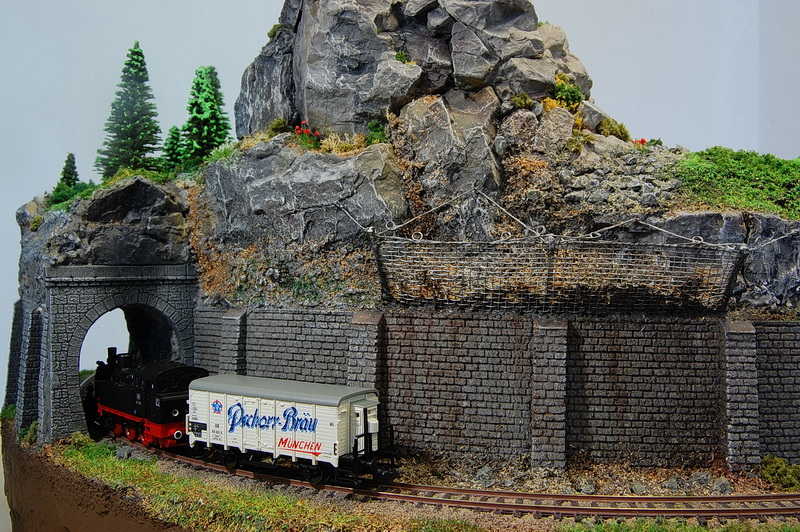
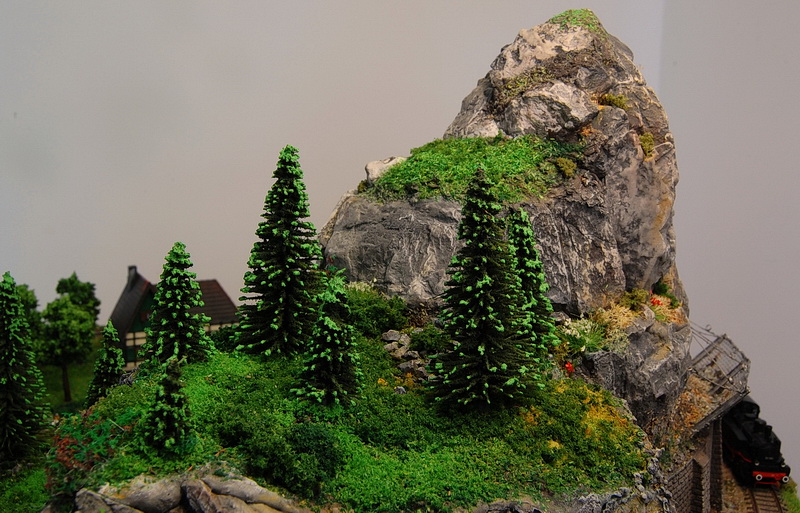
This layout is built in N by Alexandru Stoicia from Bucharest, Romania.
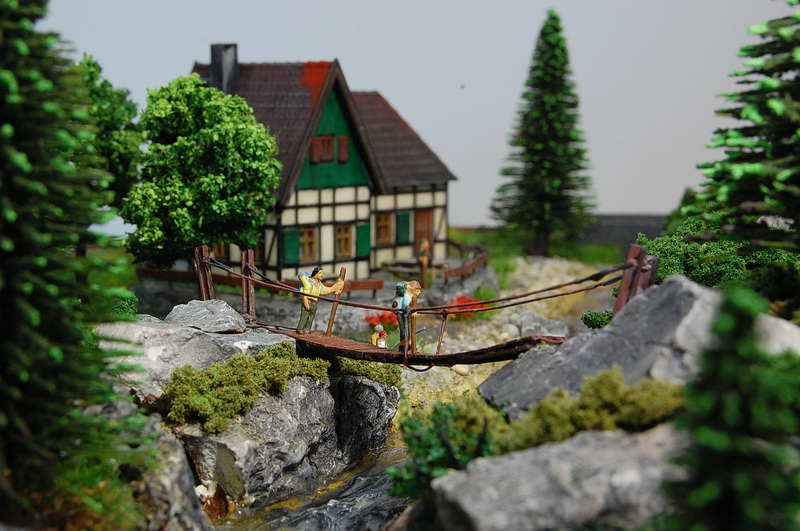
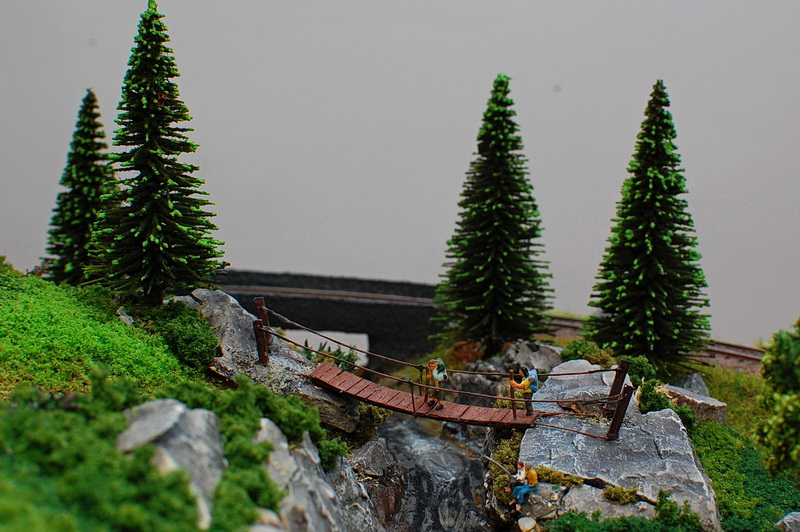
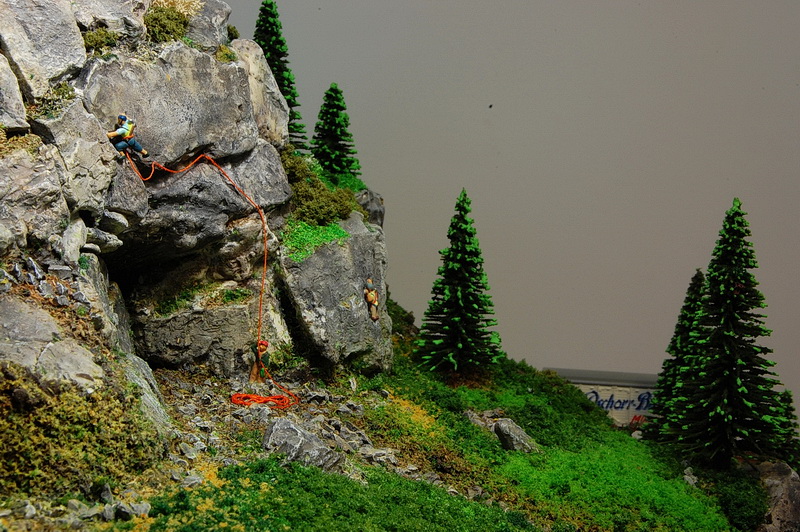
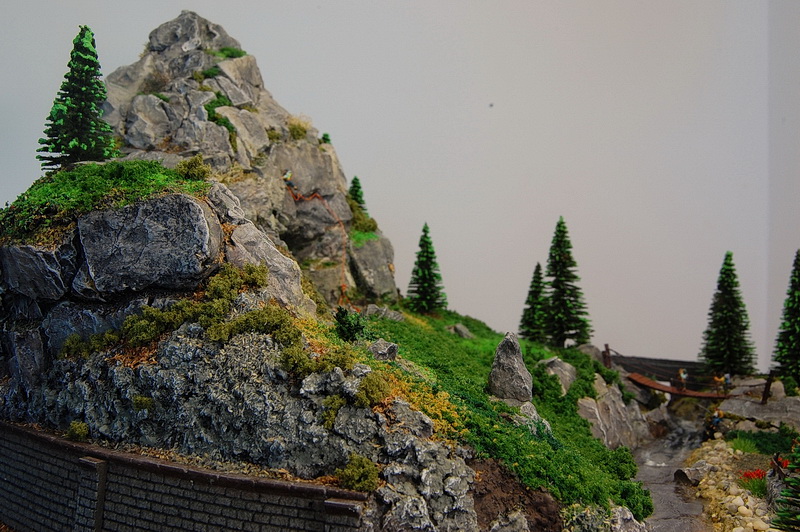
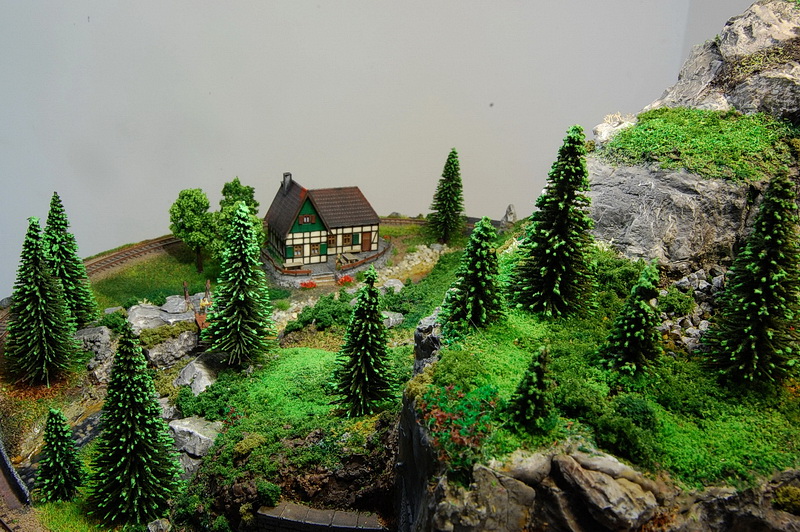
“My name in Alex Stoicia and I am from Bucharest, Romania. I am a small N scale collector (meaning that the collection is small, not the scale :)). I discovered this site and I was inspired by all this great micro-layouts. I decided to start myself such a project because I liked the concept – to chose a theme and express it in a condensed space without agglomerate it. As a result I made a Pizza layout of 49 cm diameter. The layout’s name is “Spring at N scale”. The layout is pure fictional and I tried to gave it an idealistic air. The theme is a beautiful spring Saturday morning in the mountains, near a cottage. Fresh green, pine nuts and people who have left indoor activities aside and went out to walk, to climb or just to have a beer at the cottage, each after force and abilities.”
It’s a beautiful weekend morning at the cottage Lonely Peak. A very appreciated area both by tourists and climbers, as the top is accessible by a marked tourist trail, and some climbing routes of various degrees of difficulty:
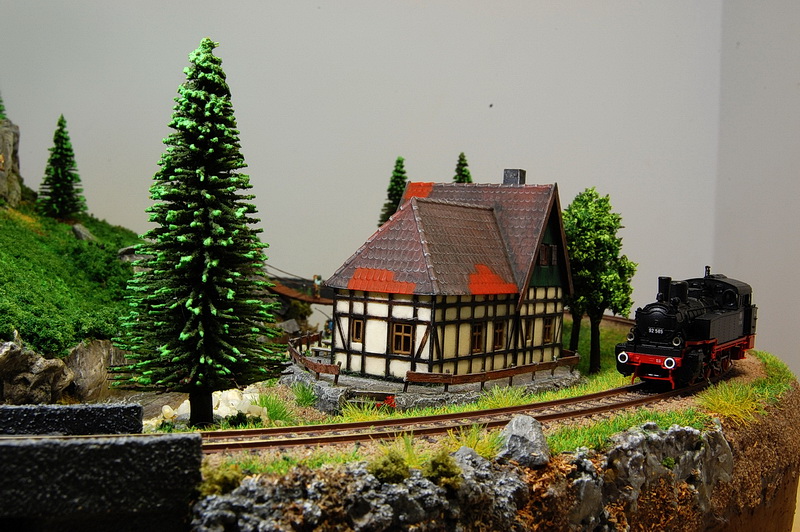
The morning train is coming! The station is not near the cottage, but one kilometer further, in the village. The tourists have to walk from the village to the cottage on a beautiful and scenic trail:
The cottage host is expecting the guests regarding the mountains:
A BR92 is heading also to the village with a beer car. It’s announced a warm day and lots of thirsty tourists.

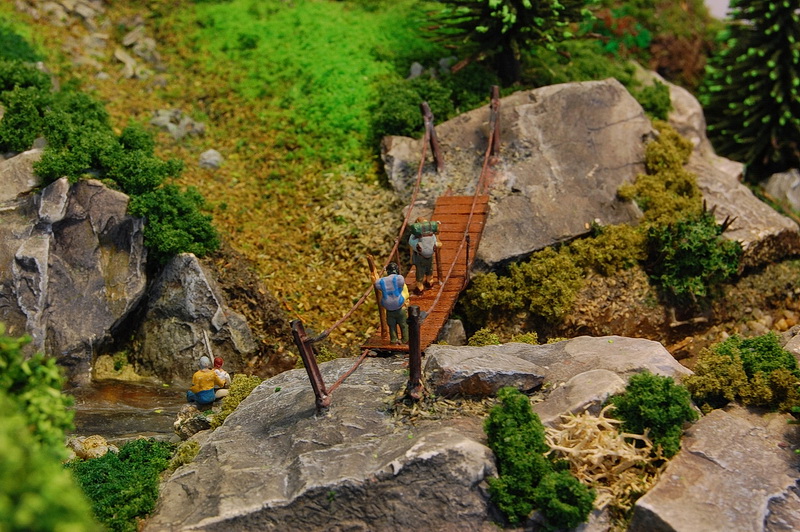
Some of them start fishing hoping for a tasty lunch:
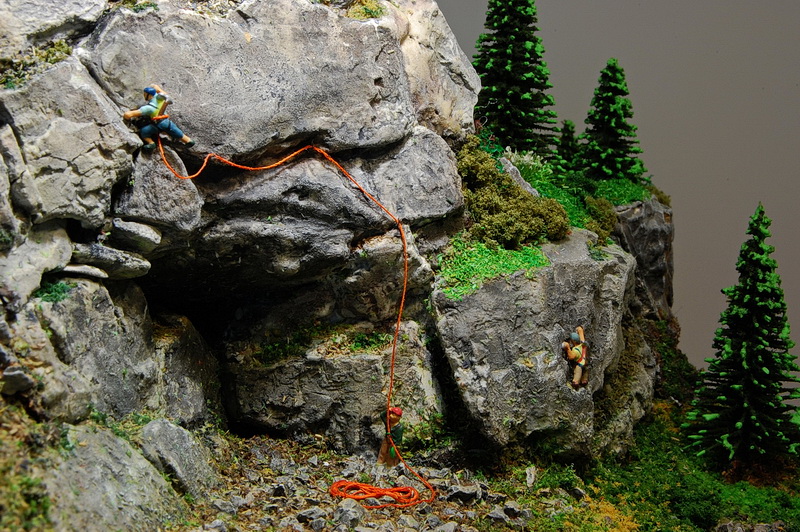
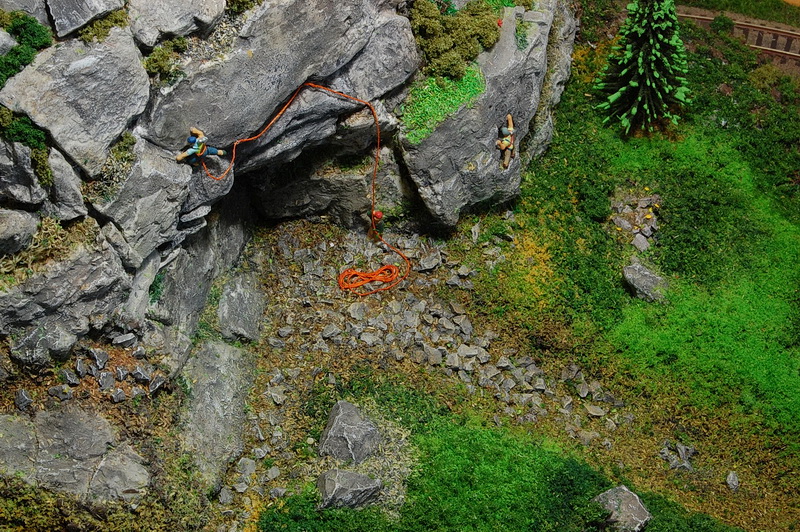
A team of climbers enters the route “Levitation” – difficulty 5B, on the front side, traversing the wall right over the Black Overhangs. A third climber is content for now with some bouldering at low altitude:
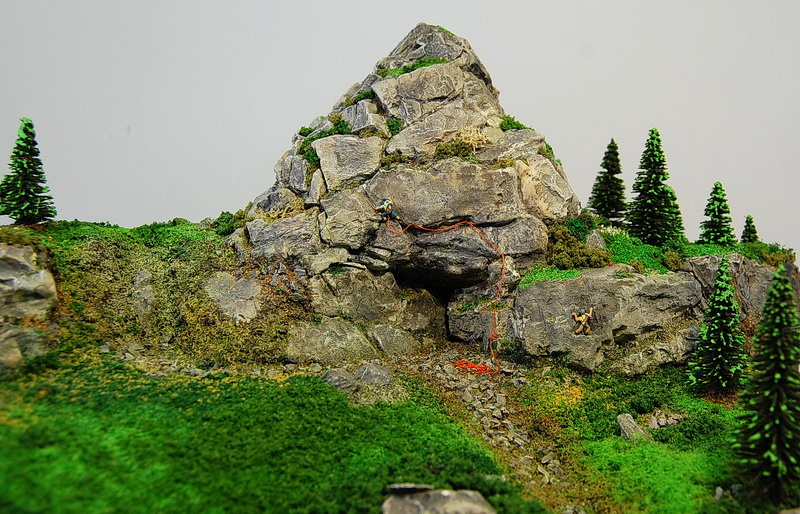
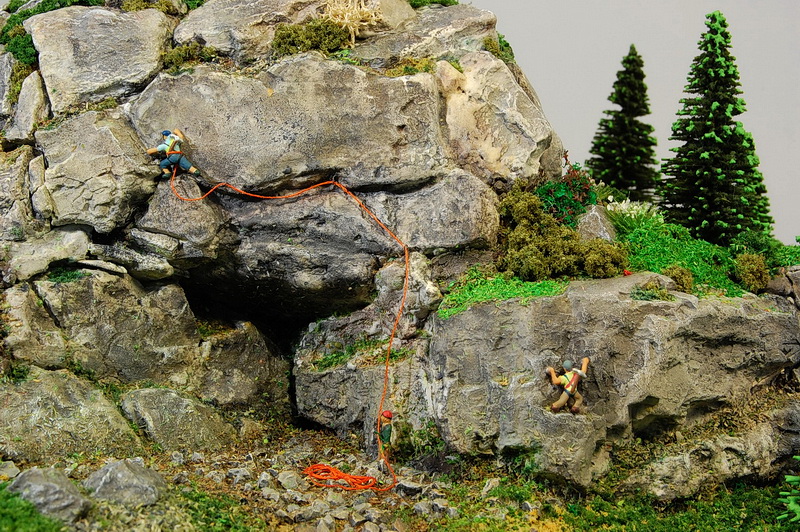
Although the climber is in a difficult passage, the belayer, probably relying on the good weather and dry rock, belay relaxed, I might even say careless, with the hand on the helmet! Blame it on the spring!
Meanwhile the tourists reached some height and they take advantage on their smartphones! They went online on Facebook and post pictures with landscapes in this beautiful day, to despite their friends from home:
This gorgeous day is also very good for flying. Some paragliders launched themselves from the top and give us some beautiful aerial photographs of the area:
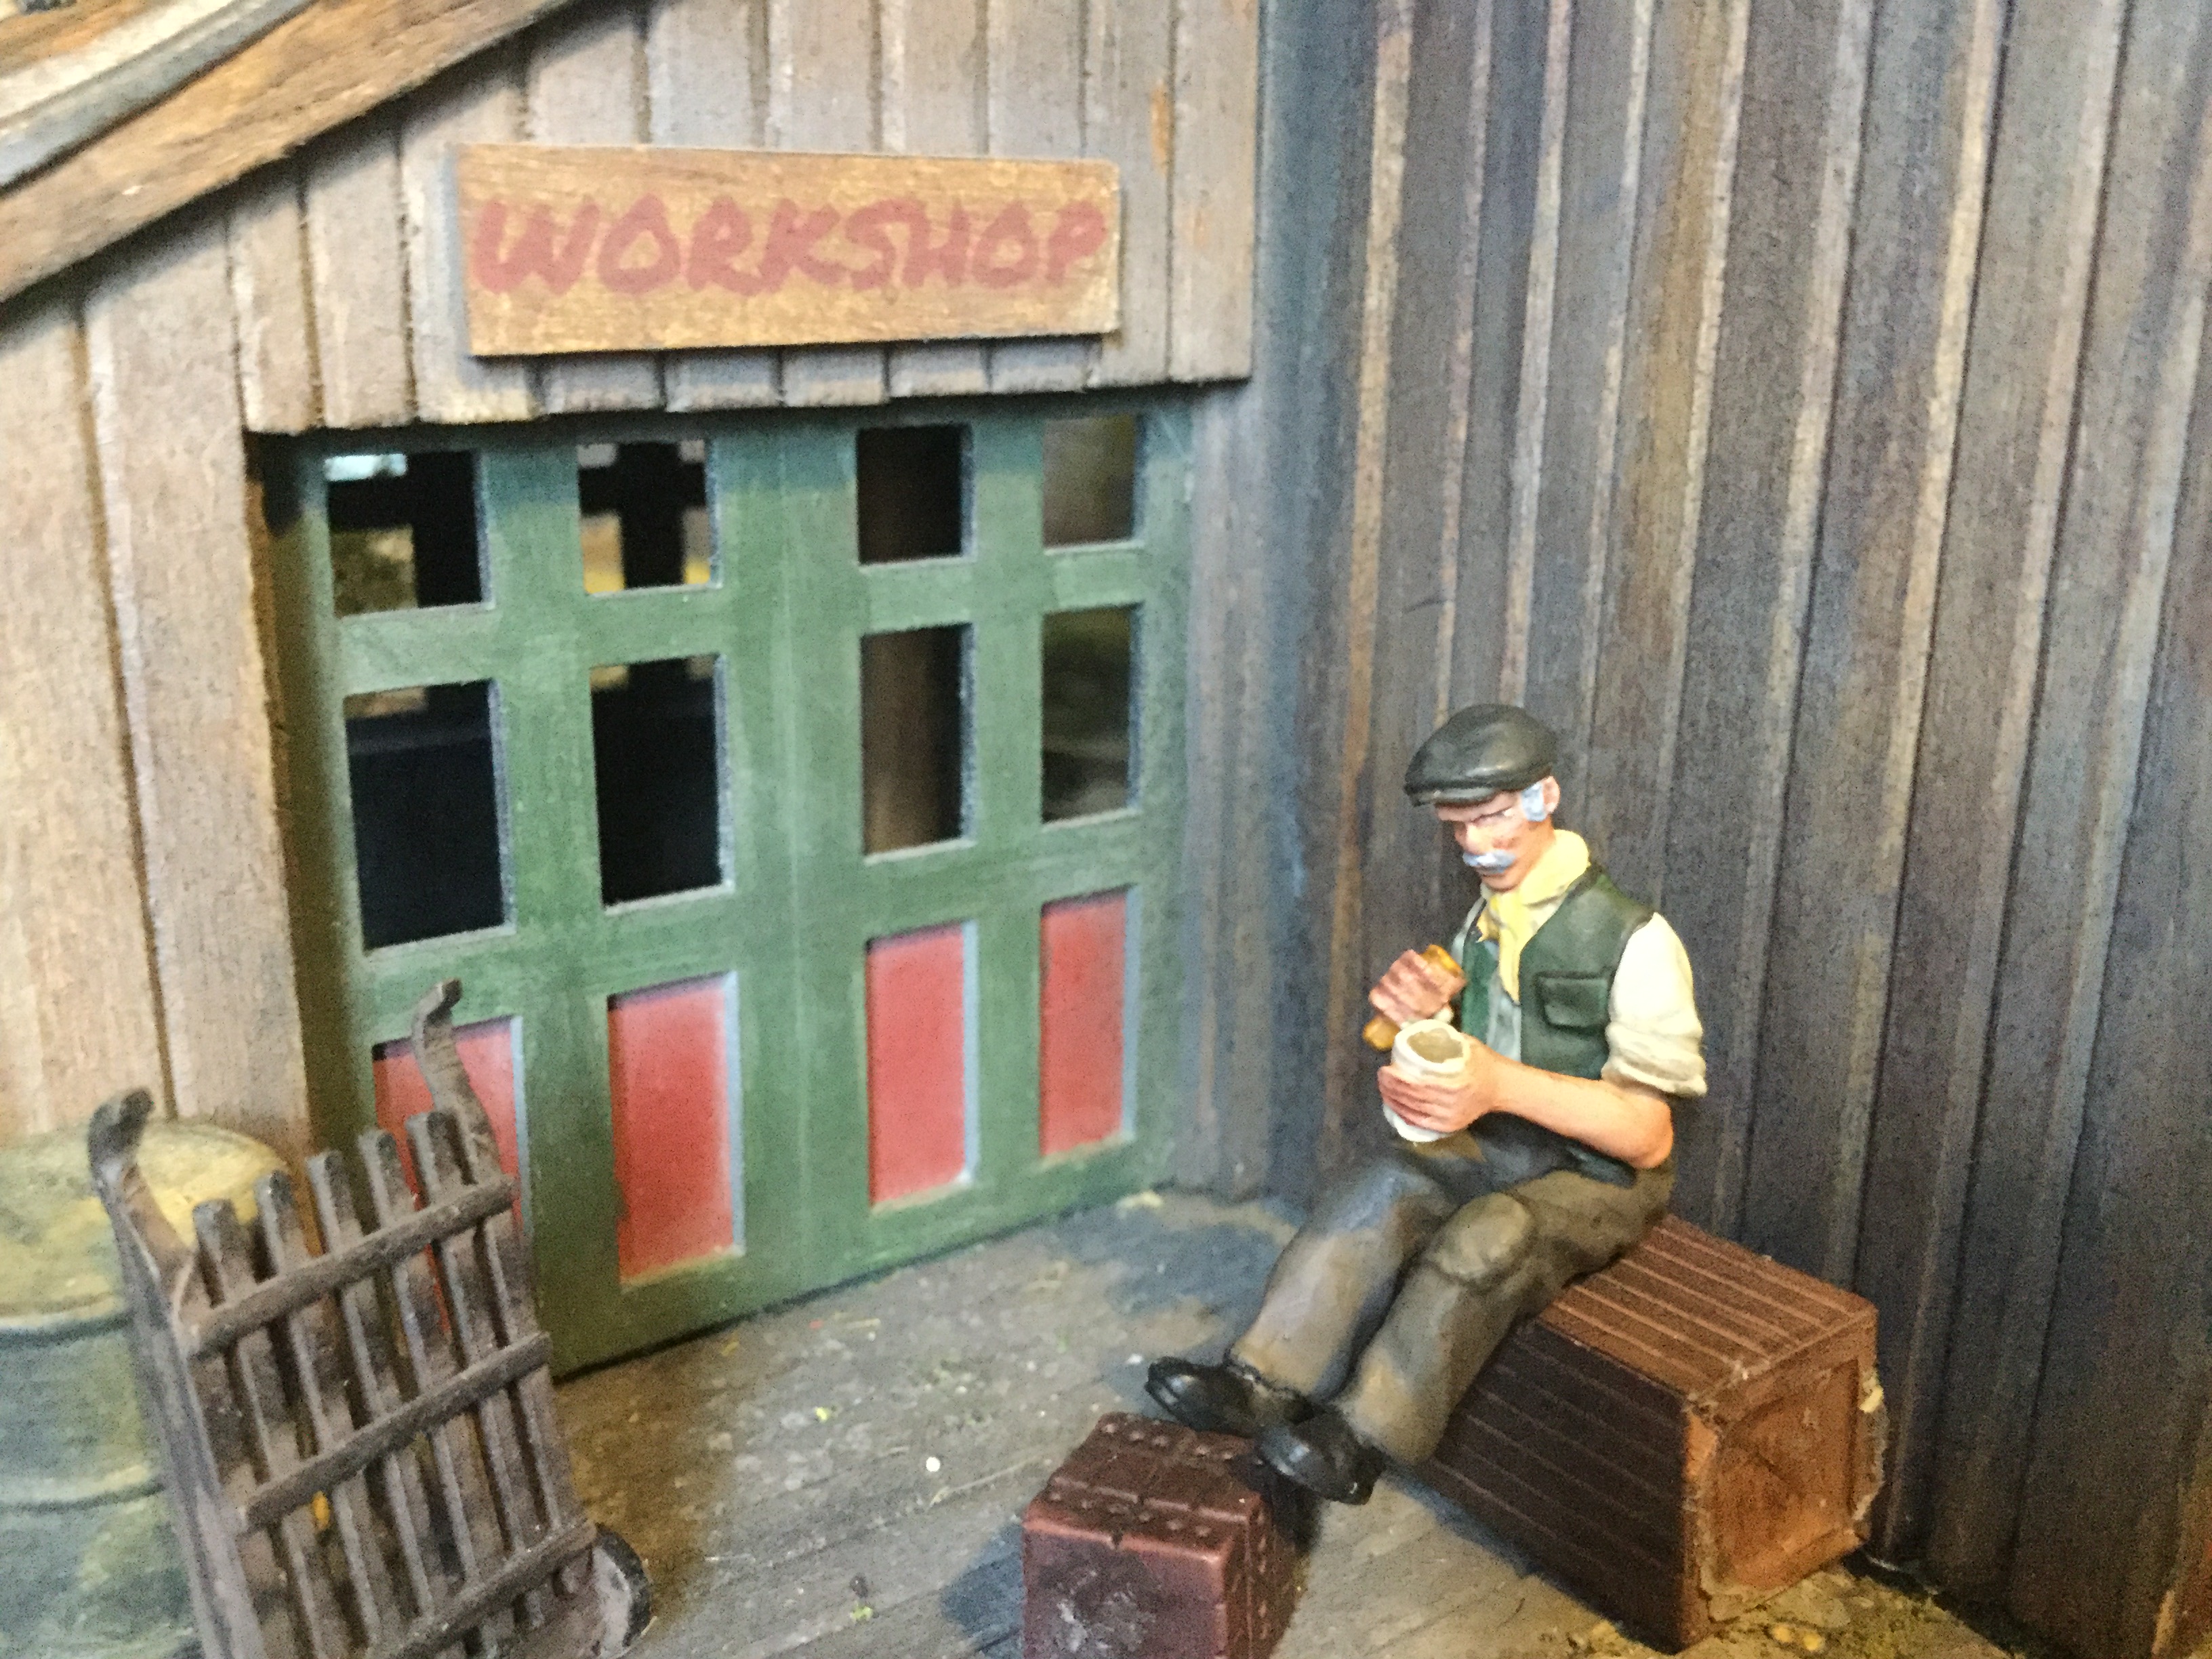
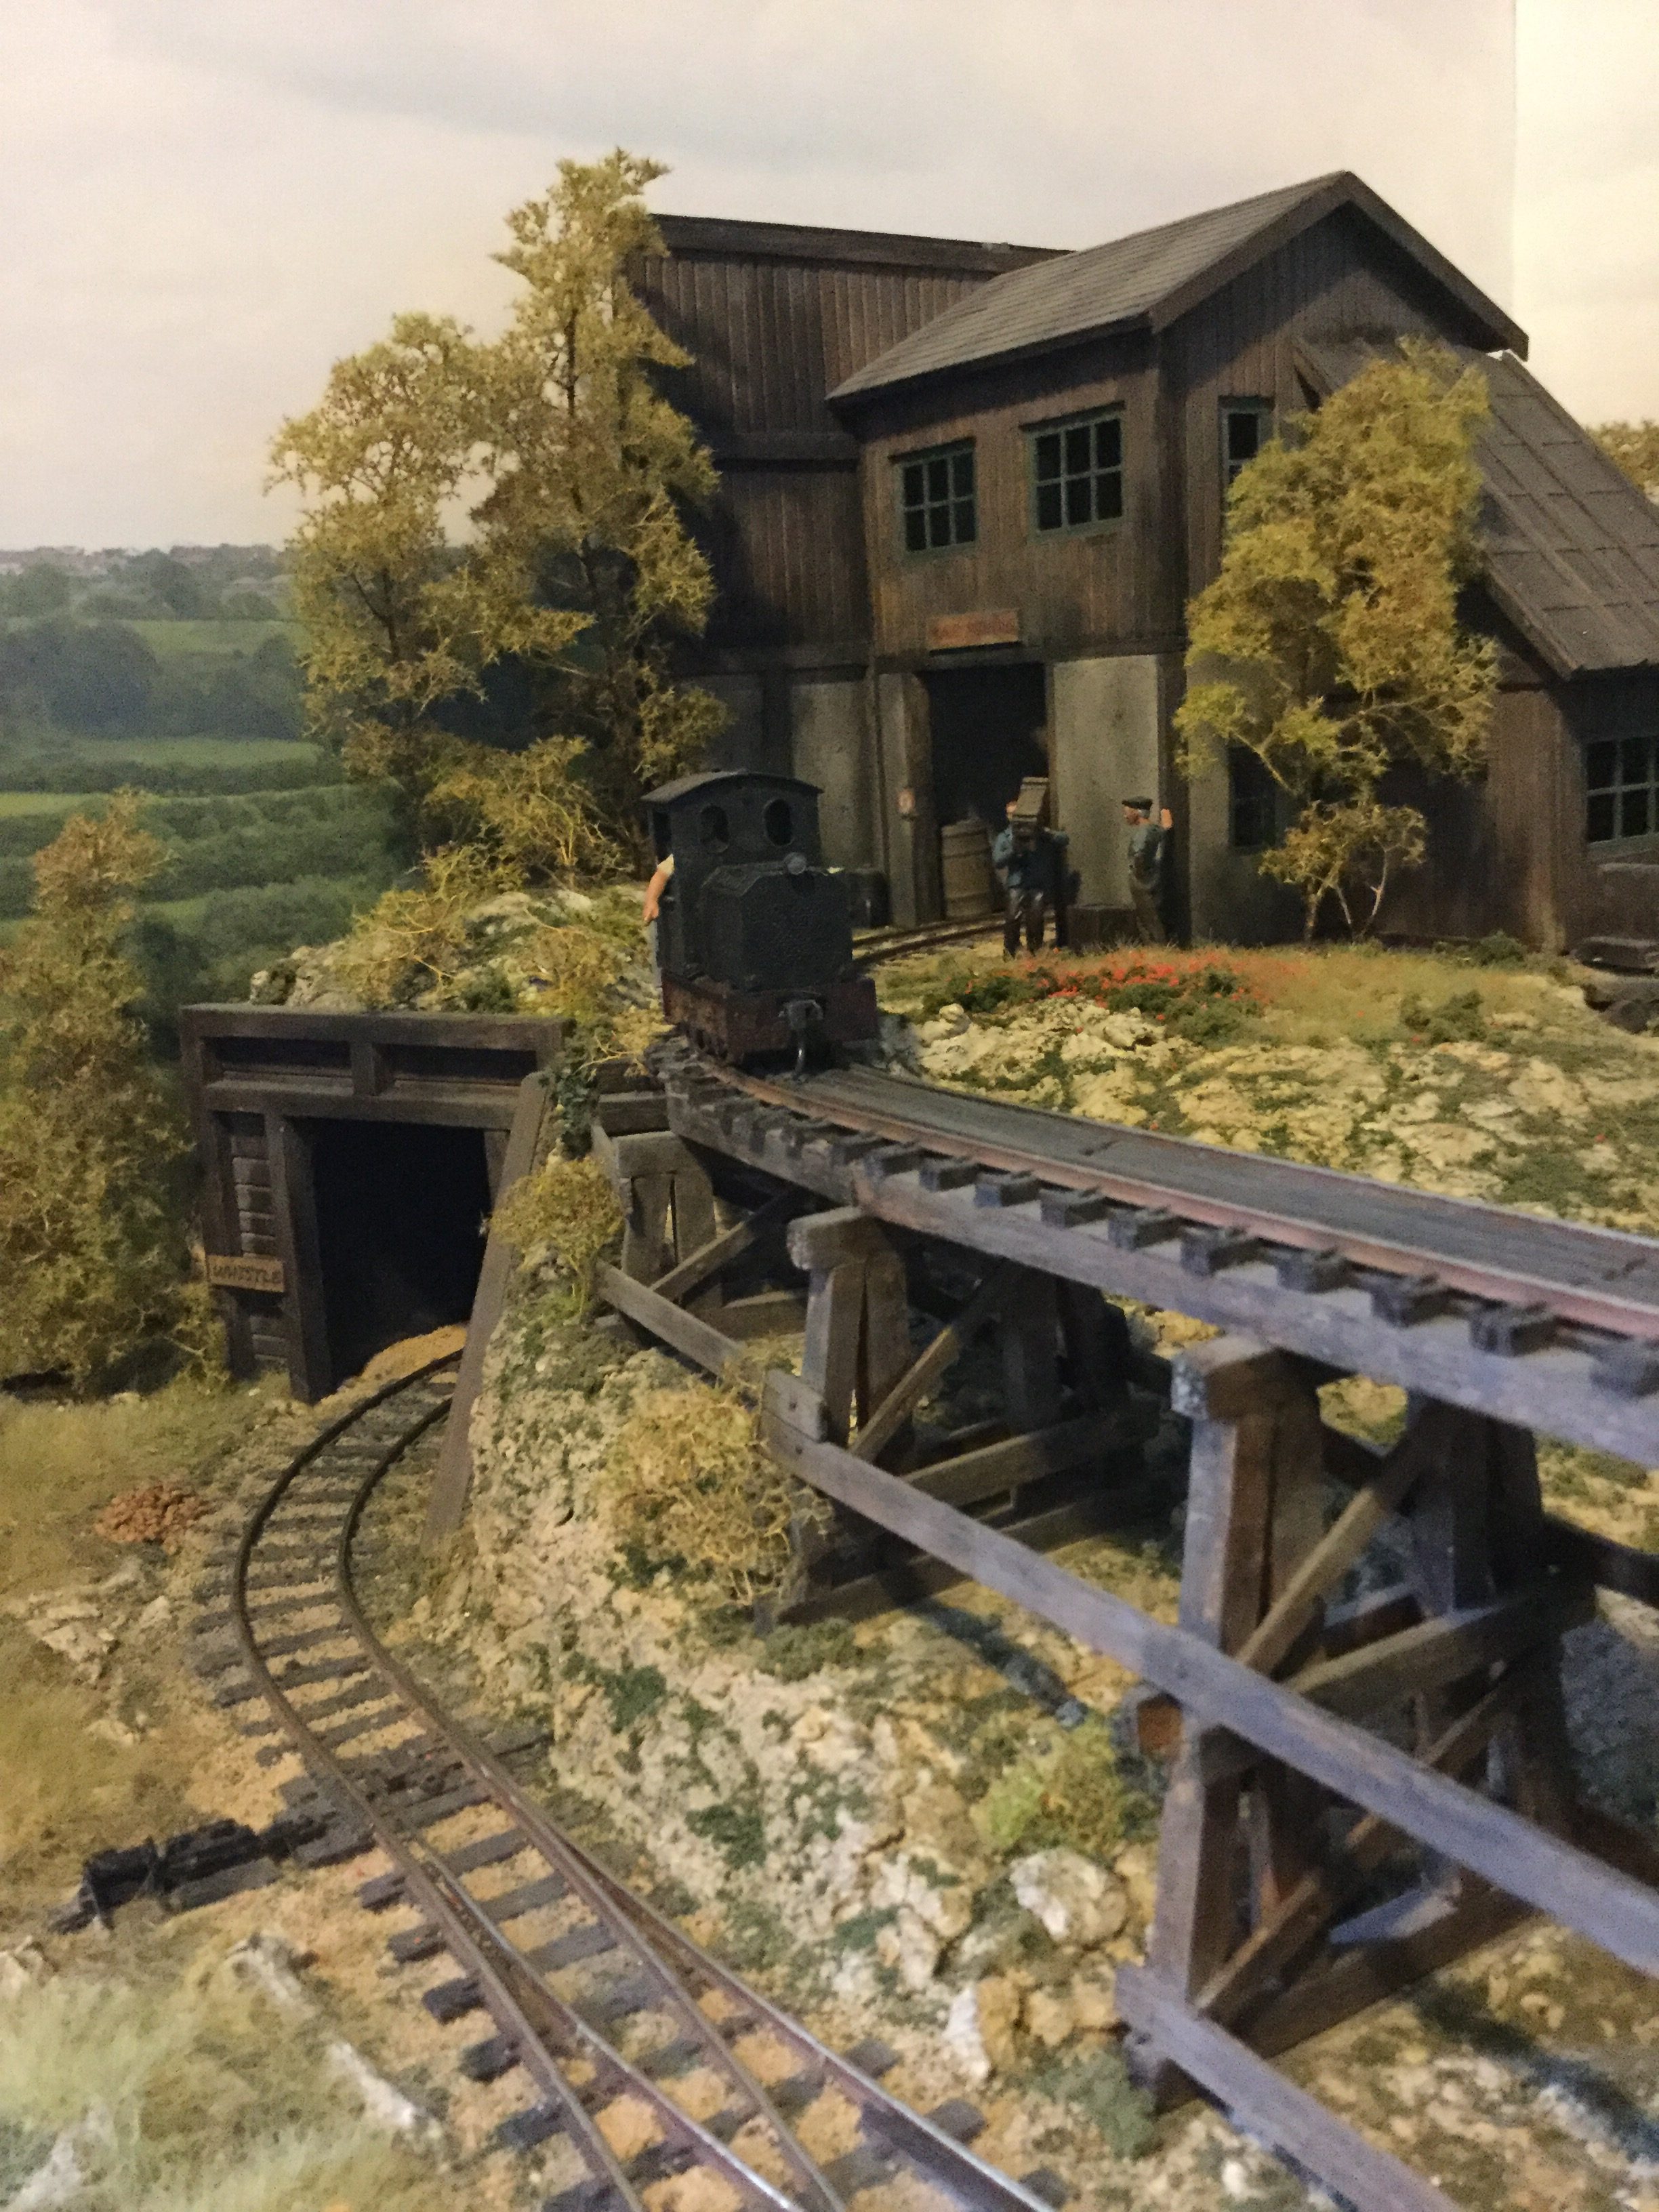
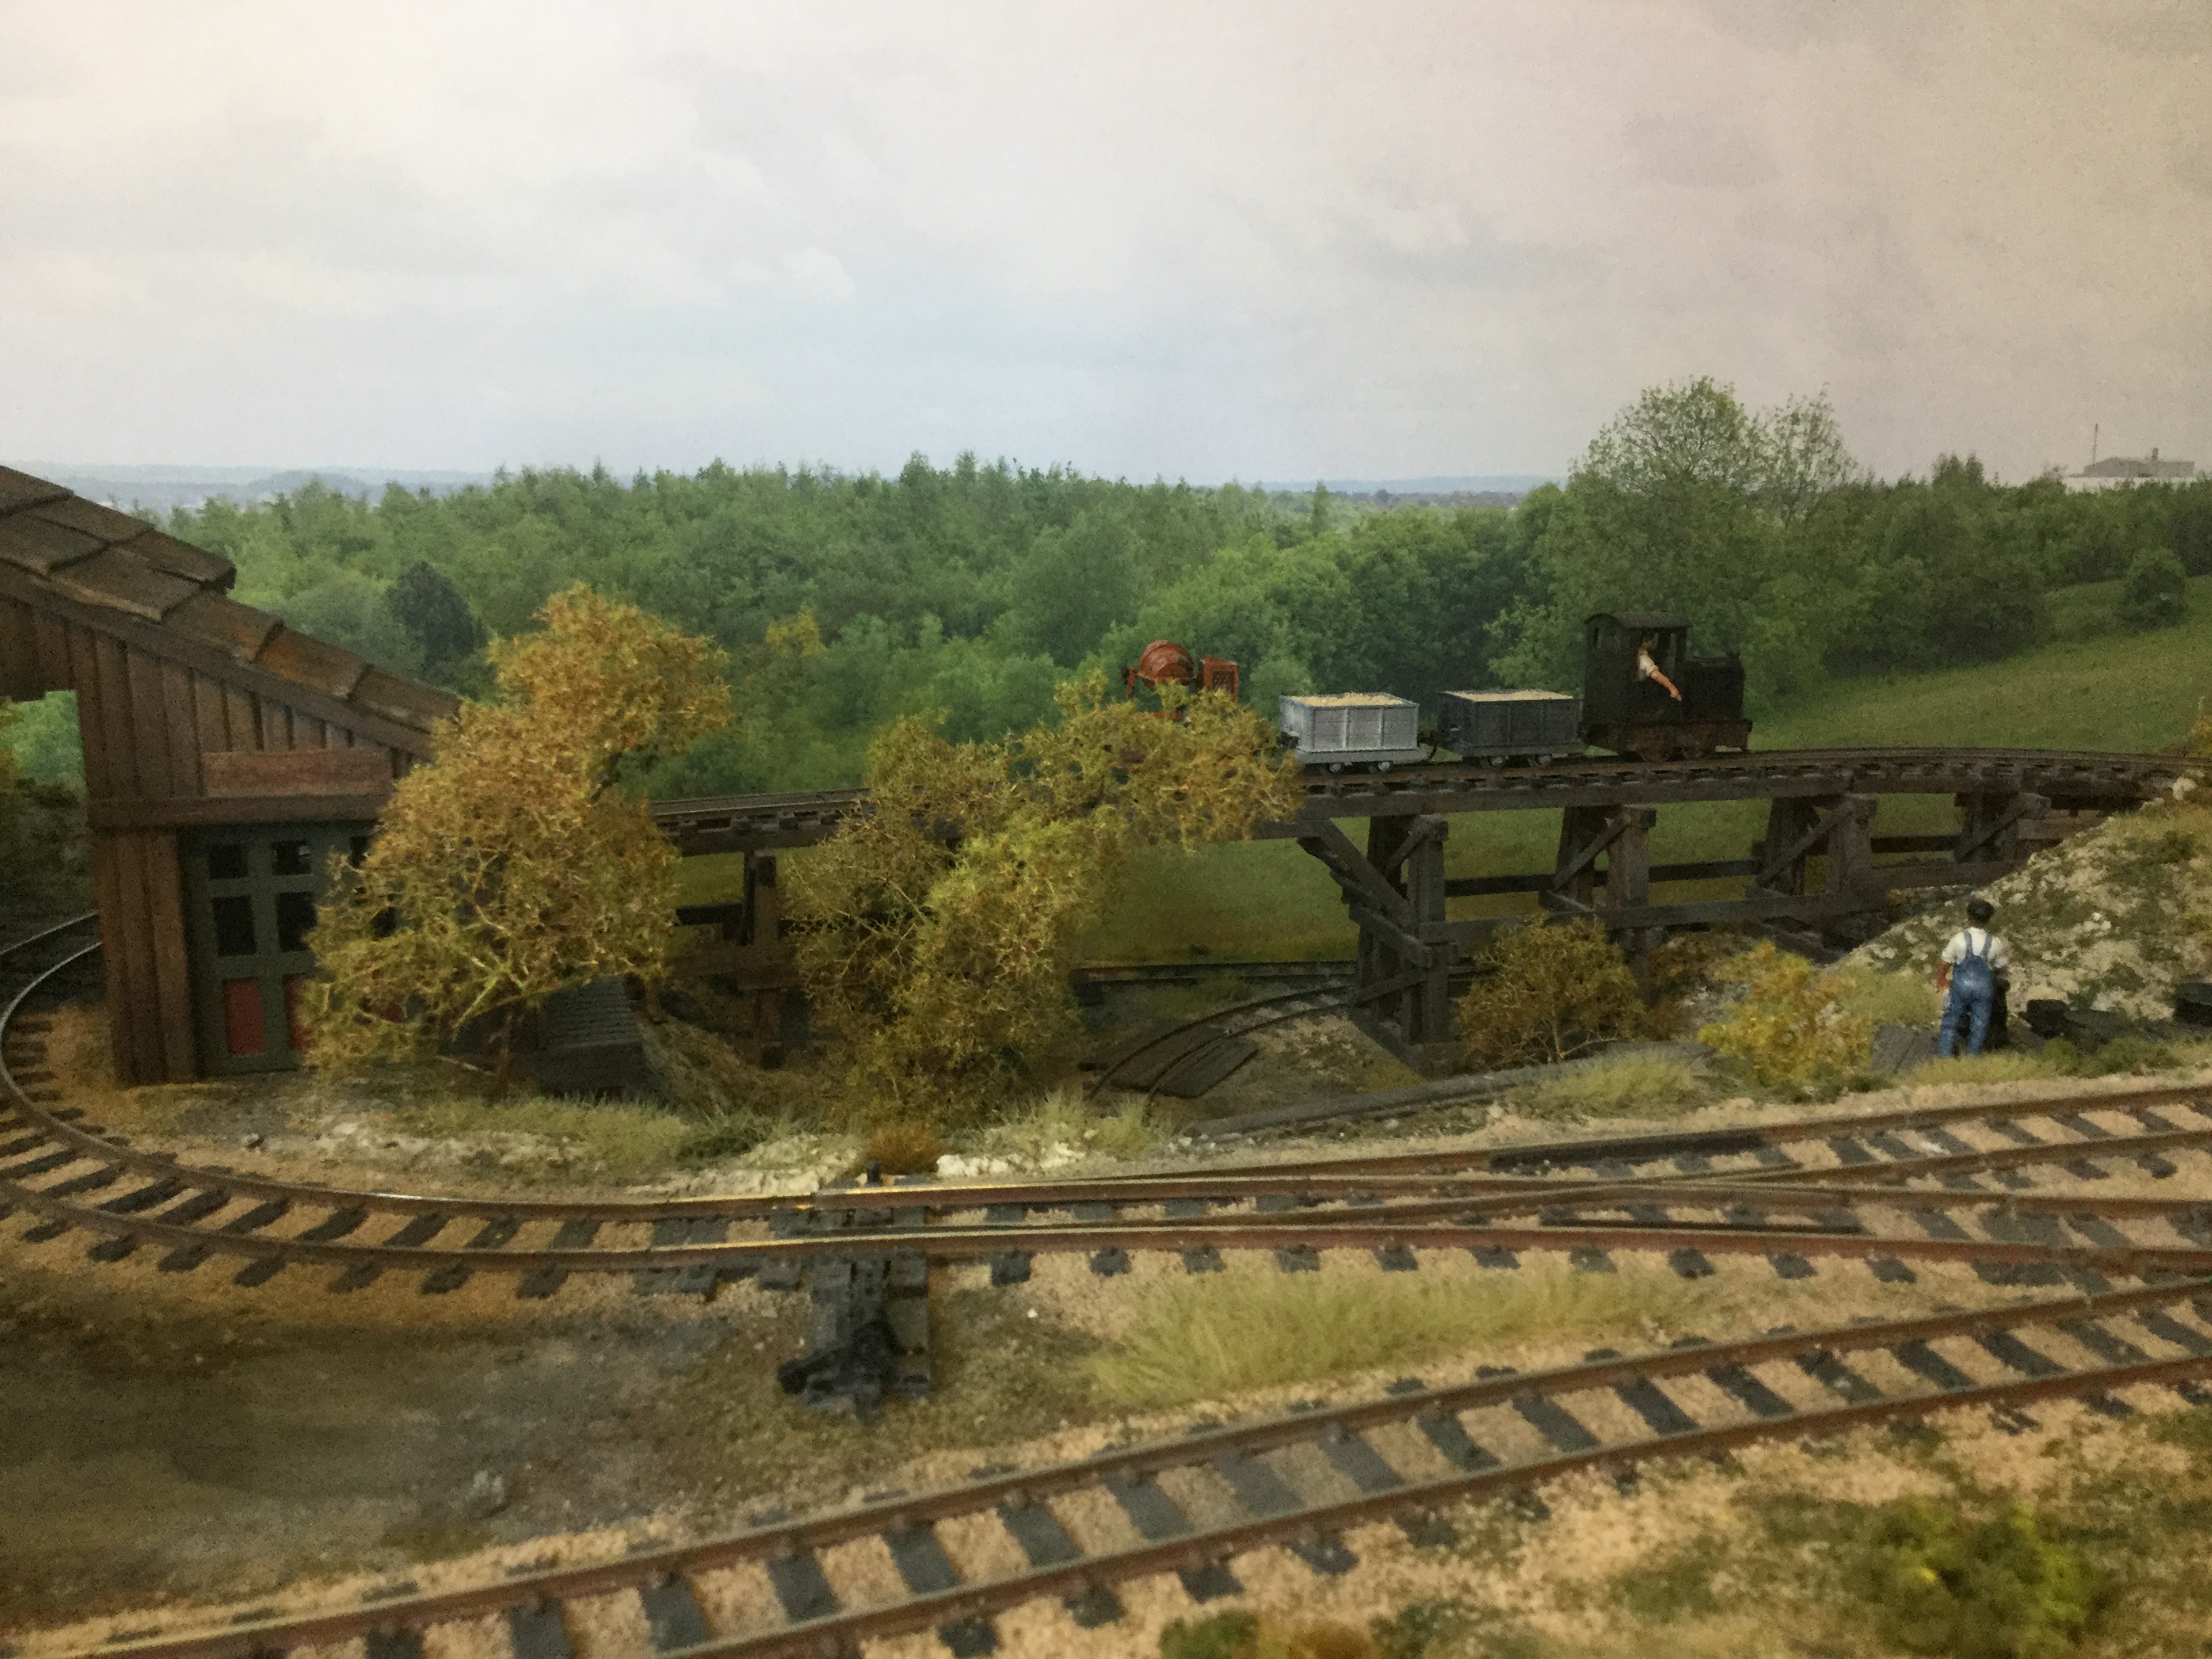
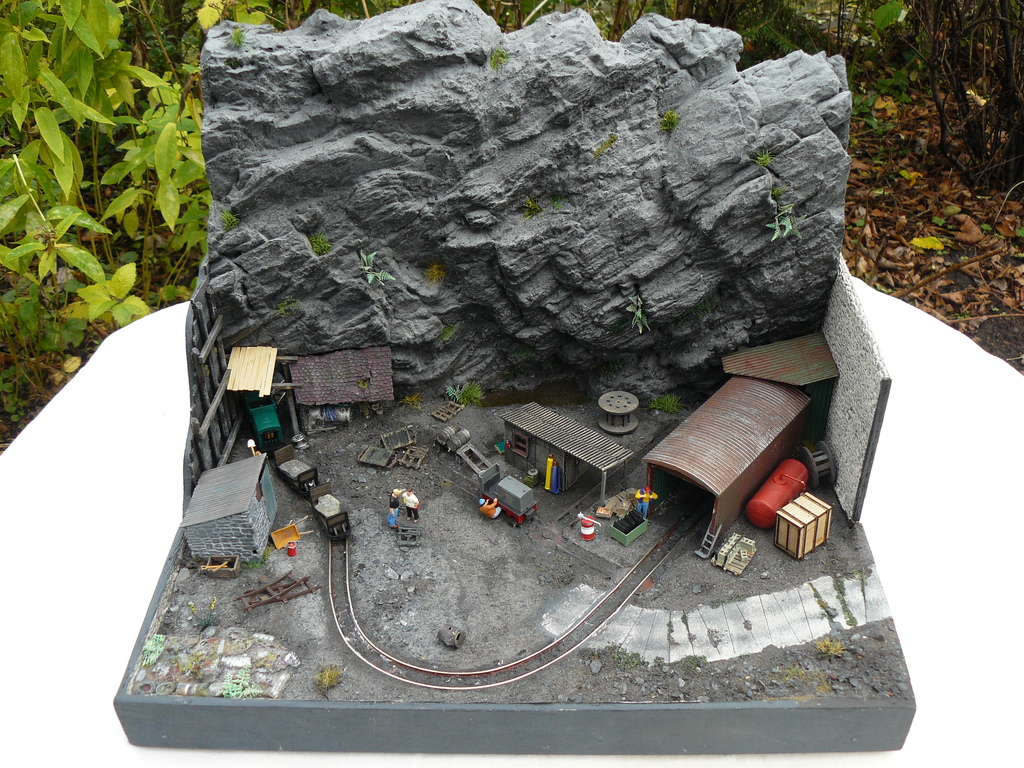
Slate mine
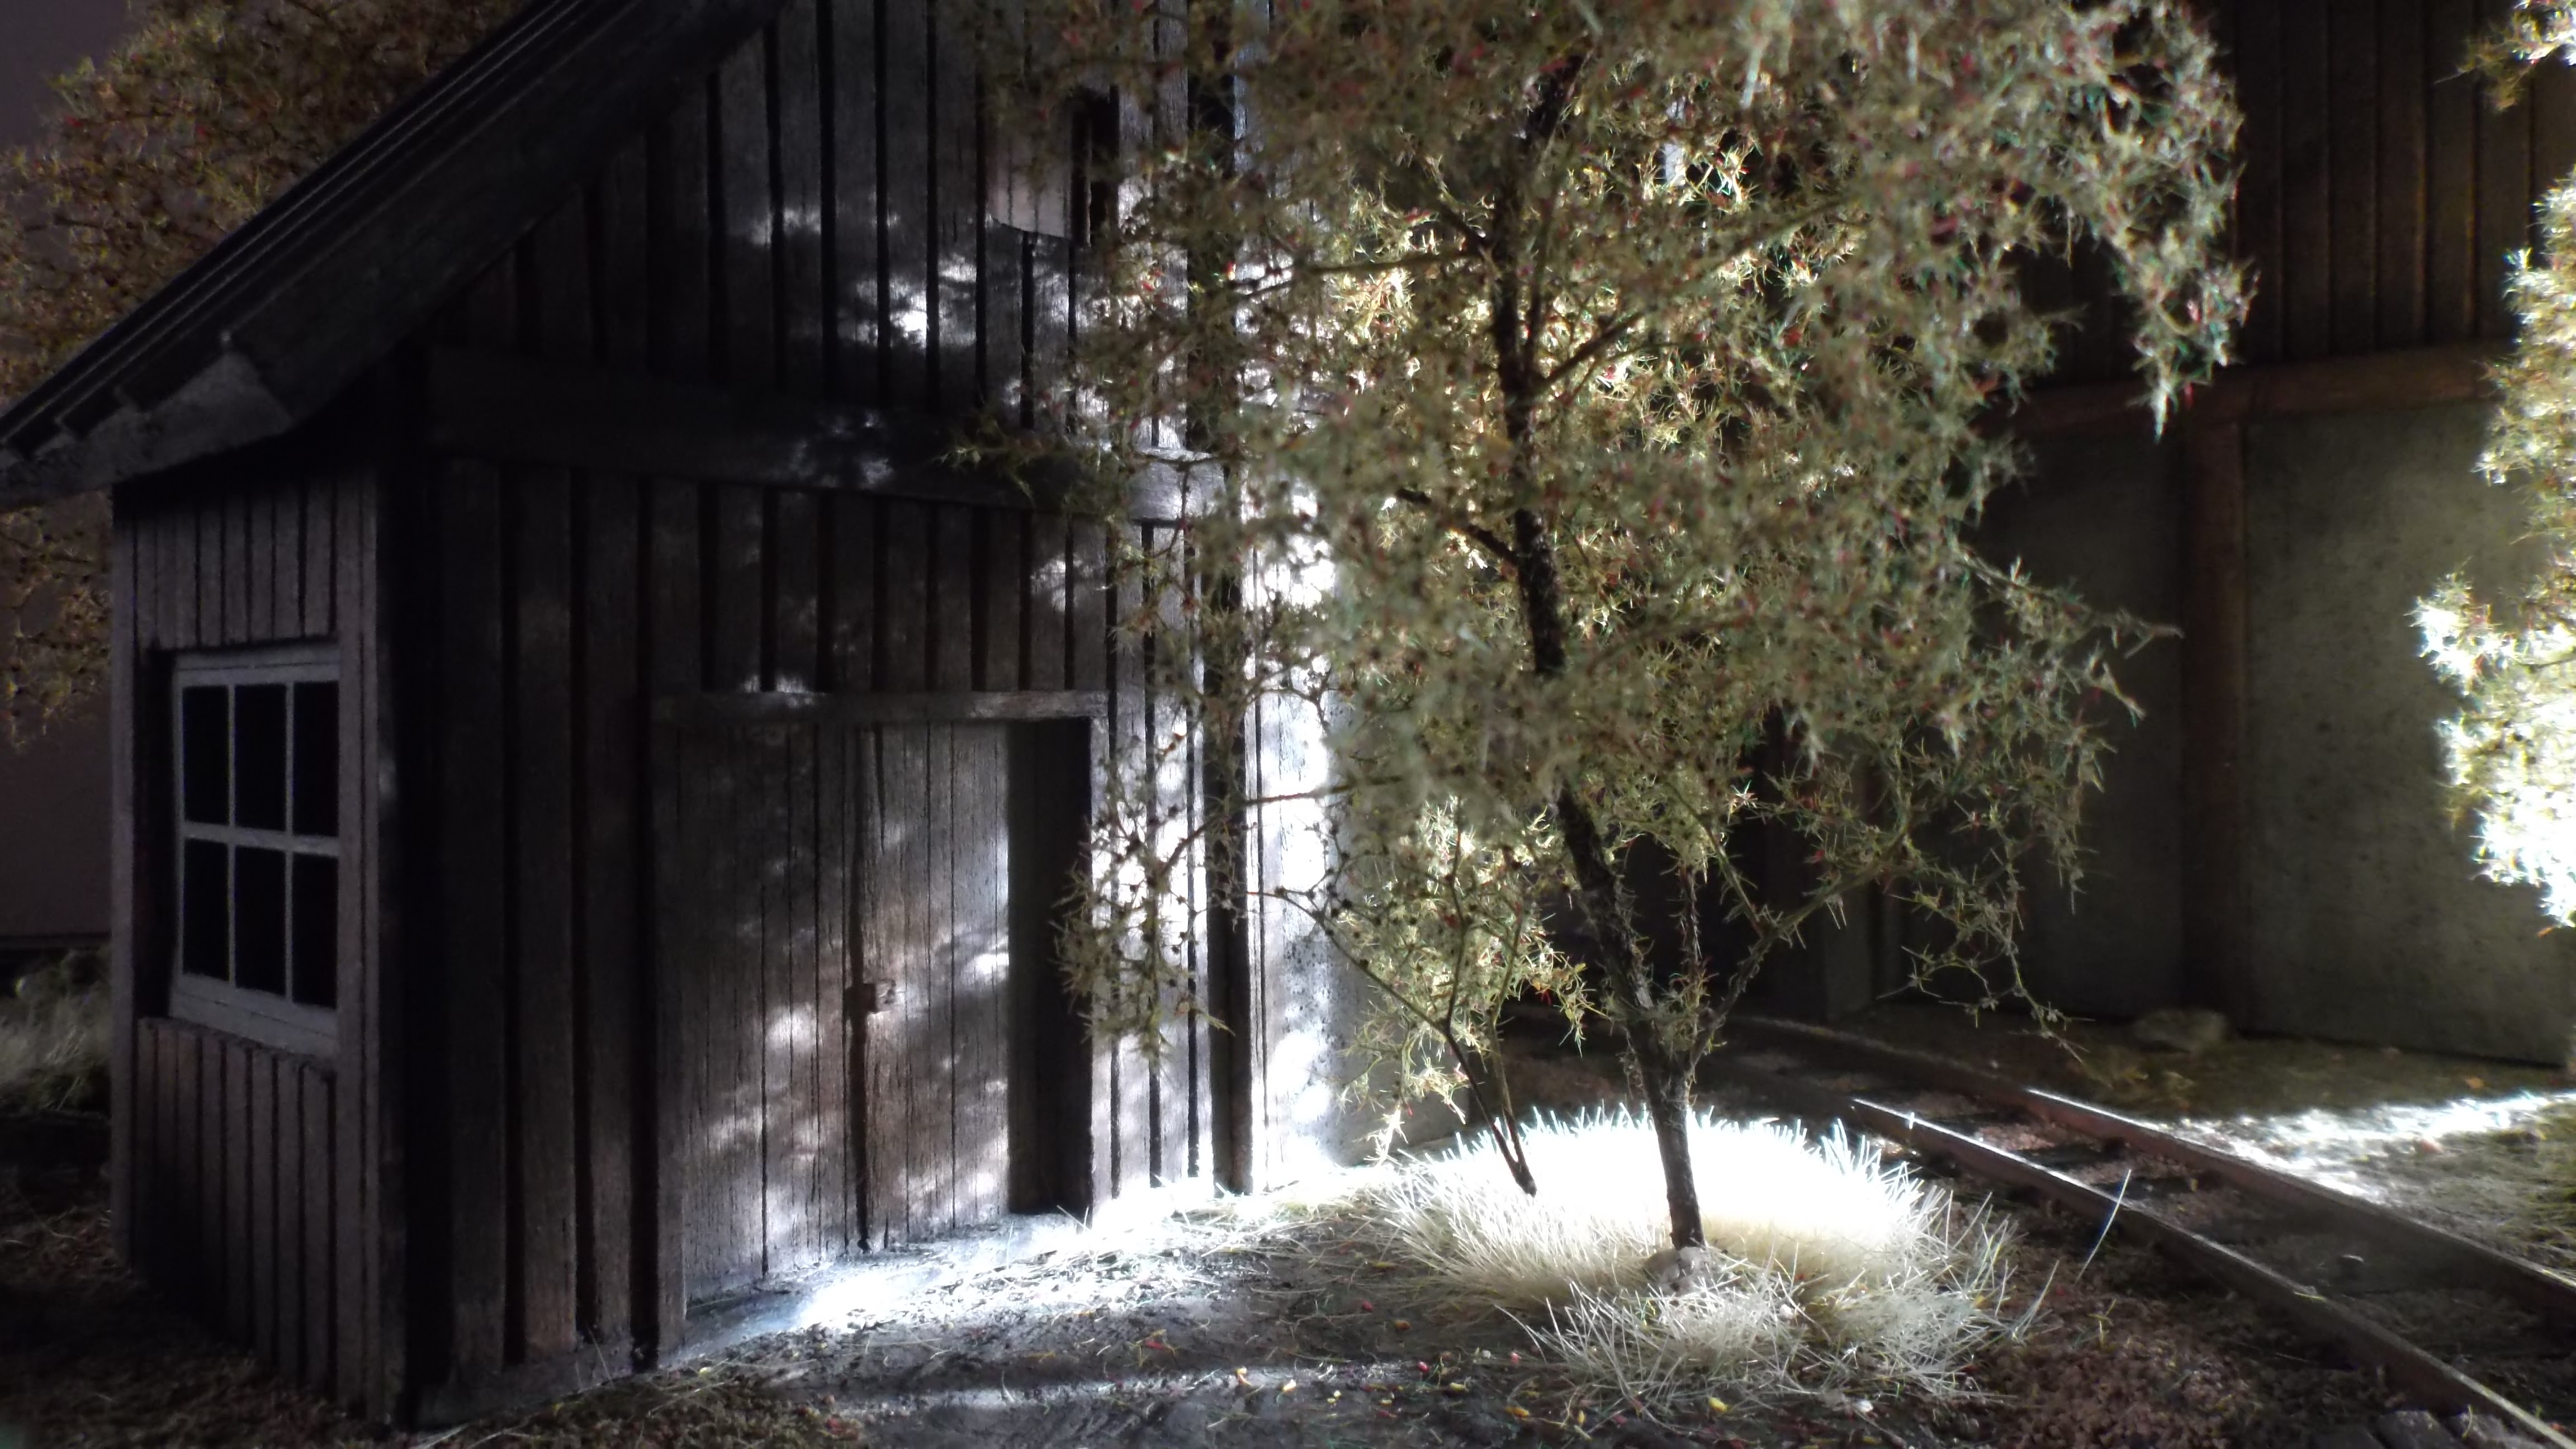
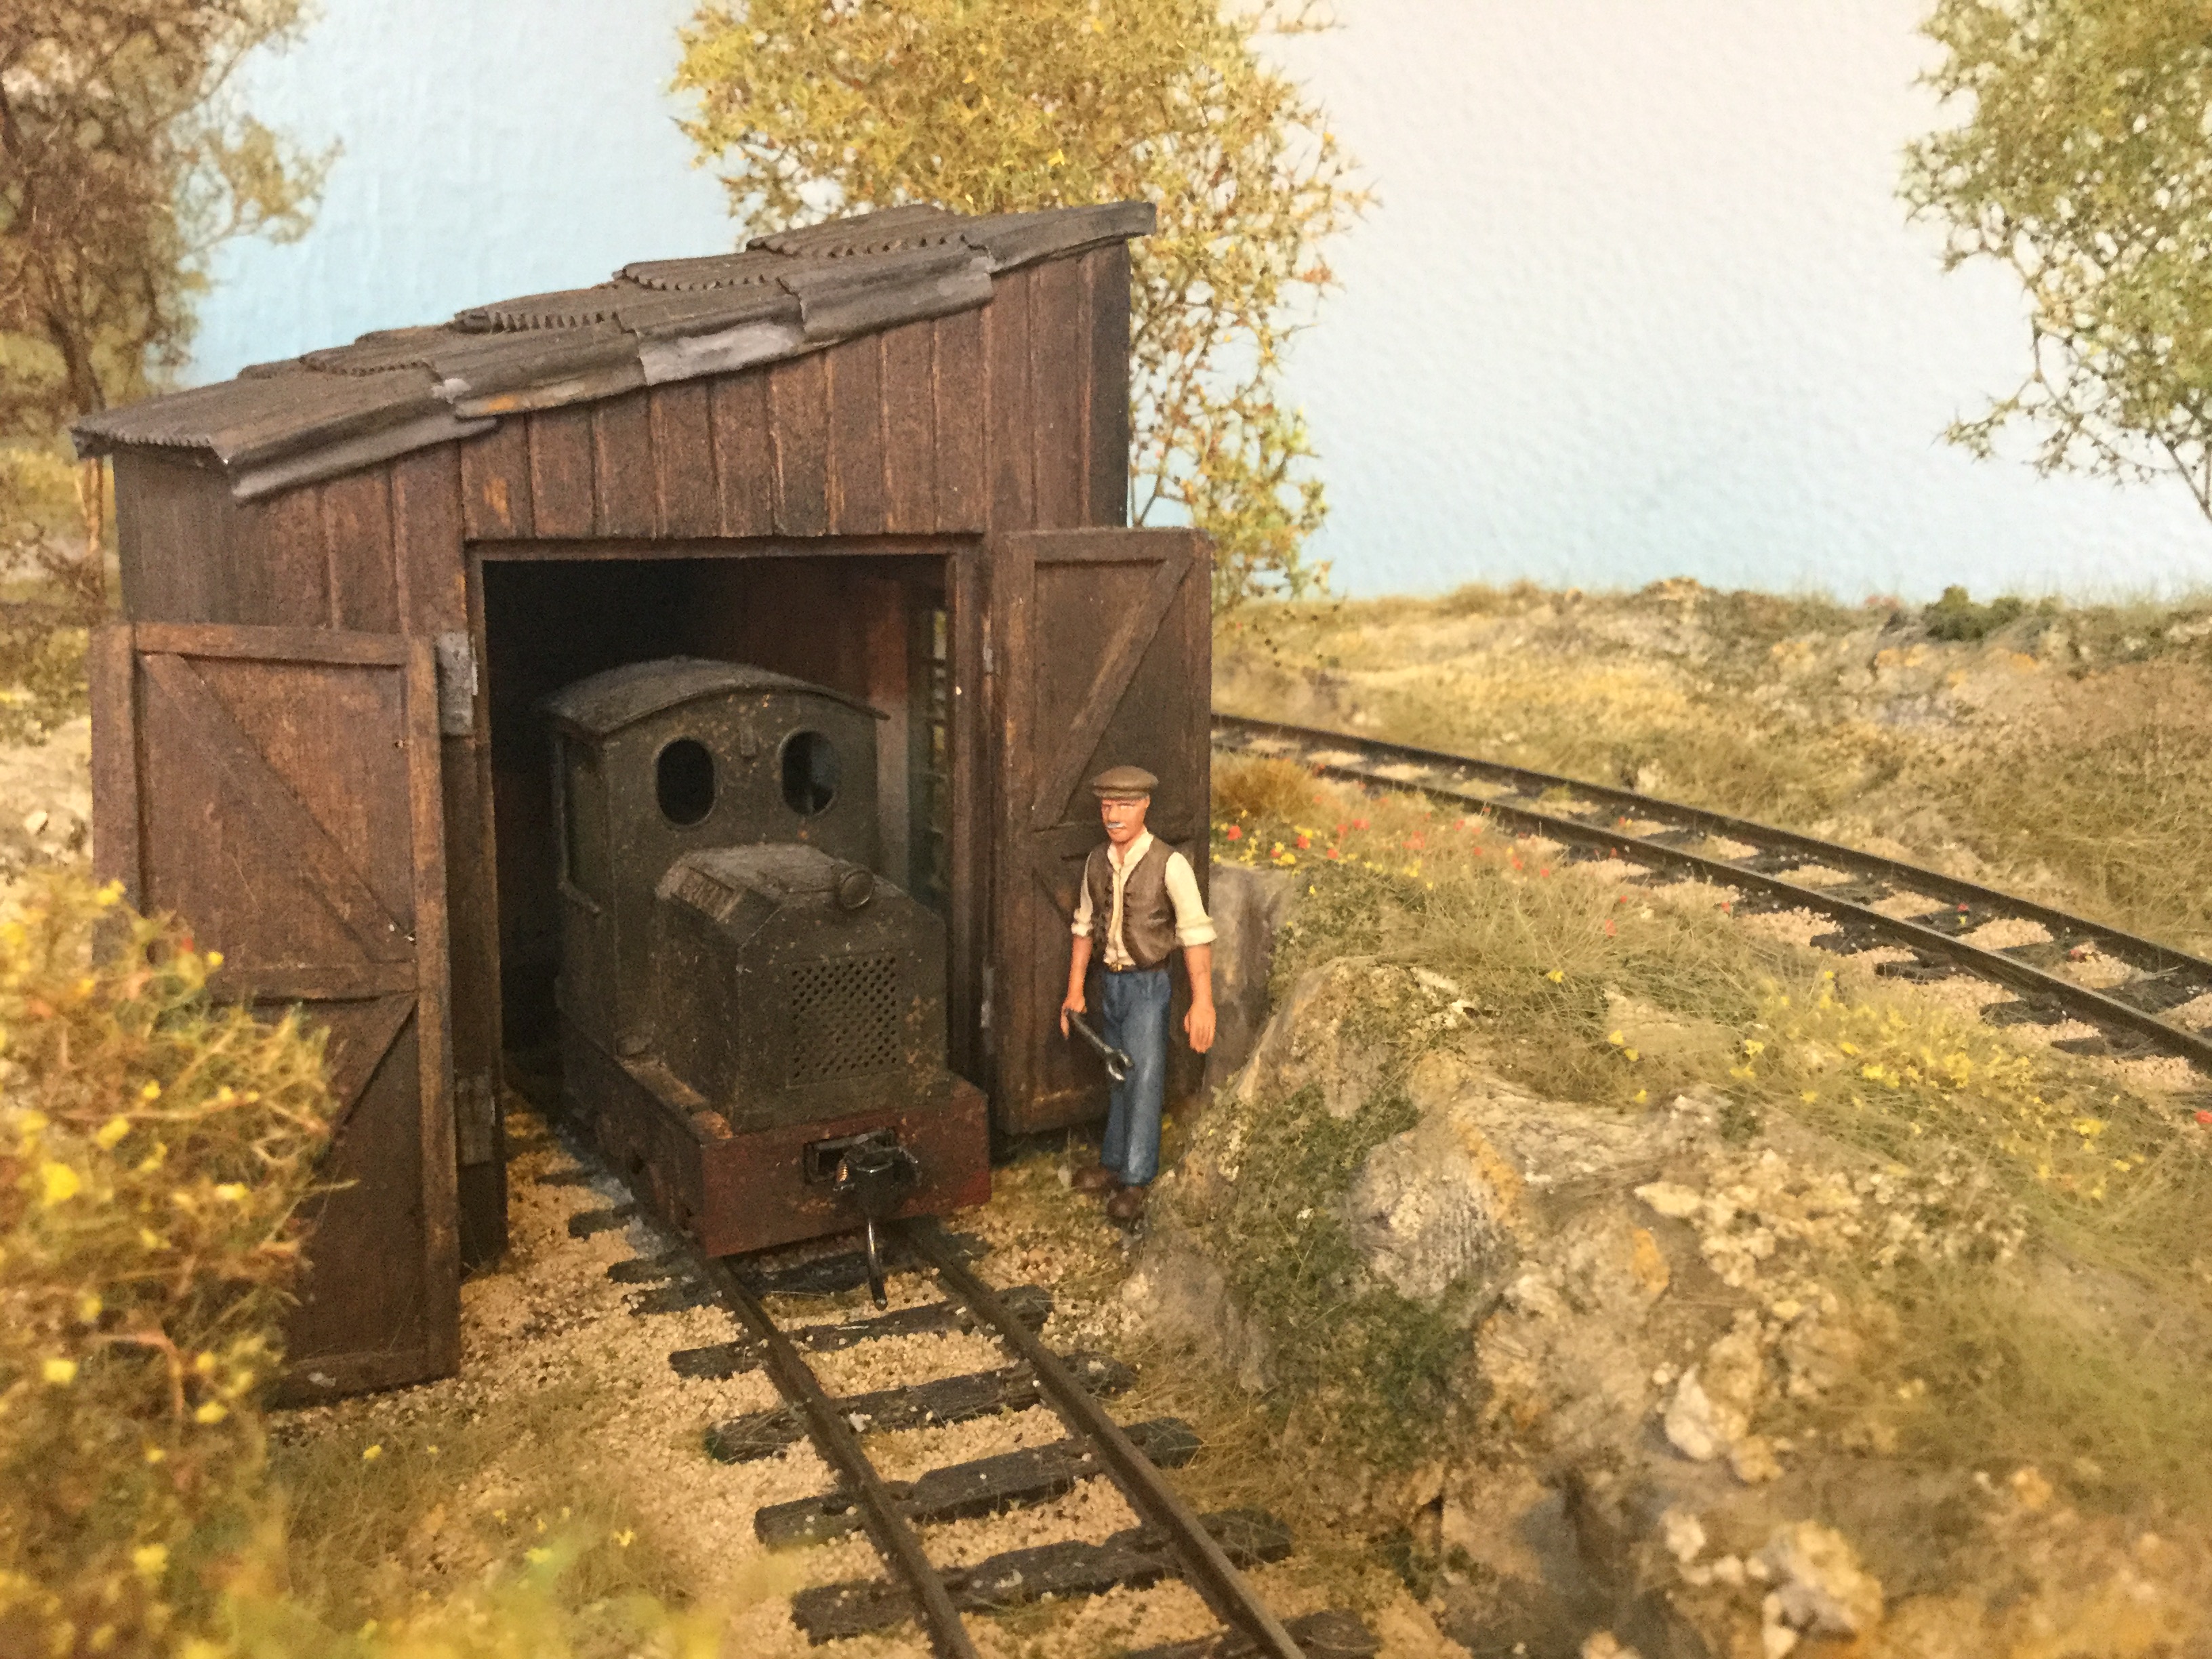
This layout is built in HOf by Bertram from Germany.
“I am a follower of Carl´s website from the early days on. May you remember my 2 little layouts that were shown at the scrapbook in 12/2007 (gravel mine) and 3/2013 (chocolate box). Now there are two new micro layouts which I built in late 2013 (“Slate Mine”) and early 2014 (“Kaulsdorfer Mühle”-mill and “Wuhle-Bräu”-brewery). These 4 micro layouts were shown at the 20th model railway show by the Berlin-Brandenburg section of the international “Dampfbahn Furka Bergstrecke” association in Berlin-Marzahn, Germany, in February 2014.
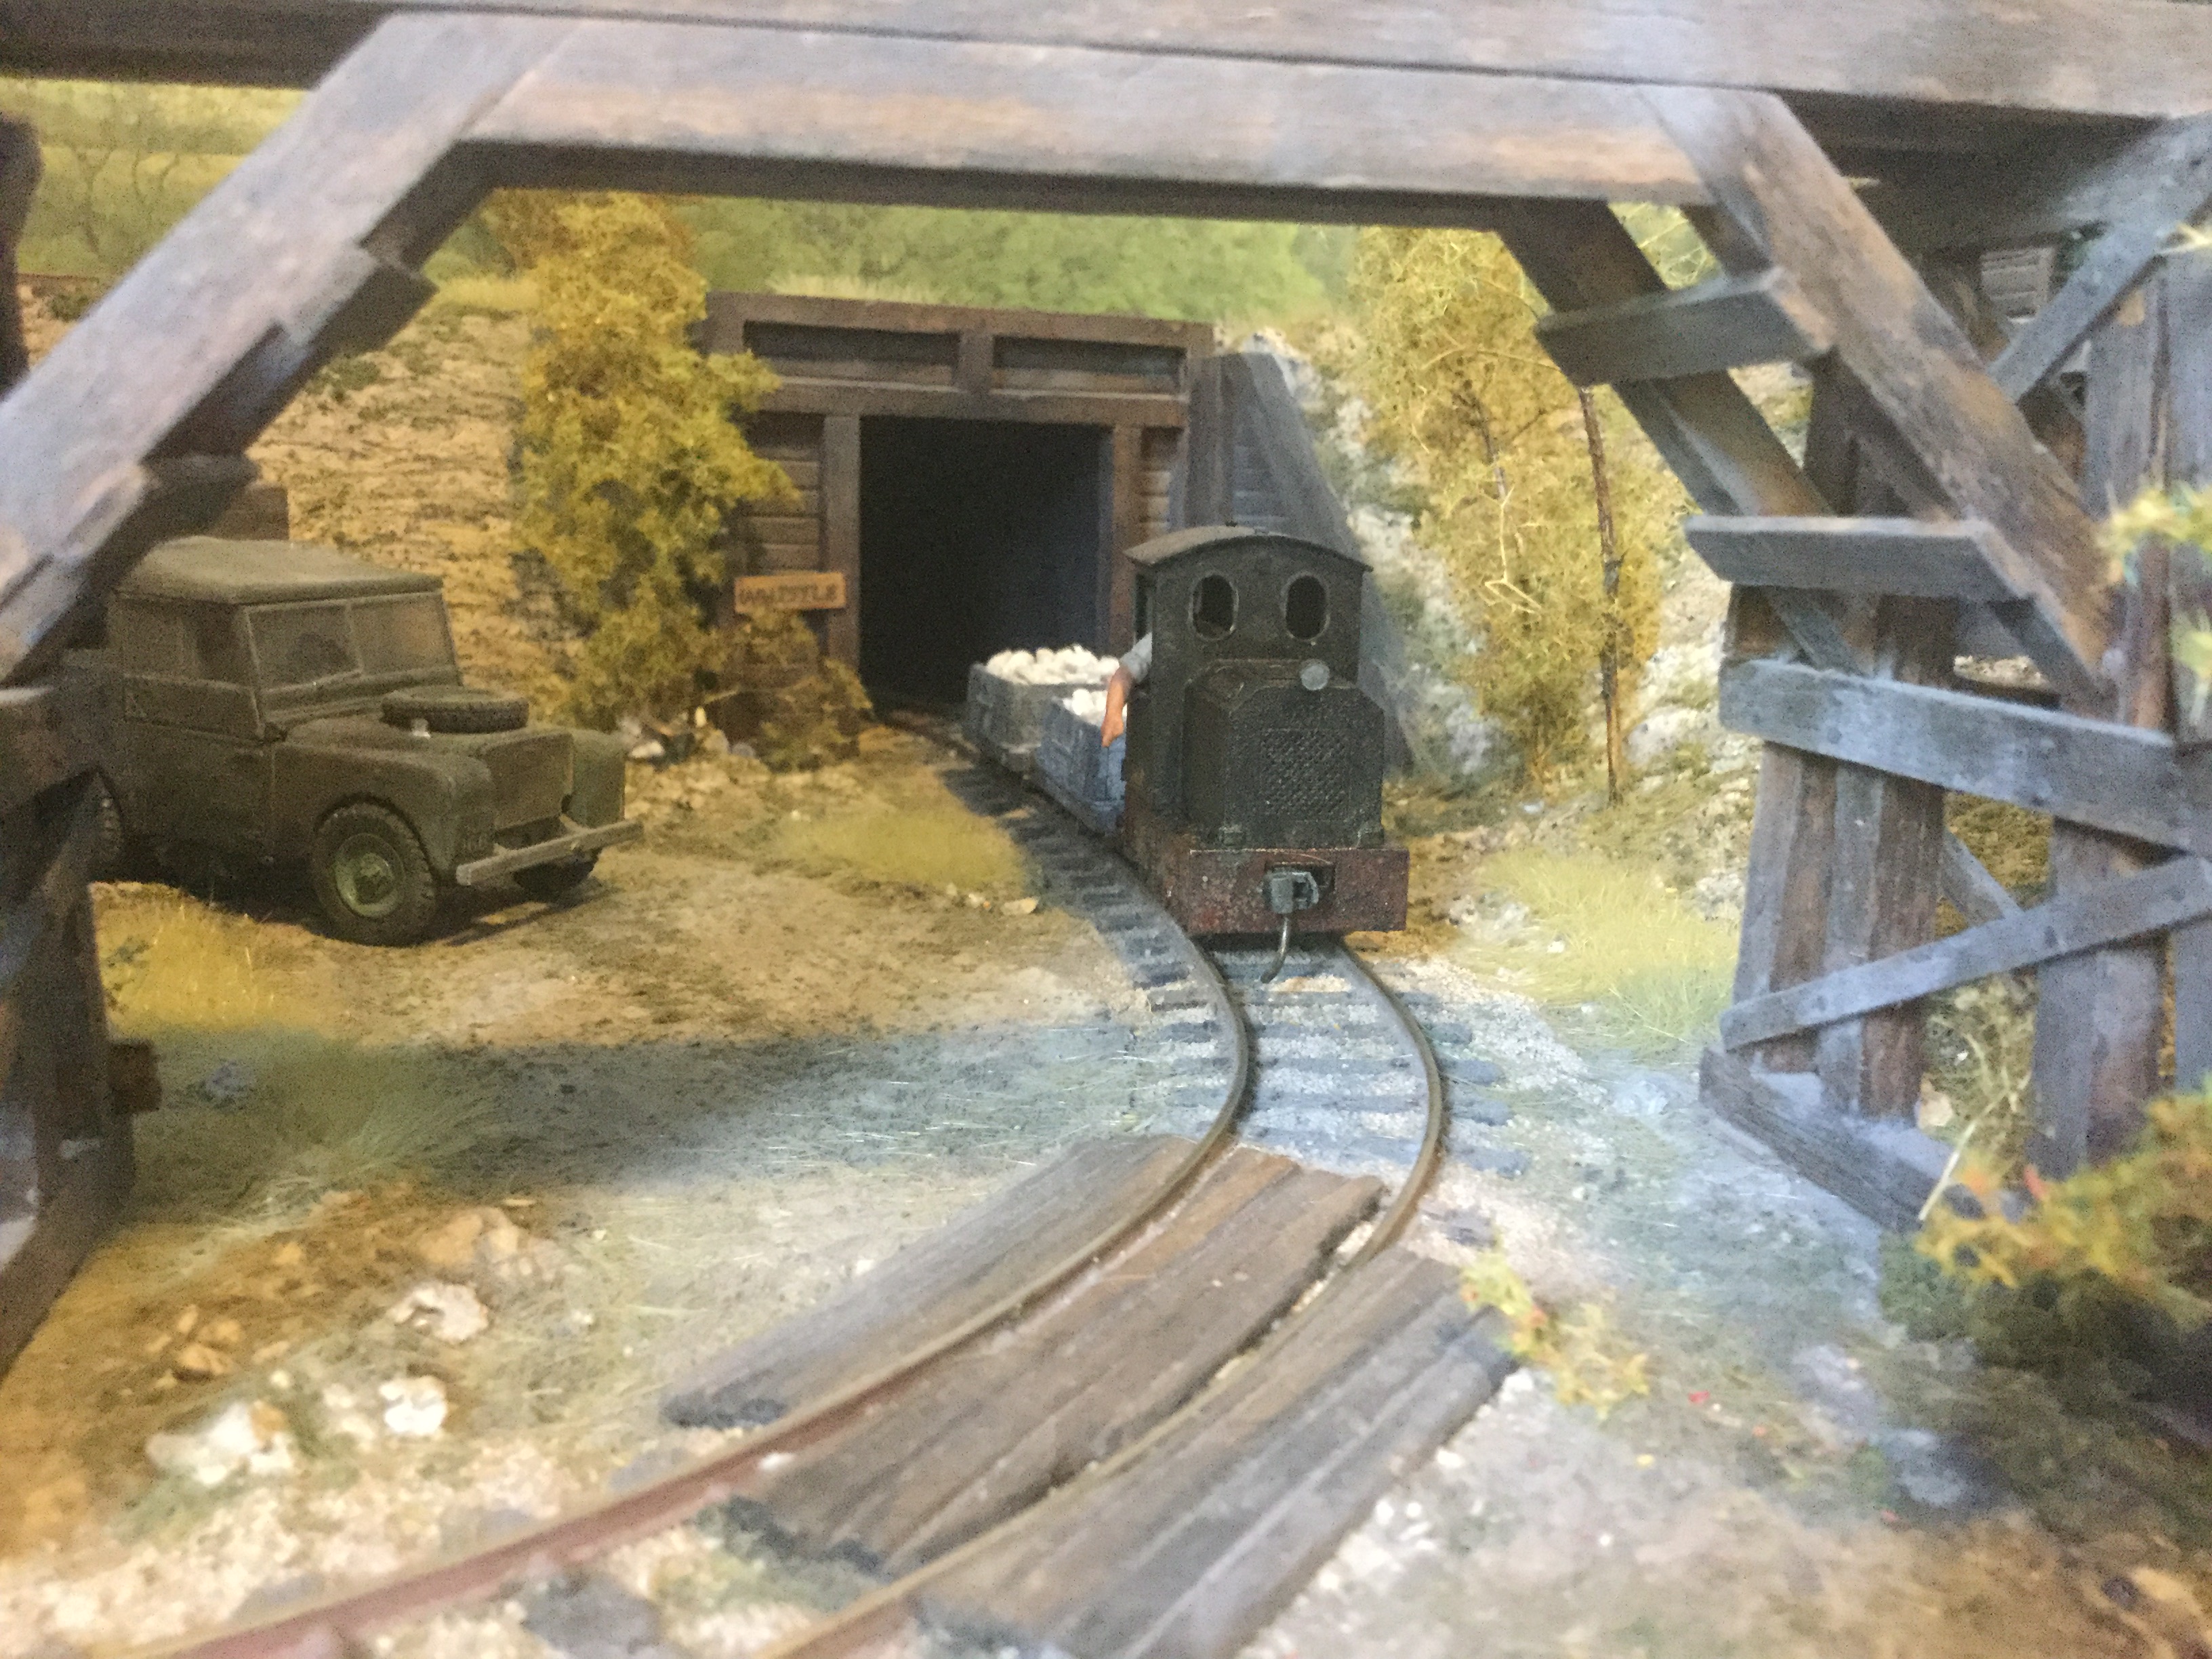
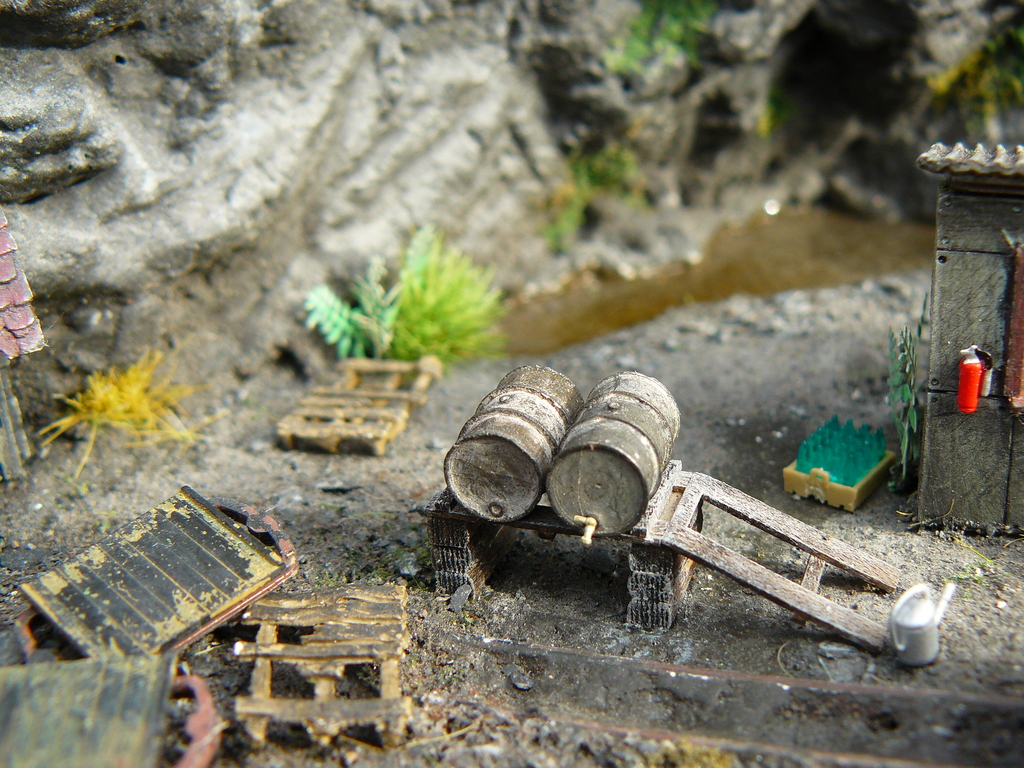
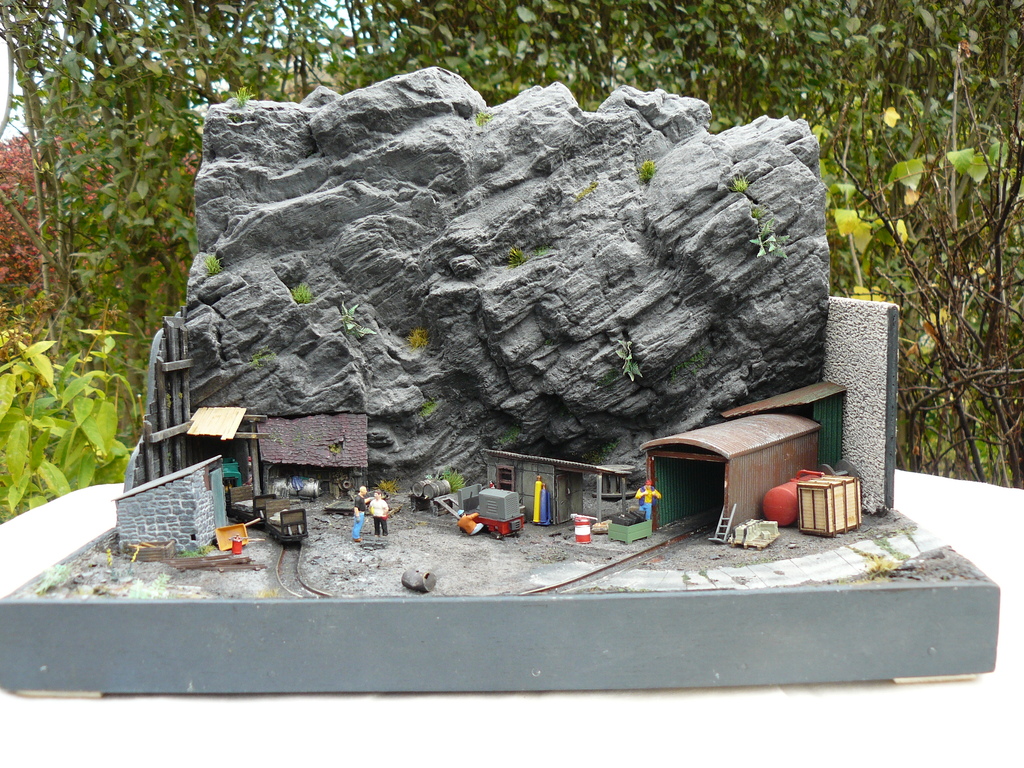
Today I want to introduce a real micro layout with a size of 30 cm to 27 cm. It shows a small slate mine with a light railway or tramway in H0f gauge (scale 1/87 light industrial railway).
Here is the story:
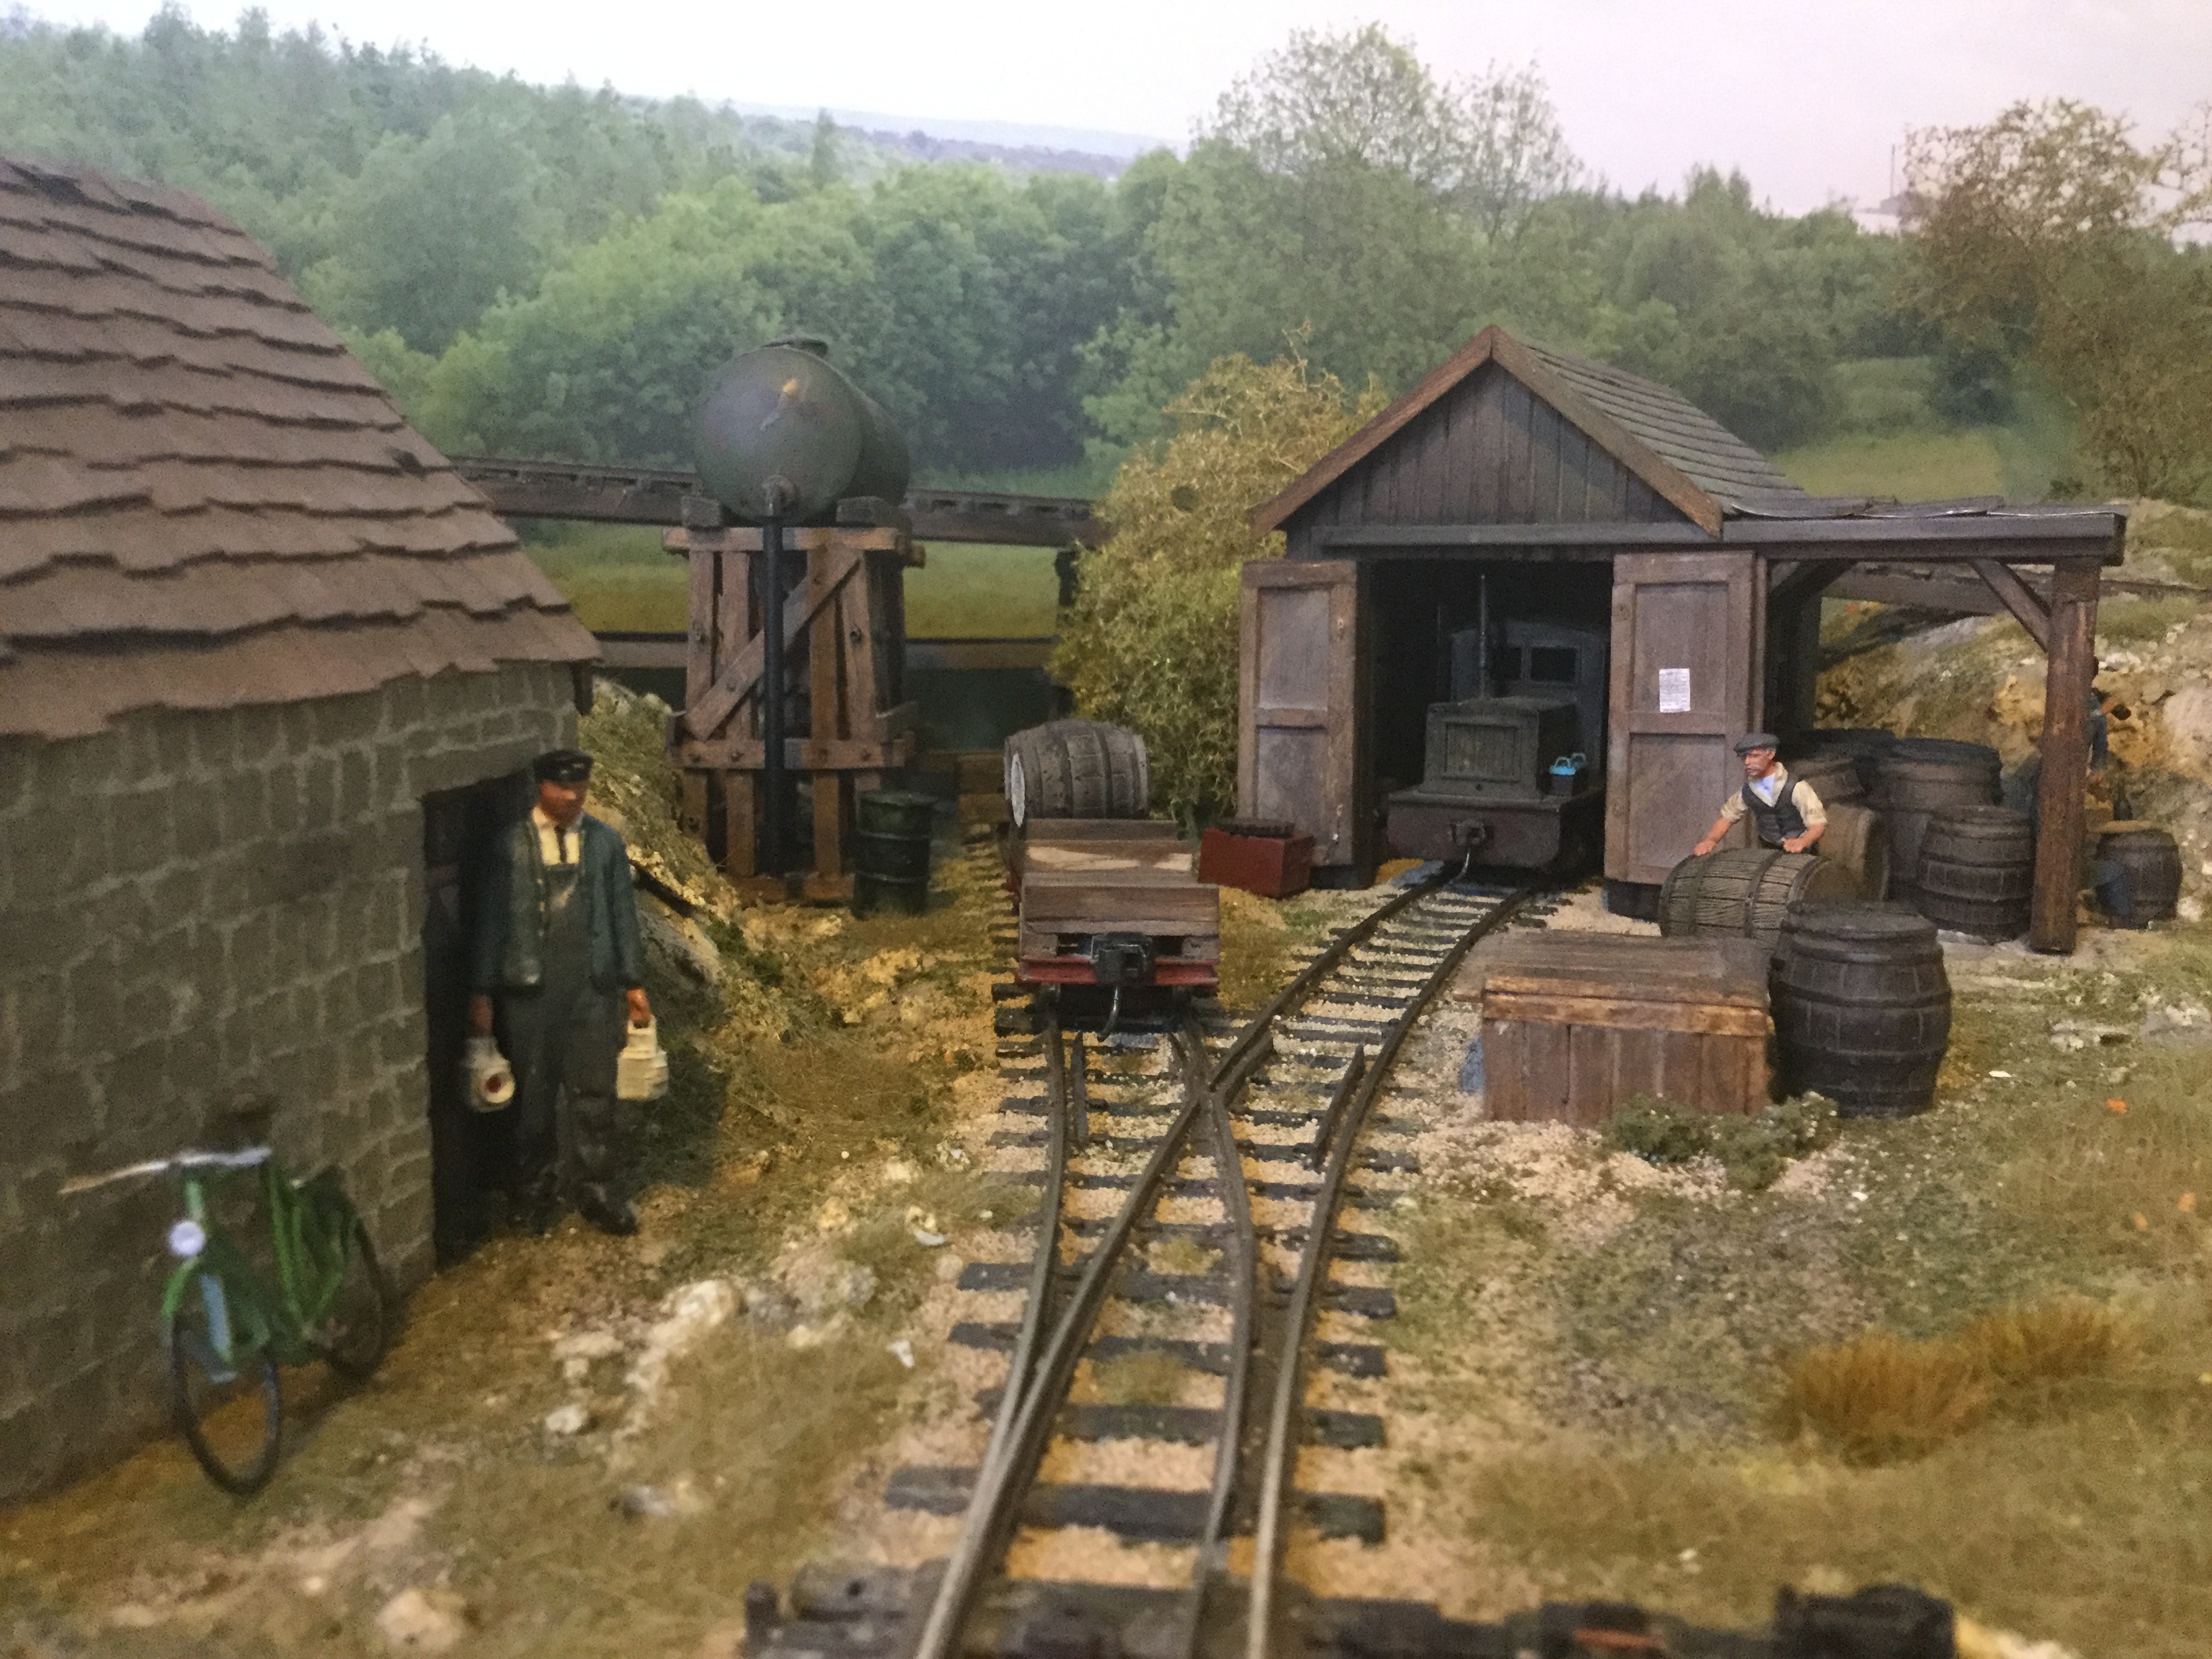
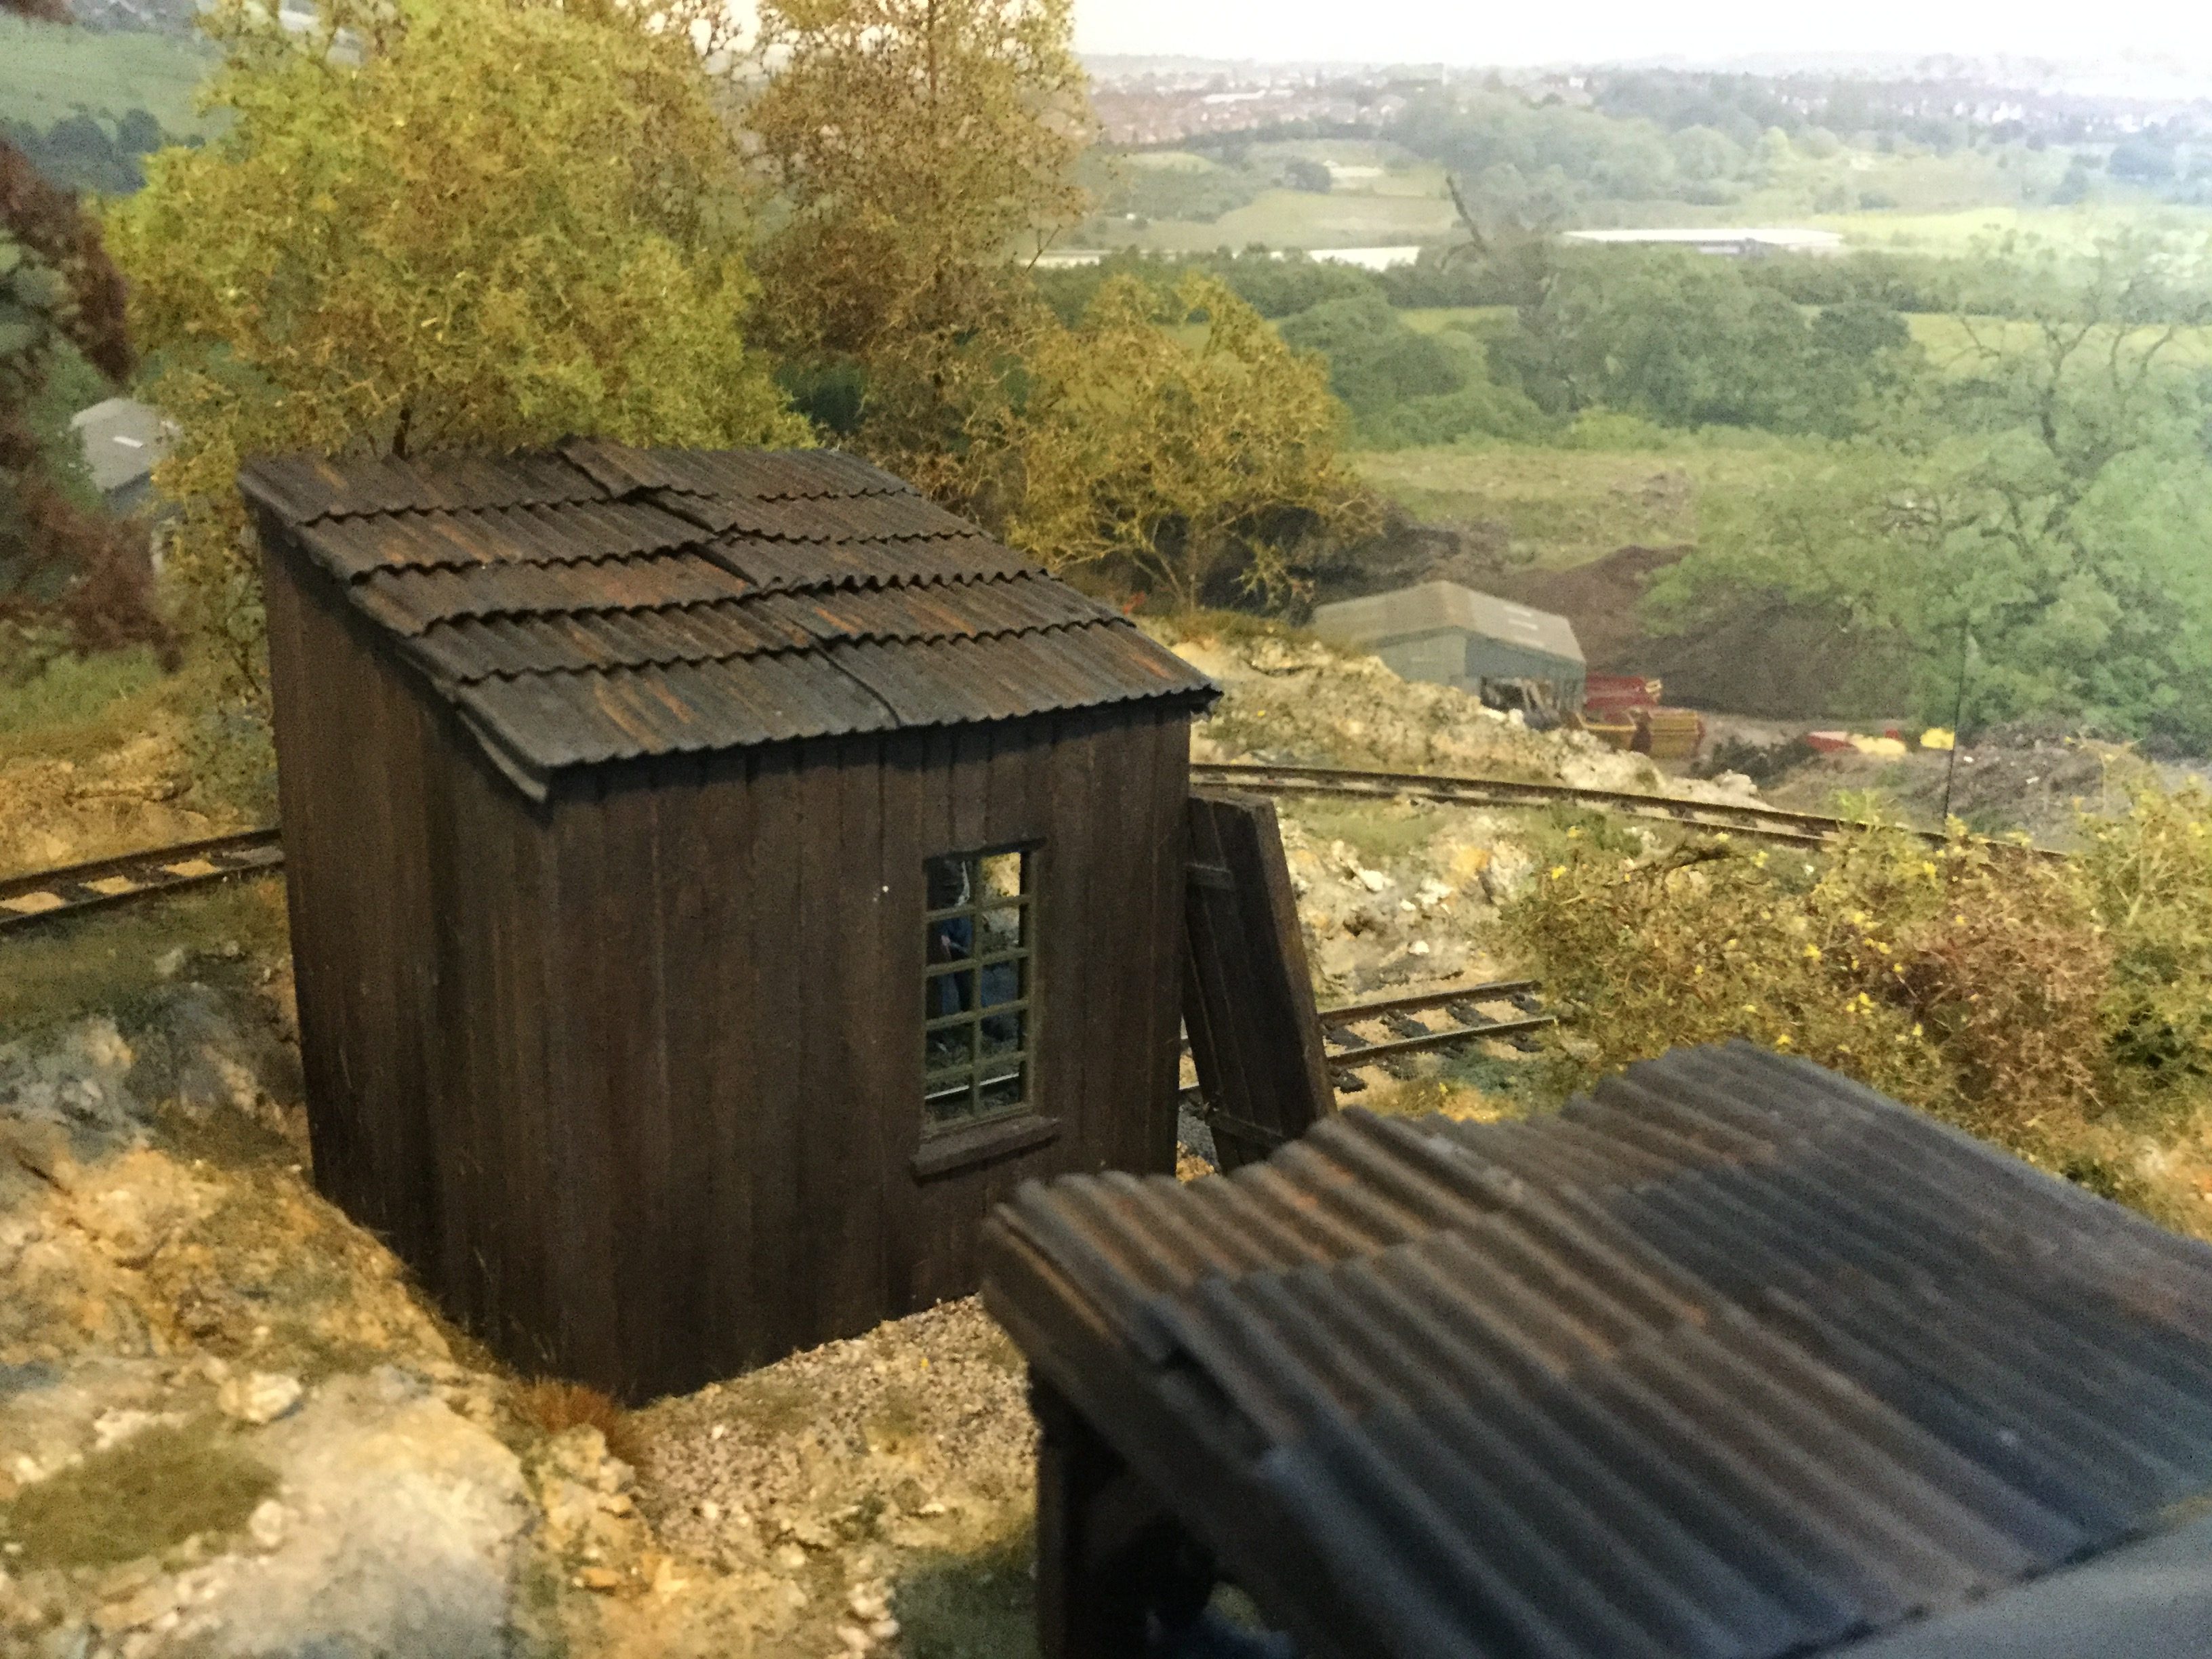
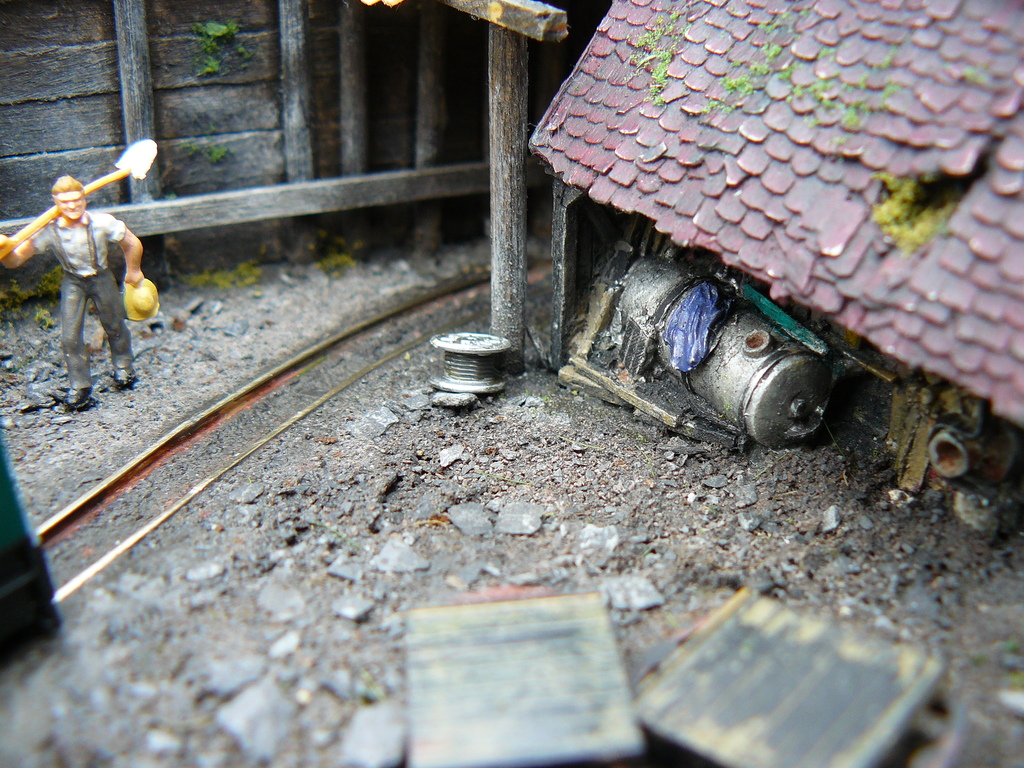
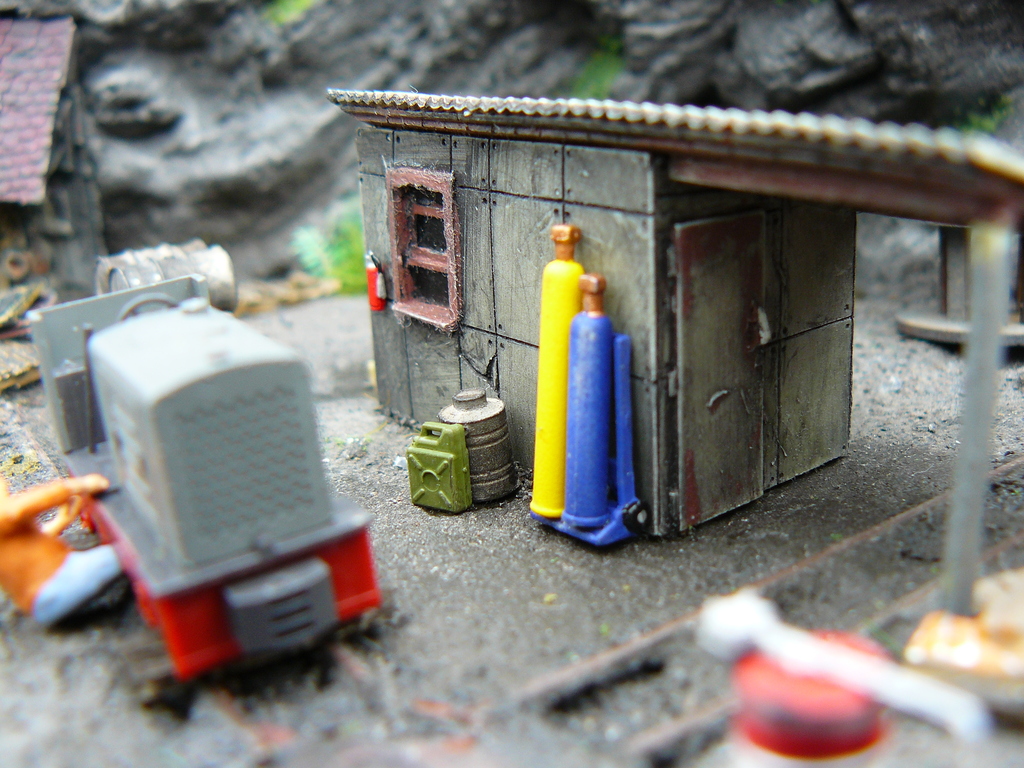
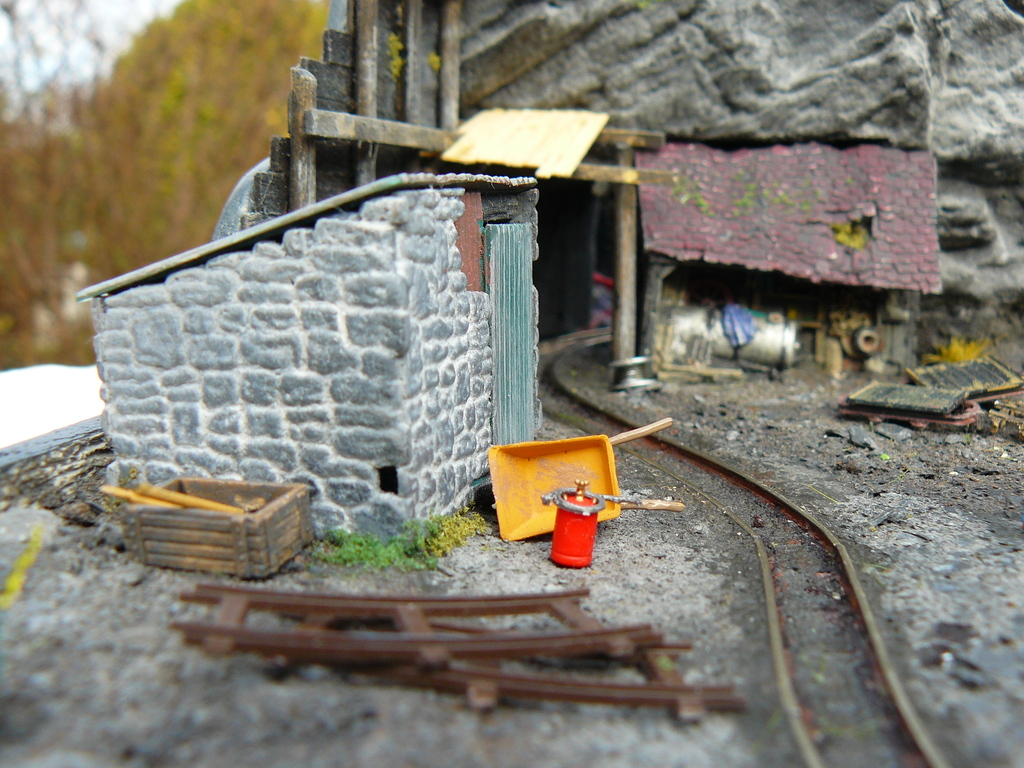
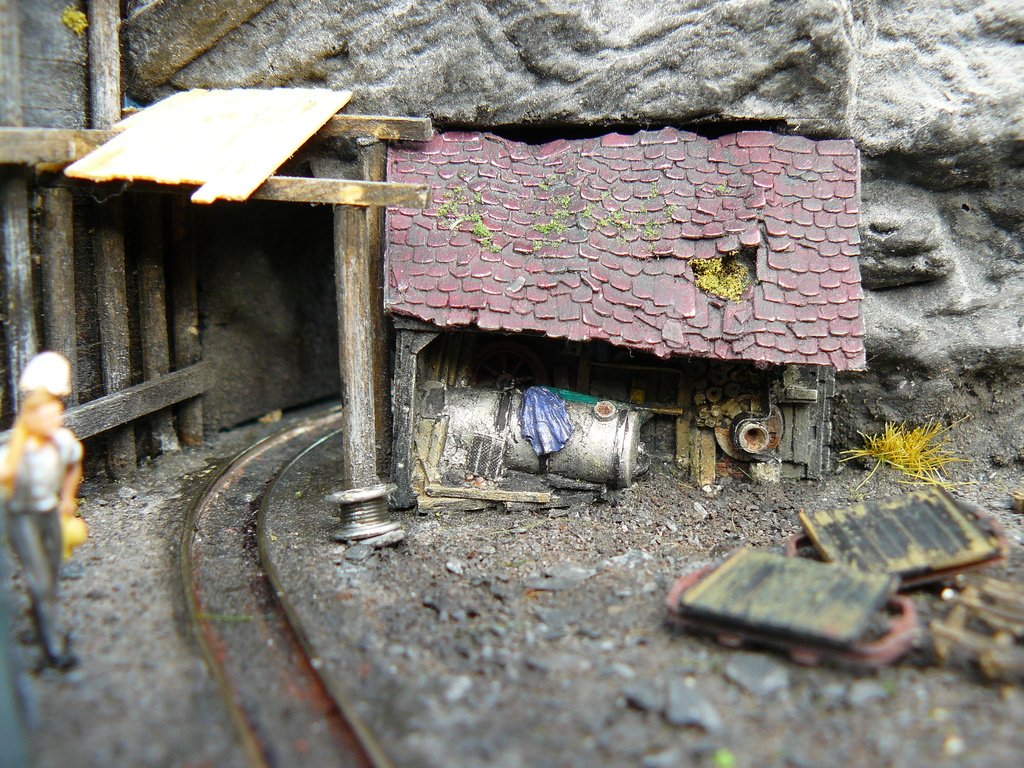
The layout shows the slate mine´s yard in front of a high rock. A “Gmeinder” loco has left the mine at the left side. Before he brings the two flat cars – each carrying a big block of slate – to the workshop driver Paul has stopped for a short talk with his buddy Mario. At the right side the foreman already waits at the workshop (corrugates steel hut) for the load: the slate must be unloaded and split down before the resulting thin plates are dressed to shape.
Besides the workshop there is the repair shop. Mine management has bought an old loco from a brick works. This loco is on repair: It was newly painted and is now waiting for new axles.
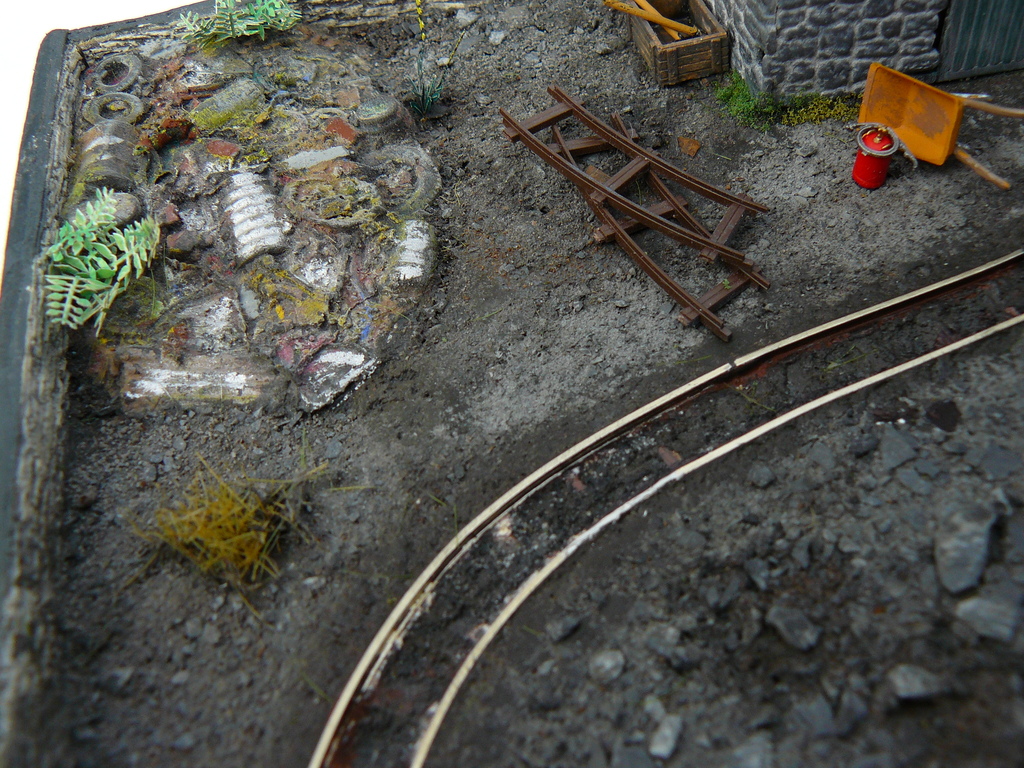
The yard´s ground is covered with slate and some junk. Environmental protection is not a highlight at this company…
All running stuff (loco and flat cars) is from the German company Busch. As the Busch loco is light as a feather it has a magnet underneath. It´s counterpart is the track which has a metal sheet under the sleepers. The loco´s magnet presses it to the track and provides proper running action. The Busch loco is running with 3 V DC.
Because original Busch H0f light railway tracks are only available with large fixed radiuses I used Märklin Z scale flex track to be more flexible. To be sure that the loco will run correctly on these Z scale tracks I milled a groove into the baseboard and glued an iron wire into the groove. Than I glued the tracks onto the wire – and everything is fine.
I used a large number of materials to build the layout:
– The high rock wall is from Noch.
– The wooden wall besides the mine´s entrance is made of coffee stirring sticks provided by the famous international burger restaurant of the Golden Seagull…
– The old shed besides the mine´s entrance and the repair shop are Resin kits from Modellbau Luft.
– The stone hut and the junk yard at the left are from Wills, UK.
– The corrugated hut at the right side is made of a 40 years old East German plastic kit from VERO.
– Workers and birds are from Preiser and Merten.
– Other stuff is from Kotol (barrels, canisters, oilcans) and Auhagen (loco on repair, old flat cars, railway tracks in front of the repair shop).
– The ground is covered with a mixture of milled slate and coffee grounds.”
For more info about the layout, here is a direct link (in German):
http://www.stummiforum.de/viewtopic.php?f=64&t=97563&p=1096514#p1096514
Bertram told me there is more to come!

That’s it for now! I hope you enjoyed!
The post Page 118: June 2015 appeared first on Carendt.com.
PAGE 117 – April 2015 8 Apr 2015 10:40 PM (10 years ago)
After almost a year of silence, a new update! The first in a series of new, regular updates.

As you might have read, I started a competition last year, to make a micro layout that fits in an IKEA Synas box. I will show you the submissions on this page. Please comment below to let everyone know which layout you like best!
Enjoy!
Flatpack layout plan from Lucas from the Netherlands
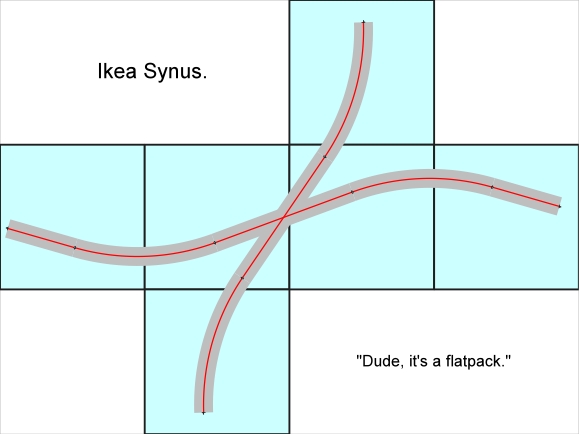
All cars stop here
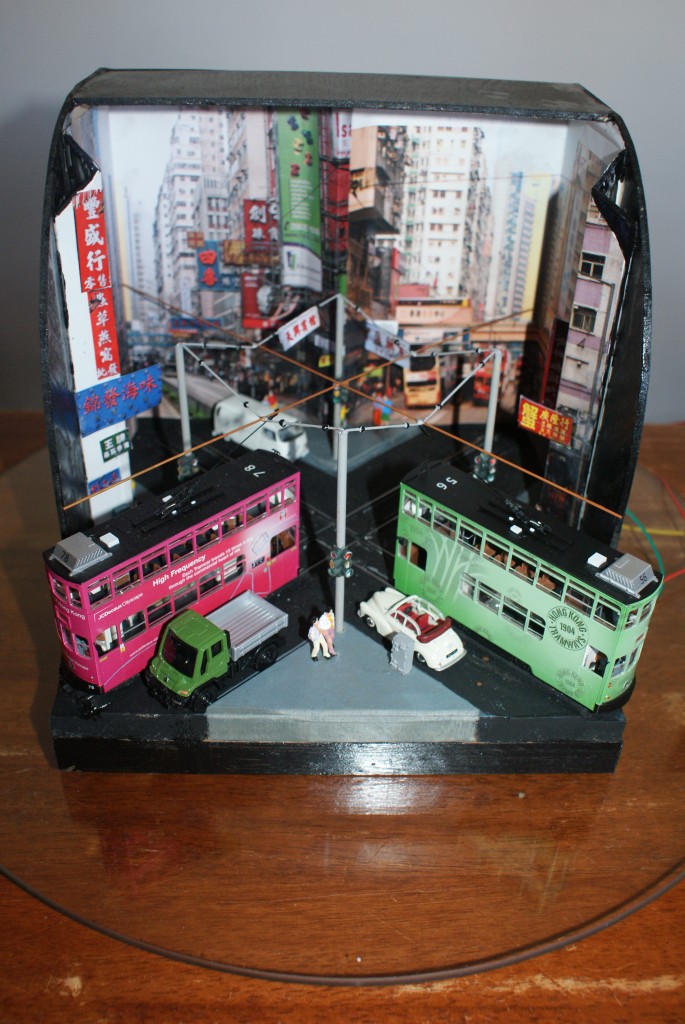
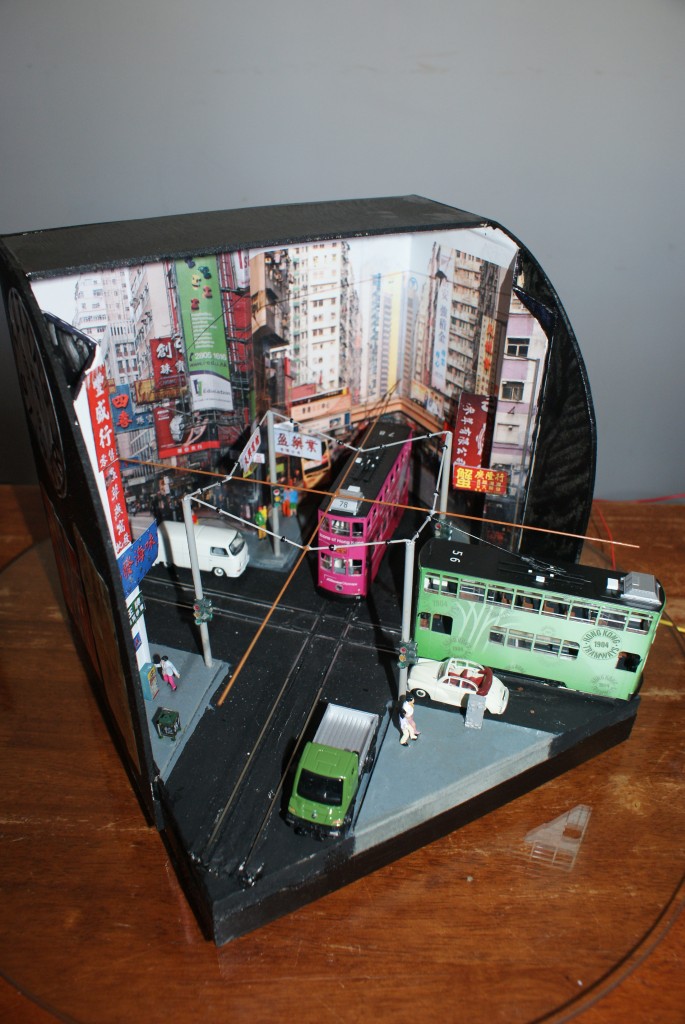
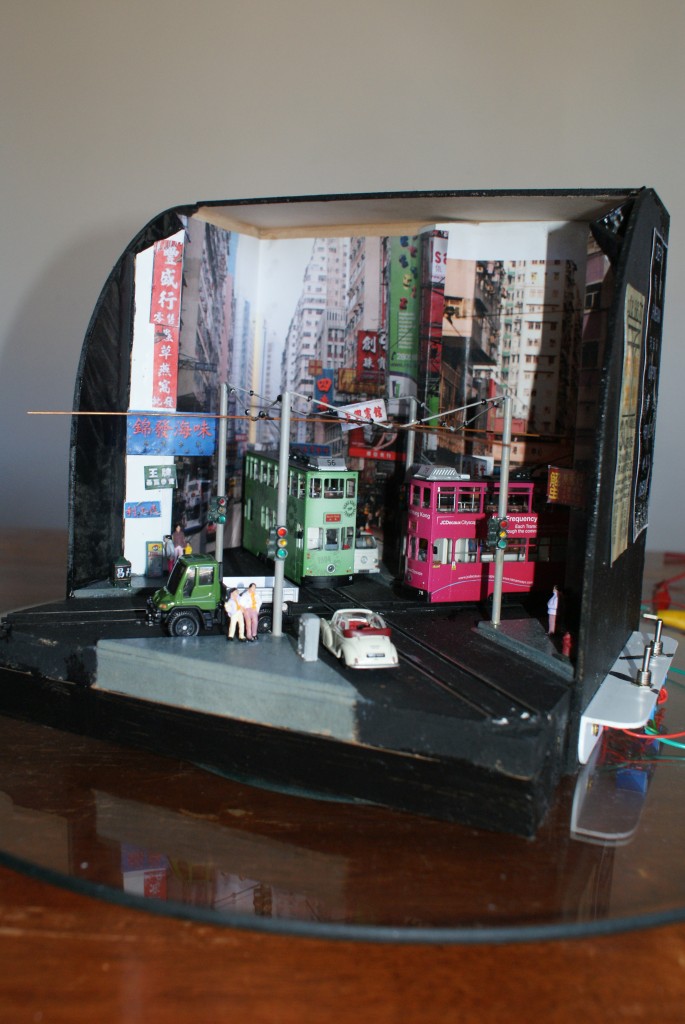
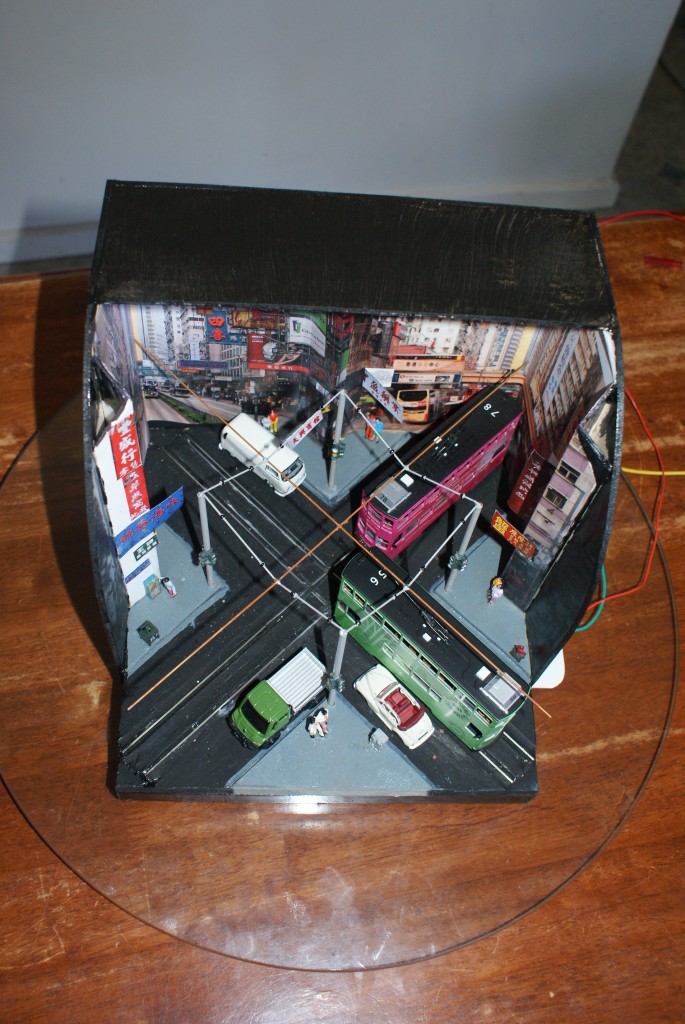
An HO Scale operating Hong Kong Tram diorama by Mark Peterson from Geelong, Australia.
When I received the email suggesting a summertime competition I started thinking. The first thought to come to me was that it would be a winter project for us in the southern hemisphere, but that was hardly a problem. A quick look at a ruler exposed the real problem, 9 cubic inches isn’t a very big space.
I am lucky that I have a fleet of Hong Kong trams that I purchased on a holiday a few years back but had never got round to building a layout to display them on, what a perfect opportunity. So what could I do with them in that space? I was looking for a way to display them in a crowded street scene representing Hong Kong but didn’t have the ability / courage to try and build hand laid track with sharp radii or the modeling required for high density buildings.
I found a 90 degree crossing track and positioned it diagonally to maximize length of each run. With track laid and wired I began building up the road surface using wood and plaster. (A big learning experience for me.) Once the concept was proven and test runs proved successful, the next task was to go 3D. Street scene images found on the net were printed and pasted into backdrops and around pvc angle to give depth perception. Some signs were cut from images and pasted strategically to also give some depth. Once all this was completed I started to add details such as street furniture, bin, hydrant, relay box and drink machine. Then street poles for supporting the trolley wire were added. These were made from copper tube and had brass wire soldered into position to depict support and contact wire. Very small beads were also used to represent insulators. The trolley wire is not “live” (the trams “spear” their poles in one direction, so do not actually make contact with the wire.) Traffic lights were made from styrene angle and tube with craft jewels positioned and then glued to the poles. Lastly the scene was populated with pedestrians and motor vehicles “squeezed” into position.
Control of the trams is by two DPDT centre off switches. Both trams can be operated at once but a collision will occur such is the limited space available. Therefore it is a sequenced mode of operation that someone with more electrical ability could probably automate, (but I’m content to flick switches.) The external walls were painted and laminated images relating to Hong Kong trams glued into position to provide decoration. All up this has taken about 15 hours to complete and has been great fun.
Video

Video
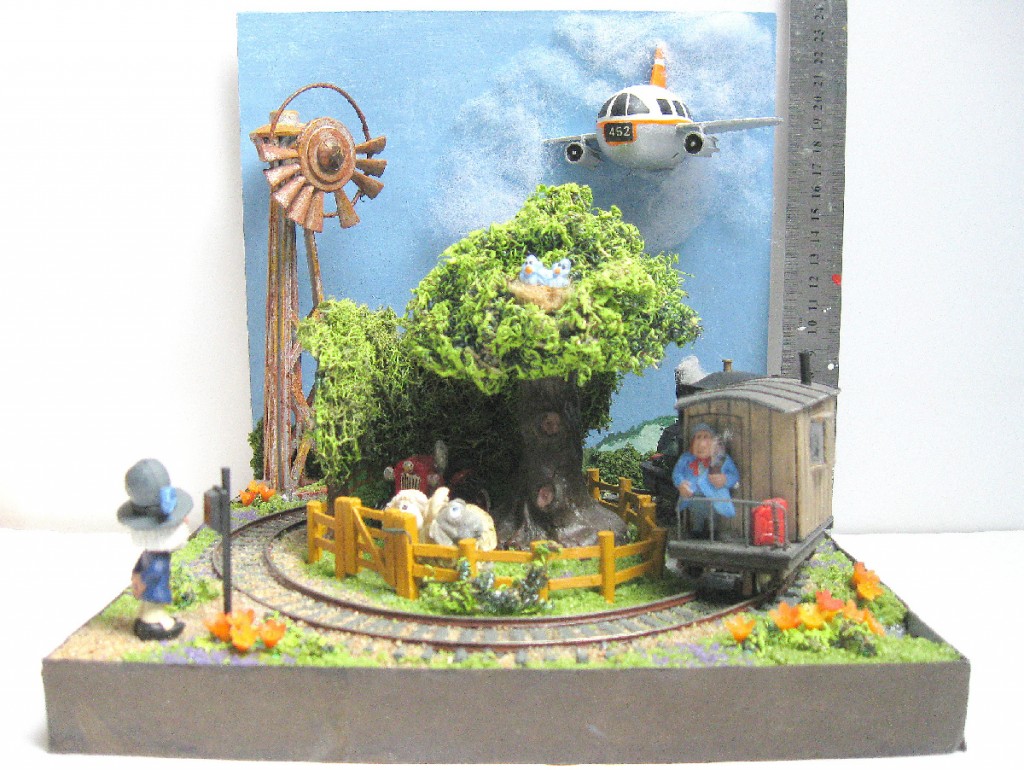
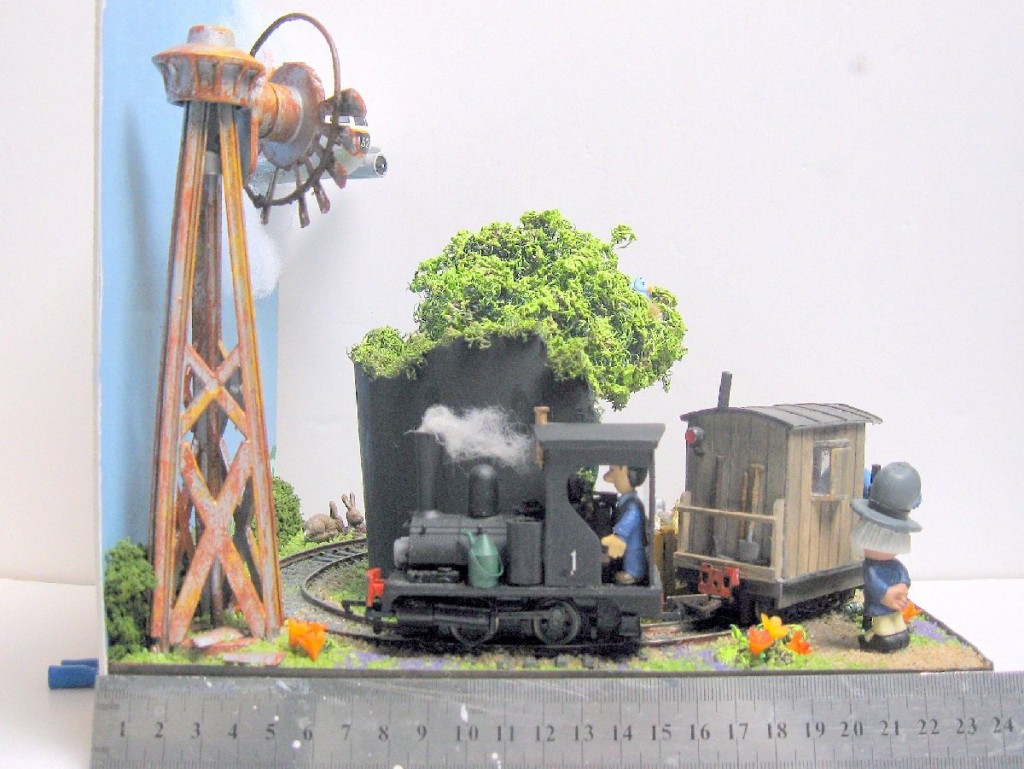
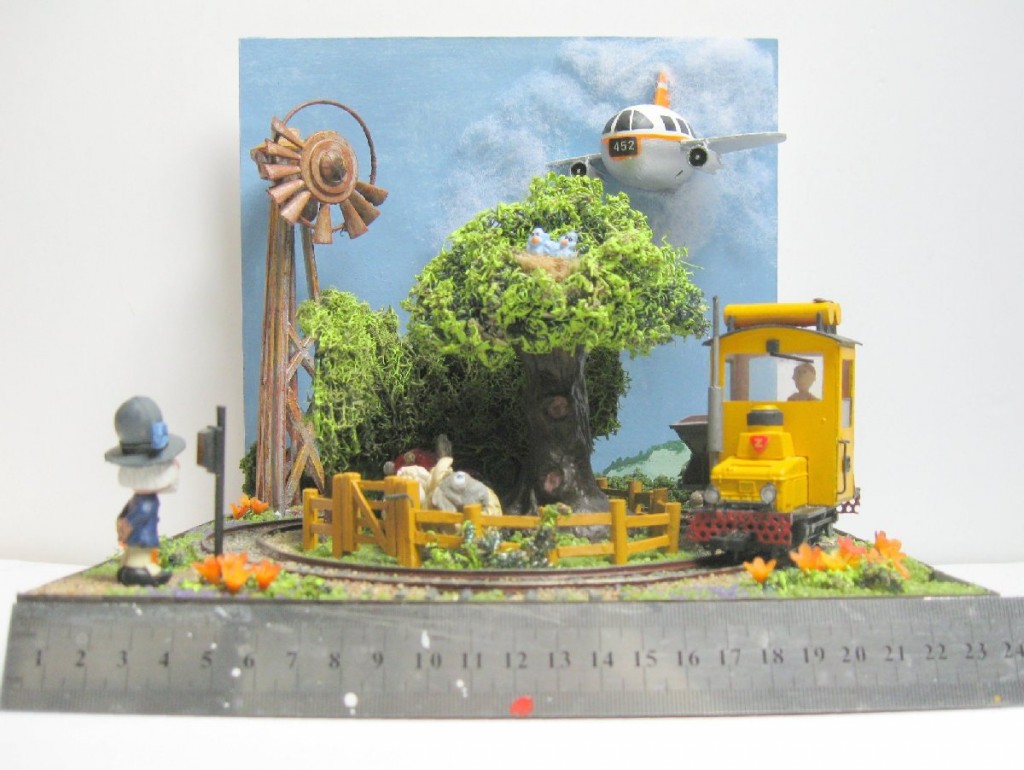
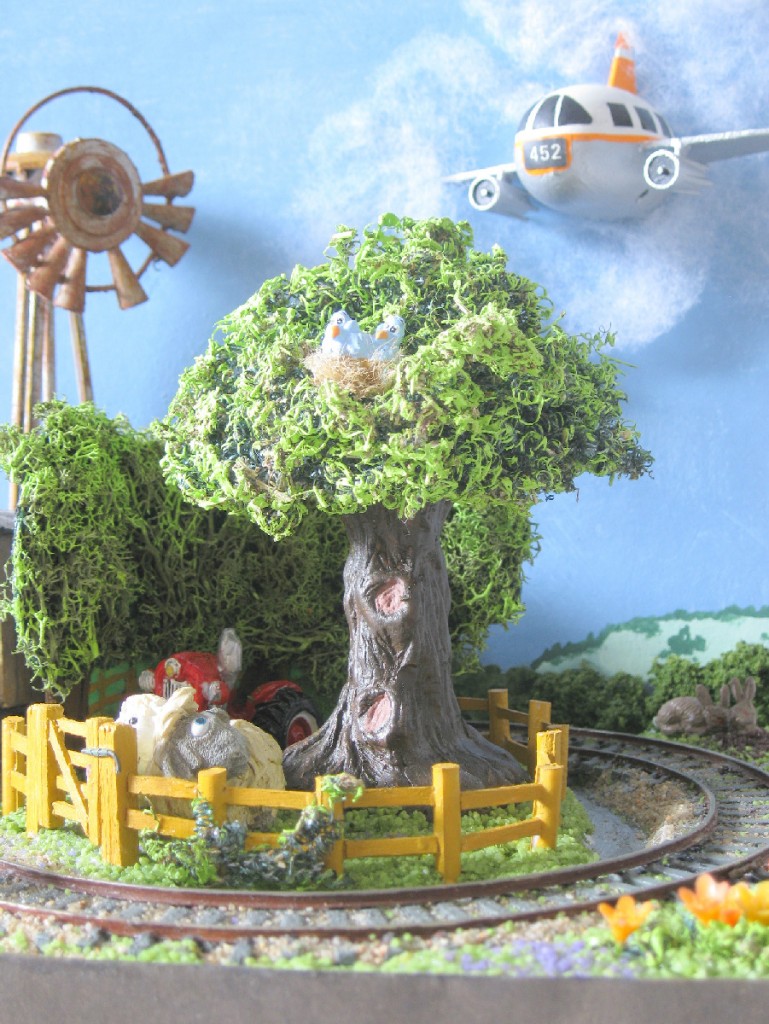
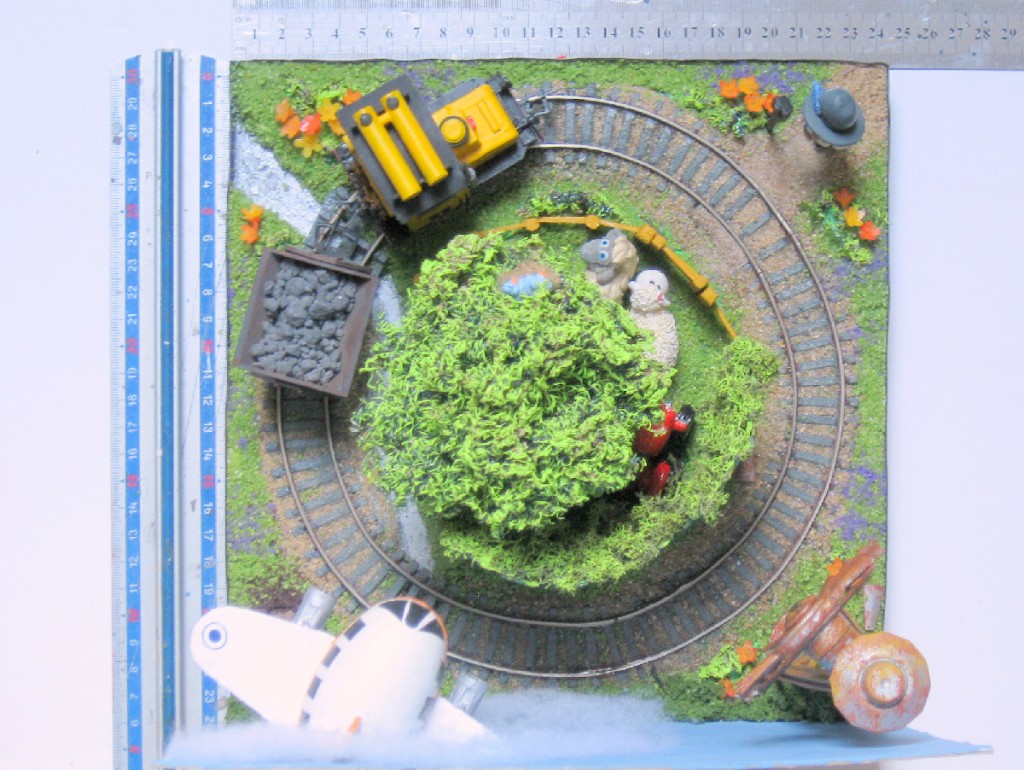
A Rural Railway in France
The model is the same sort of scale as my main model railway “Monjouet” – a bit of a mix of O30n and 7mm:ft narrow gauge.
It is built on a wooden base, 24cm square. I couldn’t afford the Ikea light box together with its post and packing costs, so there is no cover for the layout, but I have added a 24cm high back scene which I hope will be considered acceptable under the 24x24x24cm size limitation.
The scene depicts a little of the local French countryside (though sadly trains no longer run around here). A layer of 5mm foam board is glued to the baseboard, with a meandering stream cut out, bordering a large tree. (This was a model olive tree, bought on holiday in Provence, which was intended for Monjouet, but which turned out to be too big to fit on the already crowded layout so joined my ‘one day this may come in handy’ collection of oddments.)
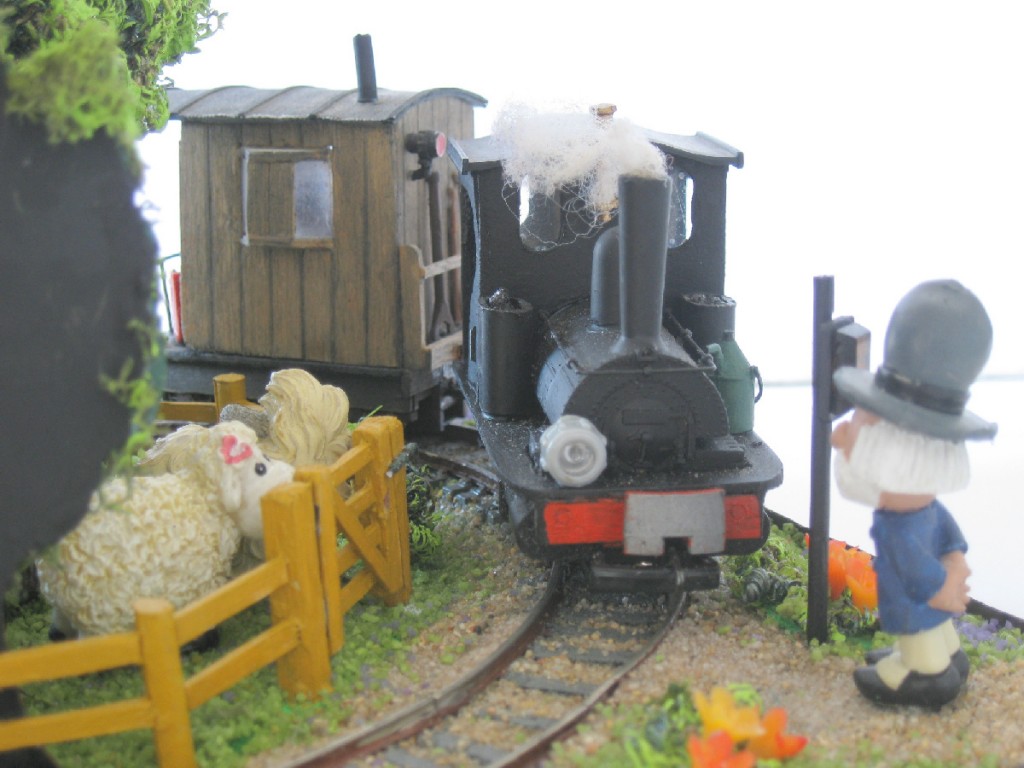
The track is left over bits of OO from older layouts, joined together into a circle. Ground cover is coloured sand with little plastic flowers inserted here and there. Engines and wagons are borrowed from Monjouet and are:- an OO Dapol Pug, adapted to 7mmNg with a bigger cab, etc., and a seriously butchered HO Brawa electric shunter (built up and converted to ‘diesel’). To give the trains somewhere to disappear to, I made a intermediary backdrop of card, fronted with painted trees with lichen foliage.
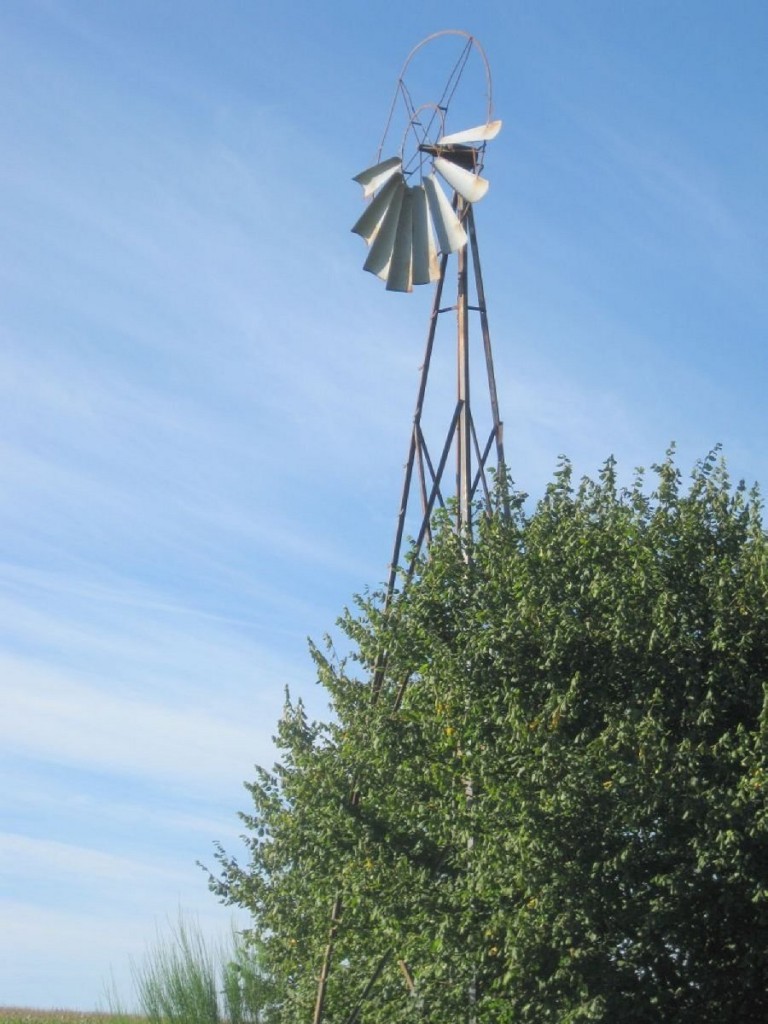
To add height to the scene, I made a wind-driven water pump using a fan from some long-forgotten piece of worn-out household equipment (another item from my ‘may be useful one day’ store). I decided to make this into something of a ‘has-been’ by breaking off half the fan blades and adding a fair bit of ‘rust’ – I include a photo of the example which inspired this, just up the road from where I live. To fill another bit of space on the back scene I modelled an airliner breaking through the clouds. (I guess the pilot will be hauling back on the stick desperately as he finds himself rather nearer the ground than he would wish for!) The body of the plane is part of a plastic key fob thingy that once contained some little model pigs (now enjoying the open air in Monjouet). Wings and tail are from card and engines are made from caps of super glue tubes (very little gets thrown away in my house!).
No French farm is complete without a dilapidated tractor rotting away in the corner of a field. Mine came with a wire with a small crocodile clip on the end sticking out of it, and was intended to be used a place setting marker at a dinner party.
Finally the figures.
I prefer cartoon figures to the somewhat staid models offered by model railway accessories suppliers, so buy most of mine from street fairs, where maturing children off-load their childish toys to this childish old man! They include two sheep, one of which is interested in the bluebird nest in the tree above, a couple of rabbits, and a farm worker surveying his flock – who is from the Kinder Egg® Magic Roundabout series. These have all come from my ‘people’ stock box. The train drivers, also toys rather than ‘models’, arrived from Monjouet already ensconced in their charges.
No doubt there will be some superbly crafted entries, which will leave mine standing in terms of professionalism, but I hope some readers will find this economy model (the only items specially bought for this project were the sprig of little flowers and the tractor) interesting at least. I certainly enjoyed making it.


The post PAGE 117 – April 2015 appeared first on Carendt.com.
Problems solved 7 Jan 2015 10:09 PM (10 years ago)
The website experienced some problems the last couple of days. Some pages where not available and at some point, the whole website was unavailable. It turned out to be a memory problem on the server. I have fixed this and I am not seeing any errors on the website or in the logfiles anymore. Please let me know if you are still having problems. I’m sorry for the inconvenience it caused.
PS. A new update is on its way!
The post Problems solved appeared first on Carendt.com.
Model Railroad Hobbyist Magazine has featured Carendt.com! 1 Sep 2014 9:00 PM (11 years ago)
Joe Fugate, from Model Railroad Hobbyist Magazine featured Carendt.com with a full fetched article in the September 2014 issue of the Magazine!
You can find it here (direct link to the article): http://mrhpub.com/2014-09-sep/land/#79
In the article, Joe explains exactly what Carendt.com is all about: Building small model railroad layouts. He explains the reasons you can have to build a small layout, the shapes a small layout can have, fiddle yards and gives a nice selection of example layouts.
The article in Model Railroad Hobbyist Magazine surely helped getting Carendt.com some traction!
If you want to know what others thought about the article, here are some reactions on the MRH website.
The post Model Railroad Hobbyist Magazine has featured Carendt.com! appeared first on Carendt.com.