Conversations That Make Instant Connections 29 Jul 2022 9:24 AM (3 years ago)
http://www.entrepreneur.com/article/223993
For entrepreneurs, knowing how to communicate clearly and effectively is critical in leading a company — and selling your business ideas. But the words you speak and hear are only a small part of getting your message across to your employees, customers and investors. It is the way you speak and listen that makes all the difference in the world.
Consider these 12 steps for starting conversations that click and, ultimately, lead to more productive relationships:
Step 1: Relax. Stress generates irritability, which leads to anger, and anger shuts down communication. Studies have shown that a one-minute relaxation exercise will increase activity in the brain that is essential for communication and decision making. So before you enter any conversation, do this:
First notice which parts of your body are tense based on a scale of one to 10 (1 = completely relaxed; 10 = extremely tense). Write it down. For 30 seconds, breathe in slowly to the count of five, and then exhale slowly to the count of five. Repeat this three times. Now, yawn a few times and notice if it relaxes you. Assign it a number between one and 10 and write it down. Now stretch your body, beginning with the muscles of your face, scrunching them up, then stretching them out. Then gently move your head from side to side and front to back. Scrunch your shoulders up and then push them down. Next tighten your arms and legs for a count of 10; then relax and shake it out. Take a few more deep breaths. Once more assign a number to your state of relaxation and write it down, noticing any improvement.
Related: The Biggest Mistake Small Businesses Make in Brainstorming
Step 2: Stay present. When you focus on your breathing and relaxation, your attention is pulled into the present moment and inner speech stops, at least momentarily. If we bring this “presentness” into a conversation, we hear the subtle tones of voice that give emotional meaning to the speaker’s words. Being in the present moment will allow you to quickly recognize when a conversation begins to go astray.
Step 3: Get quiet. Developing the skill to remain silent helps you give full attention to what other people say. To hone that skill, try an exercise with this online bell. Push the button to “strike” it then focus on the sound. As it fades, listen more closely. Ring the bell several more times, and listen more closely. This is the attentiveness you need when listening to someone.
Related: How to Sell Your Startup’s Long-Term Vision
Step 4: Be positive. Take a mental inventory of your mood. Are you tired or alert, anxious or calm? Then, ask yourself: do I feel optimistic about this conversation? If there’s any doubt, anxiety, or frustration—postpone it. If you can’t, then at least mentally rehearse the conversation first, which will help you spot statements you might make that would undermine your goal.
Step 5: Confirm values. To make a conversation balanced and fair, everyone has to be clear and up front, about values, intentions, and goals. If your values are not aligned with those of the person you’re trying to do business with, trouble is unavoidable. So learn about the person’s values as soon as you can. But beware: some people will mask the nonverbal cues of deceit and just tell you exactly what you hope to hear.
Related: Four Rules for Innovative Leadership
Step 6: Evoke memories. Enter the conversation with an expression that conveys kindness, compassion, and interest. But it cannot be faked. So if you’re not feeling it, tap into a pleasant memory of people you love and respect. It will soften the muscles around your eyes and evoke a gentle half smile on your face, which stimulates a feeling of trust in the other person’s brain.
Step 7: Watch nonverbal cues. Keep your eyes on the person you’re speaking with, but don’t stare. And stay focused, making sure you aren’t distracted by inner thoughts. If a person wants to conceal a feeling— out of embarrassment or the desire to deceive— it might only appear for a quarter of second. But remember that micro-expressions can only tell you that a true emotion is hidden, it won’t tell you why or whether the person is purposefully concealing it.
Step 8: Be appreciative. The first words you speak set the tone for the conversation, so begin with a compliment and end it with another compliment that expresses appreciation. Of course they must be genuine. Ask yourself: what do I really value about this person? Then, ask yourself which of those attributes you respect most. Remember this as you talk, too, and listen for an opportunity to share it.
Related: A Secret to Creative Problem Solving
Step 9: Speak warmly. If you drop the pitch of your voice and talk more slowly, the listener will respond with greater trust. When we are angry, excited, or frightened, we raise the pitch and intensity of our voices, and it varies a lot in speed and tone. On the other hand, a warm supportive voice is the sign of leadership and will generate more satisfaction, commitment, and cooperation between members of your team.
Step 10: Slow down. Slowing down your speech actually helps people understand what you are saying and deepens their respect for you. It’s not as intuitive as it may seem, and as children we automatically speak fast. But you can teach a child to slow down by speaking slowly yourself because they’ll match you. A slow voice has a calming effect on a person who is feeling anxious, whereas a loud, fast voice stimulates excitement, anger, or fear.
Related Video: The Esquire Guy’s Rules for Small Talk
Step 11: Be brief. Limit your speaking to 30 seconds or less. Our conscious minds retain only a tiny bit of information. If you need to communicate something essential, share it in even smaller segments— a sentence or two— then wait for the person to acknowledge they’ve understood. If the person remains silent, say another sentence or two, and then pause again. It also helps to write down major points before the conversation.
Step 12: Listen deeply. Stay focused on the person who is speaking: their words, tone, gestures, facial cues— everything. When they pause, you’ll need to respond to what they just said. If they go and on, then just study them and watch how your own inner speech reacts, without worrying about what you may remember or forget. You’ll actually be practicing a form of meditation that is neurologically enhancing and emotionally relaxing— a far cry from what we usually feel when we are bored by someone speaking.
Adapted excerpt from Words Can Change Your Brain by Andrew Newberg, M.D. and Mark Robert Waldman (Hudson Street Press, Penguin Group (USA) Inc., 2012).
Read more stories about: Leadership, Networking, Communication strategies
Andrew Newberg, M.D., is the new director of research at the Myrna Brind Center for Integrative Medicine at Thomas Jefferson University Hospital and Medical College and a pioneer of the new interdisciplinary field of neurotheology. Mark Robert Waldman is adjunct faculty at Loyola Marymount University, Los Angeles, where he teaches leadership, neuroscience, communication, and ethics. He is a personal development coach and
The post Conversations That Make Instant Connections appeared first on Cre8tive Compass Magazine.


PDF for PSD5 31 Dec 2021 1:59 PM (3 years ago)


The post PDF for PSD5 appeared first on Cre8tive Compass Magazine.
**Article ideas 18 Aug 2020 6:47 AM (5 years ago)
they will not forgive a lack of integrity
Such a powerful article. When we share our passion with those who want to be where we are, we fulfill our gift. You are doing that now because your dream was interrupted. It may never have happened w/o your contract being dropped. How beautifully the world works. I had a similar experience in 2008 when my contract as editor was not renewed. I, too, had to reinvent my dream. It led me to people who value me for who I am, not for what I am. That was the gift hidden in the pain. Thank you jJn!!!
http://www.huffingtonpost.com/jen-grisanti/shared-passion_b_1792488.html?utm_source=Alert-blogger&utm_medium=email&utm_campaign=Email%2BNotifications
“The people with whom a person works, and especially subordinates, know in a few weeks whether he or she has integrity or not. They may forgive a person for a great deal: incompetence, ignorance, insecurity or bad manners. But they will not forgive a lack of integrity in that person. Nor will they forgive higher management for choosing him.” — Peter F. Drucker, The Daily Drucker: 366 Days of Insight and Motivation for Getting the Right Things Done.
==========
Emma Sokoloff-Rubin Researcher, Freelance Writer
Familiar Balancing Acts: Conversations with the Women We Know Best
http://www.huffingtonpost.com/emma-sokoloffrubin/anne-marie-slaughter_b_1784133.html
Thought provoking! In my early life the search for ‘perfection’ seemed to slow me down and, oftentimes, prevented me from finding the longed for balance in my life. As I grew into myself as a woman, a mother and an entrepreneur, I learned to embrace the learning curve or life lessons so graciously bestowed by the universe. Life is not about waiting for it to be right or to get it right. It is about all the little things and all the big things and all the in-between things that make a life your life. Balance comes with acceptance.
========
As Milton Erickson said, “If you are willing to be confused about what you know, what you know will grow bigger, better and more useful.”
The post **Article ideas appeared first on Cre8tive Compass Magazine.
Brand Yourself as an Artist on Twitter 28 Mar 2020 5:34 AM (5 years ago)
thumbnail
http://cre8tivecompass.com/mag/wp-content/uploads/2011/04/C8C-MMM-twitter-series-logo-150×150.png
Monday Marketing Minute # Twitter Demystified Series
![]()
This is Part 7 in a series of 10 MM Minutes about Demystifying Twitter.
A strong brand is invaluable to artists. Twitter is one of the quickest ways to build brand recognition for you and your art business. A strong and recognizable creative brand is invaluable to an artist and serves to communicate credibility to your prospective collectors and buyers and other artists as well.
We have learned about your @Name, Profile picture and bio, and Twitter and Your Website. This week we learn:
When to Tweet For Impact:
Tim Ferriss tracked and measured his ’tweets’ and decided that the following times are the best ties to tweet for impact and views…
12 midnight – 4am PST: 6, all between 12 midnight and 2am = 3 per hour
4am – 8am PST: none (partially due to the fact that I am sleeping)
8am – 12 noon PST: 8, all 10am – 12 noon = 4 per hour
12 noon – 4pm PST: 11, 9 between 1:30 – 3pm = 6 per hour
4pm – 8pm PST: 9, evenly spread = 2.25 per hour
8pm – 12 midnight PST: 3 = 0.75 per hour
I find it’s worth repeating important tweets up to 4 times in about 18 hours. Typically, that would be evening, late evening, next morning and then the afternoon. Hopefully, that will catch the different audiences. But that’s enough, I don’t want to turn anyone off. ~Guy Kawasaki
Guy generally pre-schedules his tweets 8 hours apart at 7 pm PST, 3 am PST, 11 am PST, 7 pm PST…
Action Step: Use the above information to create a schedule for your tweets.
Part 1 of the Twitter Demystified Series
Part 2 of the Twitter Demystified Series
Part 3 of the Twitter Demystified Series
Part 4 of the Twitter Demystified Series
Part 5 of the Twitter Demystified Series
Part 6 of the Twitter Demystified Series
Part 7 of the Twitter Demystified Series
Part 8 of the Twitter Demystified Series
Part 9 of the Twitter Demystified Series
Part 10 of the Twitter Demystified Series
TweetDeck
DM, Replies, etc.
Please add your suggestions by commenting below…
Monday Marketing Minute #41
8. The Retweet/RT @: Re-tweeting is a great way to capture the attention of an art organization, gallery or someone you would like to have ‘follow’ you. The re-tweet shares valuable information with other like minded individuals.
Monday Marketing Minute #42
Download and use Tweetdeck (I prefer) or Seesmic. These are efficient and time saving personal browsers used to manage your Twitter & Facebook accounts. These applications are intuitive and easy, but if you are feeling intimidated, I suggest following a Tweetdeck tutorial to help you get started.
On Twitter, at times I will share a a photo using Twitpic (on my Tweetdeck) to post a newly finished painting or one that is in progress. This is a great way to get feedback and spark interest in your work.
I like to share my favorite quotes, knowledge and art tips.
Keep in mind what kind of personal information, links, resources and promotional materials you plan to post.
I read somewhere that a good rule of thumb for tweeting is – one personal tweet for every 10 informative tweets. That said, you will find the right balance that works with your following… I average around 2 per 10. (This does not include all the re-tweet ‘thank yous’!)
Sometimes it is tempting to get something off your chest or share some exciting news as I did when I taught a plein air workshop in France or when a black bear jumped in front of me on a dark trail. A little of this goes a long way, but it also important to show a real real human side.
Also, tweet frequently to build your following and brand recognition. This way, you can grow a small community of people with similar interests and who recognize your name and your brand. Having said that, don’t bombard Twitter or Facebook with numerous tweets & updates. You will find what works for you…and your followers will let you know if they don’t like it.
Monday Marketing Minute #43
9. Etiquette: Don’t forget to thank people for Re-tweeting or replying to your ‘tweet’. Oh, and don’t worry if you lose a follower or two…this happens every day and is the name of the game.
Be a human being, not a marketing drone. Otherwise you will be considered a spammer if you are constantly direct messaging to your URL or product line.
And finally……….
Monday Marketing Minute #44
10. The Golden Rule of Twitter: “Tweet others the way you want to be tweeted.”
~ Lori
If this article was helpful, you might enjoy:
5 Reasons Why Artists Need Social Media & Eye Opening Stats to Back it Up
Simple SEO Tips to Rank Your Twitter & Facebook Pages Higher on Google
How Artists Can Use YouTube to Improve Marketing
ShareThis
FILED UNDER: GENERAL, LORI’S FEATURED ARTICLES, SOCIAL MEDIA, ART MARKETING & BLOGGING TIPS, TWITTER, FACEBOOK, YOUTUBE & MORE TAGGED WITH: ART TIPS, BRANDING ART, PERSONAL BRANDING, TWITTER TIPS FOR ARTISTS
About Lori McNee
Lori McNee is an internationally recognized professional artist who specializes in still life and landscape oil paintings. Lori shares valuable fine art tips, art business tips and social media advice on her blog. Currently, Lori ranks as one of the Top 100 Most Powerful Women on Twitter & was named a TwitterPowerhouse by The Huffington Post.
Read more: http://www.finearttips.com/2009/09/brand-yourself-as-an-artist-on-twitter/#ixzz1FGCXSeoA
Here are important branding tips to think about: Please add your suggestions by commenting below…
Monday Marketing Minute #35
1. @Name: Your name is the first thing that people will see on Twitter. Use the name you wish to represent your artist brand. When I first started on Twitter I used @lorimcnee, but quickly changed my name to @lorimcneeartist and gained followers rapidly. It is easier for people to associate me as an artist this way. Also, when people search ‘artist’, my name appears. Once your Twitter page is complete, I suggest you consider adding yourself and your interests to the free Twitter Directory, WeFollow. This way, you can track your ranking, status and influence on Twitter. Currently, I am ranked as one of the most ’influential artists’ on Twitter according to WeFollow!
Monday Marketing Minute #36
2. The Profile & Bio: Choose your profile wisely. This is a great opportunity to brand yourself on Twitter. These few words will say a lot to the world about who and what you are. Make it ‘catchy’, this description says a lot about you which helps people make the choice to follow you or not. A custom page is a good way to immediately grab attention.
3. The Profile Picture: Remember you are building your artist brand. It is noted that most people relate to and want to see a friendly face. If you are not comfortable with this, then pick a great image of your art that represents you and grabs attention.
Monday Marketing Minute #37
4. Your Website: Do not forget to add your website to your profile. Make sure your portfolio is visible. Twitter will drive traffic to your site.
Monday Marketing Minute #38
5. When to Tweet For Impact:
Tim Ferriss tracked and measured ’tweets’ and came up with the following best times…
12 midnight – 4am PST: 6, all between 12 midnight and 2am = 3 per hour
4am – 8am PST: none (partially due to the fact that I am sleeping)
8am – 12 noon PST: 8, all 10am – 12 noon = 4 per hour
12 noon – 4pm PST: 11, 9 between 1:30 – 3pm = 6 per hour
4pm – 8pm PST: 9, evenly spread = 2.25 per hour
8pm – 12 midnight PST: 3 = 0.75 per hour
Guy Kawasaki states: I find it’s worth repeating important tweets up to 4 times in about 18 hours. Typically, that would be evening, late evening, next morning and then the afternoon. Hopefully, that will catch the different audiences. But that’s enough, I don’t want to turn anyone off.
Guy generally pre-schedules his tweets 8 hours apart at 7 pm PST, 3 am PST, 11 am PST, 7 pm PST…
Monday Marketing Minute #39
6. Be a Good Follower: Next, follow people and organizations that could help your art career and are of value to your business. I suggest you follow galleries, museums, collectors, art coaches, fellow artists, and others you would like to be seen by. Do not underrate the average Joe or the newbie tweeter…he might be your next big collector! It is good to learn how to be a better follower and follow interesting people from all walks of life.
Monday Marketing Minute #40
7. The Tweet: Tweet, re-tweet or post high quality content that adds value for your followers. Remember, is micro-blogging. People are looking for something of value to read and share or “re-tweet” with their followers. Each ‘tweet’ has a limit of 140 characters. Make sure to keep your ‘tweet’ to a maximum of 130 characters in order for others to easily re-tweet your tweet! Save extra characters by shortening links by using a URL shortener like Bit.ly or TinyURL.
The post Brand Yourself as an Artist on Twitter appeared first on Cre8tive Compass Magazine.
![]()
My Entryway Essentials 2020! 25 Mar 2020 12:50 PM (5 years ago)

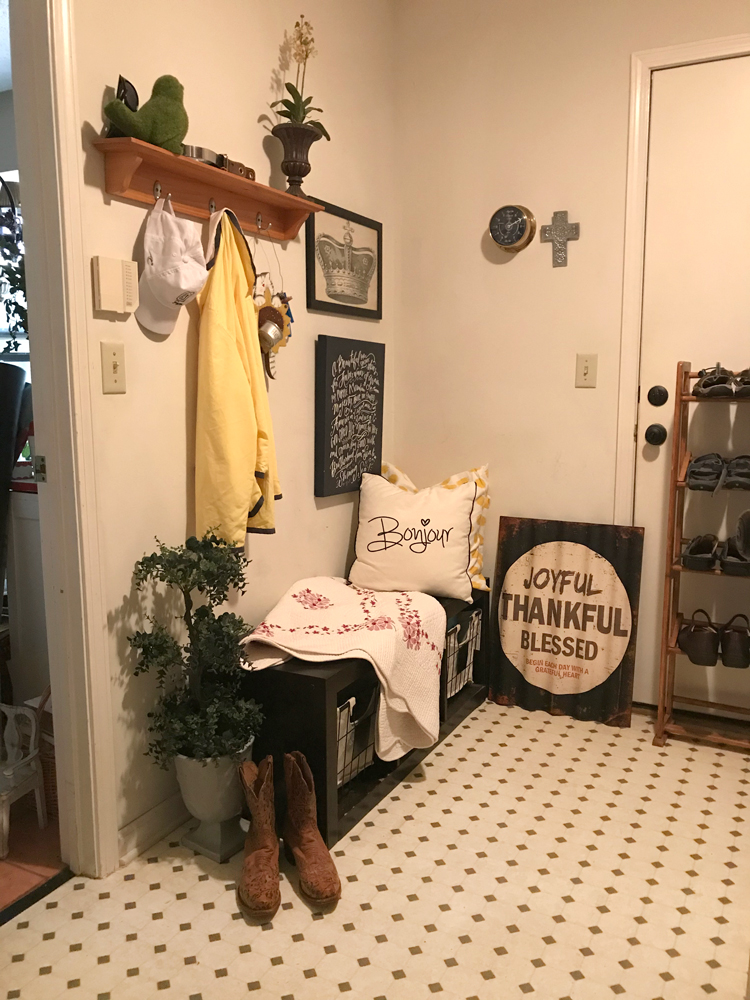
My Entryway Essentials 2020 are a few must haves for decor and for necessity. Nobody, and I mean no body, uses my front door. Guests, family, and friends enter my home through the Laundry / Mud Room. It is the first place they see and the first hint of my decorating style. It has become a catch all place of late. But that all changed this weekend. When Wayfair challenged their Homemakers to share our Entryway Essentials, I thought it would be a good time to spruce up the area. This is a paid post and all images, thoughts are my own.
Creating a Welcoming Entryway
I had one things in mind as I designed this space again – storage and accessories that would say, “Come on in.” Since we are social distancing at the moment, I wanted to create a warm welcome when loved ones were able to visit once again. Pillows, quilt, and accessories give that homey feel immediately.

My Entryway Essentials
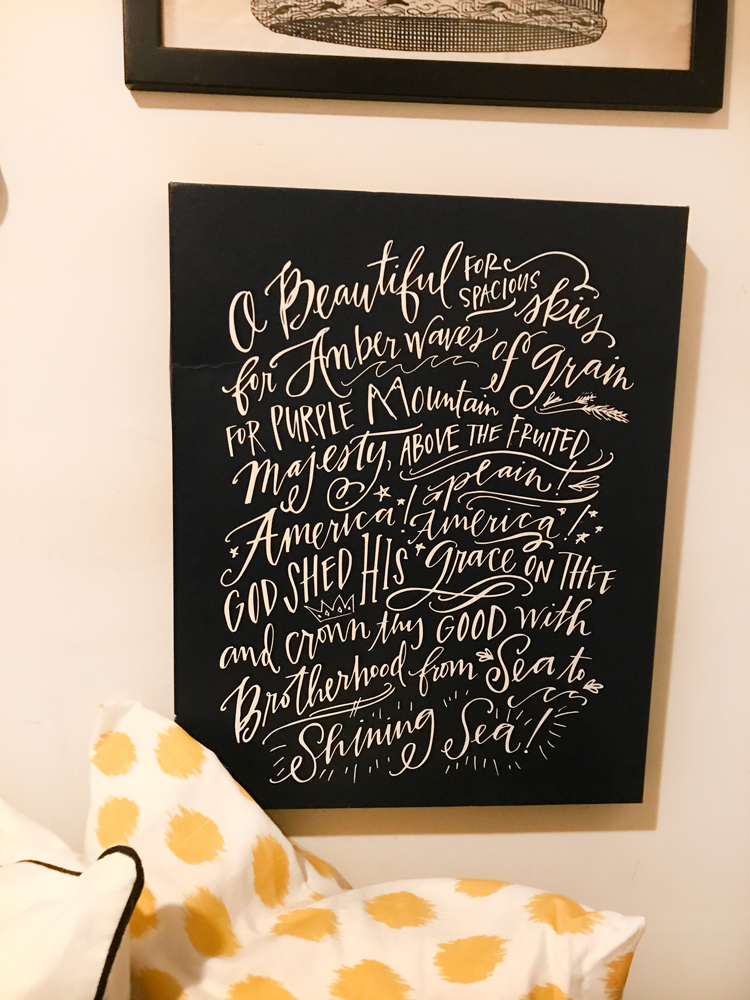
Essentials for my entryway are storage and accessories that set the tone. This makeover was inspired by this storage bench and this patriotic artwork that works well in these chaotic times. For me, decorating is about finding that WOW inspiration piece. You know the one that catches your imagination and launches a creativity spurt of daydreaming and drawing layouts in your mind. I drag out the magazines and hit Pinterest for ideas.

The mish-mash of baskets and wall decor had to go. I wanted to create a peaceful Zen feel to the room turning it into a beautiful utility area that makes me smile. I brought in some peaceful, calm accents to give the dark, windowless room some life.
Next, I added accents to the dark storage bench. I placed pillows and a quilt the top and some metal baskets with white fabric inserts. It gave it some character while adding functionality as the baskets will store dog stuff, shoes, and hats.
I love this America the Beautiful artwork from Wayfair. My patriotic soul is on fire during these stay-at-home times. I smile every time I pass as it gives me hope that we will again wander the backroads and byways of America when this pandemic passes.
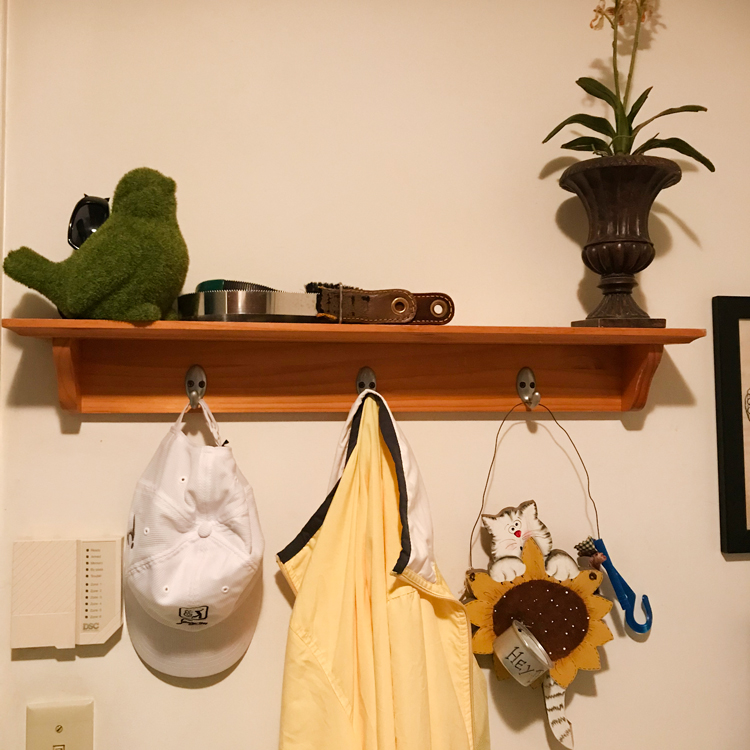
Another absolute essential part of our entryway is a coat rack. We have jackets and hats that need to be corralled. This handy 3-hook rack is the perfect size. The shelf give a great place for accessories and holding the dog brush and leash.
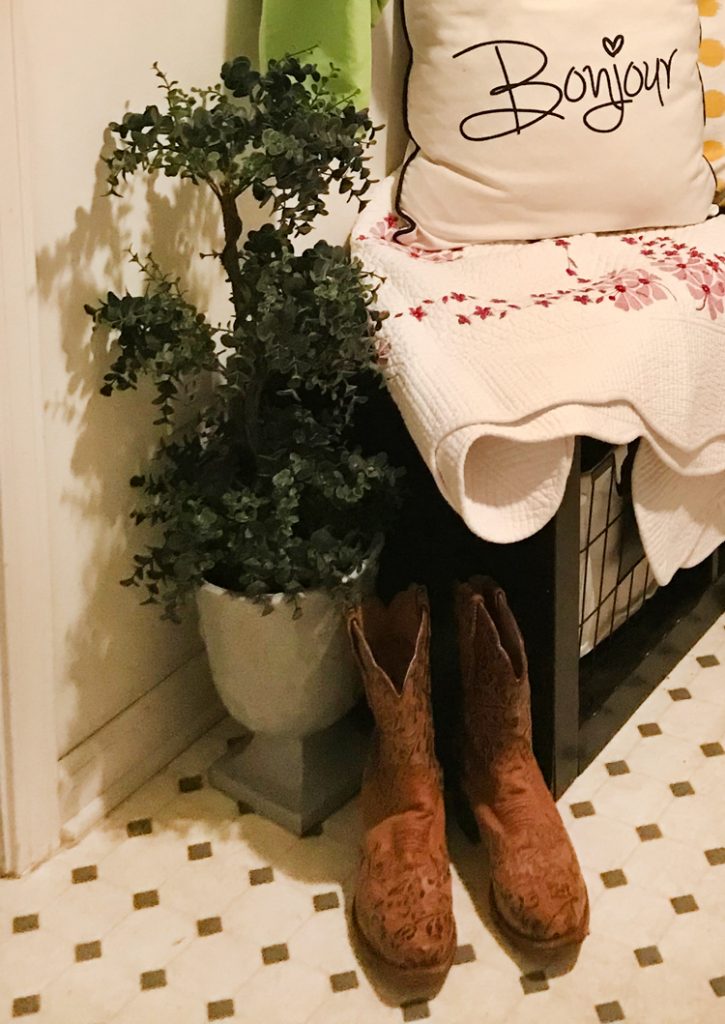
My final must have is plants (and my favorite cowgirl boots close at hand). Plants just give a bit of natural and nature in this windowless room. Sorry that some of the photos seems a little dark.
As we were beginning the makeover, HIMself kept saying, “It’s a utility room. Why does it need to be pretty?” Yes, our Laundry Mud Room serves a functional purpose. Yet I was determined to show him that the utility room can be an aesthetically pleasing part of our home while still being multi-functional.
The Before and The Clearing / Cleaning
The Before photos below show that the room had become a dumping place for misfits, jackets (how many jackets do two people need?), water jugs, and shoes. Mismatched storage bins in cubbies really look wonky. And the washer and dryer are stacked with all kinds of thing as well. None of this is welcoming, nor does it say, “Please come in and enjoy your stay.”
 |
 |
 |
We started by removing everything from the space except the washer and dryer. During the process, I discovered that this room tends to be a drop everything and run area for jackets, shoes, and a lot of the miscellaneous stuff that no longer serves a purpose in the other parts of our home.

We cleaned it thoroughly. Since it is now Spring, we did everything– walls, doors, baseboards, etc. We still had a way to go to make it welcoming, but it was clean.
Lastly, I turned the top of the washer and dryer into beautiful storage with the beautiful utility bin and a small wire basket to hold stain removal potions, etc. Just a few containers can make a big difference and keep everything tidy and organized.

I believe we did a good job mixing my essentials into the Welcoming Laundry / Mud Room Makeover. It it now a place to pause and feel a moment of peace when entering or leaving our home. And that makes all the effort worth it. Even the pink sink looks better! WINK WINK
Check out storage benches HERE!
Check out Canvas Wall Art HERE!
Check out the pillows at Wayfair HERE!
The post My Entryway Essentials 2020! appeared first on Cre8tive Compass Magazine.
DIY Decor Printable Easter Subway Tile 29 Feb 2020 11:30 PM (5 years ago)
Baskets, egg hunts, jelly beans and bunnies…what’s not to like about Easter? Easter is my second favorite holiday.Why second? you might ask. Well, Thanksgiving is my favorite. But I do love the colors and the fun associated with the Easter season…and the fact that it is Spring!!! And I love, love Spring! I was inspired to create this DIY Decor Printable Easter Subway Tile. You can download it and use it any way you like.

click and drag to your desktop (right-click for Windows)
Ideas to Use the DIY Decor Printable Easter Subway Tile
I am making Easter cards and invitations to my Easter tea out of this print. It sets the fun and sunny vibe I plan to create with the decor and food. I will also use it as a favor for my guests. I will print them as a square to fit a 6″ or 12″ square tile you can find at any home store, inexpensively. I then glue it to the tile and place a bunch of them in a basket for each guest to take when the leave.
You could let kids create a tile for their parents or a card for GrandMa. But there are so many more uses for it. What will you do with the printable? So enjoy and let me know what you make out of it!!! Send me pictures and I will post them.
Now why these are called Subway Tiles, I don’t know. Subway tiles are 3 x 6 inches. Subway Tile Art, especially the art printables, come in all sizes and shapes.
This is just for private use please!!!
The post DIY Decor Printable Easter Subway Tile appeared first on Cre8tive Compass Magazine.
Go-with-the-Grain PlyWood Artwork 27 Feb 2020 7:57 PM (5 years ago)
creative living idea this week…

photo from Lowe’s

photo from Lowe’s
I just loved creating this plywood art piece. I sometimes give this as a wedding present if it fits with the couple’s decor or style. it goes well with beachy decor, rustic decor, and modern decor. It is so versatile.
With a little paint and a couple of shelves, unassuming plywood becomes an unexpected work of art. I just love to create these artworks. I used to think they had to be large, but smaller ones look just as beautiful as the one here.
Look for plywood that has an interesting pattern with contrasting light and dark wood areas. The one in the photograph is 2’ x 2’. Sand the most interesting side using fine-grade sandpaper. Add water to any water-based, white paint (one part water to one part paint) to create a wash. You don’t want it to cover the grain completely. Next paint the lighter grain areas of the wood using the water/paint solution. Apply multiple coats to add more contrast. Let dry.
I saved these photos and instructions from Lowe’s several years ago. This has been very popular on my blog, so I wanted to share it once again.
please leave a comment or thought or better yet, share your plywood art below…
The post Go-with-the-Grain PlyWood Artwork appeared first on Cre8tive Compass Magazine.
Antique Pie Safe Milk Paint Patina Restoration 25 Feb 2020 5:12 PM (5 years ago)
The Ghosts of Furniture PastTM
This is the story of my Pie Safe Milk Paint Patina Restoration Journey!! It began with an Epic Fail for Me! I have to admit a mistake. I purchased this beautiful antique pie safe several years ago in Georgia. I was thrilled with it, but was not so savvy in paint chemistry or antique value at the time. It was obtained circa 1986 during my yellow and blue French country decor days. This is a long story of woe, rehabilitation and transformation with some amazing images and how-tos. It is another chapter in my Ghosts of Furniture Past career.

I did the unthinkable – I stripped it. HORRORS!!!
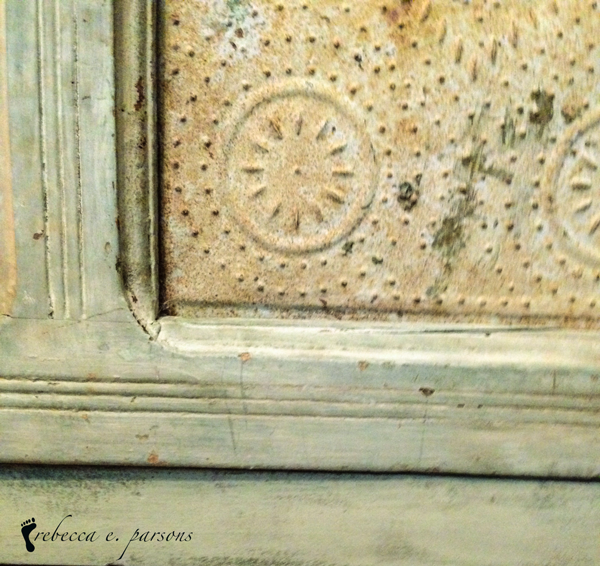
I attacked the stripping process vigorously. I could not get all that paint off. It seemed as though it had become one with the wood…and it had. Some prophetic voice of reason in my head stopped me short of stripping one door. I went to the library; yes, this was before the Internet. I read about old paint and concluded that I had committed a terrible lapse in judgment – I had stripped the pie safe of its original aqua milk paint finish. You can see the result below. Lesson learned – milk paint, done well, does not strip! YIKES!!! So it sat, untouched yet useful for some 28 years in this forlorn state. You can still see remnants of the beautiful milk paint below and the one surviving door.

Antiques Roadshow should have a photo of me in its Hall of Shame. Fast forward to 2014. I have embraced aqua and feel a sense of remorse {insert SHAME} every time I walk past this piece. In addition, I walk past it several times each day. That makes me one sad girl.
Safe Milk Paint Patina Restoration

I went through a multitude of paint chips to find the color. It was not really green, it was not really blue. It had undulations of paint hues. It was not quite flat paint either. What was a girl to do? I finally took the door that I had not stripped to the paint center to have it matched by that very useful computer/scanner device. It came back with greenish tint, so I asked them to add a little more blue. Home again I did several sample boards to work out the technique. I decided to use three colors for the recreation. I could do this. I am a master decorative painter after all. So began the journey to recreation.
First, I/we scrubbed all the surfaces of the pie safe with a multi purpose cleaner. I found that I didn’t need to scrub. I used a cloth on some areas. It removed years of stains that we have added to the wood over the years. I allowed it to dry overnight.
Painting the Pie Safe
I loaded my palette with care. I would be attempting to match the 120+ year-old patina of the one surviving door over the entire piece. To make it work, I would need to be very thoughtful about where and how the paint is placed. I took my usual position n the floor and loaded a brush…
 |
 |
I used artist’s brushes to paint from a three-color palette – the greenish flat latex paint I had color matched to the door, a Golden Paints Phthalo Green (Blue Shade) and Phthalo Blue (Green Shade). Here we go…
The Transformation
Carefully I began with a portion of the pie safe that was the least visible – inside the door I stripped. I would work out the color and the strokes here. I flowed the paint on, dabbed other colors on and wiped it back here and there. It looked so close that neither my son nor HIMself could tell which was the newly painted one and which was the original. Scheeeeewwww. I was feeling empowered now. The two images below show the original door with the new patina finish on sections of the pie safe. Can you tell?
 |
 |
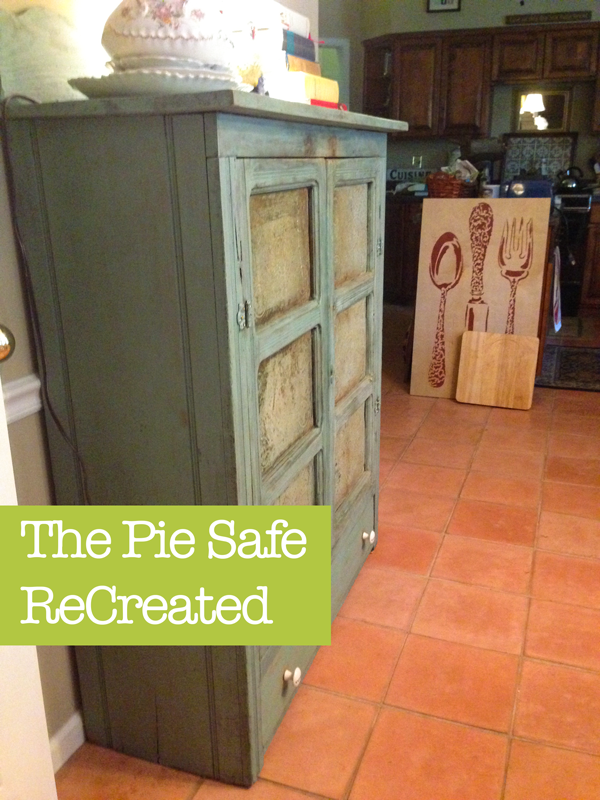
I hit my stride and painted through the afternoon. It was therapeutic for me. I have taken a few steps toward recapturing my old life and career as a master decorative painter. I love to paint – murals, walls, furniture. I stepped away from teaching and painting in 2008. I had a rekindling of that dormant, restless painting spirit in Atlanta (at Haven) when I attended a Modern Masters painting session. I found tears rolling down my cheeks as I remembered all those years of training from French and Italian masters. The years I devoted to the art and craft of decorative painting. The students I have taught. It all came rolling back. This project is validation for me. I belong to this fun furniture-painting world! And I am pretty good at it! 
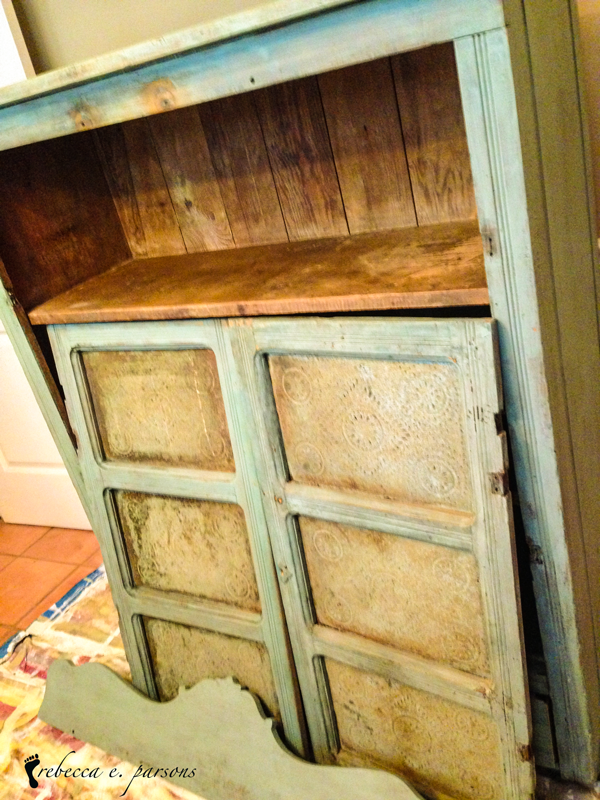
Above are the finished pieces. However, the left door was a little light when I held them together. It bothered me. I needed to add some darkness around the door to emulate the years of hands that have opened the doors. I pulled out the shading gray airbrush paint. I wiped it on a few strategic areas…et voila! Can you tell which door is original?


Make sure you clear your brushes!!

The post Antique Pie Safe Milk Paint Patina Restoration appeared first on Cre8tive Compass Magazine.
Monday Manual of DIY Style ~ French Country 24 Feb 2020 5:05 AM (5 years ago)
Offering Monday Manual of DIY Style ~ French Country today! We are moving toward the edge of what’s possible here at C8C. Check back often to see what’s new. From today forward, Monday’s will almost always be about DIY style ideas and resources. DIY makes my heart sing…I love creating something from nothing or something for less than I can buy it in a store. So let’s begin where I always begin…
French Country Style Appreciates the Beauty of Nature
Bénédicte Patin apprécie la beauté et l’apaisement qu’offre la nature et se plaît à la mettre en scène dans son propre univers en utilisant un procédé ancien de stabilisation des feuillages et des fleurs.
A French sensibility envelopes everything I do. There is a rustic charm in each piece laid to rest in this well collected home . Nothing is neglected, nothing too small to matter. There is an easiness about it…a simplicity that I crave.
Examples of this style are shown below. All from E-magdeco.com. Click the photo to see more of this home.
A well-read book open to hold a small bunch of flowers. I love that the doors and drawers of the chest don’t quite meet perfectly.

Below Bénédicte sits amid the beautifully crafted rooms of ‘The Convent of the Roses.’ Shutters rest against walls and add texture the the quiet room.

A table is casually set for a simple meal…more shutters create a faux fireplace.

Bénédicte blogs at Convent of Roses where she shares her love of nature.
All images are from an article at E-magdeco.com. Visit to see even more images from this charming place.
Editor’s Note: Coming soon The Well Collected Home magazine. I CANNOT WAIT TO LAUNCH THIS!! Yes, I am that excited to create a beautiful magazine for all my DIY and creative friends who love living the creative lifestyle. Stay tuned…soon my friends!
The post Monday Manual of DIY Style ~ French Country appeared first on Cre8tive Compass Magazine.
Craft Do Over Painted Purse Tutorial 14 Feb 2020 8:00 AM (5 years ago)

National Craft Month Painted Purse
Let’s get crafty! Wayfair.com challenged me to give my very first blog craft a makeover for National Craft Month. You can see the first painted purses posts here and here on my Cre8tiva Blog. I am creating a #CraftDoOver and updated tutorial below of this very French painted purse…
My First Blog Craft
Back in 2007, I began experimenting with painting fabric. After 20+ years as a decorative painter and hundreds of murals and faux finishes in my portfolio, I was ready to use these skills in new ways. One day, I was rolling up my canvas dropcloths when I noticed a paint smear in the shape of a heart. I had signed and dated it back in May of 1994.
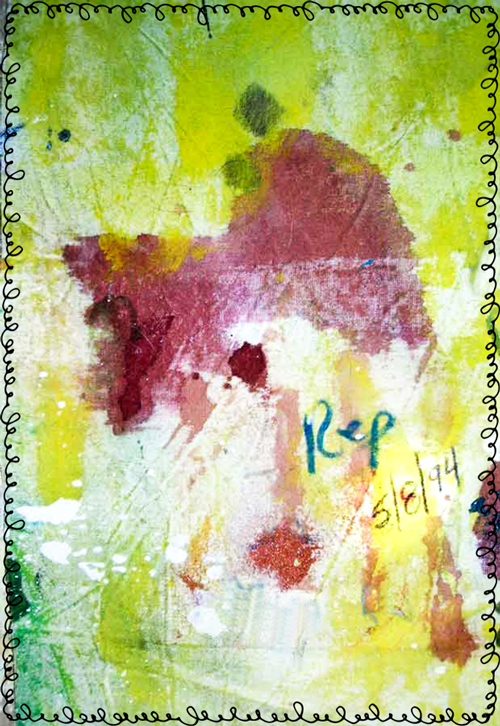
When I saw it, I thought I would frame it as a keepsake because the dropcloth was beginning to tear. After I cut it out, I realized that the paint on the rest of the dropcloth was pretty cool. So I decided to make a little purse with it. I made four that day and shared them on my blog. My readers loved them and I thought I was onto something.
My First Painted Purse Tote

my first commissioned painted purse with the owner’s face
So I painted more canvas with some of my faces that were so popular on my blog at the time. I sewed it into clutches and tote bags. They were a hit. People wanted me to teach them how and others wanted to buy them. My Doodle Bags were born.
In October of 2009, I launched The Dixie Doodler Bags. This was my first batch for sale and my ad. My photography skills were pretty bad back then!

By June of 2010, I published my first Painted Purses eBook and the name had changed to Doodle Bags! I traveled all over the US teaching artisans how to create their own. It was a fun time.

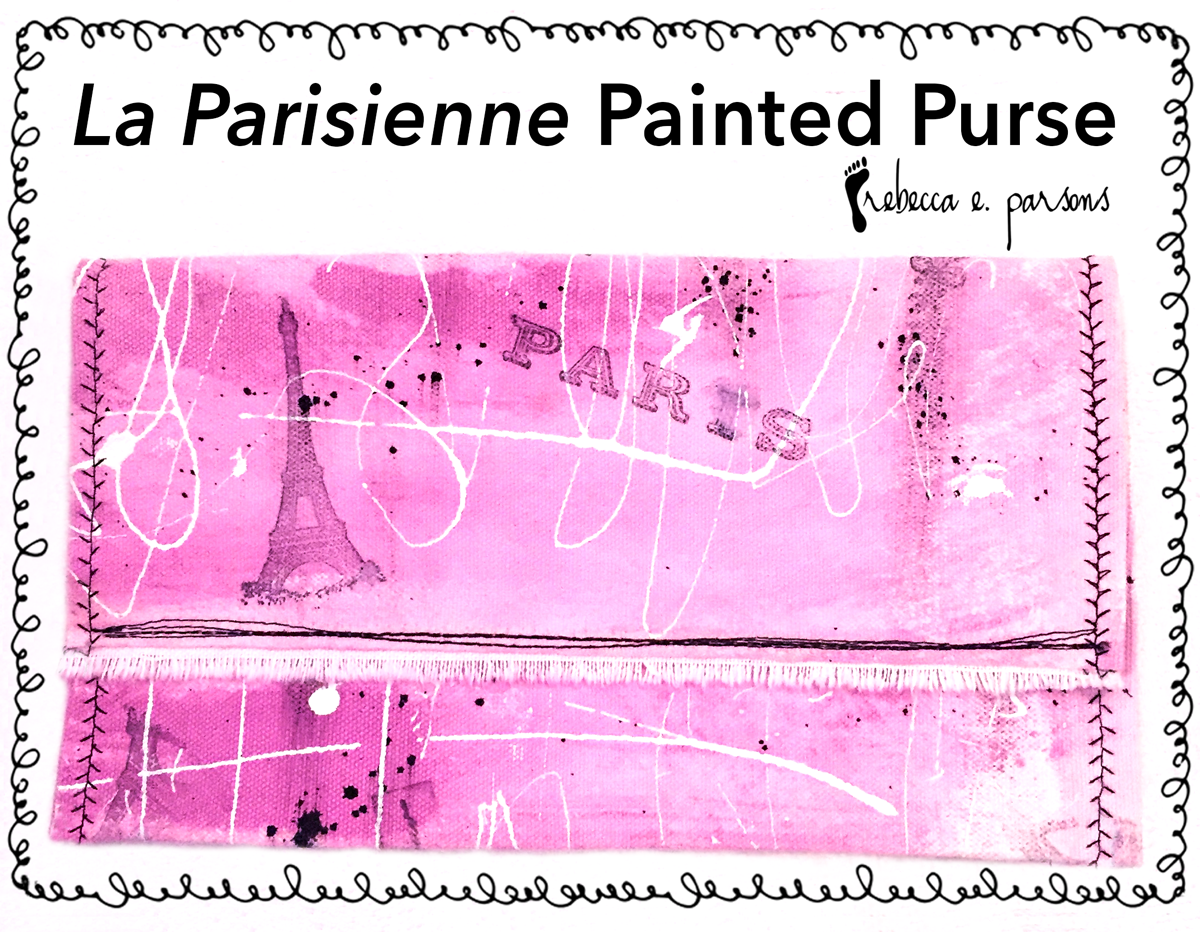
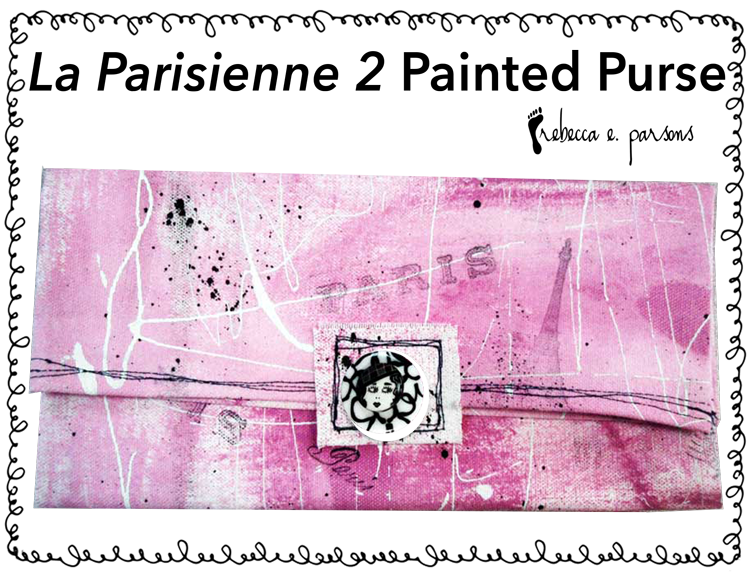
La Parisienne Painted Purses Tutorial

Materials
Canvas Duck cloth or other heave woven material
Acrylic paints
Artist brushes
Rubber Stamps, Stencils
Rubber stamp ink (permanent)
Paint Pens and markers
Thread in contrasting color
Lining material (optional)
Directions
Iron material if necessary. Lay flat on a protected surface. Painting cloth is messy and it bleeds through. You can click images for closer view.
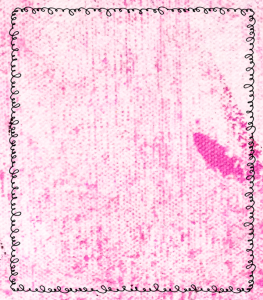
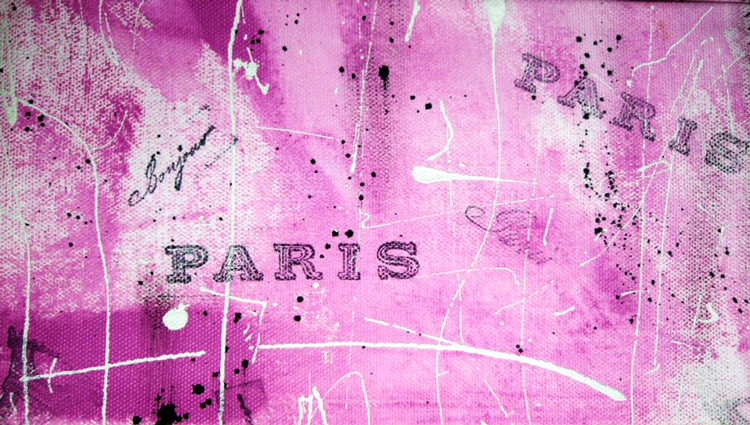
- Decide on a color scheme and just let the paint flow. I used fuchsia pink, black and white. Brush the pink on in wide, sweeping strokes. I wanted the white of the fabric to show through. In some areas the paint is more concentrated.
- Dilute black paint with a little water and spatter on fabric.

- Load a large portion of white paint on a brush and drizzle across the fabric. Let paint dry and iron on reverse side to set into fabric.

- Embellish with rubber stamps and paint pens.


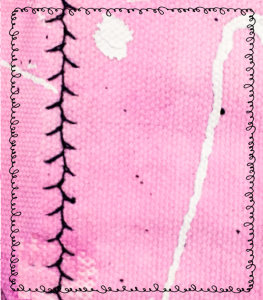
- Sew into a clutch purse. I do this without a pattern. I cut a large rectangle about 30″ long and 10″ wide. I then fold in half, painted sides together and sew the sides.I top stitch the top edges with contrasting thread in random manner. Then I turn it painted side out, clip the bottom corners, and iron edges with pressing cloth.

- Here is a close up of the top edge random stitching.

- Fold into a clutch and sew the side together with a decorative embroidery stitch.
- Another version of the purse with a French button closure.


For more ideas and inspiration, visit Arts and Crafts and Baskets, Boxes, Buckets at Wayfair.com.
The post Craft Do Over Painted Purse Tutorial appeared first on Cre8tive Compass Magazine.